Author Archives: hoe328

Final _ Lisa Ho + Link to Instructables

For my final, I decided to combine the idea of fidget blankets for Dementia, Alzheimer’s, Seizures and fabric books to make a series of interactive fidget portable pieces for children in which they can play anywhere with them.

Materials use –

  • Felt (different colors)
  • Different texture paper (your choice)
  • Sponge for push button
  • Sewing kit & thread
  • Buttons & small pompoms
  • Patterned Fabric Material
  • LEDs
  • Conductive thread
  • Paper roses
  • Fabric glue

I think the hardest part is to think of a good circuit to incorporate into your swatch design, once that is drawn and tested out. The rest will be sewing the circuit and hoping that there isn’t any short circuits that prevent your LED from working.

Then, I sewed the drawn circuits on my fidget pieces!


Link to Instructable page: https://www.instructables.com/id/Fidgety/

Week 12 – Lisa Ho

For this week’s project, I made my flip dot with 1 circuit. It took me a long time to embroider the circle/ring part of the circuit to the fabric. I wanted the circuit to be completely hidden. It is really satisfying to see the dot flip as you connect to the battery.

Materials used-

  • Fabric
  • Conductive thread
  • Embroidery thread,
  • Magnetic Bead
  • 9v battery

Video of the bead flipping –

https://youtu.be/Q6W-RdFmVhA

Week 11 – Lisa Ho

In this week’s assignment, I tried to put the flexinol into a start to mimic how it glitters and sparkles in the sky. I think the effect is not what I expected. It is a little bit slow. But I love stars so I still love the little star I made.

Materials – felt, flexinol, jumper wires, 9-volt battery, and resistor

I used one of the soft buttons I build and made my start sparkle.

Week 10 – Lisa Ho

For this week’s Thermochromic ink assignment, I created one swatch with a message which is the smiley face where I wanted to bring forth the importance of smiling and staying positive. The other two swatches I just tried with different sewing techniques to see if there is a difference between the speed of ink change.

Material Used-

  • Thermochromic Ink
  • Tracing Paper
  • Conductive Thread
  • Fabric

Continue reading

Week 9 – Lisa Ho

For this week’s speaker assignment, I decided to use paper and fabric to build my speakers. I wish I had the patience to spend more time to make the fabric speaker closer so it plays louder. The paper speaker did not work and I’m not sure if it is because of some parts not being soldered properly. Nonetheless, it was very fun to make. Below is the heat controlling circuit for the speaker.

.

Material used-

  • Paper
  • Conductive Tape
  • Solder
  • fabric
  • conductive thread
  • thread for sewing


Week 7 Midterm – Lisa Ho


My midterm was a star constellation embroidery that lights up when you touch it and connect the thread together. I’ve always loved constellations and stars at night because I love how it lights up the dark. For this project, I used thread, conductive thread, water paint to paint the white fabric, LEDs, Attiny to make the LED light up, solder and hot glue to make my circuit connection stronger.

I sew my circuit of the light with conductive thread on another fabric and then embroidered the star embroidery to make sure that the two LEDs I’m lighting up are in the right places. Then I sewed it all together. And the end product is when you touch the two threads at the bottom, one LED will light up and when you connect the thread on top, the top LED will light up.

You can find the instructable here 

This is the Attiny circuit I made which is the basis of the code and circuit I used in my midterm.

Continue reading

Week 6 – Lisa Ho

I connected one of the soft switches I made to your Arduino. I used it to light up an LED. So when I pressed on the switch, the LED will LED up.

Then, I built a circuit with the switch and 3 LEDs. I light up the LED by using different pressure. When the sensor goes greater and equal than 100 but less than 200, the red LED will turn on. When the sensor goes greater or equal to 200, the blue LED will turn on and else the green LED will turn on.

Sadly, I lost the video I filmed. But I have the code which I will post below.

The materials used include Arduino, LEDs, soft switch I made out of felt and sponge, jumper wires, breadboard.

For Midterm

I love constellations. I am thinking of doing an embroidery and incorporating light into the embroidery so it lights up whenever I touch it. I’m thinking this could be an art that hangs up by my wall.


Continue reading

Week 5 – Lisa Ho

Nodes & Connectors

I built my two nodes- one with the battery with fabric and the one with LED with paper. I used the conductive thread and conductive fabric to make the battery node. I also sewed a lining at the edges of the rectangle fabric. For the LED node, I simply used a conductive tape and soldered the LED on it.

Two out of the three connectors I used the conductive thread in the middle of the rope and solder it at the ends onto either a paperclip. The other connector I used a stretchy conductive fabric and sewed a felt over it to make it look warmer and cuter. I used the sewable meta snaps in the ends.

A tool I would like to have in class

I would love to have a desk-sized ironing device where you can put your conductive fabric and the fabric you want to attach it to and just iron it quickly to it. You could leave it on and used it whenever without always having to heat the iron up.

Continue reading

Week 3 + 4 – Lisa Ho

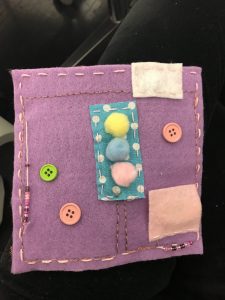
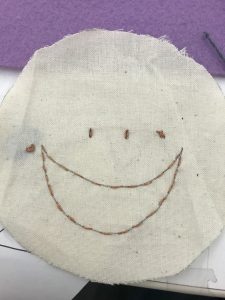
New Craft – Embroidery
I started my homework with learning a new craft which was embroidery. I actually always wanted to embroider but never got my hands into starting one. This homework is my perfect reason to start.

I would consider myself a storyteller, maker, designer, and a craftsperson. I love anything that is hand-made which I feel really gives another aspect of warmth to it. That is why I would say I’m a craftsperson. I love anything physical that you can hold. I also love to tell a good story and hear a good story. I realized that storytelling’s importance from last semester’s motion graphic class in engaging other people to understand your situation or your perspective. I’m also a designer because I love to solve problems or even just noticing an issue and trying to design for or with a specific goal/outcome in mind.

I love hand lettering and embroidery. These two are something that really makes me relieved and relaxed. Although I am not an expert in both of these tools, I love using them to make things. The repetitiveness of these two tools somehow soothes my mind and makes me really clear-headed and satisfied.

Learning embroidery was really fun. I think the most frustrating part for me was that it takes so long and requires precision for it to look nice but hard work always pays off and the end product makes you really happy and satisfied. Therefore, I would suggest beginners give their full attention to it for the first time. I think learning it was not as intimidating as it looked and there are a lot of great instruction videos on YouTube and I would suggest beginners to start searching there.
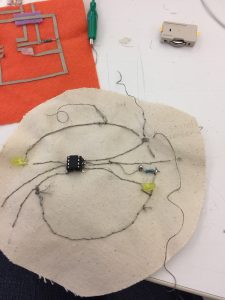
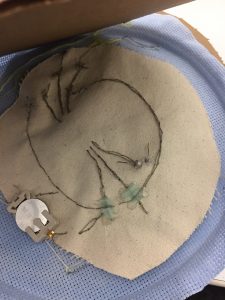
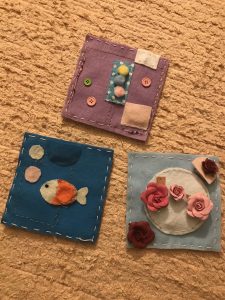
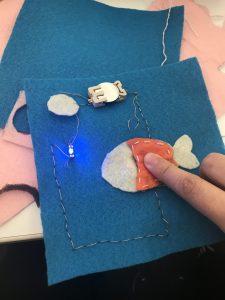
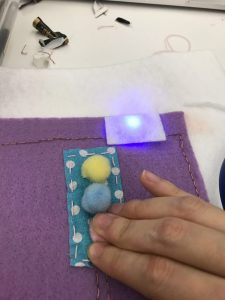
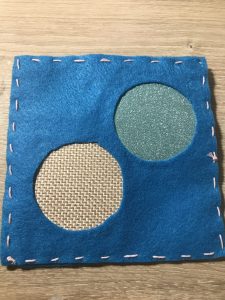
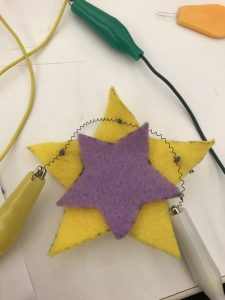
Swatch – Poki Dots

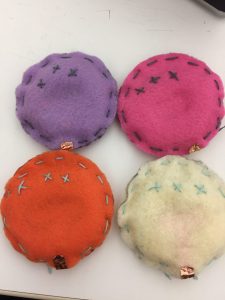
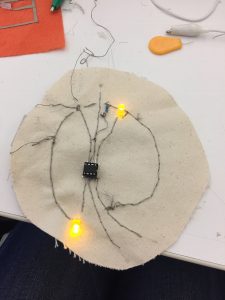
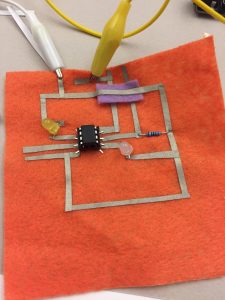
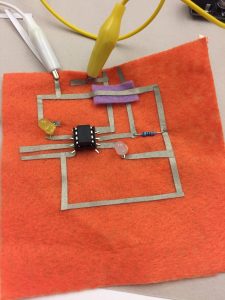
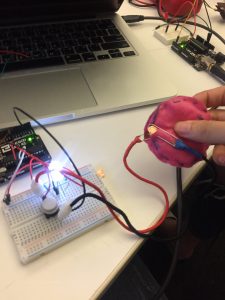
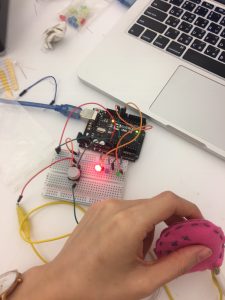
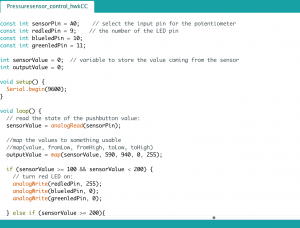
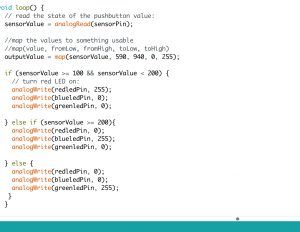
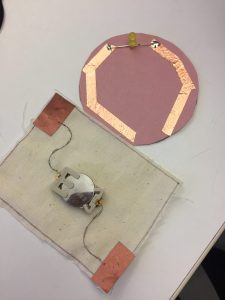
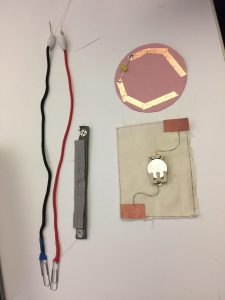
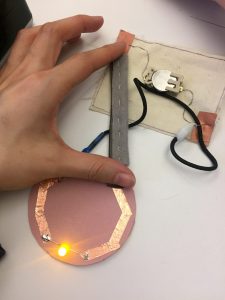
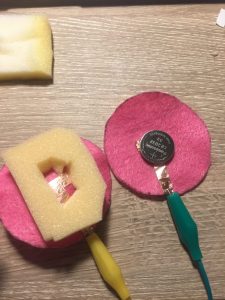
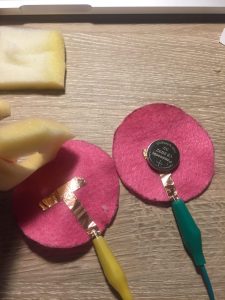
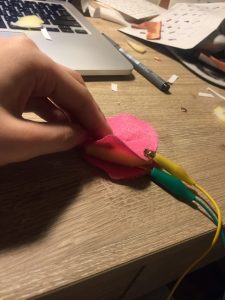
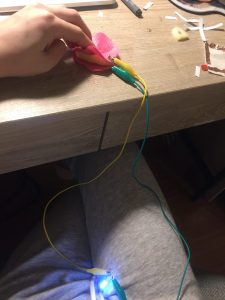
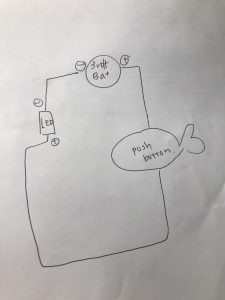
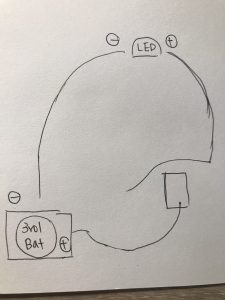
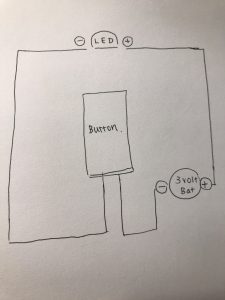
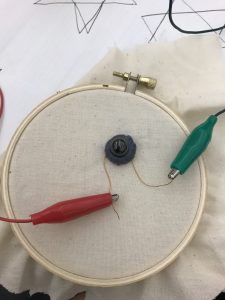
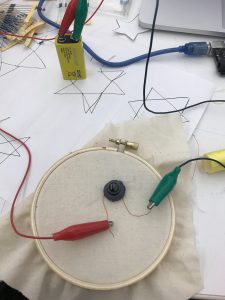
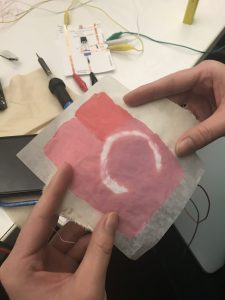
The inspiration for my swatches was my love for polka dots. I decided to make polka dot push sensors. When you push on my poki dot swatch, you can turn on a LED. The materials I used were felt, yarn, conductive tape, and sponge. I was going to use conductive fabric did not find enough fabric and resorted to tape in the end.

The swatch was made by me cutting same sized circles and sewing them together. Inside I would tape the conductive tape inside with two stripes of conductive tape making a T shaped track and put a sponge in the middle to make the push button. I put the 3-vott battery to try if the circuit is ok and it worked fine.

Continue reading

Week 1 – Lisa Ho

This is an Interactive Light Painting that was done by Jie Qi which when you blow on the white puffs, the seeds will grow and generate into new flowers. This is done by using LEDs, microcontrollers, and copper tape. I love how this project seems so clean and beautiful but requires such complexity into the circuits behinds the painting. And I also wonder what they used to sense the users’ breaths to trigger the seed’s growth. I’m intrigued by how you can make a simple painting like this and change it to a painting with this many dimensions. It becomes a fun piece to interact with!

Detailed Project Details can be found on her blog here.