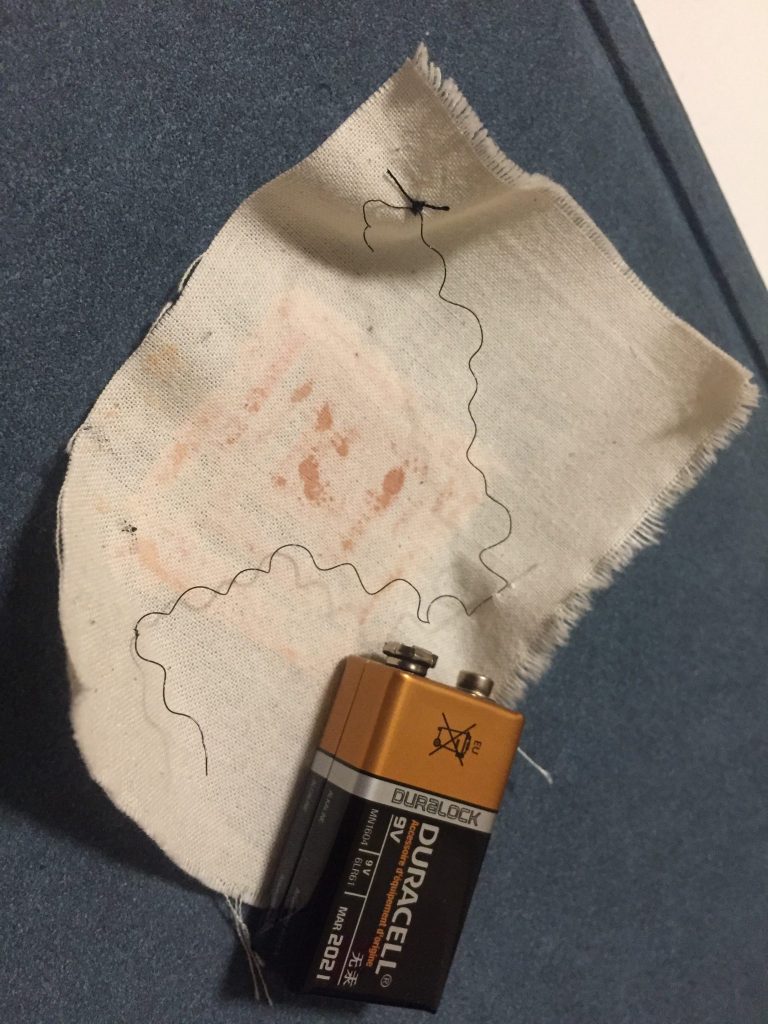
The circuit is completed but the effect is minimal. I think I mix the water too much or the powder is too low. It’s hard to make it right however, I can make it happened in the final project.
Challenge: The mixture is very hard to get it right. As I do not have the basic knowledge of watercolor or brush.
Experiment with Flexinol
I like how the spring can go back to its original form. This is pretty fun when playing with it. I failed to work on the first try because of the voltage.
Challenges : The calculation of the voltage is a little complex for a beginner.
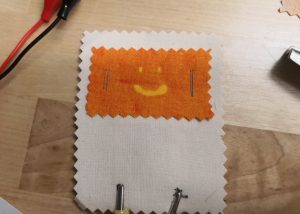
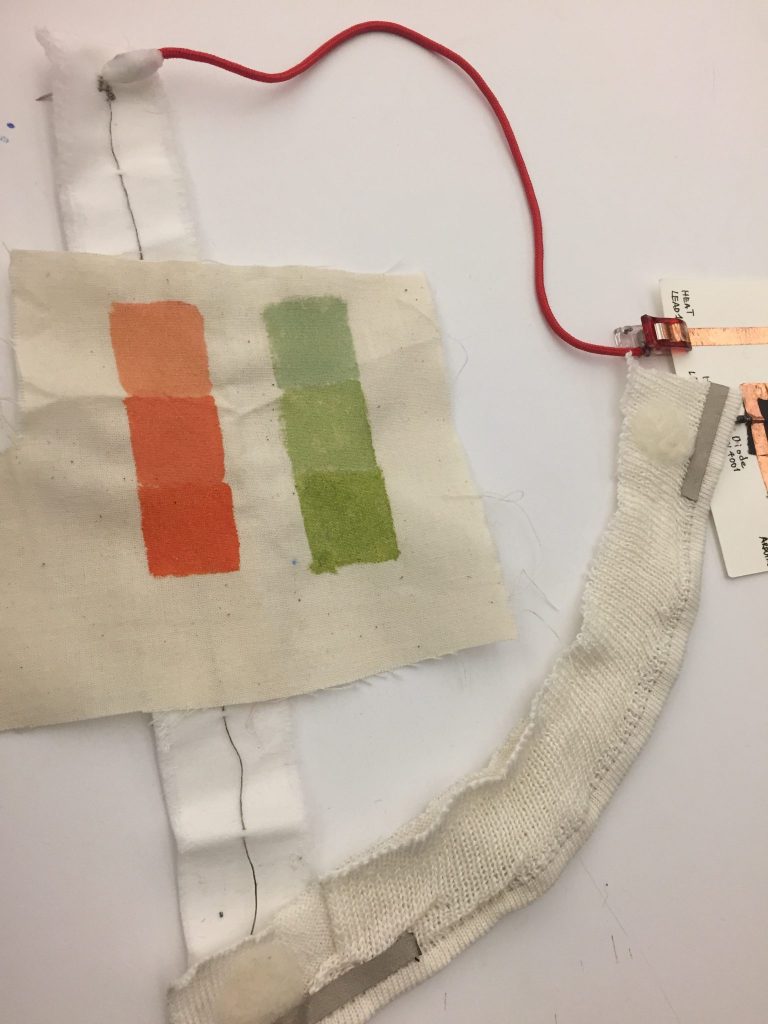
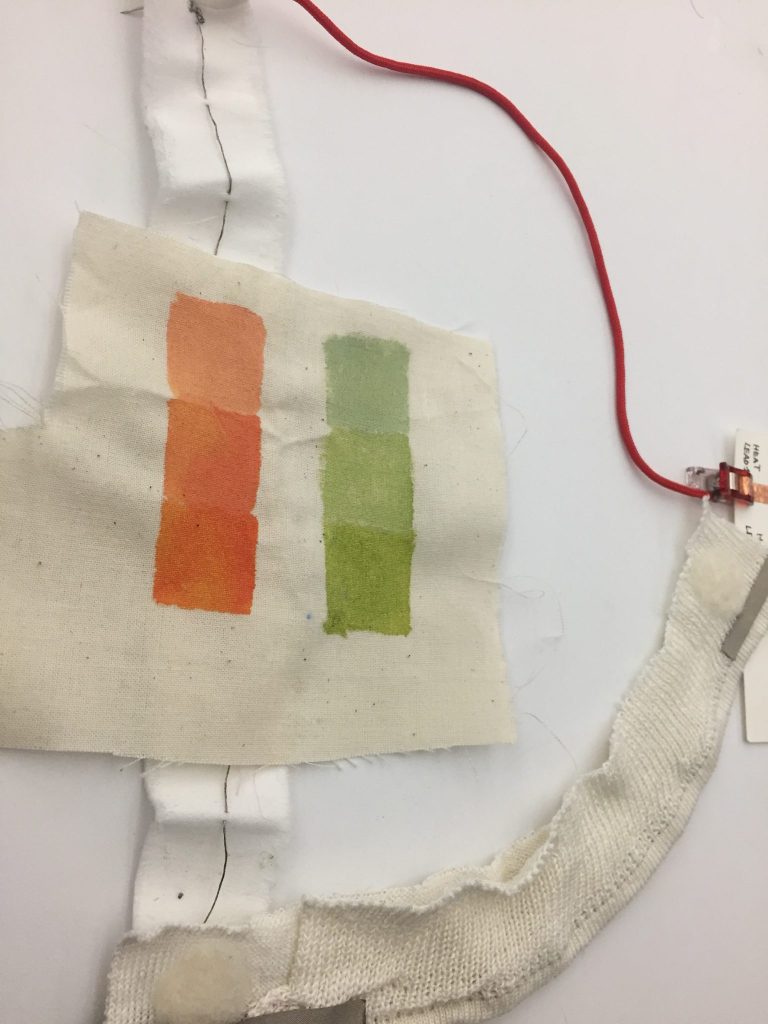
For this week’s Thermochromic ink assignment, I created one swatch with a message which is the smiley face where I wanted to bring forth the importance of smiling and staying positive. The other two swatches I just tried with different sewing techniques to see if there is a difference between the speed of ink change.
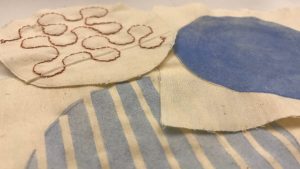
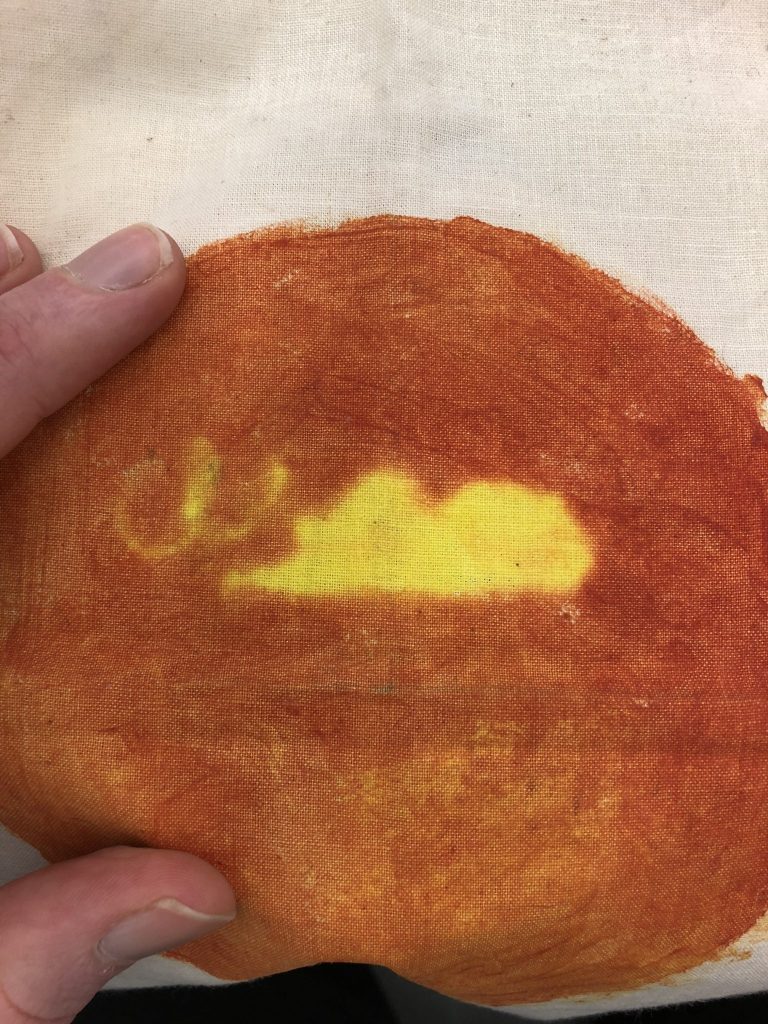
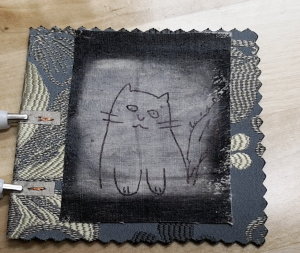
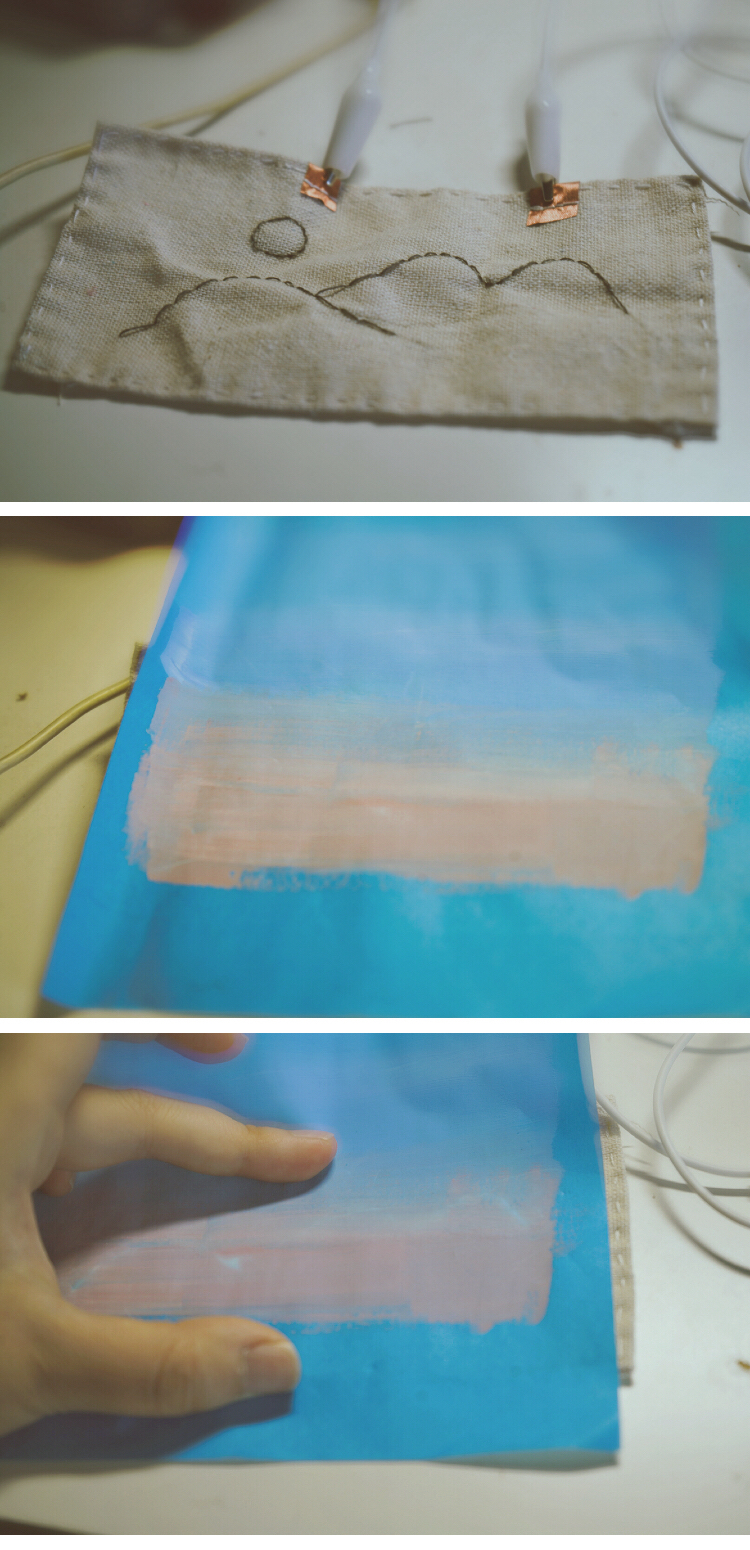
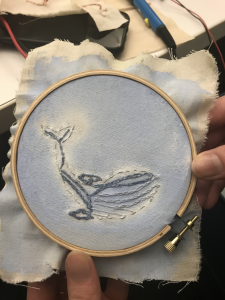
In this mini project, I used thermochromic ink to reveal the shape of a baby whale in the sea. I used blue and grey embroidery threads to outline the whale body. When the conductive thread is connected with the heating circuit and the power source, the pigments around the thread will turn from blue to white like a splash of water.
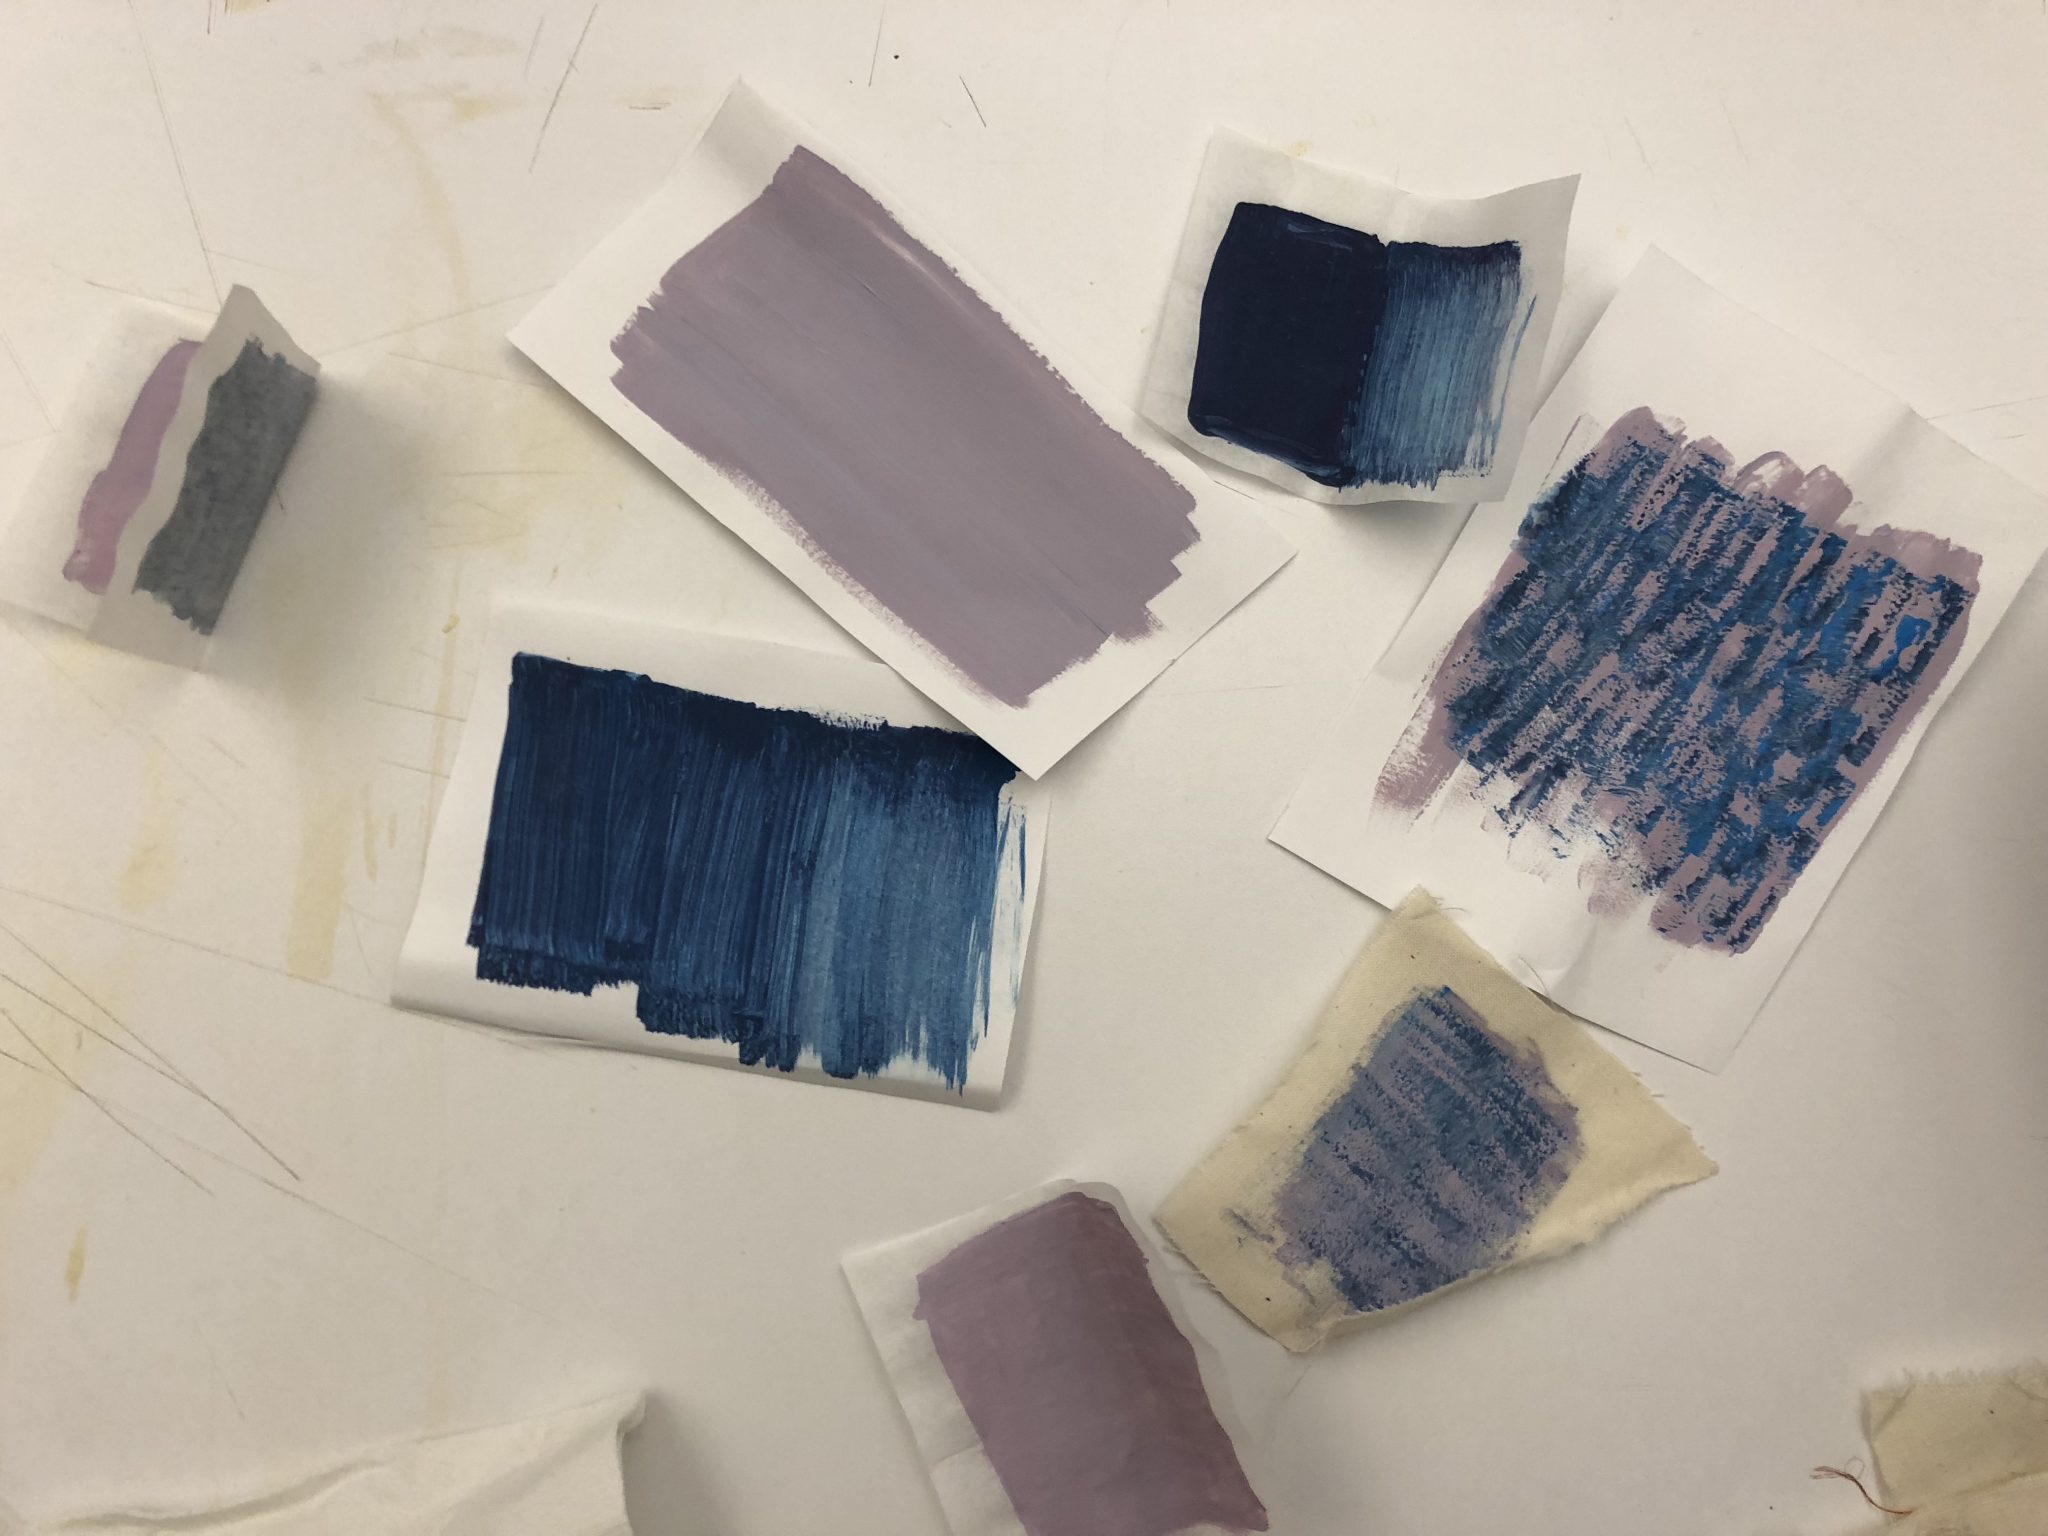
In order to work with Thermochromic ink, it is extremely necessary to perform tests with different colors and volumes of pigments. For example, I didn’t have any luck using yellow Thermochromic Ink; if it is used with a clear pigment, the contrast is very low and the change in temperature is not perceived; If a dark pigment is used, the powder is not sufficiently strong to clarify the mixture and create enough contrast.
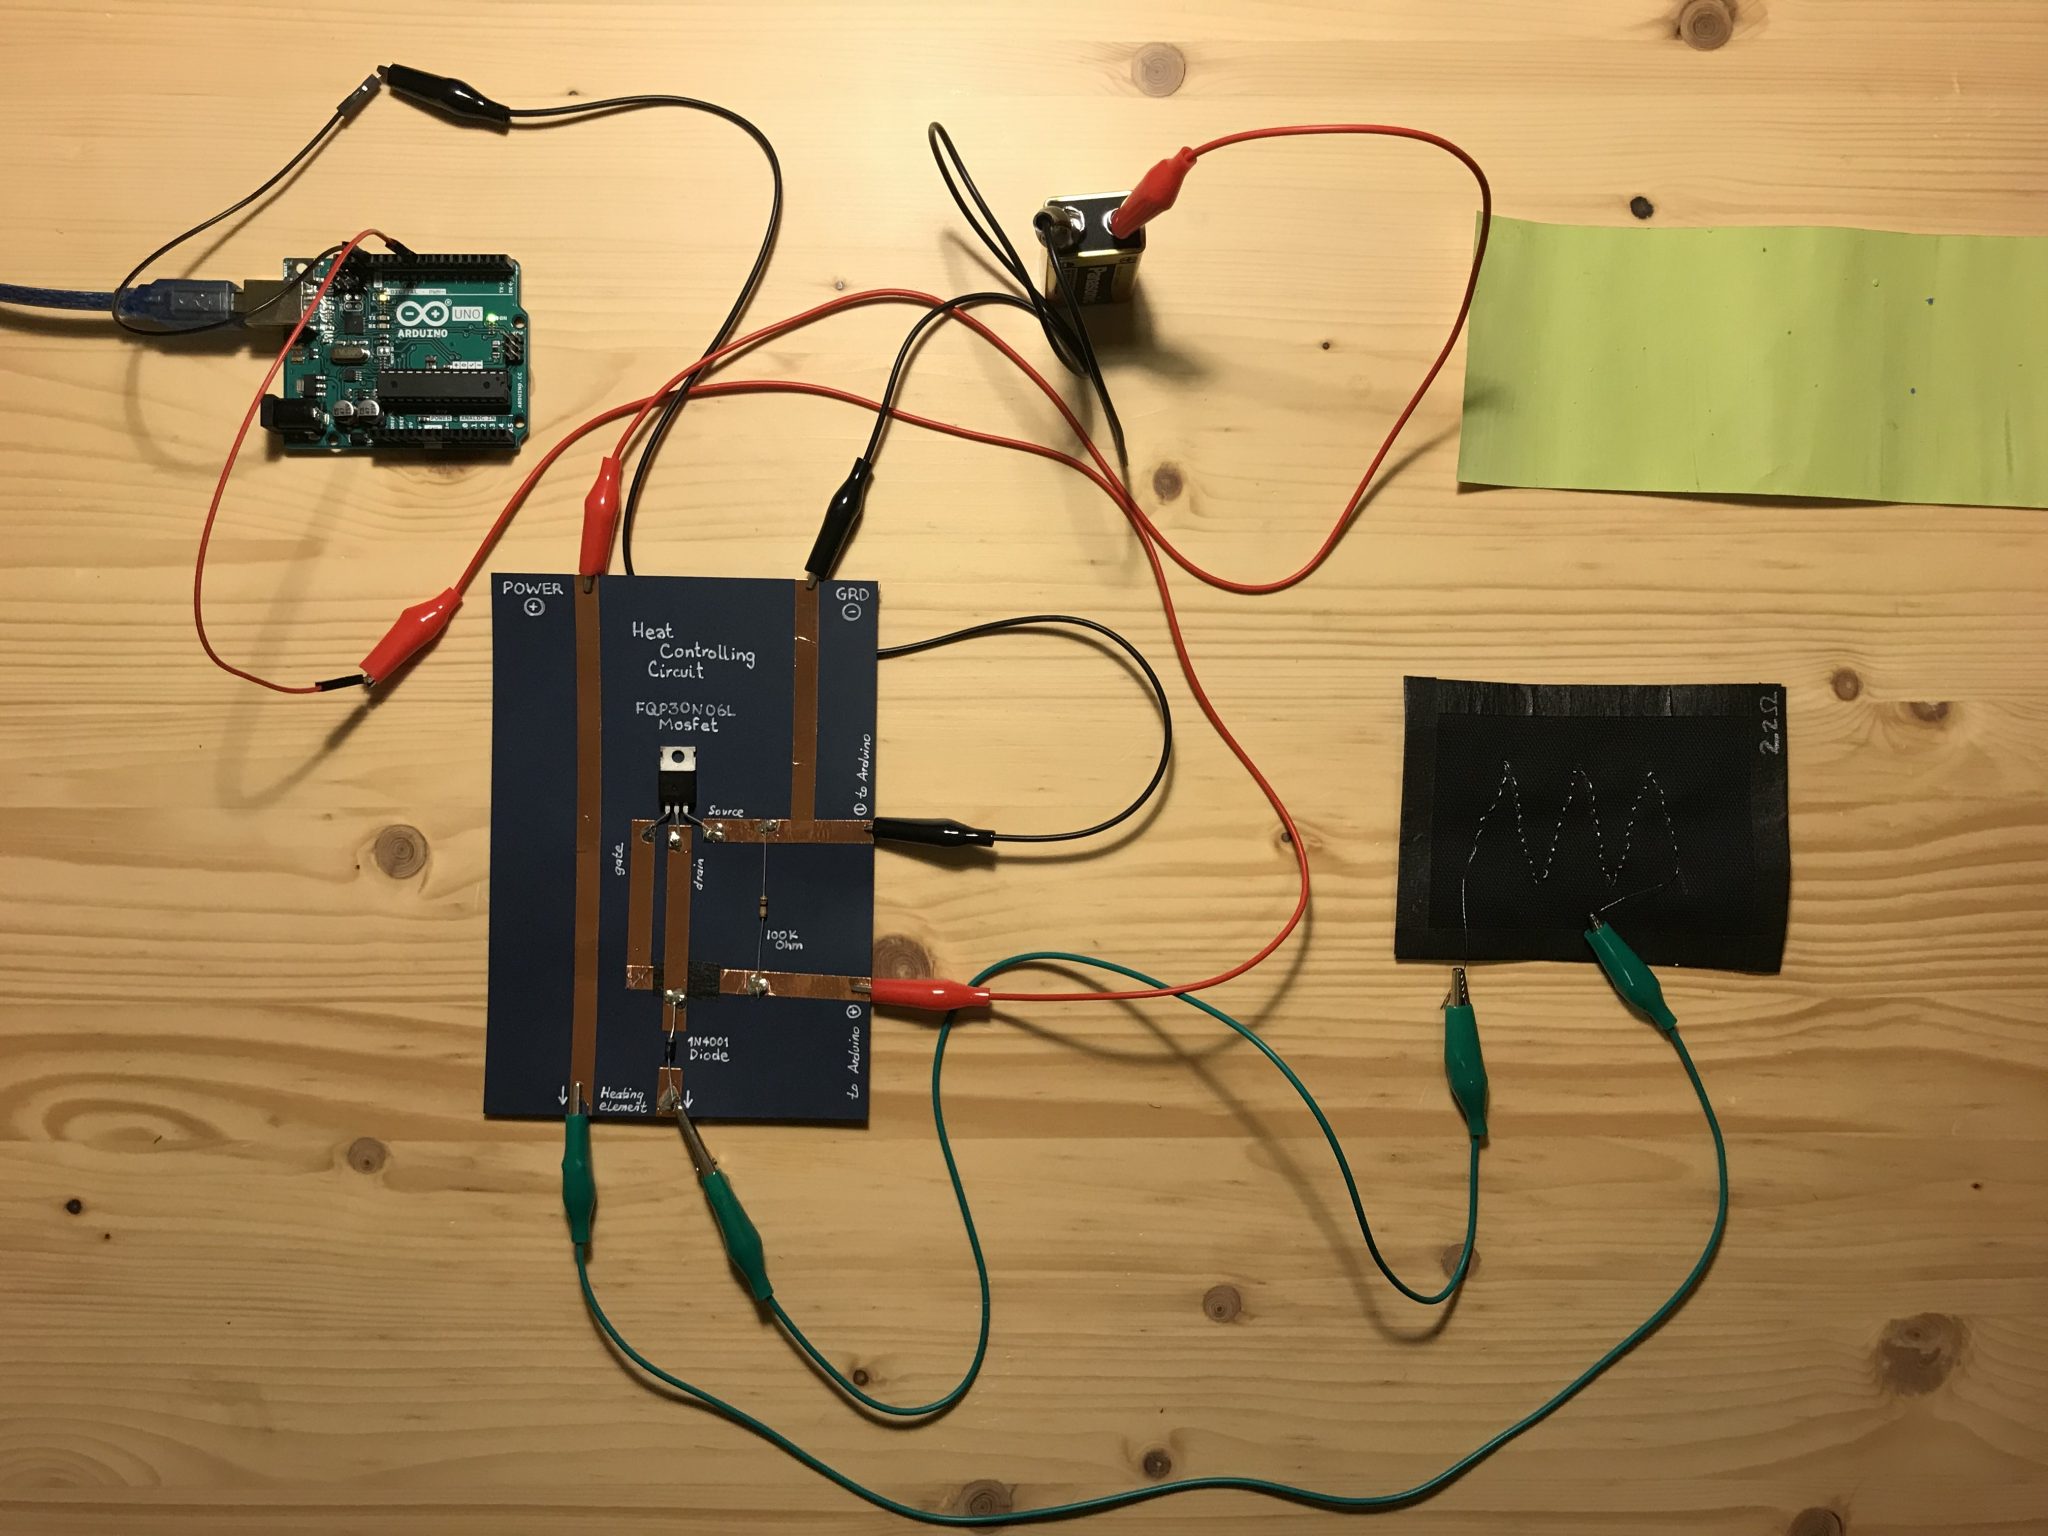
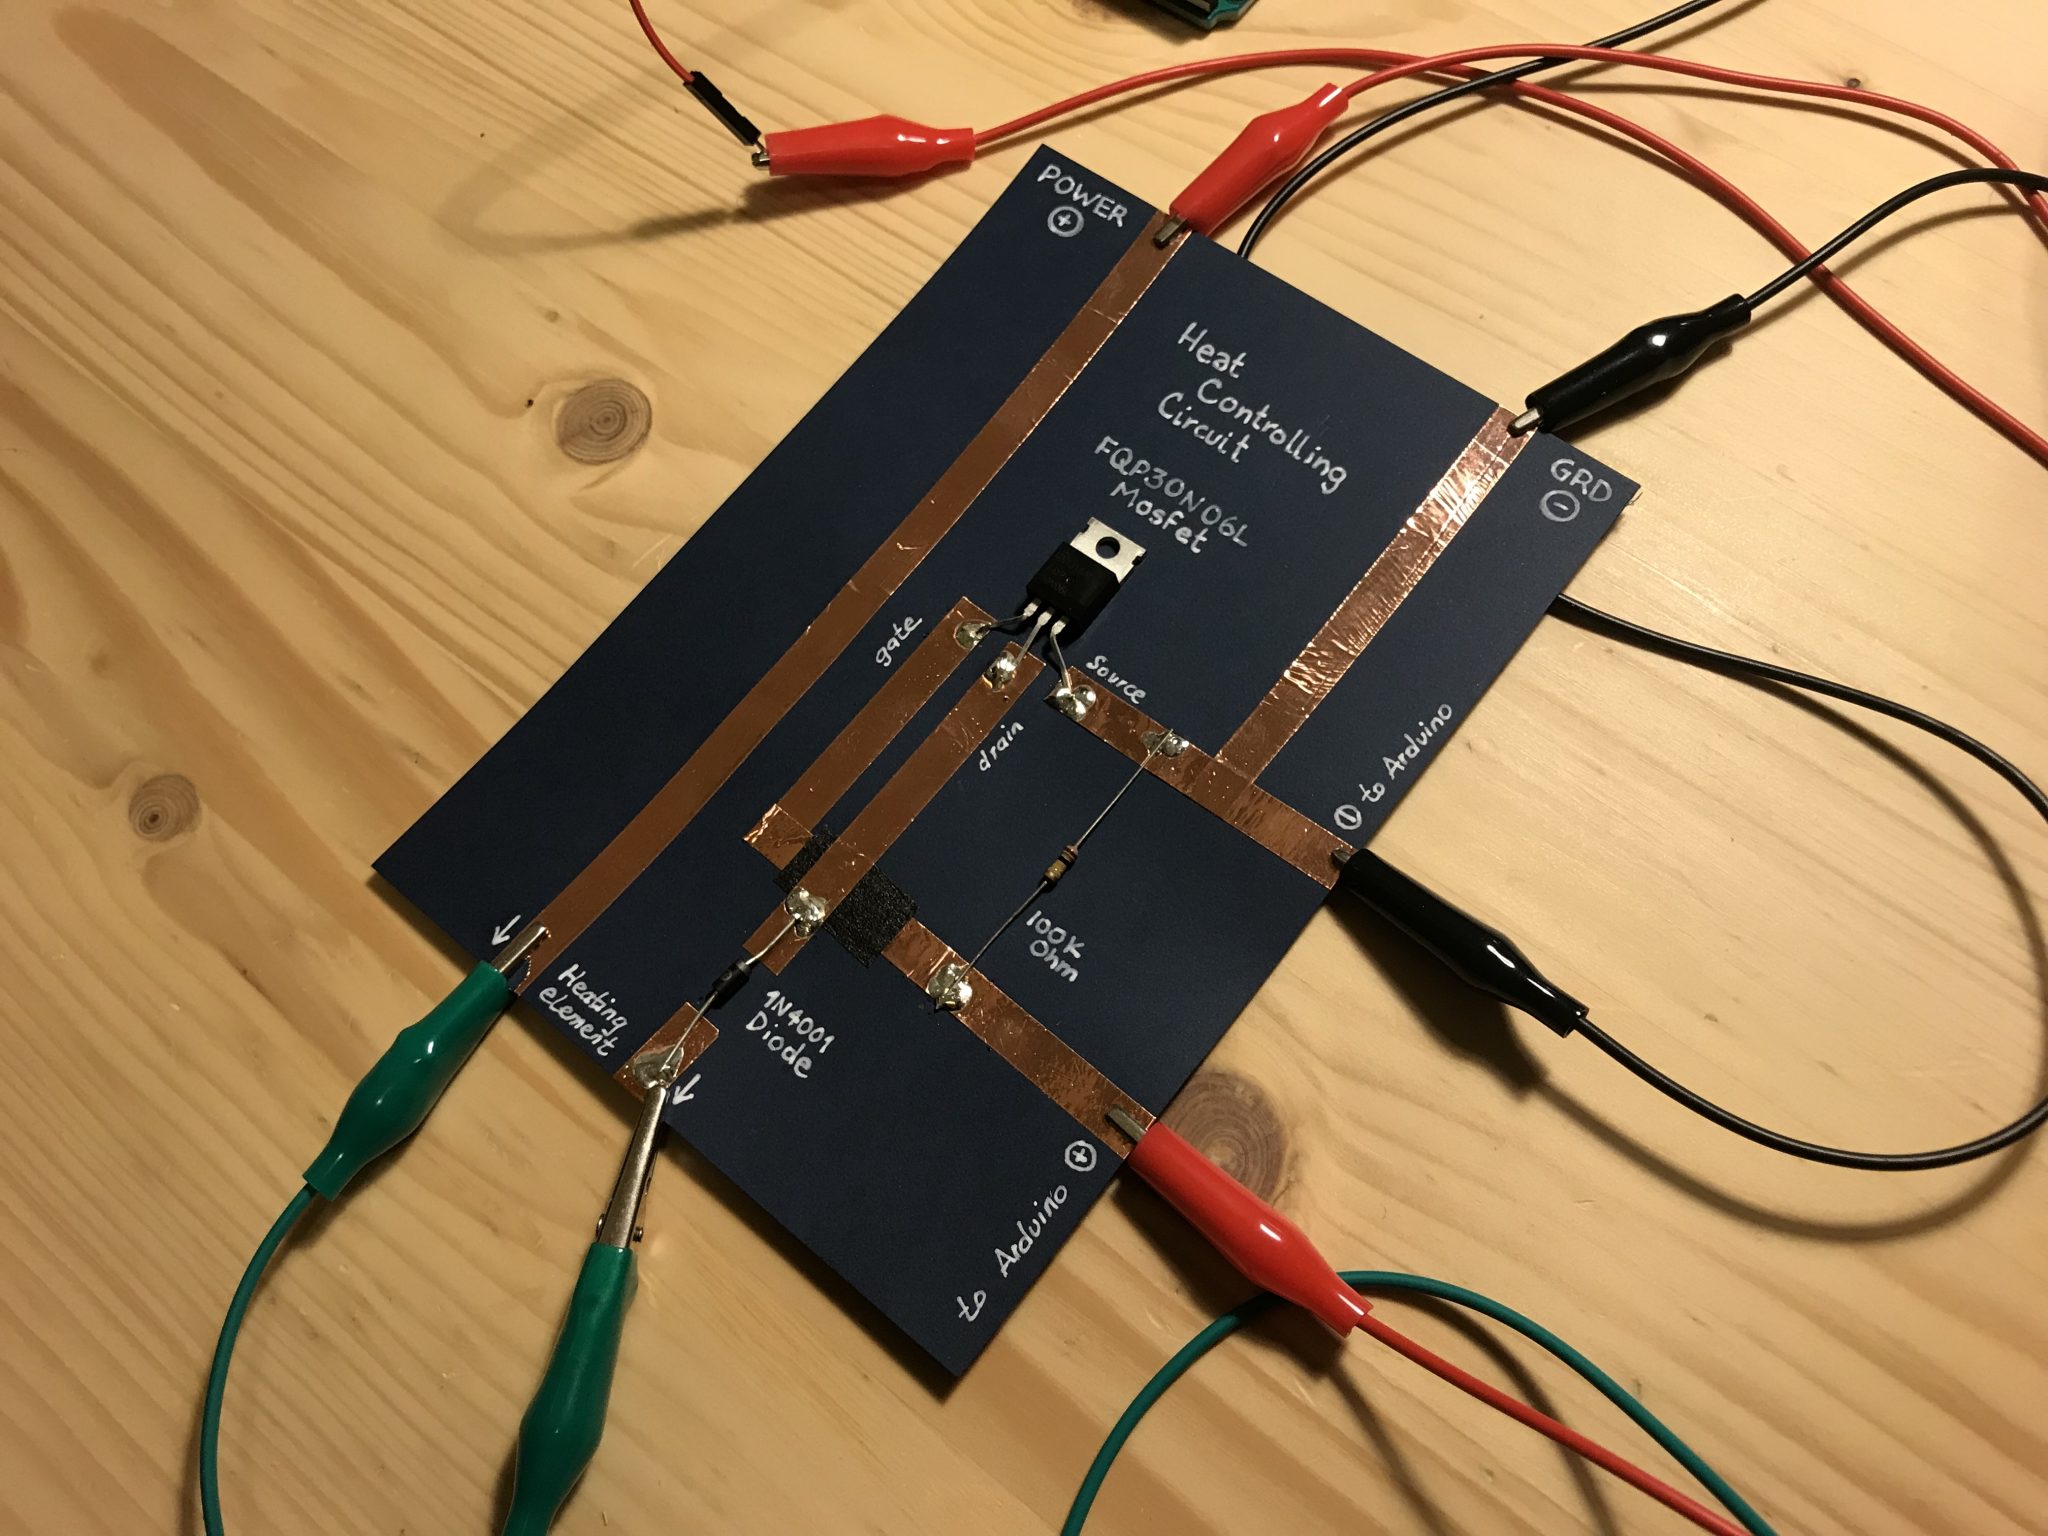
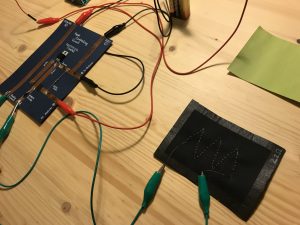
Conductive thread worked perfect to generate an approximate resistance of 22-23 ohms. Enough to be used with a 9 Volt battery and create enough heat to affect the Thermochromic Ink. Of course, combinations of powder of high contrast colors is highly recommended.
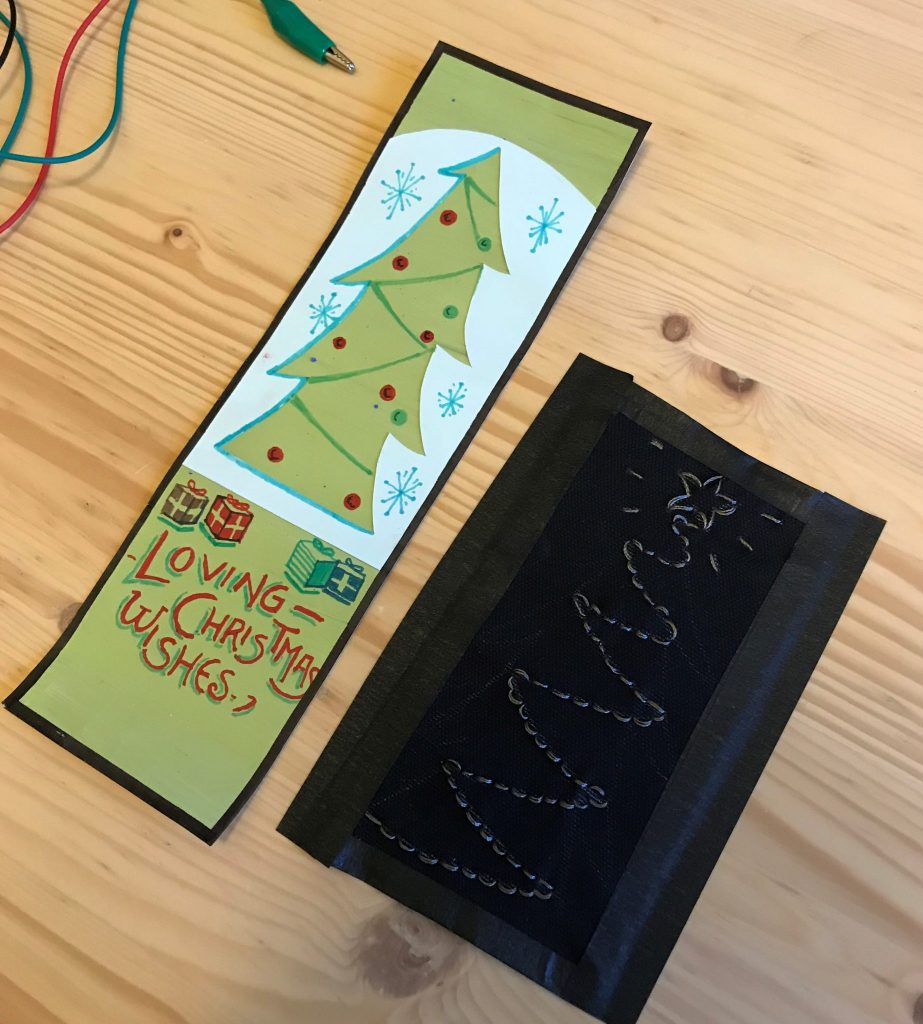
For the I wish I could have explored another mini-project (a VERY premature idea for the time of the year, I’m sorry!), But I had to use the resources I had in hand, and this seemed a decent answer. The idea here was to allow the transformation of color to showcase the Christmas tree lights and star.
I really love doing circuits with paper or fabric with the intention of illustrating connections (using notes and symbols). I find enchanting the look and the educational sense of them. I just imagine having many of these nodes that could be combine in multiple ways.
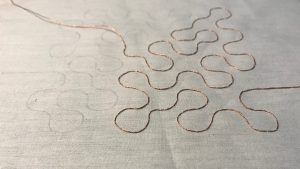
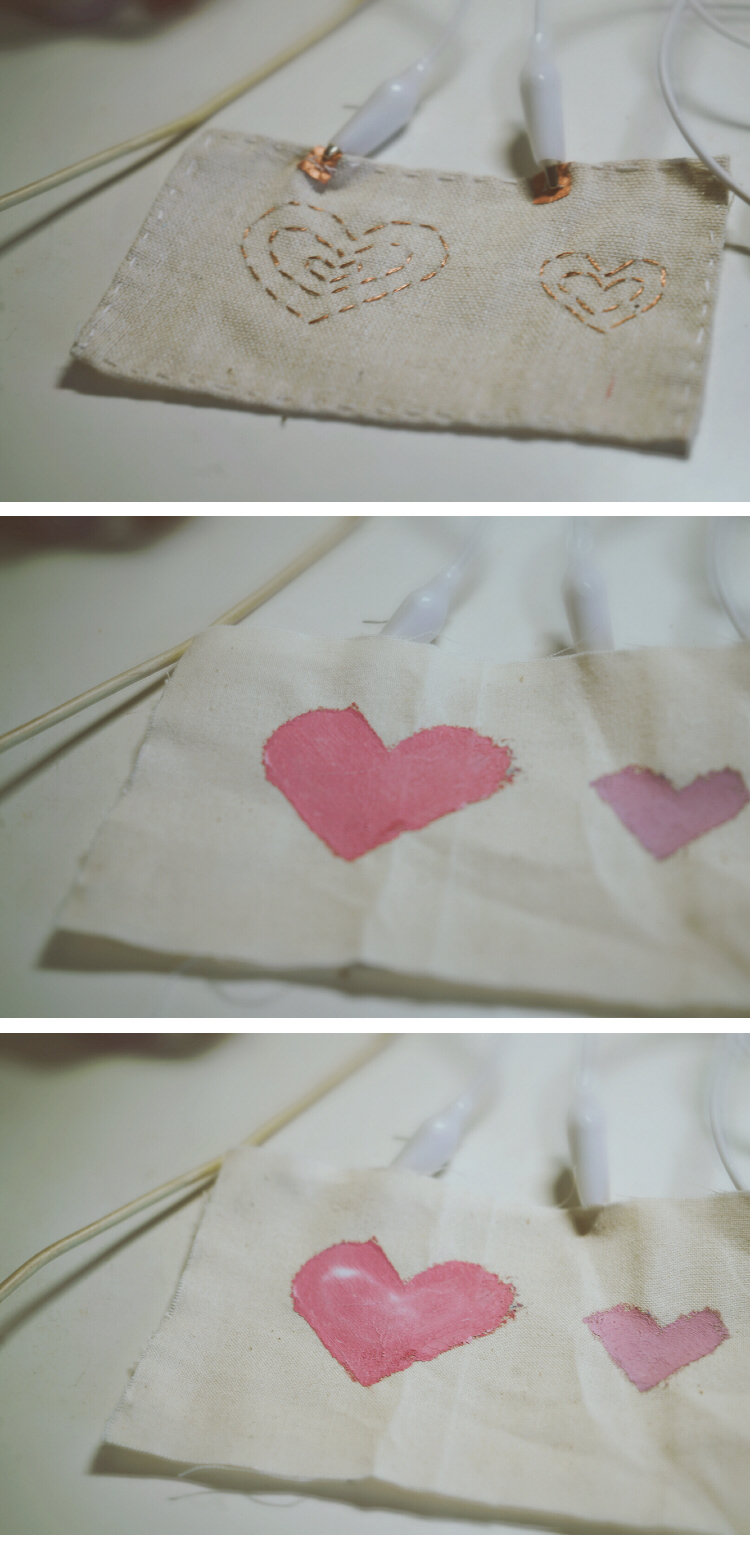
The first copper thread heating circuit (below) was created with a backstitch. After in-class debugging we found its resting-state resistance to be too high for our purposes (~67 Ohms). When we press on the circuit, we can close air pockets between stitches, creating significantly lower resistance (~10 Ohms). I’ll iterate on this swatch with a new stitch that has less resistance, and will post an update with new results.
(no pressure applied – 67 Ohm)
(pressure applied – 10 Ohm)
12/20 update:
A new stitch does the trick! I’ve redone these using a couch stitch, which reduces the resistance significantly.
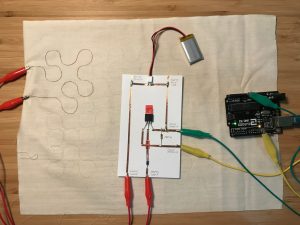
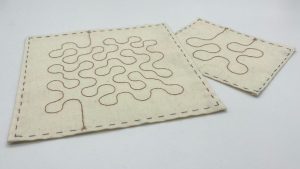
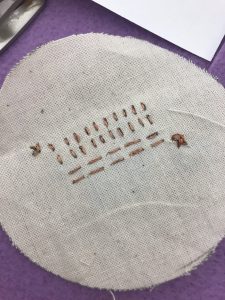
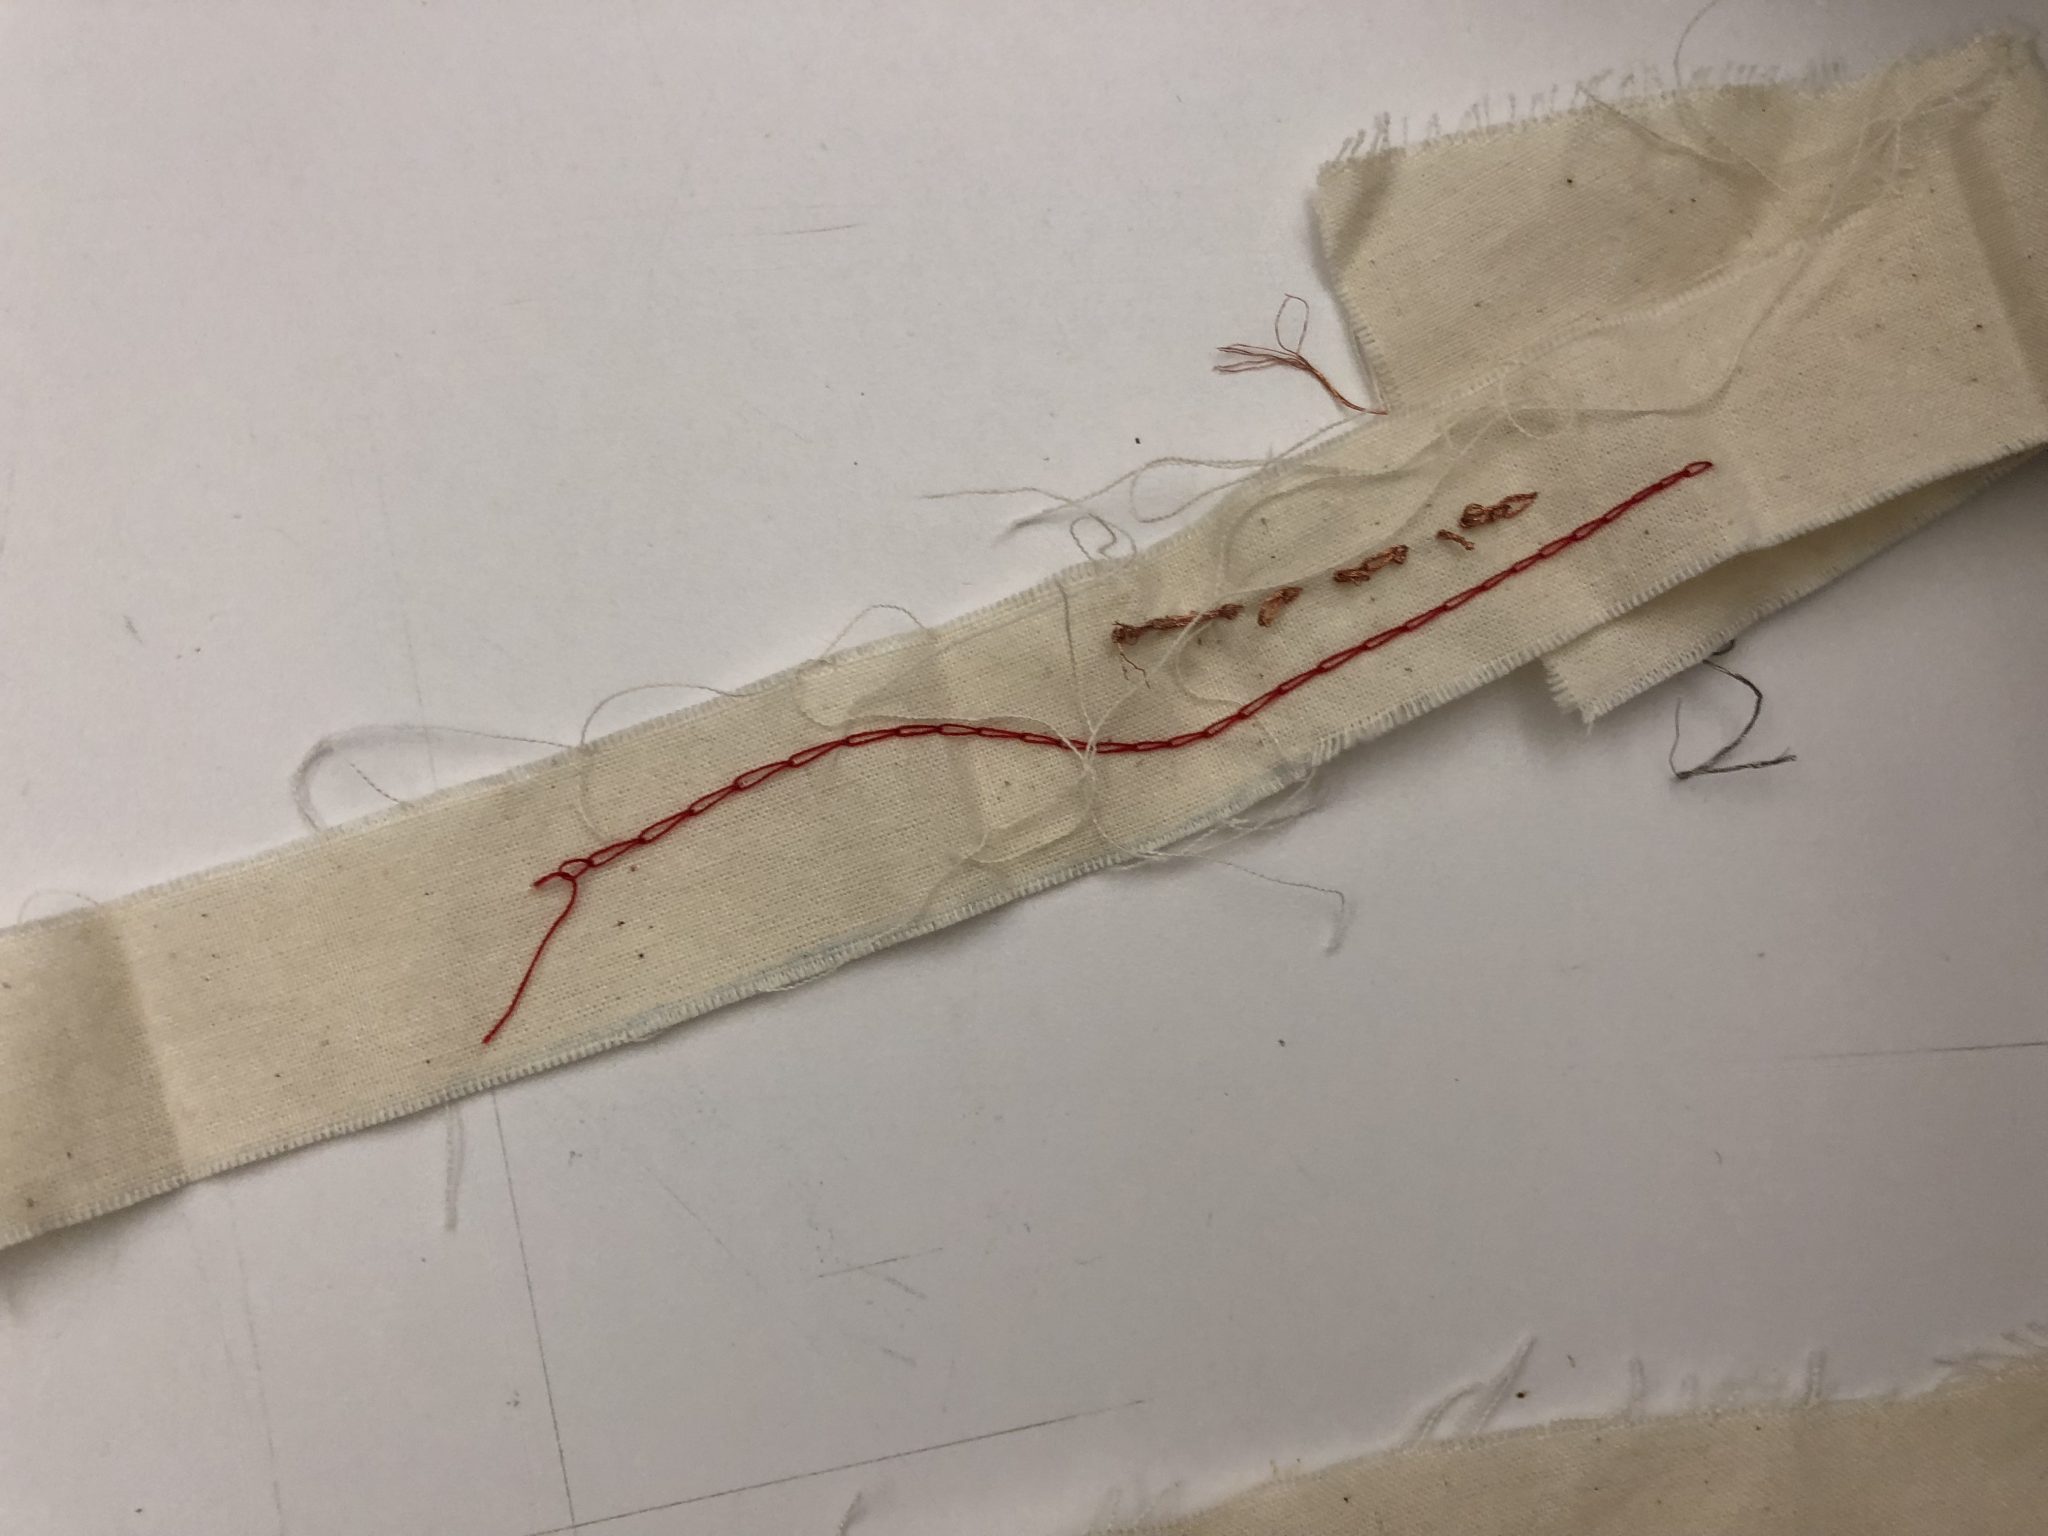
For this project I made the circuit first. Which is something I always find very relaxing. After making the circuit I moved on to making the traces to test the resistance of the different threads we had access to. I made two traces using the steel thread, I was interested to see exactly how much resistivity it has. Below is a video of me testing my traces with one of the swatches in Liza’s kit.
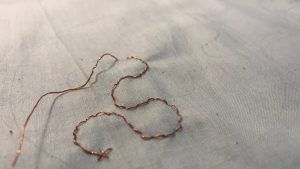
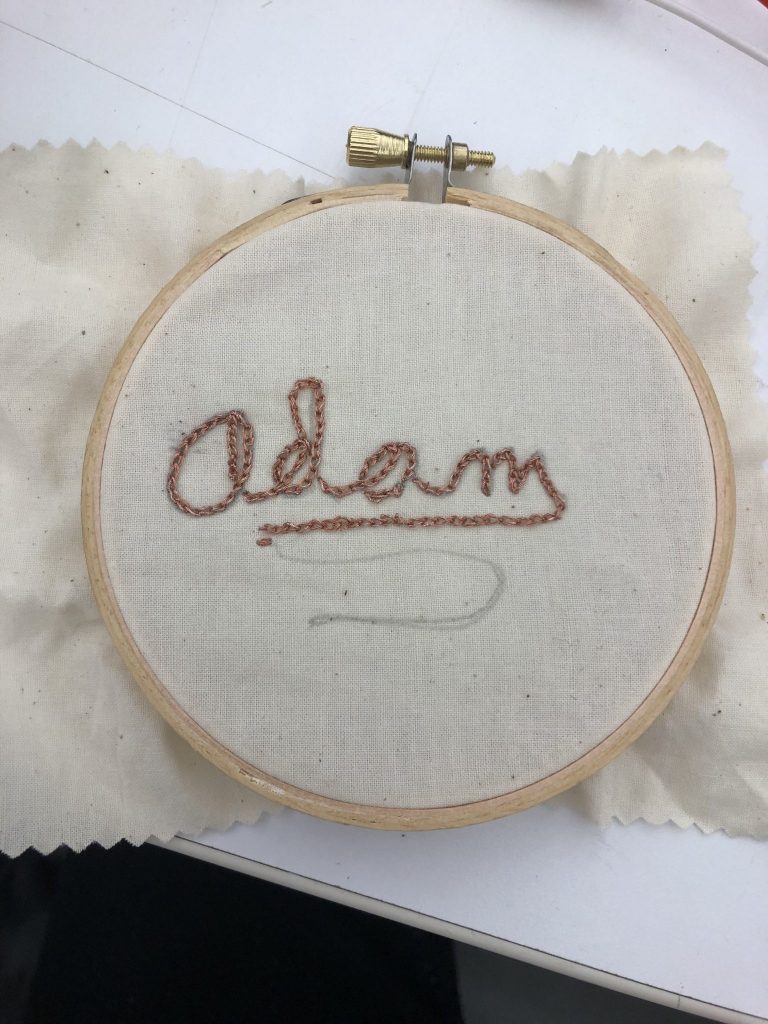
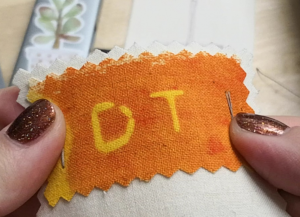
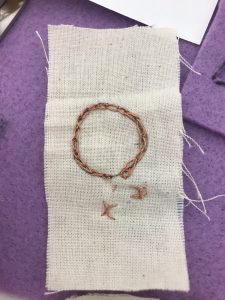
After seeing how small the traces would have to be to use steel thread I decided to use copper thread for the small piece I wanted to make. Chain stitching is a type of embroidery I’ve always wanted to make so I decided it would be interesting to play with the traditional soft look of embroidery. I embroidered my name in copper thread using a chain stitch.
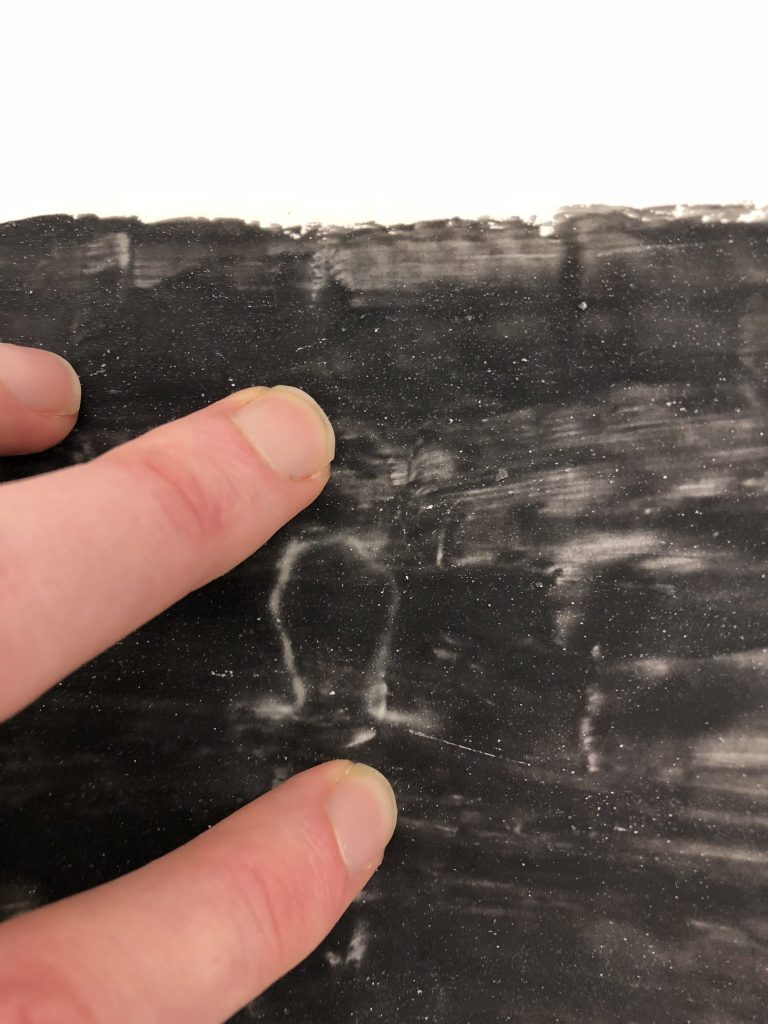
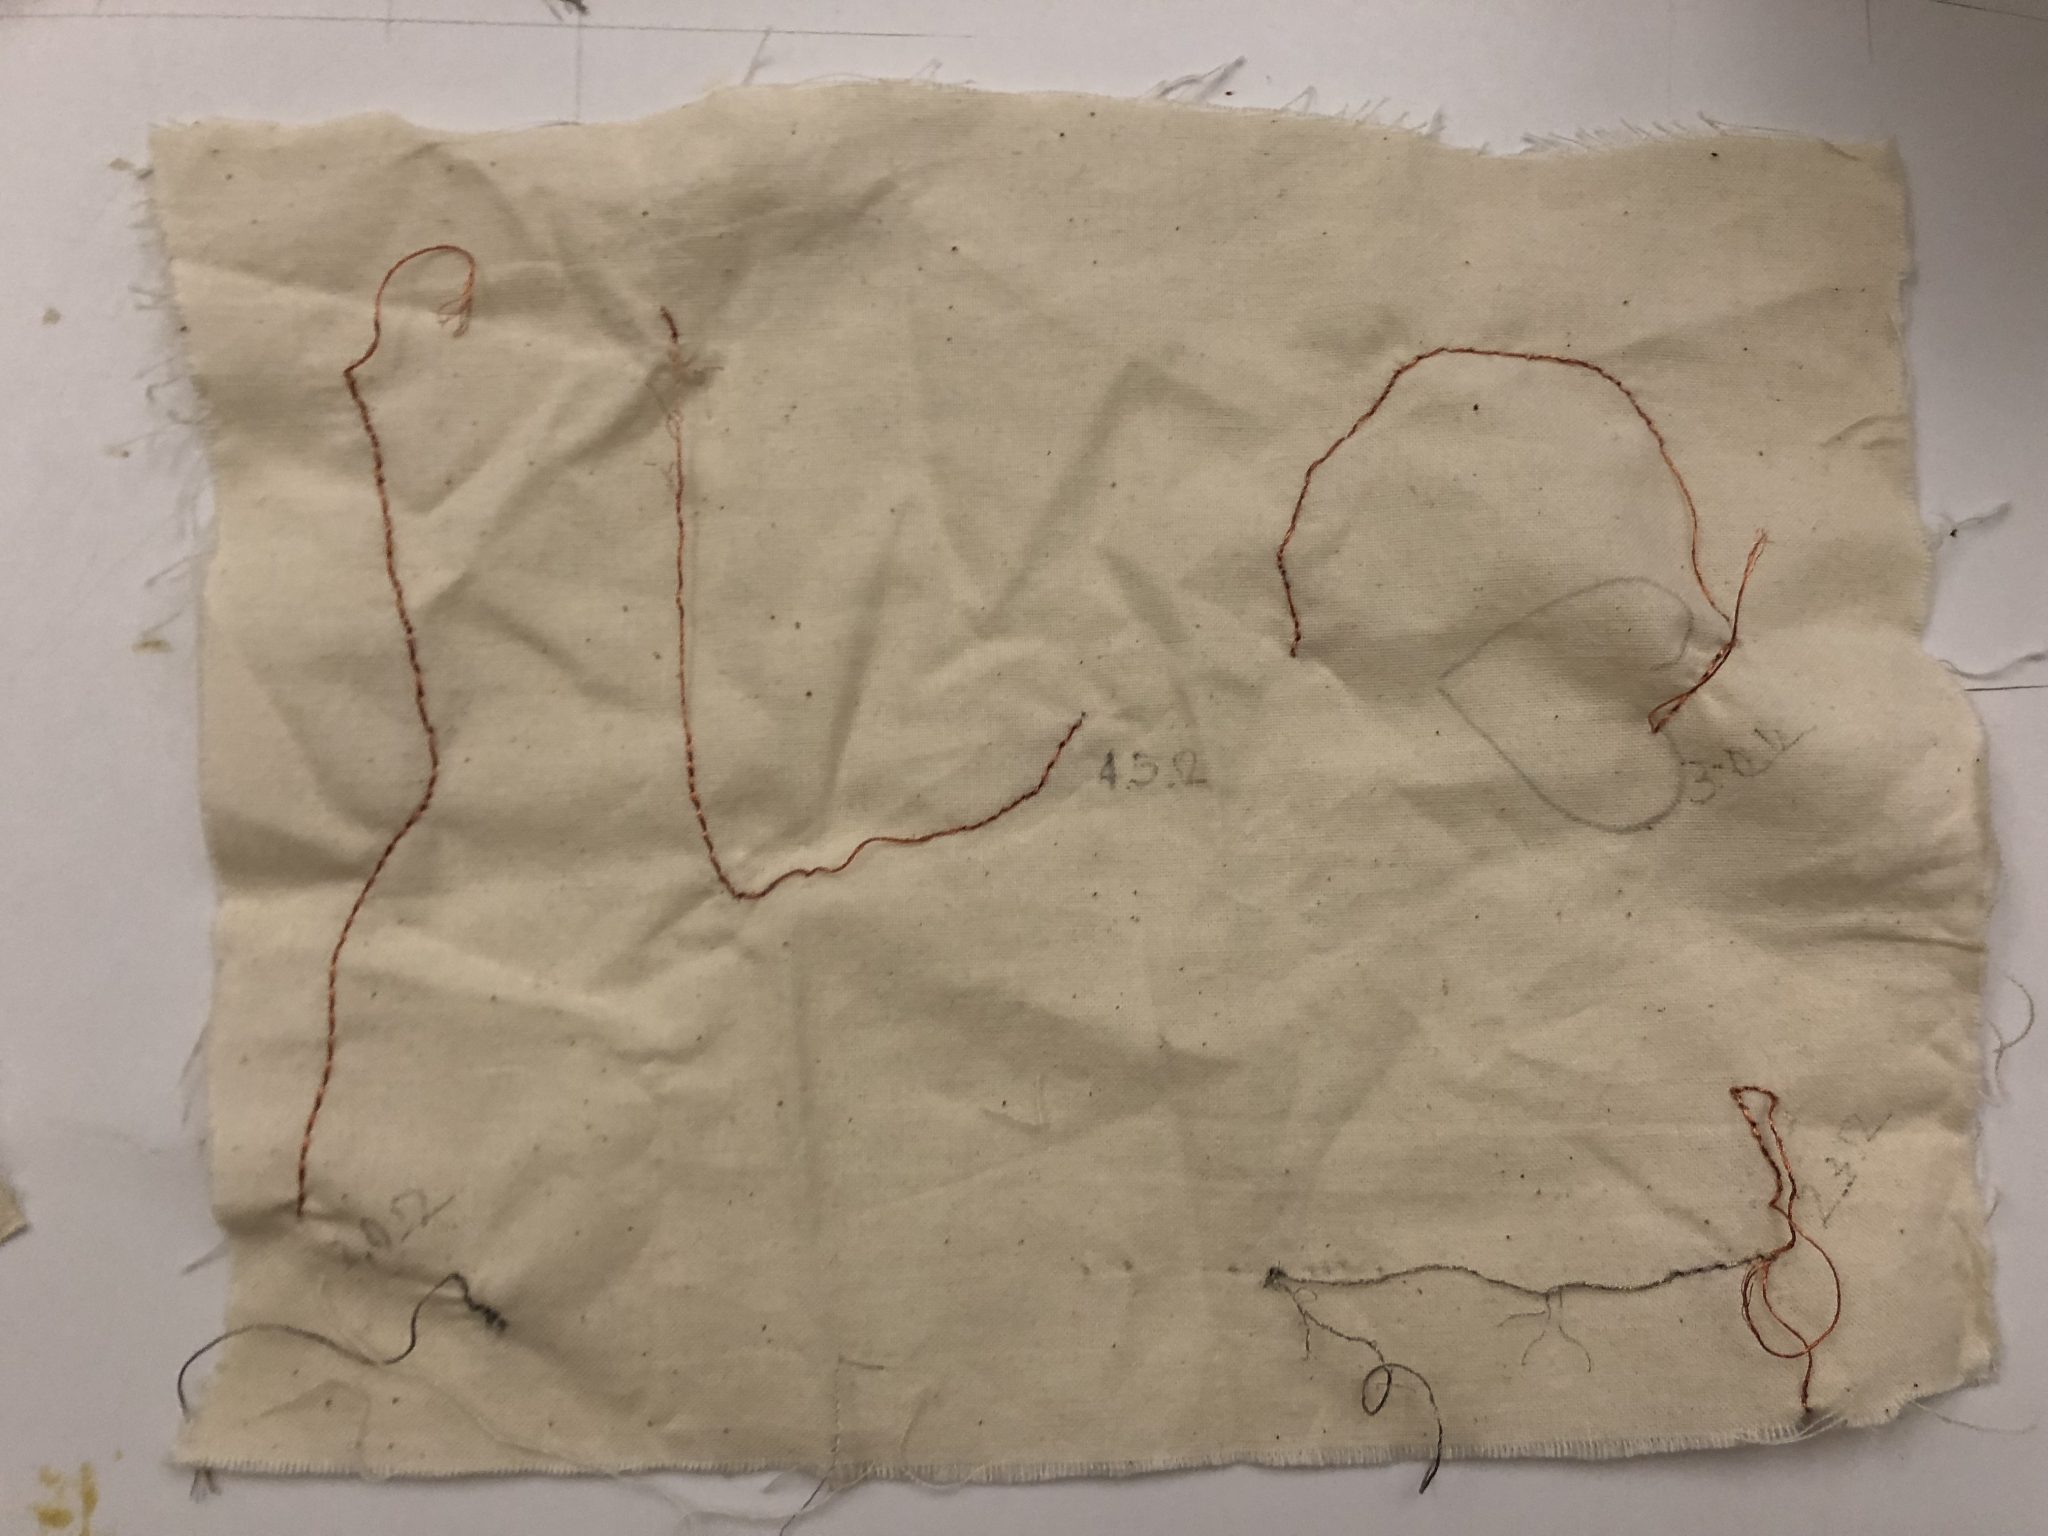
I tested the resistance and it was consistently around 3.5 ohms. I used a li-po battery to power my heating element and I wanted to test with the same swatch I’d been using before moving on to creating a thermochromic swatch of my own. This is where I ran into issues.
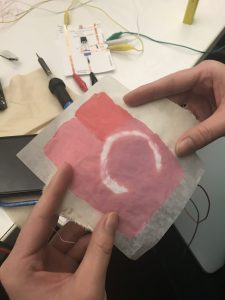
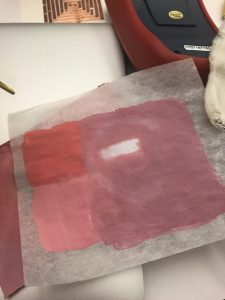
It turns out the the embroidery is too close together for it to appear clearly in thermochromic ink! To make this work better I would have to create a new embroidery on a much larger scale, given how long this smaller sample took I didn’t have time for that. I did still create a version of the thermochromic painting that I would have liked to use. I think I may have applied too much for the paint onto the velum paper because I had to use a 9 volt battery to get even my small tracing to appear.
All in all I really enjoyed learning how to do the embroidery and the thermochromic ink is quite very fun even if a little temperamental in the hands of someone who is not experienced in its use.
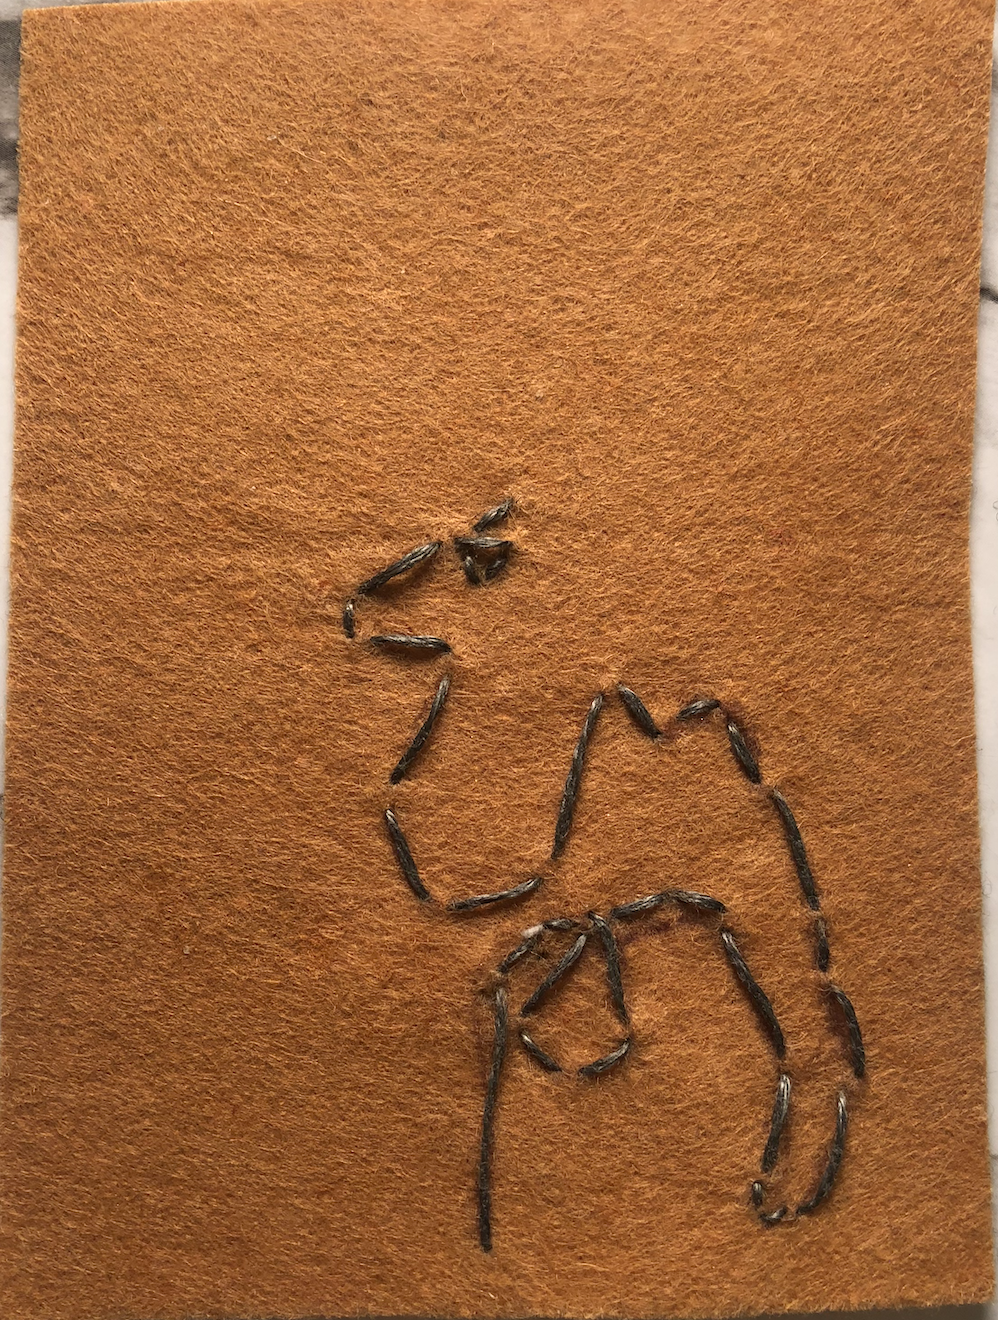
I made these two heating elements below, by hand sewing using stain steel thread and fabric. The first one is a pattern in a line drawing by one of my favorite artists Pablo Picasso, with 8ohm resistance in it.
The second one is a victory sign meaning cheering up, with 11ohm resistance in it.
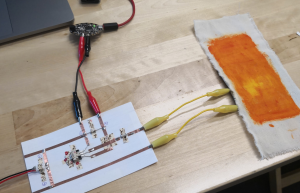
For both of them, it is good to use 9v battery as a power source, according to the equation. But when I was trying it, it didn’t work very well. The pattern seemed very weak and couldn’t really be seen in the photo. I guess that the problem was probably because the color I used to paint the fabric is too light so it didn’t have room to change much. I intend to try using a darker color on fabric to test.
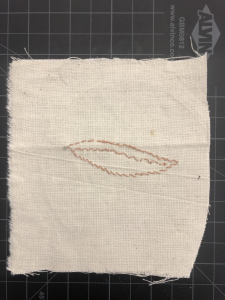
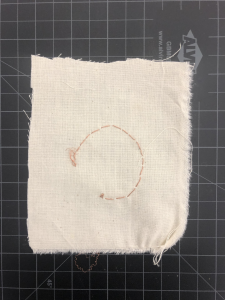
For the thermochromic ink exercise, I made two conductive thread embroidery where the shape/characters are sewn underneath the thermochromic ink swatch, and one thermochromic ink swatch with the same color drawing on it.
I found out that mixing the black powder with fabric glue works pretty well because of the glue dried up clear, so I can use a black pen to draw on it.
Here are two simple circuits I created to test the thermochromic ink. The patterns are not very obvious. I might need to press hard to make sure there is a contact between the circuit and the thermochromic ink.
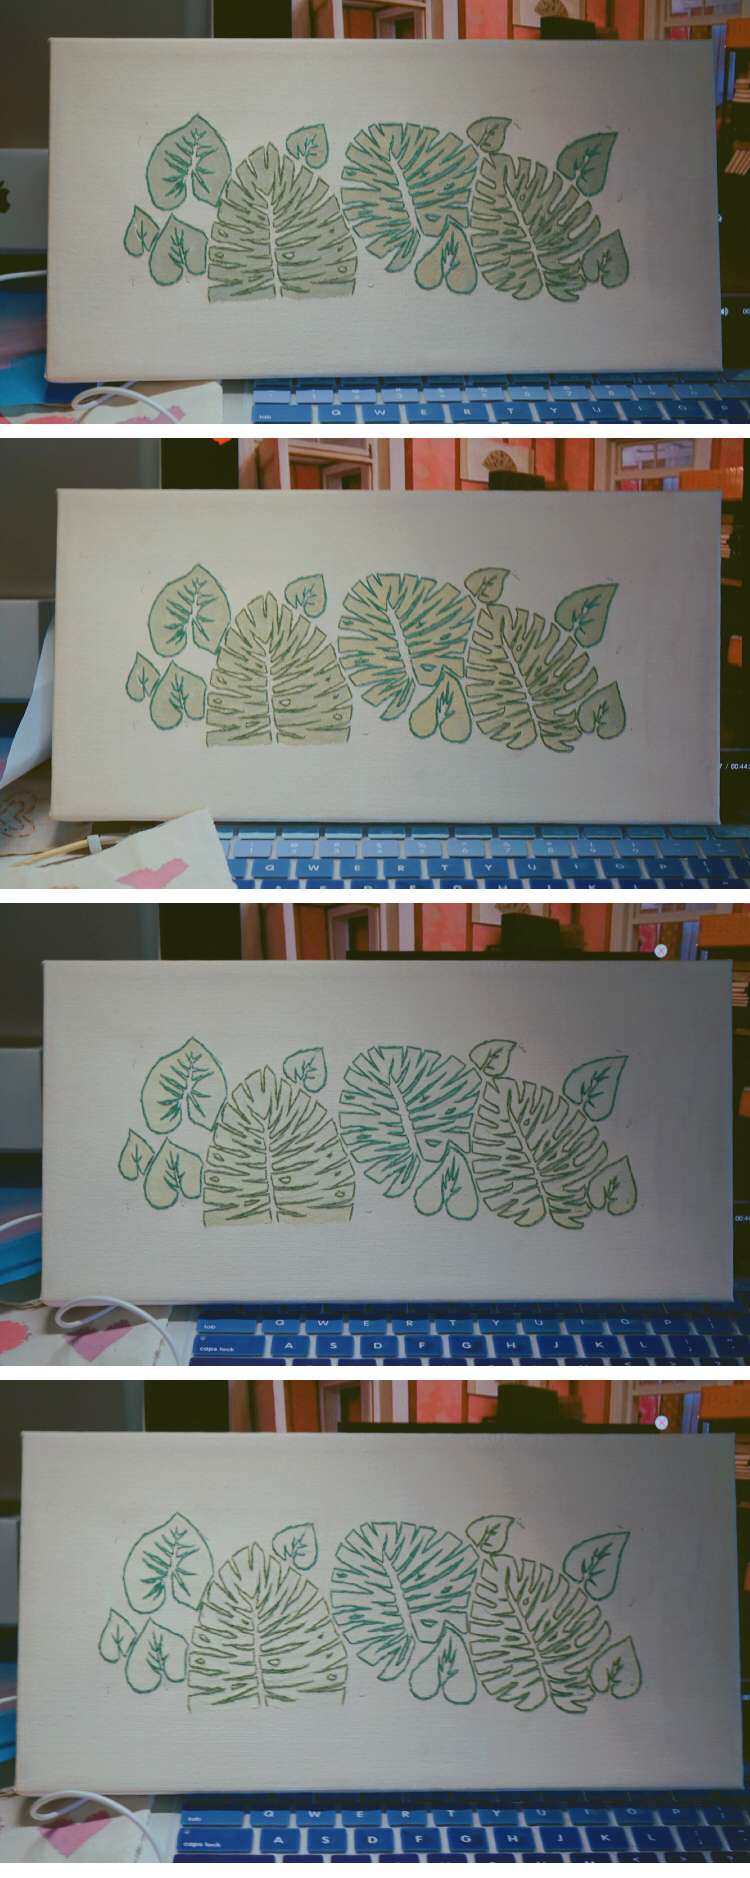
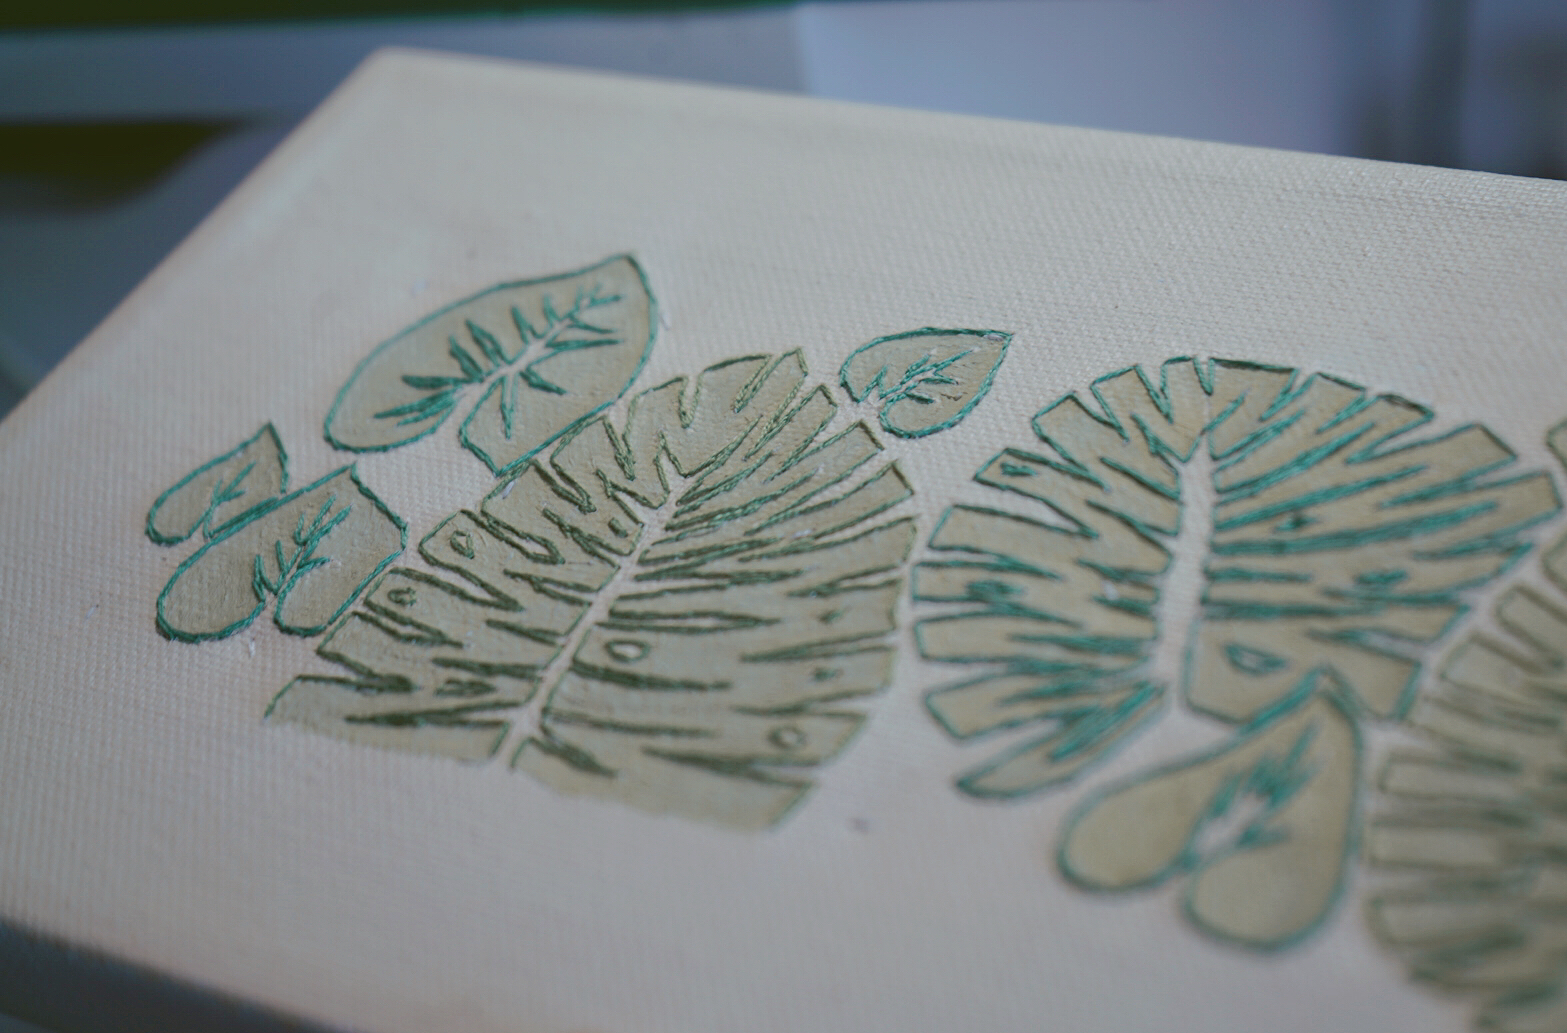
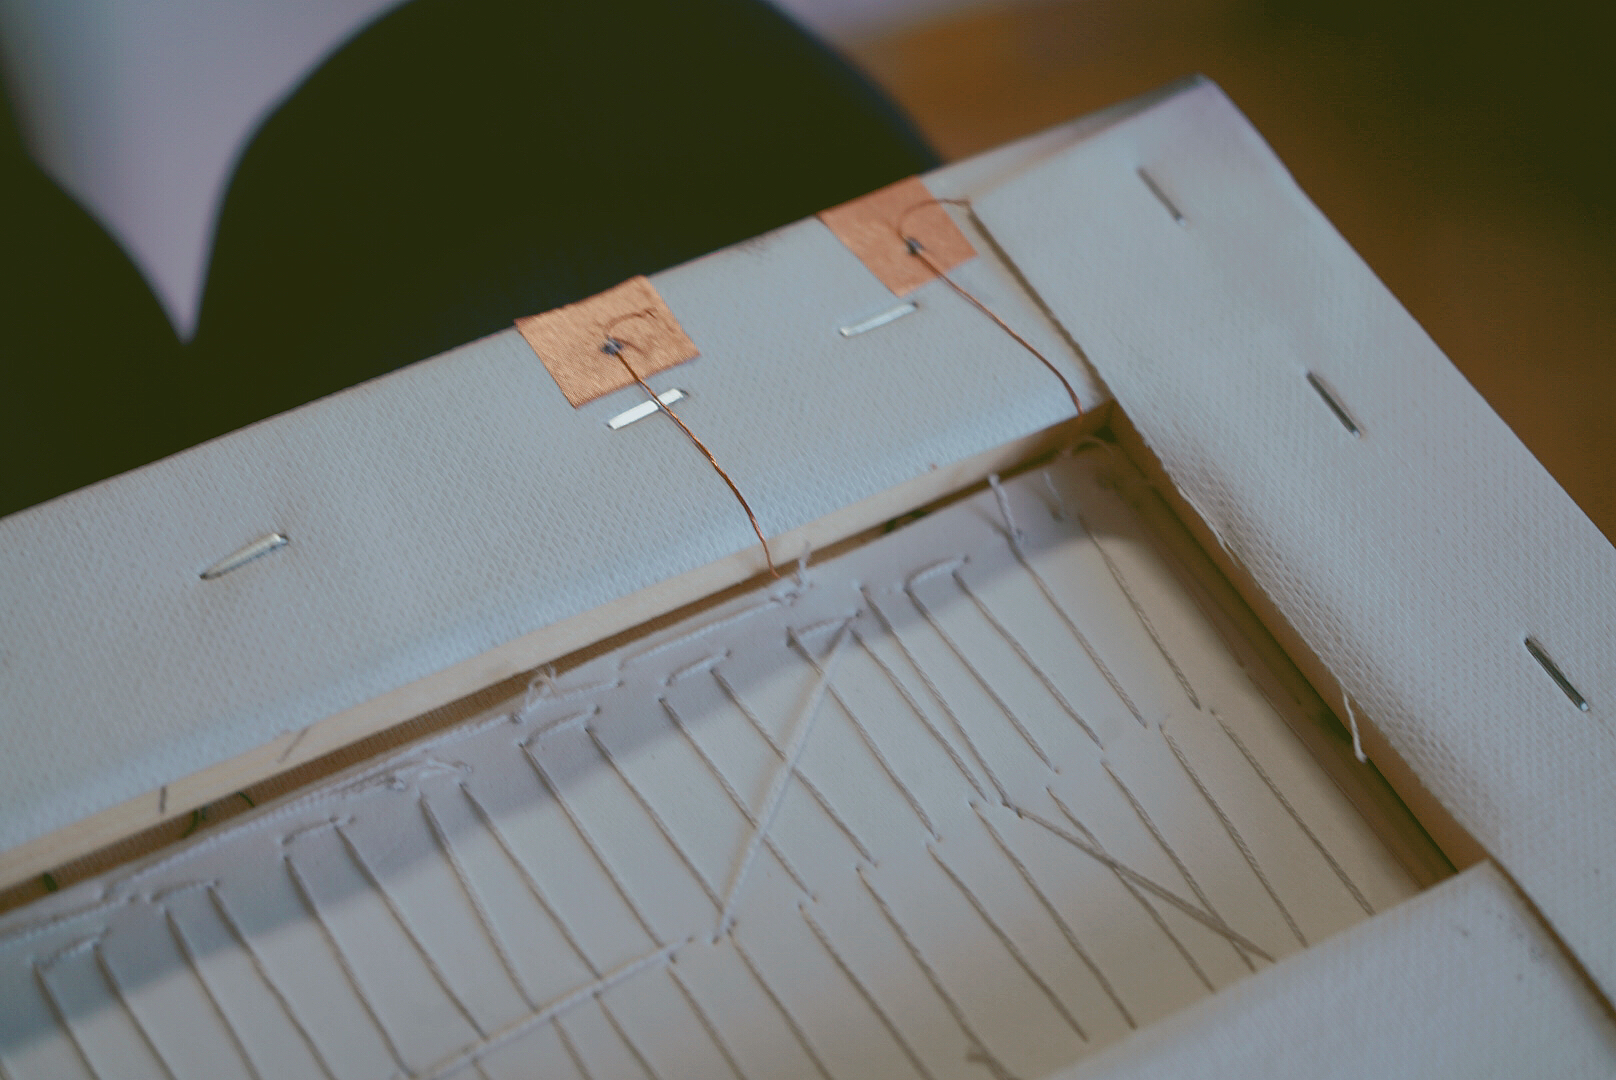
As for the mini project, I drew some green leaves(white acrylic paint, blue and yellow ) on the oil painting canvas. So we I connect the Arduino to my laptop, the ink get heat and the leaves turn green into white. The idea of the project is to show the influence of global warming, environmental issues might cause species extinction, so we need to save energy to protect our environment.


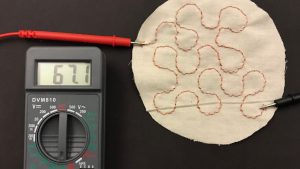 (no pressure applied – 67 Ohm)
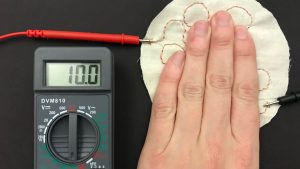 (pressure applied – 10 Ohm)