Week 12 Motion 2 Homework
Week 12 Motion 2 Homework
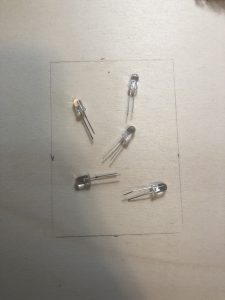
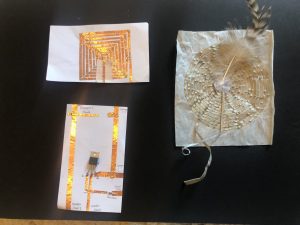
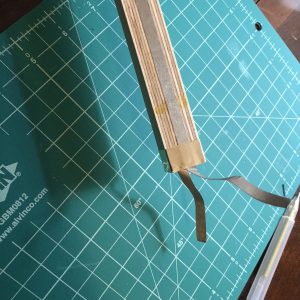
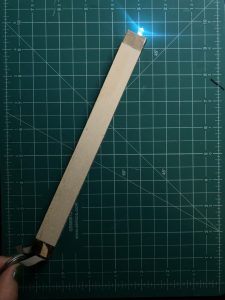
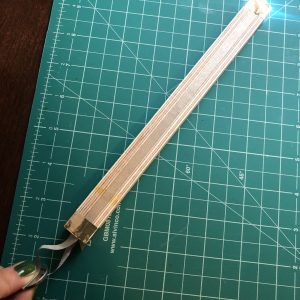
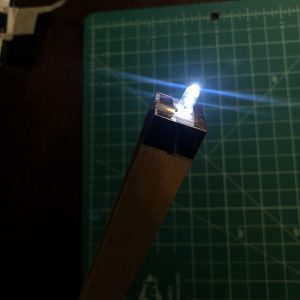
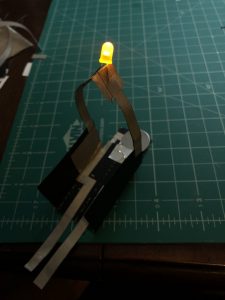
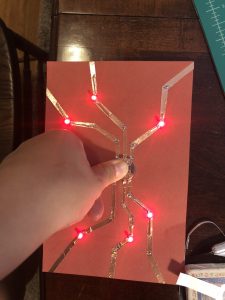
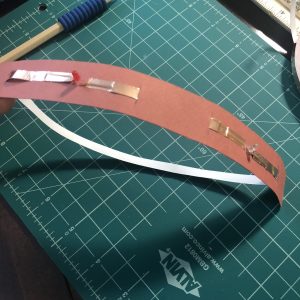
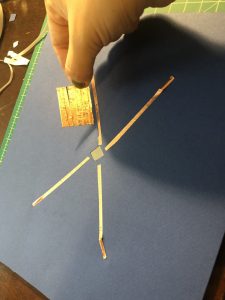
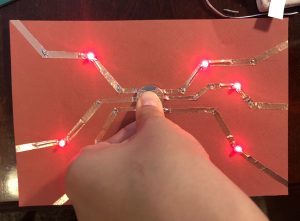
For the final project, I made a switch which could be triggered by human touch the feather.

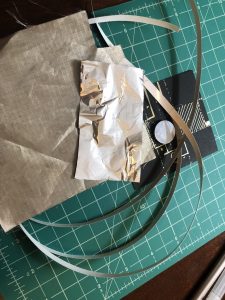
Material:
Process:
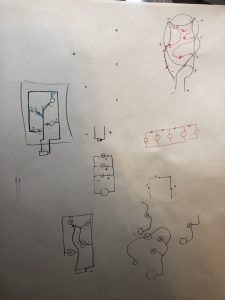
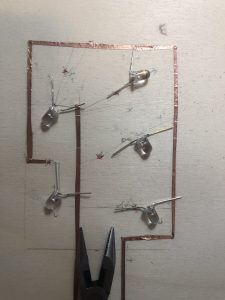
I did spend some time thinking about the circuit of how can make it work.
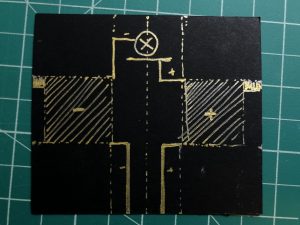
First I know that I need parallel; But where to put the break (switch) and also incorporate with the aesthetic placement of the LEDs is a little bit tricky. I only want to light up one LED at a time when the feather touching on one corresponding switch.
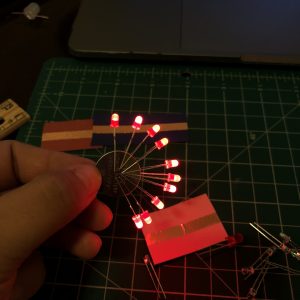
Finally the circuit work out like this:

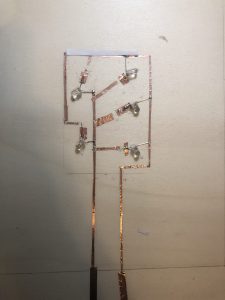
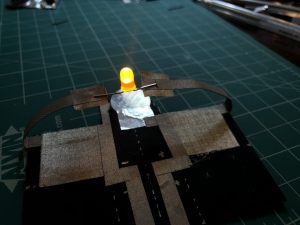
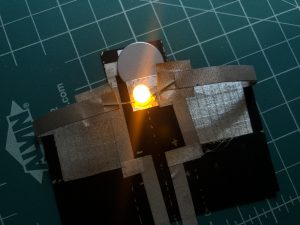
Start placing the LEDs on the wood sheet. Facing different directions to light up.
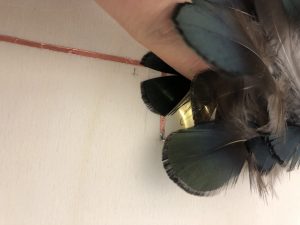
Adding feathers layer by layer.
Video testing the circuit:
Instructable Link:
https://www.instructables.com/id/Human-Touch-Switch/
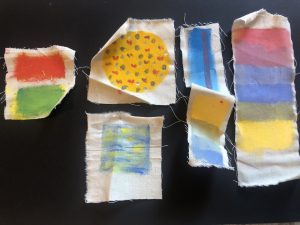
Thermochromic ink exploration.
I created 5 pieces of swatch for this assignment.
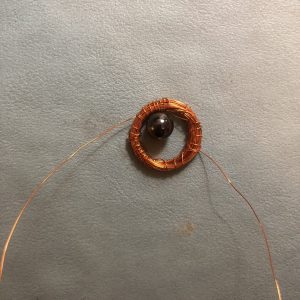
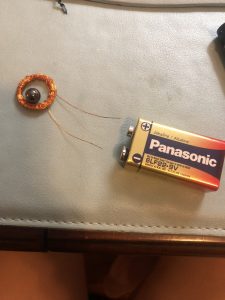
For this week I constructed there pieces of speakers with different substrate materials for homework.
It was fun. Love to see the feather dancing when the speaker is on and vibrating.

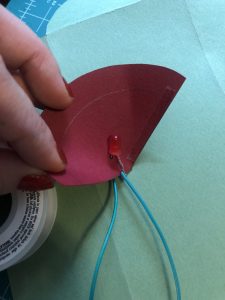
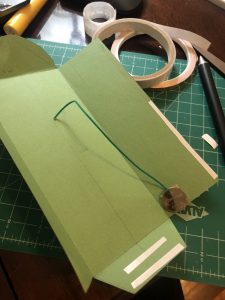
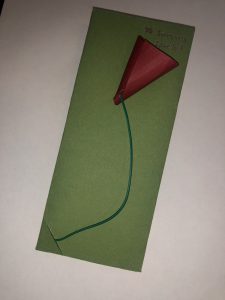
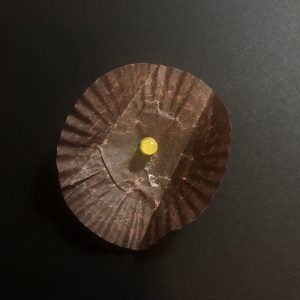
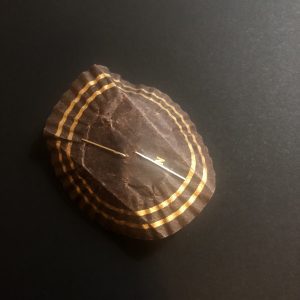
I designed a special wish/blessing/gift card.
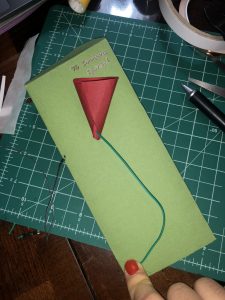
There is a rose on the front of the envelope; and when you place the stem of the flower into the down left corner of the envelope where there is a gap, mimic the process of “putting the stem and root into the pot/mud ” then the rose will light up, lighting up the wishing message written on the top right: “To Some Special”.
Material:
Process:


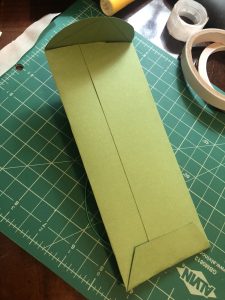
Done:

Video Documentation:
Instructable link:
https://www.instructables.com/id/Greeting-Rose/
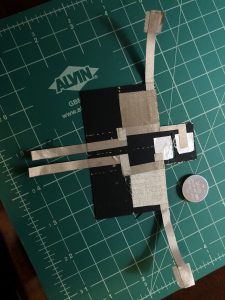
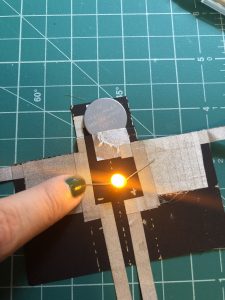
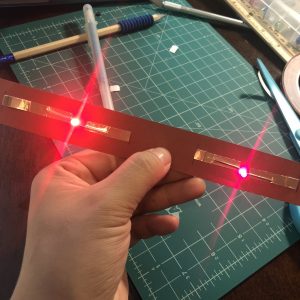
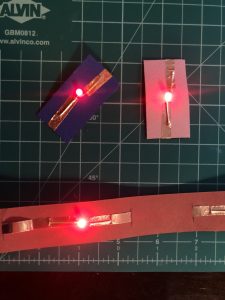
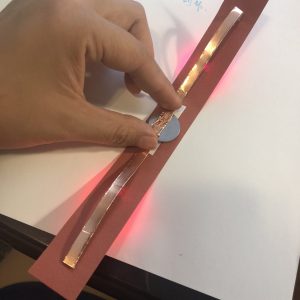
For this assignment I created a soft switch to play with the on and off of the LED.
Get inspired by Jie Qi’s soft circuit construction. I am really interested in the connection of the motion of smooth your finger back and forth to trigger the LED light up.

I played with the aesthetics of the circuit. Silver color conductive tape chosen for the simplicity of elegance contrast to the dark navy blue background.
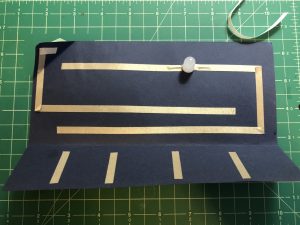
The trick of the circuit is that only when you pressed and the circuit will be completed and the LED will light up. It turns the whole piece of area to be a magical pad when people are pressing back and force, it creates a satisfying loop (at least to me). The potential of this circuit can be scale up and more complex to make a puzzle of switch to let people explore where to press to trigger the LED.
Video Here :IMG_9612
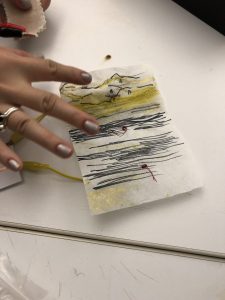
I made a paper painting and the view on it will be distorted when press the pressure sensor.
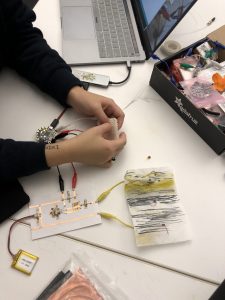
Video here:~
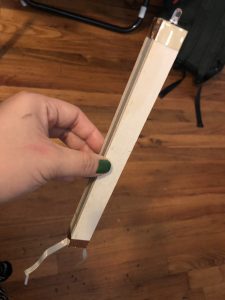
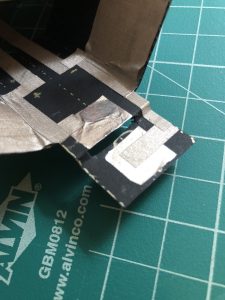
I did two nodes: One is led one is for battery.
For the Led one, I always interested in taking the node into a more 3D form (jump out of plane paper/ fabric! ) In favor of wood and stick, this idea just came into my mind: A Led Fake Candle!
This idea excites me! I love the combination of this little toy:
 My “candle” ?
at the end side of my ‘candle’ leaves two string easy connect to battery;
Light it upppp!!!!
My ‘flame’ :))))))))))
For the battery node also the tool I designed as a battery connector:
It’s all started with the idea: Sometimes when we are inserting led into a project and two legs of the led is stretched into a 2D surface which it’s not convenient to test with a battery in quick prototypes —— since the negative and positive side of the battery naturally form a 3D space!
So this idea came into my mind: I want to design a tool to hold the battery, but also has different way of connecting the power into different length, dimension, sizes; It can be plane, so when you stretched out the two legs of the led you can just simply put it onto the plane touching different the conductive area of negative and positive, then you can easily test the led;
Or when your led with two legs downward standing, you can easily manipulate the ‘arms’ of the tool which also connect to the battery, to place it with the led legs, leave plenty of connection forms and ways, makes quick circuit test much more accessible!

Also it looks like a cute guy with head (where the battery is); two arms (long distance connection point); two legs (close surface connection point). Cute
Process:
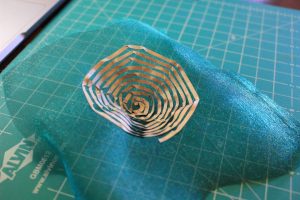
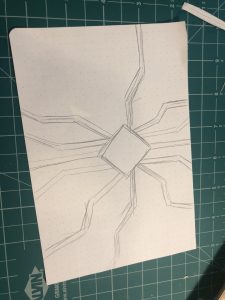
Circuit Diagrams; All golden parts indicate conductive area;
Material preparation;
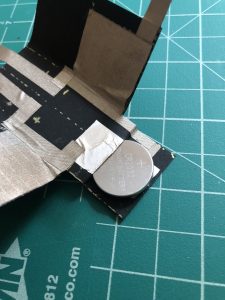
The close-up of how the battery part works:
You can easily insert the battery into the ‘head’ of the guy; So you don’t need to worry how to fix a battery, and the replacement becomes very flexible and convenient;
I was so touched when I read the quote
“The little boy robot in Steven Spielberg’s 2001 film ‘A.I. Artificial Intelligence’ wants to be a real boy with all his little metal heart”
in <Outing A.I.: Beyond the Turing Test> by Benjamin Bratton.
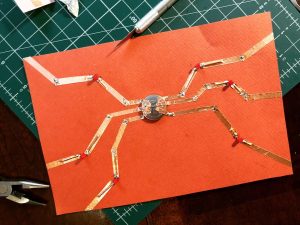
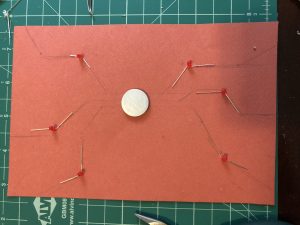
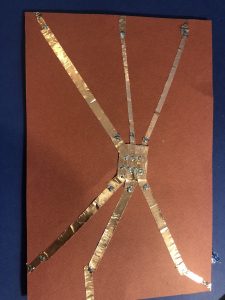
In this project, I want to use the red led light to represent the emotion of love,with the copper tape compose a geometry and electronic-path-like pattern, to abstractly be a metaphor for the metal/ machine-made heart. When you press the battery, the led light up, making diffuse reflection against the pink red paper in the background, mimic the feeling of longing for love.
I explore the effect of how to work with paper and place the led to provoke an emotional vibe and feeling. Also tried to add blue led at the four back corners of the front main paper to mimic a feeling of emit the signal, try to add more feeling of the sense that it’s a non-organic creature.
【Process Documentation】
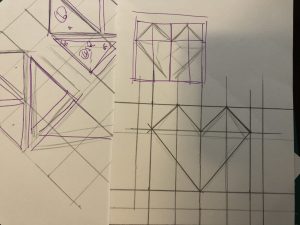
Started from the very beginning of concept sketching:

Tried different small scale samples to test the property and effect of the led light, compared with different background colors;
tested how many leds can be powered by one single battery; [it’s fun >▽<]


place the led the sketched places:
back of it:
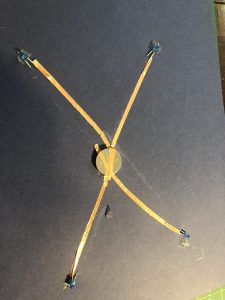
tried out the blue leds:

Final:
The project I like the most is < La Porte Rouge > by Clement Cogitore. I first saw this piece of work during my visit to Palais de Tokyo in Paris.

It was installed in the middle of a pathway hall where every visitors have to go through this final door before being able to continue their journey in the rest of the exhibition.
A heavy, monumental stage curtain, decorated according to the lavish codes of the opera, opens then closes again mechanically, but also chaotically, in an asynchronous and irregular rhythm. As a large passage in the form of a stage entrance for the visitors, this curtain comes over as active, living, haunted element: here, it is the set itself that becomes a character, putting on a show.
This is a piece of work that I would say using the simplest effect to create a strong experience. I was totally shocked the first time I saw it and strong feeling of impression it brings to me still haunting around even when I left the scenario.
It was made by the film director and artist Clement Cogitore collaborated with Enrique Lopez & Germain Benoit – Manufacture Royale Bonvallet.