What an incredible semester! Here are all of the midterms and final projects from the fall.
Instructables Collection
Leave a reply
What an incredible semester! Here are all of the midterms and final projects from the fall.
Instructables link: http://www.instructables.com/id/Fading-Domes-Thermochromic-Painting/
documentative video: https://vimeo.com/197175143
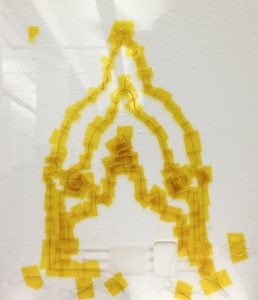
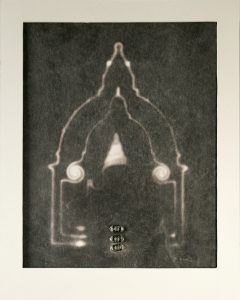
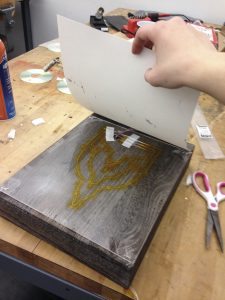
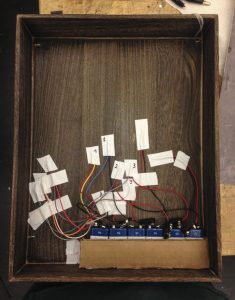
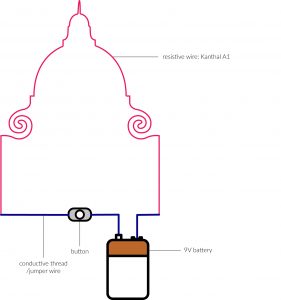
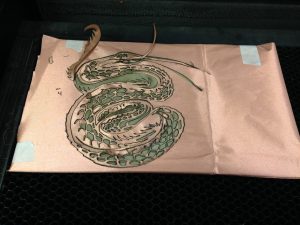
Thermochromic Painting.
The surface of the painting is coated in thermochromic pigment, which is black at ambient temperature and becomes transparent when heated.
Three resistive wires are shaped into an engraved sheet of Perspex, forming the perimeters of three famous Italian domes (San Pietro and Sant’Ivo alla Sapienza in Rome and Santa Maria della Salute in Venice). These are then connected to a battery through three buttons that interrupt the circuit.
Once the buttons are pressed the energy flows and heats the resistive wires, which are placed directly behind the thermochromic ink layer, heating the pigment and thus changing its color.
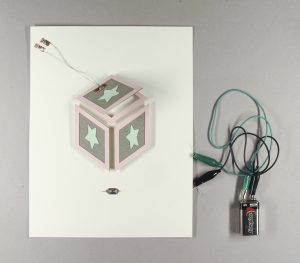
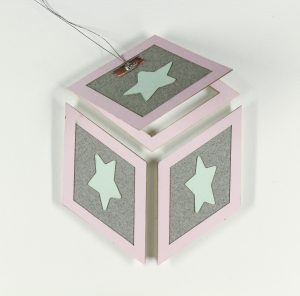
An experimentation with Flexion, shape changing wire that retracts when heated (thus when connected to 9v battery in this case). A button completes the circuit: when the butto is pressed, the wire is heated, it retracts, and pulls the box lid.
See demonstration video here: https://vimeo.com/191721664
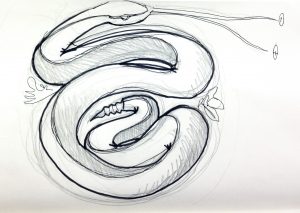
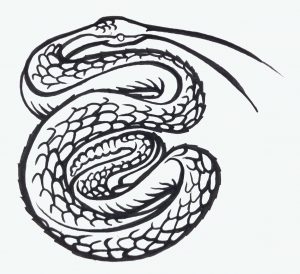
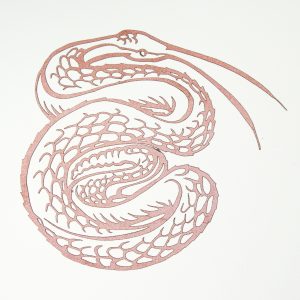
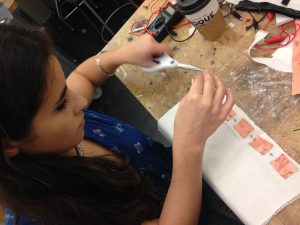
This laser-cut copper conductive fabric snake works as a speaker when connected to an amplifier and brought close to a magnetic source which amplifies the vibrations generating the music.
See demonstration video here: https://vimeo.com/190763544

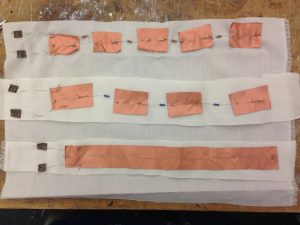
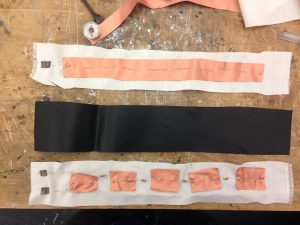
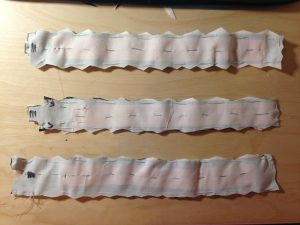
DIY touch sensors made with conductive copper fabric and Velostat.
The addition of resistors between every piece of conductive fabric simulate the concept of a distance sensor.
Demonstrations video here: https://vimeo.com/197172460
Speaker Swatch:
Materials used- Plexiglass, X-Acto knife, and Copper tape
Challenges: Mine didn’t end up working because I didn’t solder the areas on the copper tape where I had to bend it.
Quote: To me, a story can be both concrete and abstract, or a concrete story can hold abstractions. And abstractions are things that really can’t be said so well with words. David Lynch
I wanted to use a simple circuit to form pink light. I put 3 Red LEDs on one side and 3 Blue LEDs on the other connecting them with conductive thread. If you stare at it and close your eyes, you can see pink circles; they also show up on camera (not as intensely).
Materials:
Conductive thread, roofing copper (simple button), Record (with hole drilled out), aluminum (for holding it), 3V battery, and a wood base (spray painted black).

Inspired by:
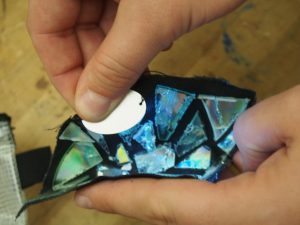
Button Swatch:
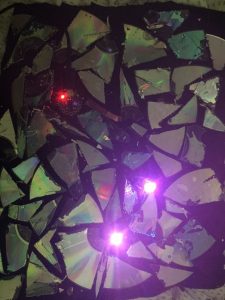
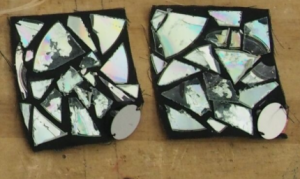
Materials used- Old CDs, Led, Copper tape, and metal tag.
How it works:
You press the aluminum tag onto the copper, completing the circuit to light the LED. The LED reflects the light onto the CDs causing a reflective effect. I wanted to see what it would look like if I trapped light into a box.
Challenges:
It was a pretty straight-forward project, with the hardest part being cutting up the CDs (a lot of labor!).
I want to take this project further by placing the CDs more strategically making a more intense mirror effect.
Inspired by:
For my Computational Craft midterm, I wanted to take a swatch that I made earlier in the semester and expand upon it. I am a musician (trumpet player/composer) and I have always been fascinated by/passionate about making mosaics.
The materiality of the CDs is important to me because I feel like they are just a business card for musicians now. Most people buy music on iTunes or listen to it on Spotify or Pandora making the landscape for a performing artist’s revenue and distribution radically different than it was even 10 years ago.
Things I learned:
How to sew a working circuit with conductive thread and Lilytiny
Clear nail polish is PERFECT for making your connections stronger
CDs are very beautiful when you combine them with a light source
how to use the digistump library (for Lilytiny)
how to use the Adafruit Neopixel Library
http://www.instructables.com/id/RGB-Conductive-Mosaic/