What an incredible semester! Here are all of the midterms and final projects from the fall.
Instructables Collection
Leave a reply
What an incredible semester! Here are all of the midterms and final projects from the fall.
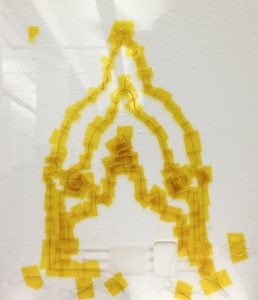
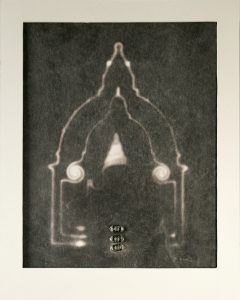
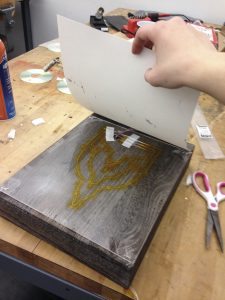
Instructables link: http://www.instructables.com/id/Fading-Domes-Thermochromic-Painting/
documentative video: https://vimeo.com/197175143
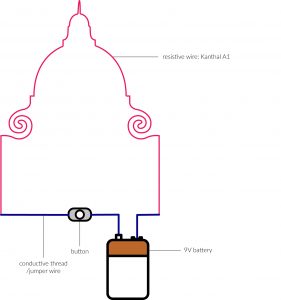
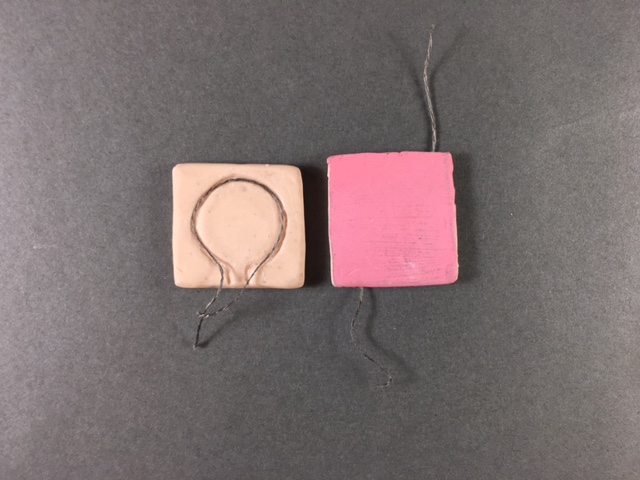
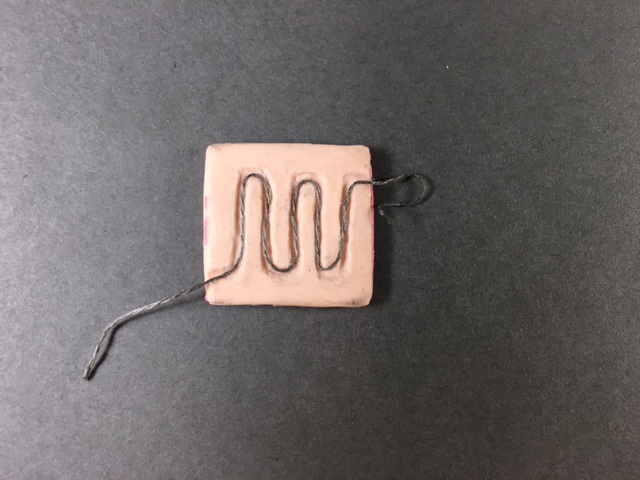
Thermochromic Painting.
The surface of the painting is coated in thermochromic pigment, which is black at ambient temperature and becomes transparent when heated.
Three resistive wires are shaped into an engraved sheet of Perspex, forming the perimeters of three famous Italian domes (San Pietro and Sant’Ivo alla Sapienza in Rome and Santa Maria della Salute in Venice). These are then connected to a battery through three buttons that interrupt the circuit.
Once the buttons are pressed the energy flows and heats the resistive wires, which are placed directly behind the thermochromic ink layer, heating the pigment and thus changing its color.
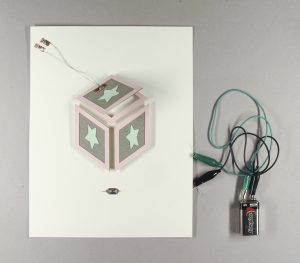
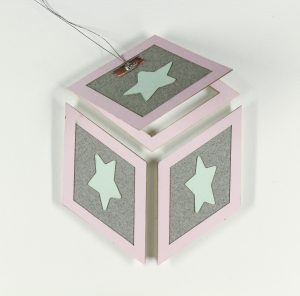
An experimentation with Flexion, shape changing wire that retracts when heated (thus when connected to 9v battery in this case). A button completes the circuit: when the butto is pressed, the wire is heated, it retracts, and pulls the box lid.
See demonstration video here: https://vimeo.com/191721664
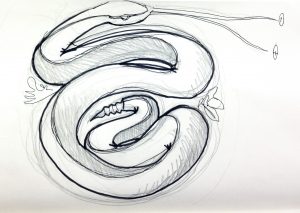
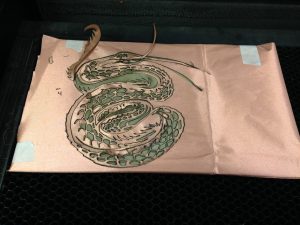
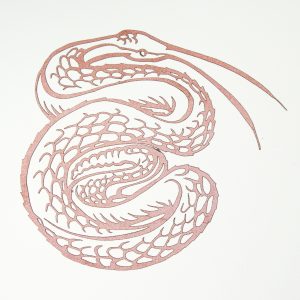
This laser-cut copper conductive fabric snake works as a speaker when connected to an amplifier and brought close to a magnetic source which amplifies the vibrations generating the music.
See demonstration video here: https://vimeo.com/190763544


Speaker Swatch:
Materials used- Plexiglass, X-Acto knife, and Copper tape
Challenges: Mine didn’t end up working because I didn’t solder the areas on the copper tape where I had to bend it.
Quote: To me, a story can be both concrete and abstract, or a concrete story can hold abstractions. And abstractions are things that really can’t be said so well with words. David Lynch
I wanted to use a simple circuit to form pink light. I put 3 Red LEDs on one side and 3 Blue LEDs on the other connecting them with conductive thread. If you stare at it and close your eyes, you can see pink circles; they also show up on camera (not as intensely).
Materials:
Conductive thread, roofing copper (simple button), Record (with hole drilled out), aluminum (for holding it), 3V battery, and a wood base (spray painted black).

Inspired by:
Button Swatch:
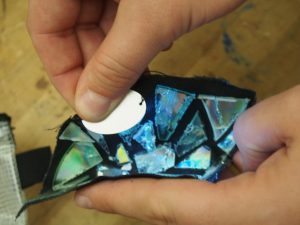
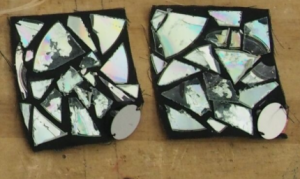
Materials used- Old CDs, Led, Copper tape, and metal tag.
How it works:
You press the aluminum tag onto the copper, completing the circuit to light the LED. The LED reflects the light onto the CDs causing a reflective effect. I wanted to see what it would look like if I trapped light into a box.
Challenges:
It was a pretty straight-forward project, with the hardest part being cutting up the CDs (a lot of labor!).
I want to take this project further by placing the CDs more strategically making a more intense mirror effect.
Inspired by:
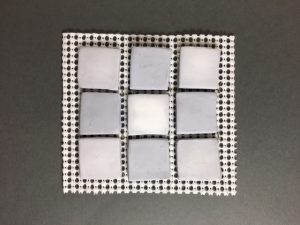
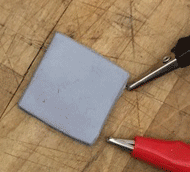
Ceramics and screenless interface relate to my thesis project. I took my final for Computational Craft as an opportunity to dig into the subject. I began with the question of how might I use thermochromic ink to display visual state changes in ceramics? Upon digging into the research I found that ceramics and thermochromic are being combined, but not for visual display purposes. While my initial inclination was to do a materials study, through the process I found in an intriguing application of my idea. My prototyping process using polymer clay acted as initial steps in my proof of the concept for this exciting materials and display opportunity: tiles as a display.

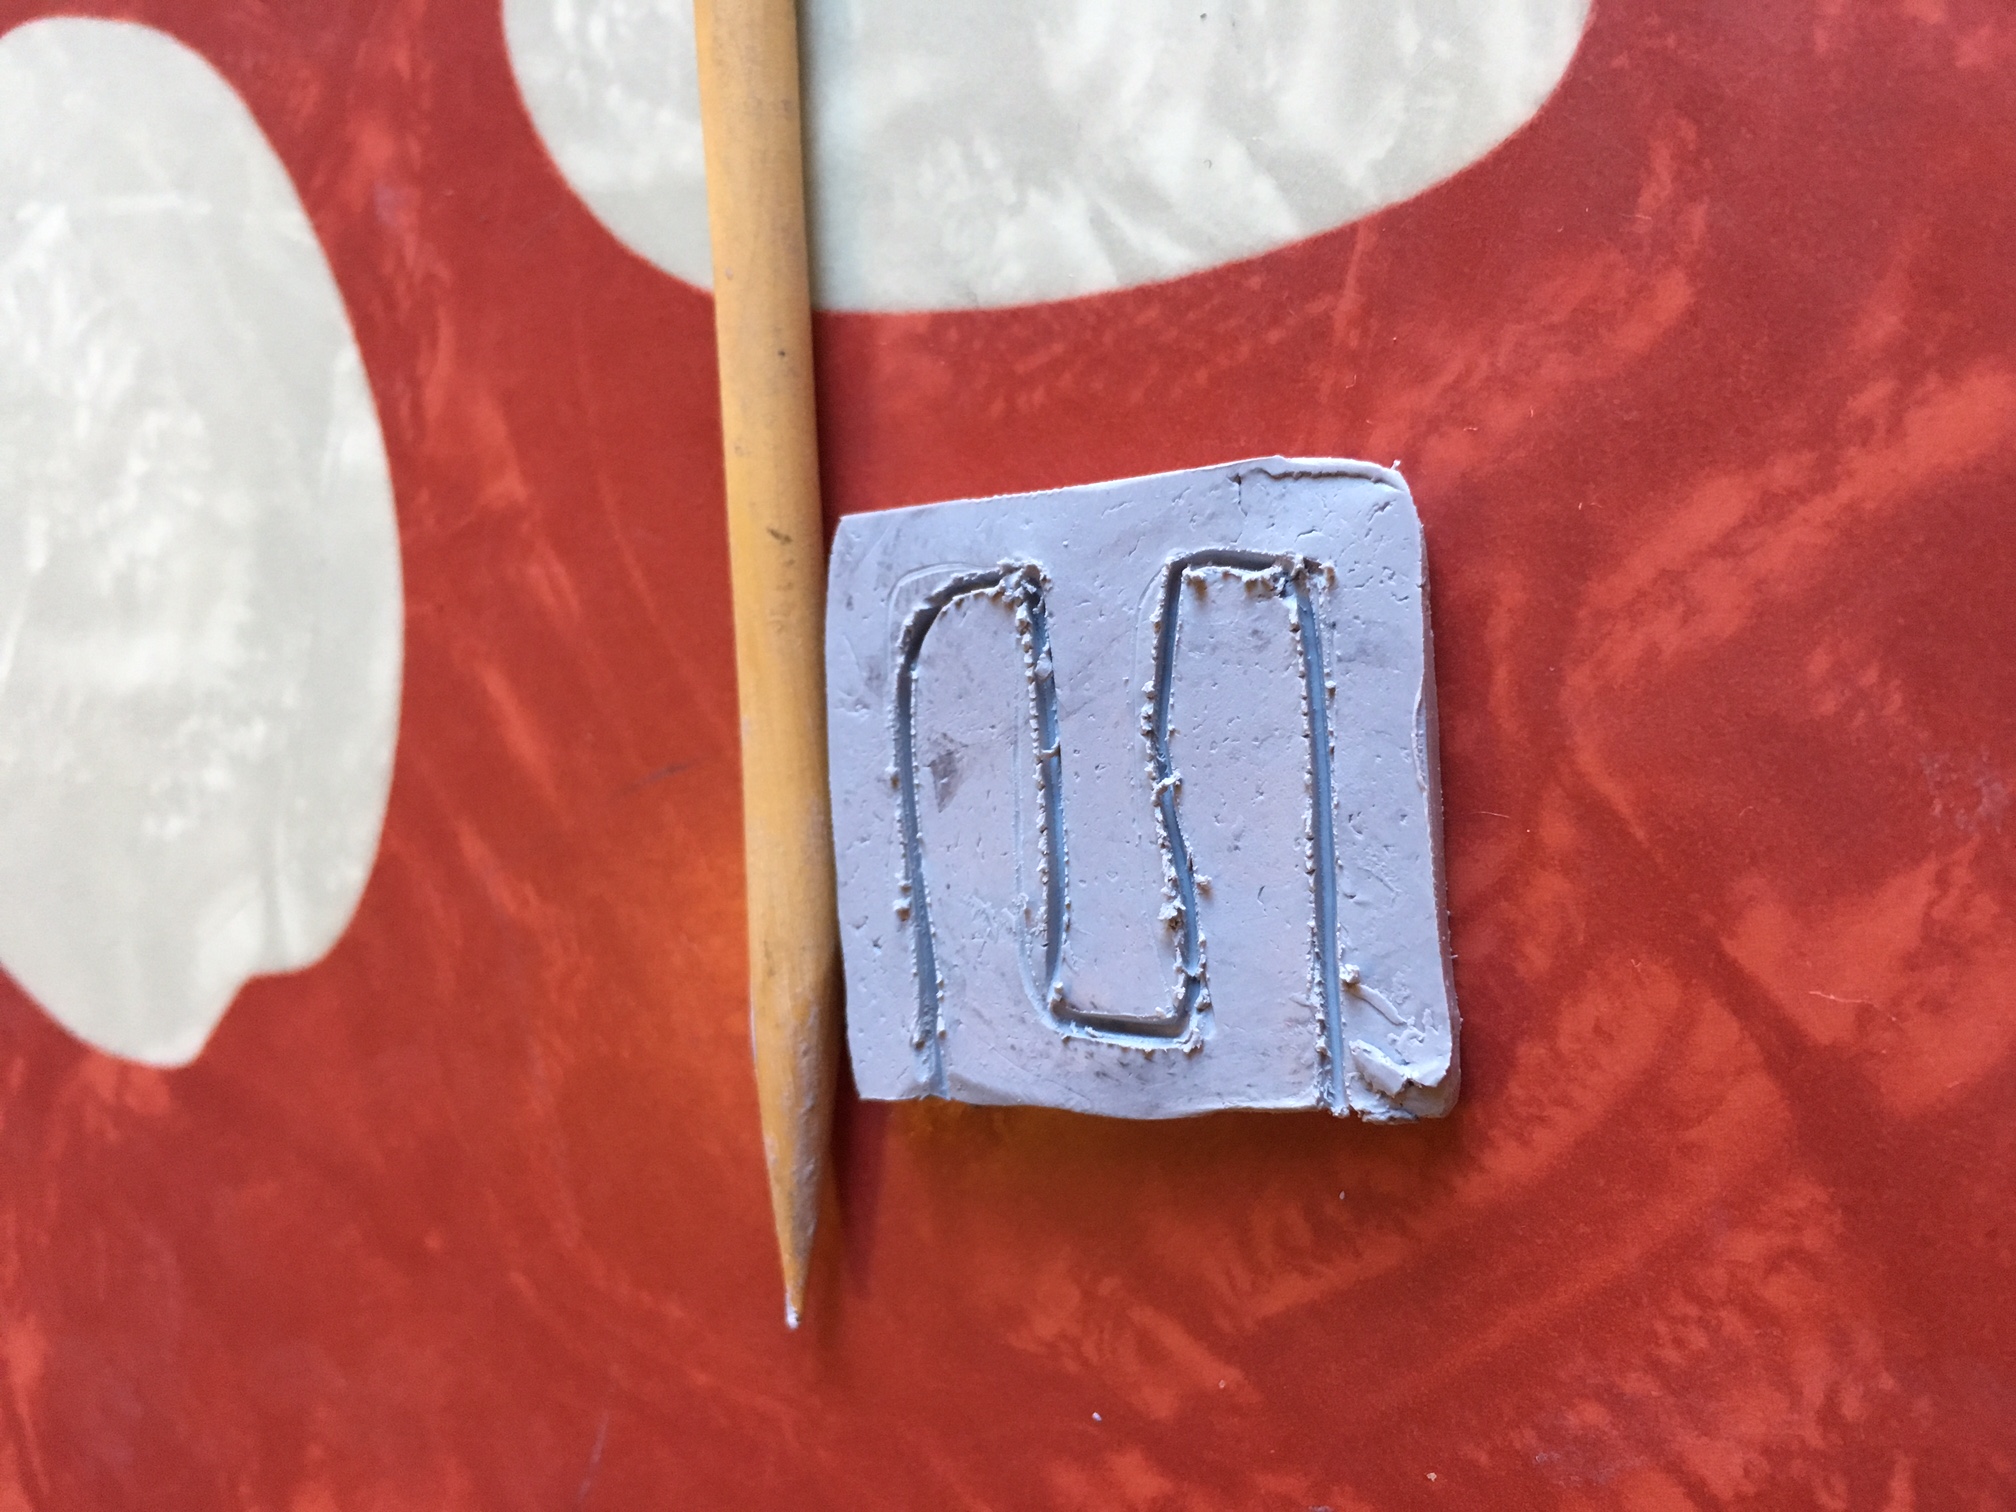
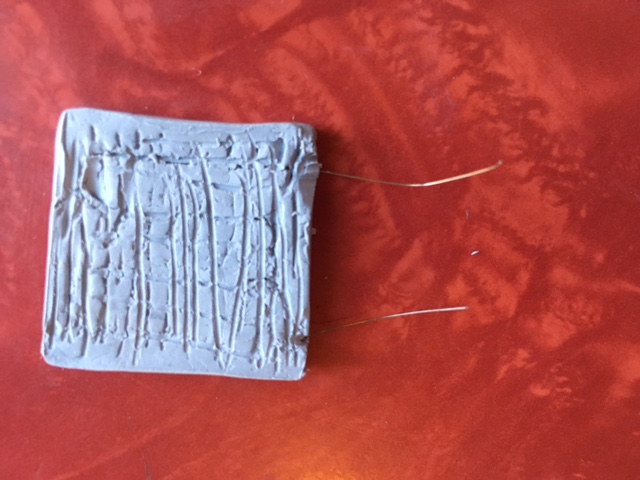
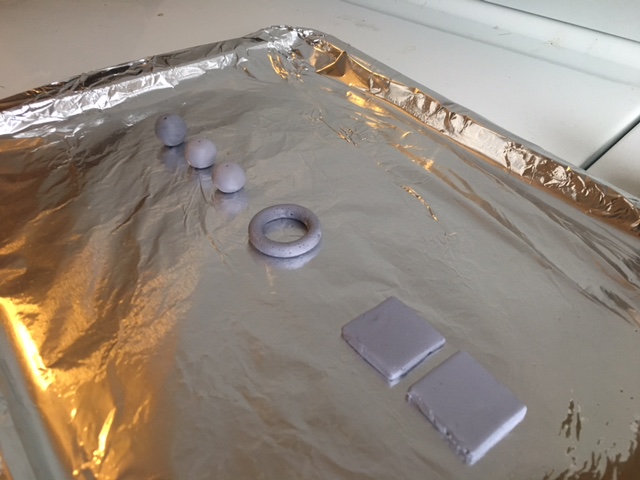


I went through a series of tests swatches through my prototyping phase. In the process, I made some interesting discoveries. Firstly, thermochromic ink can be incorporated in and survive the baking temperature of polymer clay. Secondly, one can also bake the resistive wire at this temperature. These points lead me to speculate that some very interesting jewelry or physical forms could be created using this process.
Challenges and Future Iterations
I had drawn the connection mentally between the idea of a LED matrix and of tile matrixes (as in the kind used to lay interior tiles in the home). However, I soon found that the electrical principals do not translate seamlessly between the two mediums. In my case, I used resistive wire to create the heat which changes each tile. This works well for single tiles, even in a series, but in terms of making an addressable grid of these tiles, a la LED matrix, I ran into an issue. As you know, electricity takes the path of least resistance. Consider if a tile matrix were set up in a LED matrix circuit fashion. How one would make a column of tiles change color when, considering the resistance, the electricity would stop at the first tile’s ground out? It remains unclear to me and having asked Liza as well as Adiel, the answer seems to lie is in individually addressable tile points which use a shift register with built-in MOFSET to regulate the power load. For my means, I solved this issue by treating each row of tile in my grid as a series. Sustained pulses of electricity from the Arduino and connected 9V battery built up the heat and created color change effectively. For my means, I solved this issue by treating each row of tile in my grid as a series. Sustained pulses of electricity from the Arduino and connected 9V battery built up the heat and created color change effectively. In future iterations, I plan to get my hands on a
For my means, I solved this issue by treating each row of tile in my grid as a series. Sustained pulses of electricity from the Arduino and connected 9V battery built up the heat and created color change effectively. For my means, I solved this issue by treating each row of tile in my grid as a series. Sustained pulses of electricity from the Arduino and connected 9V battery built up the heat and created color change effectively. In future iterations, I plan to get my hands on a TPIC6B595 chip and work on treating each tile effectively as a pixel. I also look forward to expanding on the materials side of this concept and working with earthenware clay.
I consider this idea my intellectual property and idea I intend to further it. Therefore I have created a purpose-abstracted Instructable which you can find here.
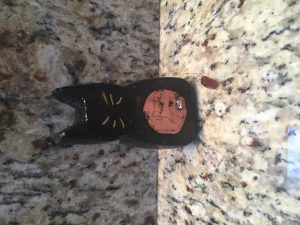
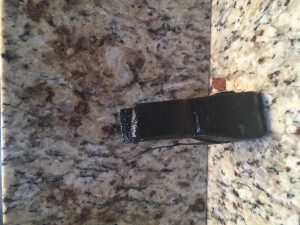
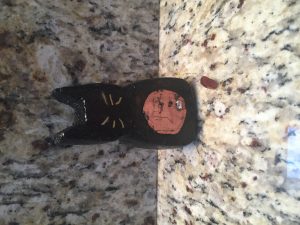
Flexinol Cat Alexandria Smith
Flexinol is difficult to use, but super cool!! I definitely need to explore this material more!
Materials:
Moldable foam (for the cat)
roofing copper (for the button)
Scotch tape(for the tail)
Flexinol (in the tail)
Things I learned: