Speaker Swatch:
Materials used- Plexiglass, X-Acto knife, and Copper tape
Challenges: Mine didn’t end up working because I didn’t solder the areas on the copper tape where I had to bend it.
Speaker Swatch:
Materials used- Plexiglass, X-Acto knife, and Copper tape
Challenges: Mine didn’t end up working because I didn’t solder the areas on the copper tape where I had to bend it.
Quote: To me, a story can be both concrete and abstract, or a concrete story can hold abstractions. And abstractions are things that really can’t be said so well with words. David Lynch
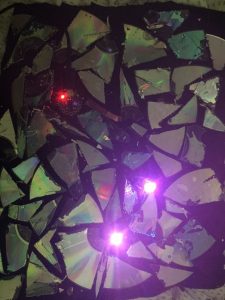
I wanted to use a simple circuit to form pink light. I put 3 Red LEDs on one side and 3 Blue LEDs on the other connecting them with conductive thread. If you stare at it and close your eyes, you can see pink circles; they also show up on camera (not as intensely).
Materials:
Conductive thread, roofing copper (simple button), Record (with hole drilled out), aluminum (for holding it), 3V battery, and a wood base (spray painted black).

Inspired by:
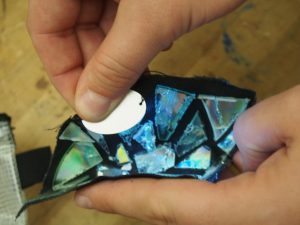
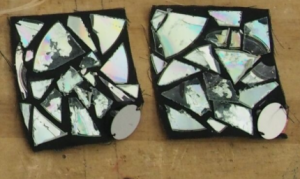
Button Swatch:
Materials used- Old CDs, Led, Copper tape, and metal tag.
How it works:
You press the aluminum tag onto the copper, completing the circuit to light the LED. The LED reflects the light onto the CDs causing a reflective effect. I wanted to see what it would look like if I trapped light into a box.
Challenges:
It was a pretty straight-forward project, with the hardest part being cutting up the CDs (a lot of labor!).
I want to take this project further by placing the CDs more strategically making a more intense mirror effect.
Inspired by:
For my Computational Craft midterm, I wanted to take a swatch that I made earlier in the semester and expand upon it. I am a musician (trumpet player/composer) and I have always been fascinated by/passionate about making mosaics.
The materiality of the CDs is important to me because I feel like they are just a business card for musicians now. Most people buy music on iTunes or listen to it on Spotify or Pandora making the landscape for a performing artist’s revenue and distribution radically different than it was even 10 years ago.
Things I learned:
How to sew a working circuit with conductive thread and Lilytiny
Clear nail polish is PERFECT for making your connections stronger
CDs are very beautiful when you combine them with a light source
how to use the digistump library (for Lilytiny)
how to use the Adafruit Neopixel Library
http://www.instructables.com/id/RGB-Conductive-Mosaic/
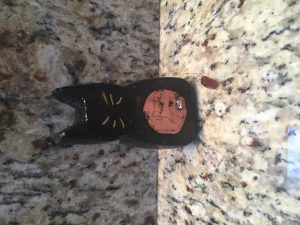
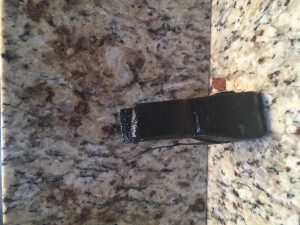
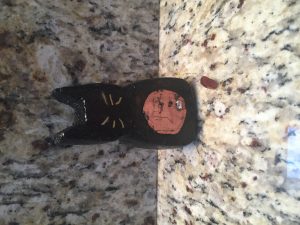
Flexinol Cat Alexandria Smith
Flexinol is difficult to use, but super cool!! I definitely need to explore this material more!
Materials:
Moldable foam (for the cat)
roofing copper (for the button)
Scotch tape(for the tail)
Flexinol (in the tail)
Things I learned:
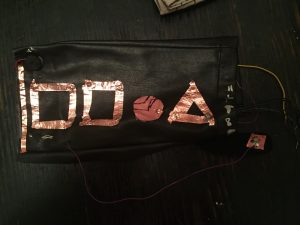
Final Project- The Mini Midi Controller for kids 🙂
Alexandria Smith
How to make a child’s first midi controller or introduction to music!
-Uses the Tone library now, but I will add how to connect to Ableton later
Level = Easy-Intermediate
Audience:
students in an after school program (3rd-12th grade); must be done with a facilitator. A great project for students to use simple circuits to learn basic code, information about sound, and how to use Ableton Live (later).
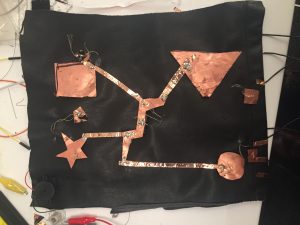
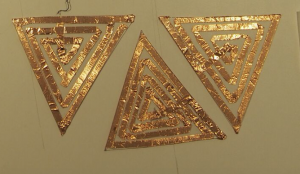
The Controller- There are three shapes, square (2), circle (1), triangle (1). Once connected to Ableton Live, I would like the squares to be a symbol for rhythm (the students will map it to some kind of drum output), the circle would symbolize effects (reverb, cathedral, distortion, etc), and the triangle for auxiliary instruments or samples.
Prior knowledge necessary (facilitator if working with a beginner class):
coding with Arduino IDE
using the Arduino Tone library
soldering
sewing
proper use of conductive thread
knowledge of various conductive materials
Reflection:
Process- I had a problem that I wanted to solve. This led me to think about how I could use conductive materials and wires (needed for arduino uno) in a seamless way that is easy enough for a child to do!
Challenges- I spend hours trying to get it working with Ableton Live. I feel like I am so close and that I will figure it out really fast after I take some space from the project
What did I learn- The beginning of connecting serial and midi using OSC, that not all arduinos (at least I can’t figure this out…) can work with the Ableton Connection Pack, that I should think more about how I want my images to represent my musical ideas, and how I would teach young students how to make this.
Next Steps:
Smoother interfaces
Wearable controllers
Controllers made out of both hard and soft material.
Connection to Ableton Live or Logic.