Author Archives: molic786

Merry Grinchmas Sweater – Carla Molins


The Merry Grinchmas sweater is an interactive garment that provides a wide range of personalized printed messages as a complain whenever someone touches the Grinch’s hat pompon. Anti-Christmasy messages coming through a thermal printer controlled by Gemma MO, Arduino, and Capacitive Sensing.

This project is aimed at everyone who wants to have some fun and make others laugh while being the Grinch themselves!. Also, If you’ve ever wanted a sweater that prints, this is the one too.

Reference: Petrifax (mid- 90s).

Find here my Instructable–>

https://www.instructables.com/id/Merry-Grinchmas-Sweater-Thermal-Printer-GemmaM0

Week 12- Dancing dot – Carla Molins

My flip dot aimed to resemble a dancing small flower. The crochet technique used to cover the coil helps to visualize small petals made of yarn and the flower core made by the bead.

  1. For my circuit, I used a double coil made by more than 100 turns each.

2. Before crocheting the cover I labeled the wires to be able to, later on, connect it to the batteries to add the current and consequently motion.

Here a close-up of my flower core. I sewed the wires as well as the coil and the bead. very carefully.

Here a clear shoot changing the polarity from one coil to the other making the bead go back and froth.

Takeaways, it was worth it to add so much detail to the coil because it moved very smooth and at the same time very fast.

Week 11- Breathing X-Mas tree – Carla Molins

My idea for this project was to bring to life a tiny Christmas tree. Winter season is here to stay for a couple of months but Christmas trees will join our households just for a couple of weeks. I was planning on keeping the tree alive by interacting with it.

This is the circuitry, heating circuit + swatch + breathing tree +9V battery.

Detail of the breathing movement when applying current.

After some failed attempts this version kept the movement quite subtle but smooth. However, the connection of the Flexinol wasn’t strong enough. So I had to reinforce it.


WEEK 10- Carla Molins

I created some thermochromic swatches using different shades of purple and blue. I was trying different brushes and textures.

This is my first attempt using the quick sew machine. It works nicely with a regular thread but not as good with the conductive one.

I managed to sew some interesting shapes with varied resistances.

I ended up sewing by hand my message.

I created in a way that the message in the way the word LOVE wouldn’t be readable until the last letter is heated.

Heating circuit here.

Week 9- Speakers Carla Molins

For my speakers, I decided to work with known substrate and conductive material such as conductive copper tape and paper. However, I tested different patterns.

Number 1

Speaker 2 + pressure sensor

This pattern requires covering a larger surface with magnets to be as successful.

Speaker 3 

Midterm – Carla

Social Scarfmeter

This project comes aims to quantify and visualize the mood, more specifically how eager I am to interact with other people at that precise moment. Ranging from 0 to 4, embedded LEDs show the value on the front of the person’s torso. The user has a stretchy knitted knob that can be used to change the value of the social value just by pulling.

User testing

Demo


On the final iteration of the project, I used a scarf, some black canvas that provided some structure to the soft circuit, copper thread, conductive tape, conductive yarn, AT-tiny85, socket, resistor, Lipo Battery and battery socket.

This project had 3 past iterations that didn’t work as expected. This circuit was very tricky. All version below had some kind of shortcircuit even though they follow the same circuitry than the final version. During the process, I improved no only my technique but also my decision making towards circuits.

Here the first prototype that work using ATtiny and breadboard.

Find here the code used. There is a threshold for the sensor that I defined first using Arduino UNO and taking advantage of the serial port. After that, I’ve adjusted blindly any time I needed.

ATtiny exercise capacitive + switch 

Week 6 – Carla

  1. Connect one of a soft switch to your Arduino. Use it to control an LED.

I decided to try out Lily tiny ( ATtiny-85). It quite tricky to set up and to control as desired. I got to control the LED with my soft switch.

2. Build a circuit with one constructed sensor (variable resistor), your Arduino, and 3 (or more) LEDs or an RGB LED. 

I tried with the Lily tiny but I didn’t manage to control the analog input properly. So I switched back to the Arduino UNO. I created a switch with copper fabric and Velastat that allows me to control the Leds easily.

I wanted to create a stretchy switch with a french knitter, but I could use conductive yarn, so I used regular yarn.

It looks nice I could use it in the future.

Midterm proposal

I’m planning on creating an interactive scarf. A very handy piece for those cold winters to measure the intensity of those persistent sneezes.

I have to figure out some details, such as how to control the signal with the lily tiny or how to power the system without wires.


Week 5 – Carla

1. Nodes

When creating my nodes I wanted to experiment with different materials I’ve never used before. I wanted to have fun too, so I added some crazy ideas!

SWITCH

The first piece I used felt as a substrate and copper fabric and stretchy fabric for the different modules of the node. The switch is compound by two sides that need to be connected by folding the fabric to make the stretchy fabric connect the two small pieces of copper.


I wanted to test the switch and at the same time try a vibrating mini motor disc that fit nicely on the top of the pieces with copper tape.

LED

I created a coil using a piece of adhesive copper surface. I designed the shape using illustrator and I used a vinyl cutter to cut the desired shape and I transferred manually into a paper. I could user transfer paper because the circuit was very fragile.

Learning curve- machine defects

The material is really delicate and it requires a lot of care when manipulating. The Vinyl cutter that I used it had a damaged blade which created lots of tears on the material.  I had to manually transfer and fix with patches.

2. Connectors

I wanted to give a thought to my connectors to the ones I might be using in my practice.  I have two different sizes of plastic clip and a safety pin. I used copper fabric, conductive thread, heat shrink tubes and I assembled them to be resistant.

3. Invention

I wish I could have a 3d doodle printer that could fuse copper fluid to create an amazing geometrical structure including some electronic components.

Daisy bud – Week 3 & 4 – Carla

PART 1: Daisy Bud


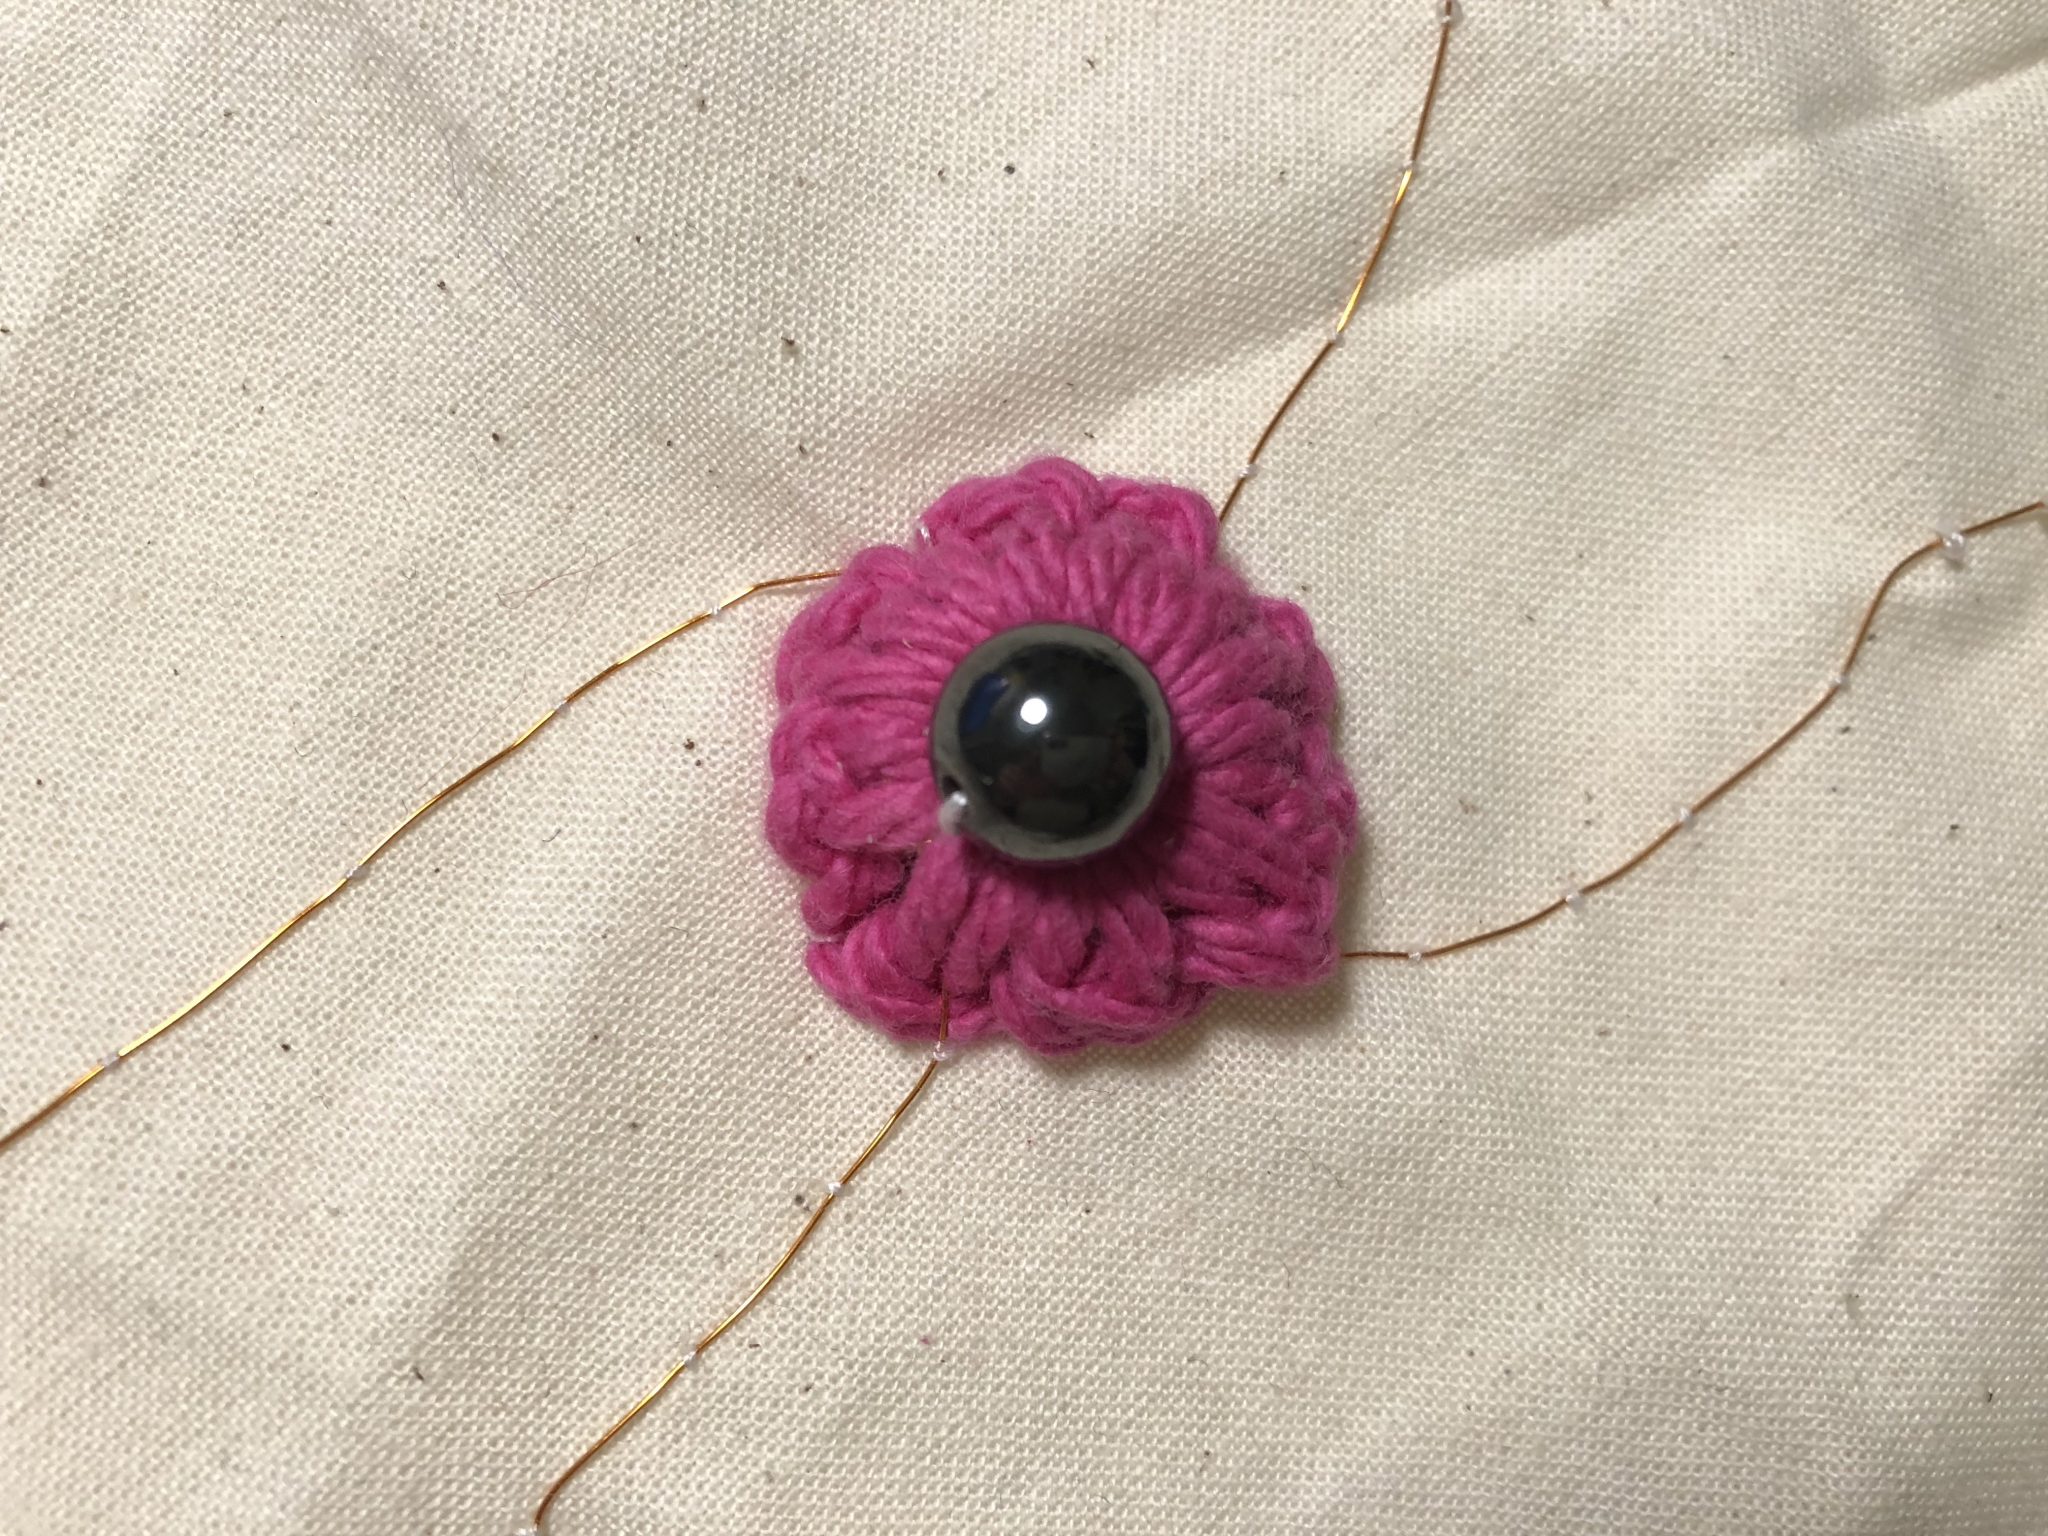
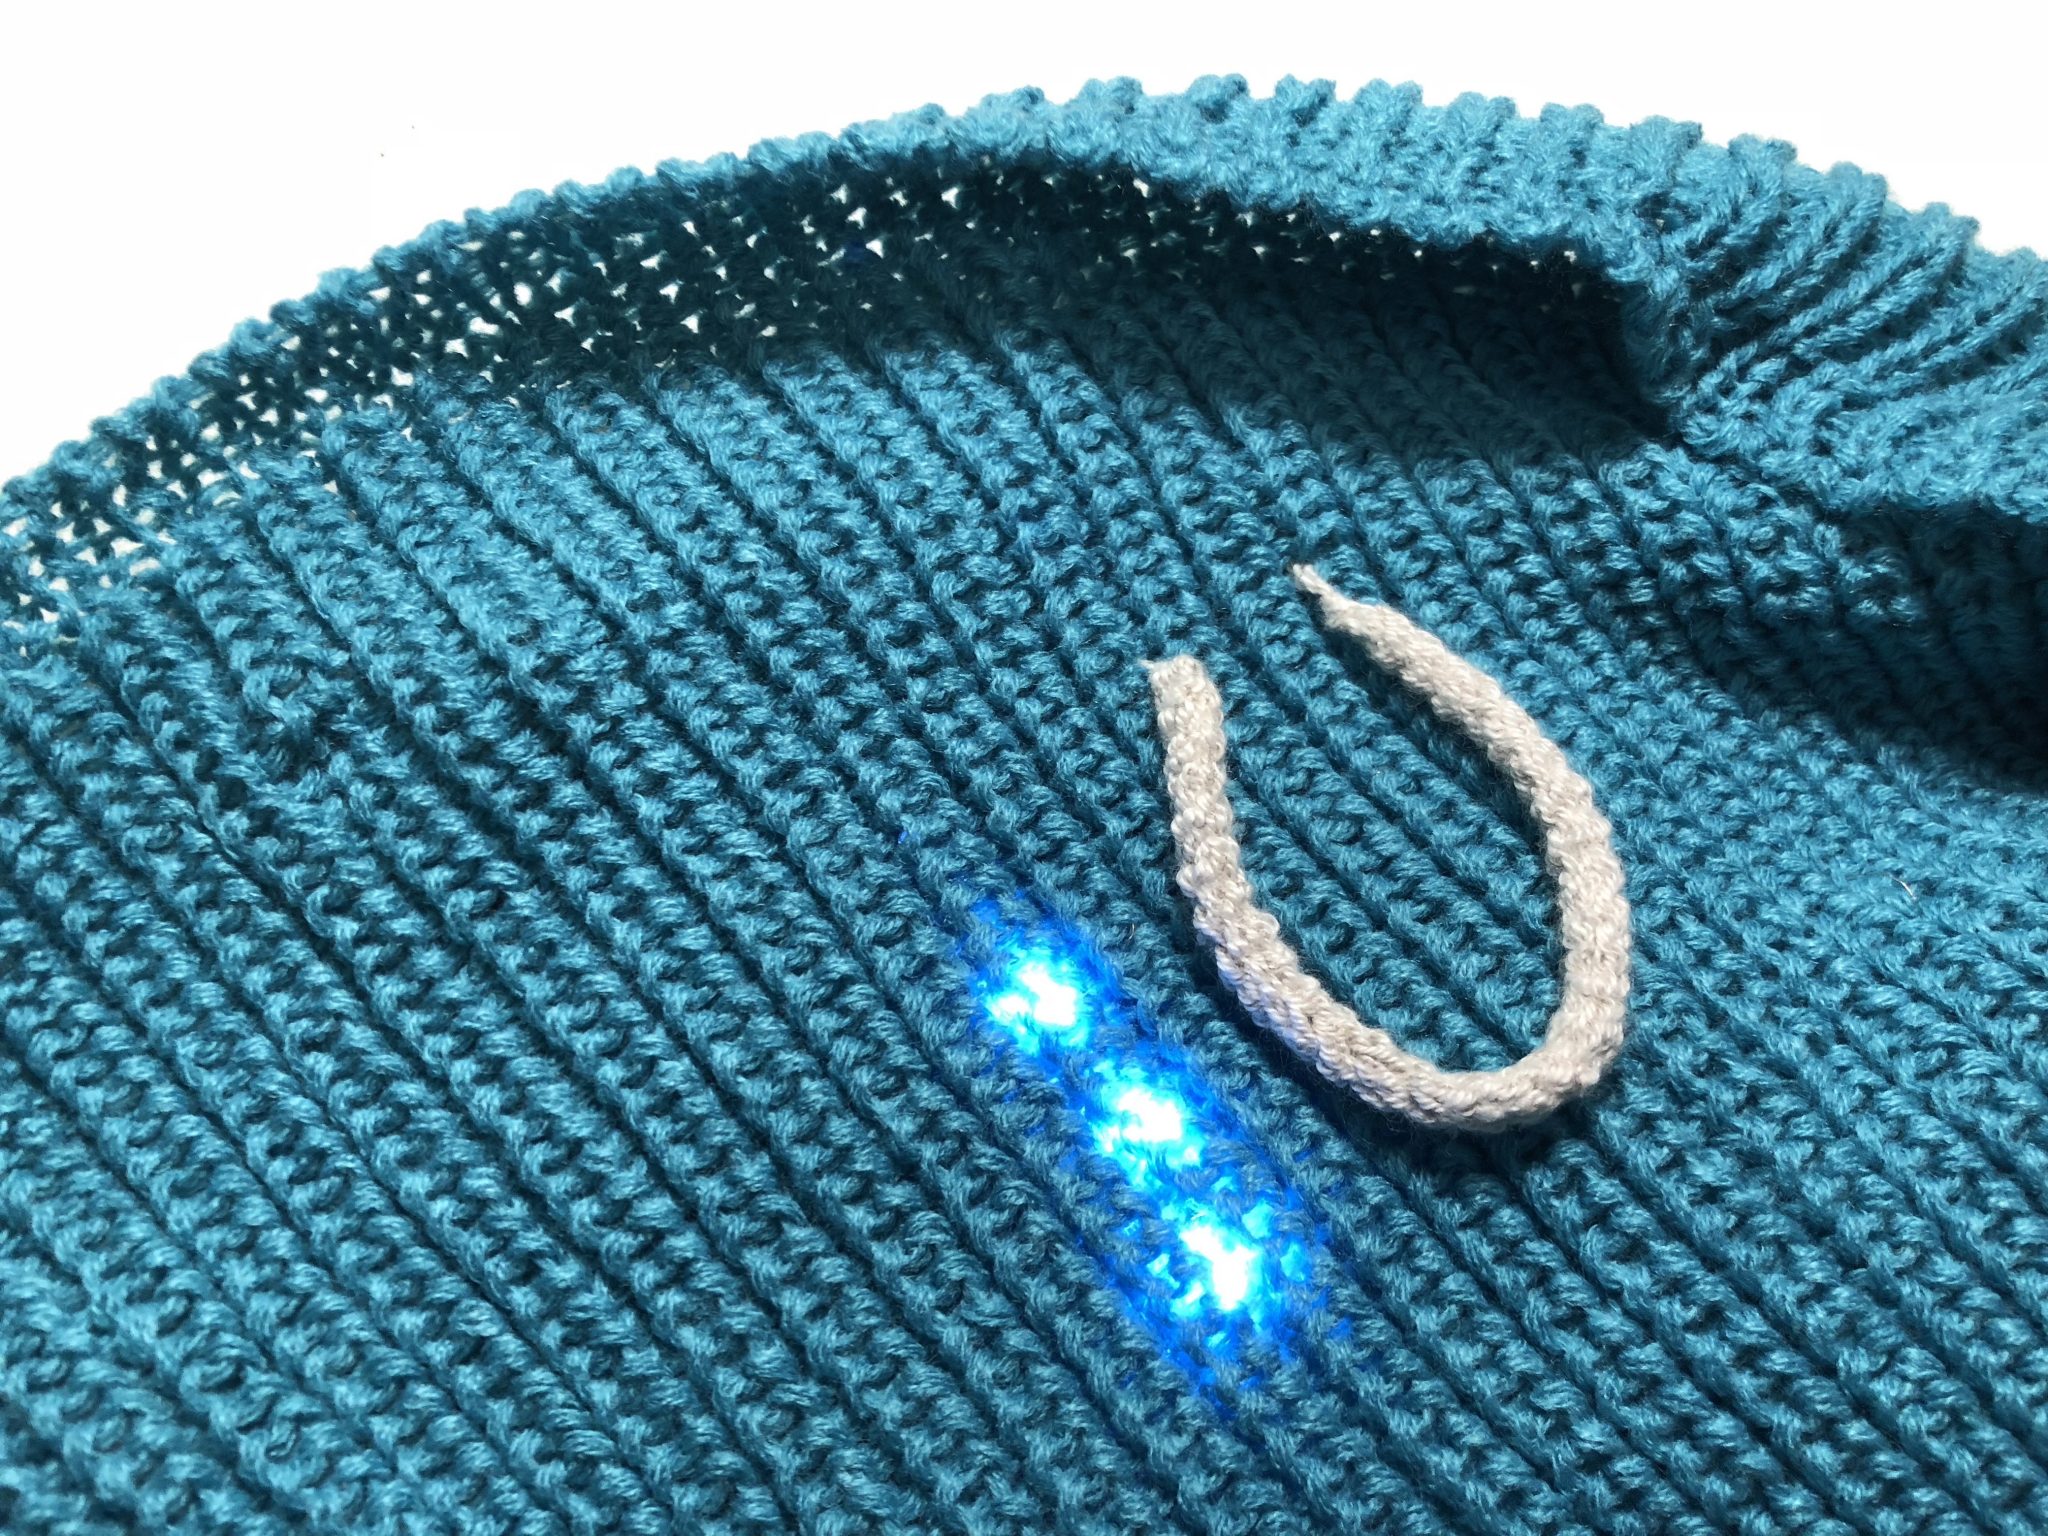
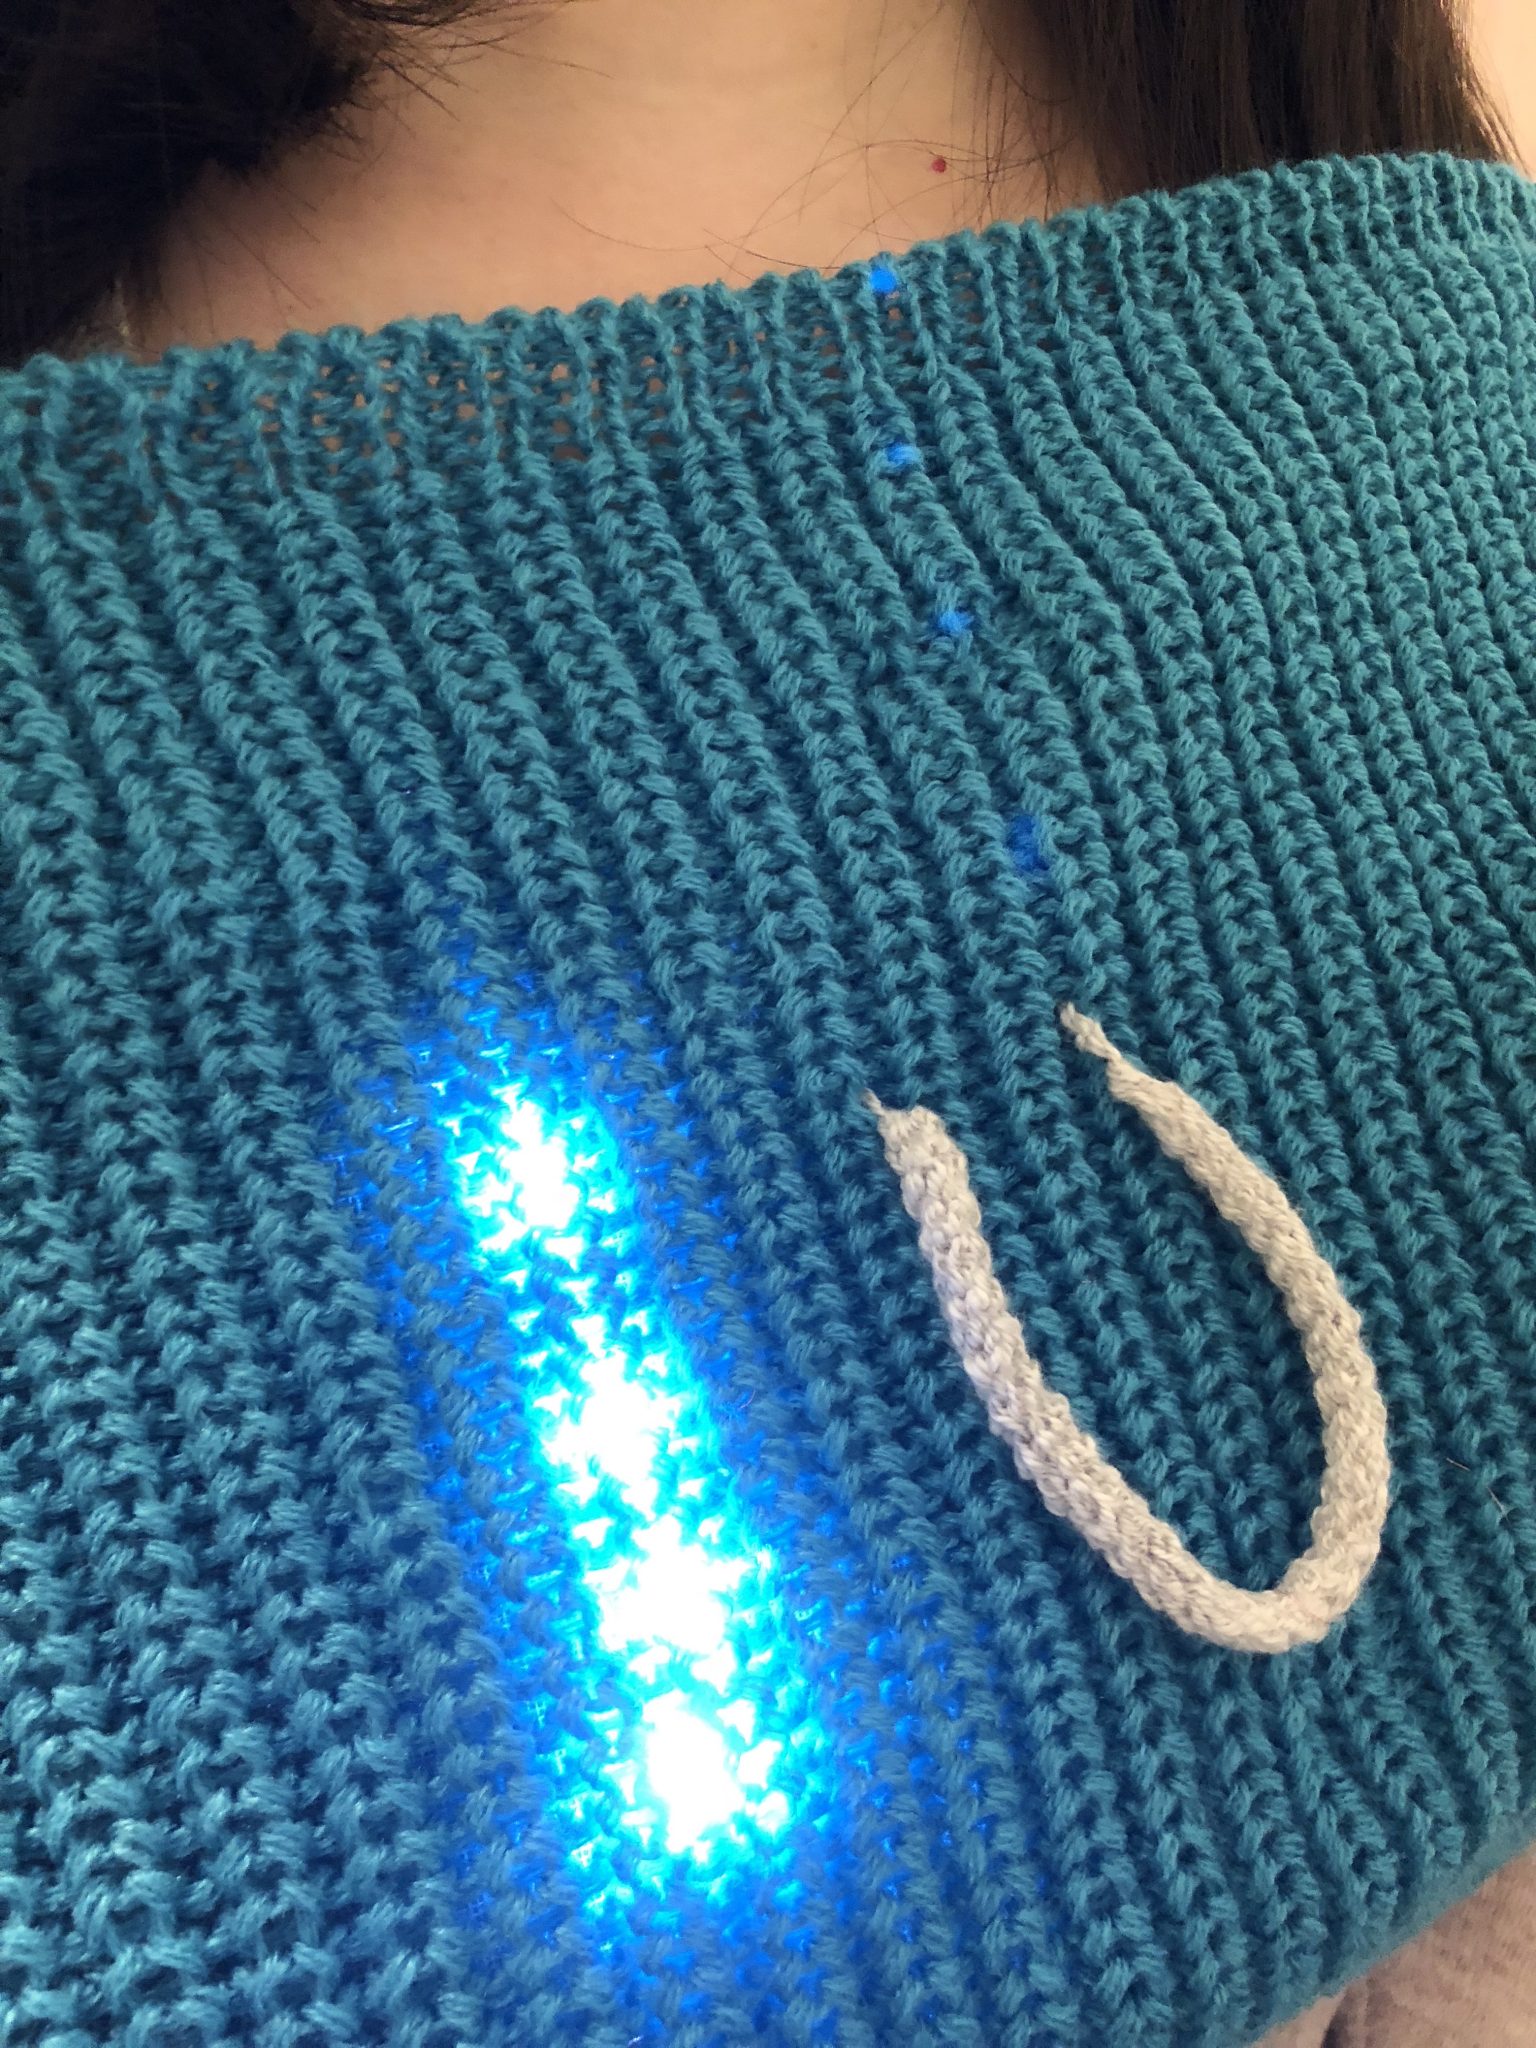
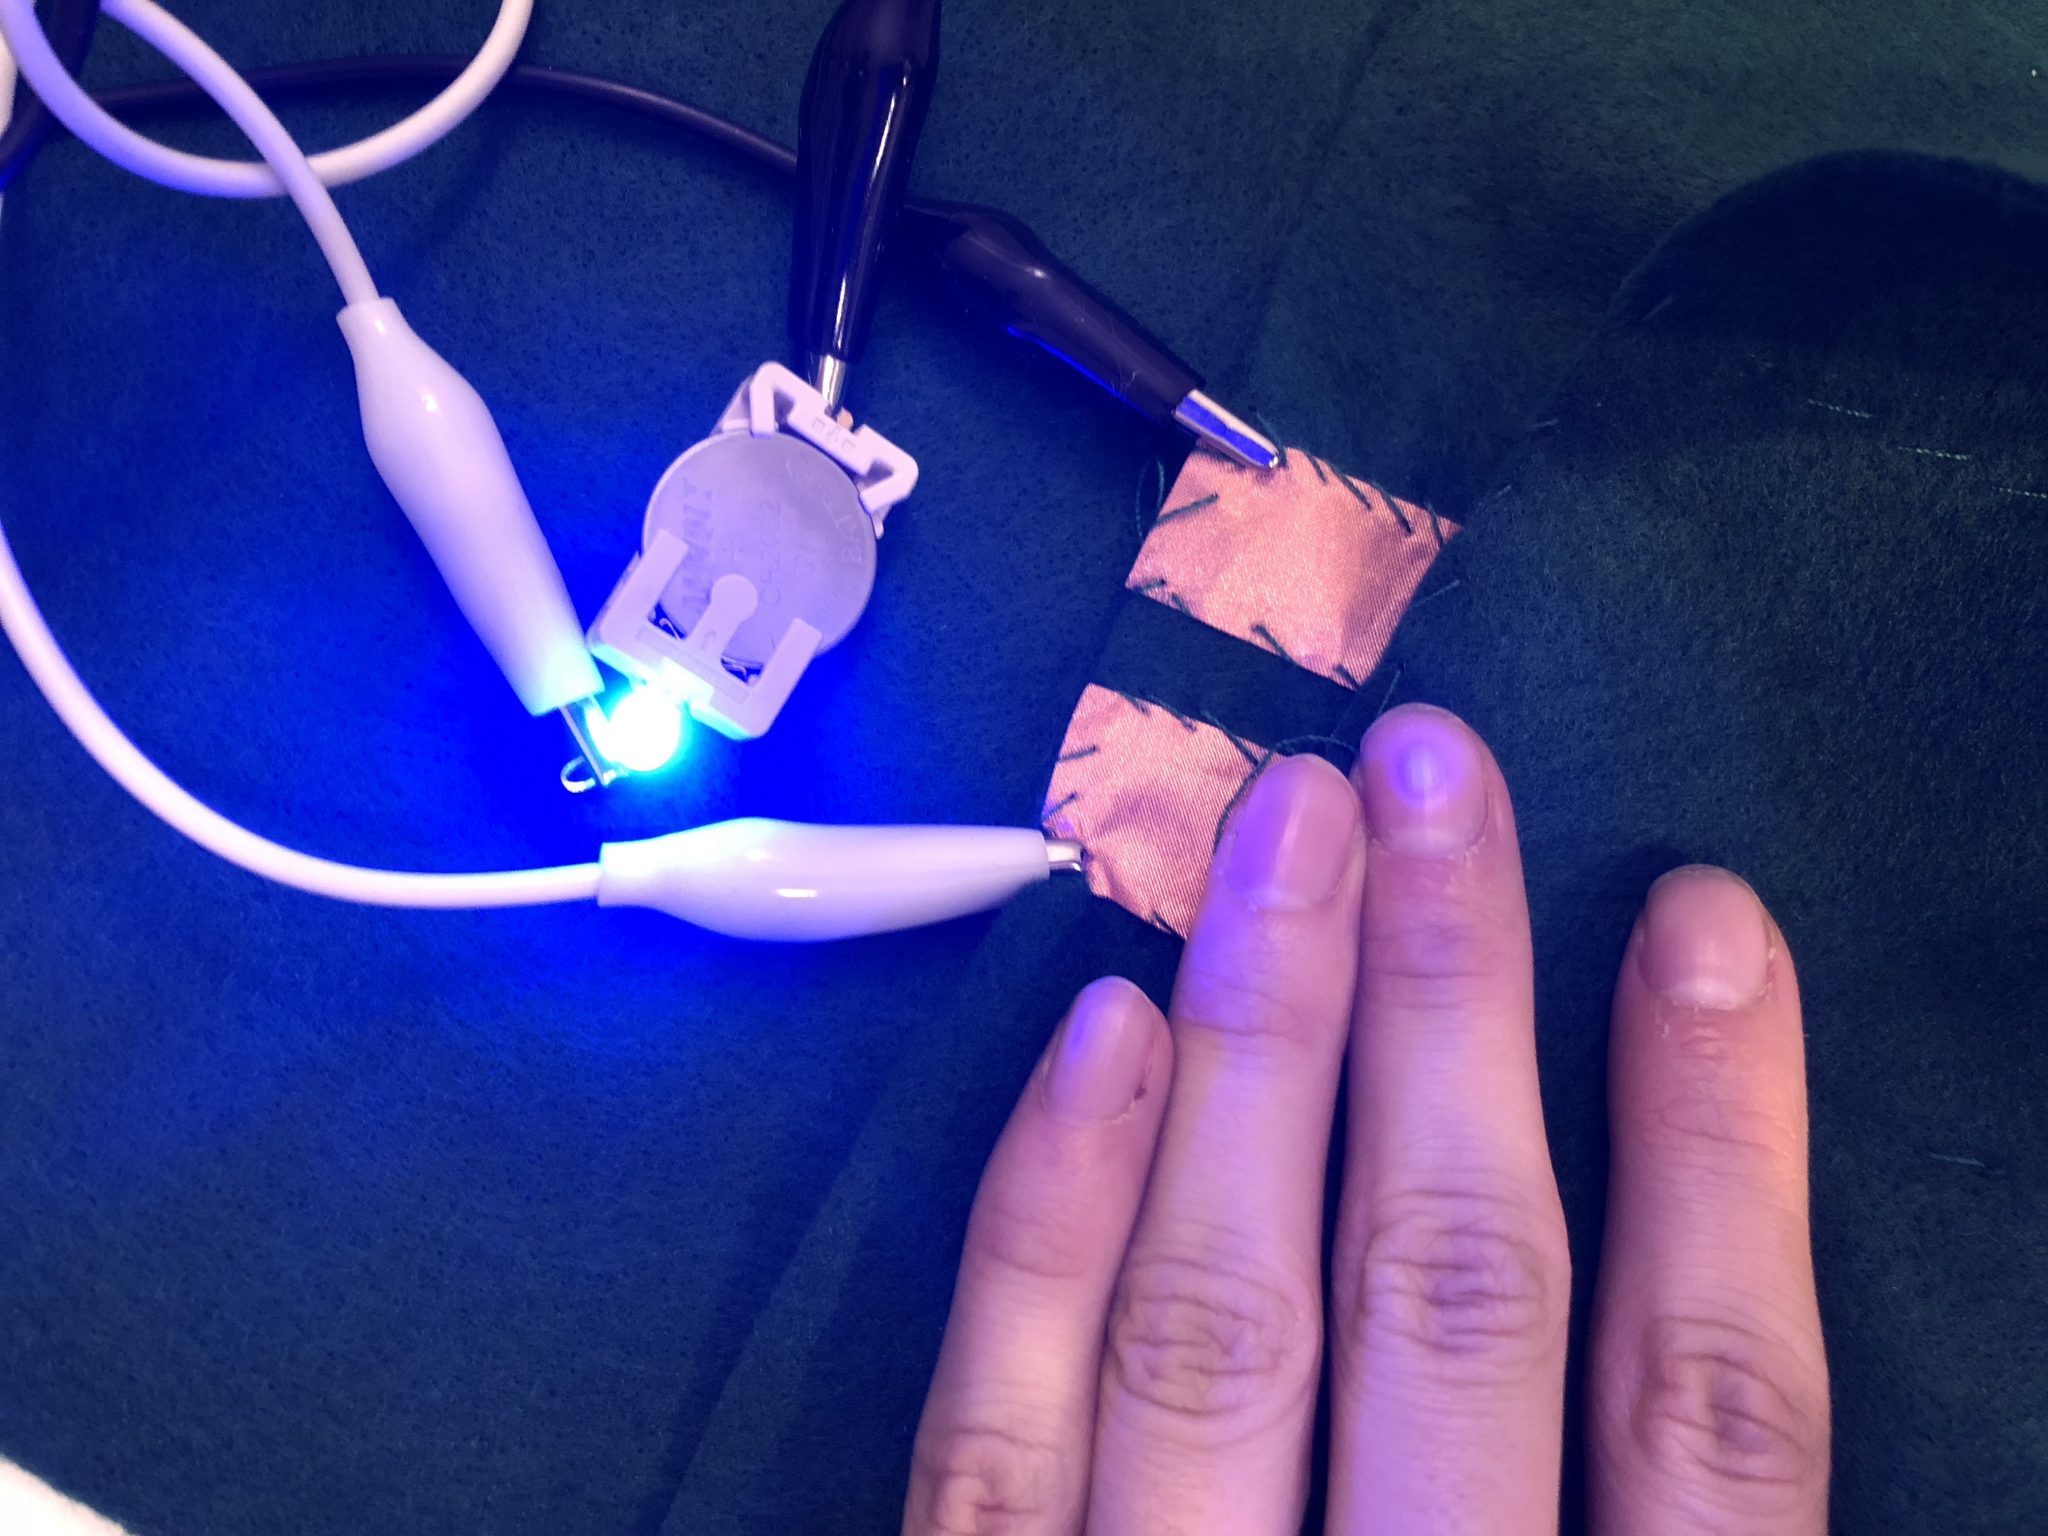
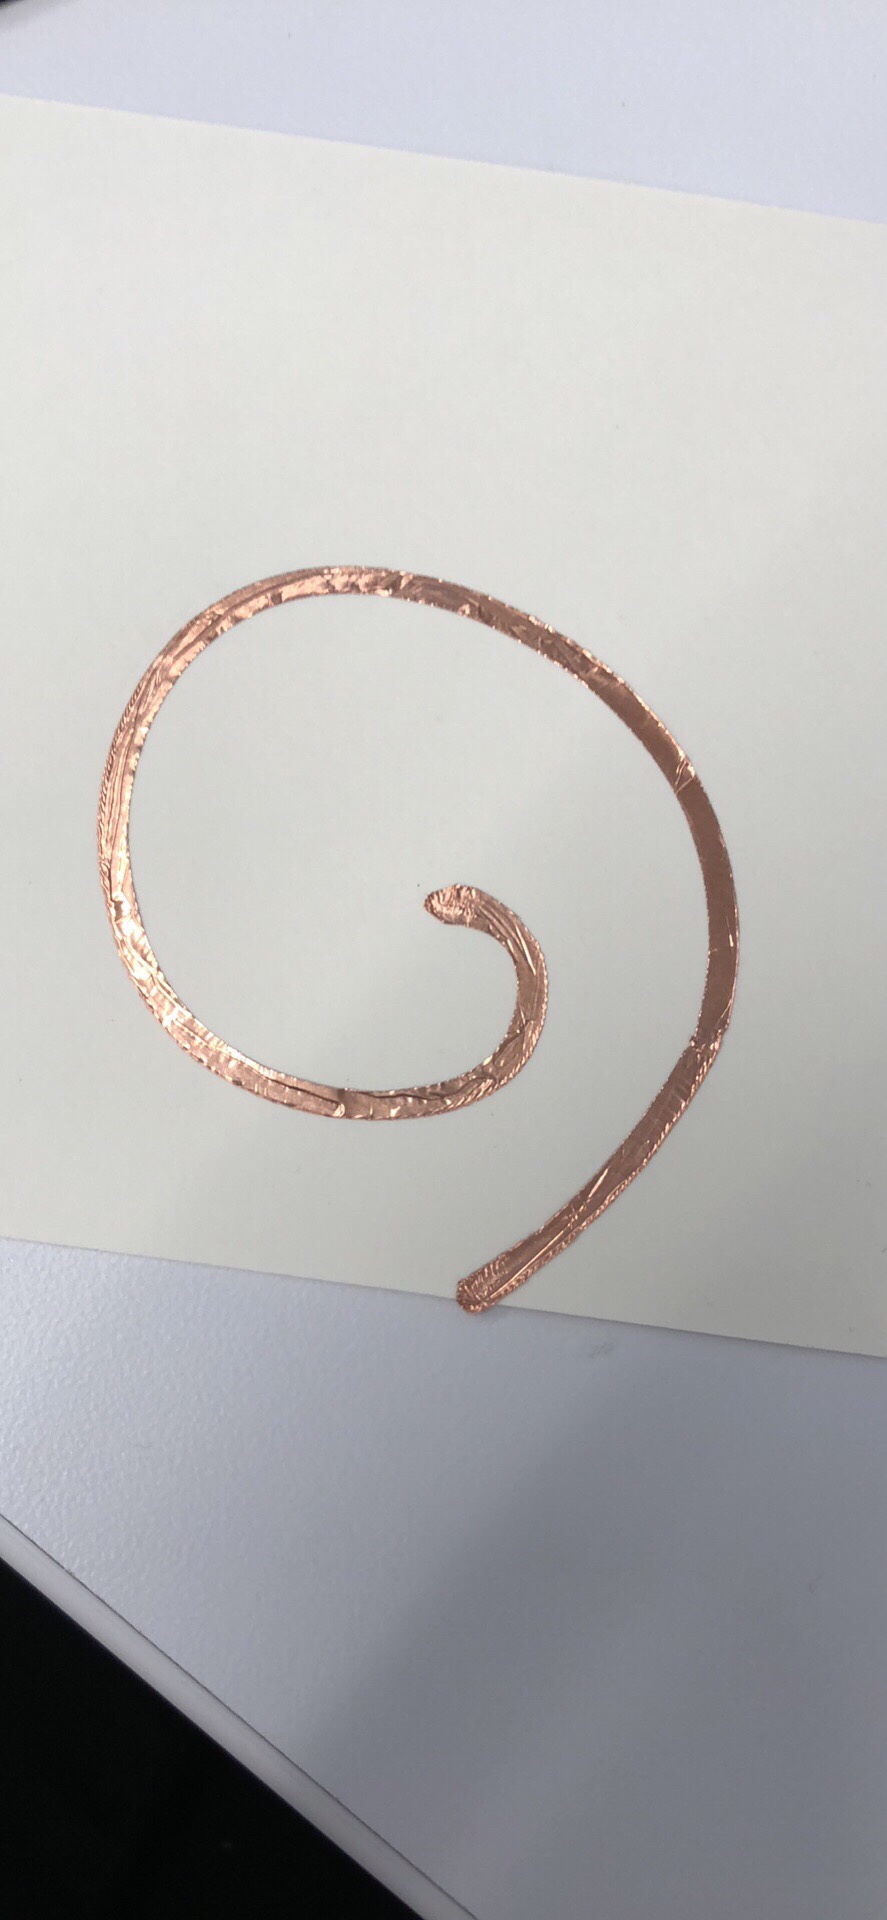
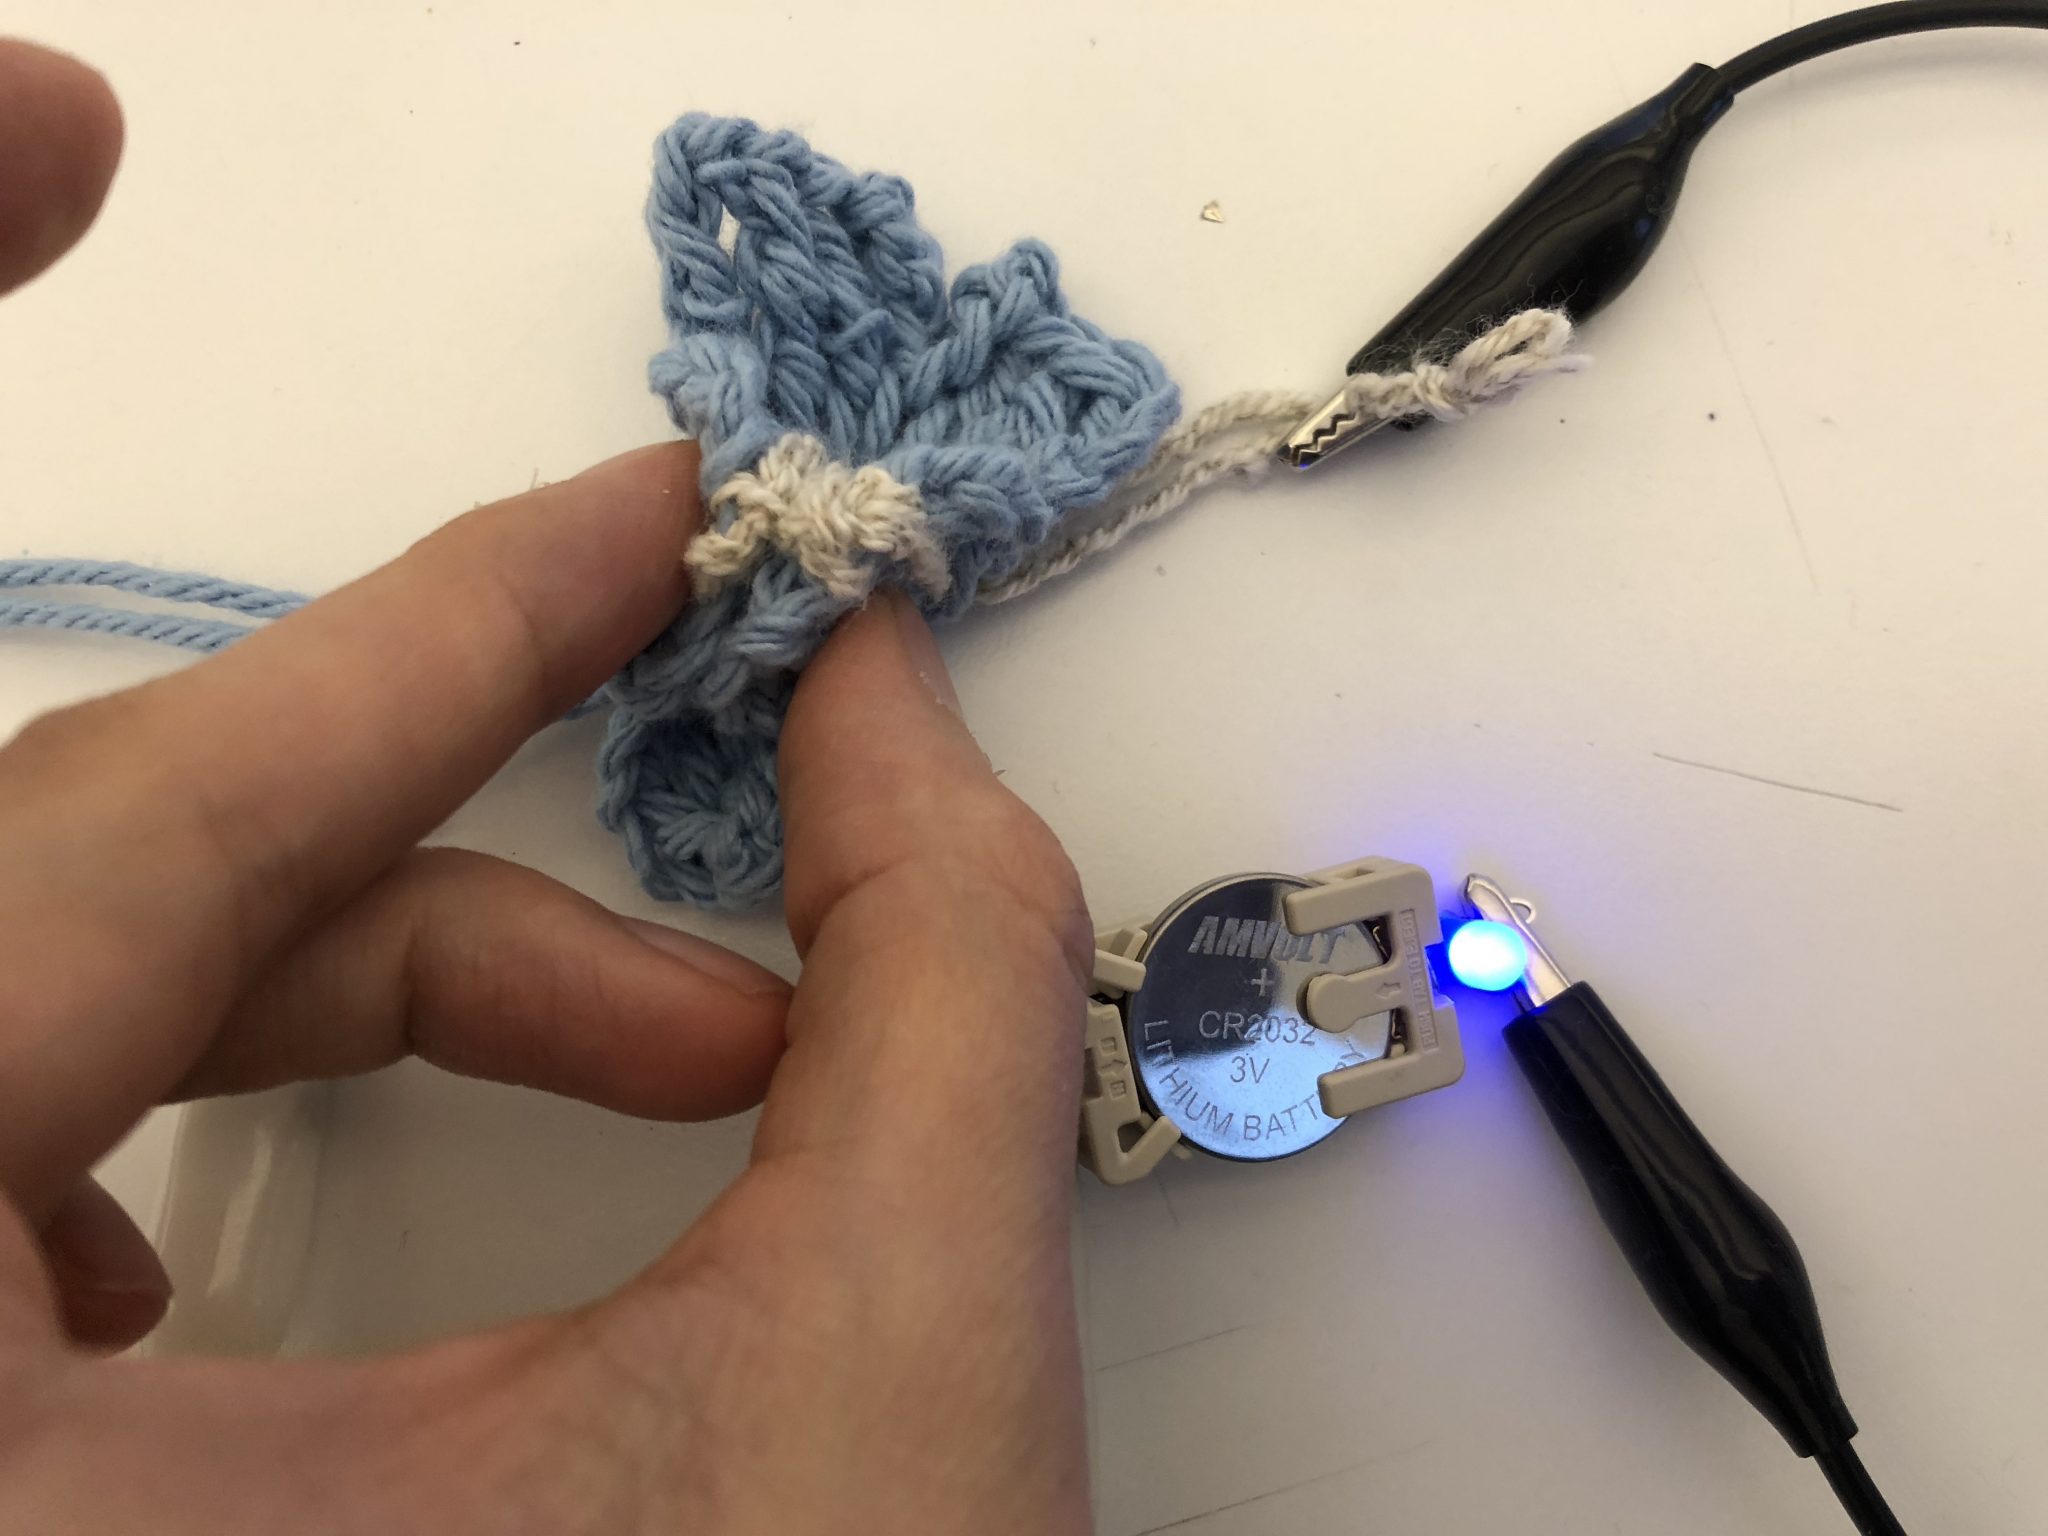
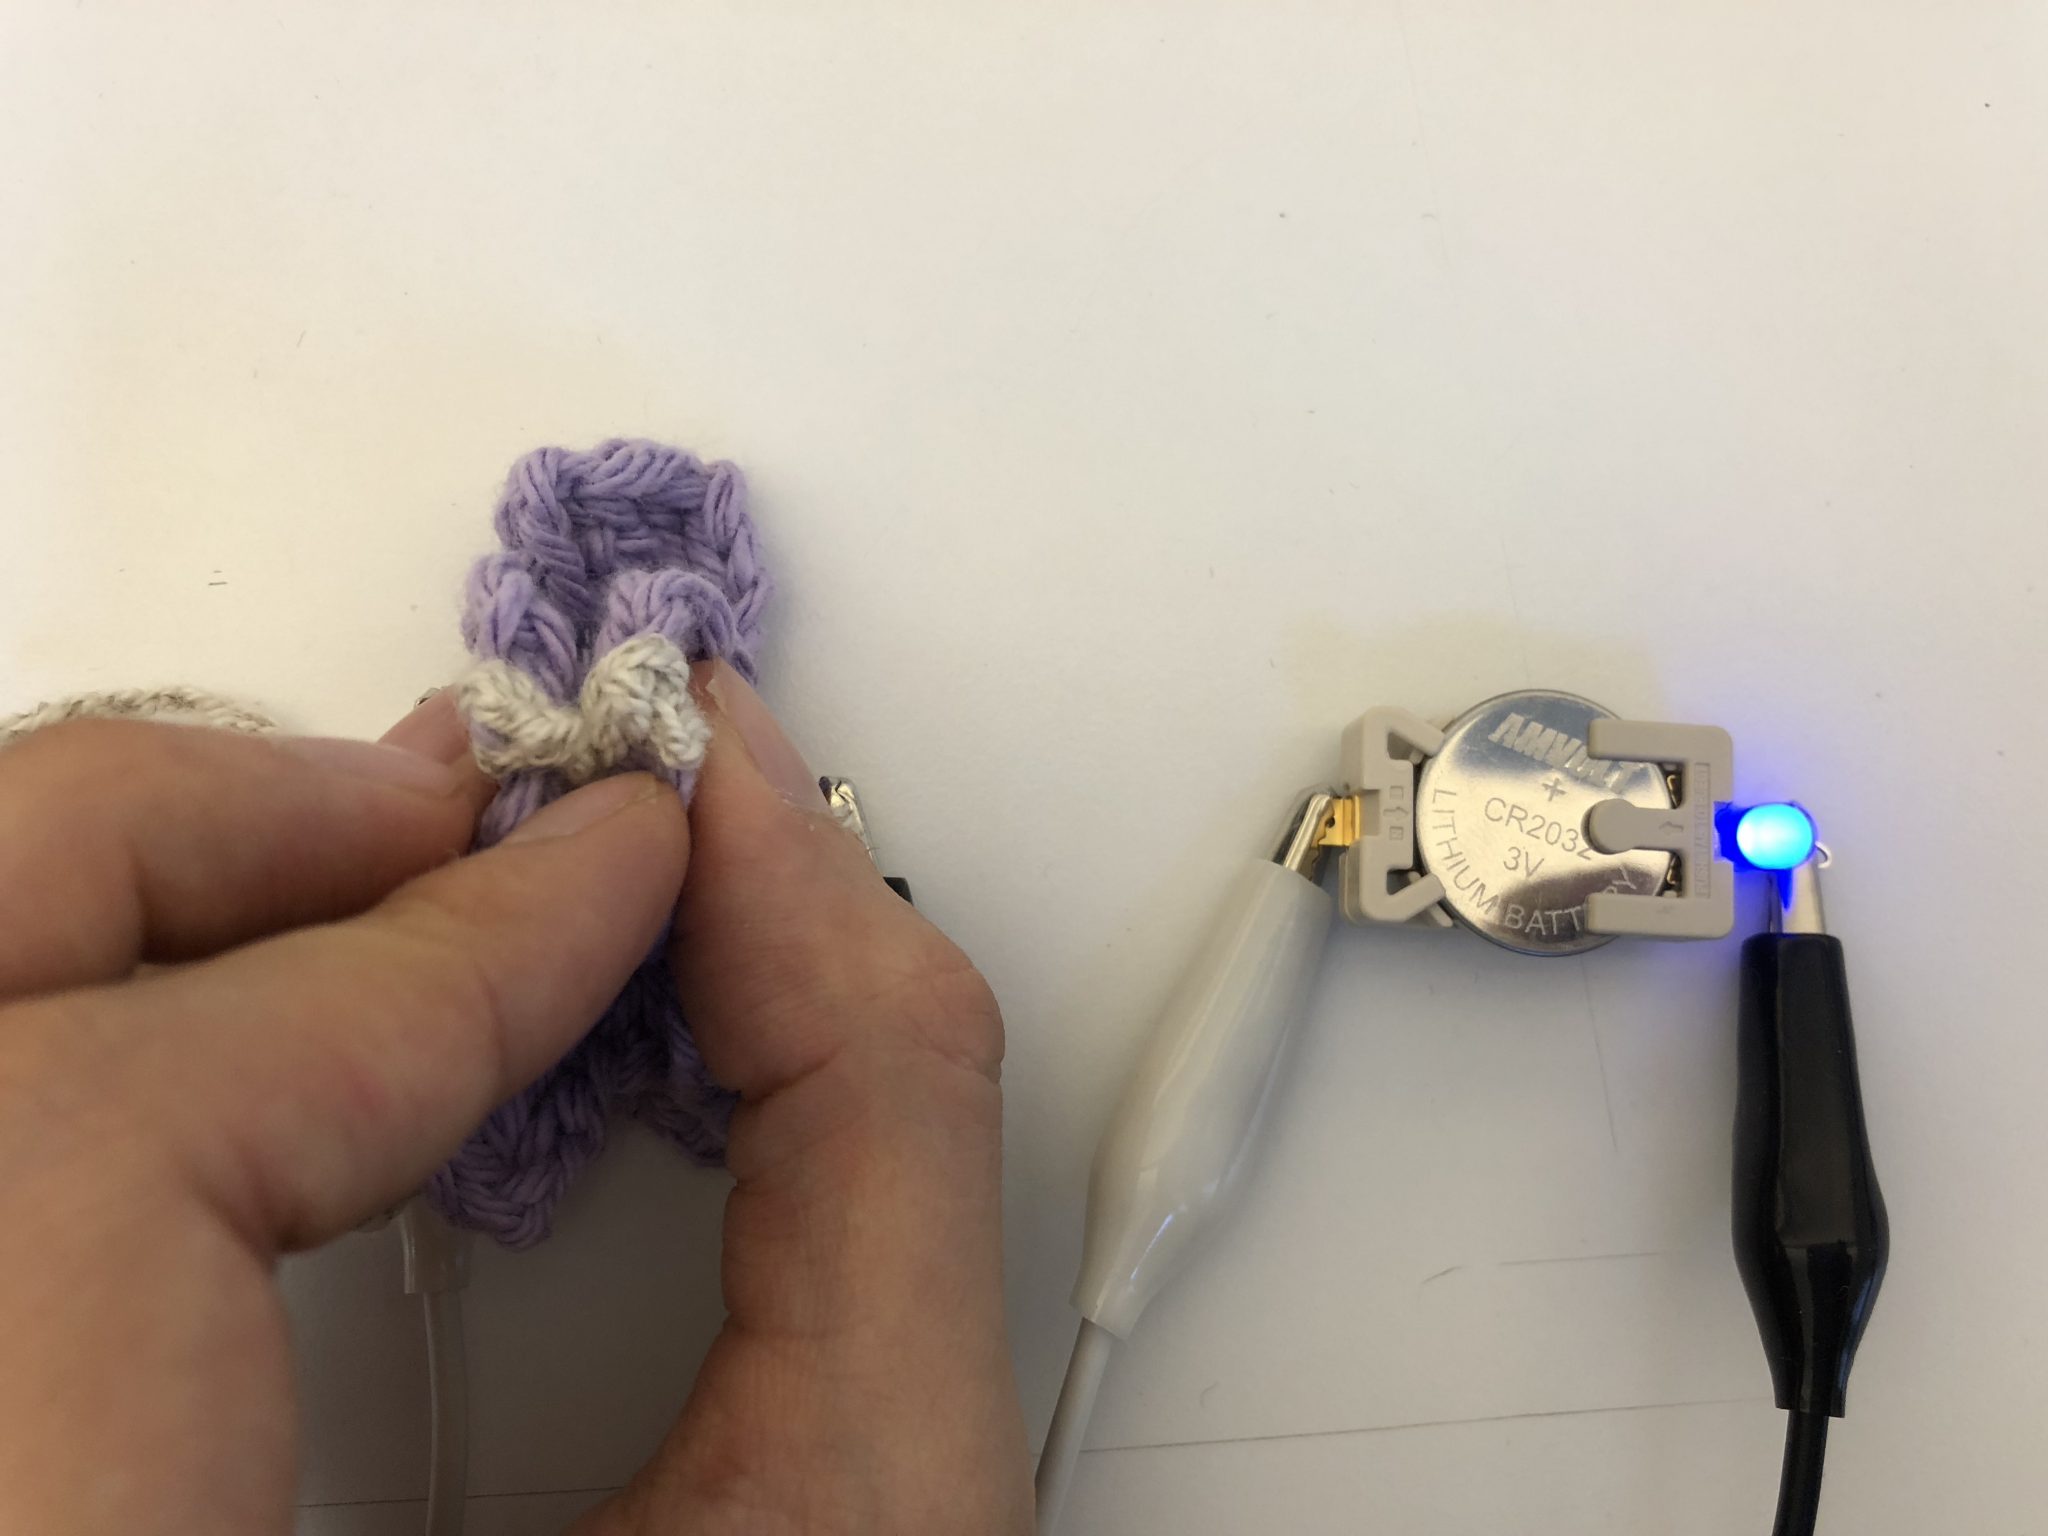
Description. I used crochet to fabricate the swatch which is shaped like a flower. I wanted to have a flower that could have two different states, open -> bloomed and closed -> bud. When the flower is closed and both sides of the conductive yarn touch, the testing circuit is closed and it lights up an LED.

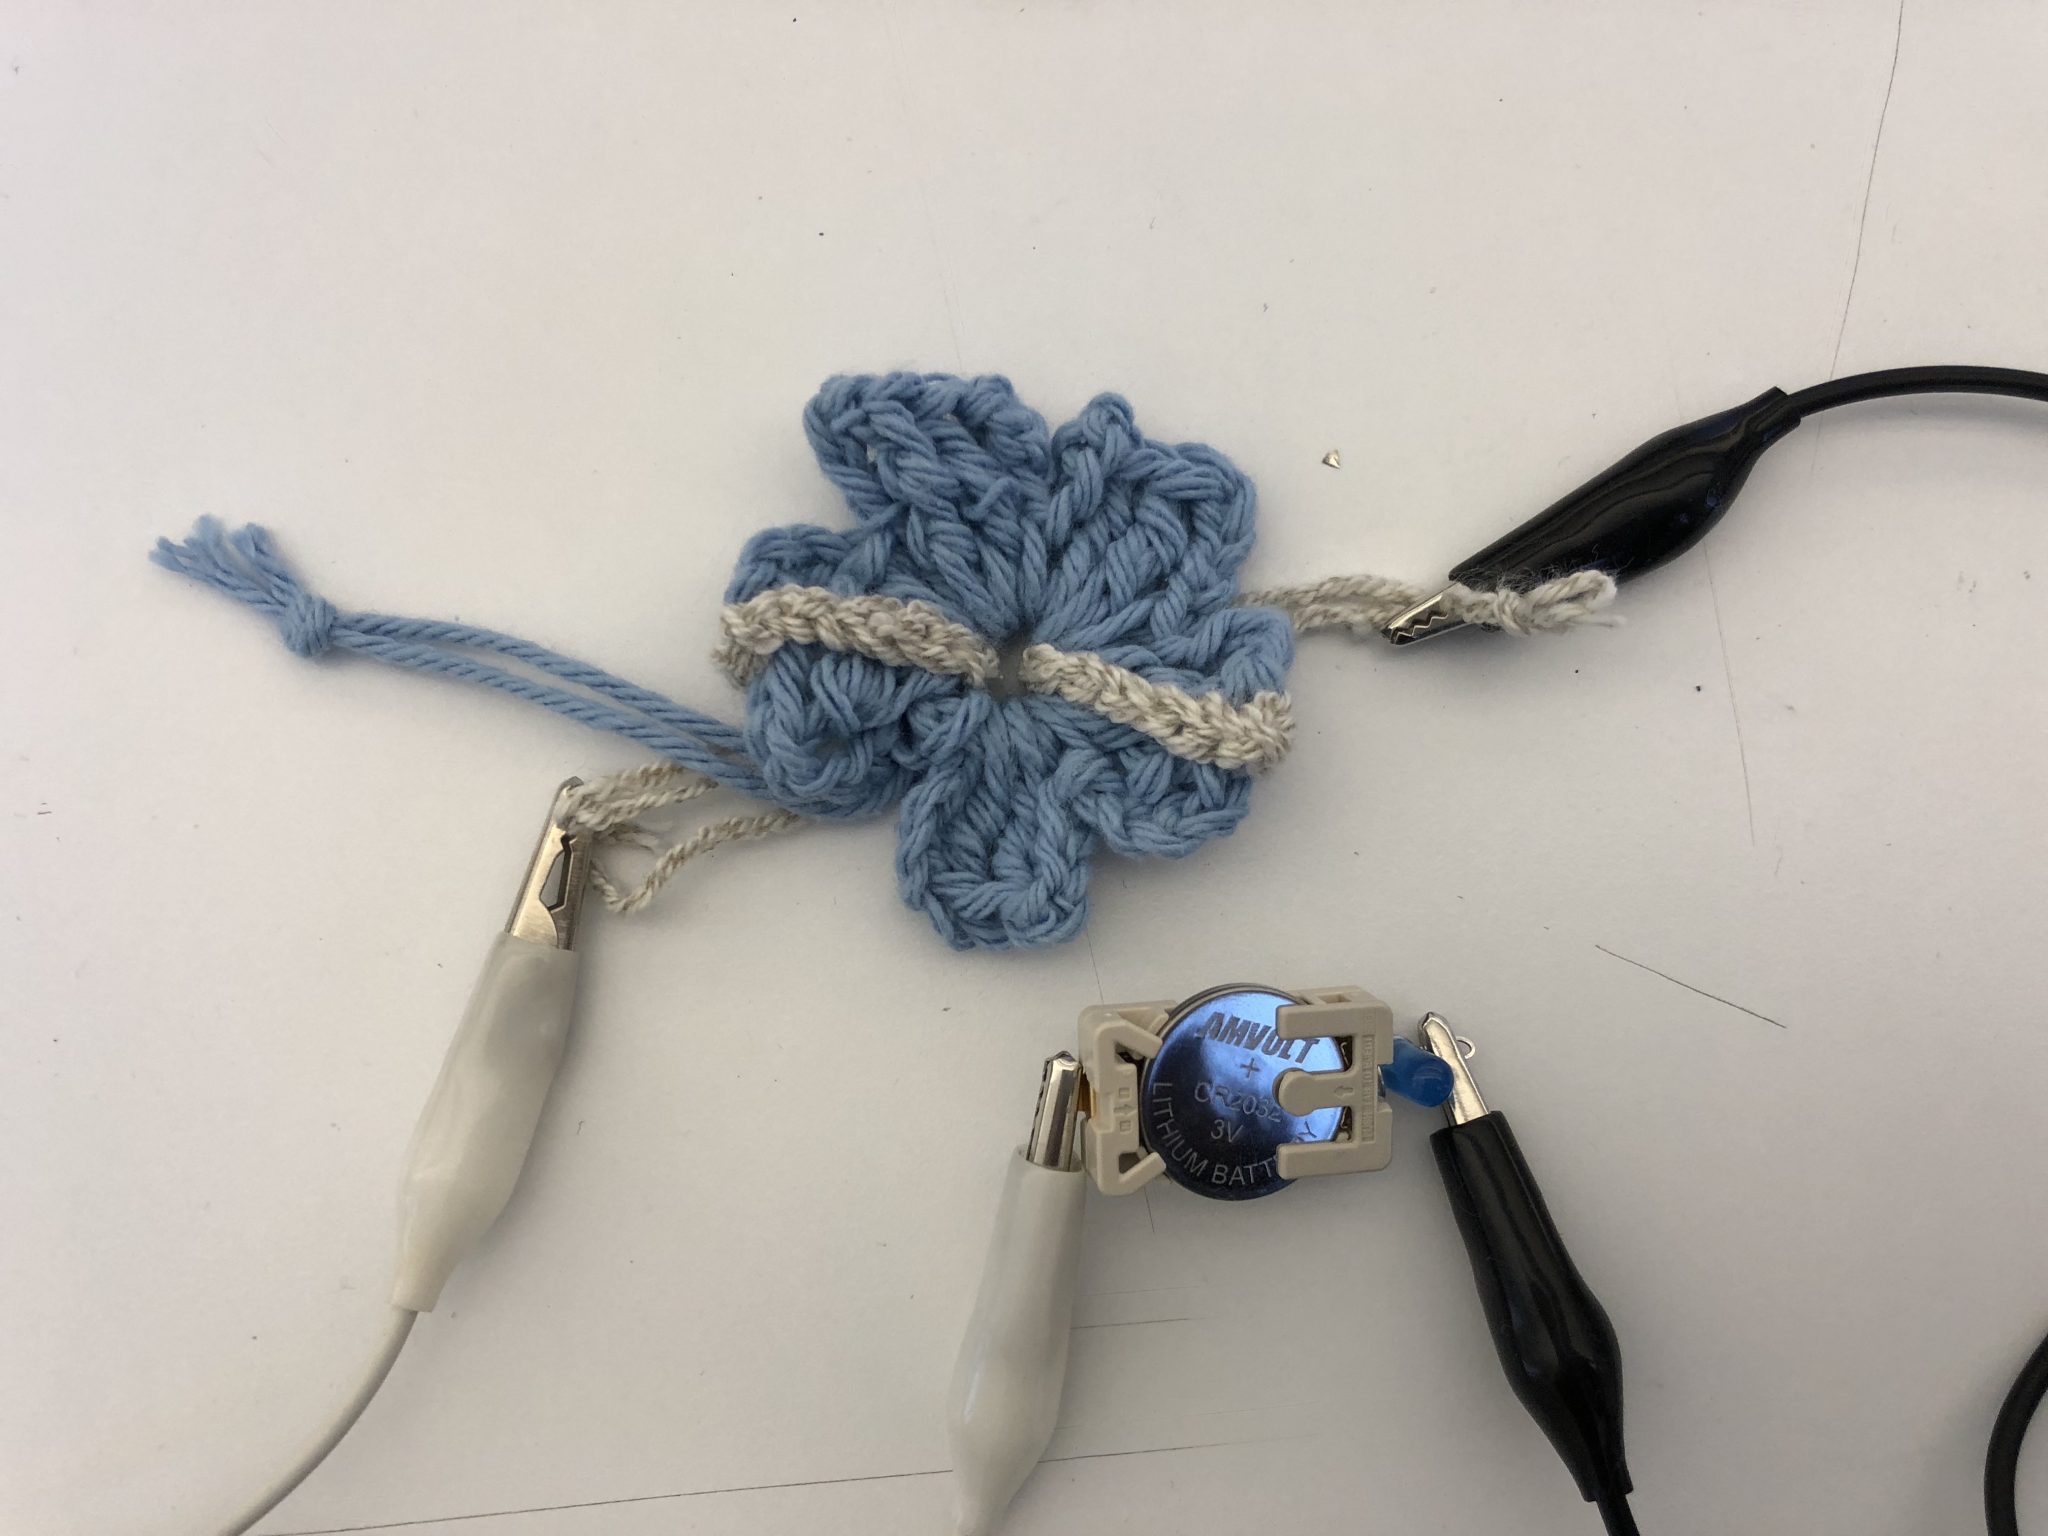
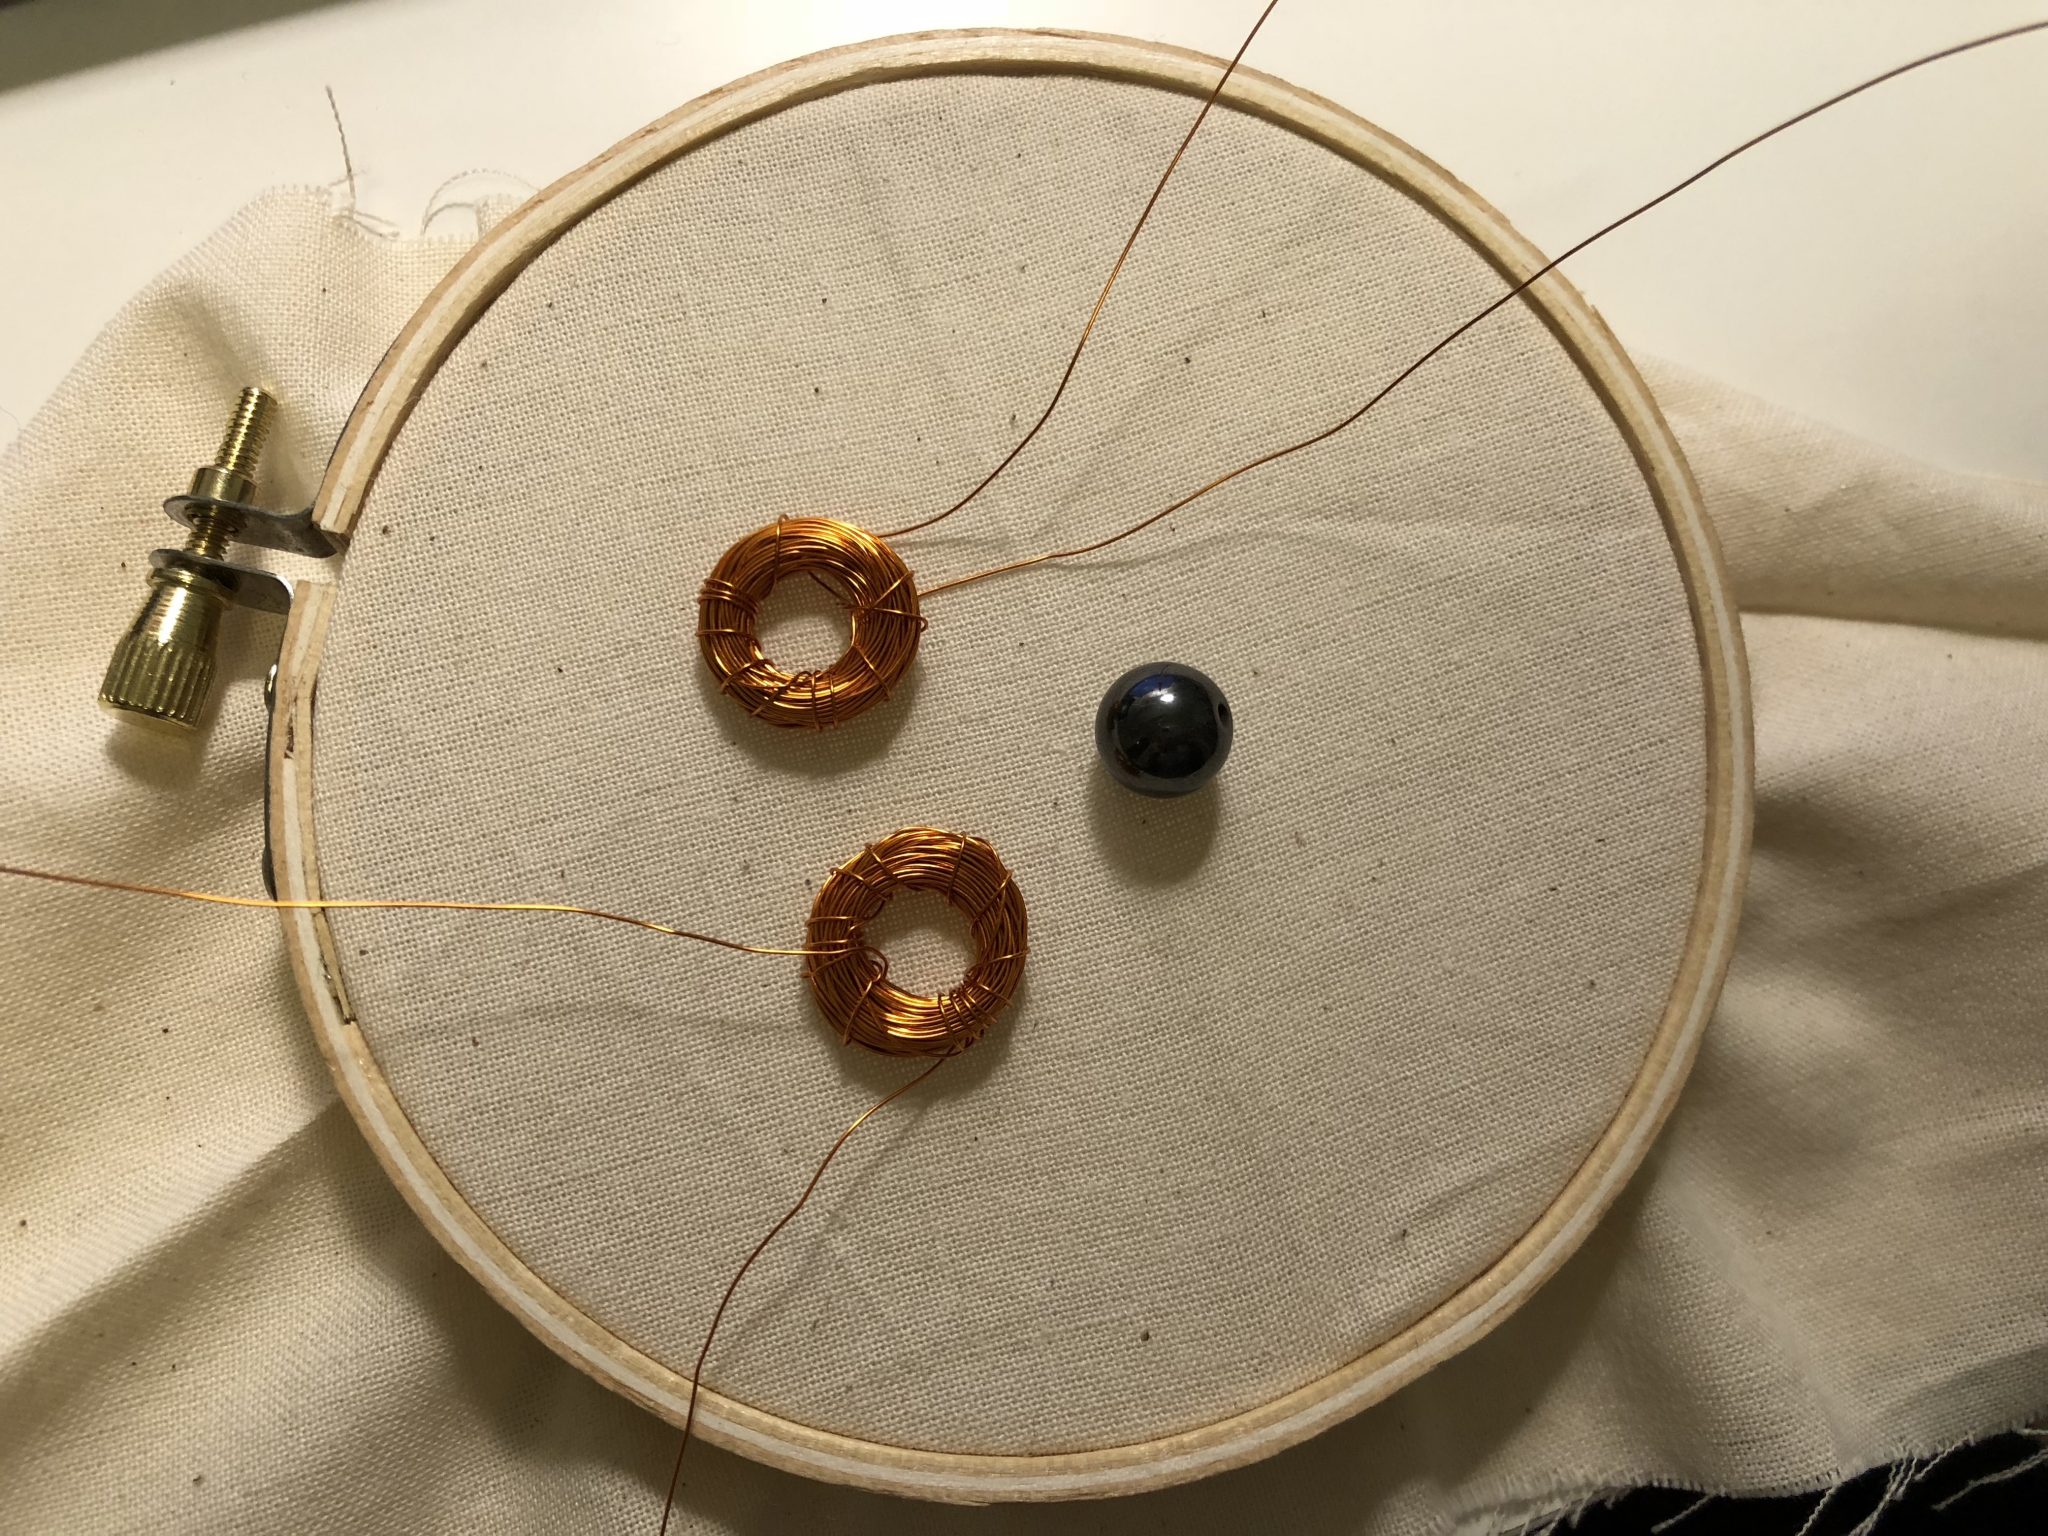
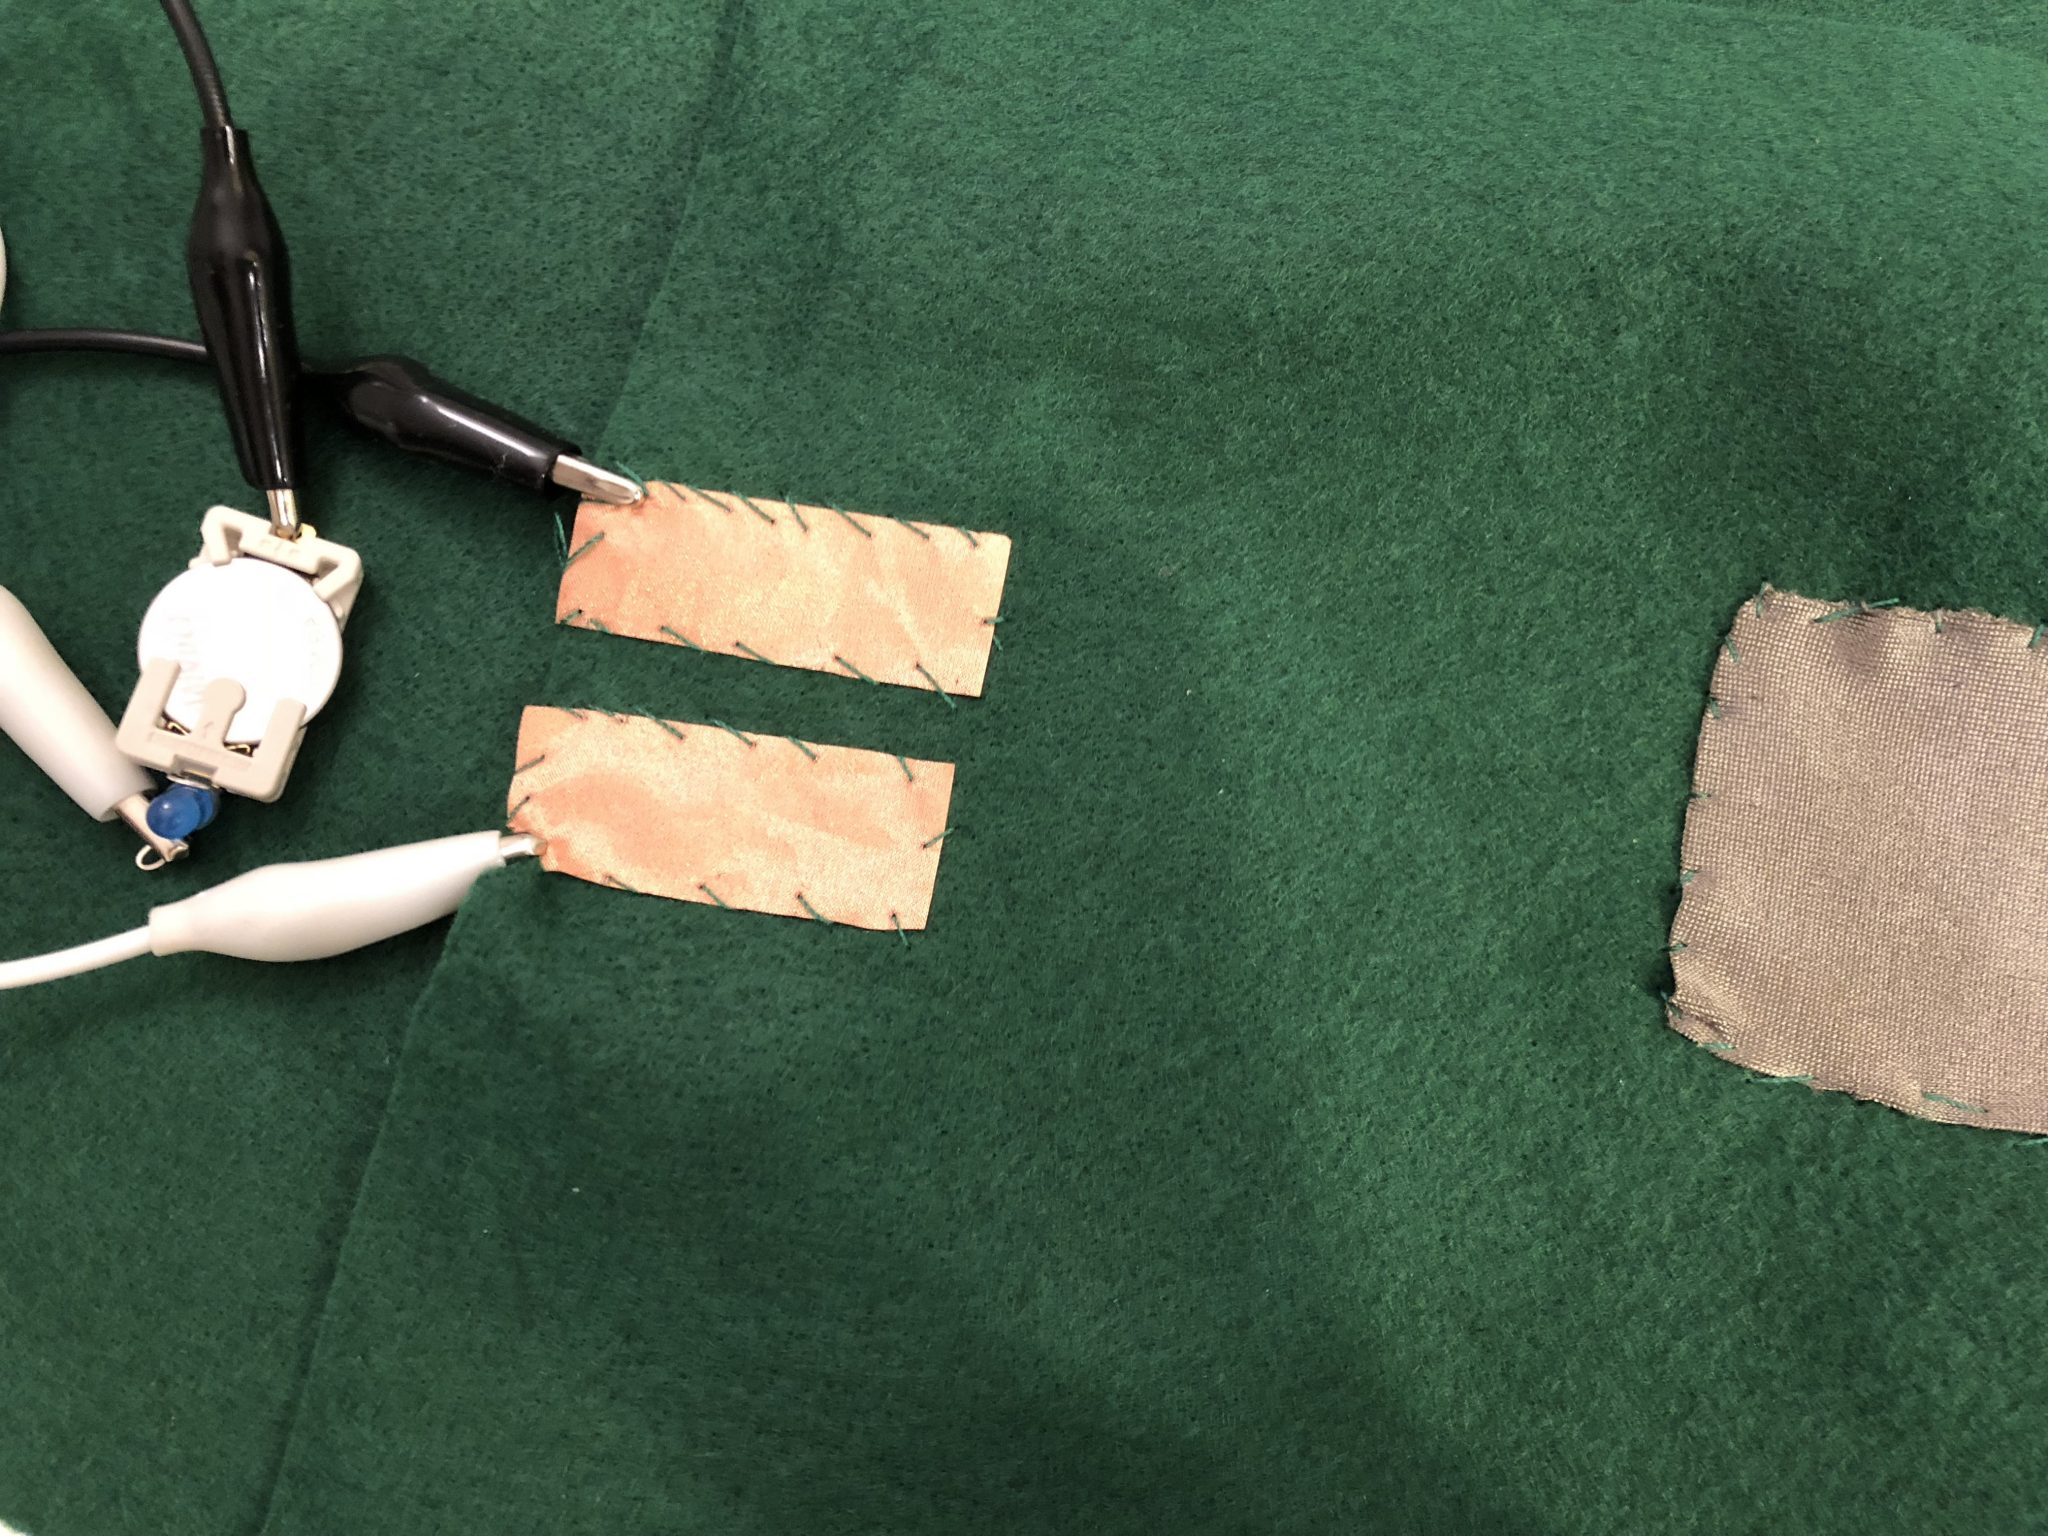
Materials. Color yarn, crochet needle, conductive yarn. Testing circuit: led, alligator clips, sewable battery holder and 3V battery.

Technique. I used the colored yarn for the base flower using the simple and double stitch, and conductive yarn using the simple stitch to create an attachment to the main flower that could create the connection between both ends.

References.

https://www.instructables.com/id/Amigurumi-octopus/

I wish, one day, I could do something like this:

https://www.ravelry.com/patterns/sources/mathematical-intelligencer-june-2001/patterns

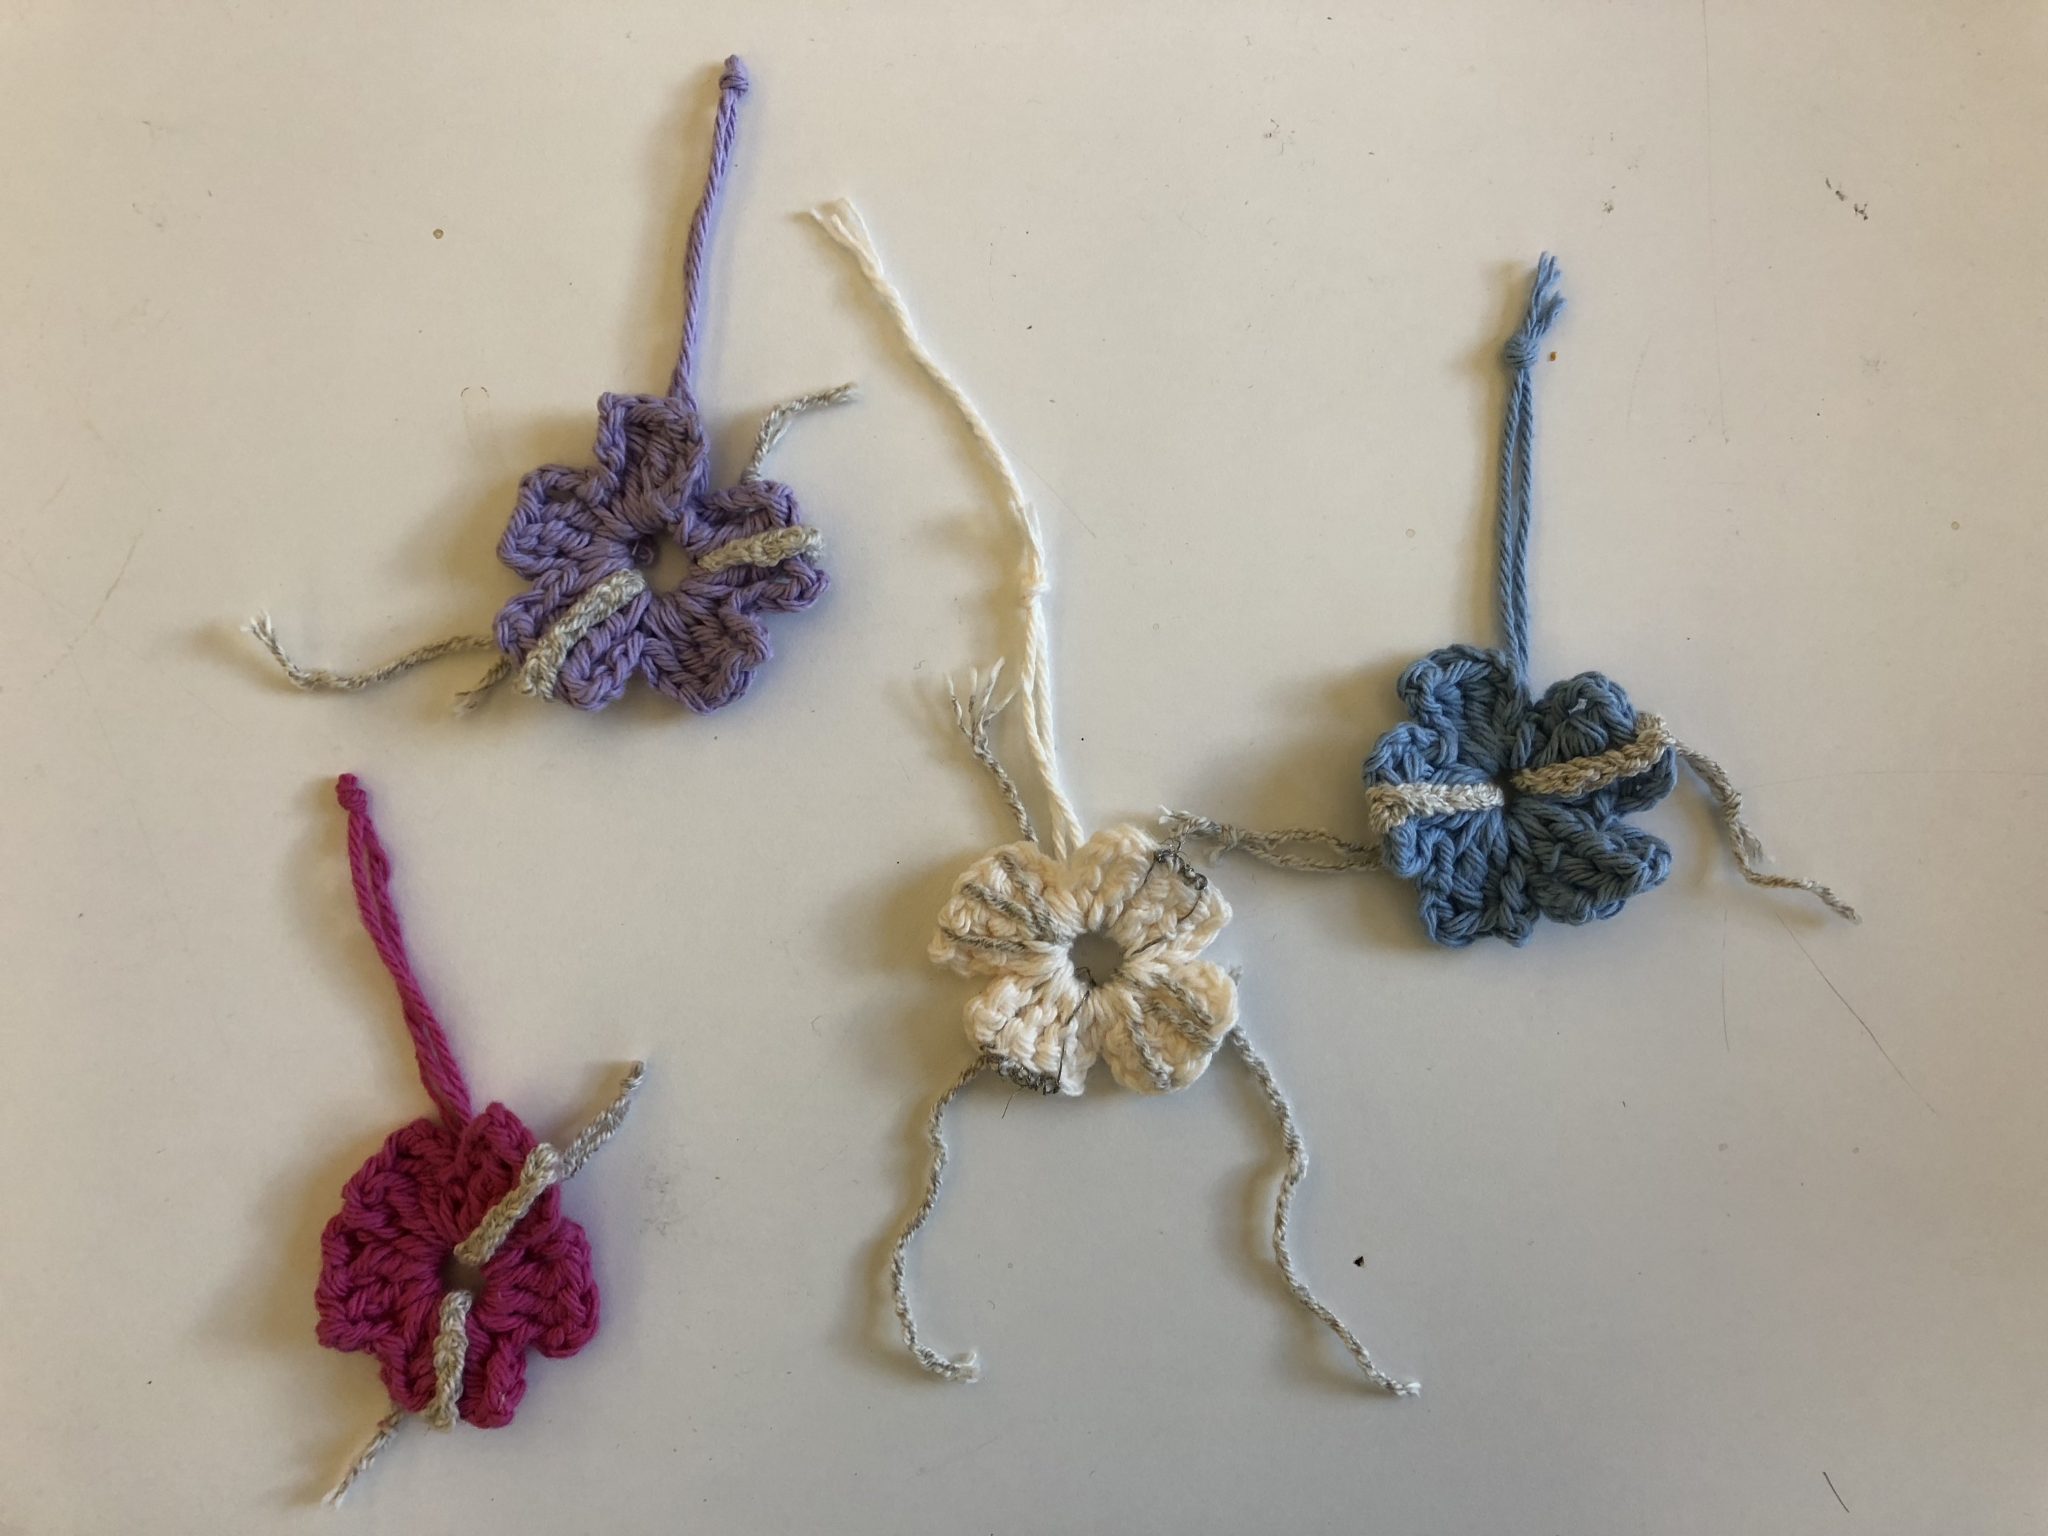
Make three more identical ones.

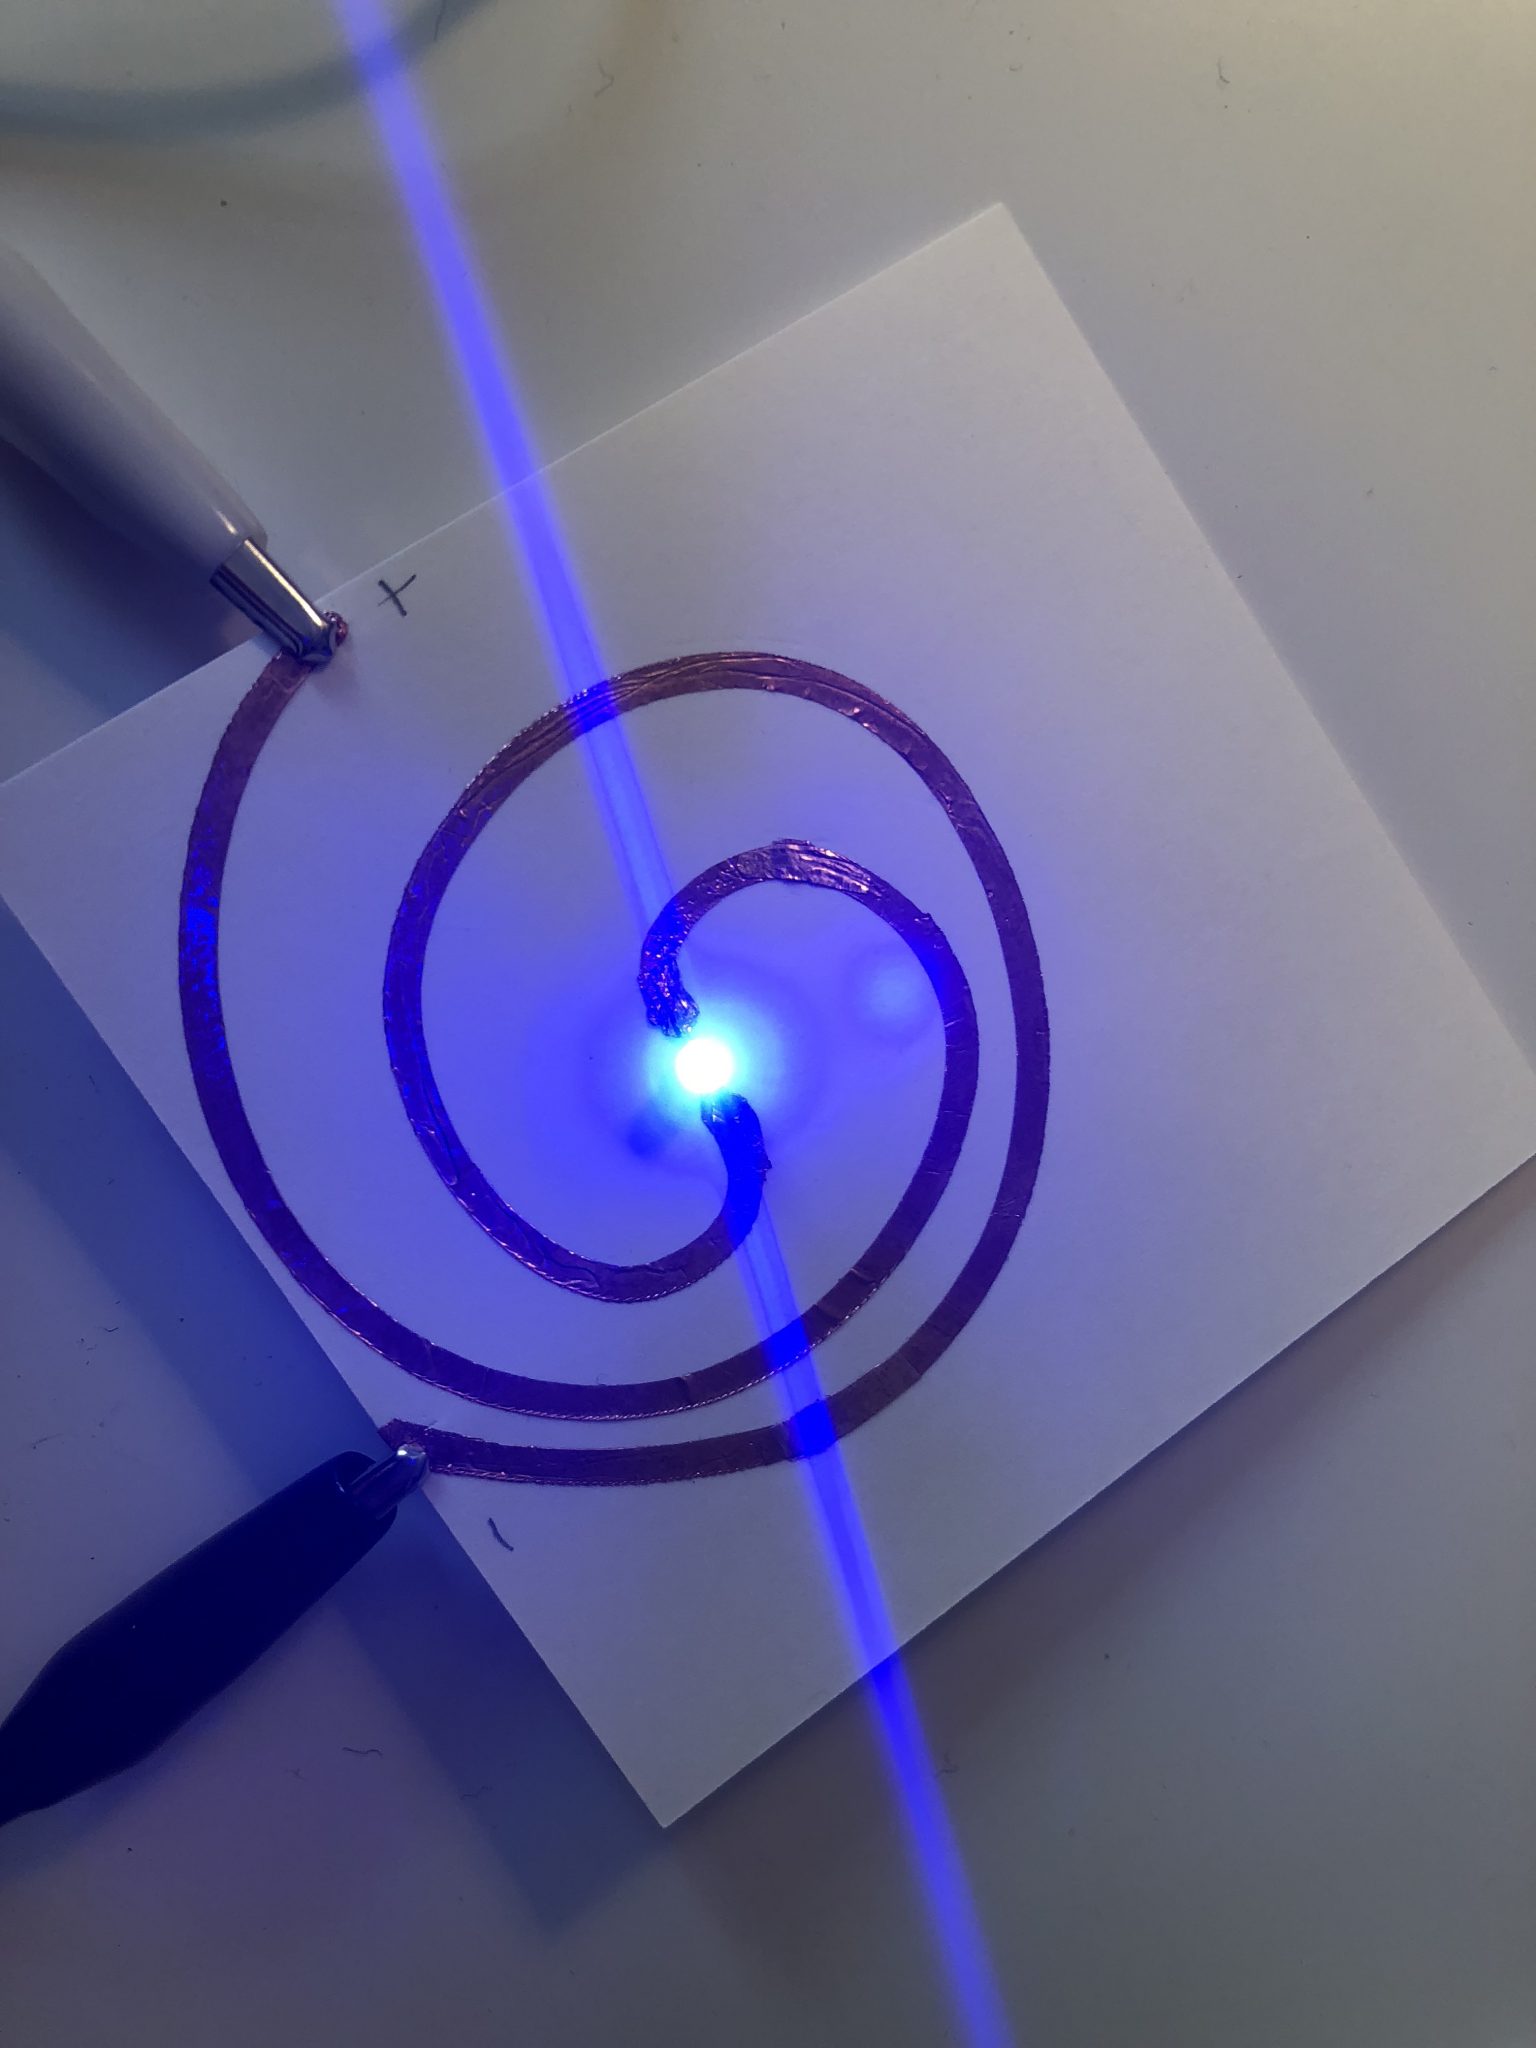
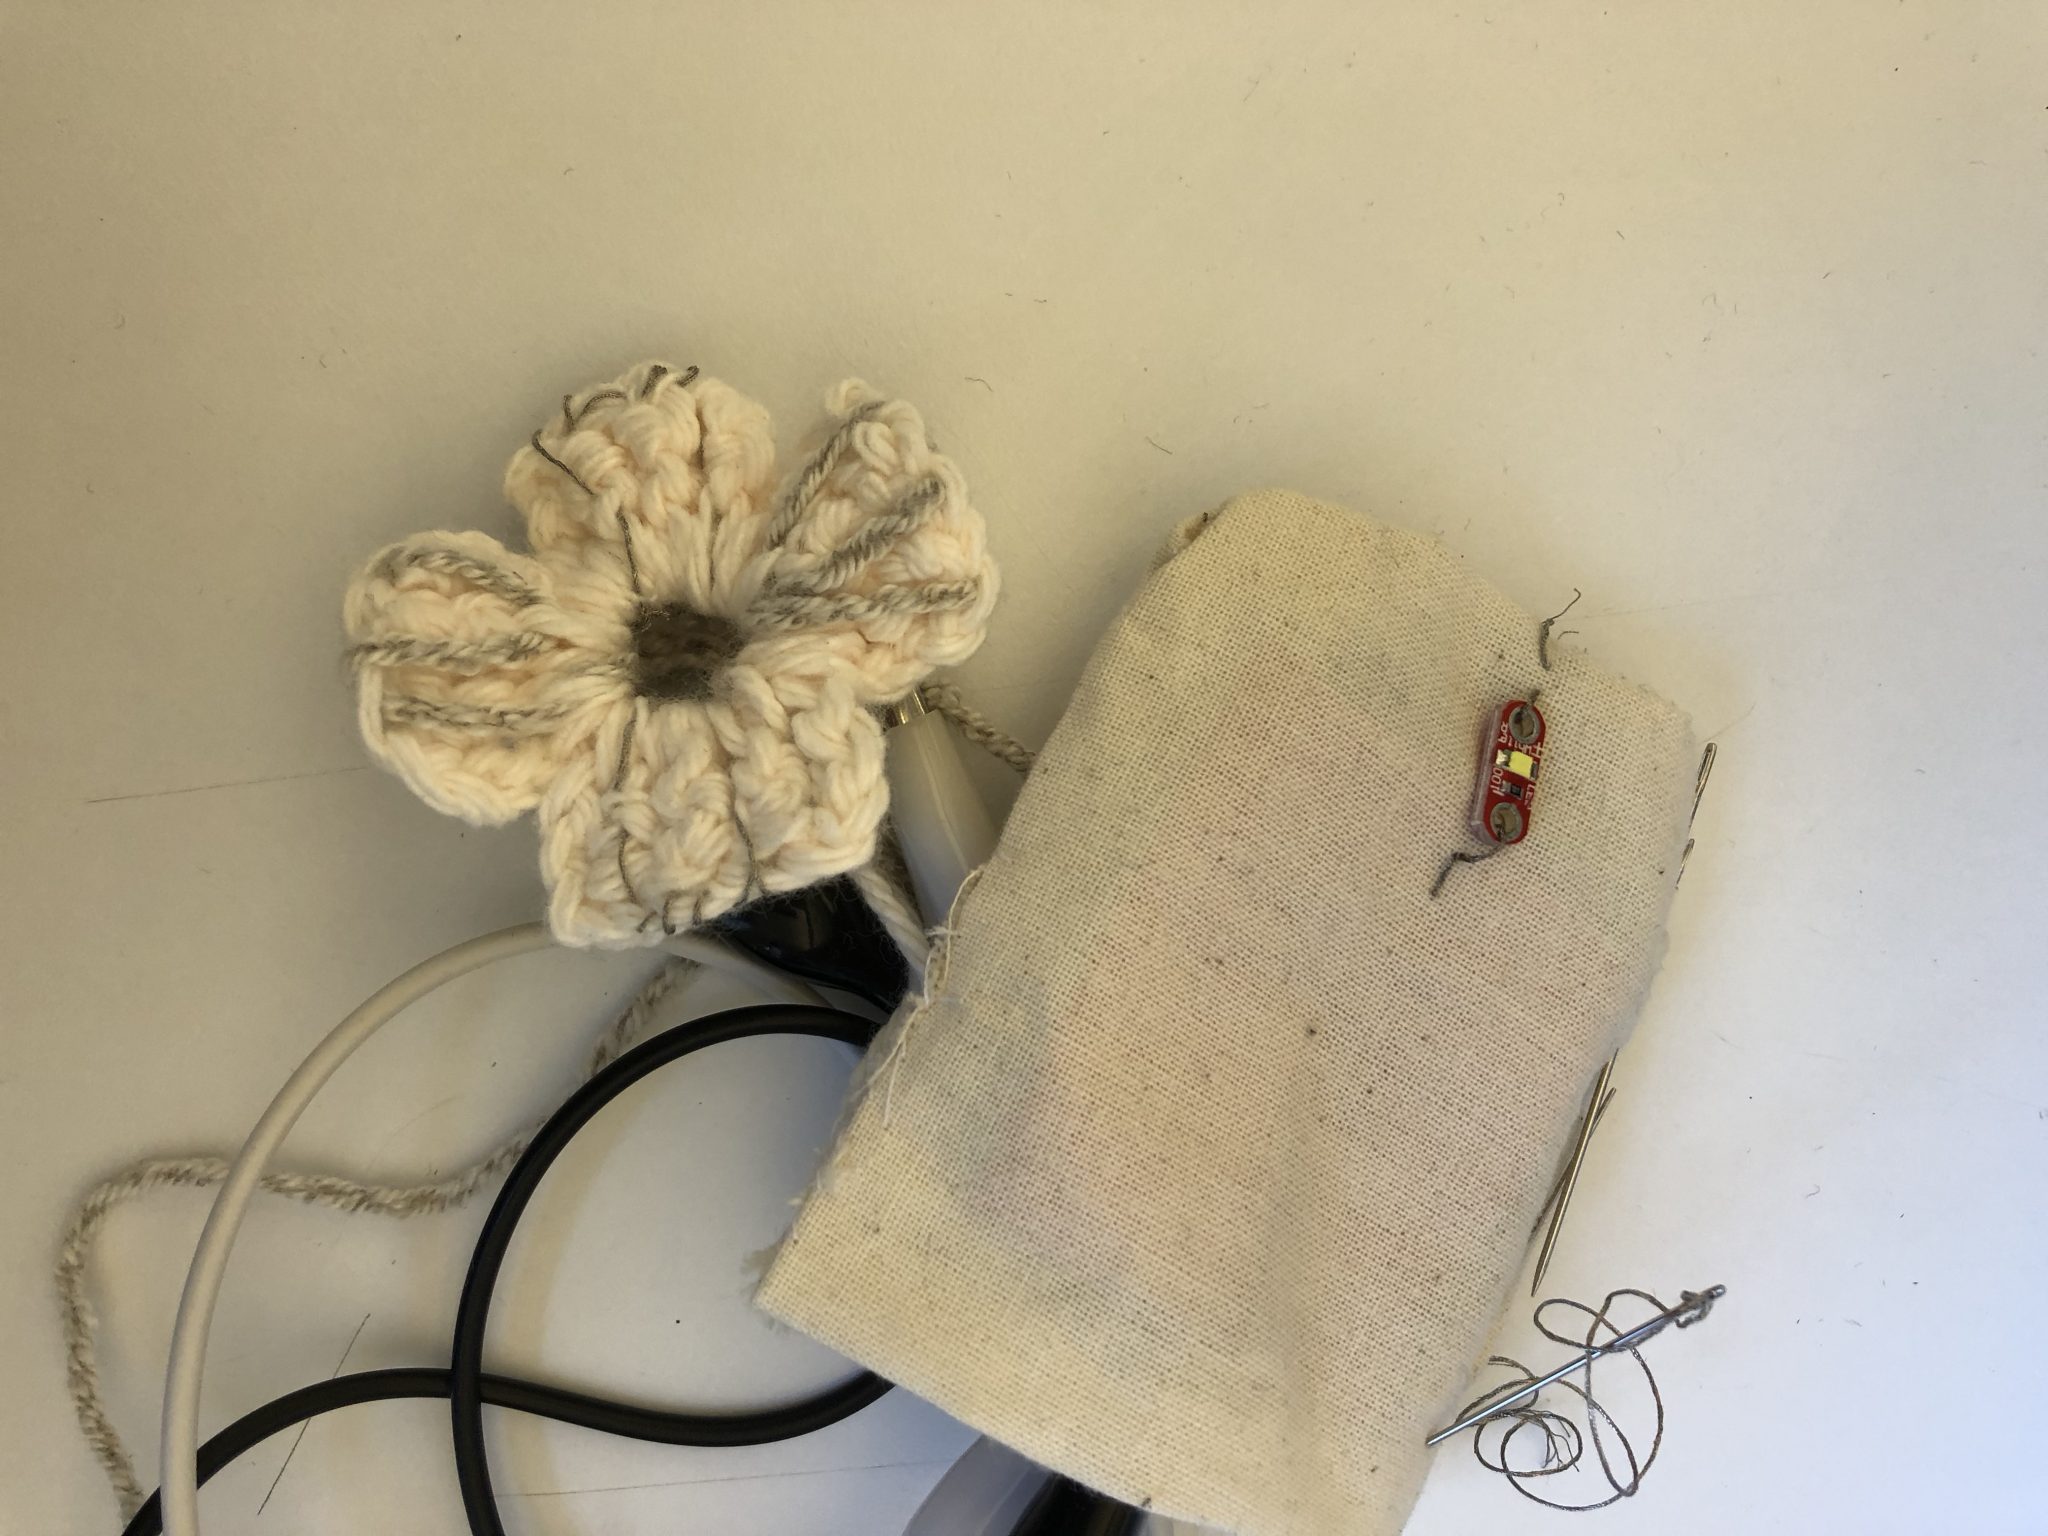
I created a series of flowers. The three colored ones are part of the swatch exchange. The white one, slightly different has a little bit more of experimentation using different stitches and materials ( conductive yarn + conductive thread). I can totally tell which one was the first and which one was the last one!

PART 2: Learn a New Craft 

I learned how to crochet. It’s something that I always wanted to do and I decided to use it as the main technique for my swatches too.

I identify myself as a designer, maker, researcher and educator who tries to simplify complexity by making stuff and experiences.

My favorite digital tool is still a Wacom that can work as an extension of my own hand as I’ve used it since I was a child. However, as I’m doing a lot of fabrication stuff I may have soon enough one new favorite tool.

I really liked trying a new technique with a material that wasn’t new at all (yarn) as I’ve knitted before a scarf. I found interesting that what was supposed to work theoretically at the end required a lot more time, and practice than expected. I personally found frustrating not being able to read the crochet patterns even though I was starting to feel comfortable with stitching.

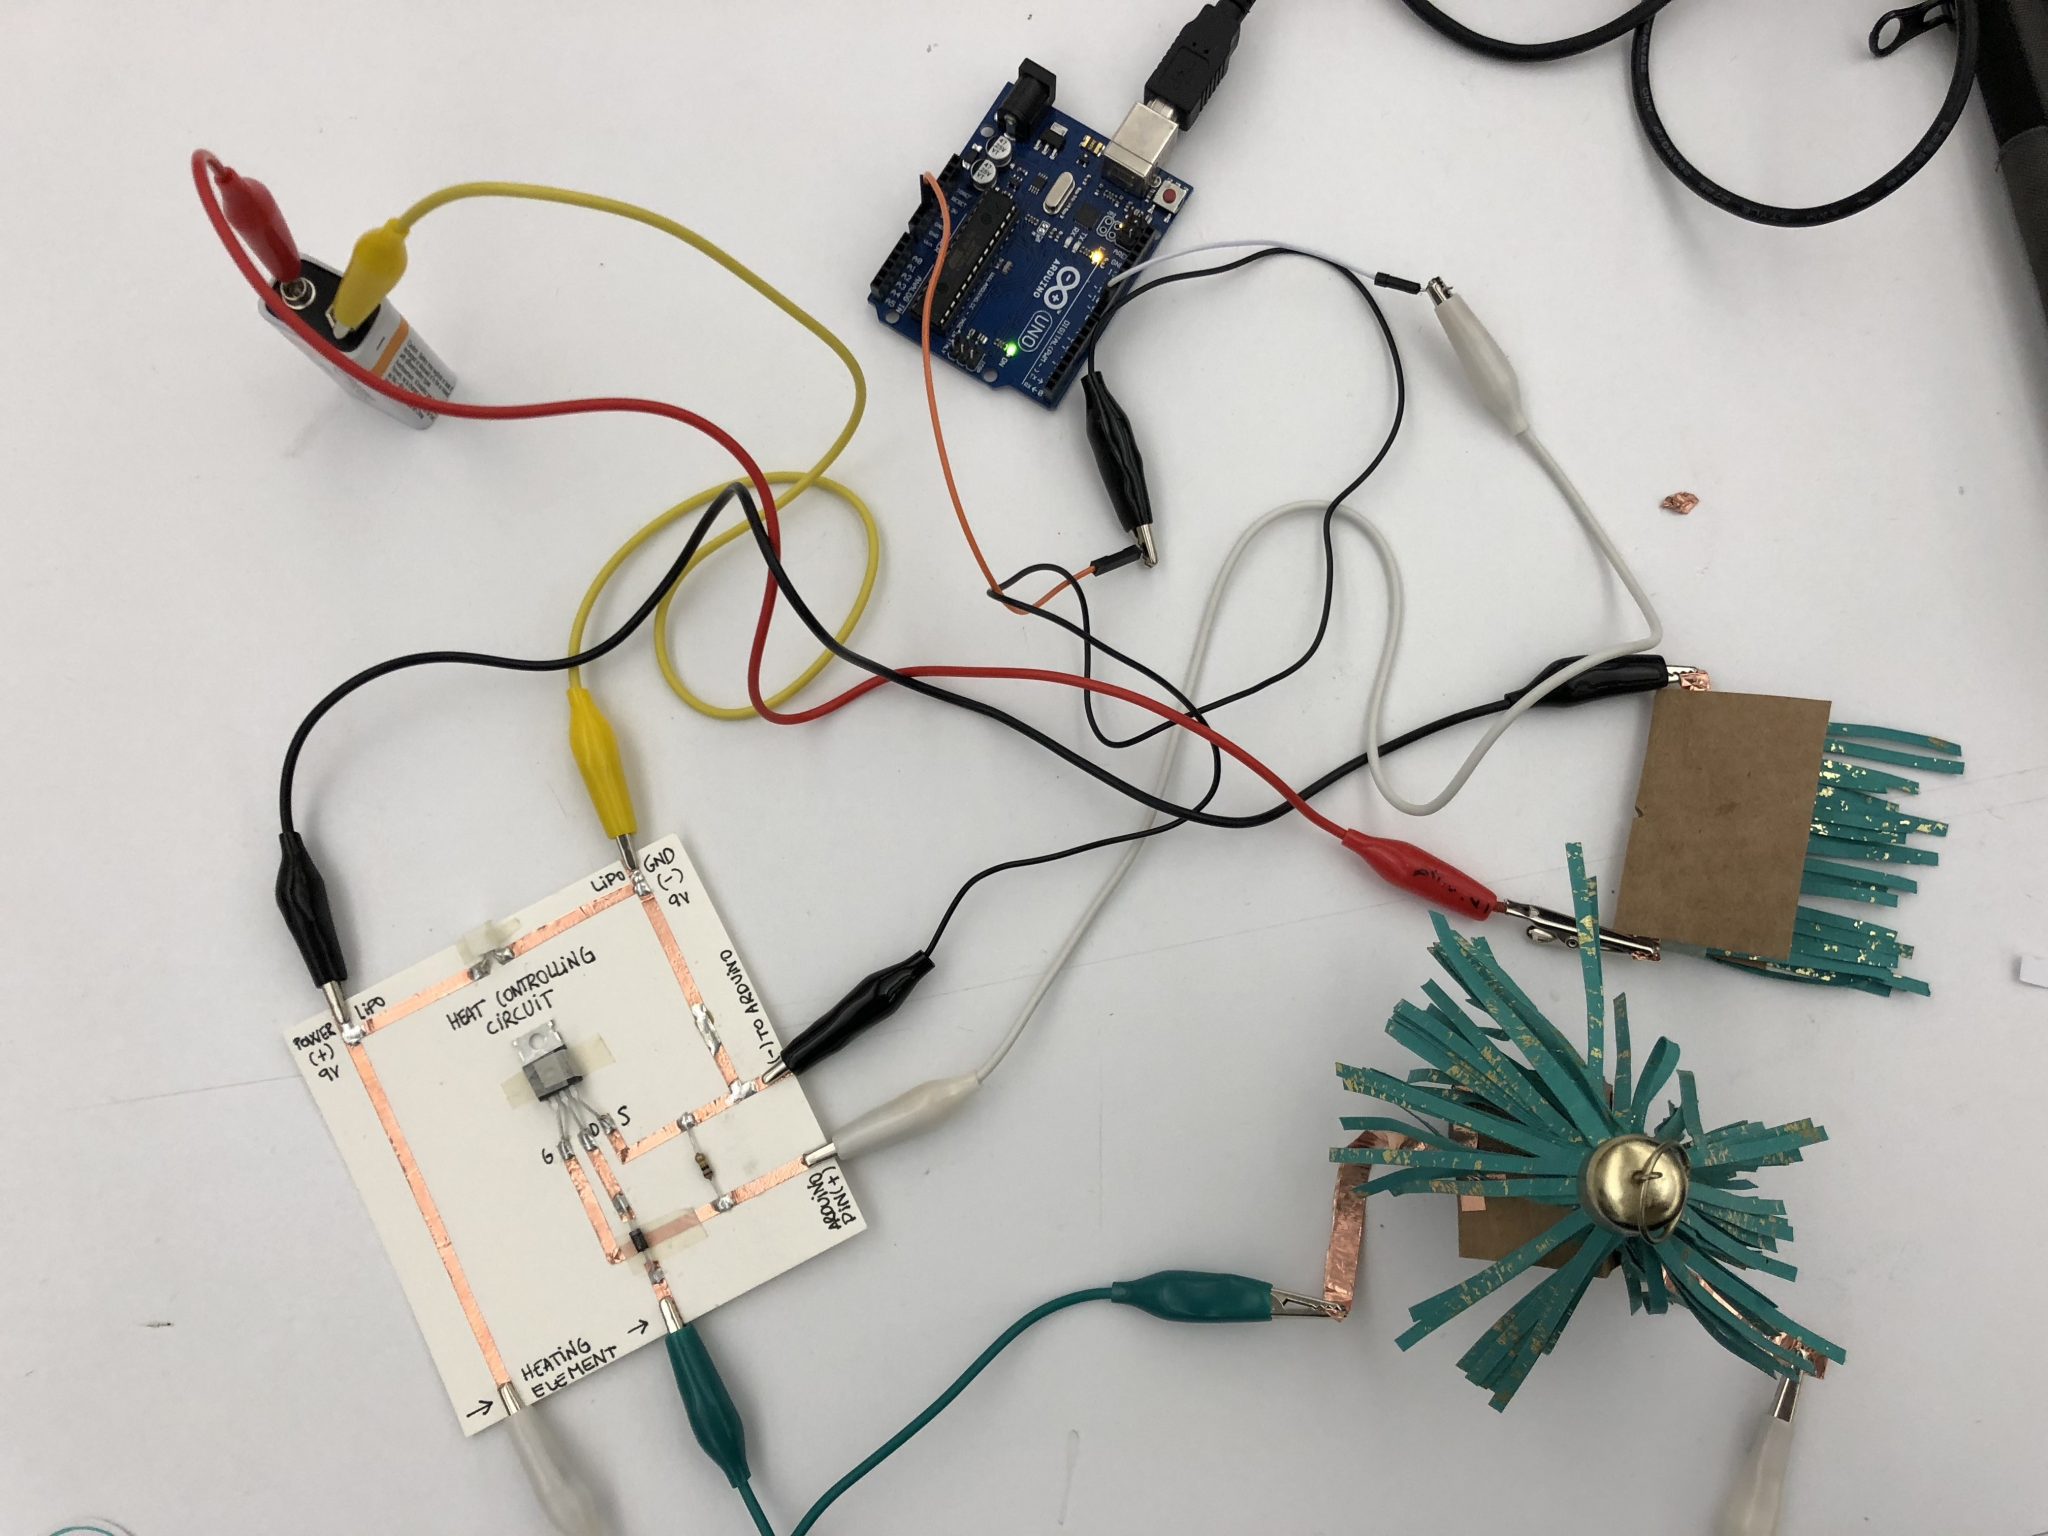
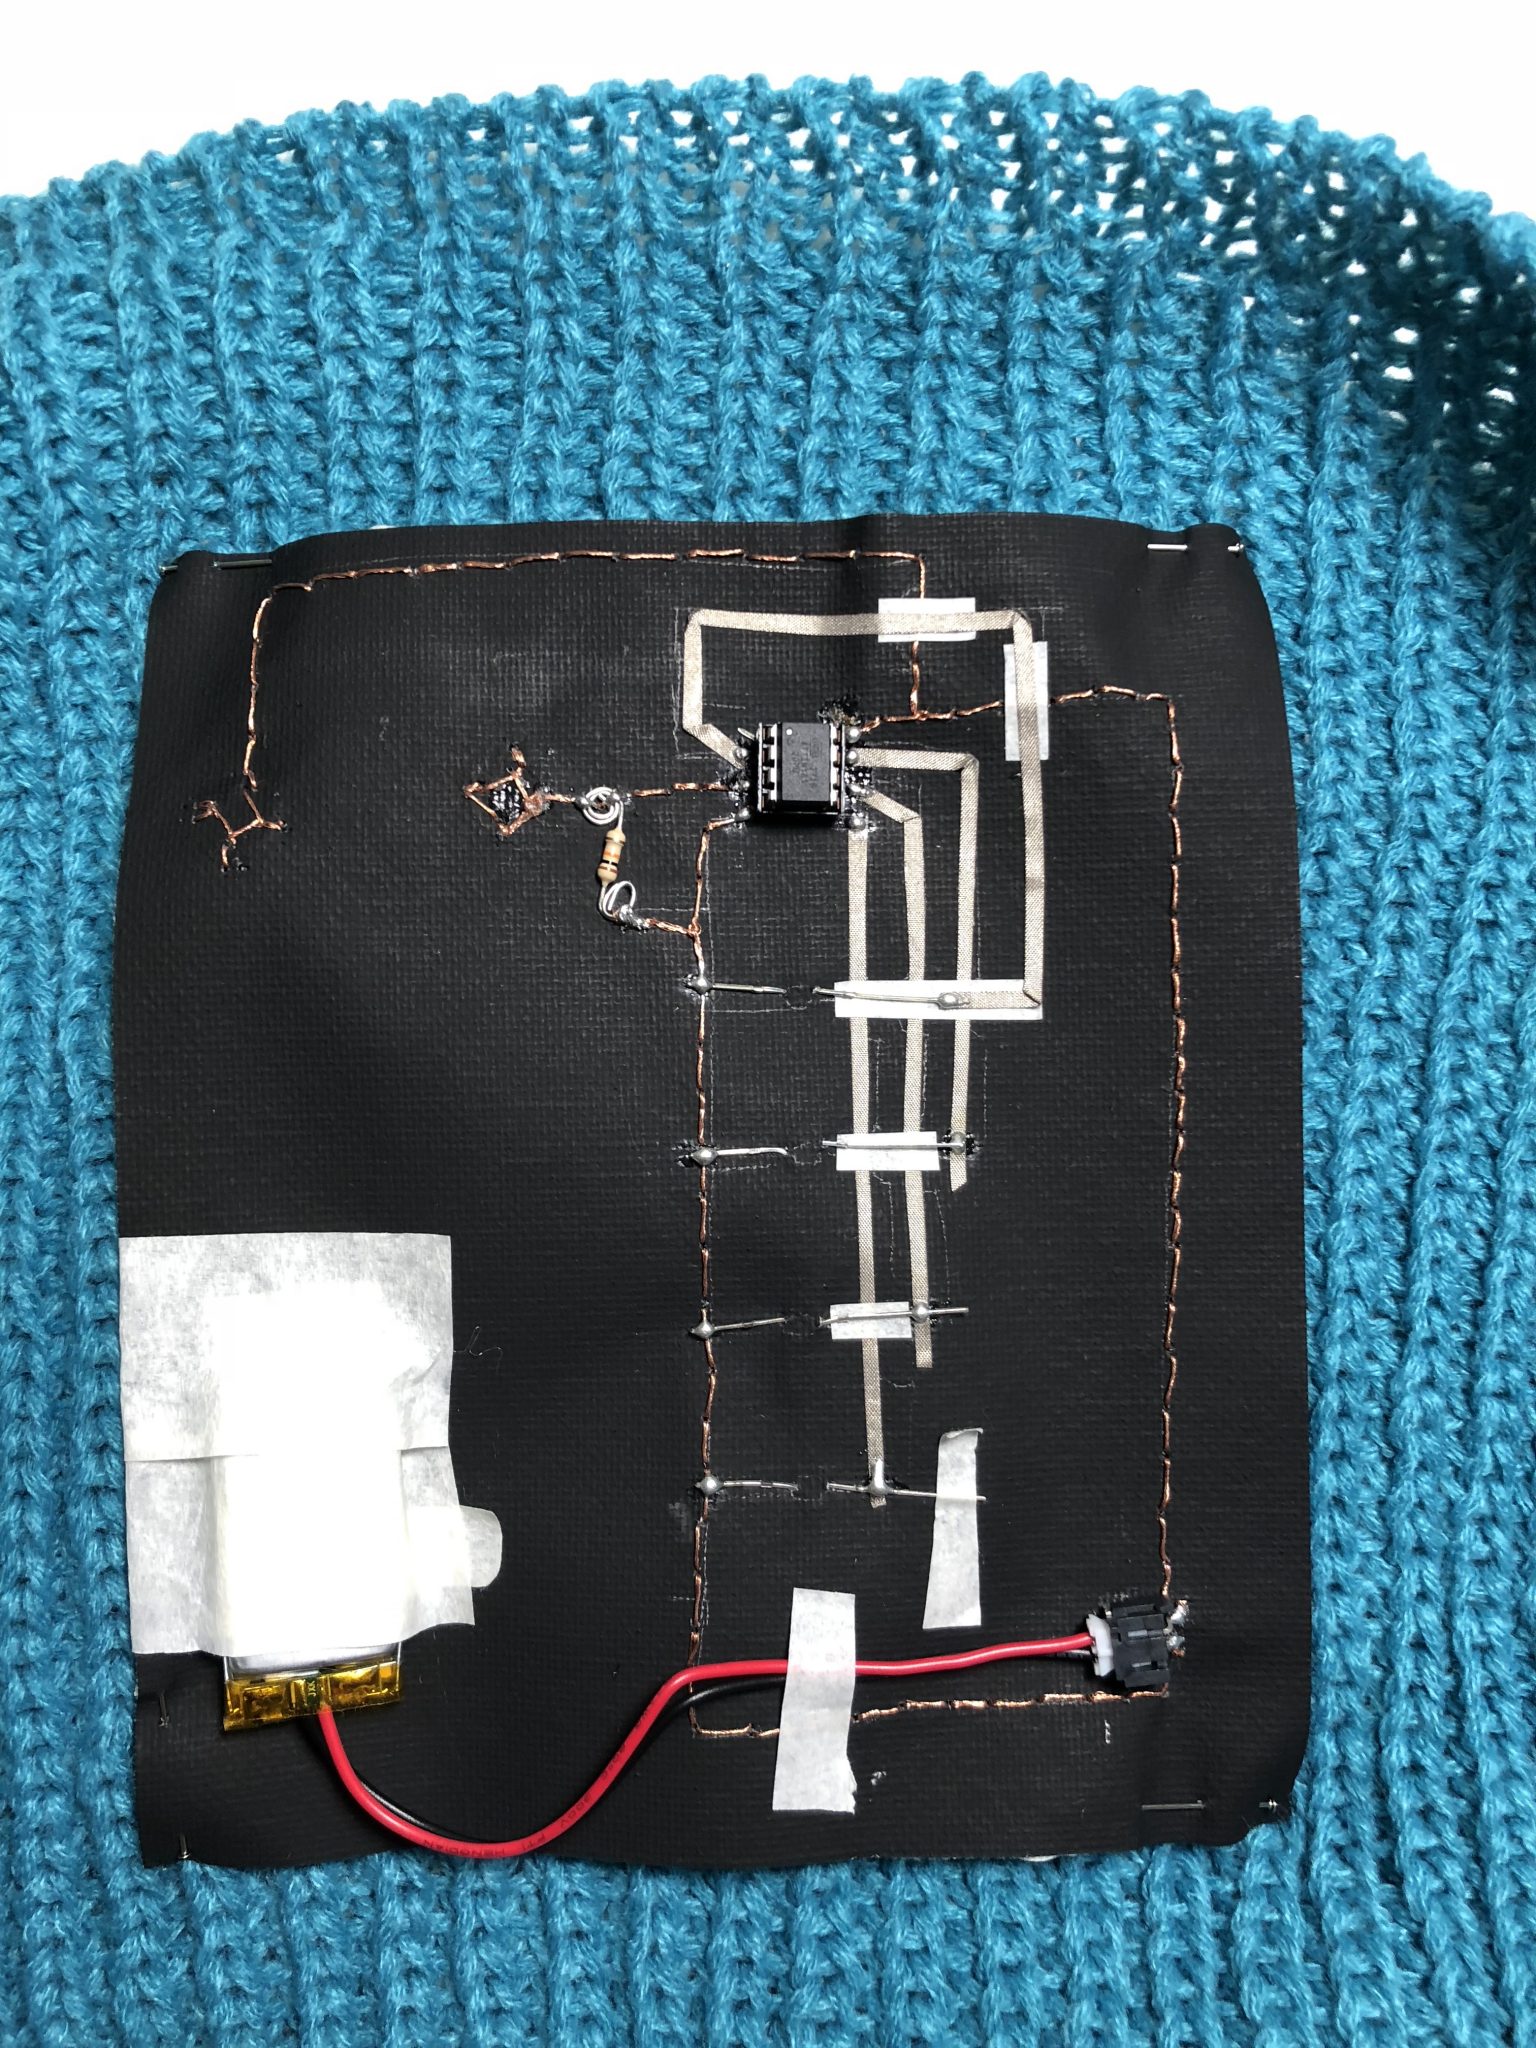
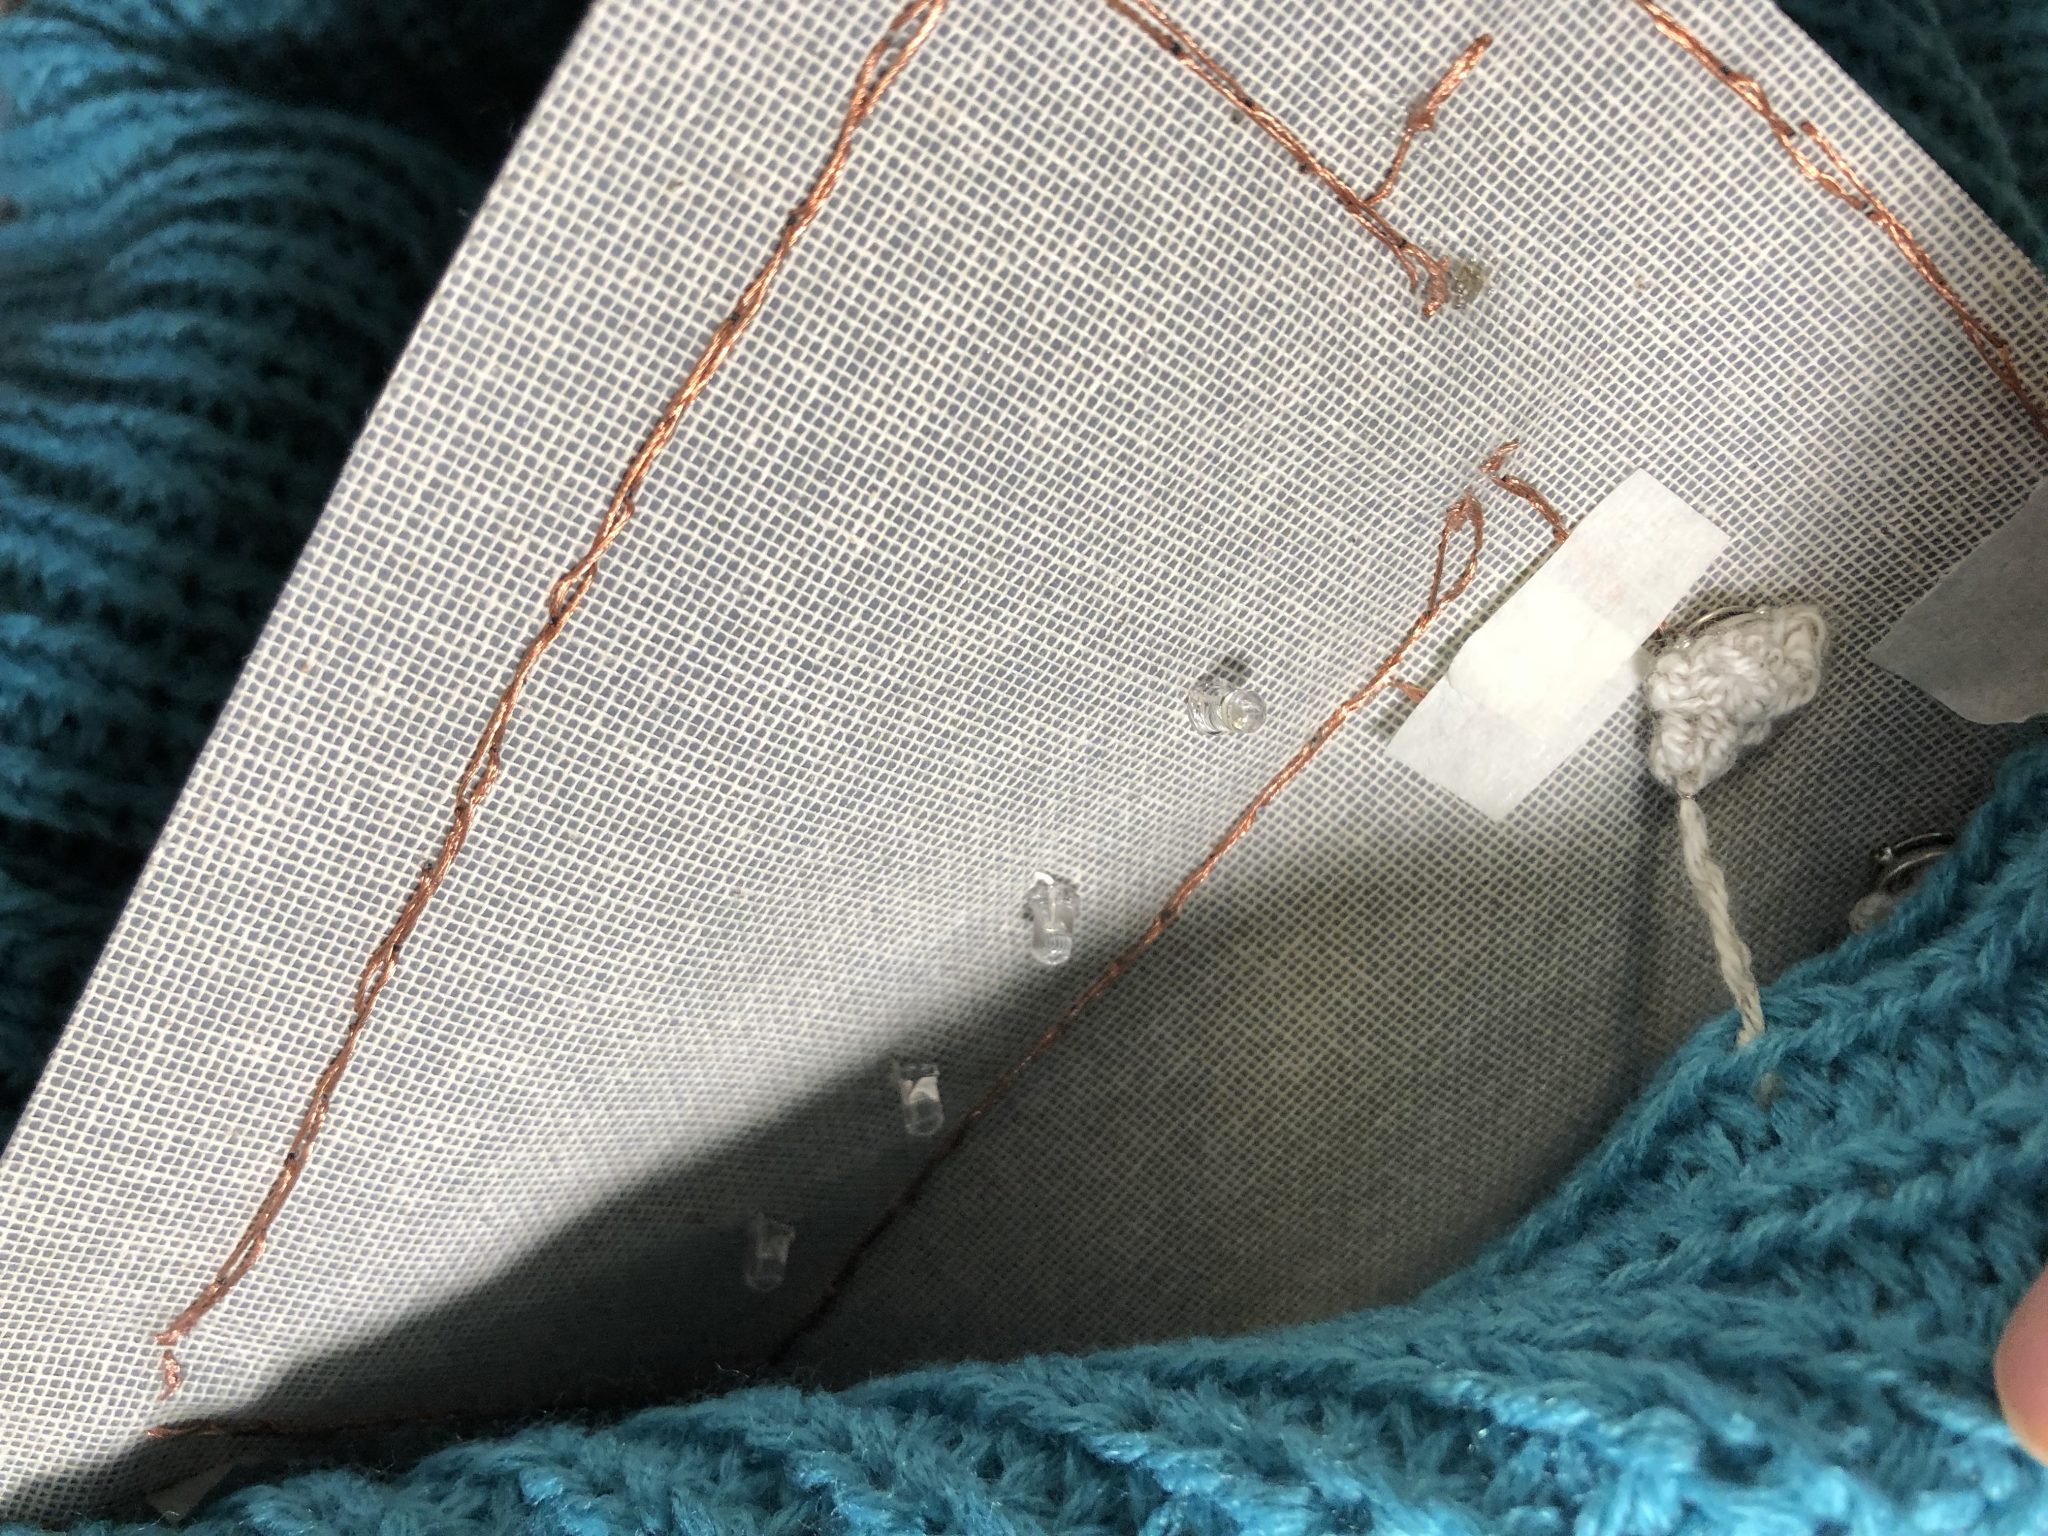
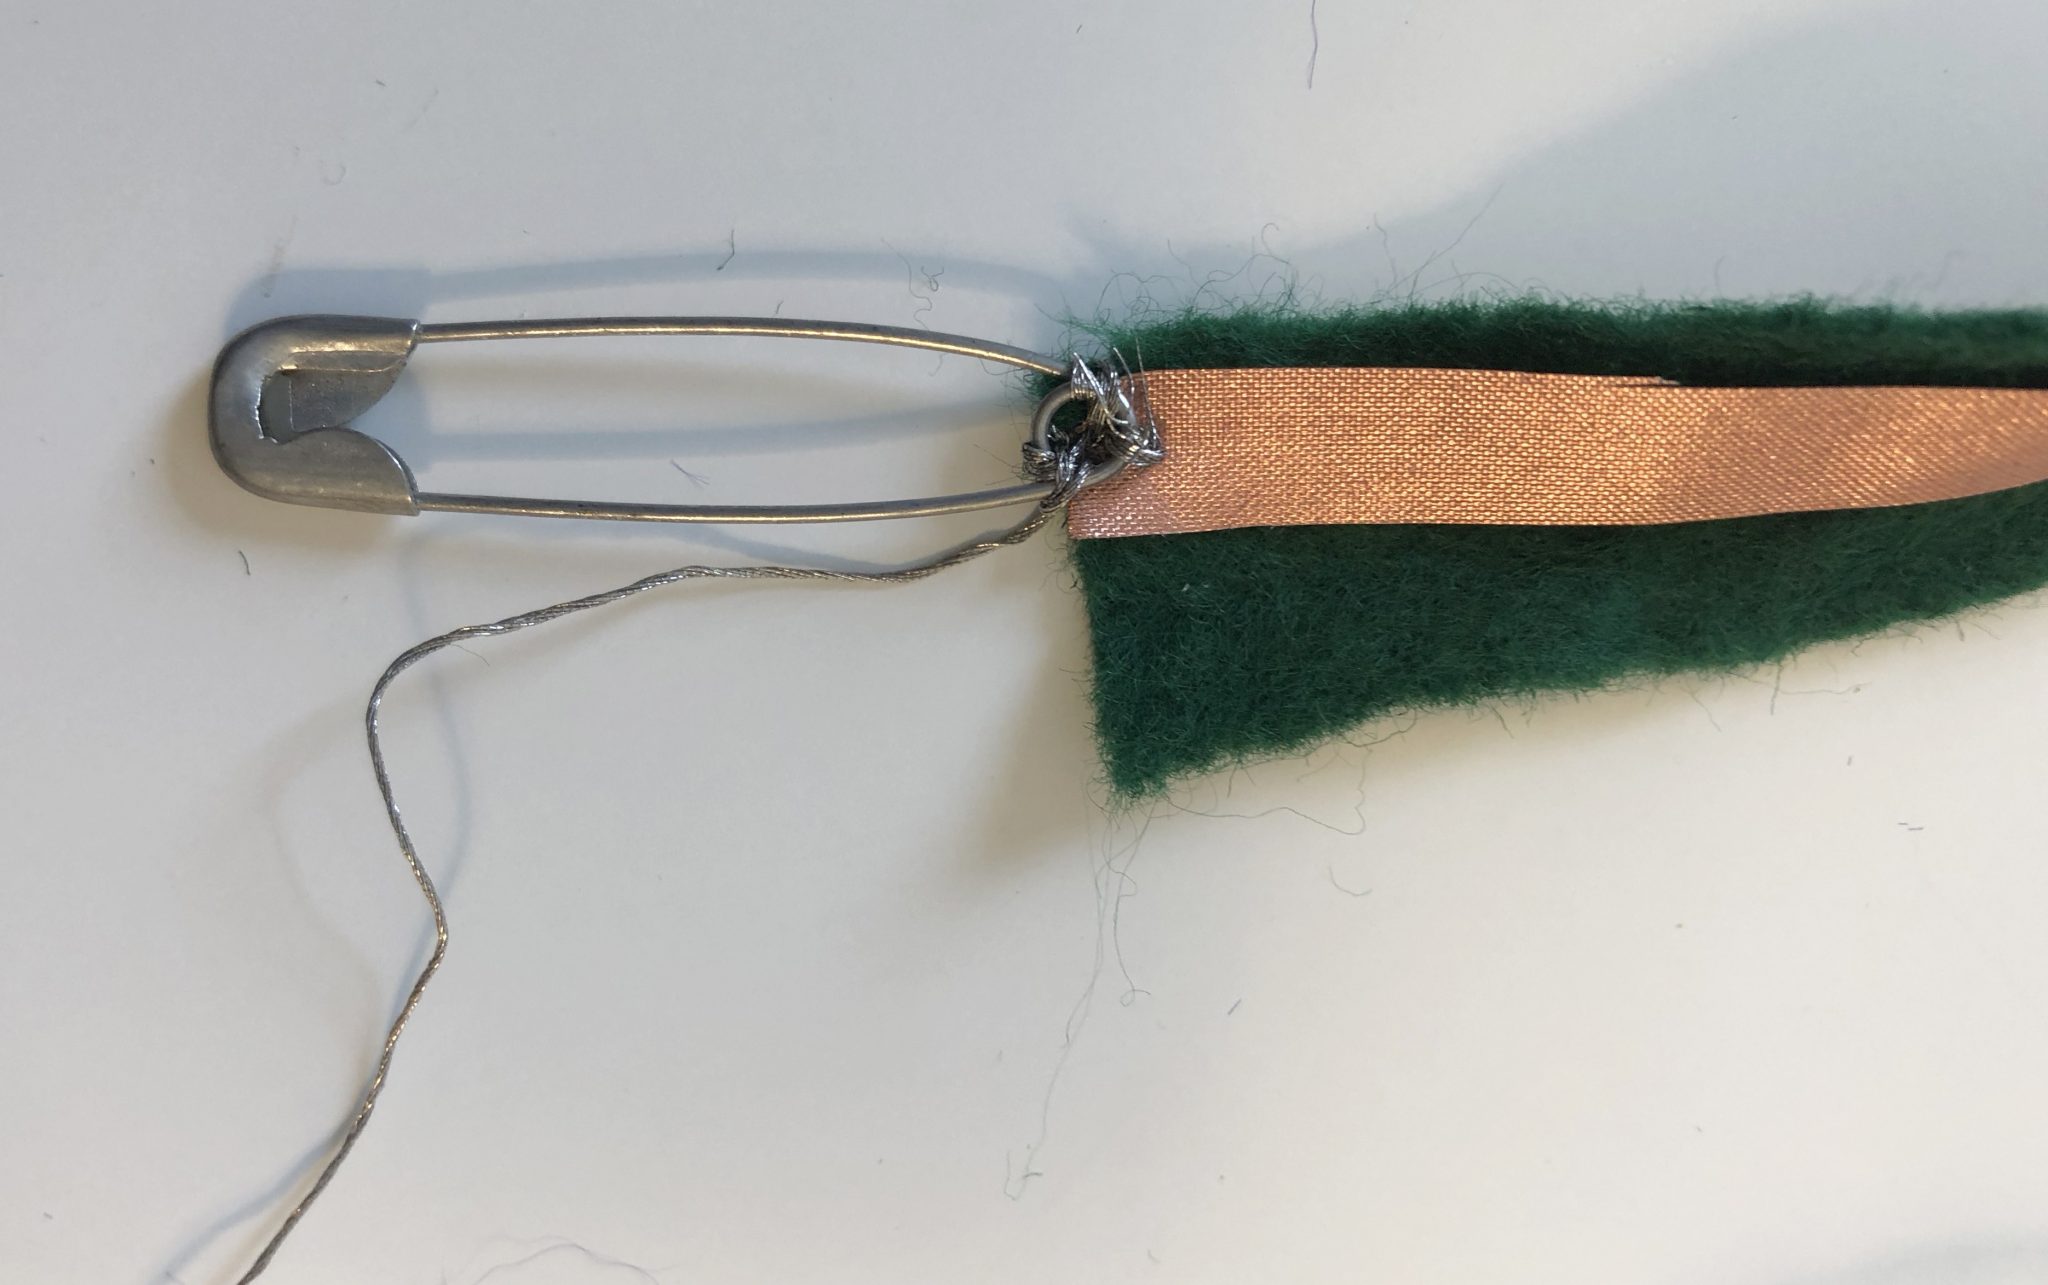
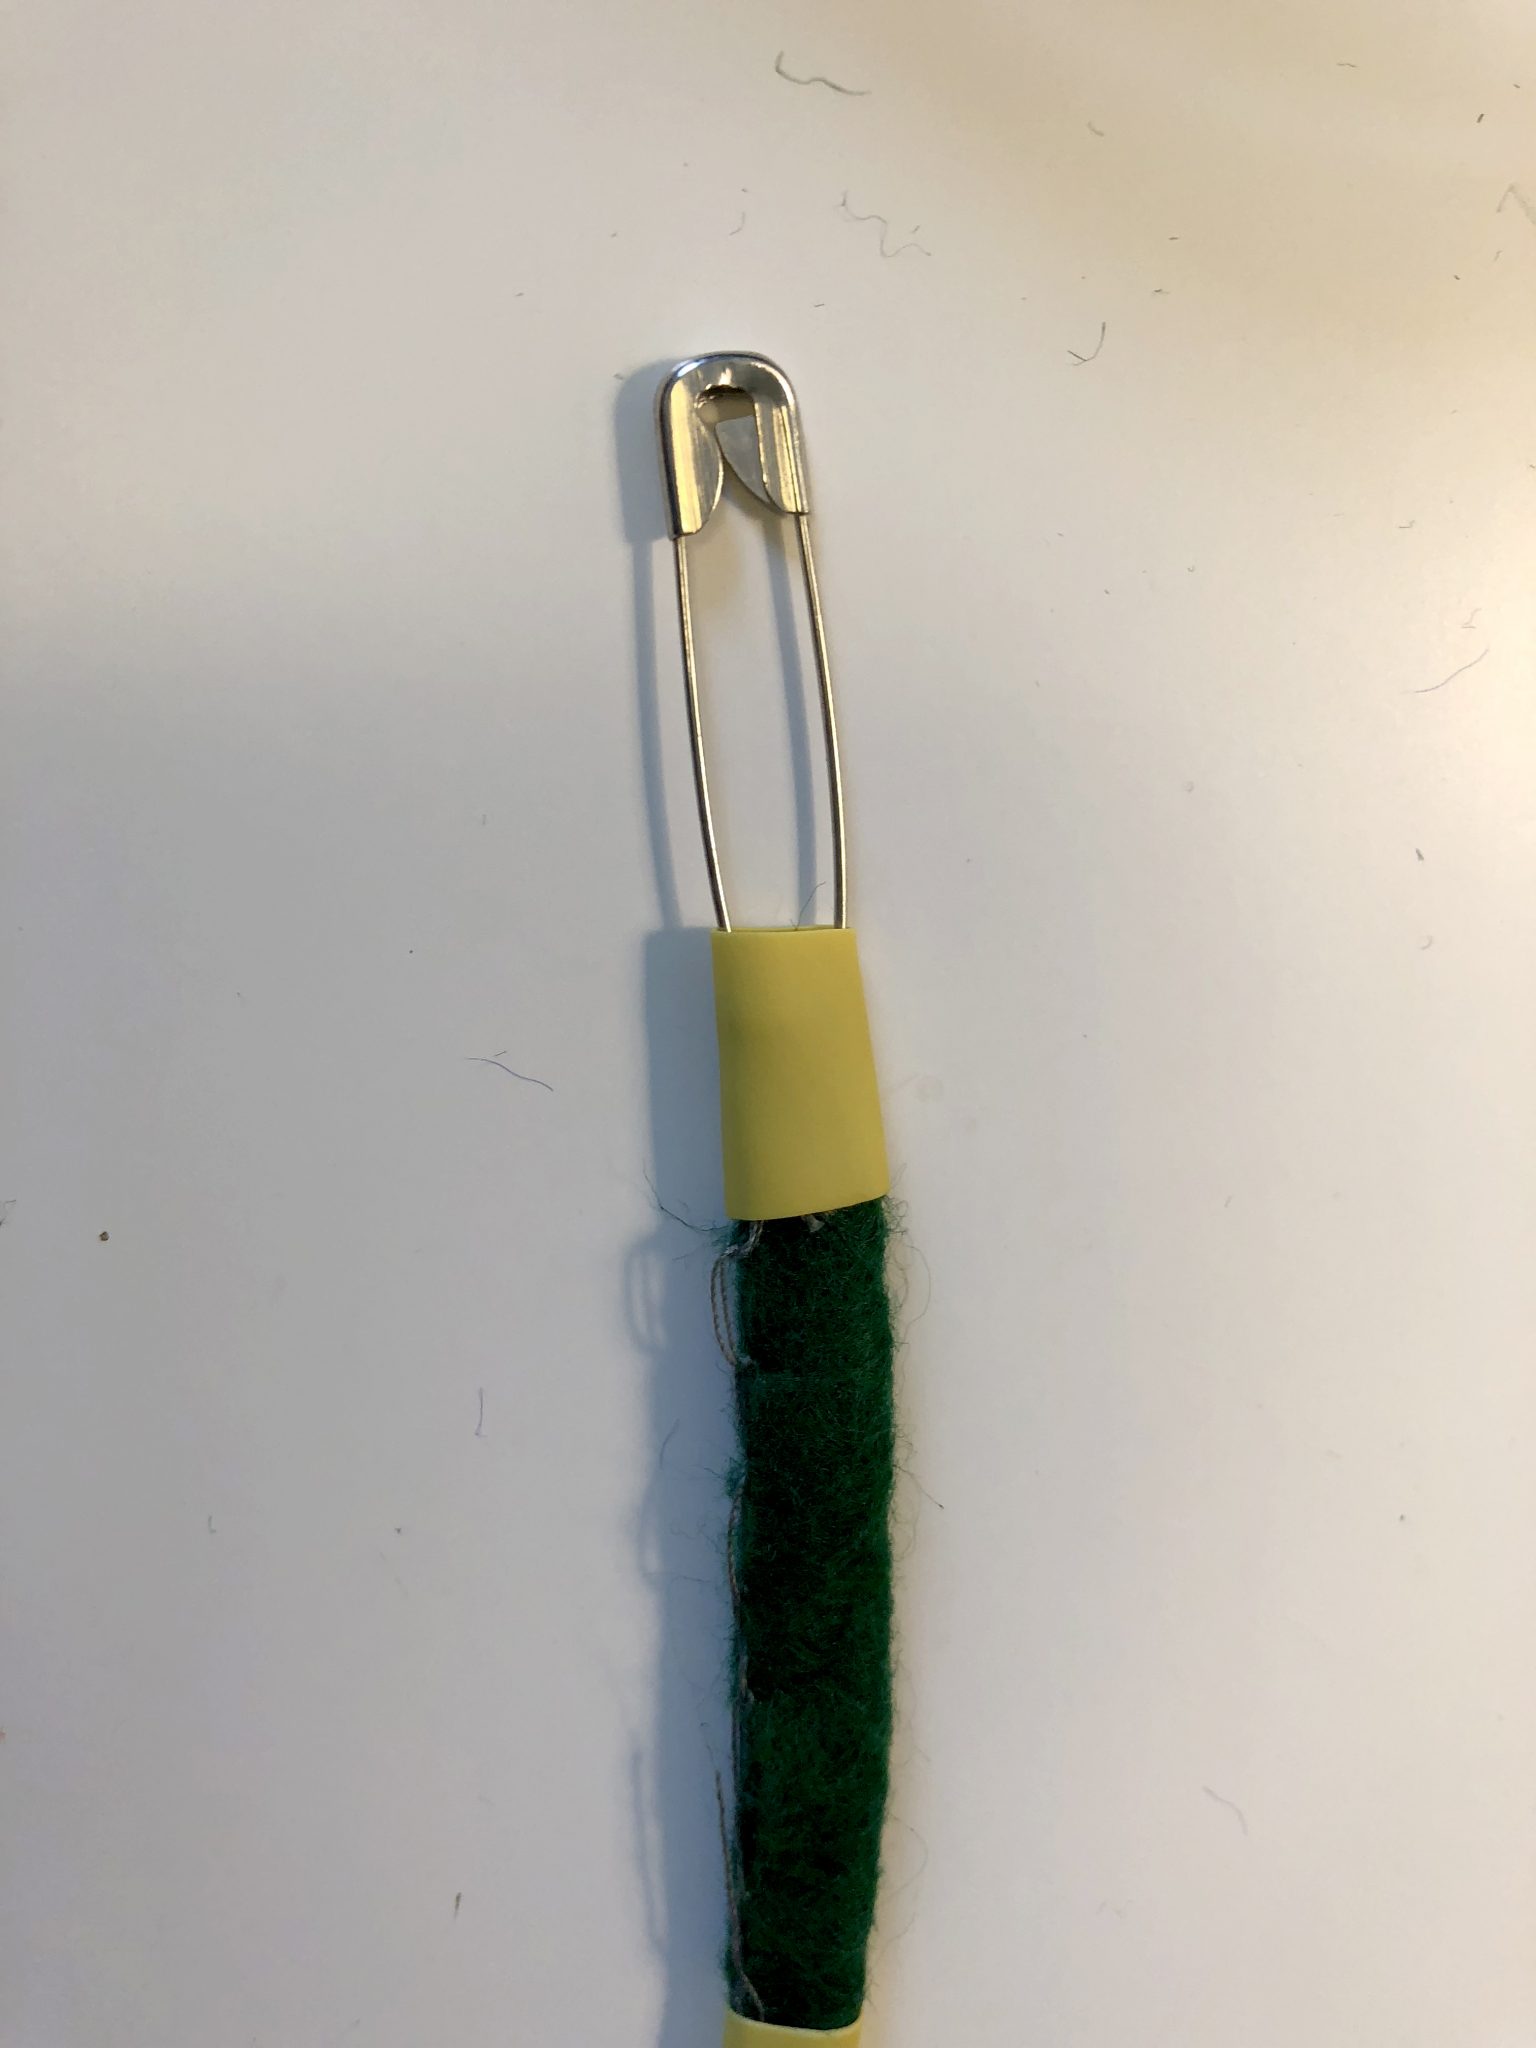
I also decided to try different ways to make the swatch and I choose the one that worked better. Here an example using conductive thread edges.


TIP: I found easier to learn crochet by watching a video with the basics and then going back to the written instructions. The combination of both made me understand everything better.

Alice in the Wonderland – Week 2 – Carla Molins


I’ve always loved Alice and the microworlds in which reality and scale always are reversed!

At first, I tried cutting curves but it didn’t work as expected, so I decided to think of other options. I’ve never used copper tape before and I wanted to try different arrangements. I wanted the lines to come from the bottle as if they were tears.

I created a bigger switch to be able to play around with the thinner connections and being able to blink those LED as if they were dropping.

I enjoyed working with this material, but I had the sense that it needs some practice to make really clean and polished cuts.