I tried to use many different techniques for making connectors. I found beads is a very pretty enclosure or the conductive threads and are quite easy to use.
I tried to use many different techniques for making connectors. I found beads is a very pretty enclosure or the conductive threads and are quite easy to use.
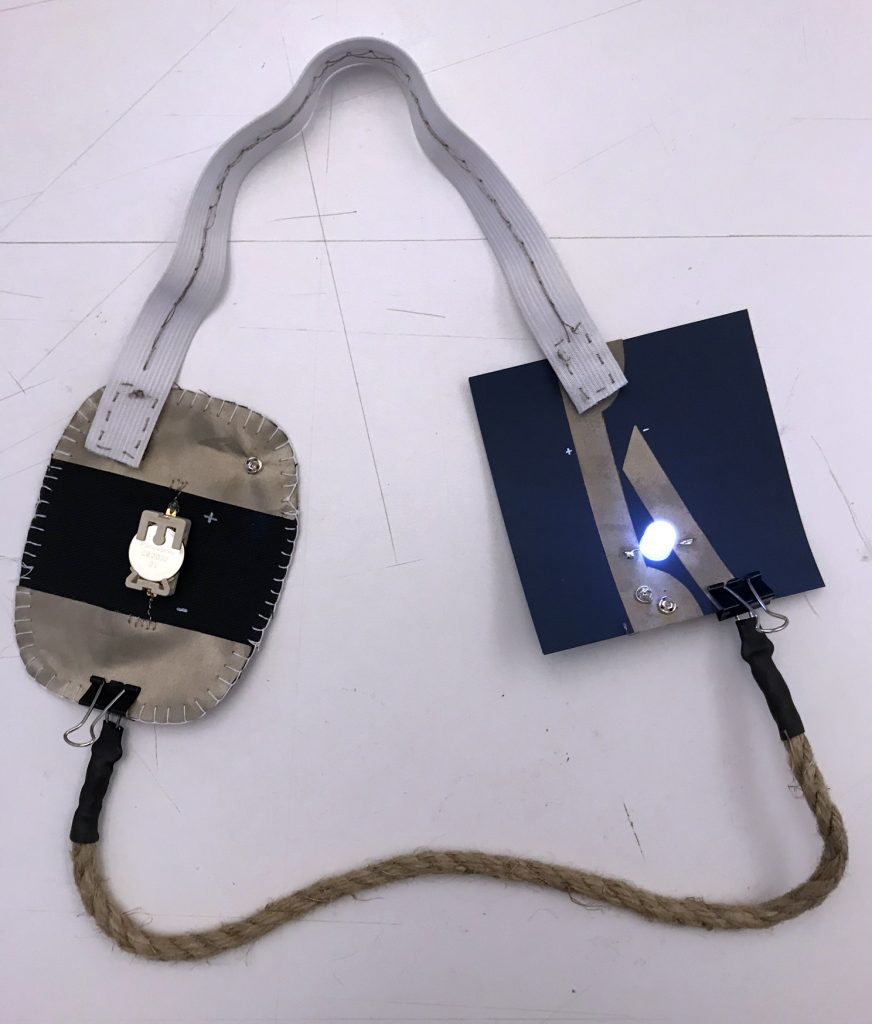
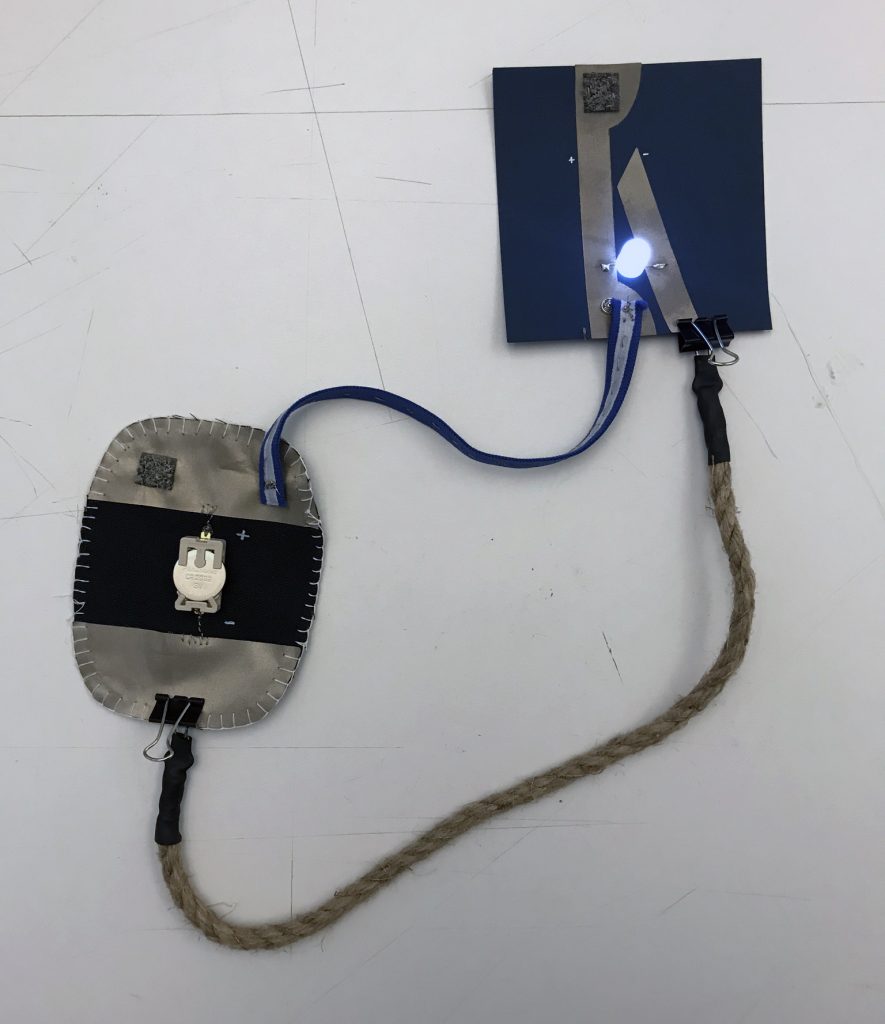
2 Nodes : 1 for battery / 1 for light

I wanted my nodes to be small and simple. I used one big light and conductive thread, and conductive tape/fabric.
I tested my circuit with nodes and a switch.
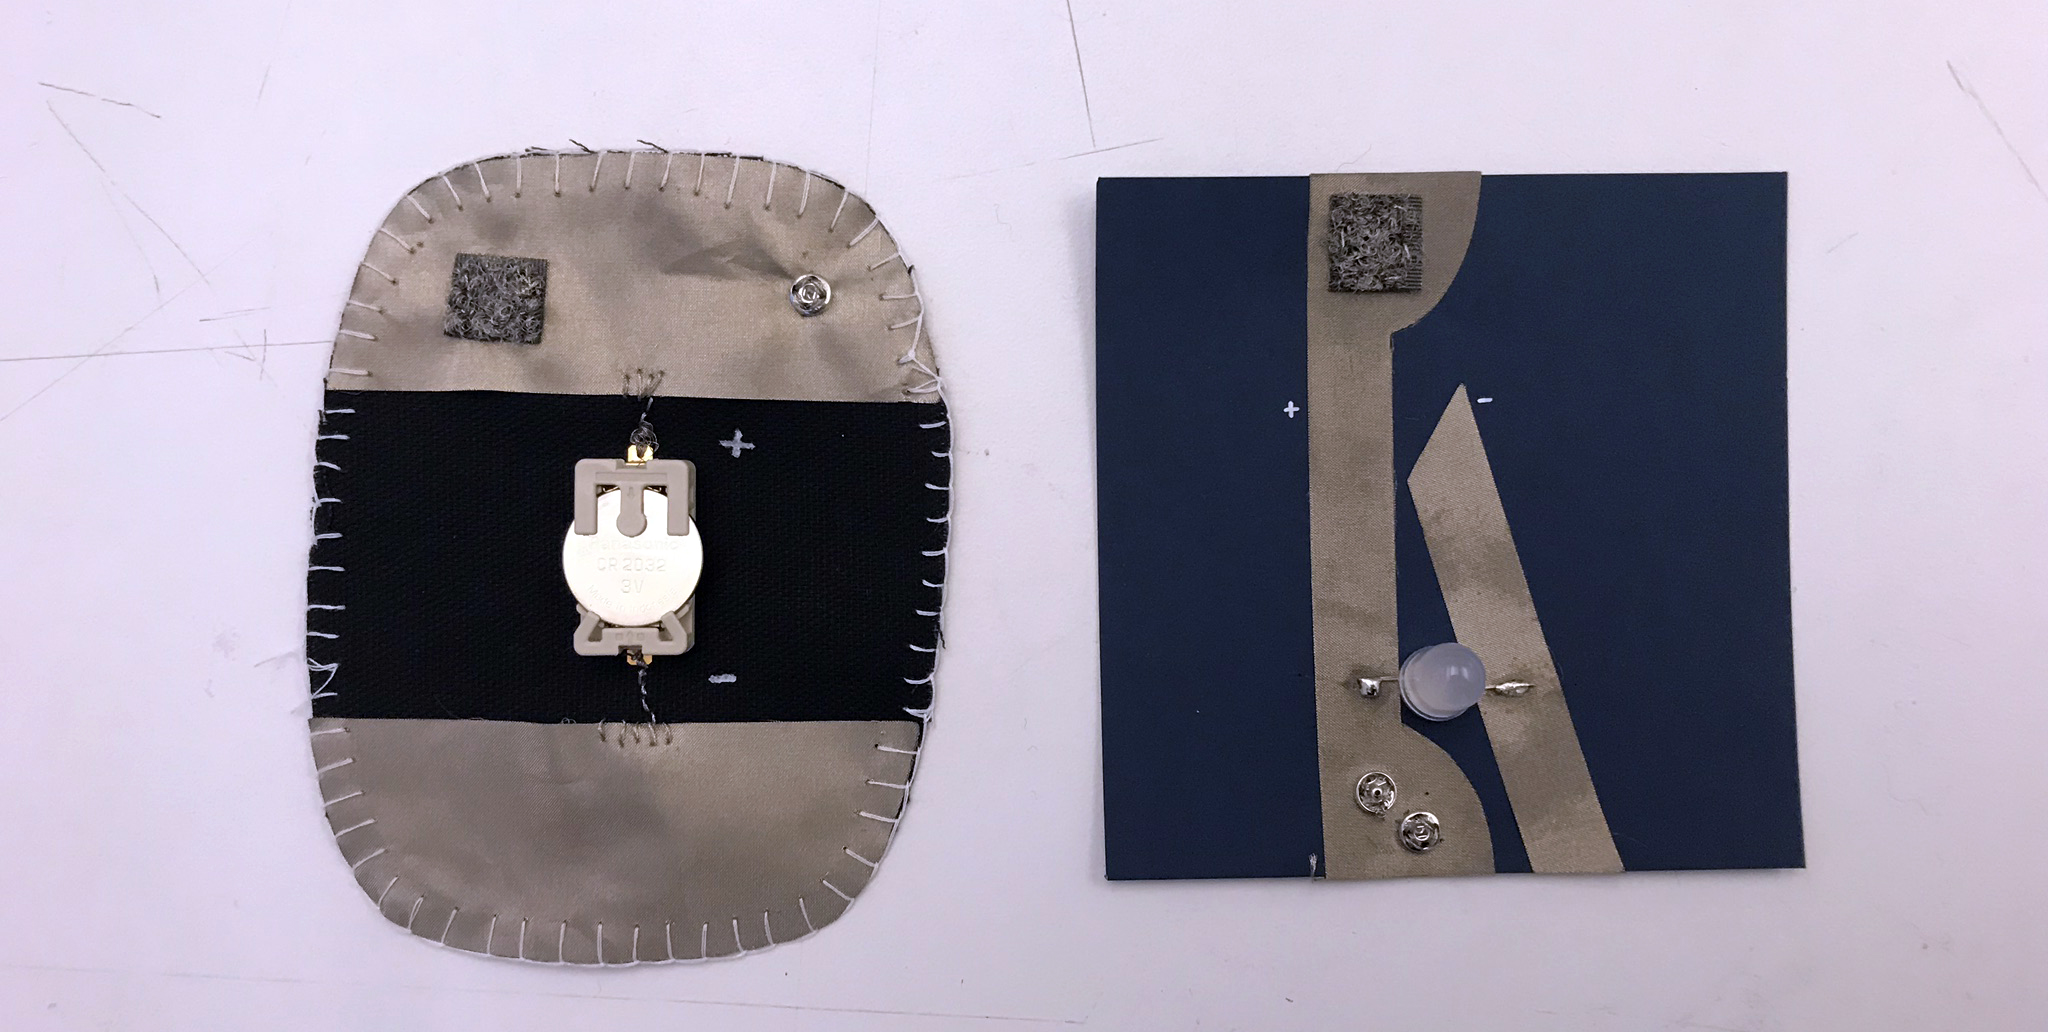
Nodes & Connectors
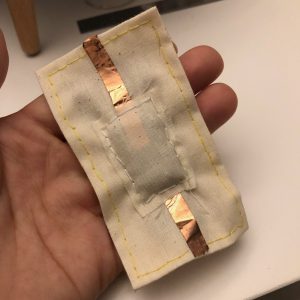
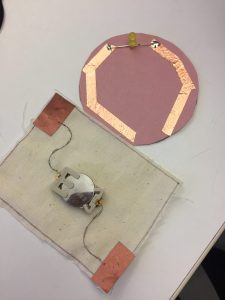
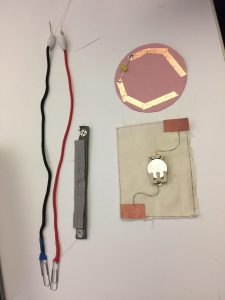
I built my two nodes- one with the battery with fabric and the one with LED with paper. I used the conductive thread and conductive fabric to make the battery node. I also sewed a lining at the edges of the rectangle fabric. For the LED node, I simply used a conductive tape and soldered the LED on it.

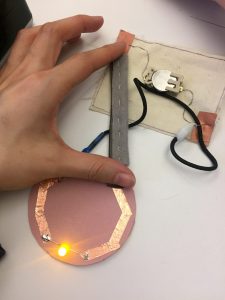
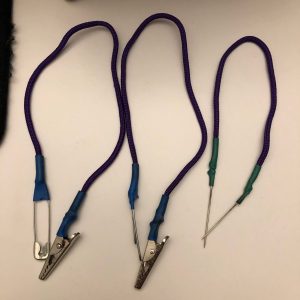
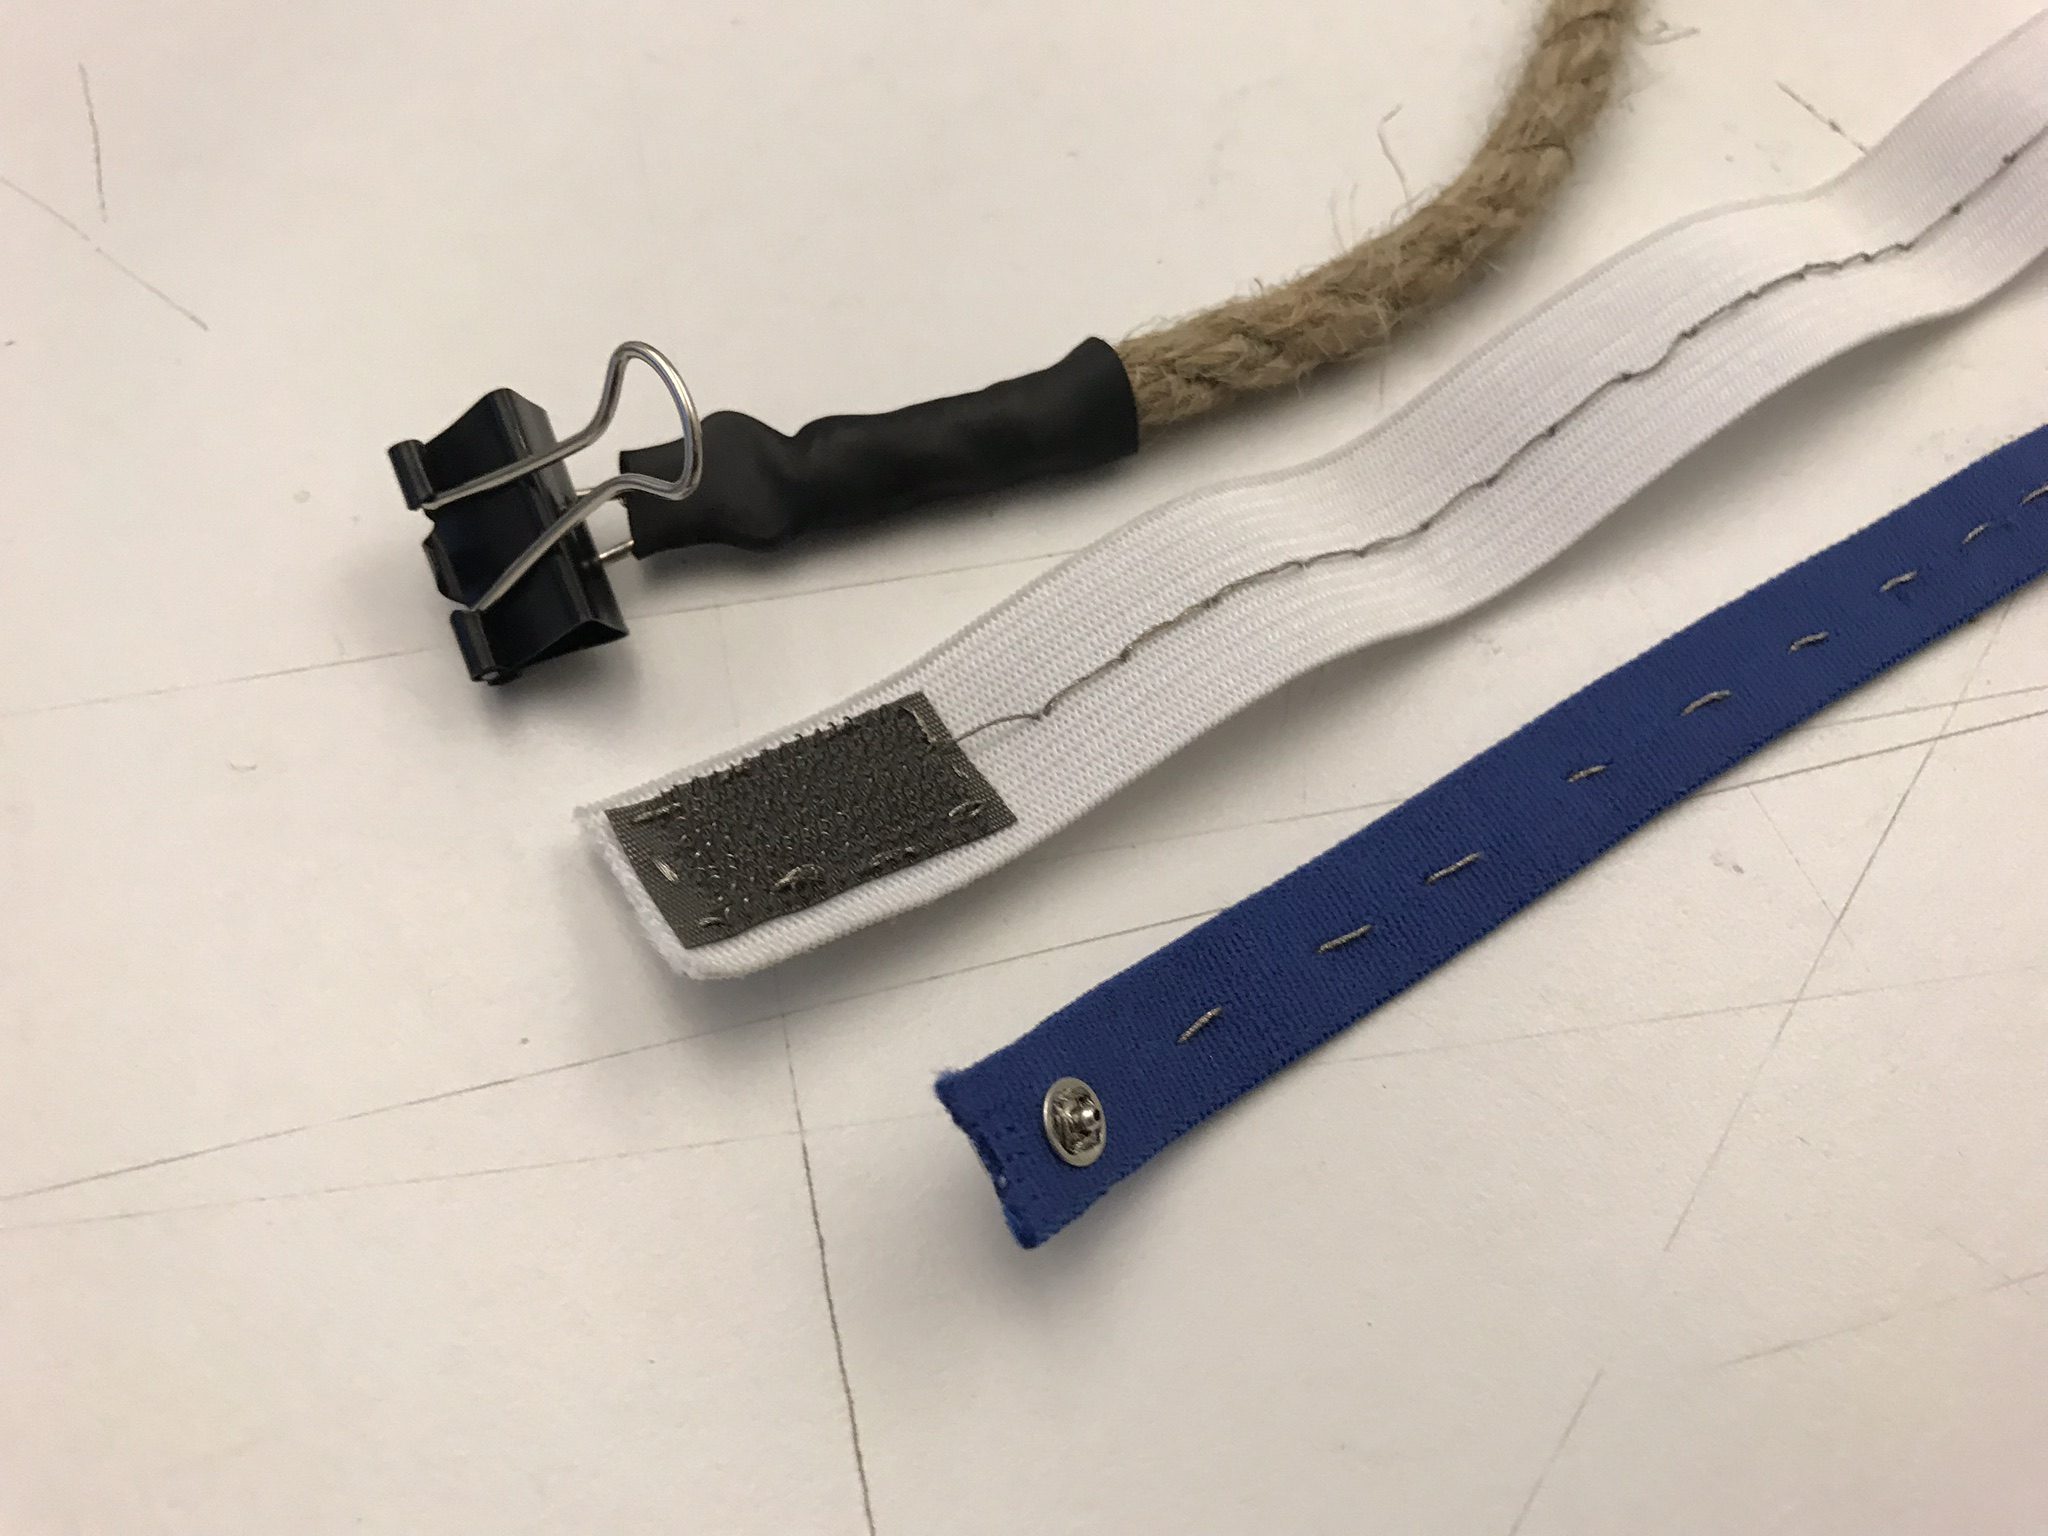
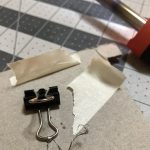
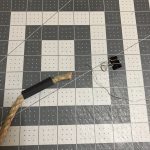
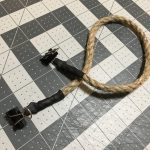
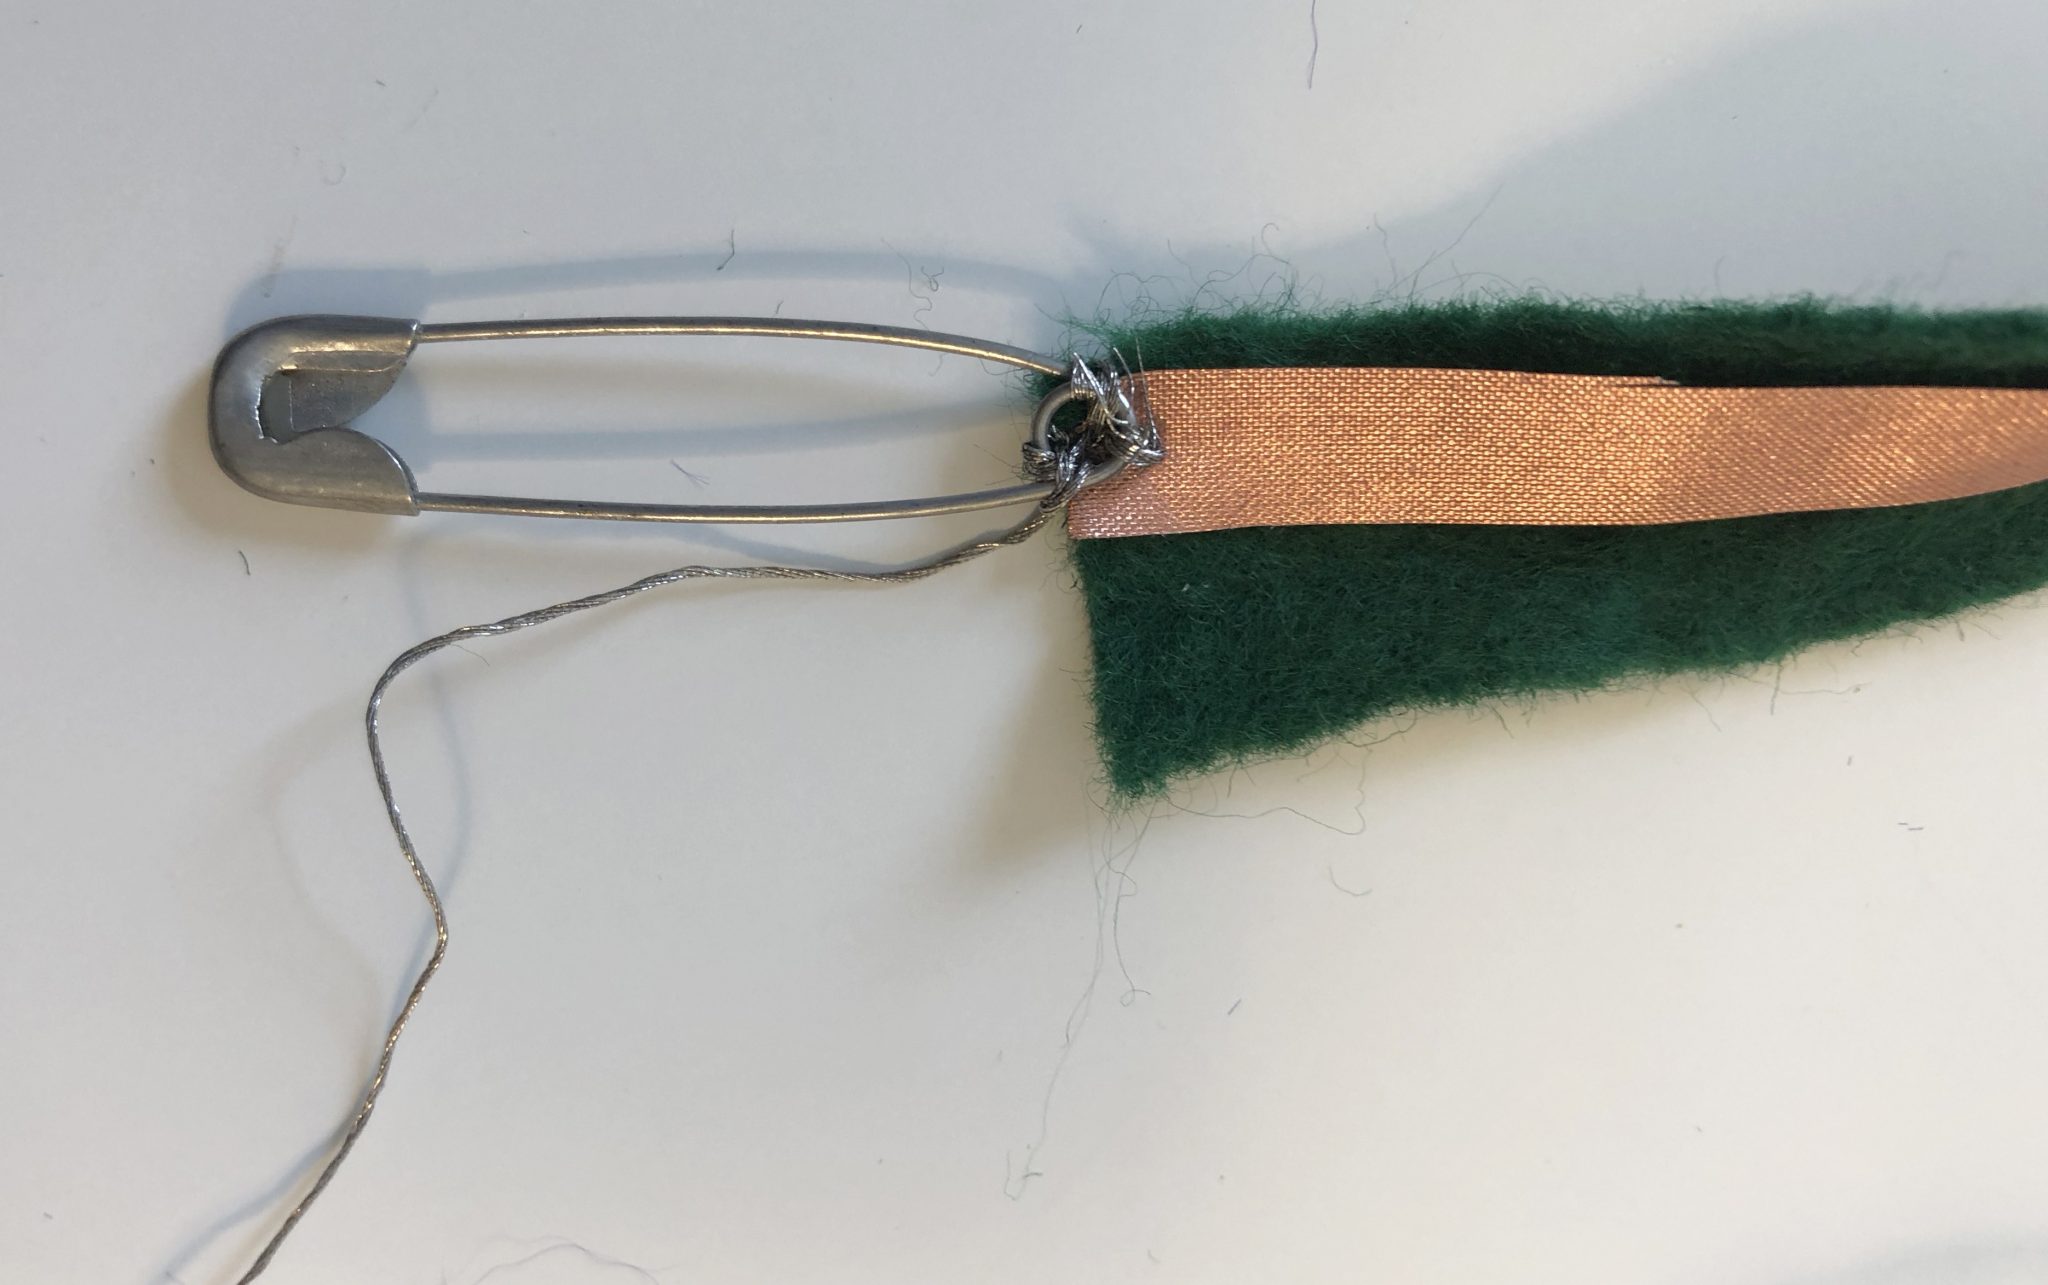
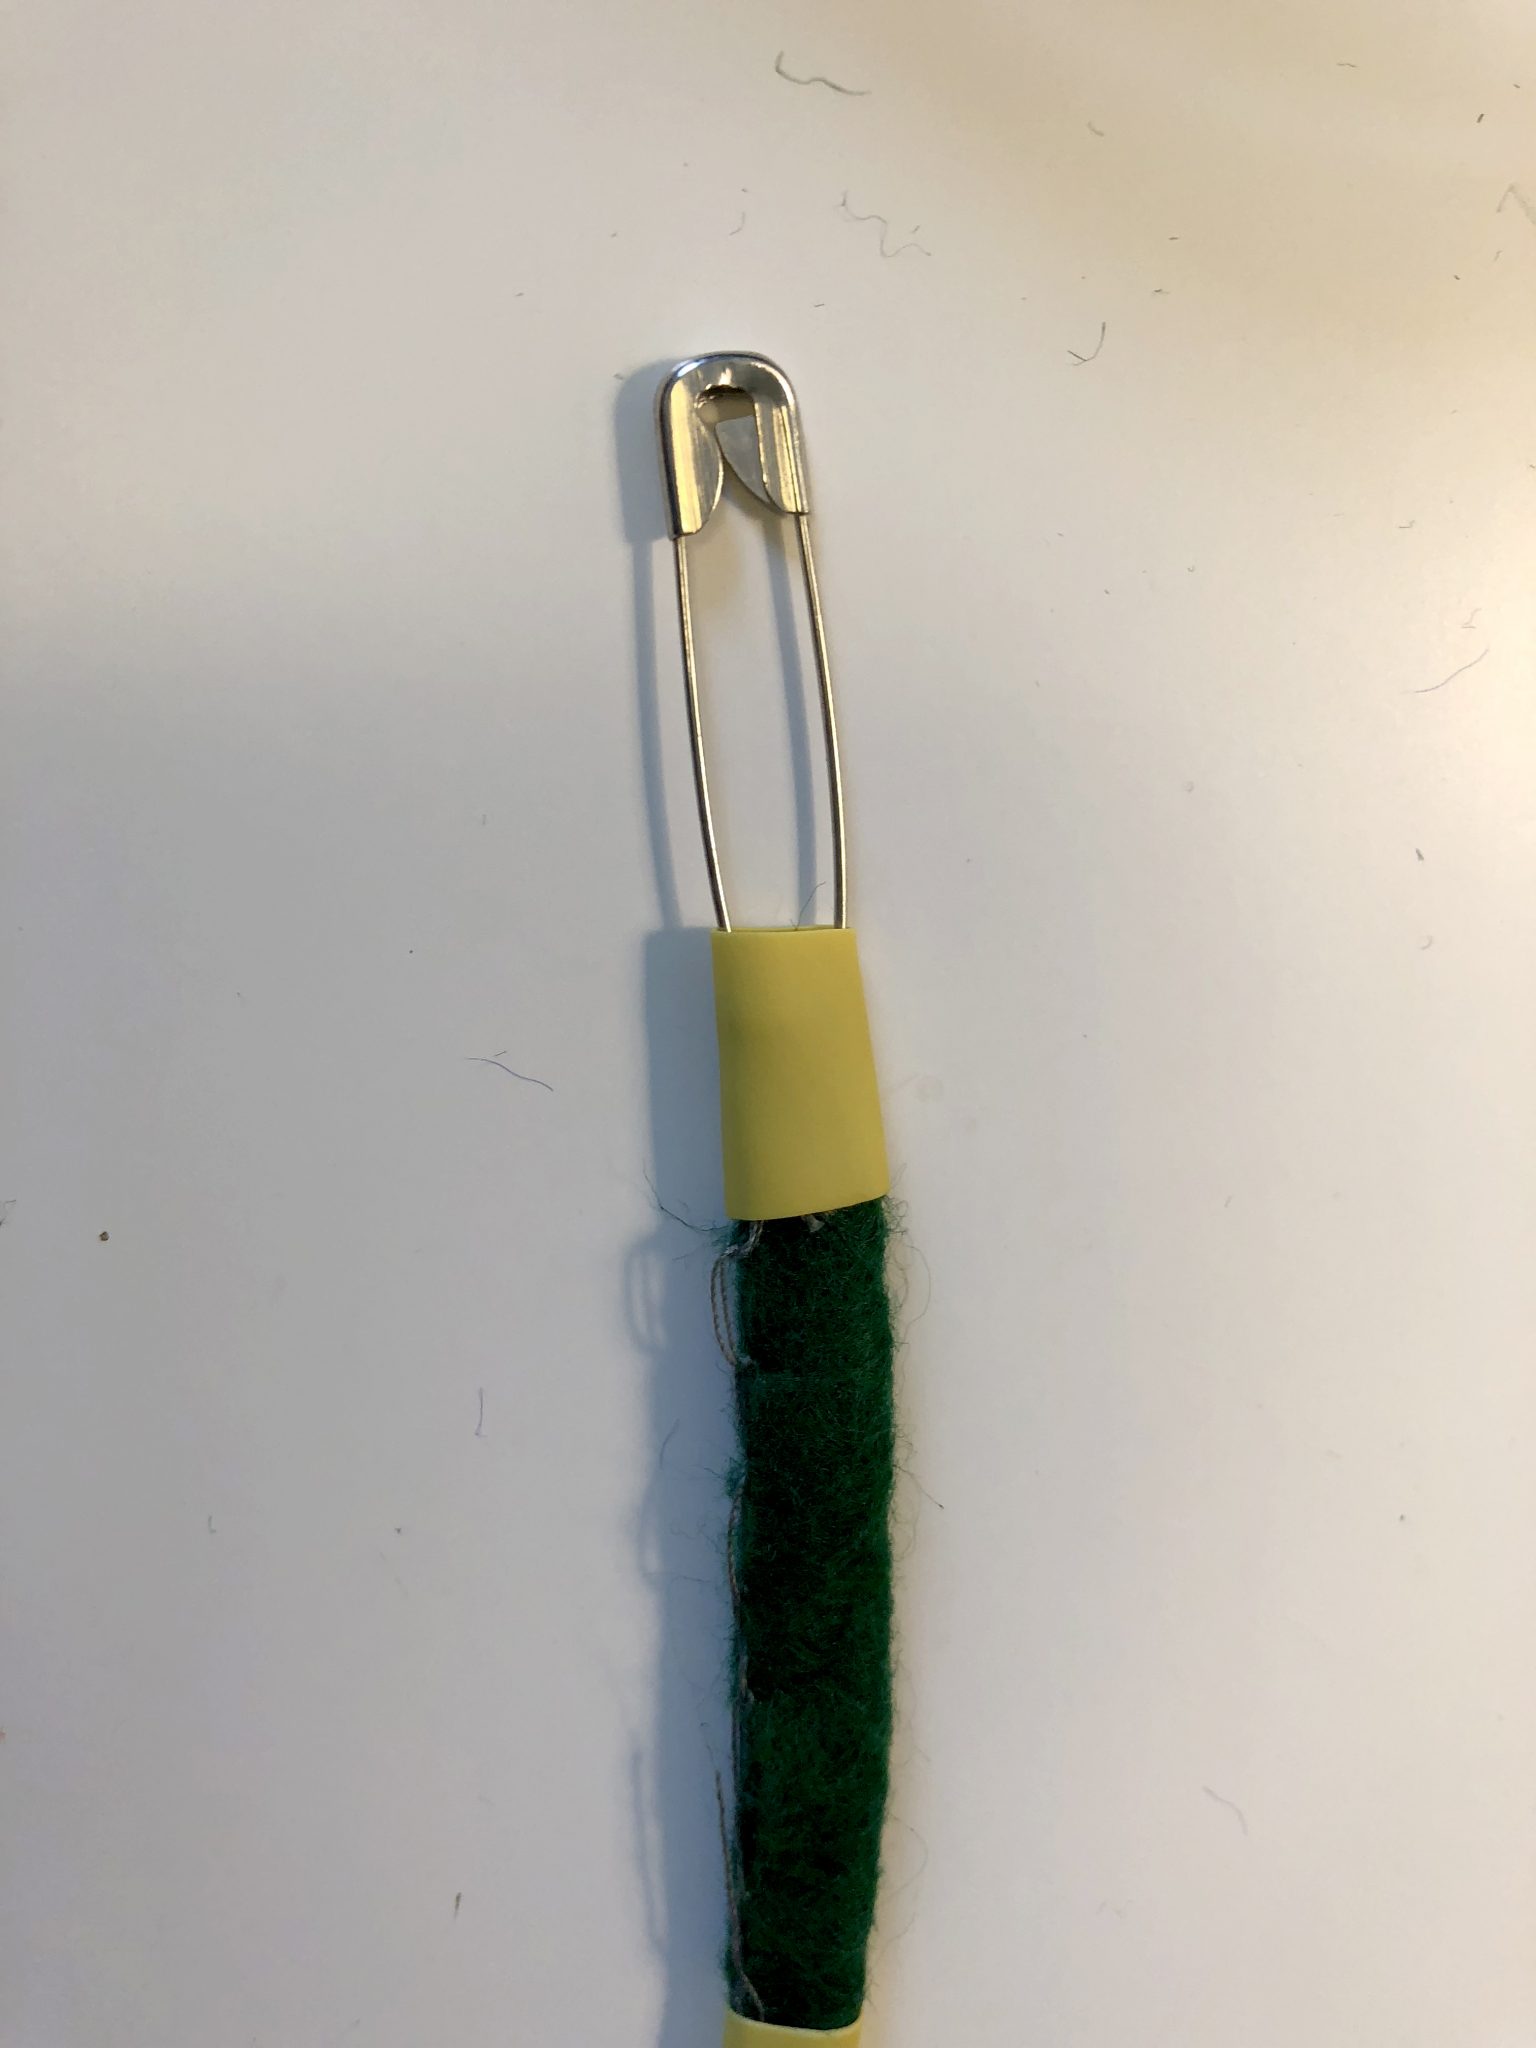
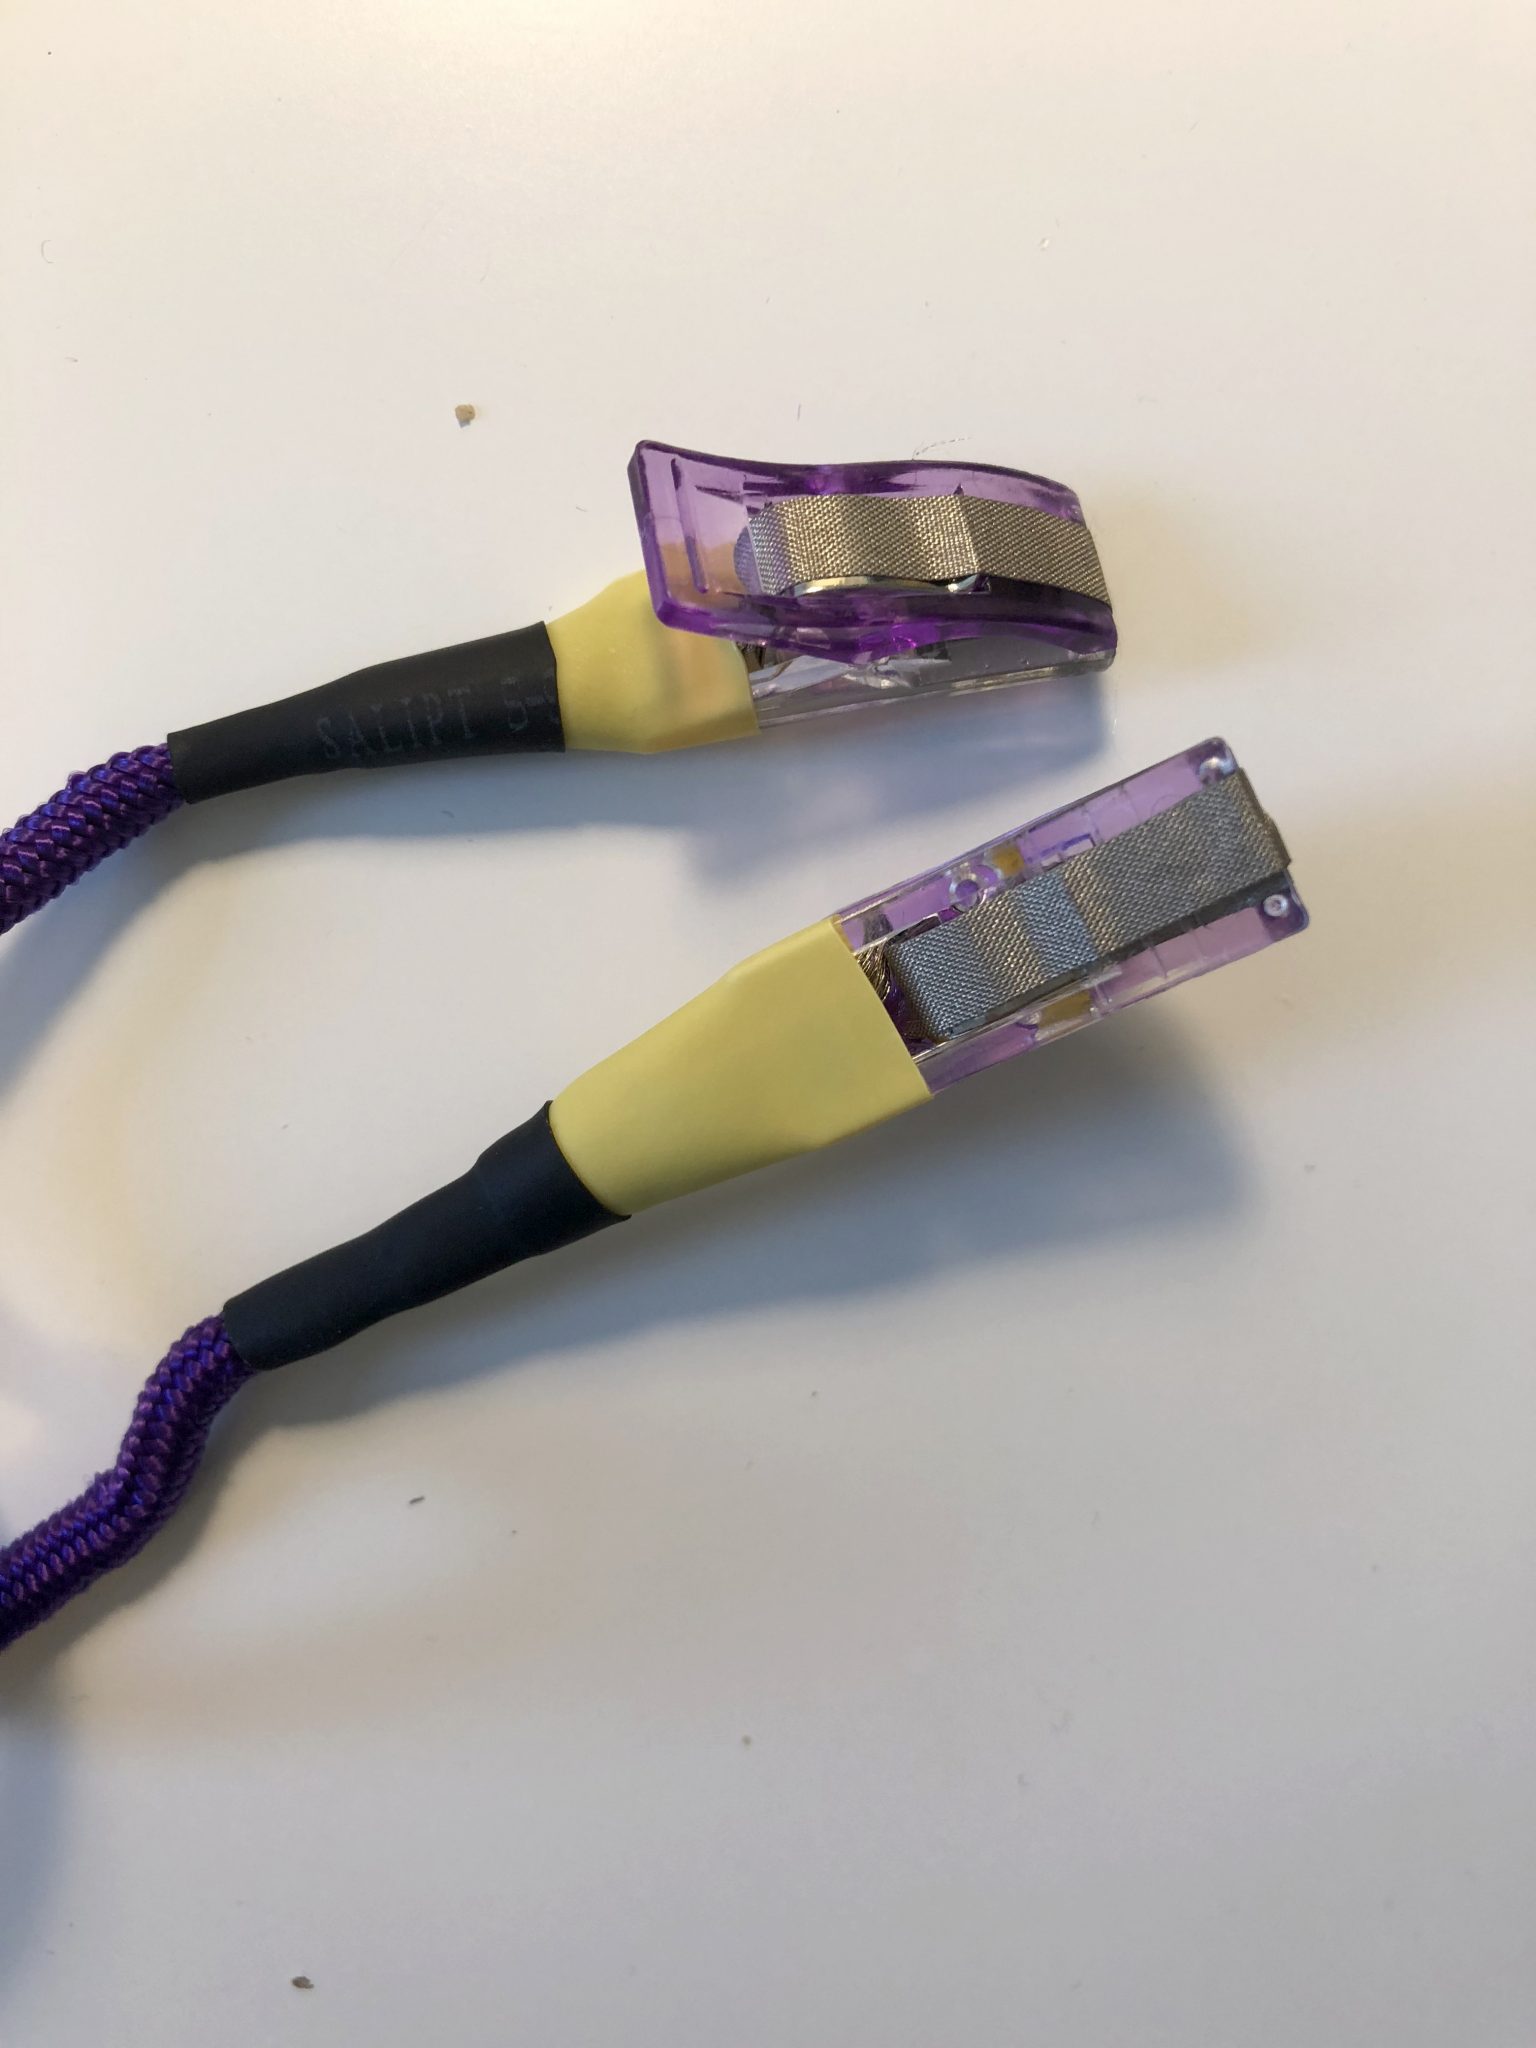
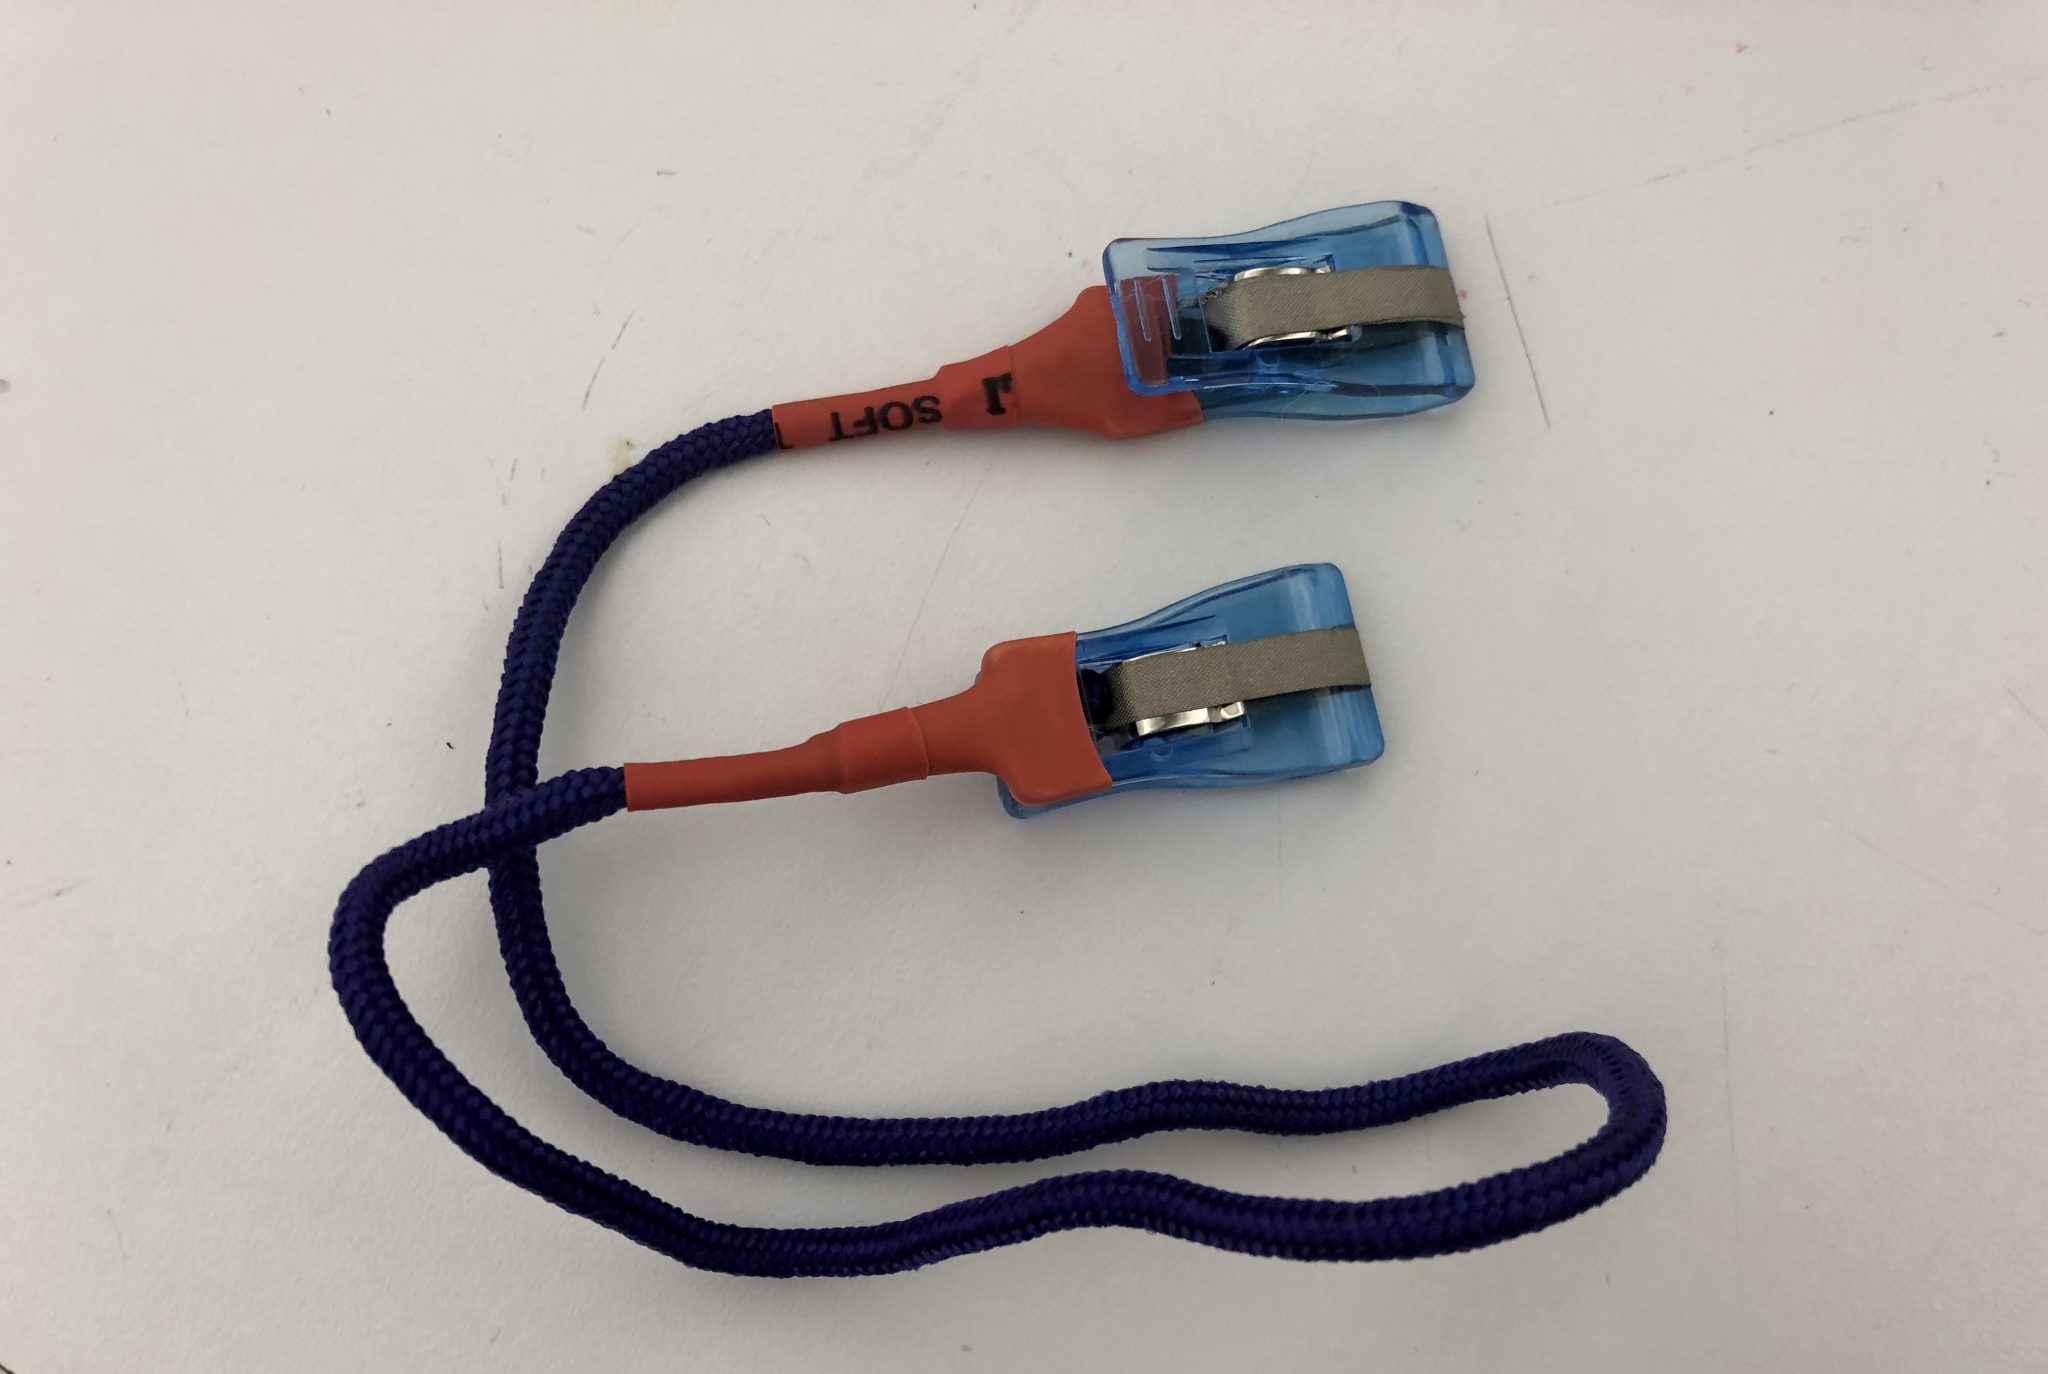
Two out of the three connectors I used the conductive thread in the middle of the rope and solder it at the ends onto either a paperclip. The other connector I used a stretchy conductive fabric and sewed a felt over it to make it look warmer and cuter. I used the sewable meta snaps in the ends.
A tool I would like to have in class
I would love to have a desk-sized ironing device where you can put your conductive fabric and the fabric you want to attach it to and just iron it quickly to it. You could leave it on and used it whenever without always having to heat the iron up.
Nodes and Connectors
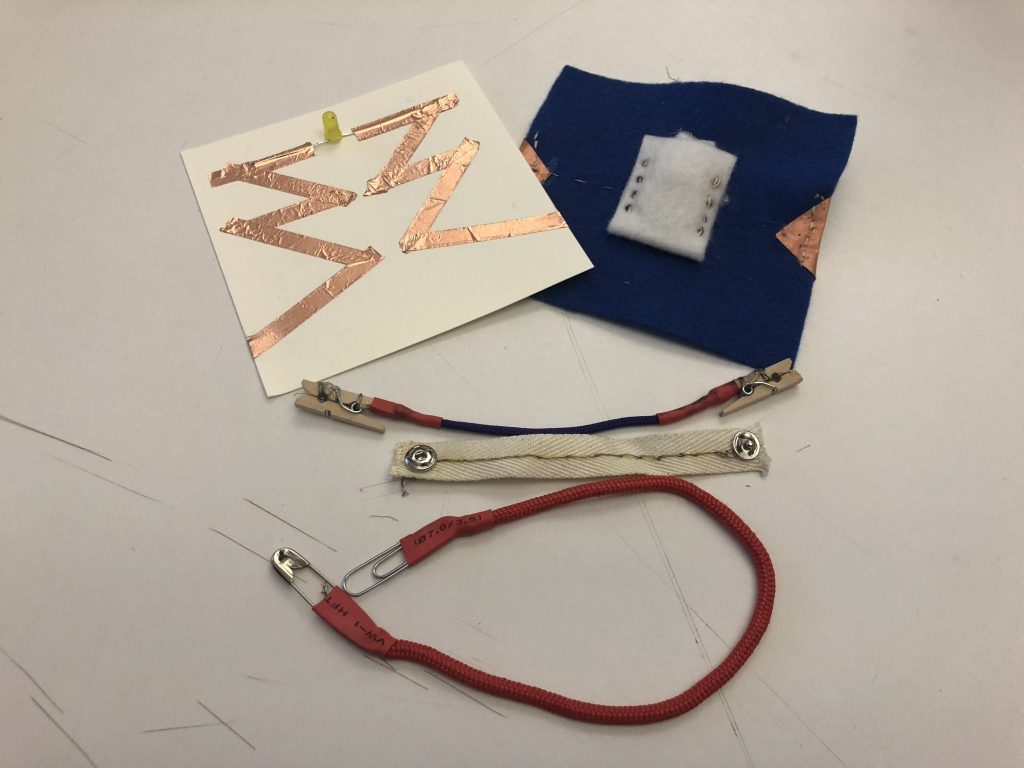
The two nodes I made this week are made with paper and felt. I used the copper tape, one piece of cardstock paper and a yellow LED to make the LED node. For the battery node, I used the conductive thread, the conductive fabric, a small piece of felt to make the battery holder, and a bigger piece of felt.
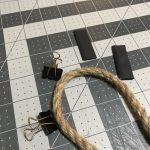
The three connectors are using the same structure in the middle – the conductive thread either sewed to a piece of fabric or inside the thick knitted thread. I explored different kinds of objects in the junction part. I found a small bag of tiny wood clips at the crafting store, which became a part of my first connector. The second one is made with the sewable meta snaps. In the third one, I used the paper clip and the pin.
A tool I would like to have in this class
I wonder if there is an embroidery hoop that can be changed to different shapes so that all kinds of size of materials can be fixed to it. Most of the hoops are either circular or in an oval shape, but since the shape we created sometimes can be really random, more flexibility here would be great. 
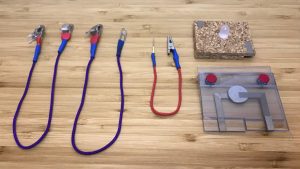
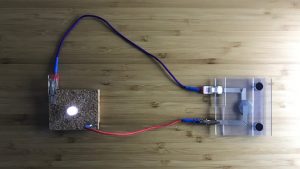
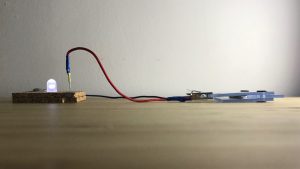
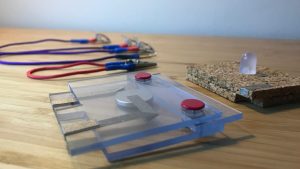
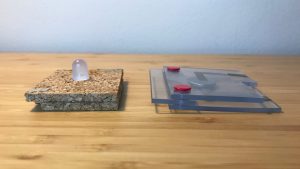
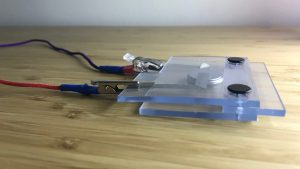
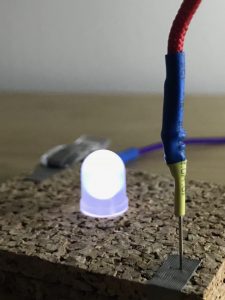
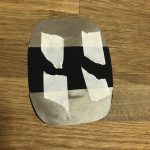
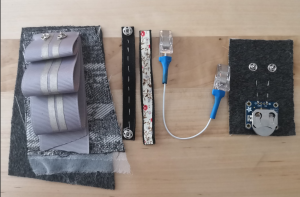
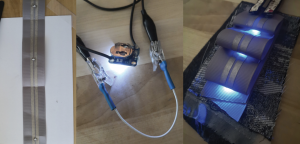
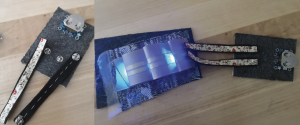
Node materials: two layers of cork with conductive fabric tape between, superglue, LED (node 1); soft plastic held together with push pins, visible conductive fabric tape circuits, removable cell battery (node 2)
Connector features: pin to gator clip (connector 1), plastic clip with conductive tape to plastic clip with conductive tape (connector 2), clip and plastic clip with conductive tape to paper clip (connector 3)
Design considerations: Short and long tape signify negative and positive ends when connecting to the LED node; these connecting points can be clipped onto or pushed into. Black and red pins help show positive and negative side of cell battery at a glance.
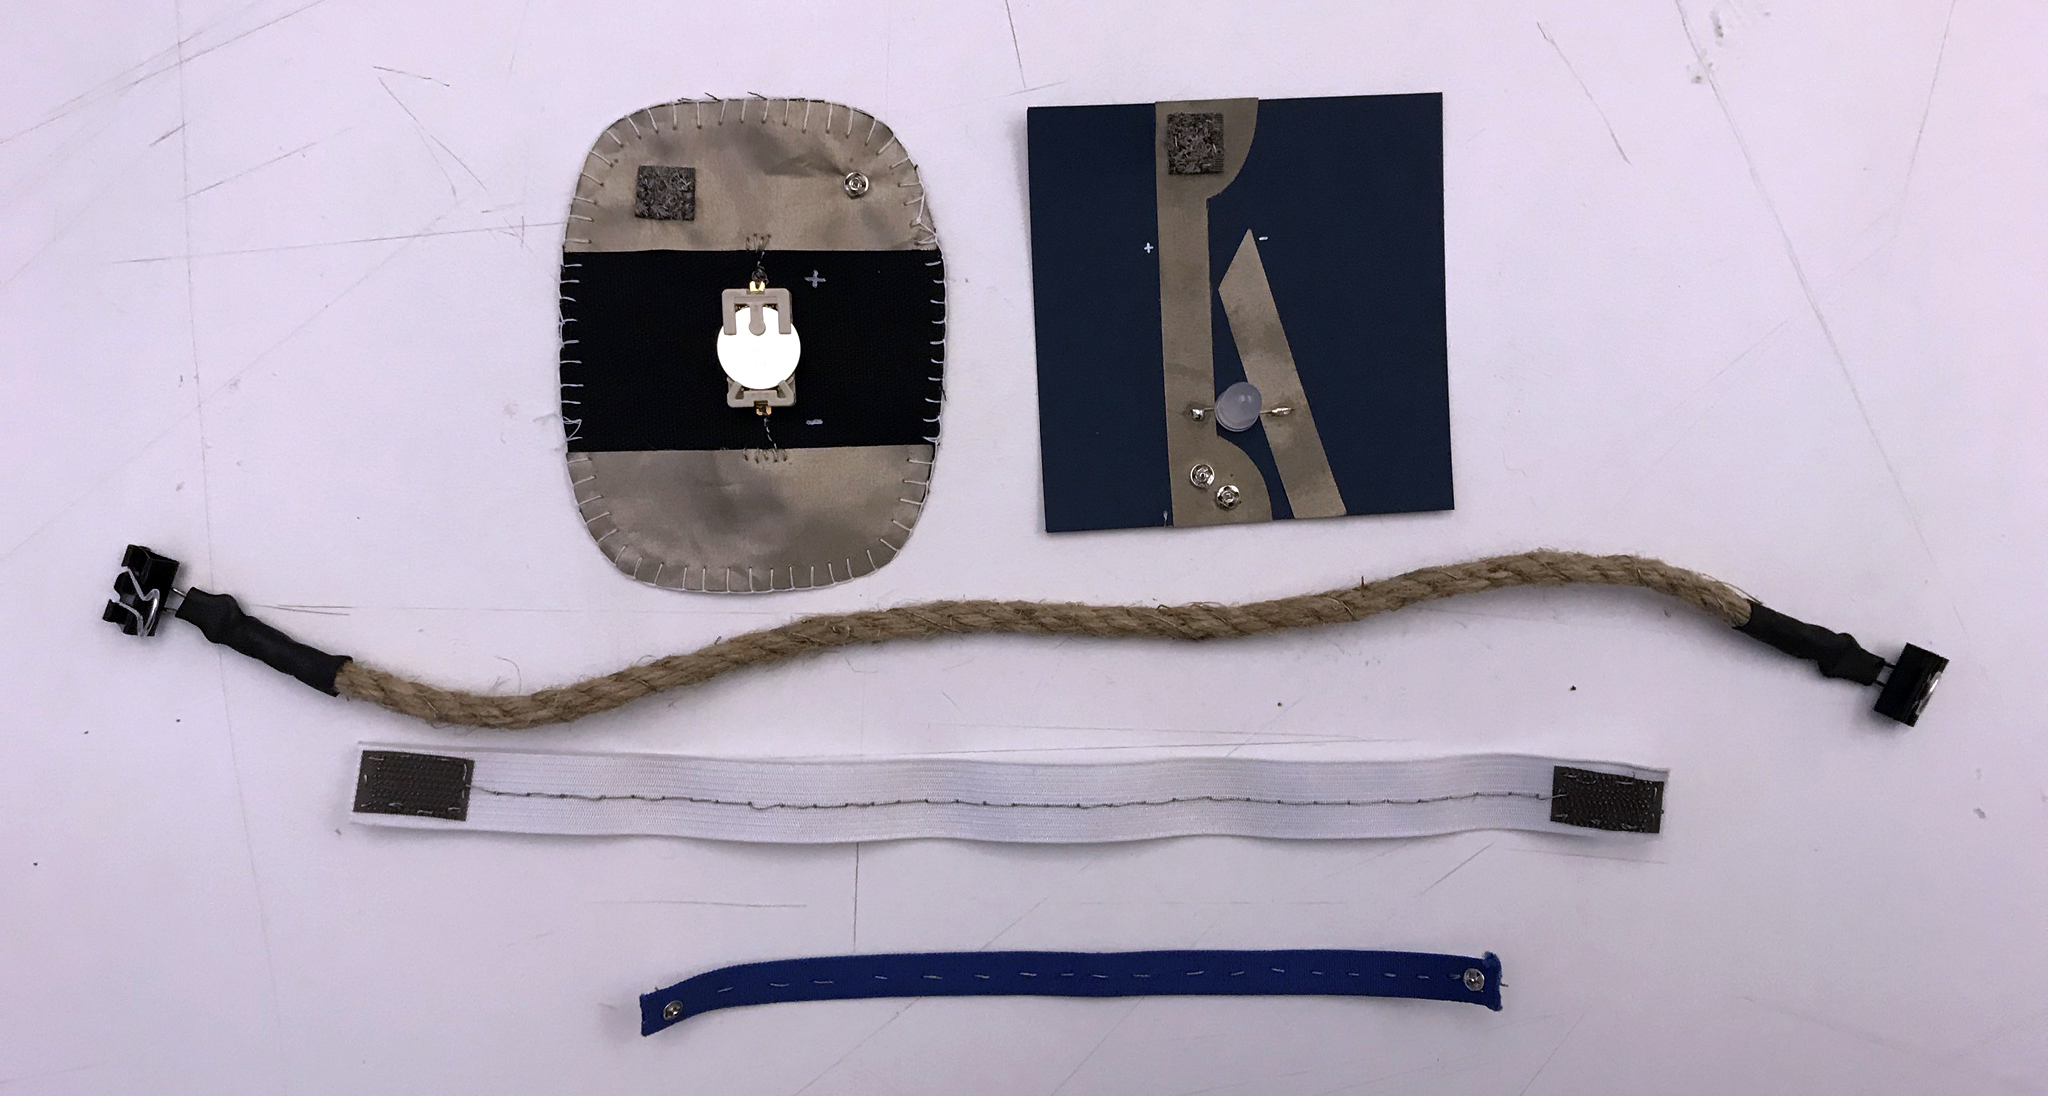
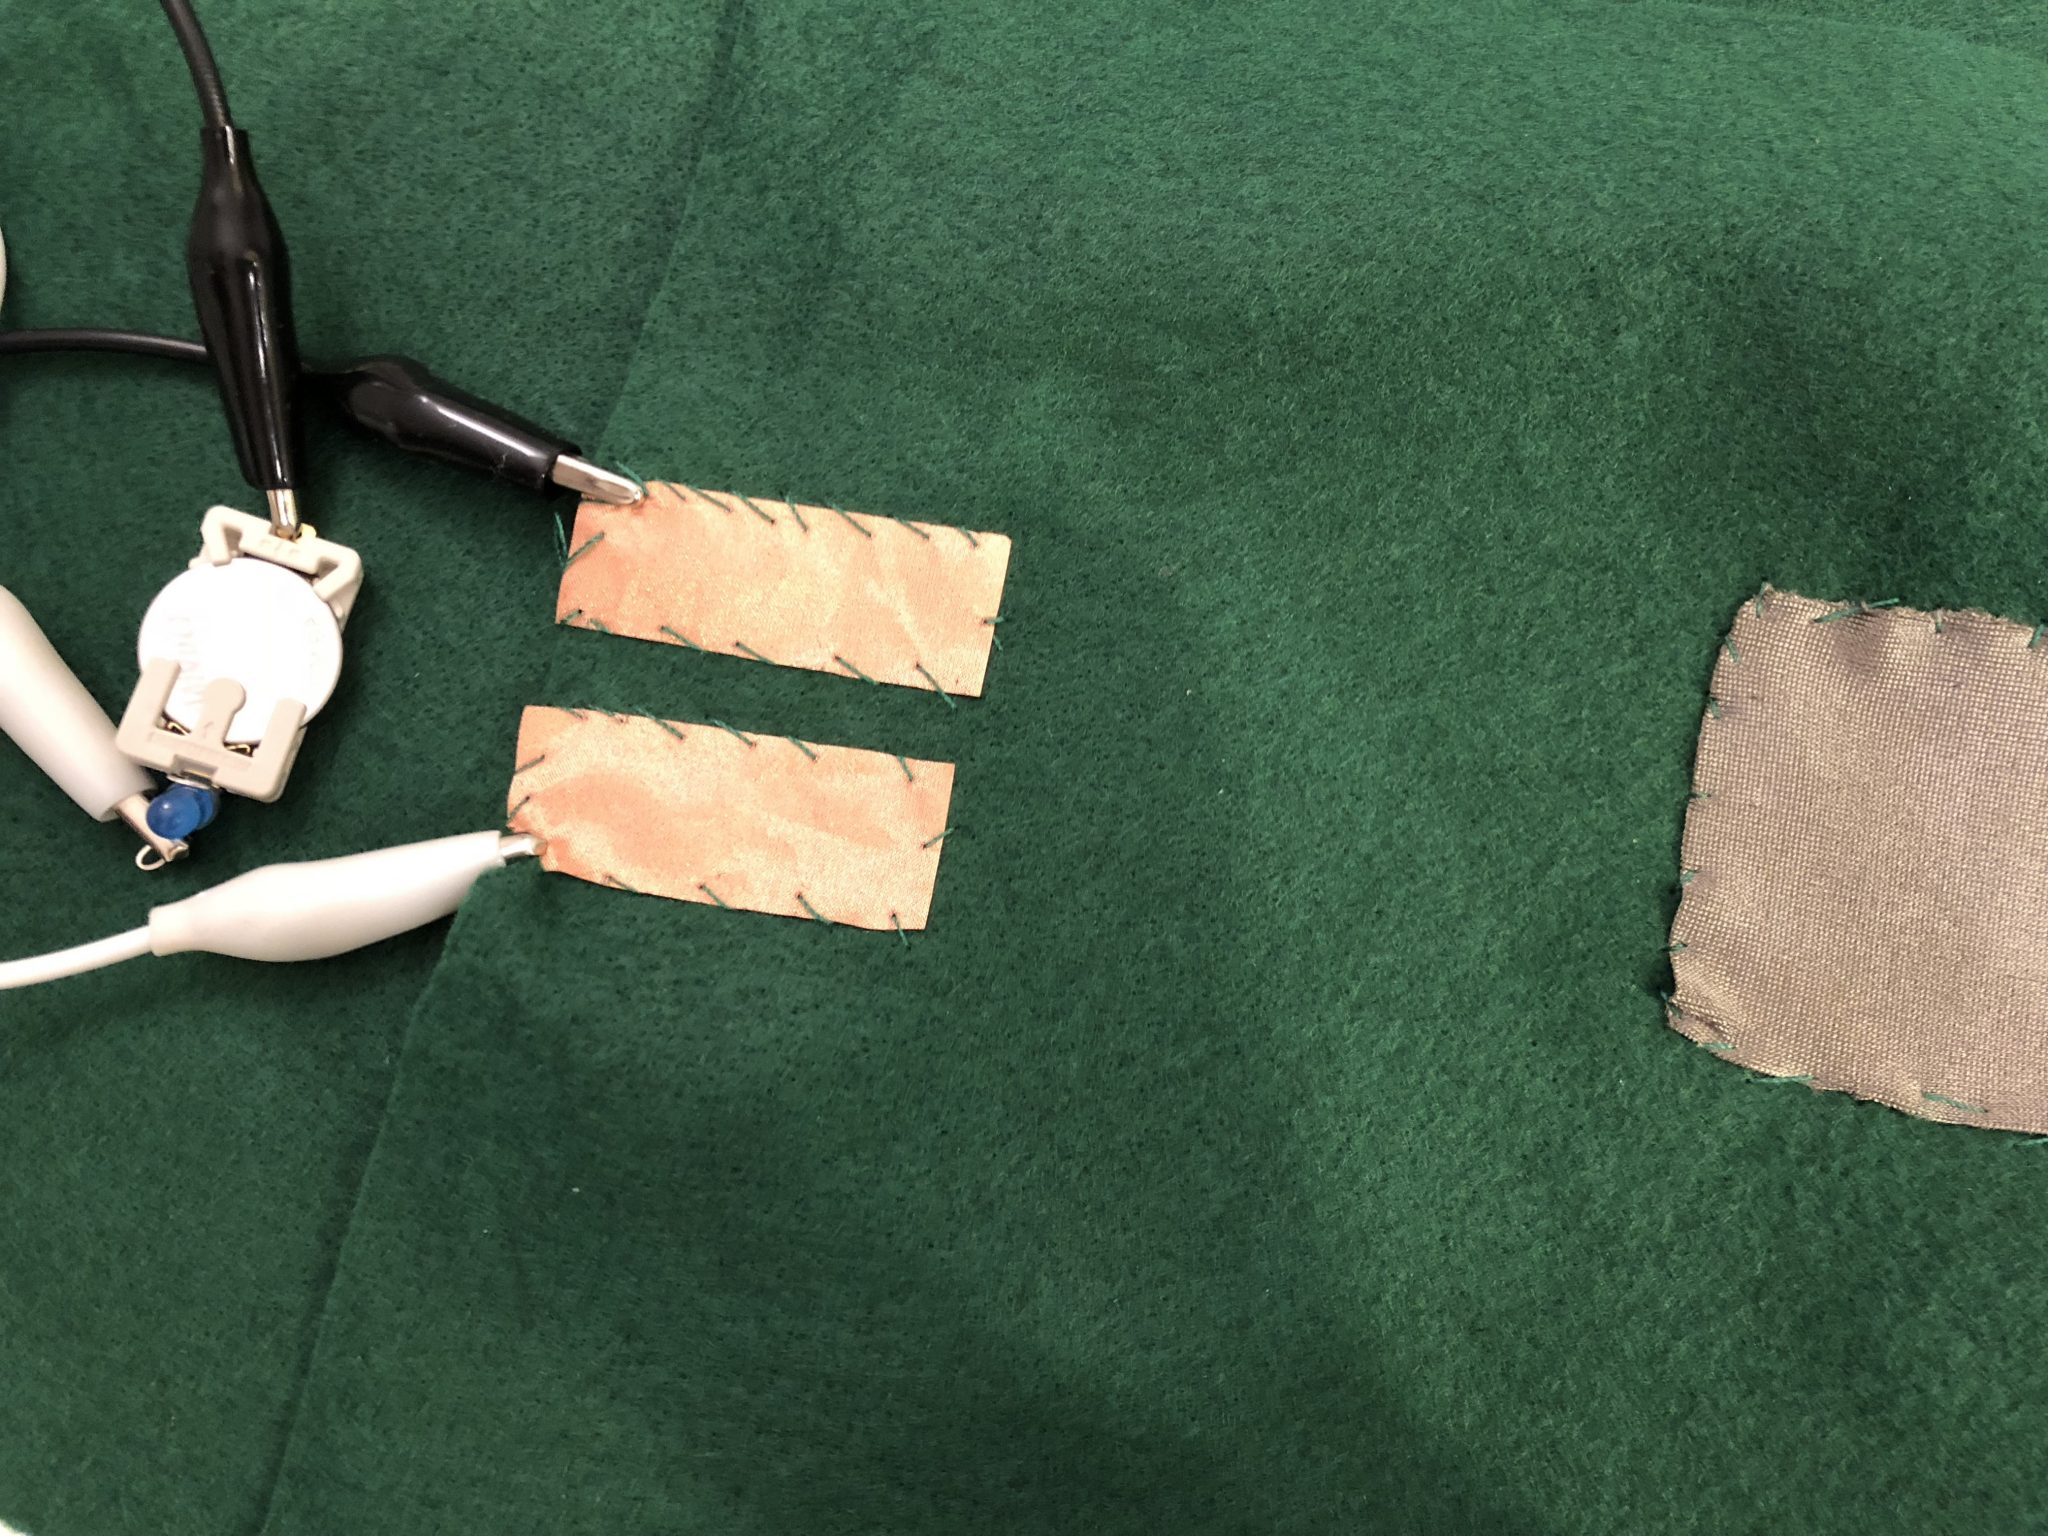
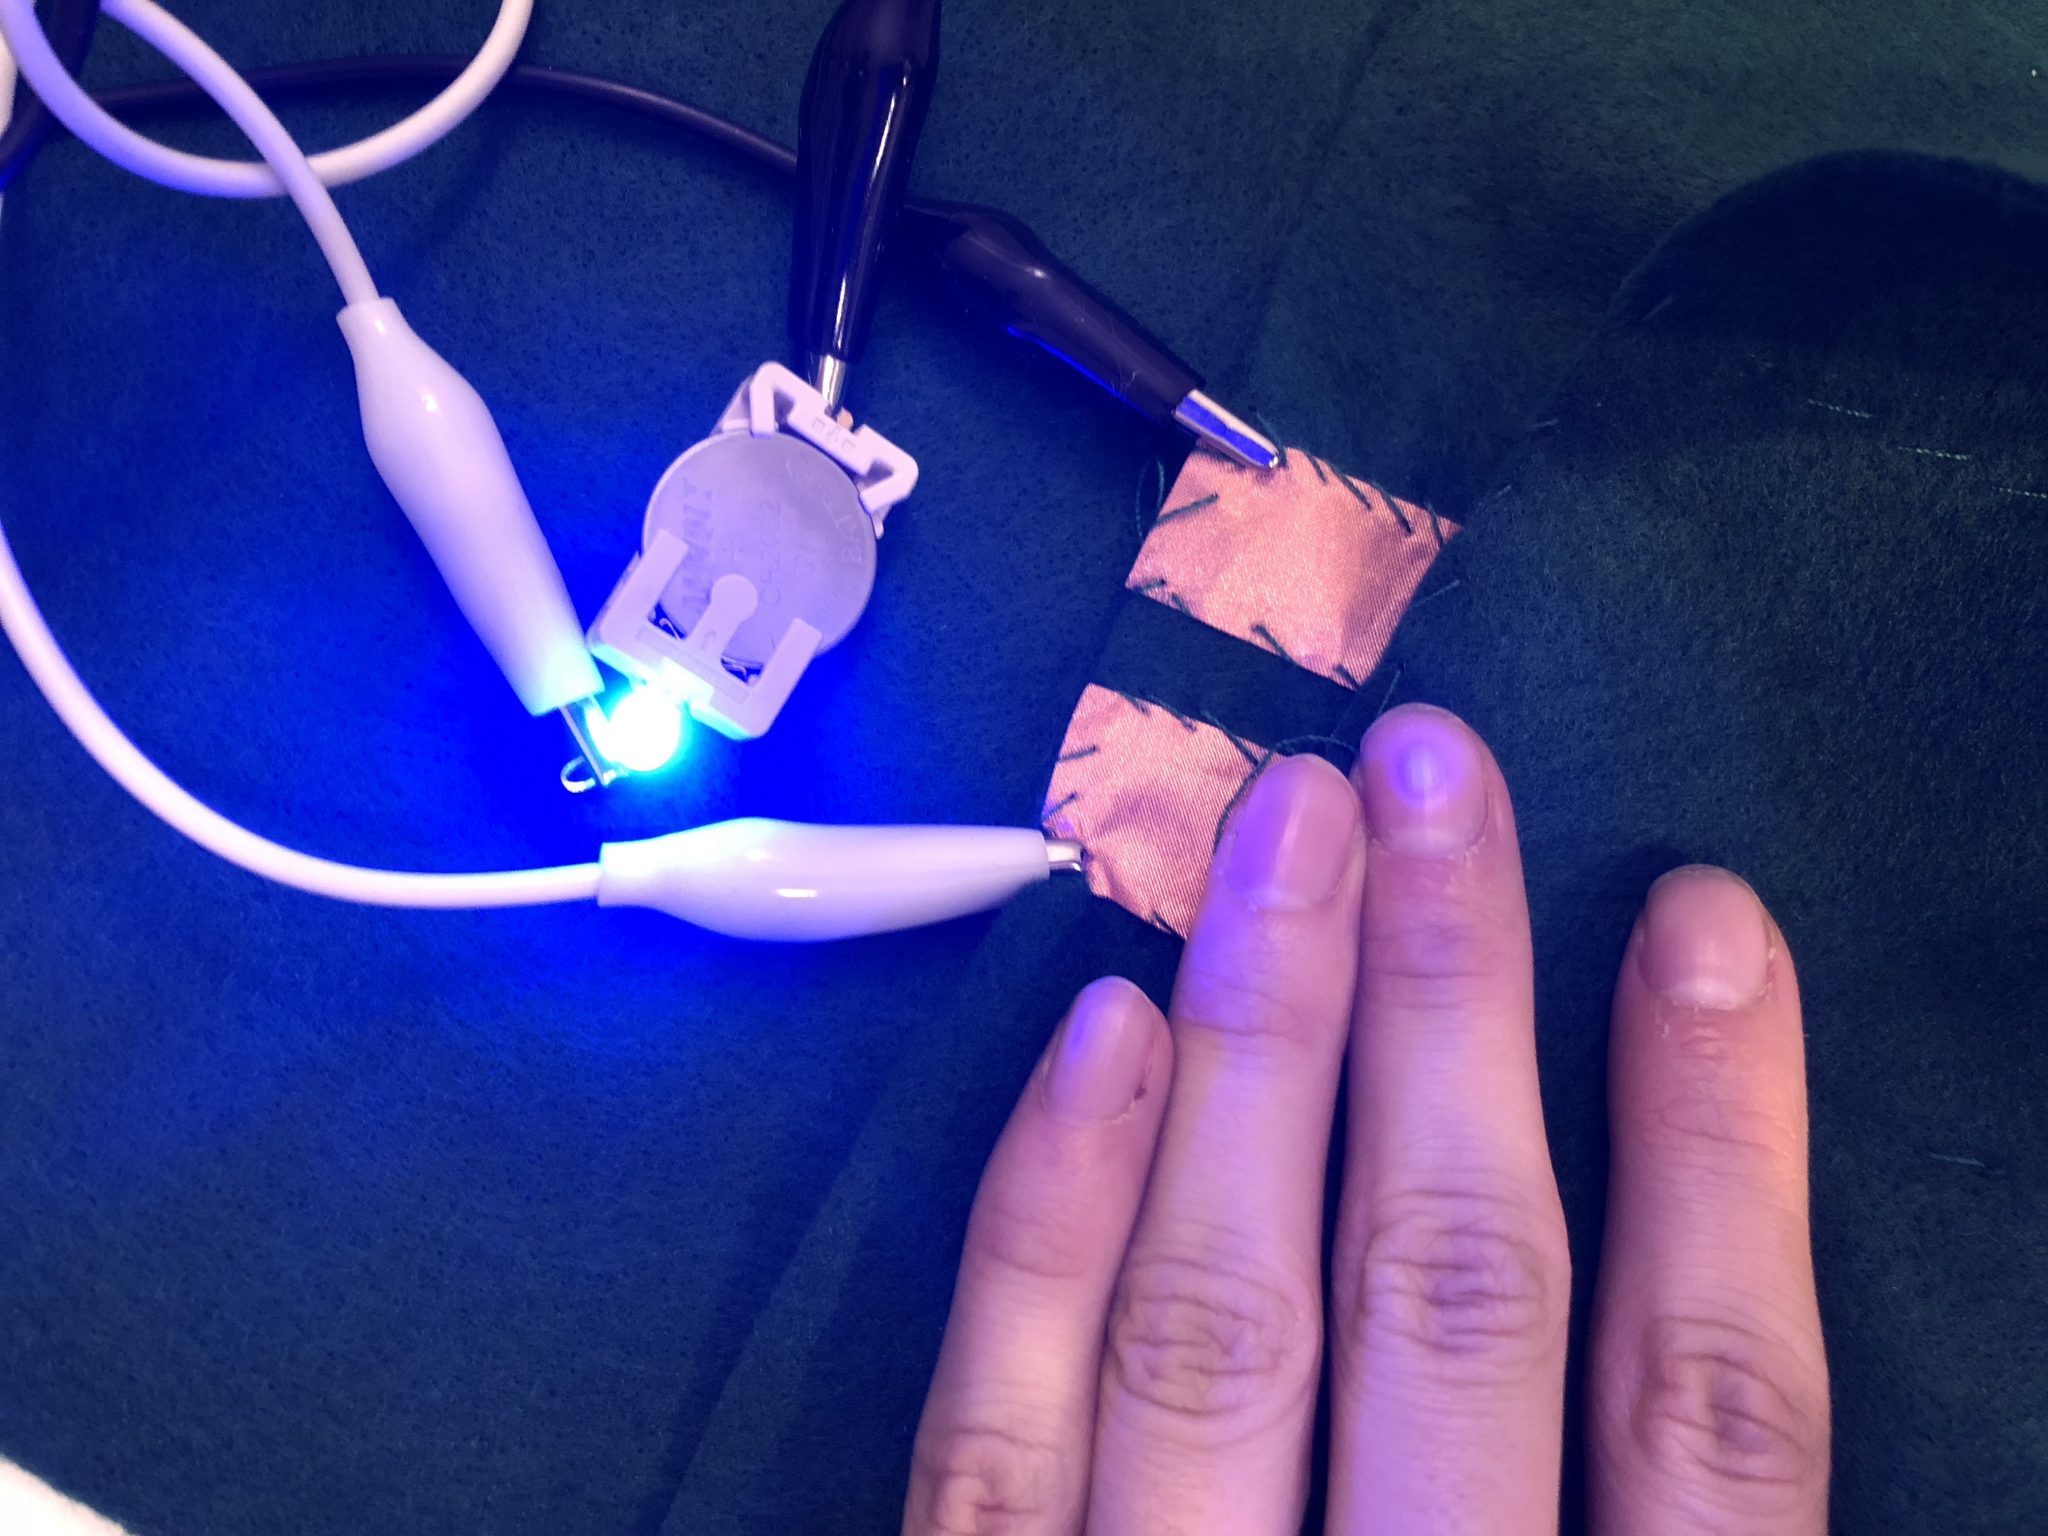
For this week I built 2 soft-circuits nodes made out of fabric and paper, as well as 3 connectors. These components explore the properties of different materials such as with woven conductive fabric, conductive Velcro, natural jute and sewable metal snaps.
Materials:
Fabric Node:
Paper Node:
Connectors:
Construction Process:
Sew all the components joining positive and ground nodes and areas, as well as the LED to the conductive fabric. The connectors were made by joining the snaps, the Velcro and the paper clip using conductive threat.
Important Note:
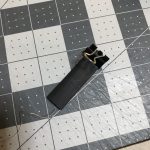
For the Paper Clip I connected the 2 silver components with conductive thread. The black part in the clip is NOT conductive.
Idea of a Tool!
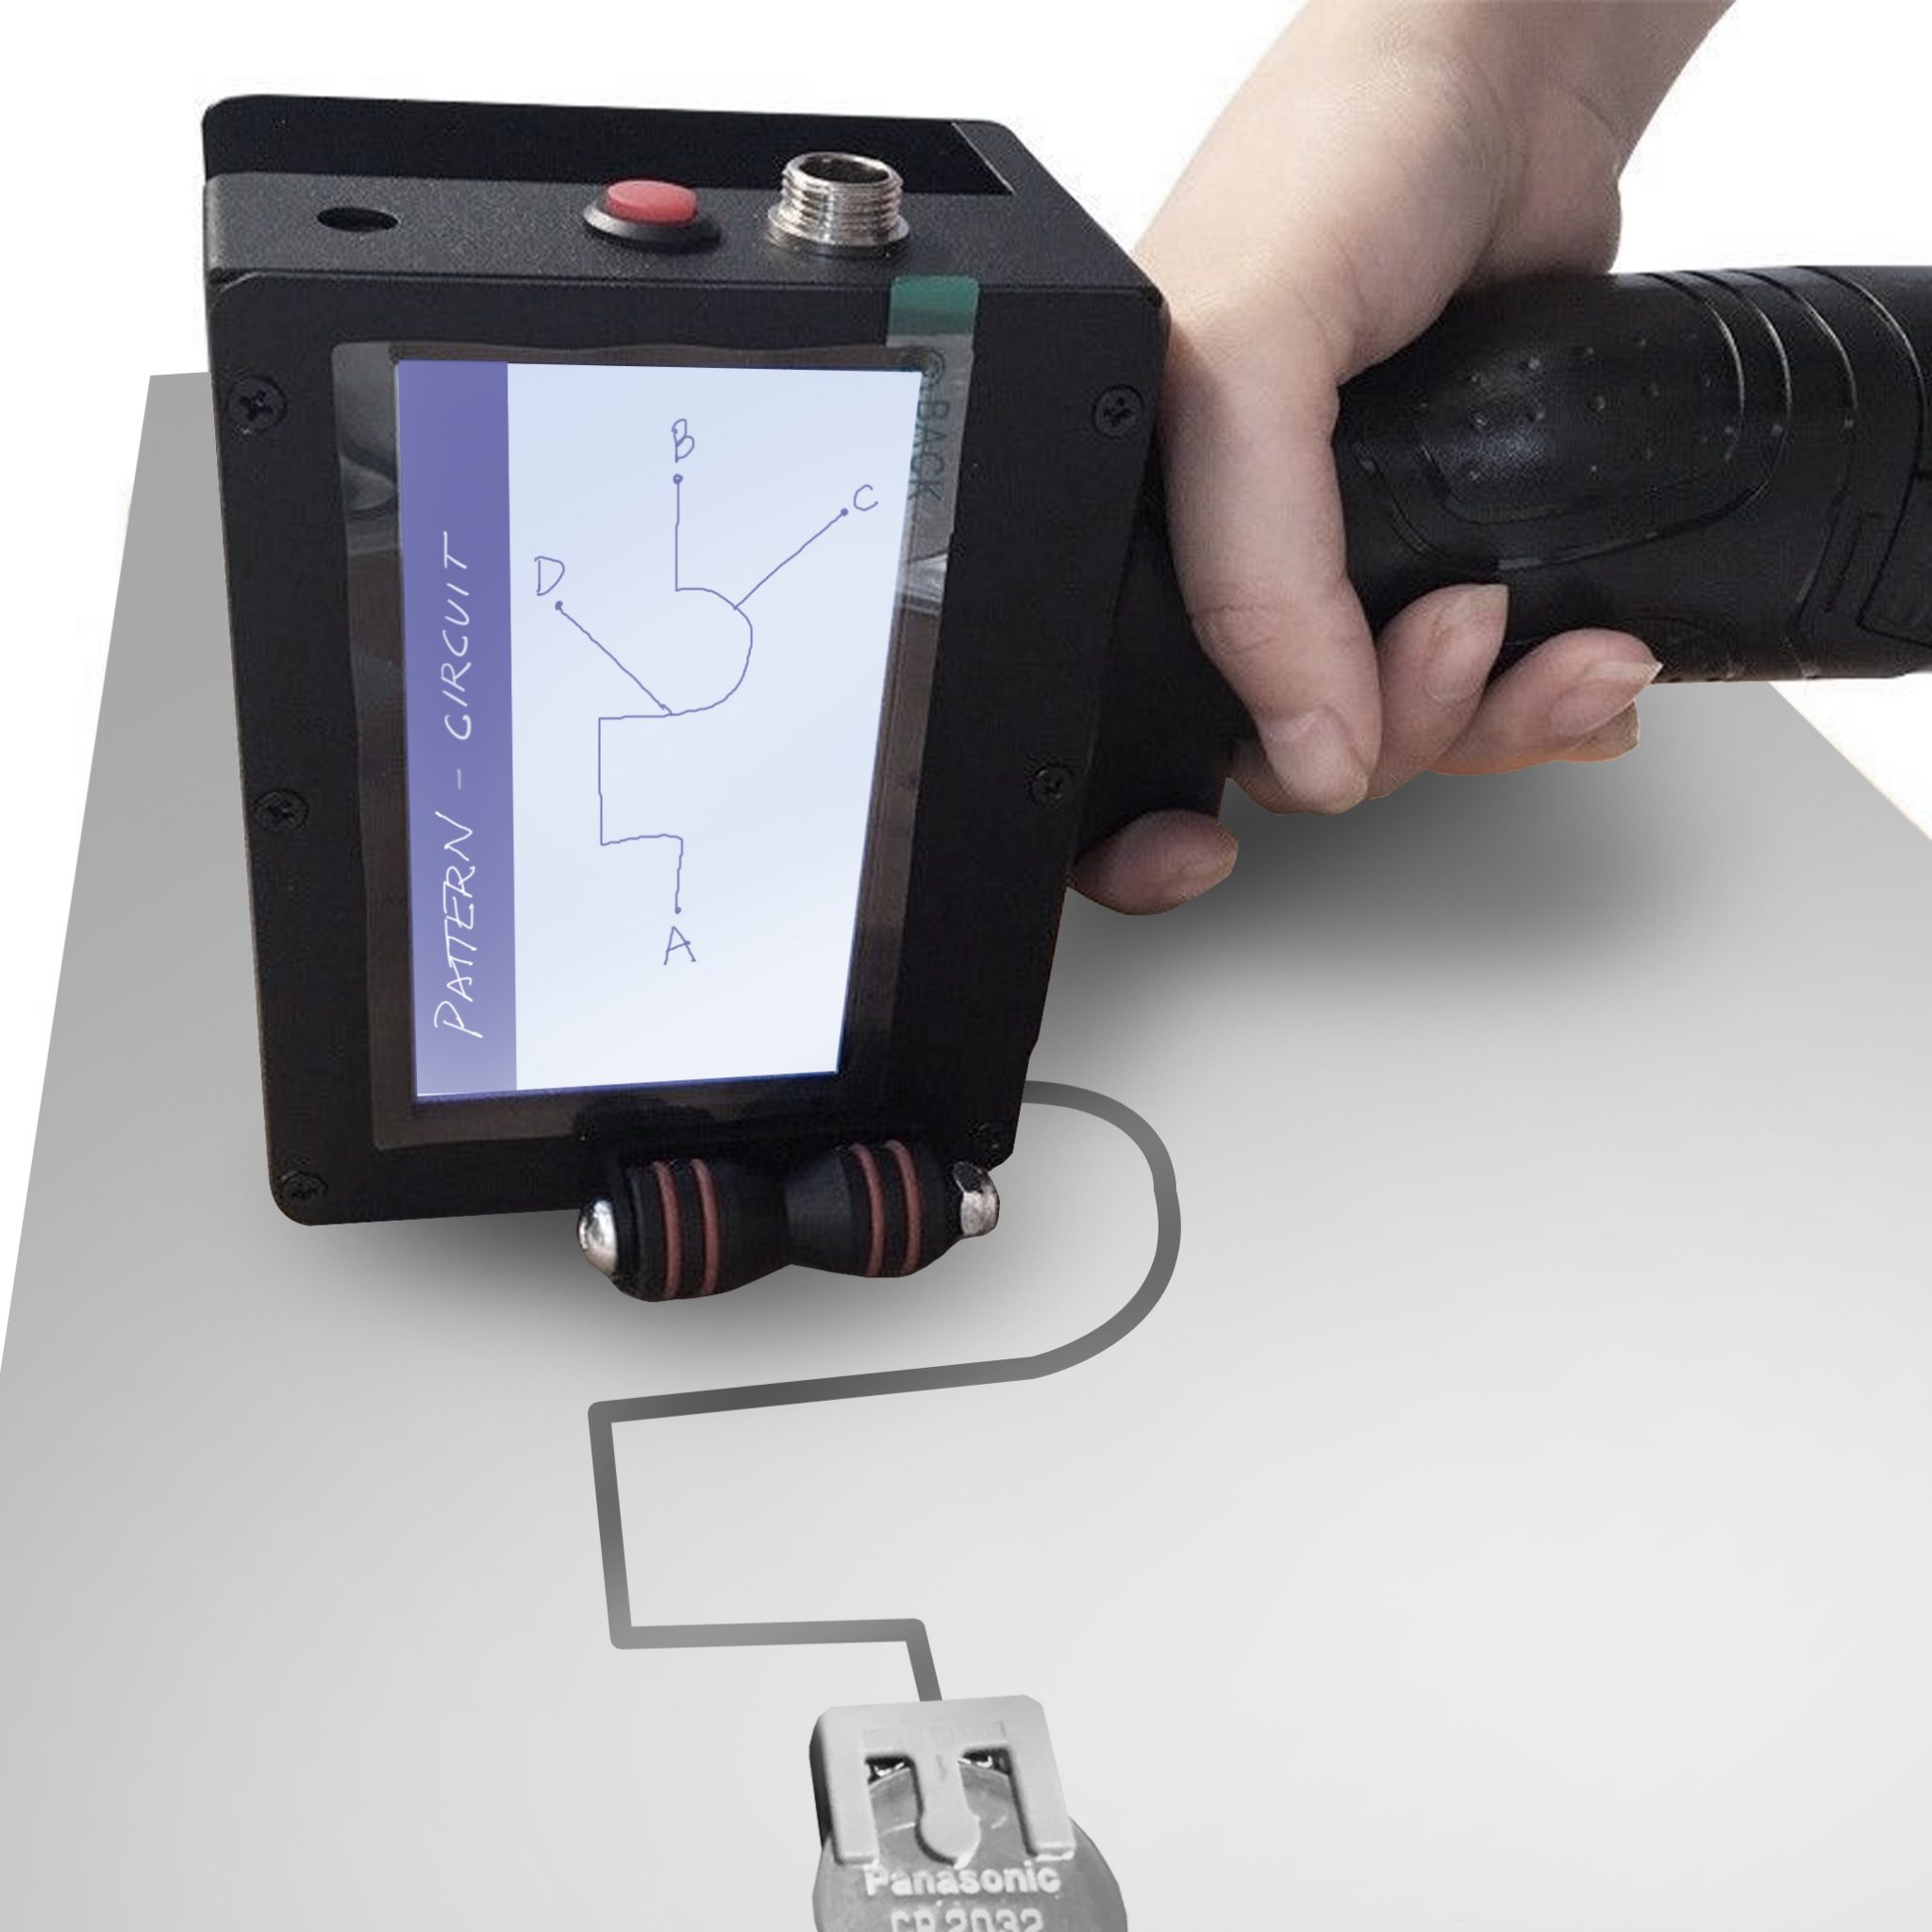
I’m thinking in a handheld printer (similar to the handheld inkjet printers), but where you can select the pattern (or upload your vector design, or predetermined lines, circles or geometric shapes), and this pattern can be printed on paper or fabric , generating conductive pathways.
1. Nodes
When creating my nodes I wanted to experiment with different materials I’ve never used before. I wanted to have fun too, so I added some crazy ideas!
SWITCH
The first piece I used felt as a substrate and copper fabric and stretchy fabric for the different modules of the node. The switch is compound by two sides that need to be connected by folding the fabric to make the stretchy fabric connect the two small pieces of copper.
I wanted to test the switch and at the same time try a vibrating mini motor disc that fit nicely on the top of the pieces with copper tape.
LED
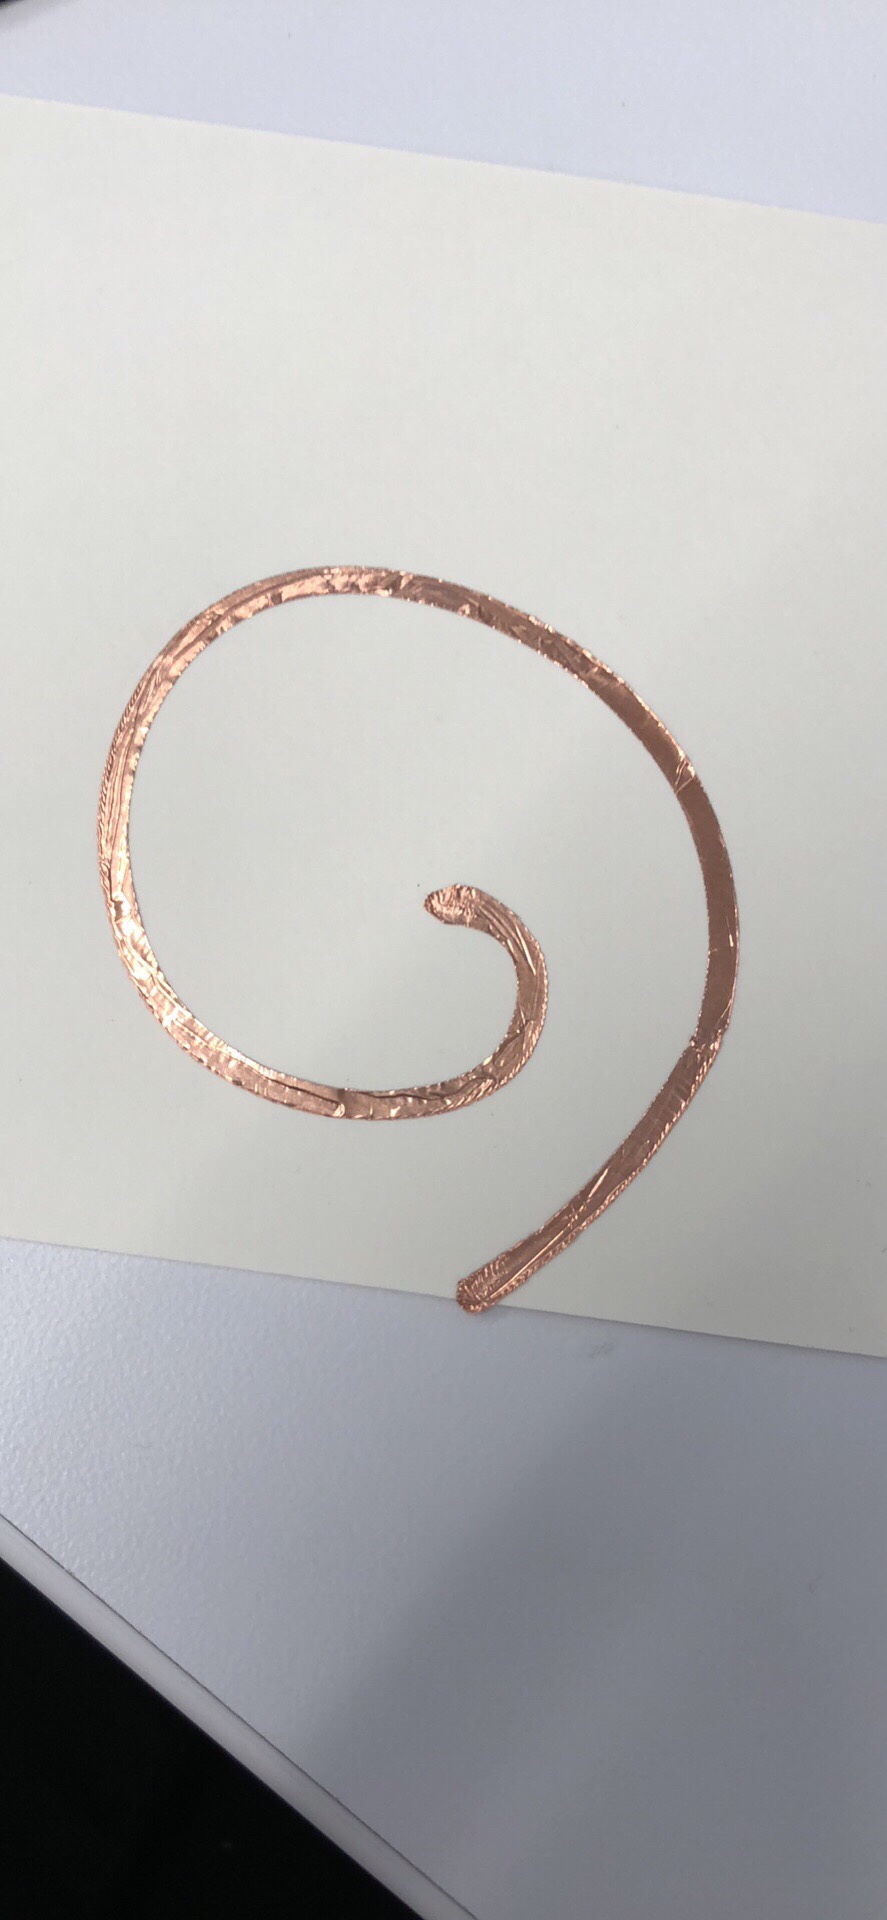
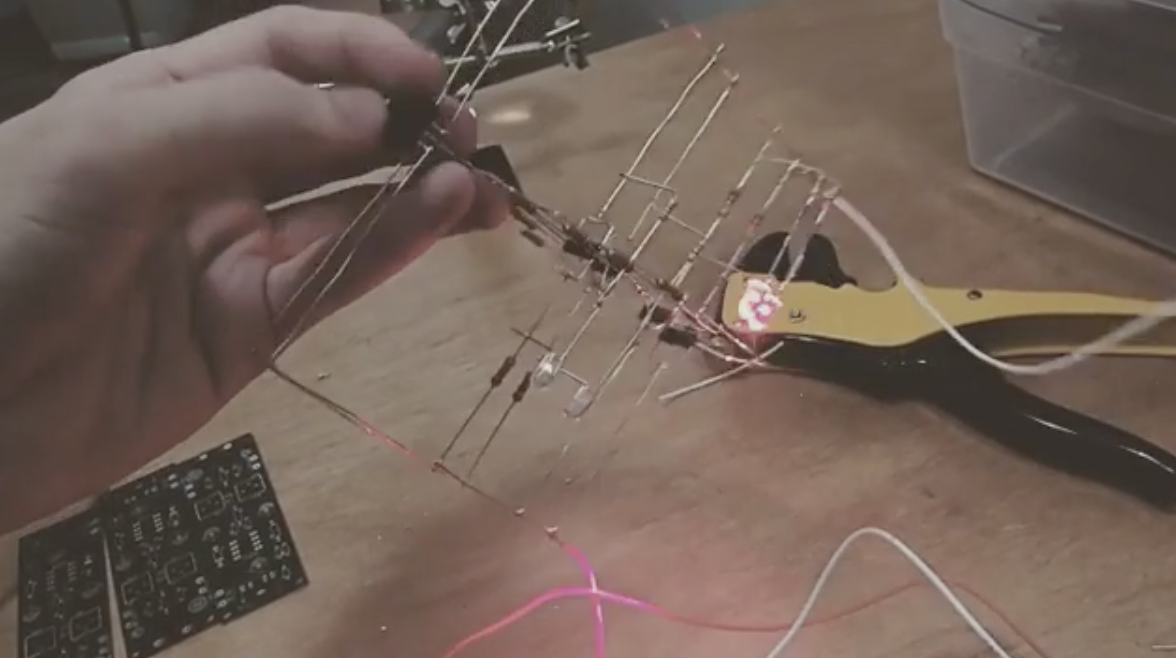
I created a coil using a piece of adhesive copper surface. I designed the shape using illustrator and I used a vinyl cutter to cut the desired shape and I transferred manually into a paper. I could user transfer paper because the circuit was very fragile.
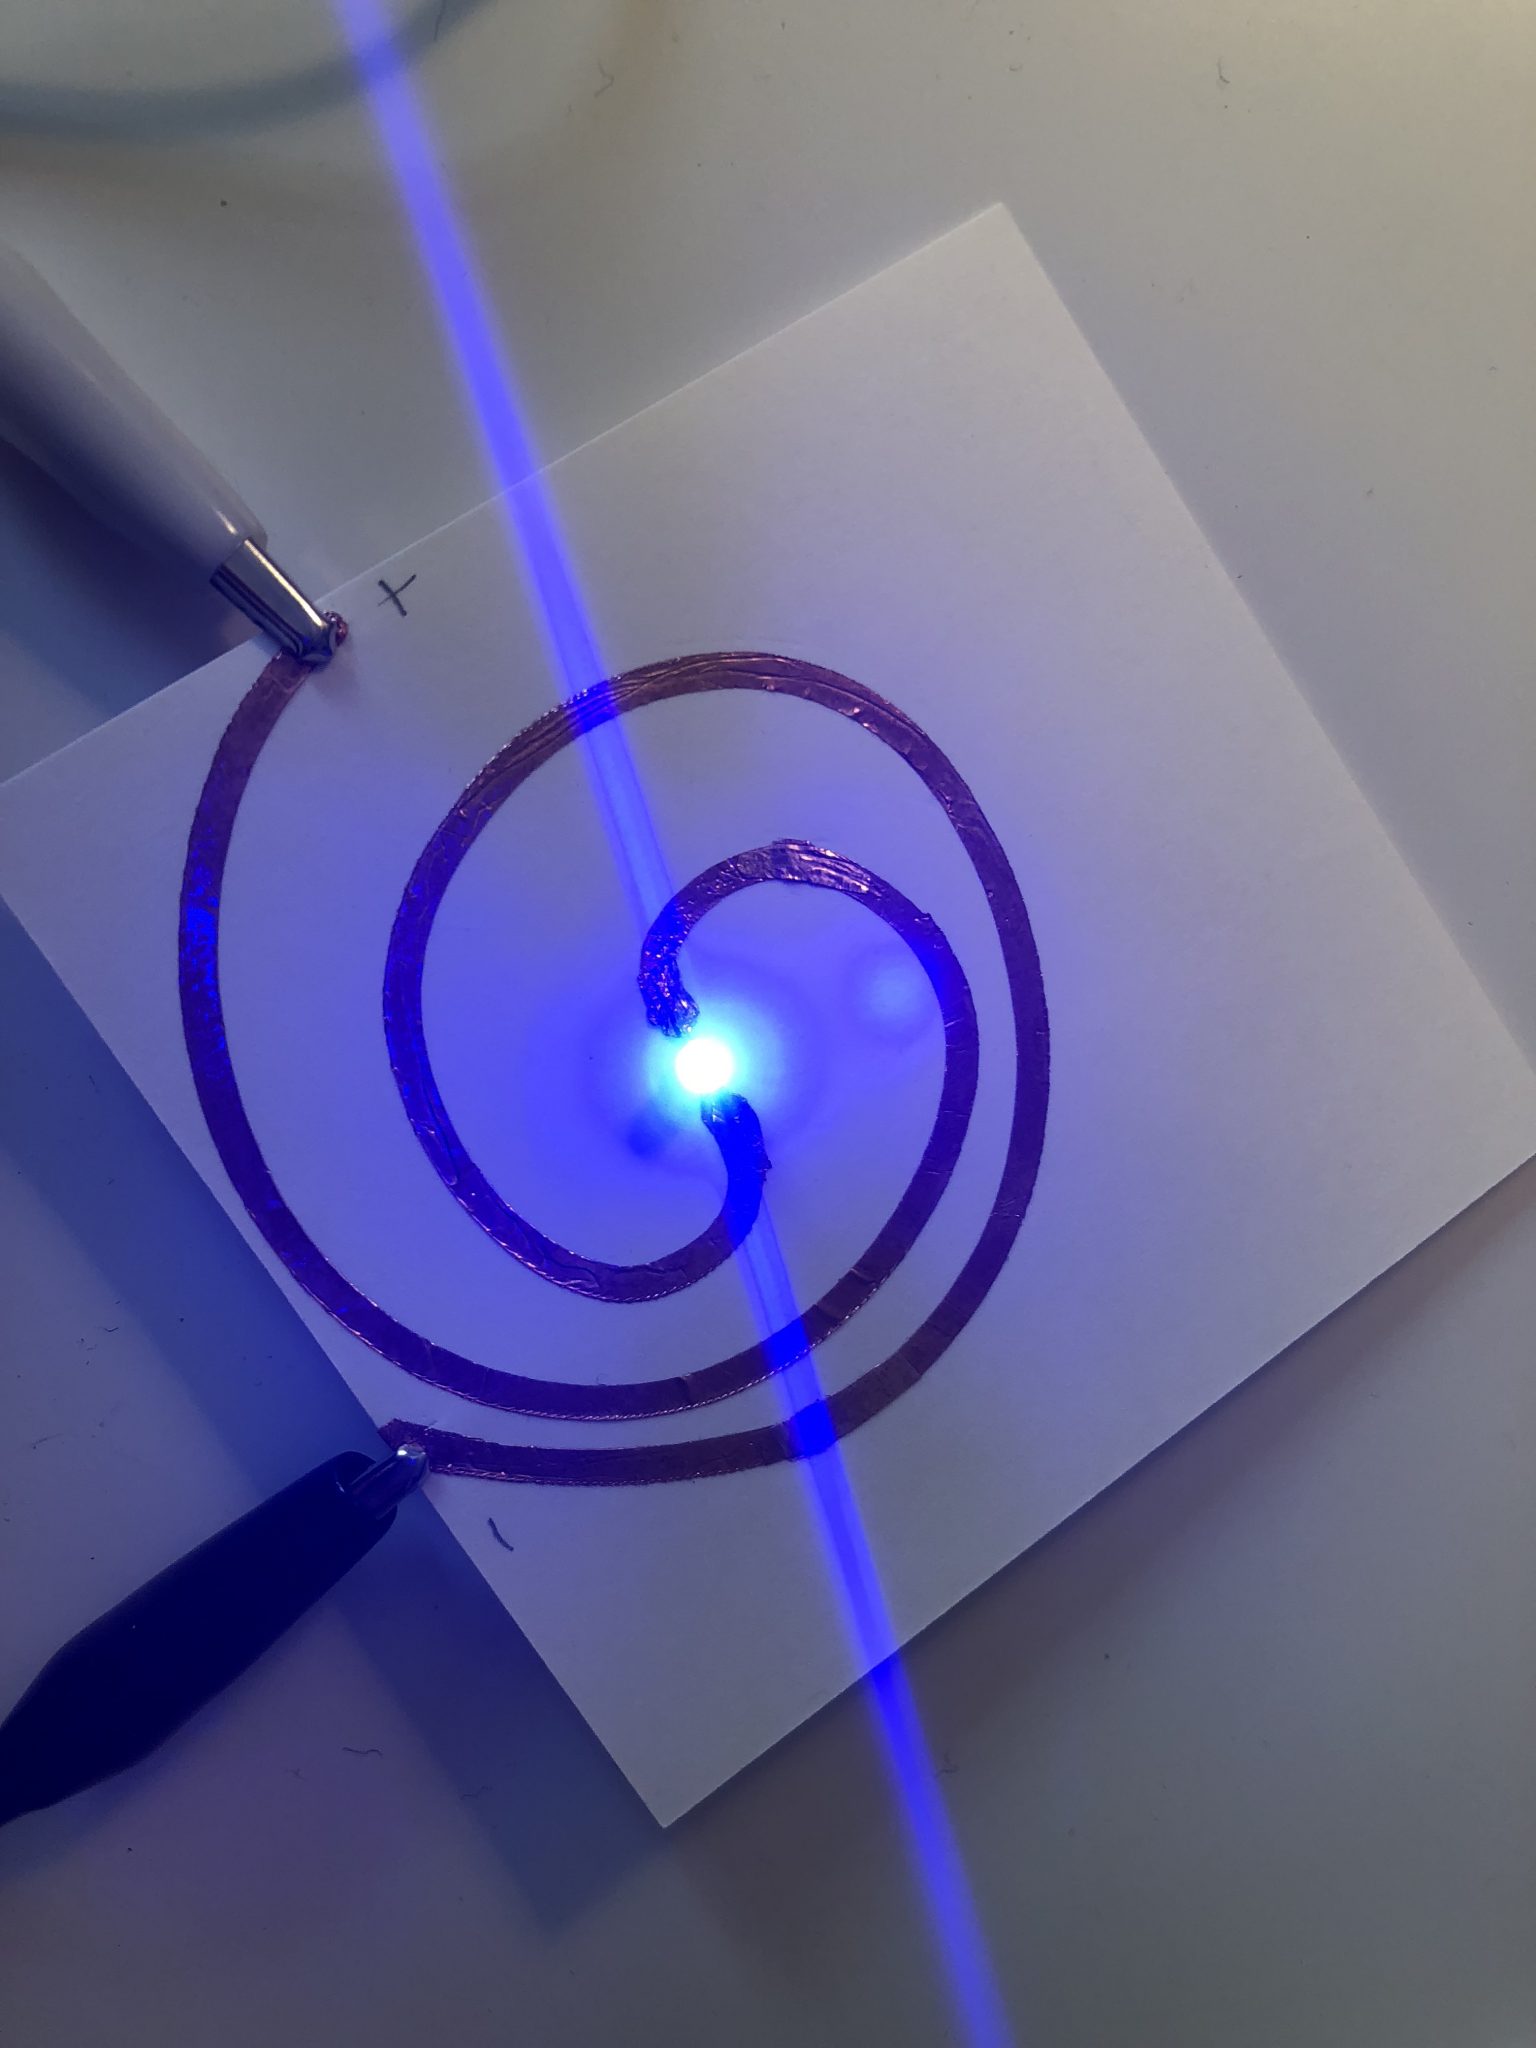
Learning curve- machine defects
The material is really delicate and it requires a lot of care when manipulating. The Vinyl cutter that I used it had a damaged blade which created lots of tears on the material. I had to manually transfer and fix with patches.

2. Connectors
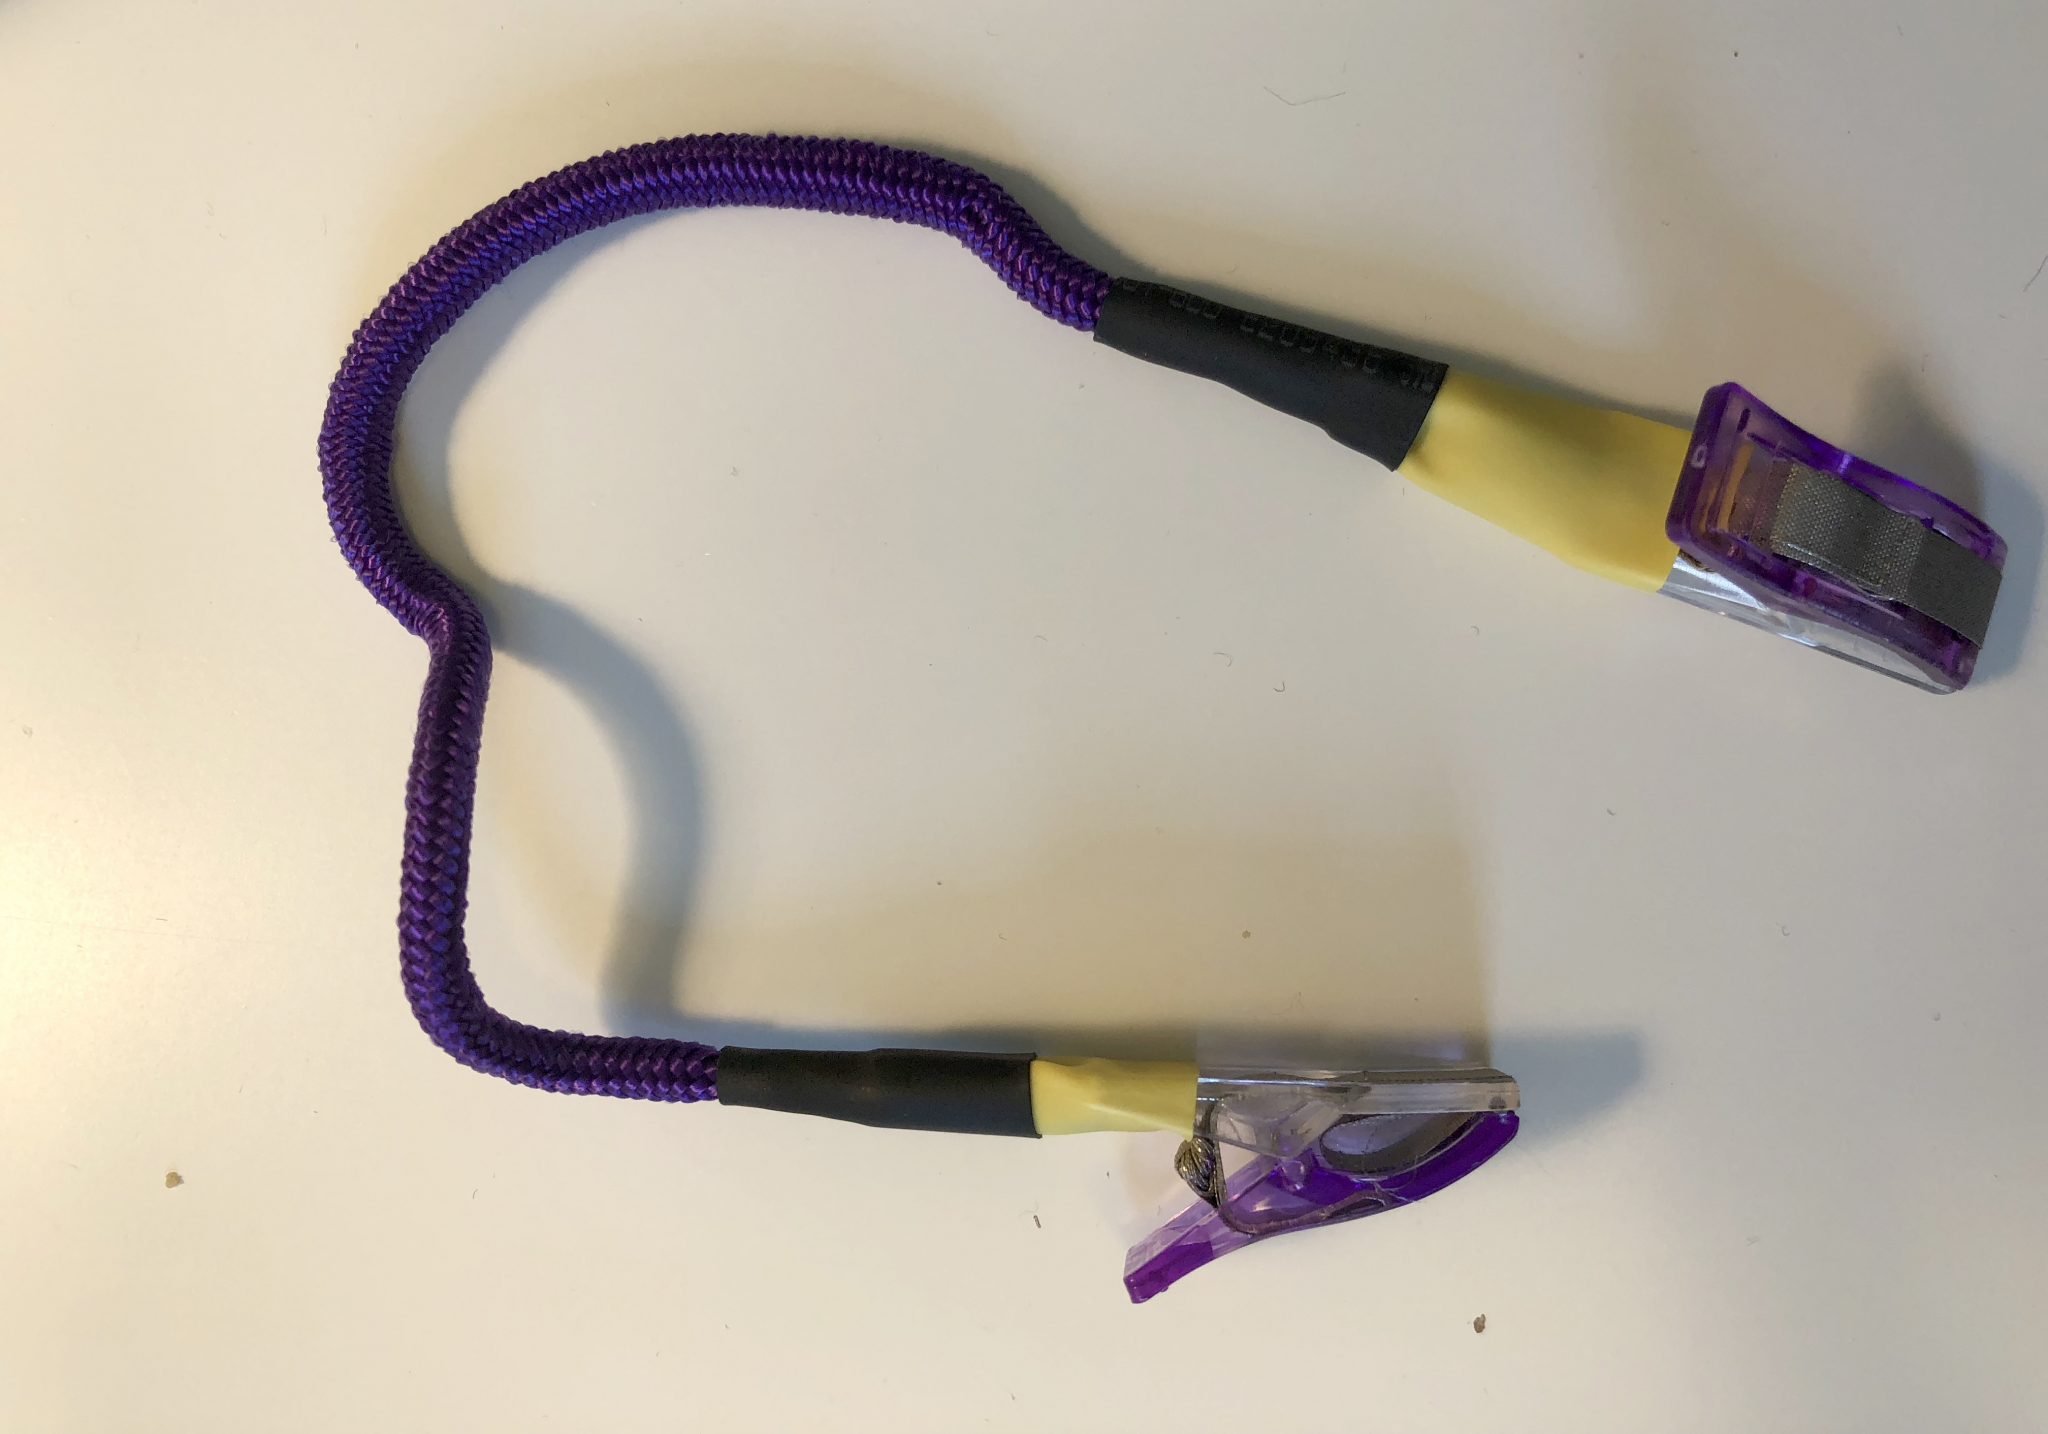
I wanted to give a thought to my connectors to the ones I might be using in my practice. I have two different sizes of plastic clip and a safety pin. I used copper fabric, conductive thread, heat shrink tubes and I assembled them to be resistant.
3. Invention
I wish I could have a 3d doodle printer that could fuse copper fluid to create an amazing geometrical structure including some electronic components.
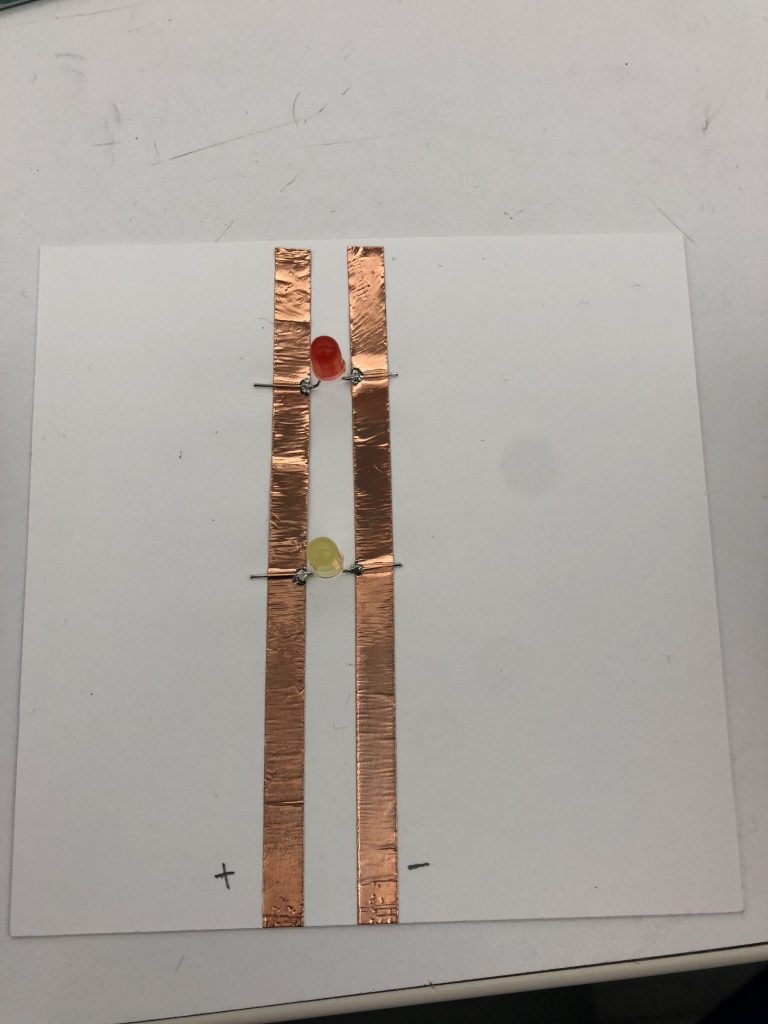
For this week I created two nodes, one from wood, the other from paper. As usual I really enjoyed using the different tools in the wood shop to create the node that is the power source. I would have liked to create my own battery holder rather than using one of the ready made ones, but this gives me an excuse to continue experimenting. Below are pictures of the nodes.
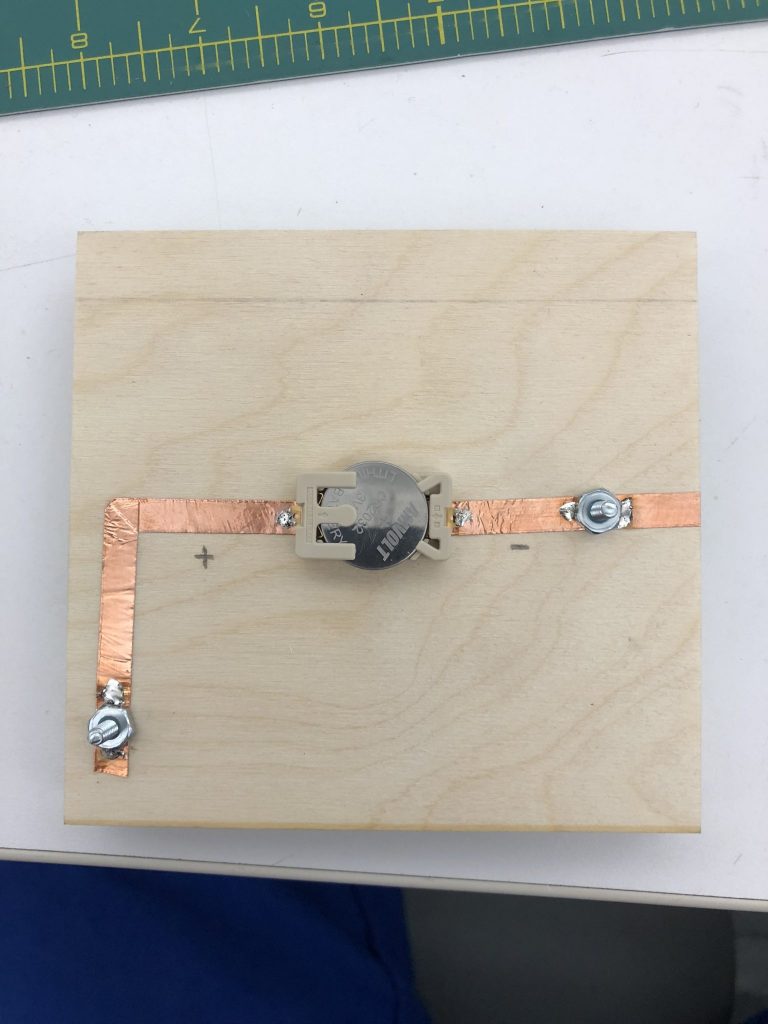

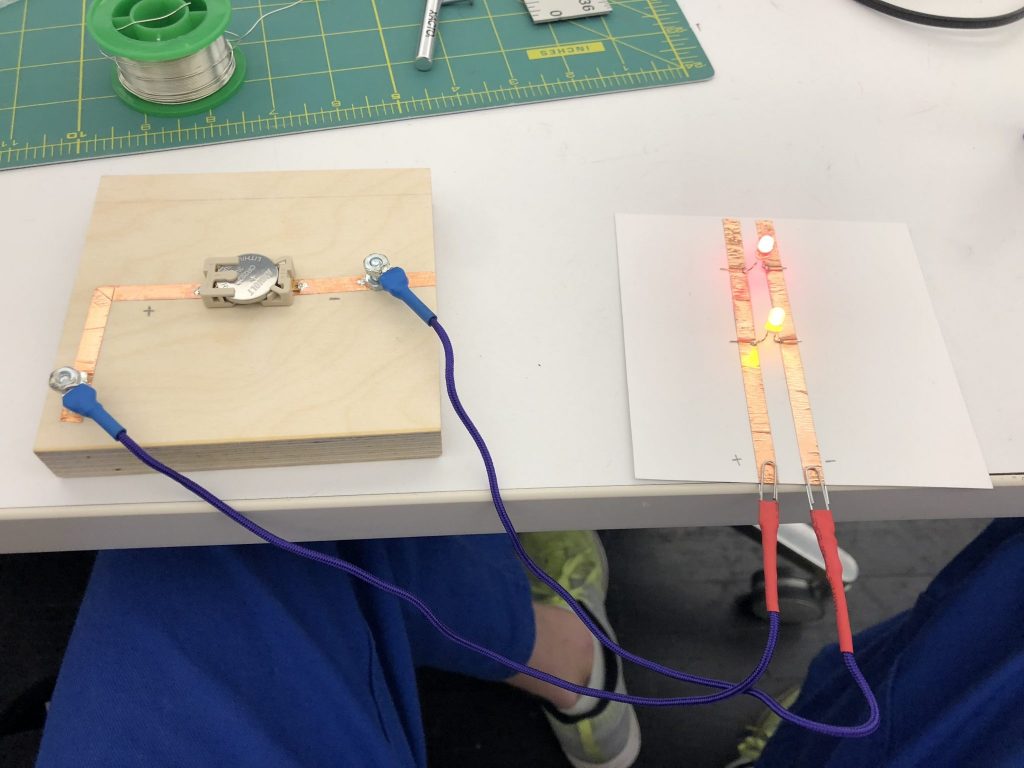
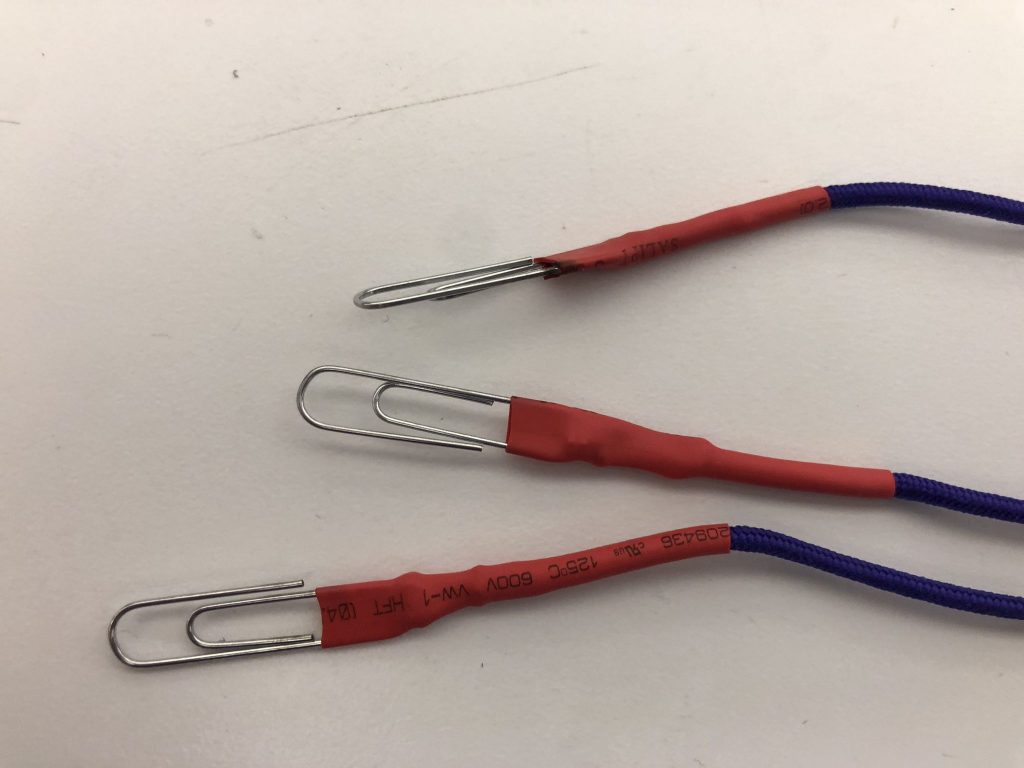
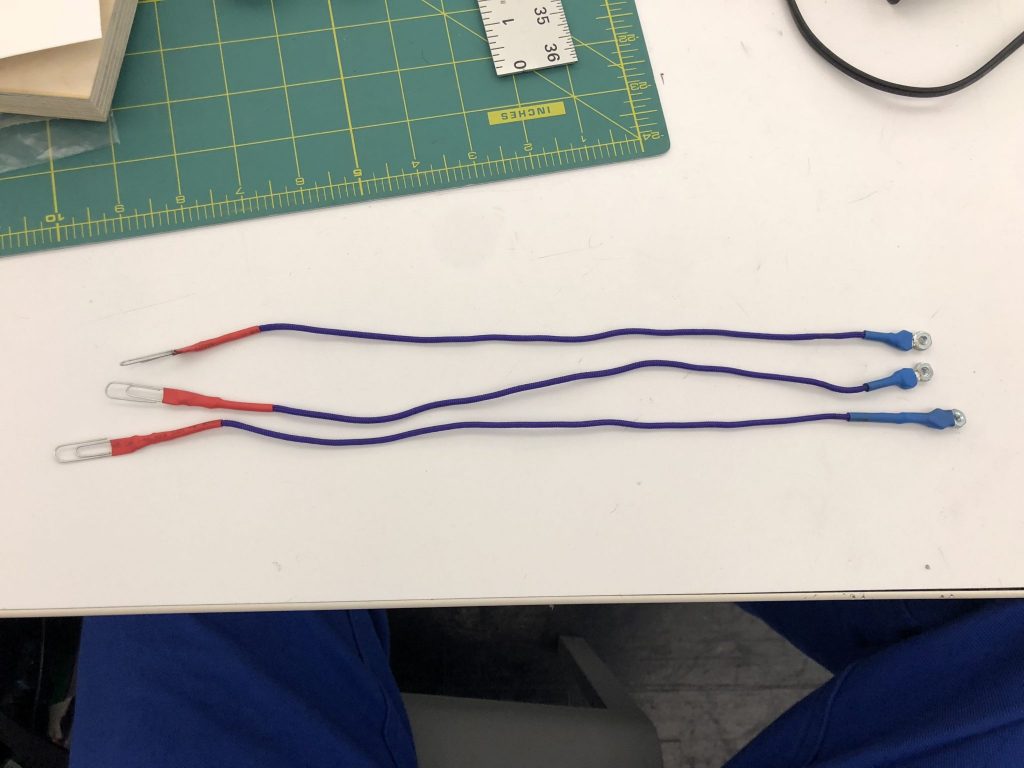
The connectors I created were equally enjoyable to craft. To connect to the wood node I used two nuts soldered together, one of which is covered by heat shrink. I discovered that soldering is not very strong, if I were to continue iterating on this I would first super glue the nuts together before soldering them. Attached are pictures of the flexible connectors.

As far as new tool I would like to have a tape gun that dispensed copper tape!
Nodes and connectors
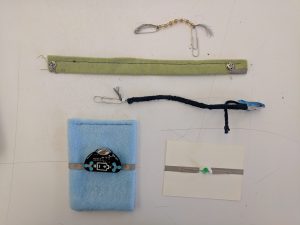
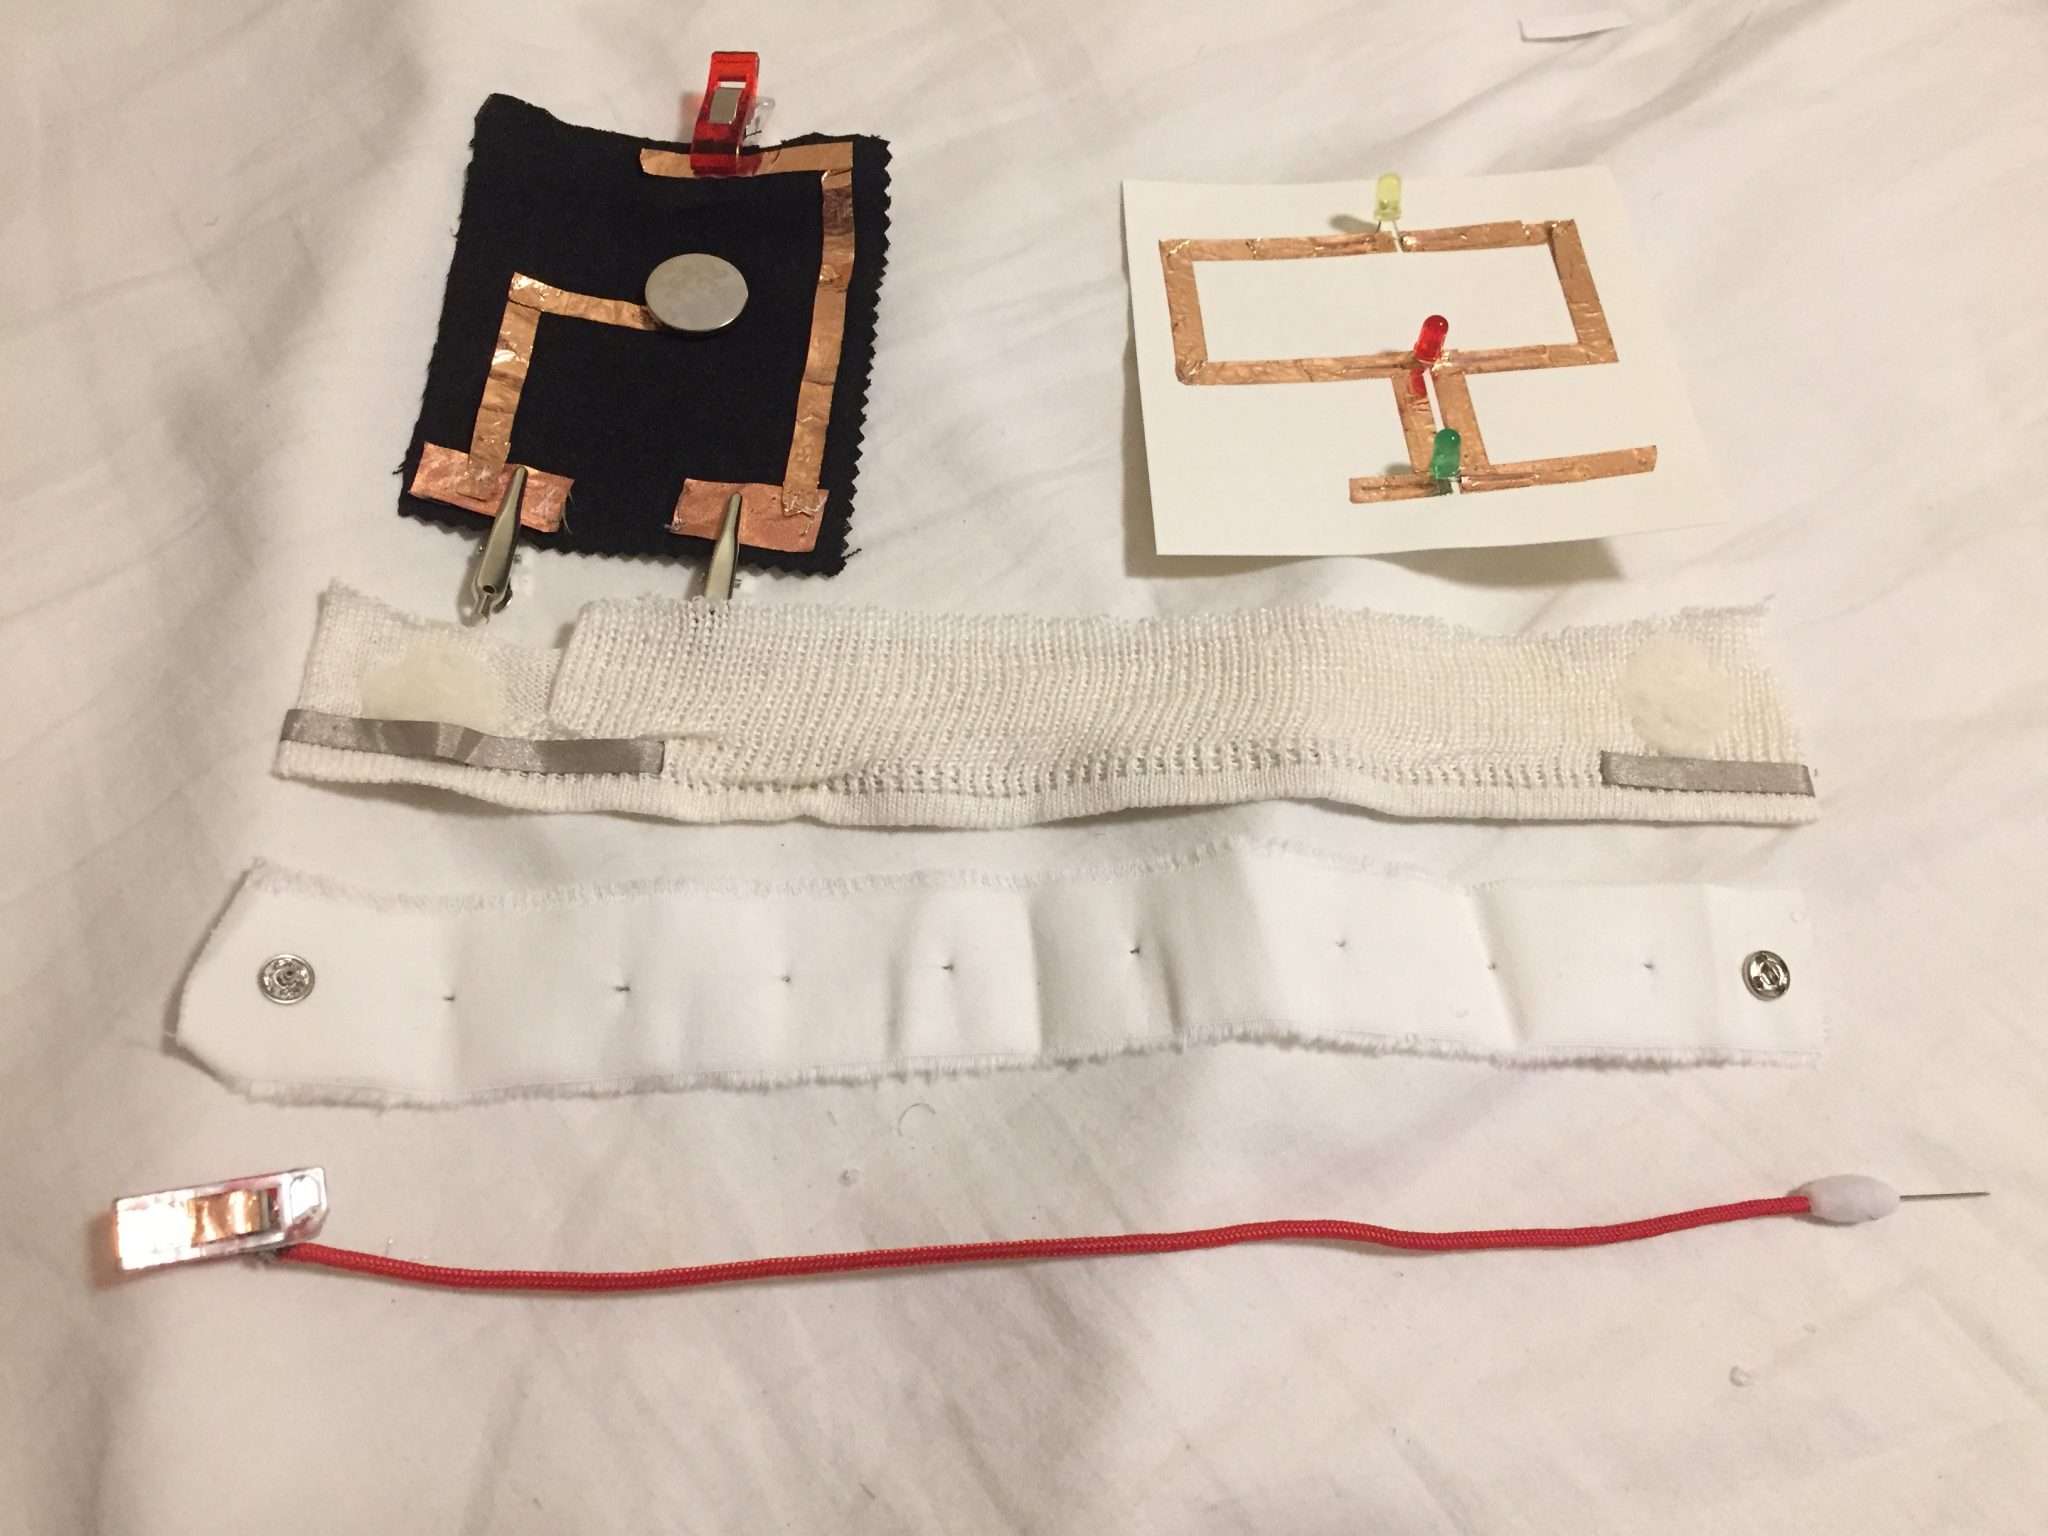
The two nodes I created for this week’s assignment are 1- LED textile node and 2 – fabric battery holder. I solder the LEDs on the fabric ribbon then sew it on the base. I used conductive thread and metal snap buttons to link this node to the battery node. The battery node is also on top of a piece of fabric swatch and has conductive threads with metal snaps. Two of the connectors are made with conductive thread + metal snap and the other one is made with the little clips from Liza.
The tool I want but does not exist yet is a sewing machine for conductive threads and conductive materials. The current machines are not always great with conductive threads so having a machine just for that will make my life a lot easier. Maybe the bobbin and needle are made with special material.
I try to make the basic connectors with different materials that I have. I come up with Fabric tape connector, Button connector and Snap and Needle connector. I use playful materials to experiment with conductivity for each one. They all work perfectly.
3 Connector Tools:
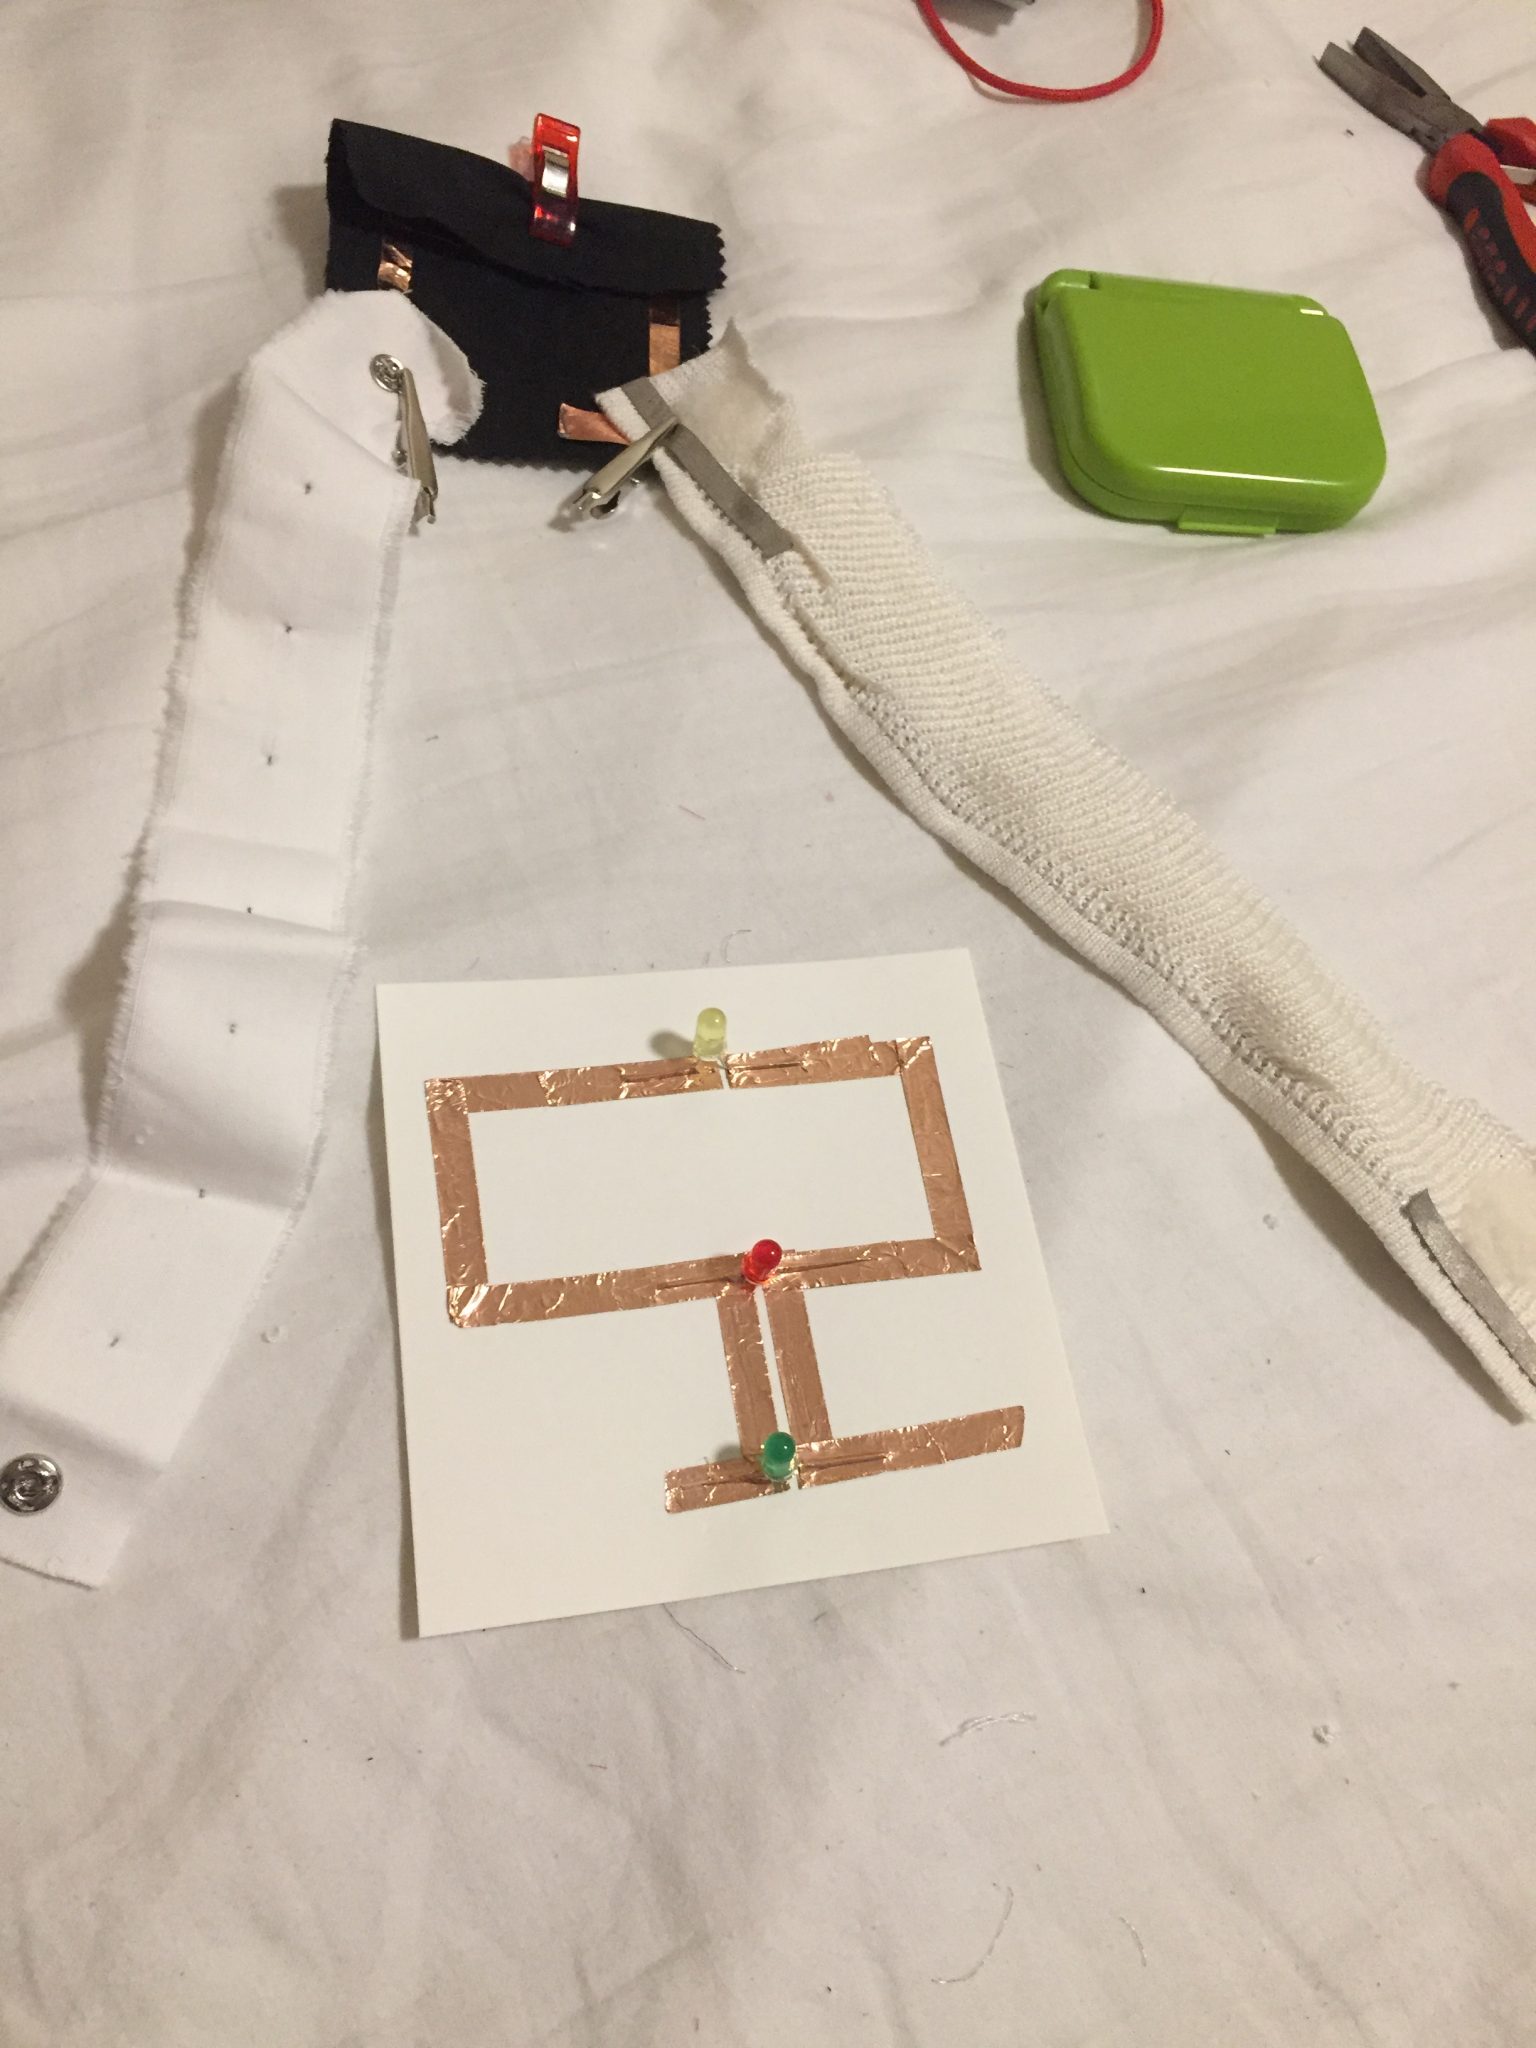
So the battery node is using the folding technique to let you easily change coin cell battery. For the LEDs, I use three lights as the indicators to test the circuit works.