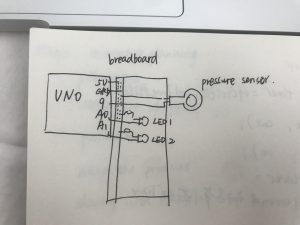
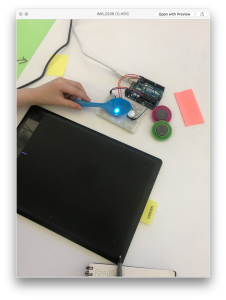
I use the pressure sensor to control two LEDs.
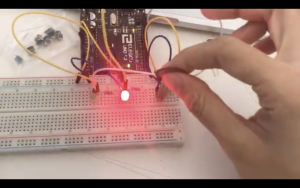
I use the pressure sensor to control two LEDs.
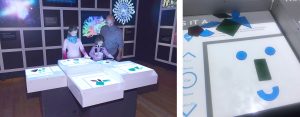
The video is a demo (or trailer) of my final project, and images are the final view.
Online Link:
https://drive.google.com/open?id=1xcC8PSXATgWr8_nK9iuvLwP5t0UJ21i3
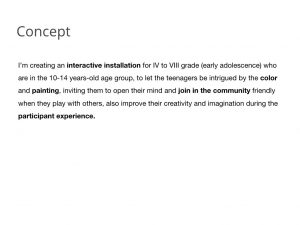
Concept + Goals.
I’m creating an interactive installation embed with the learning function for teenager (early adolescence) who are in the 12-18 years-old age group, to let the teenagers be intrigued by the color and painting, also improve their creativity, imagination, experimental spirit and cognition ability during the immersive experience.
Intended audience.
My target user is a teenager who is between 12 and 18 years old. When teenagers in this age group, they have more active learning and thinking ability. They manifest more positive action toward learning, exploring and creating new things. also this is a golden age for innovation. I’m also targeting at the people who is interested in the painting, color and creating things by themselves.
Precedents.
How teenagers interact with each other or another group, how they play with this installation and figure out the working process, is the main point I consider. Ideally, when teenagers meet this installation, they can attract by the function of inputting the color then they can feel unexpected by the shapes will match the color. For the project interactive function design, this should be simple to understand, friendly to move and use the tools.
This project named HUBO, it shifts the perception of coloring from 2D to 3D, this area satisfied the demands from children which are curiosity, creativity, imagination and the desire of playing. Over time the space will become a creative, colorful scene of furry food, each piece is the trance of interaction and experience.
Thinking about my project, I want to encourage teenagers to draw the screen start from the blank to colorful step by step, I believe every painting created by children are having their story and special meaning. My project will provide a relaxed environment to support their creation.
For the reaction from children, I collected much information from the Our Senses exhibition located on the American Museum of Natural History, and I found this project in the Seeing area. The walls in this room were drawing by multiple animals with different colors, when the light changes only the images that absorb that color can be seen. For the interactive part, children will explore by using the flashlight instinctively. This project actually inspires me a lot about which tool is friendly enough that I can use it in my project to let teenagers know this can be move and use not for display.
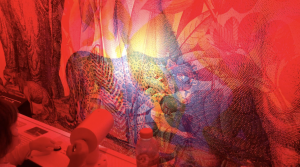

I got a reference from the Our Senses exhibition, as the image show, a user can play with the puzzles and the digital screen will give them an feedback on the result of machine learning. People will enjoy the process of making puzzles plus interacting with the screen. From what I have seen in this installation, people will be more passionate and engage when they can see something reacts to their input.
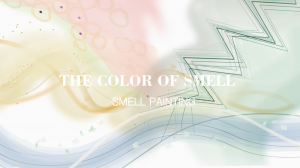
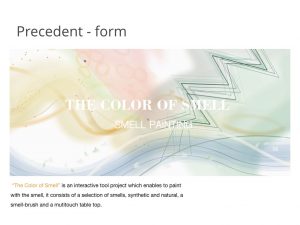
“The Color of Smell” is an interactive tool project which enables to paint with the smell, it consists of a selection of smells, synthetic and natural, a smell-brush and a mutitouch table top. This project can draw different shapes based on the smell you input from the objects, and this function really inspires me that how to surprise the user. So I want to classify a color input from the user, then different color ranges have specific brush.
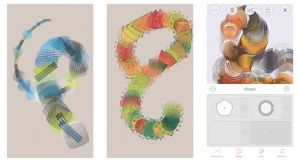
“FABRIKA” is an APP focus on the customized pattern design, you can choose the shape, color, size, transparency, density and so on. Basically, everyone’s outcome is all the different.
Description of the project.
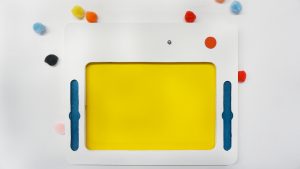
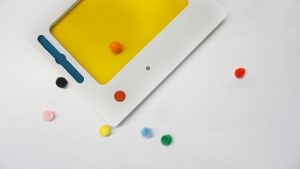
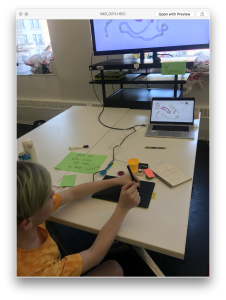
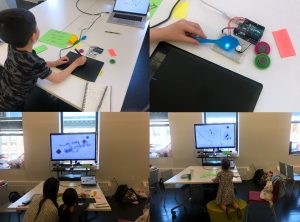
This project has three parts, color sensor, Wacom digitizer, projection on the wall. This installation will set up on the darkroom for the better user experience, when a user comes into the room they can find some objects placed around the color sensor, they may try them at first them find the other color they need in the surrounding.
set up place arrangement
Generally, when people go into the showroom, they can understand the use of this project. I use the big digital screen to help have a better view of their drawing outcome, also I played a short trailer for this project which contained the simple introduction and the process of using. When they found the color samples cannot satisfy their demands of color use, they tended to found other objects out of the room.
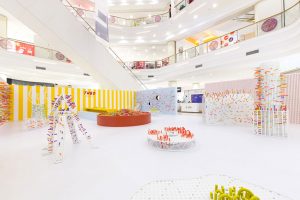
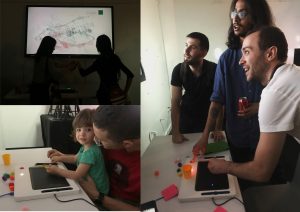
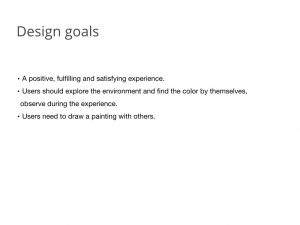
Outcome

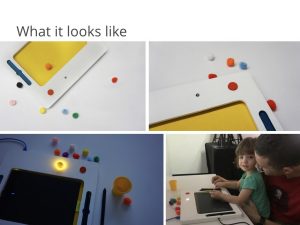
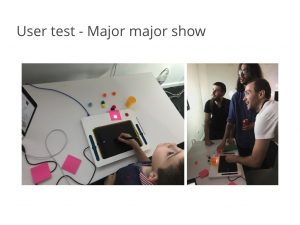
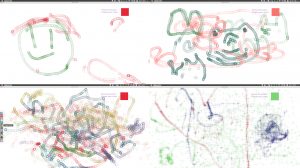
As images display, users show their creativity and passion in choosing the color and draw on the canvas based on the brushes changed.
Feedbacks from the Major Major show
Results

There are two main educational modes are used in many primary schools. Based on huge amounts of research, one mode is following the outline of the image, practicing to fill the color, another is the teacher give students a topic then teach them how to draw. These two modes are all not focused on improving the creativity and imagination, they give students too many limitations.
When tweens participate in this project, they can choose the color to control and change the brush patterns, which can improve them to explore the surrounding closest to them.
Further Efforts
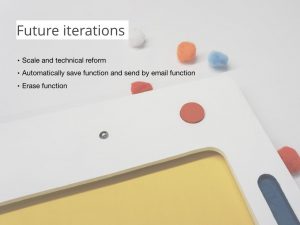
I think the scale is the main limitation of this project, a bigger scale can accommodate more people to enjoy the collaborative artwork. The ideal number of people involved in this project is 4 to 7, they will have a fast drawing and better interaction than the effect I have right now.
Some people want to save their drawing and get a copy by email, so I will try to achieve this technical function as my further step.
As what I have mentioned in the feedback from the Major Major show, I wish I could do more research in the physiological field to get more support as well as more possibilities about my concept. Currently, it is still quite a simple tool that people can play with. Moving forward to how the painting in the virtual world we are immersed in influences our perception toward the real world would a great iterate choice.
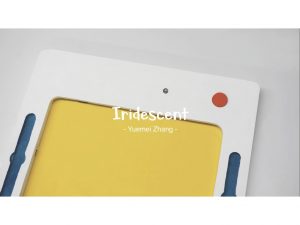
final presentation slides:

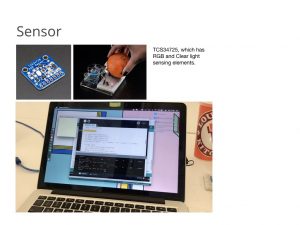


This project has three parts, color sensor, Wacom digitizer, digital screen. This installation will set up on the darkroom for the better user experience, when a user comes into the room they can find some objects placed around the color sensor, they may try them at first them find the other color they need in the surrounding.
Prototype:
Playtesting:
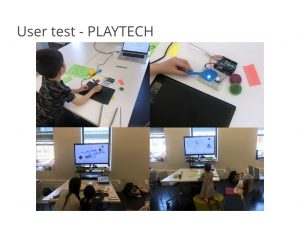
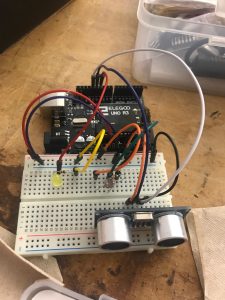
I attended the PLAYTECH (in D12) activity for the children and teenagers user testing, I use my conceptual prototype to test more than ten young people at a total. The main part I test is the stability of the sensor, the playability of the function, the unexpected outcomes from a different kid.
I provide the RGB sensor which can catch the color you input form the objects with a tip note, also I put a Wacom board and digital pen beside the sensor to test how they react with them.
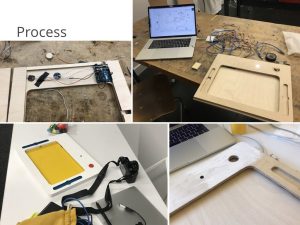
Process:
Outcome:
Feedback:
Iteration:
DC motors
DC motor is a continuous rotation motors, it only has two wires. This motor will work when you give it the power no matter what, and it will stop when you remove the power.
Servo Motors
The position of servo motors can be controlled more precisely than those of standard DC motors, and they usually have three wires (power, ground & control).Power to servo motors is constantly applied, with the servo control circuit regulating the draw to drive the motor. Servo motors are designed for more specific tasks where position needs to be defined accurately.
Stepper Motors
A stepper motor is essentially a servo motor that uses a different method of motorisation. Where a servo motor uses a continuous rotation DC motor and integrated controller circuit, stepper motors utilise multiple toothed electromagnets arranged around a central gear to define position.
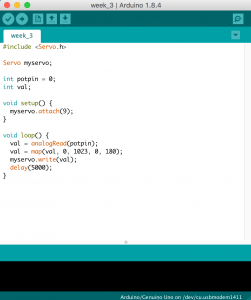
design goal:
I use the potentiometer to control the servo motor rotates, when you give more power to the servo motor, the motor with move faster. I think it can use in the children electronic toy, as a parent, they can control the toy move or stop.
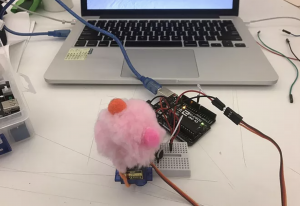
Materials:
-Arduino + USB Cable
-Potentiometer
-Servo Motor
-Breadboard
Code:
Demo:
For this week’s assignment, I use the sound sensor to control the LEDs depends on the different levels of the sound inputted.
List of Materials
1 x Elegoo Uno R3
1 x Full sized breadboard
1 x sound sensor
3 x LEDs
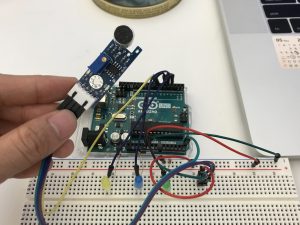
How it works:
three LEDs will blink when the sound’s value changed, but I noticed that the sound sensor is not that sensitive to detect the accurate sound.
code:
video:
This prototype is making for my Major Studio final project, I will give a simple intro and a draft to show what I will make in this semester.
In order to improve the creativity and imagination of 4th to 8th grades (early adolescence) in the 10-14 years age group, I designed an interactive installation that invites collaborative artwork in a community. Thought the use of a digital pen and Wacom pad, and a sensor that can detect the color of everyday objects, students can simultaneous paint on a large digital screen.
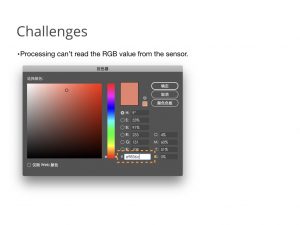
My initial idea of this installation is you can input any color you like, from any objects (use RGB sensor). Then you can create a brush by mix the different geometric figures (use camera sensor). From now I can get the color from the RGB sensor but it’s not that stable, also I met a problem when I use openFrameworks to read the three value (RGB) through Arduino.
Materials list:
RGB sensor
button
UNO
breadboard
Precedents:
1:
I got a reference from the Our Senses exhibition, as the image show, a user can play with the puzzles and the digital screen will give them an feedback on the result of machine learning. People will enjoy the process of making puzzles plus interacting with the screen. From what I have seen in this installation, people will be more passionate and engage when they can see something reacts to their input.
2:
“The Color of Smell” is an interactive tool project which enables to paint with the smell, it consists of a selection of smells, synthetic and natural, a smell-brush and a mutitouch table top. This project can draw different shapes based on the smell you input from the objects, and this function really inspires me that how to surprise the user. So I want to classify a color input from the user, then different color ranges have a specific brush.

Goal:
List:
Arduino Code:
https://github.com/yuemelz/pcom2018/blob/master/photocell_distance.ino
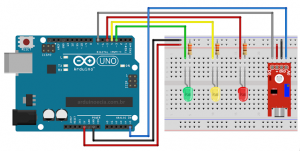
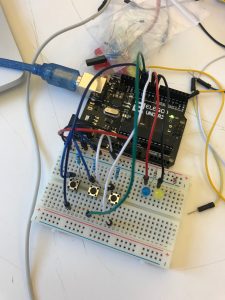
Goal of the project:
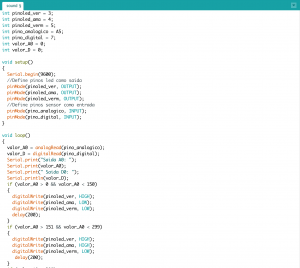
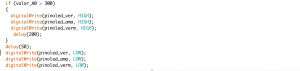
using two of three buttons to create a code then turn on or turn off the LEDs.
List:
button x 3
blue LED x 1
yellow LED x 1
resistor x 5
Arduino code: pcom2018/3buttons.ino
https://github.com/yuemelz/pcom2018/blob/master/3buttons.ino