Category Archives: Final Presentation

TransSense: Environmental Interconnectedness

The title of this work is called TransSense: Environmental Interconnectedness. The exploration into this project started by looking into how technology can influence not only how we interact with fellow humans across the world, but also our environment. So much of our lives are dictated by family, friends, acquaintances, our surroundings, etc. How can we extract environmental data to create a sense of calmness to our lives.

Presentation

Concept + Goals +Audience:

I started this phase of the project by asking myself:

  • How can information be translated in real time to the body?
  • How can it be sensed through physical output?

How many of us communicate with the world is through cellular devices. When too much time is spent communicating through this form, this can create a disconnect between us and our physical surroundings. The aim of this  project is to better integrate one with the world, through a different form, one that doesn’t rely on screens.

So, began to look at different forms of interaction as well as what information can we globally receive from spaces. I have been interested in wearables for sometime and one of the hardest things that I come across when developing wearable devices or garments is justifying the use of the item when the same information can be derived from a phone or other mobile device. However, I find that certain forms of sensation and particular types of information lend themselves to the platform. The sensation being haptics, and the information being weather.

In order to sense a vibration, one must be touching the device which generates the feedback. Due to the nature of clothing, which touches the human body for over 90% of the day, this lends itself to great advantages for intuitive connection. Clothing is also an item that changes based on the weather. If its cold one may wear a sweater. If it rains, a raincoat. If its a hot, a short sleeve shirt. With this project I want to push that function even further. Why not allow for our clothing to “speak” to us about the weather. In this case, I wanted not only to inform about wind patterns, but replicate them.

To this project there is also a poetic side to it. To replicate the wind on the body using information from anywhere in the world may allow one to feel more connected with a particular place in one’s past. For instance, by wearing a garment that can replicate the live wind patterns from my hometown I may be able to establish a mental connection with that location, to fill a dissent void. Of course, this is more poetic in nature, as I mentioned before. If even capable, much more testing and speaking with psychological specialists would be needed.

To clearly state my goals, I want to “shrink” the world for those who are away from the places they care (audience) about by replicating the live wind patterns of that location, in order to provide comfort and a better communicative relationship with our environment which is becoming more cutoff by the use of mobile technologies.

I chose this particular audience because I am one who misses home from time to time, as many do, but can always make it back. I am developing this product as a means for people in the future to cope with being away from a place that they care deeply about.

Precedent:

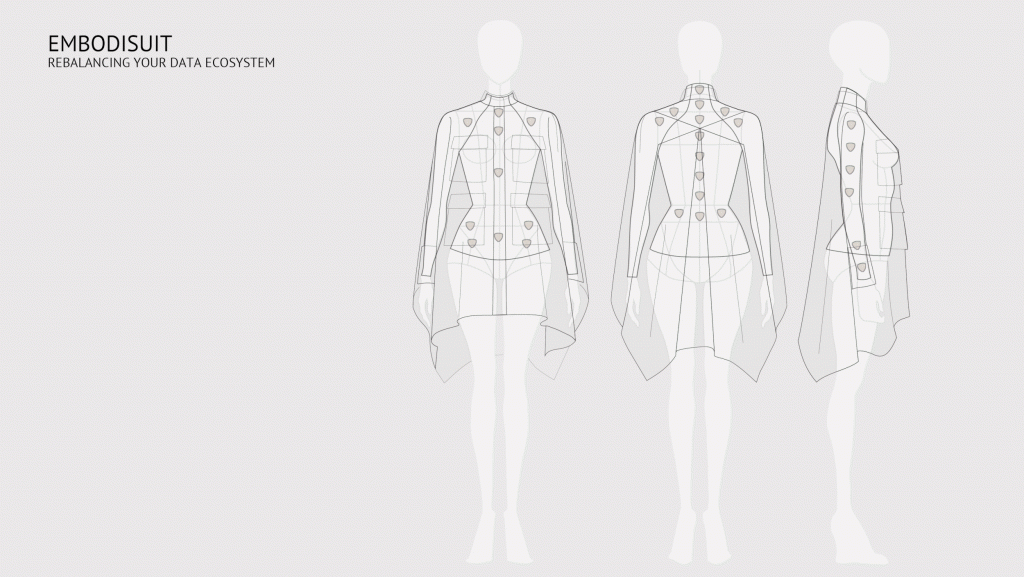
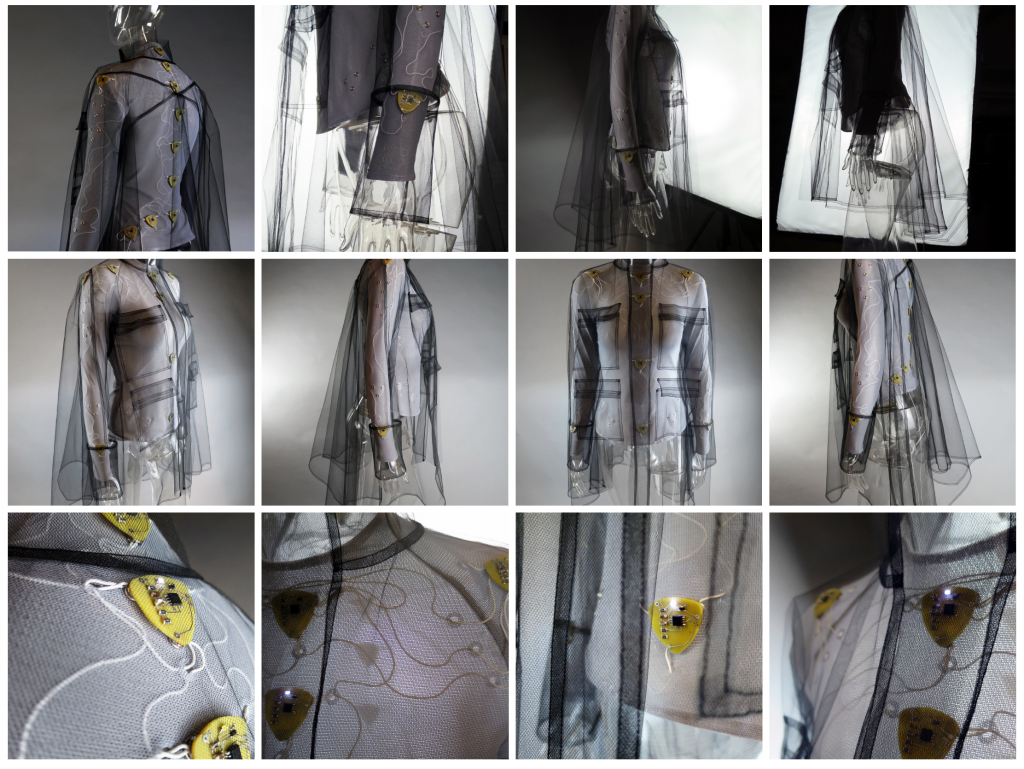
One precedent that I researched while working on this project was, Rachel Freire. Freire created a wearable called the embodisuit. What this suit does is act as a wearable mesh, worn as an undergarment that would parse information that the user was interested. This suit uses heat, cooling, and haptic feedback to alert the wearer of various forms of changing data, such as the weather and people -to- people communication.
Description of the product:

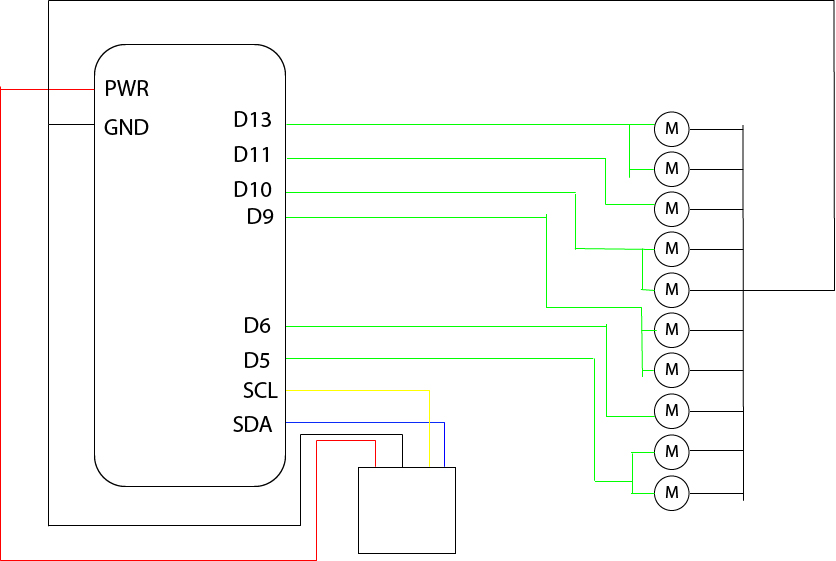
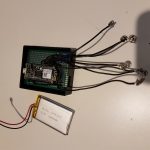
This product is a wearable haptic garment that allows the user to receive update-to-date weather conditions via the internet (IOT). This garment is embedded with 10 vibration motors. Each motor is connected to an Adafruit Feather MO WiFi Microcontroller. This microcontroller, when connected to a nearby accessible WiFi network, will pull the weather data by location from the OpenWeatherMap API. It then parses the information needed, in this case only the wind information, and maps it to the vibration motors. The are two pieces of information being mapped. One, the wind speed is being used to control how much power is given the the motor, and two, the wind direction is used to determine with motors are being activated.

Because this garment is meant to replicate the wind wind it was important to obtain a pulse effect across the body as if it was a gust of wind passing over the wearer. This also meant this varying intensities of power would have to be given to each motor and as stated previously the direction gathered from the API would dictate where on the body this gust would begin. For instance, it the wearer is facing NORTH and the API states the wind is coming from NORTH then the front-facing motors would be given full strength, the motors on the side are given slightly less power, and the motors on the back don’t receive any. How much power each section has is  modulated based on the wind speed taken from the API.

In order the make this a dynamic experience, a magnetometer (digital compass) was included initially. This compass would keep track of the user rotation and remap the “pulse” to a different part of the body, determined by the direction from the data set. I will speak to that instance further down.

Video Documentation:


Materials List:

Process + Prototypes:

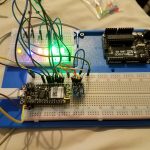
This process started off with coding. Before the making process started I wanted to make sure that I could do it code wise with the electronics I had available. I started off coding the NODEMCU. I found this WiFi developer board quick for connecting to the internet and grabbing information through the API, however, it was tedious when it came to programming the pins. The first thing that I noticed was there were no PWM pins. To create the breeze effect I felt it vital to use PWM. In addition to that the number of pins available to power all of the pins as outputs were limited due to the multiplexing of the pins. When WiFi mode was enabled in the code, several of the the pins stopped outputting. If I tried to connect one pin to another, the board would reset.

At that point I decided to use the Adafruit Feather which was capable of PWM and WiFi connectivity, and without the multiplexing issue. Once I was able to map the API data to the LEDs I was using for testing, I added a digital compass to keep track of which direction the user was standing, as to create a my dynamic experience of feeling the motors react to your rotation. However, the compass was prone to many disruptions, electricity in particular. When I placed it near my computer I found that the readings were quite sporadic and didn’t map well to 360 degree movement. Readings could go from 0 degree to 230 degree with no values reading between. I believe this also has to do with the movement of the human body is faster then the ability of the microcontroller to process.  In the end, I decided it would be best to focus my efforts else where, and save the compass for a future iteration.

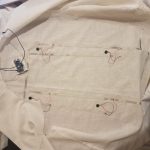
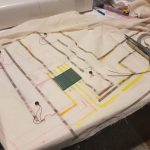
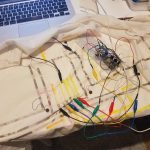
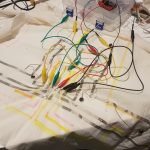
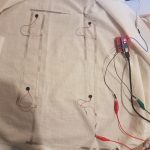
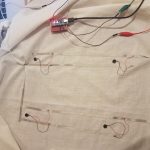
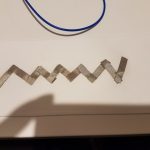
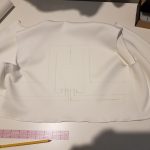
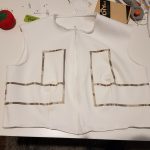
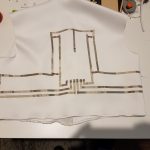
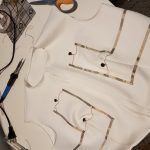
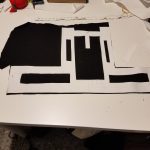
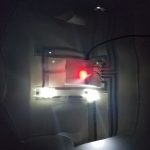
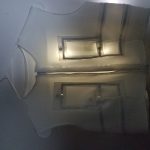
I then began crafting out the circuit and determining the best placement on the body. I tested various fabrics, and conductive materials. The Eeontex Stretch fabric was not conductive enough, so I switched to a conductive fabric tape, connected the vibration motors, sewable LEDs (more so for visual demonstration) and secured it from shortages by placing a layer of insulating material on top of the circuit.

Circuit Diagram:
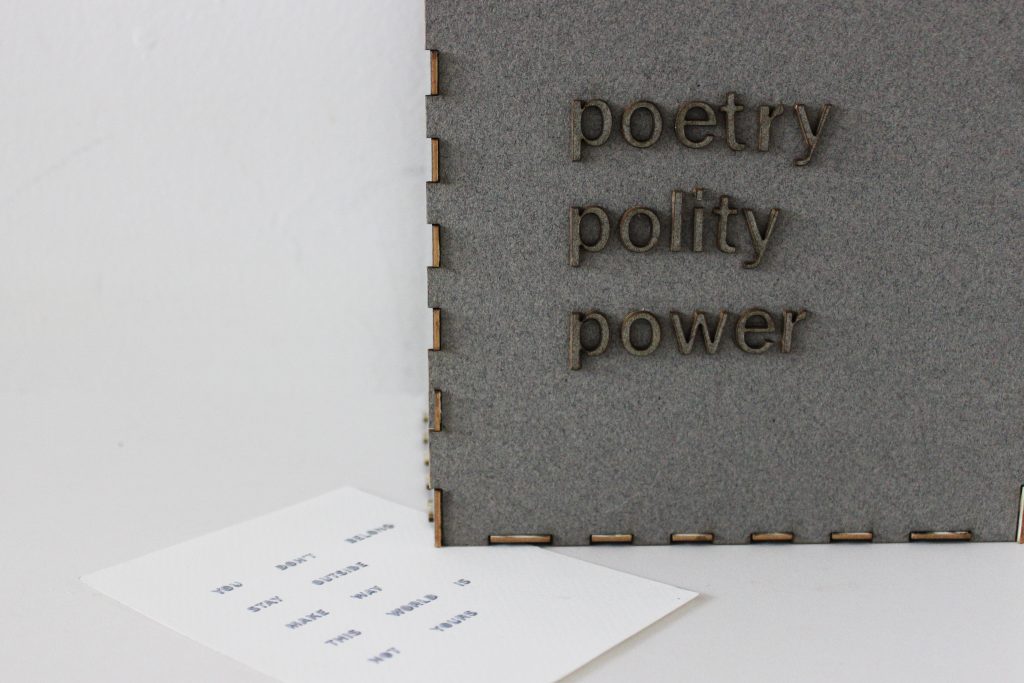
Poetry, polity and power Instructable

Poetry, polity and power is the culmination of two disparate ideas that I have been intrigued by this past semester. The first is about a new kind of interaction that is emerging between human beings and machines as technology gets integrated into everyday processes. The common perception of technology or computerized systems being objective is a myth- they embody the values and perspectives of the people who design them. The second is about the power of art and poetry- and how they can be used as dynamic tools for resistance.

Poetry, power and polity is an optimistic poetry generator that can be fed biased text- hate speeches, discriminatory policies, misogynistic statements- and it removes words to create poetry that is hopeful and empowering. I wanted to create a computerized system that would automatically generate poetry from the source text- without human intervention. I see this project as a conceptual prototype that captures the essence, the value inherent in the idea- but needs further iterations to be fully realized.

In its current form, the generator would be more effective if it could respond to different source texts- by activating different heating pads depending on which text was fed in. Future iterations include programming a system that can operate on its own. Possible ways to do this would be to train Machine learning algorithms using many such blackout poetry examples.

The challenges for this project were mainly working with unfamiliar material, that was inconsistent and would react differently on different days. It taught me the importance of experimentation. Powering the circuit using the wall wart was challenging too- mainly because I found very limited documentation on it.

I loved working on this project though because I realized how simple, basic materials, mechanisms and methods can be used to convey ideas.

Here is the pdf with the final slides.

Here is the link to my final Instructable. 

https://www.instructables.com/id/An-Optimistic-Poetry-Generator-Using-Thermochromic/

Final Project (Week 12 and 13)_Alyssa

Final:   Time’s Up 

Presentation: https://docs.google.com/presentation/d/1O3Tbw3HGmVE0klQ0oouqTND-hTB1slgr_E4iCs59kCk/edit?usp=sharing

Concept + Goals: With this project, I sought to create an interactive exhibit that complements the ‘Me Too’ and ‘Time’s Up’ movements. These were my guiding design questions:

Continue reading

Twinkle Stare – Final Presentation Documentation

  • Your presentation
    Online Link:
    https://docs.google.com/presentation/d/1hC8NEC84CYO7_m8aihOJW1nSprMXHYKTWJMagTQmW_o/edit?usp=sharing or
    PDF link:
    Pcomp Twinkle Stare_2
  • Concept + Goals.
    My concept was to create an IoT device that reconnects me in New York and my dog in Taiwan to be able to feel her presence and recreate a moment we share together. My goal was to be able to feel my dog’s presence over long distance and to spend more time with her somehow. This project is very close to me and I decided to an long distance device because of my dog who is actually sick with cancer back in Taiwan. So I want to build something that will actually work for us.
  • Intended audience.
    This project is mainly for myself so I can spend more time with my dog with her presence over long distance. However, I feel like this device for be for other dog owners who are in long-distance relationship with their dog and would like more presence of their dog.
  • Precedents.
    Pillow Talk is a device that lets you hear the real time heartbeat of your loved one over long distance by Little Riot, which really inspired having the presence sense in my device. SoftBank from Japan also created a series of devices called called Personal Innovation Act, Analog Innovation that helps connect the older generation to the younger generation by translating the new technology we use into older forms such as printing your social media updates in the mailbox as newspapers every morning so your grandma can read updates about you.
  • Description of the project.
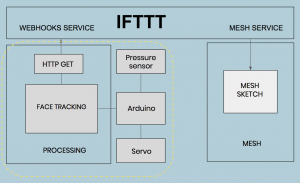
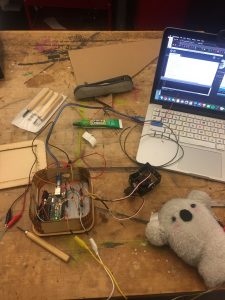
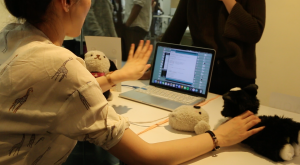
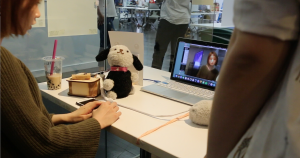
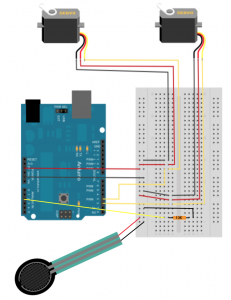
    After confirming my concept, I begin to think about the technical aspects of my project. My device’s interaction has two parts with different interactions. One part will be my dog’s end with her doll embedded with a pressure sensor on which she will lay on it and a speaker. The other part is the model of my dog in my room in New York which will have a face tracking camera, a button, and a pressure sensor built into it. As I began searching online for the details of how to make these interactions work, I was also introduced to two tools that could help with the long distance IoT connection to work. One tool is the MESH sensors which consists of 7 block sensors which each has a built-in function such as tilt, led, button, motion, and more functions to make prototyping and building project easy for the Internet of Things. The other is the IFTTT the free web-based service to create chains of simple conditional statements, called applets, to connect with different applications and services over the internet. Both tools are extremely helpful for my IoT device, however, I want to make all my interactions work properly first offline. First of all, I decided to figure out how to get the face detection to work on camera. I used an Arduino controlling to a servo motor and connecting the servo motor to the OpenCV face detection on a program called Processing to track faces when it moves from left to right on the screen. Thankfully, I spent a few days studying the open source code example online and made face tracking work with no problem. Next was to get the pressure sensor connected to a trigger to open the face tracking camera to start tracking face detected when it is pressed. This was a part where I was stumped and frustrated because I could not get the code to work with my own ability. With some help from my peers, I was able to get the pressure sensors to work to open up the camera to start face tracking when it is pressed and another pressure sensor to turn in off. However, there was another one problem I encountered with my code which was that it can only be run once. If I want to try to press the pressure sensor to turn it on again, the sensor cannot read my pressures values anymore. I would have to rerun both the Arduino and Processing sketch for it to work again. After some debugging, I discovered that it was part of the Arduino code that made the instructions appeared to be stuck in a loop. After modifying my code, my code was working fine, though, at times unstable, I decided that with the time I had, I would not make the IoT connection happen but just focus on the interactions and the physical doll of my device. My whole framework to make this IoT device work is displayed in the diagram below. What I’m focusing on is the interactions on the left. Ideally, I would incorporate this with the MESH sensors and by using the IFTTT webhooks service to send to communicate with my MESH sketch.
  • Video documentation


  • Materials list

    For the face tracking part: 

    Software Required
    Firmware Required
    Hardware Required

    For the physical making of the doll –

    • Fluffy Socks – http://amzn.to/1FwCmTk, http://amzn.to/1NWUkhD
    • Polyester stuffing – http://amzn.to/1Ke62Wy
    • Sewing Kit – Amazon
    • Process + Prototypes.
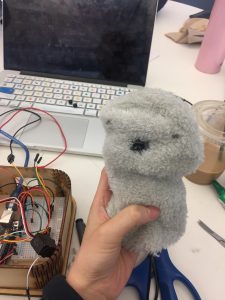
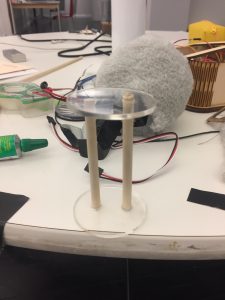
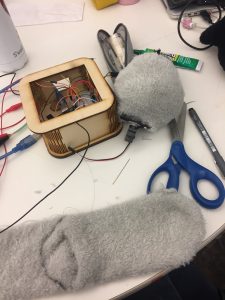
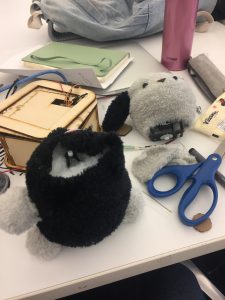
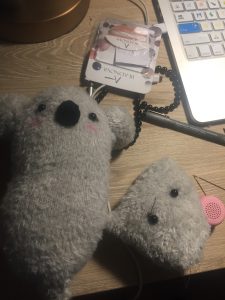
      After making the technical part of my device work, I decided to quickly move on to the physical enclosure. The physical enclosure of my device consists of two parts. One is the doll that my dog will lay on and the other is the model doll that sits in front of my desk. I completely underestimated how hard it is to put anything physical together, even if it is something cute and furry such as a doll. Somehow, the thought of making a doll to me seems simple to me. Not until I started a few tries with making a doll did I realize that I have a lot of practice to do. I thought of taking apart an actual doll but I also wanted my doll to be customizable so I decided to make one myself. To start off, I used fluffy socks as my main material and stuffed it with polyester fiberfill. I made a koala doll as the doll that my dog lays on. This was easier to make as it is such a small doll with no body. Then, I moved on making the model doll of my dog. With my limited experience, it was hard to me to make a model of the dog that looks exactly like my dog. One of my first versions of my doll was unable to stand up properly so I had to make a stand stuck onto an acrylic board and put it inside the doll so the model doll could stand by itself by itself. I then glued the servo onto the board and cover it with polyester fiberfill and put the sock fabric for the model’s head over it to make the model’s head. After getting the body to sit properly on a flat surface, I moved onto making the head. I put a web camera into the head and cut a small hole for the web camera to be able to peak out through the sock fabric. The web camera, however, did not work well hiding inside. One problem is that the web camera is very sensitive to the lighting, the distance, and the height of where you stand. When testing with the web camera inside the head of the doll model, the camera had a hard time detecting face and would jump from different shadows in the screen which causes spasm of quick movements. Another factor that was contributing to this unstable web camera screen was the fur from the sock material I used. This seemed to disrupt the clarity of the screen with a few furs sticking out along the side of the hole I cut. Therefore, I made a hard decision to connect my device to my computer’s camera to ensure the most stable and accurate face tracking. In the end, I was able to put together a functional model doll of my dog. The face tracking camera can be triggered by another doll when you press on it (when my dog lays on it) and you can turn it off by pressing on the model’s head. You can also press a button which is using one of the MESH button sensors that will turn on music which will play in the speaker inside the doll.Prototypes-
           
      Playtesting:
      Challenges:
      • Pressure sensor did not work as will as I thought
      • Complexity of the code
      • Webcam did not work well behind my fabric + distance issues
      • Time Management
      • Aesthetics doll’s with many wires sticking outFuture Iterations:
      • Refinement on the design/look of the doll with no wires with webcam built inside the doll
      • Making it work over local distance and wireless with bluetooth
  • Circuit diagram.

Continue reading

Final Documentation

Title of this project

Storytelling Soundsystem of “Silence Breaker : One Survivor’s Story”

Presentation

https://docs.google.com/presentation/d/e/2PACX-1vS1Z4WoHKKeZttYAWRaZlF0HmT32XRFfxQtOlJhQp30_M3232goVM0RB9MDam6KEYw5Mc1xT9OmMIeu/pub?start=false&loop=false&delayms=3000

Concept

In the midst of current #metoo movement, I’d like to focus on domestic abuse particularly for this design project. We are facing significant moments of women’s right against sexual abuse in these current issues, and there are needs to bring about more positive effects to society than just mere attentions. I would like to bring up domestic abuse against women and children for my design project because sexual abuse in domestic area could be the most hidden, and deluded part.

One of a common myths associated with DA (Domestic Abuse) is that victims of DA are helpless, passive and fragile. However, survivors are often strong, and use a number of coping strategies to manage their situation. But society’s traditional approaches to survivors such as victim blaming, stigmatization, and pathologizing make obstacles to let them speak out. Also survivors are at risks such as retaliation from perpetrators and losing their life foundations. Through this design project, I’d like to call for a change to society to the level of acting out.

Continue reading

Final

The video is a demo (or trailer) of my final project, and images are the final view.

Online Link:

https://drive.google.com/open?id=1xcC8PSXATgWr8_nK9iuvLwP5t0UJ21i3

Concept + Goals.

I’m creating an interactive installation embed with the learning function for teenager (early adolescence) who are in the 12-18 years-old age group, to let the teenagers be intrigued by the color and painting, also improve their creativity, imagination, experimental spirit and cognition ability during the immersive experience.

Intended audience.

My target user is a teenager who is between 12 and 18 years old. When teenagers in this age group, they have more active learning and thinking ability. They manifest more positive action toward learning, exploring and creating new things. also this is a golden age for innovation. I’m also targeting at the people who is interested in the painting, color and creating things by themselves.

Precedents.

How teenagers interact with each other or another group, how they play with this installation and figure out the working process, is the main point I consider. Ideally, when teenagers meet this installation, they can attract by the function of inputting the color then they can feel unexpected by the shapes will match the color. For the project interactive function design, this should be simple to understand, friendly to move and use the tools.

This project named HUBO, it shifts the perception of coloring from 2D to 3D, this area satisfied the demands from children which are curiosity, creativity, imagination and the desire of playing. Over time the space will become a creative, colorful scene of furry food, each piece is the trance of interaction and experience.

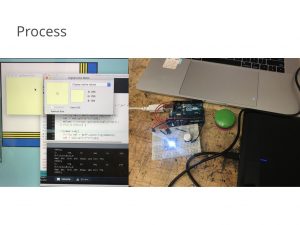
Thinking about my project, I want to encourage teenagers to draw the screen start from the blank to colorful step by step, I believe every painting created by children are having their story and special meaning. My project will provide a relaxed environment to support their creation.

For the reaction from children, I collected much information from the Our Senses exhibition located on the American Museum of Natural History, and I found this project in the Seeing area. The walls in this room were drawing by multiple animals with different colors, when the light changes only the images that absorb that color can be seen. For the interactive part, children will explore by using the flashlight instinctively. This project actually inspires me a lot about which tool is friendly enough that I can use it in my project to let teenagers know this can be move and use not for display.

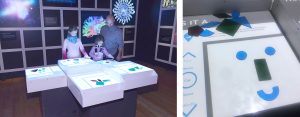
I got a reference from the Our Senses exhibition, as the image show, a user can play with the puzzles and the digital screen will give them an feedback on the result of machine learning. People will enjoy the process of making puzzles plus interacting with the screen. From what I have seen in this installation, people will be more passionate and engage when they can see something reacts to their input.

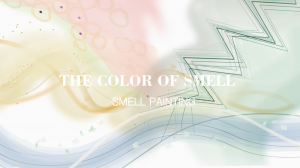
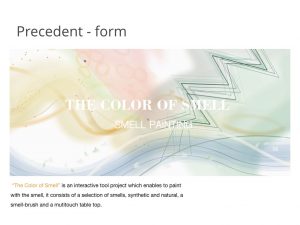
“The Color of Smell” is an interactive tool project which enables to paint with the smell, it consists of a selection of smells, synthetic and natural, a smell-brush and a mutitouch table top. This project can draw different shapes based on the smell you input from the objects, and this function really inspires me that how to surprise the user. So I want to classify a color input from the user, then different color ranges have specific brush.

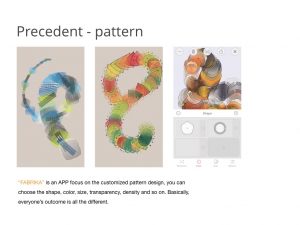
“FABRIKA” is an APP focus on the customized pattern design, you can choose the shape, color, size, transparency, density and so on. Basically, everyone’s outcome is all the different.

Description of the project.

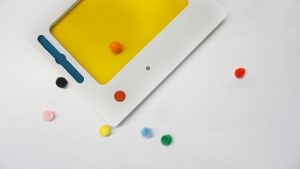
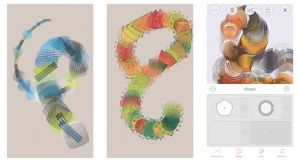
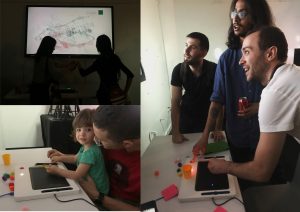
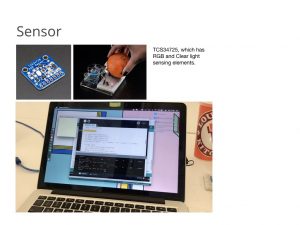
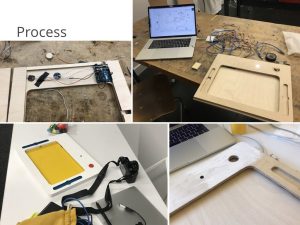
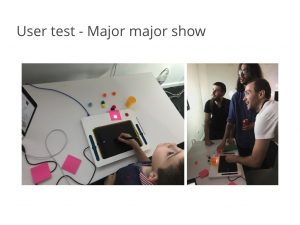
This project has three parts, color sensor, Wacom digitizer, projection on the wall. This installation will set up on the darkroom for the better user experience, when a user comes into the room they can find some objects placed around the color sensor, they may try them at first them find the other color they need in the surrounding.

set up place arrangement

Generally, when people go into the showroom, they can understand the use of this project. I use the big digital screen to help have a better view of their drawing outcome, also I played a short trailer for this project which contained the simple introduction and the process of using. When they found the color samples cannot satisfy their demands of color use, they tended to found other objects out of the room.

Outcome

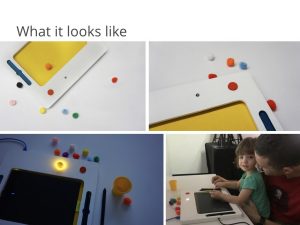
As images display, users show their creativity and passion in choosing the color and draw on the canvas based on the brushes changed.

Feedbacks from the Major Major show

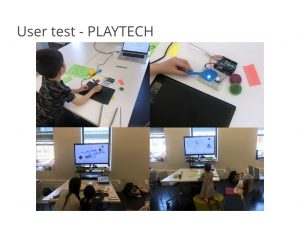
        • Yujie mentioned that I can add a white color with the circle shape to fake the effect of the eraser, and if I do not want people to use it then try to encourage them does not use this function.
        • Some people want a copy of the drawing.
        • Some people have a confusion about when is the restart of the drawing system.

Results

There are two main educational modes are used in many primary schools. Based on huge amounts of research, one mode is following the outline of the image, practicing to fill the color, another is the teacher give students a topic then teach them how to draw. These two modes are all not focused on improving the creativity and imagination, they give students too many limitations.

When tweens participate in this project, they can choose the color to control and change the brush patterns, which can improve them to explore the surrounding closest to them.

Further Efforts

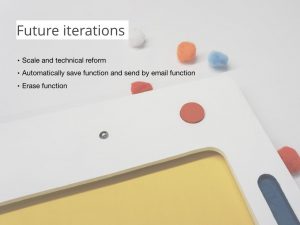
  • Scale and technical reform

I think the scale is the main limitation of this project, a bigger scale can accommodate more people to enjoy the collaborative artwork. The ideal number of people involved in this project is 4 to 7, they will have a fast drawing and better interaction than the effect I have right now.

  • Automatically save function and send by email function

Some people want to save their drawing and get a copy by email, so I will try to achieve this technical function as my further step.

  • Iteration: moving forward

As what I have mentioned in the feedback from the Major Major show, I wish I could do more research in the physiological field to get more support as well as more possibilities about my concept. Currently, it is still quite a simple tool that people can play with. Moving forward to how the painting in the virtual world we are immersed in influences our perception toward the real world would a great iterate choice.

final presentation slides:

Final documentation – Carla Molins

This is my final blog post including all deliverables required:

1.Final presentation

https://drive.google.com/file/d/1B-UEswSAtg4PgTHOUH33RxvD7tlx0vFU/view?usp=sharing

2. My final documentation below.

The Issuu document covers: Concept + Goals, Intended audience, Precedents, Description of the project, Materials list, Process + Prototypes, Circuit diagram + Code, Challenges, and Conclusion. In addition, I have included part of my research too because it’s important to understand the nature of my project.

3. Video documentation

Final project document_Joyce Zheng

Facebook Plant

Context

Data has never been as valuable in human history as it is today. As data is becoming an essential part of our society, it is crucial to discuss that what the relationship between data and people is right now and the possible form of information is going to develop.

So what if the online information had a lifespan of living things in reality? Would people see or treat information in another way? I am planning to do research on social media information and how users interact with the information they receive and send in their daily lives to discover the possibility of reversing people’s negative attitude towards information.

Concept statement

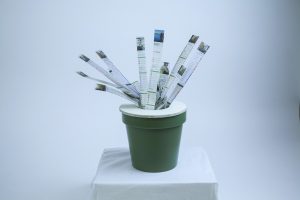
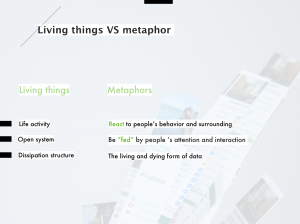
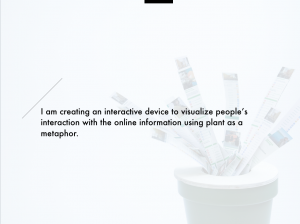
I am creating an interactive device to visualize people’s interaction with the online information using the plant as a metaphor. Through interacting with the installation, people can understand how our interaction can influence data and rethink or imagine our possible relationship with data.

Screen Shot 2017-12-22 at 10.14.06 AM

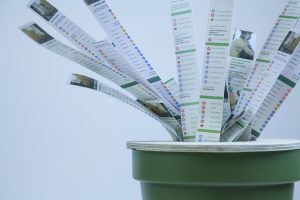
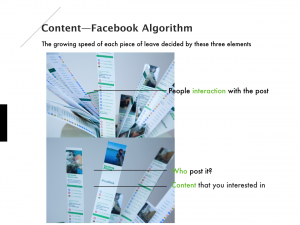
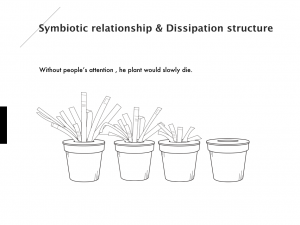
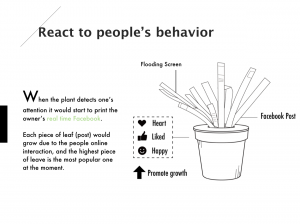
It is a plant-like product that represents the social media. For example, on Facebook. The posts you made on Facebook would be printed on a leaf. The growing speed of the plants would depend on the interaction activity of people passing by. The usual action we do on social media, like sharing, liking and commenting would respectively correspond to tearing part of the post. Without people’s attention or interaction, the social media plant would die, which shows the relationship between social media and people. The former relies on the input and attention from people, and the latter needs to build their identity with the public. Also, bringing the virtual action to actual physical ones exaggerates the bounce between the two vividly.

Technology

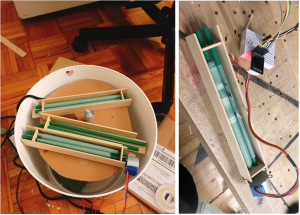
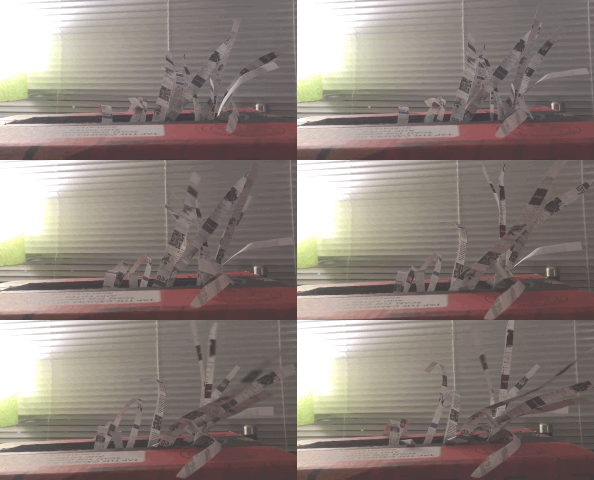
About the technology, I used many stepper motors for the roller system. I did a lot of tests on the motor speed and the paper material to simulate the most natural growing movement. I also use ultrasonic sensors and sound sensor to detect people’s presence and movement.

Slides:

Final Project Documentation

Concept + Goals: 

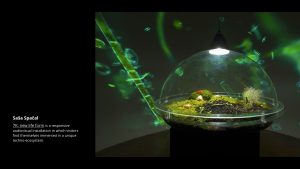
  • Constructing an artificial, small-scale futuristic ecosystem under the scenario when synthetic biotic organisms are largely penetrated in human beings’ daily life.
  • This ecosystem will trigger interactions between human and simulated biotic organisms to raise a discussion of individual bio existence and the ecosystem at a large scale.
  • A system that humans are party to, but not sovereign over.

Intended audience: I imagine this piece living in the gallery, the structures in this piece are seen not as inanimate, fixed objects, but as living entities, capable of regeneration and growth. The intended audience should be someone who is interesting in immersive installation environment and synthetic form.

Precedents: 

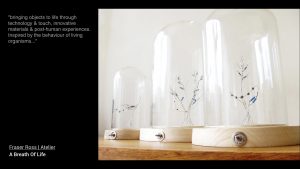
A breath of life by Fraser Ross | Atelier

Muscle wire projects by Jie Qi

7K: new life form

Description of the project:

A.Sketch

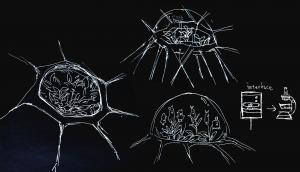
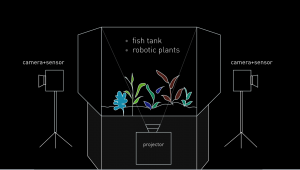
Before going into the implementation stage, I created sketches to illustrate the possible project scale and appearance. (Fig1.1)The outlook of the installation should look organic enough to make people think of cells or life form etc. Transparent glass and the customized base are being considered as important elements in this project, for both how it looks like as well as the setup detail. In Fig1.2., this diagram shows how this installation will be set up, and the layout of the components including robotic plants, camera or sensor, and projector. The camera will be used to capture audiences movements and the projector will be used to create an appropriate visual outcome. Since this is an interactive installation, the main input will be audience’s movement, which will trigger the robotic plants to respond to it. Robotic plants will be influenced by human factor, but will still have the random movement like real plants.

Figure 1.1. Project appearance sketch

Figure 1.2. Project setup and layout

B. Technique

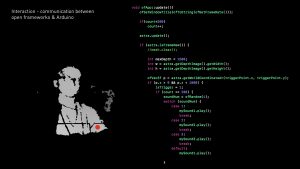
To generate a movement that is intriguing enough, the sensors in electronic components and multi-platforms are required. I want to connect Unity, Arduino, and Kinect these three platforms to complete the interaction. For each execution detail:  Kinect– using the infrared camera to detect audience’s body skeleton and find the x, y, z-axis. Unity– using the c# program to enable the trigger function when audiences touch the certain area  (there are five little yellow people models spread on the screen representing different location). When the models being triggered, Unity will send a byte to the serial monitor in Arduino. Arduino– in code, there is a processing message which will start to heat up the wire and rotate the motor, by typing “on” in the serial monitor, the function loop will start to run. To conclude, by connecting these three different platforms, I can achieve an indirect interaction without using a sensor. For the final setup, the audience will not see the unity interface so that they can just walk around, being captured by Kinect, and the robotic plants will move based on their movement without notice. The reason for putting all the technique together is to response the original idea for this project: a system that people can interact with in an indirect way.

C. Prototype and Playtest

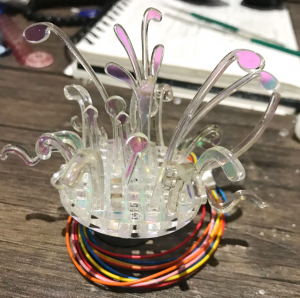
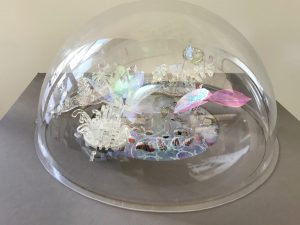
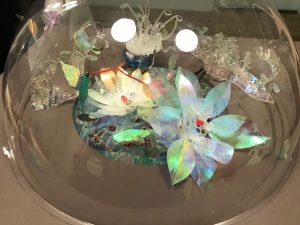
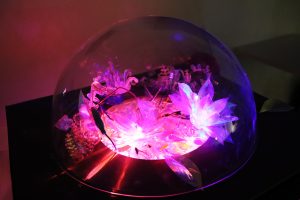
Through making a physical prototype, the main material for making robotic plants is the radiant acrylic. This is an important design decision being made— the acrylic itself representing cheap and mass production like what we can see in CD or any plastic product. However, the shimmer visual effect makes the robotic plant look futuristic, and it also fits into the context of  “largely penetrate into our daily life”. I use laser cutting for customizing each plant, and also electronic components such as muscle wires, motors to create different movement.

Figure 1.3. the first physical prototype with radiant acrylic and stepper motor

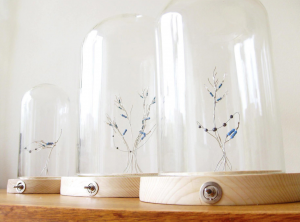
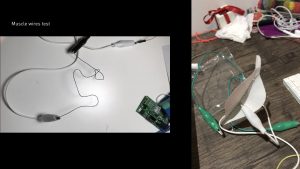
After the very first prototype, I found out the movement of the motor is too stiff, and I need to find the other components that can create natural movement. The muscle wire is what I chose in the end. It is a unique type of wire that acts like the muscles in our bodies. Muscle Wire is an extremely thin wire made from Nitinol (a nickel-titanium alloy) that is known for its ability to contract when an electric current is applied. I incorporated this component to my project, and there are some interesting precedents created with muscle wires that I got the inspiration from. For example, A breath of life by Fraser Ross, using Flexinol, recycled electronic components, specimen jars, these “flower lamps” reside in a state of death until human interaction — a breath — brings them to life for a brief moment. The blowing is the appropriate interaction as trees and plants grow on carbon dioxide. Every living thing needs a home, plants change themselves to survive in their habitat.

Figure 1.4.”A Breath of Life by Fraser Ross.”, 2010. 

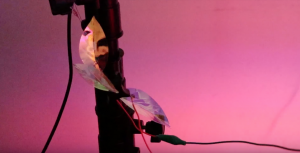
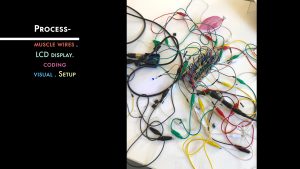
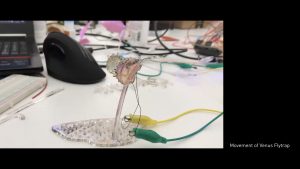
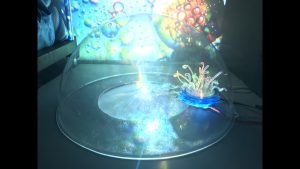
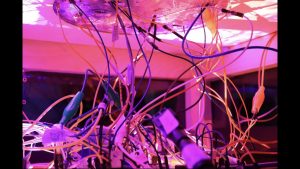
For my own creation with muscle wire, I tested out several prototypes to make a real-life look based on the shape of real plants, like a leaf, flower, and Venus flytraps (FIG 1.5). Using muscle wire is the most challenging part of this project, it’s really difficult to manage the right amount of electricity and there are countless wires to put together. However, after series of tests, I put all the components together and add the light effect to see the real set of the project and then conducted a primary playtest. At this stage, the primary project form and the aesthetics have already come out.

 muscle wire movement prototype- venus flytrap 

Based on the feedback I got from playtest, there are two aspects needed to be improved: first, the movement of wire and plants are not that clear, the movement is sparse and too gentle to notice. Second, the layout of plants are not well-formalized, they looked like individuals rather than a whole ecosystem.

D. Finalise

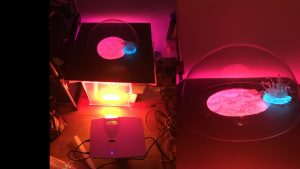
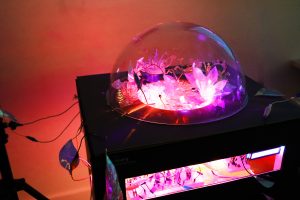
Consider the setup for the exhibition, I made a customize stand to store projector and all the electronic components inside. One another important decision is that I used transparent acrylic to reveal the wires and the circuits of this projects because I want people to feel the technology behind this piece as if those wires are the origin of robotic plants. Also, the depth camera used to capture human beings’ movements are decorated with robotic plants in order to make it fit into the project.

Figure 1.5. decoration on the depth camera

Reflection

The criteria used to evaluate this project is mainly based on visitors’ behavior during the major major exhibition. The most frequent feedback I got from this project is that people enjoy its aesthetics, including lights and handcraft robotic plants. At the same time, people do feel want to interact with it and see what will happen, and they will want to dig more into the concept behind.  The whole interaction takes people for 3 mins on average. Most of the feedbacks are positive, but one thing I think should be improved is that some people will neglect the movement because it happens randomly and there is no clear light resource to light up each component. The future iteration of this project will be the reassessment of the project scale, maybe the large scale living system can provide a more immersive experience.


List of components:

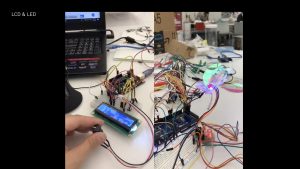
  • Arduino Mega2560

(there are more pins on Mega which enables me to connect 6 muscle wires, 1LCD, 8 LED lights, and 1 stepper motor, the total number of pins in need is 34. )

a nice substitution for Kinect, lightweight, easy to set up, and compatible with Mac environment. I was supposed to use Kinect 2 to track people’s skeleton but my windows laptop broke the night before the exhibition, so I change unity to openframework and Kinect to depth camera to create the desired outcome.

I bought tons of them on sparkfun. There are different specs and I think 0.012″ looks good, not too thin or too thick.

  • tip120
  • 330-ohm resistor
  • 12v stepper motors
  • motor shield for stepper motor
  • 12v 6a power sourcex2 – each for heating up 3 muscle wires

Presentation slides and Process:


Additional resource: For this project, I tried to gather all the useful information about using muscle wires, and I put them all in a google doc

Code: Code in Arduino on the GitHub