Category Archives: Assignments

Week 5 Assignment

1) Build two “nodes”, one for a battery and the other for LEDs. Use a different substrate for each (e.g. paper, wood, fabric, ceramics, etc).
2) Use your zine to build three more connector tools to connect your “nodes.” They can be all the same or all different.
3) Design a tool you would like to have in this class. It can be completely fantastical or gravely functional or both. You do not have to make this – it is a brainstorming exercise.

Document these all on the blog and bring them to next class.

Week3,4

  • Title. “Tight it to Light it!”
  • Description. This swatch (when light and the battery are in place) is to light a LED when the belt is tightened.
  • Materials. conductive fabric & paint & thread are used.
  • Techniques. Conductive threads are hand sewed onto a fabric that is used for embroidery.
  • References. I wanted to be creative with surface contact activated circuit. And thought a way of making two surfaces lock up to light the LED. (the belt!)

I’m using conductive paint spread on the fabric! and the thread.

belt type switch! using conductive fabric also. I liked that even a thin layer of the paint was able complete the circuit. I enjoyed hand sewing experience =].


Week 3,4 – Dario Narvaez

Accordion Switch: A playful push-button made out of paper and foam.


This switch explores a fun way to activate and control a circuit, by using the spring properties derived from forming intricate geometries with paper. The paper and the mechanism derived from the folding have ‘memory’ (return to the original state – usually all kind of elastics have memory), so the button can return to the initial position and state after is released, and therefore, opens the circuit. The key in this exercise is to use the properties of the materials without the need to add mechanisms or extra parts such as a spring. It is interesting how a non-elastic material can become elastic by modifying with various triggers, in this by changing the geometry. Can hard-flat materials, such as wood, metal and plastic become elastic by changing properties?

Materials:

  • Paper with accordion template – Letter Size
  • Conductive flat surface (I used cooper tape and coins)
  • Foam for touch feedback (There is foam in the push surface and in the inside of the accordion to achieve a better physical feedback)

Construction:

The switch was made using paper engineering (template and design downloaded from https://www.robives.com/product/make-your-own-paper-squeeze-box-accordion/). This involves a complex and very persevering process of bending and gluing in different angles, as well as being able to find the right way to form the volumes. I had never worked with paper engineering, it is an exciting field, but one that requires a lot of time and patience (above all patience!!!).

The switch and the mechanism are simple; I used two conductive surfaces that allow the continuity of electricity. I also used different types of foam (at the top and inside) to provide physical feedback that is appropriate with the action of “pressing”.

References: 

This project was inspired by the amazing work of the paper engineer and artist Rob Ives. I also was inspired by this visual reference of the popular goofy glasses with elastic eyes. What would be the interaction of a button that is constantly moving and that has a goofy appreciation? Perhaps an answer that goes against the principles of ‘good’ design (maybe?), but that explores affordances and interesting mechanisms for game …


New Craft Endeavor

The craft that I started learning and exploring was embroidery (I followed the tutorial on the basics of embroidery from this youtube video). It is interesting how I was surrounded all my life of this craft for the beautiful work of my grandmother, but I had never tried it. There is an emotional connection with textiles and embroidery that I find motivating to explore. In this particular case, I spent a very good of time doing it, it was not so difficult, and it was definitely relaxing. I want to continue exploring more and more types of increasingly complex stitches. It is amazing to see the work of people who work in this craft, and the potential this field has to be mixed it with other fields.

I consider myself a designer and maker. I am always thinking about exploring materiality and construction methods but having a conscious process that involves constant communication with a specific user. I’ve also been intrigued by hacking processes and materials, as an interesting way convert a design in a sustainable system, where the life of use of a product is not limited to its vital functionality, but to possible and innovative alternatives to revive it.

My favorite tool is the pencil. With it, I can capture and plan what the brain is producing. It is often difficult to represent these ideas, which are often abstract, in the brain itself. They have to validate with reality, and the easiest way is to communicate them through a pencil. I also love calipers. I use this measurement tool in my everyday as an Industrial Designer. It’s always on my side while I’m modeling in 3D or constructing models.


Week 3,4 – Anna

Oh snap! These four swatches use copper thread with a snap switch. When the circuit is closed, the mini LED shines.

** Swatches **

** Swatch materials and process **

** Learn a new craft **

Last week, I did hand sewing for the first time through my swatch-making. I also took a silkscreen printmaking class, and am looking forward to playing with printmaking and conductive ink in a future project this semester.

Week 3 HW – Zhenyuan(Christina) Shi

For this week’s homework, I created a selection switch which allows the user to choose which light to be turned on. I used conductive thread and sewable LEDs.

And I then I made three identical ones, in which I used different materials to achieve the same effect.

For learning a new craft, I learned embroidery.

My favorite tool is X-ecto knife, because I really like working with paper and the knife makes it very fast and precise it could cut paper.

I think I would identify my practice as storyteller, maker, designer, and craftsperson. Since I came from a film background, it is quite important for me that my piece of work carries a story or some kind of narrative. I consider myself as also a maker&craftsperson because I am really into DIY culture and I’m passionate about figuring out how things work and constructing them.

Daisy bud – Week 3 & 4 – Carla

PART 1: Daisy Bud


Description. I used crochet to fabricate the swatch which is shaped like a flower. I wanted to have a flower that could have two different states, open -> bloomed and closed -> bud. When the flower is closed and both sides of the conductive yarn touch, the testing circuit is closed and it lights up an LED.

Materials. Color yarn, crochet needle, conductive yarn. Testing circuit: led, alligator clips, sewable battery holder and 3V battery.

Technique. I used the colored yarn for the base flower using the simple and double stitch, and conductive yarn using the simple stitch to create an attachment to the main flower that could create the connection between both ends.

References.

https://www.instructables.com/id/Amigurumi-octopus/

I wish, one day, I could do something like this:

https://www.ravelry.com/patterns/sources/mathematical-intelligencer-june-2001/patterns

Make three more identical ones.

I created a series of flowers. The three colored ones are part of the swatch exchange. The white one, slightly different has a little bit more of experimentation using different stitches and materials ( conductive yarn + conductive thread). I can totally tell which one was the first and which one was the last one!

PART 2: Learn a New Craft 

I learned how to crochet. It’s something that I always wanted to do and I decided to use it as the main technique for my swatches too.

I identify myself as a designer, maker, researcher and educator who tries to simplify complexity by making stuff and experiences.

My favorite digital tool is still a Wacom that can work as an extension of my own hand as I’ve used it since I was a child. However, as I’m doing a lot of fabrication stuff I may have soon enough one new favorite tool.

I really liked trying a new technique with a material that wasn’t new at all (yarn) as I’ve knitted before a scarf. I found interesting that what was supposed to work theoretically at the end required a lot more time, and practice than expected. I personally found frustrating not being able to read the crochet patterns even though I was starting to feel comfortable with stitching.

I also decided to try different ways to make the swatch and I choose the one that worked better. Here an example using conductive thread edges.


TIP: I found easier to learn crochet by watching a video with the basics and then going back to the written instructions. The combination of both made me understand everything better.

Week 3 & 4 – Erica

The switch I created is called ‘Fold-n-Twist.’ The switch will turn on the LED when the user folds and twists it back and forth. The materials I used are fabric, yarn, conductive fabric tape, and threads. I bonded two layers of fabrics together first to make it stronger and thicker. Then I place the conductive fabric tape on both sides of the fabric and they have to be uneven. Lastly, I sewed the yarn on top. The LED will not light up when the user is just folding the swatch because the yarn covered the tape, so the twisting movement is needed.

I tried to create a conductive pom pom at first but it didn’t work well, and the LED is really dim. Maybe the yarn is reducing the conductivity of the conductive thread.

The new craft I learned is creative weaving. I’ve tried basic weaving before and I really want to try making creative swatches where I use many different types of materials. I like how the outcome is spontaneous. So I used all the scrap pieces of yarns and ribbons I have at home and I made two swatches. It was harder than I thought because it is hard to line up materials of different thicknesses. My advice will be plan a little bit before starting even though this is supposed to be creative and spontaneous.

I identify myself as a designer(clothing – not fashion), craftsperson, and a semi-artist (lol). I’ve been using these terms to describe my practice for a while now. Working with my hands comes in natural for me and I am usually pretty OCD about the craftsmanship of my work. My favorite tools are my hand and the sewing machine. I am really glad that my hands are somehow pretty ‘tools-friendly’ and they work really well with the sewing machine. The two can create beautiful things together.

Week3&4_Yixun

Pearl Switch
This is a switch that the users can move the bead to different positions to turn on different LEDs. I used LEDs, paperboard, conductive tapes, pins, and foamed plastic. The pin is the trigger in my swatch. And the foamed plastics are stuck together to hide the needles of pins. I soldered 3 LEDs in each swatch. I got inspiration from arcades. Some old game machines have this kind of mechanism.

I learned how to weave by making use of a mini weaving loom. Maker, designer, artist, learner, craftsperson, and practitioner are the labels I gave myself during the process of weaving. Because the first thing I need to do is understanding the theory of weaving which is not very difficult. However, it takes time thinking about how to make different patterns instead of just rectangles. My favorite tool is my brain for now. And doing the creative jobs is the most exciting part of the making process. I realized the tricky thing about weaving is not how to make pretty patterns but how to hide all the thread residues to finish a piece.

Tips: Make sure binding of yarn and loom is tight enough or you will find all the yarns become loose in the end.

Fabric Sensors & Learning A New Craft (Weeks 3/4)

Part 1:

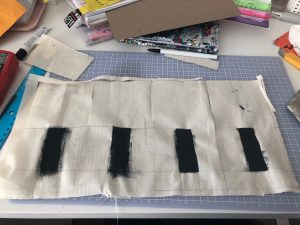
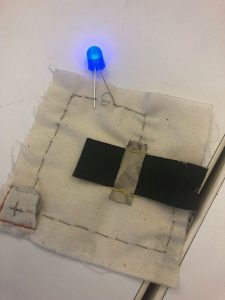
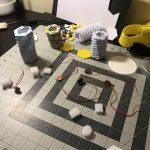
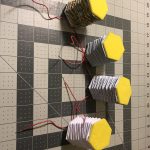
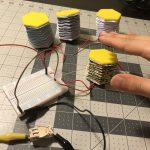
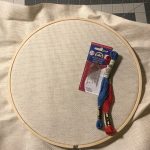
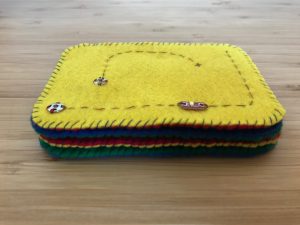
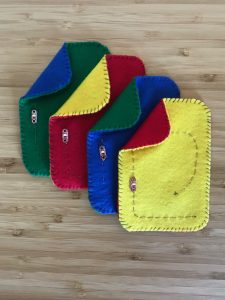
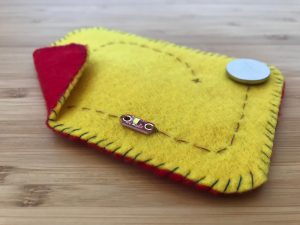
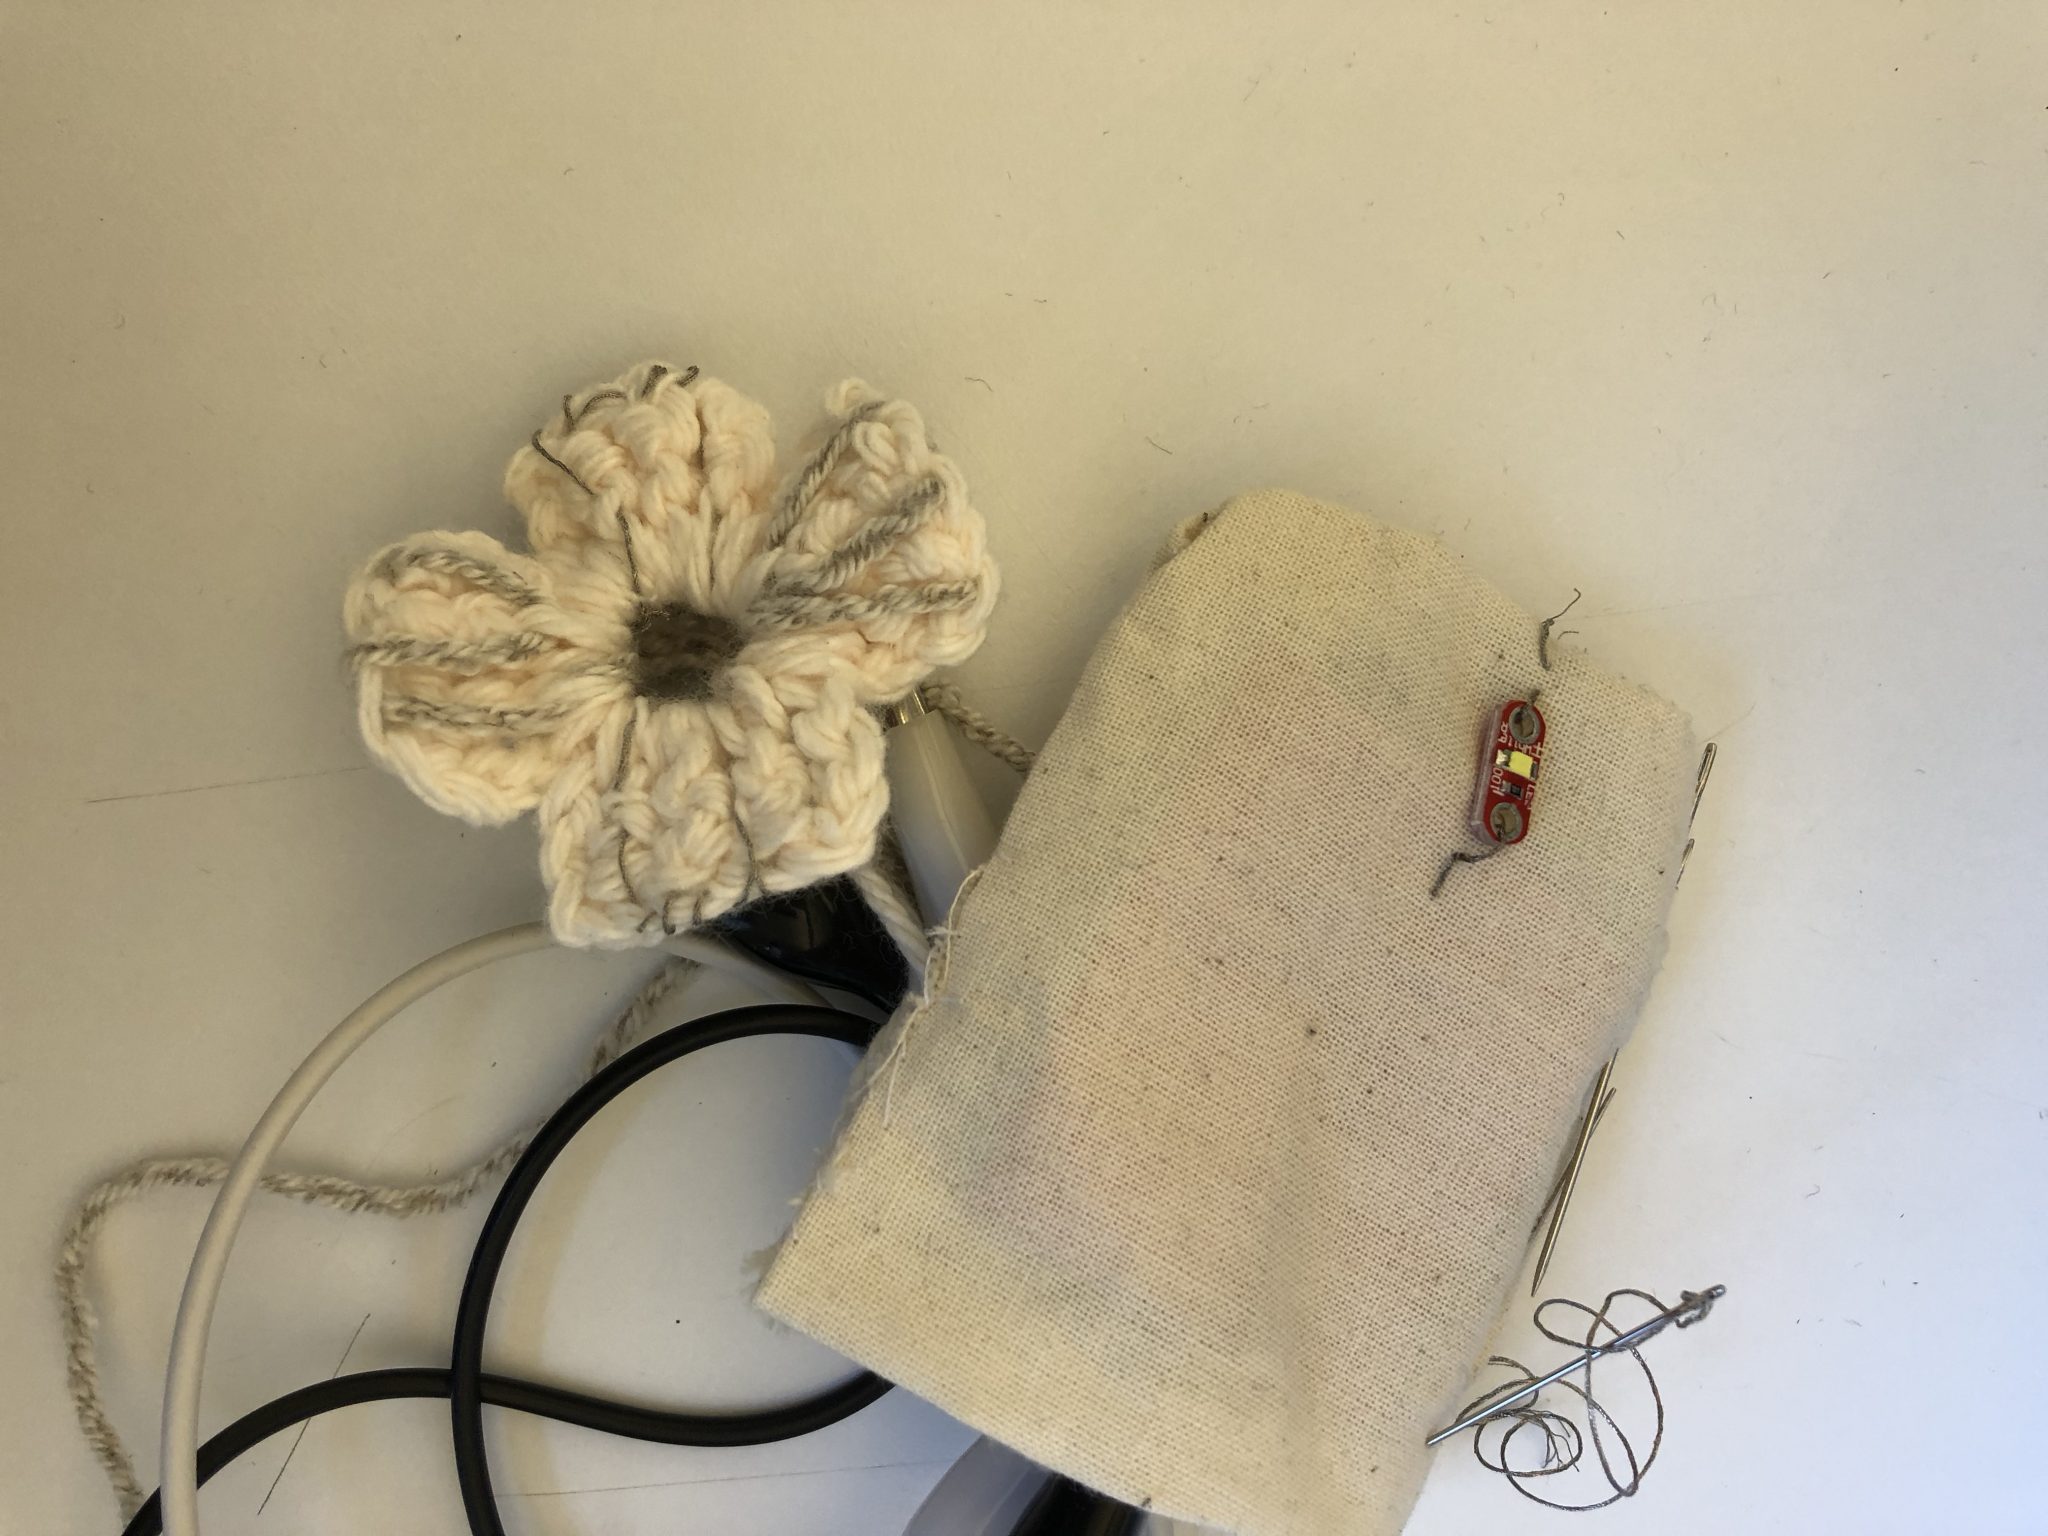
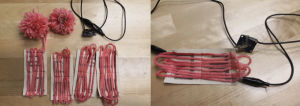
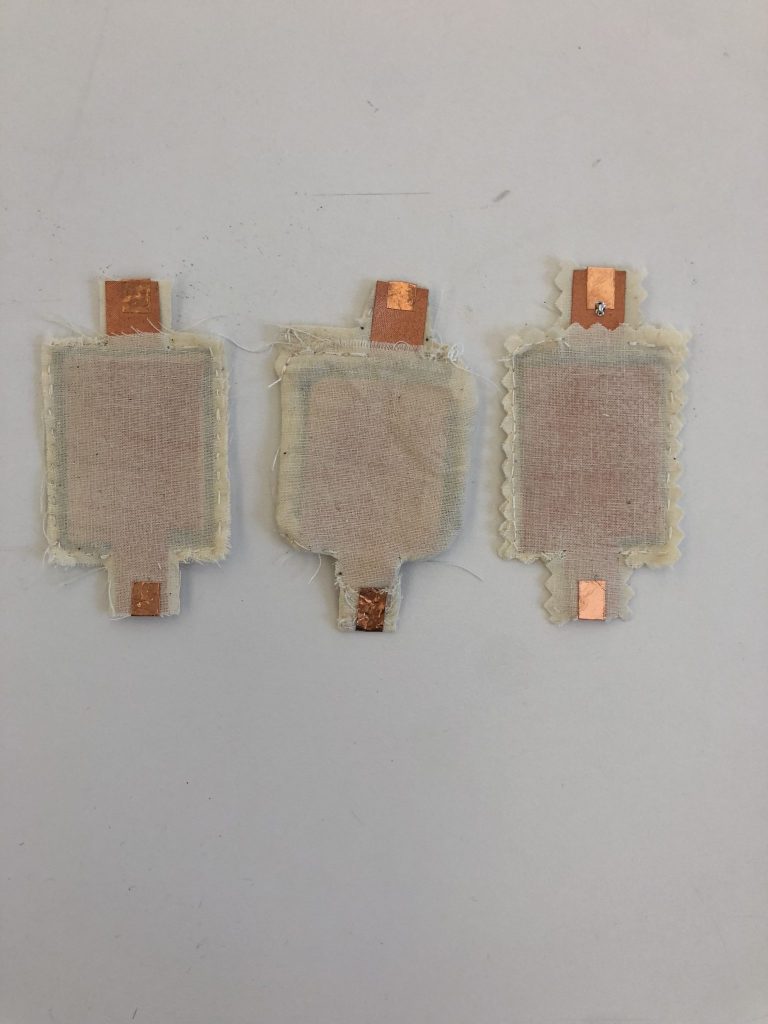
Fabric Pressure Sensor: Made from muslin, thread, conductive copper fused, velostat, copper tape.

I constructed this sensor by sewing two pieces of velostat between muslin with copper fused to each side. I followed the general idea on this instructable quite closely. I modified the shape and I used pinking shears to finish the edges of the three swatches made for my classmates. I didn’t like just giving people swatches with unfinished edges, but using the serger on such small swatches seemed like overkill. I experimented with keeping the raw edges on the inside of the sensor but the sensor was too small to turn it right-side out and not possibly damage the conductive material.

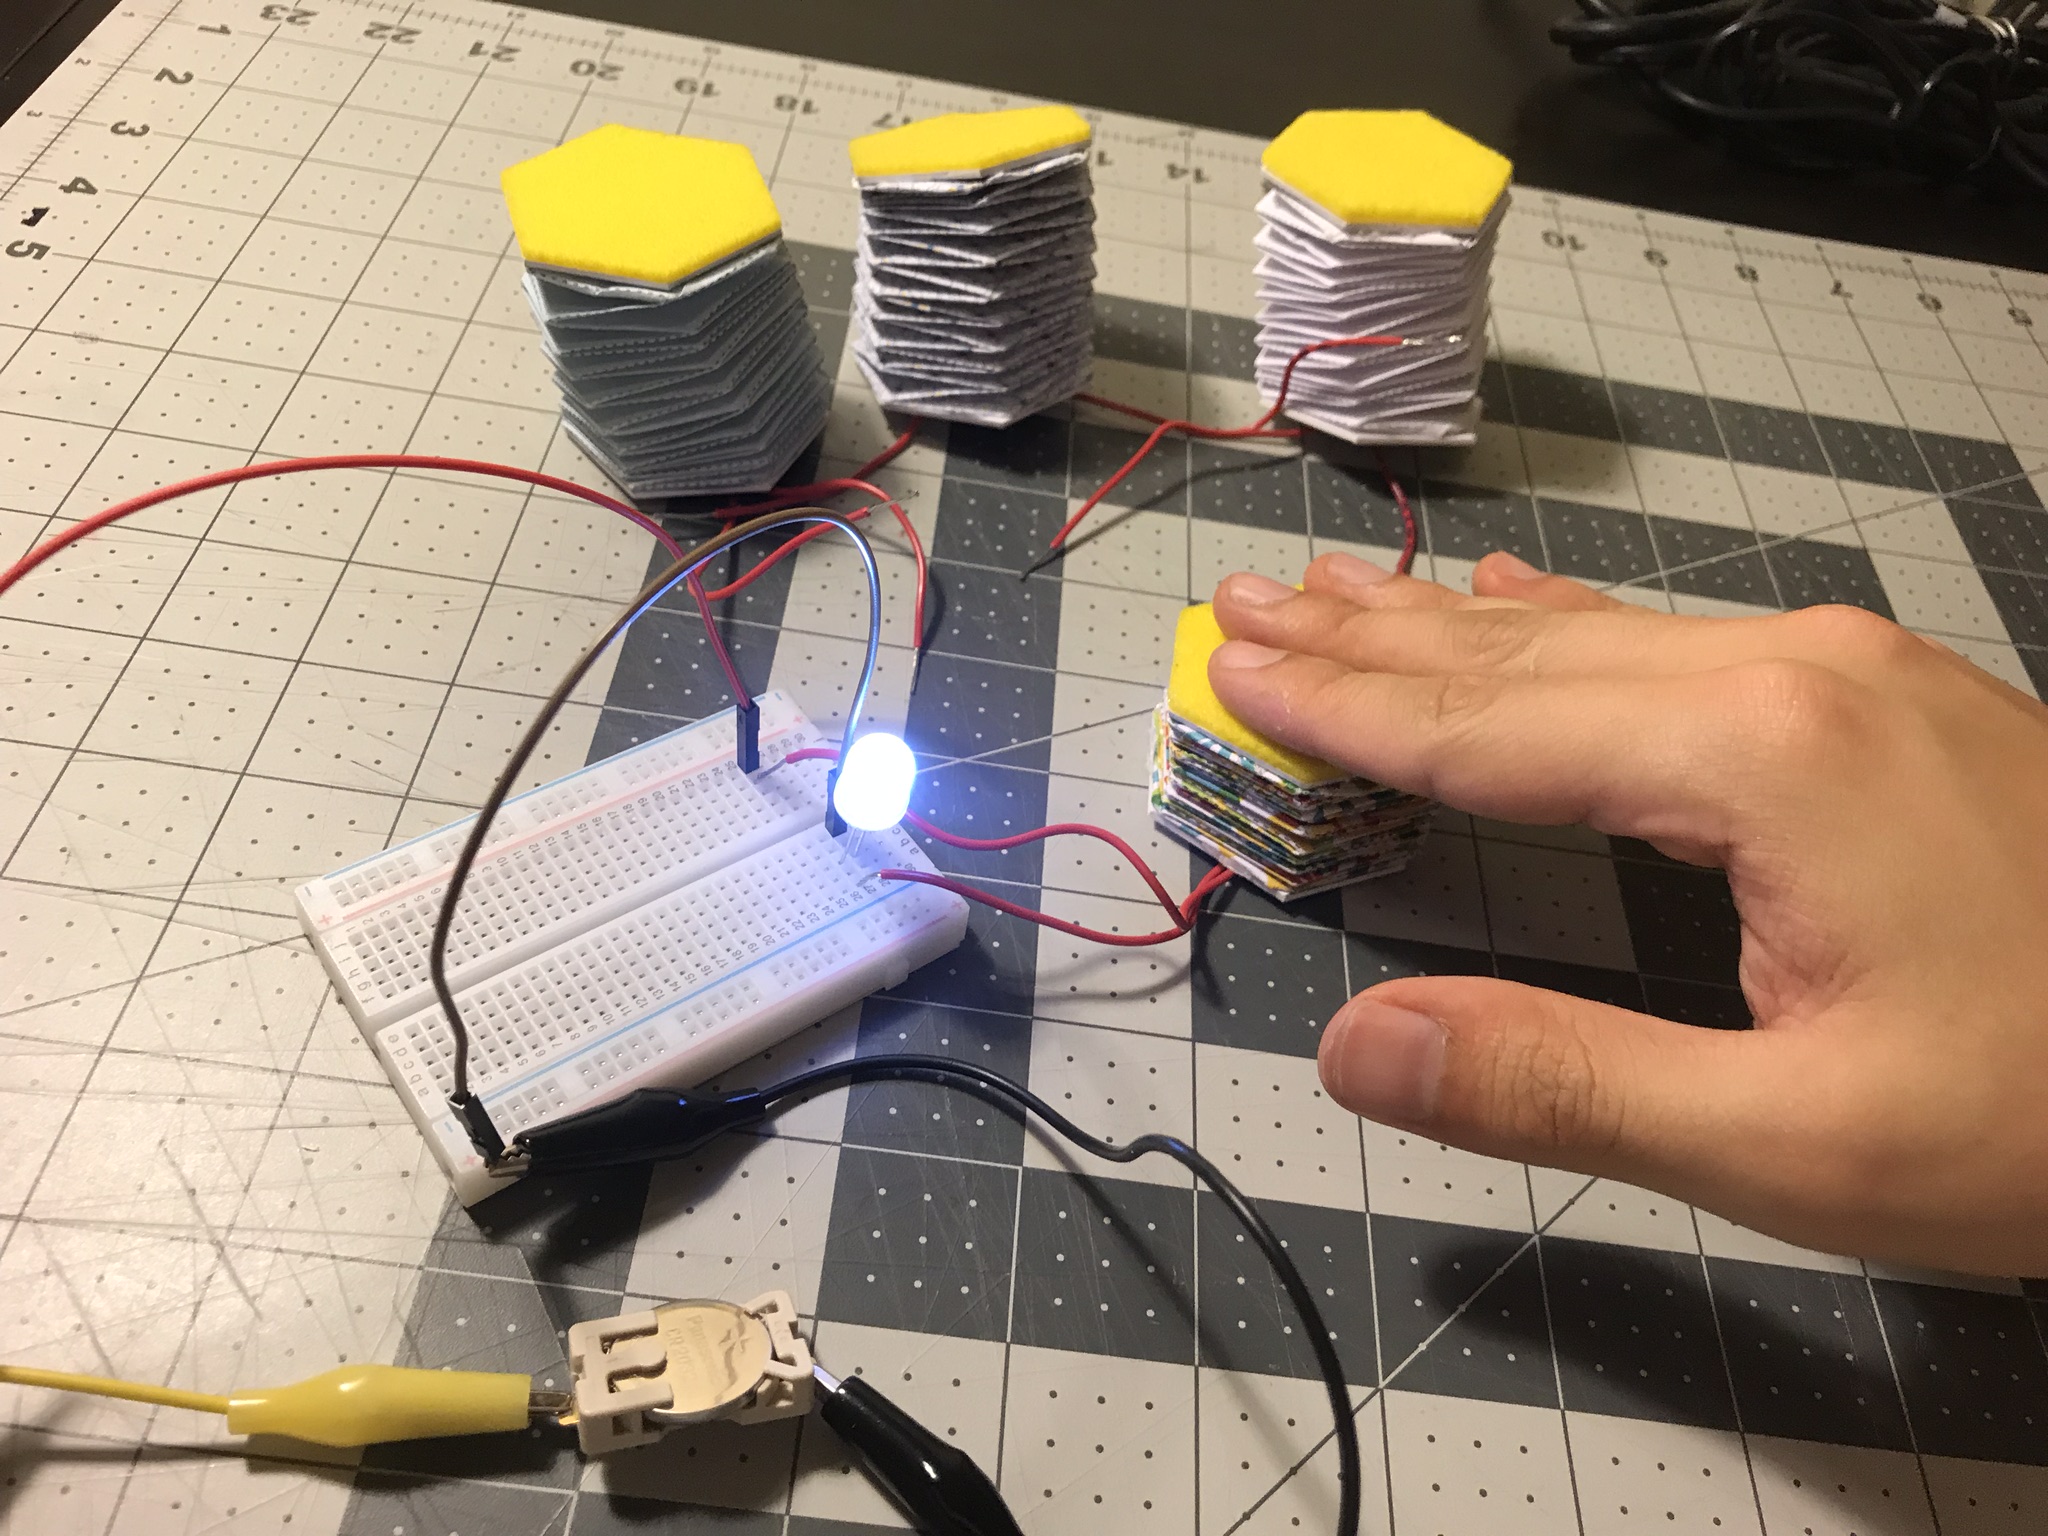
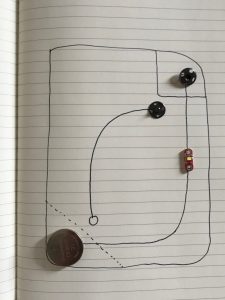
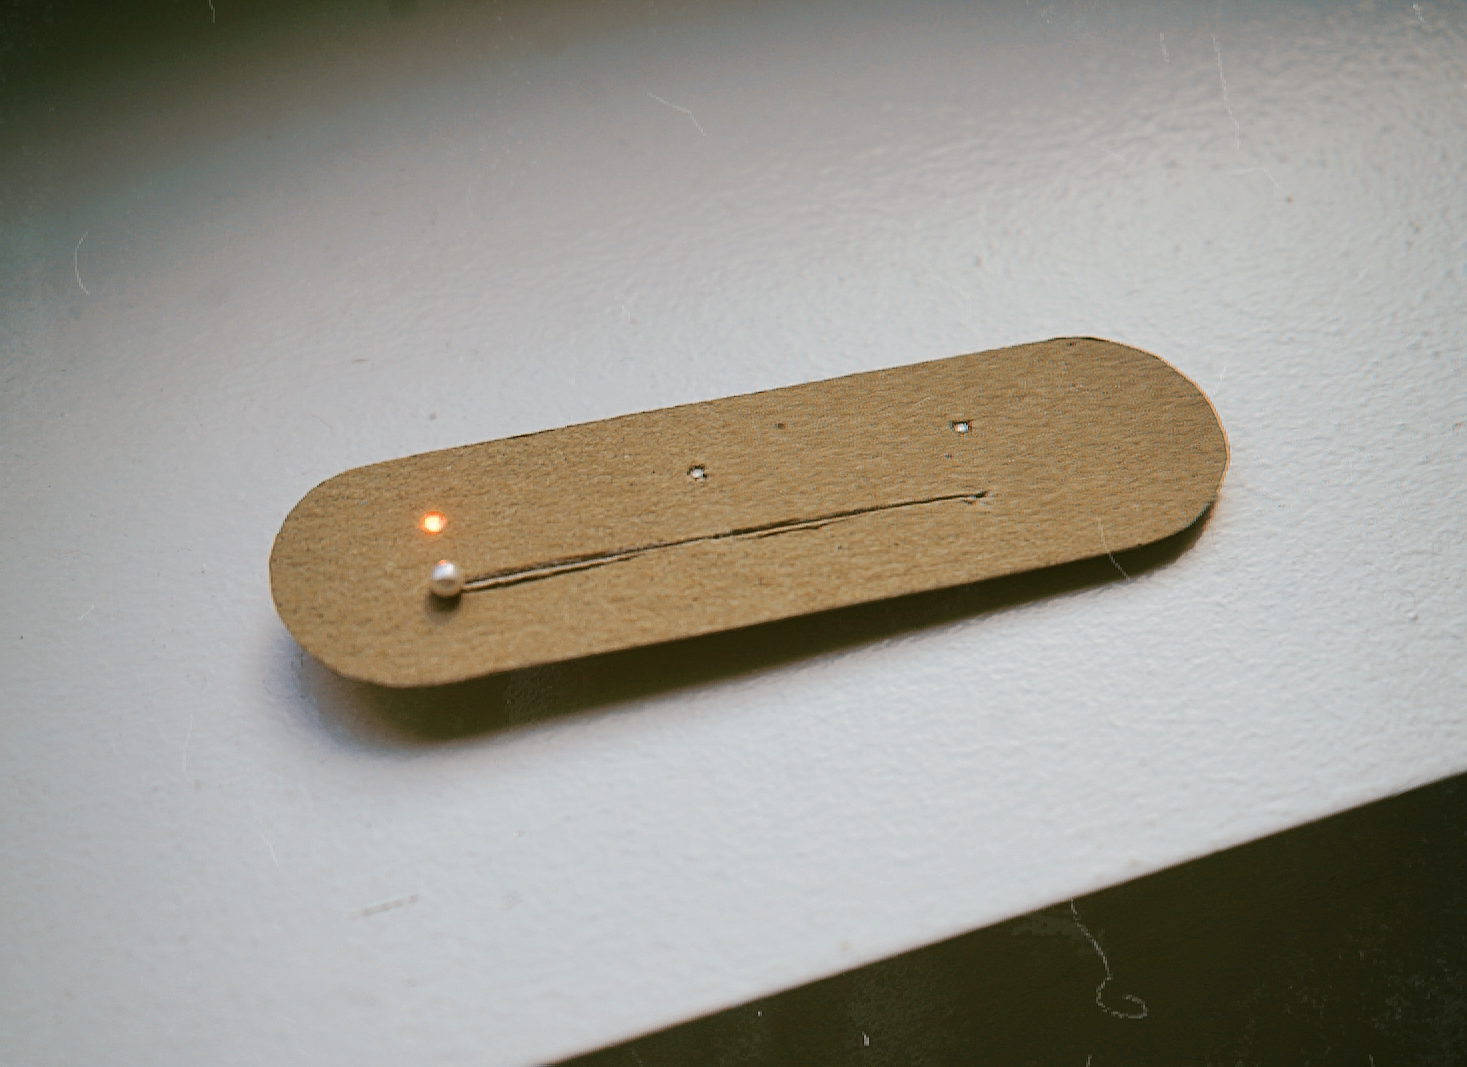
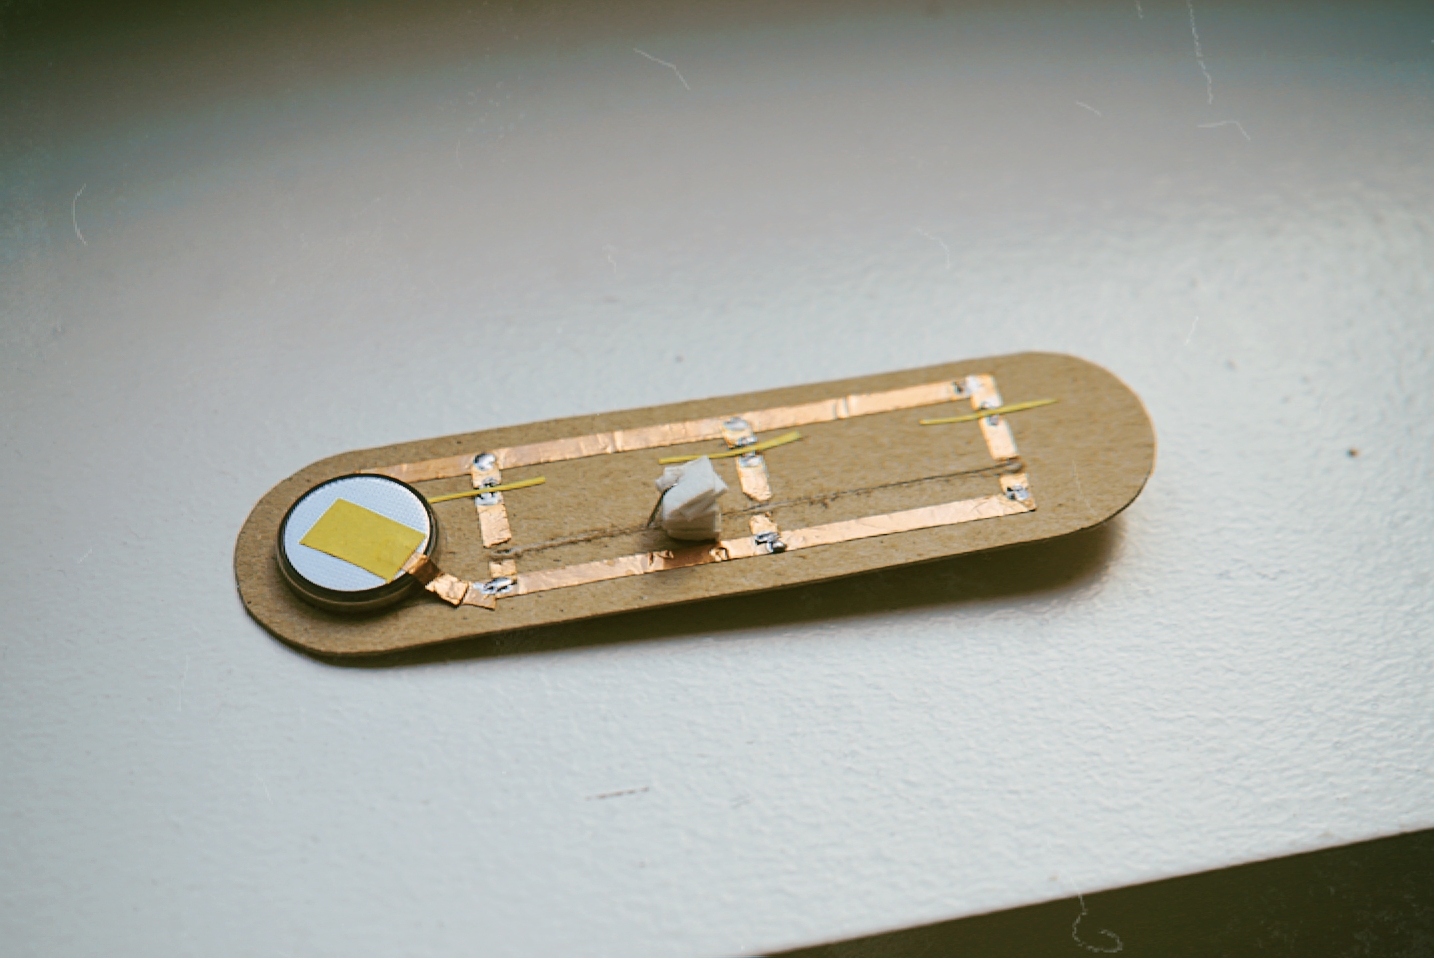
I also tried to make a linear potentiometer out of paper, copper tape, and graphite paint from Guerra paint. After a few hours of trying I could not figure out how to complete the circuit. I like the potentiometer as a sensor, I have no idea why, so I want to continue to try to make this work.

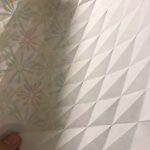
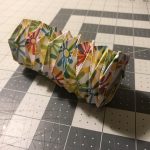
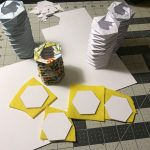
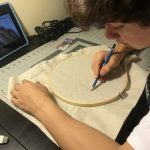
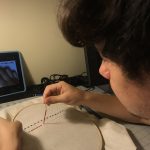
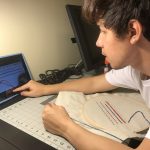
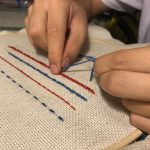
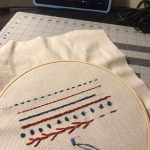
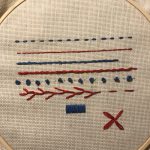
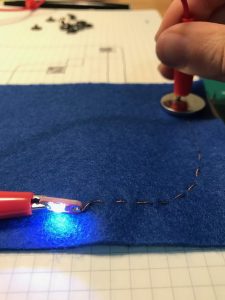
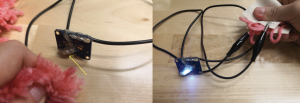
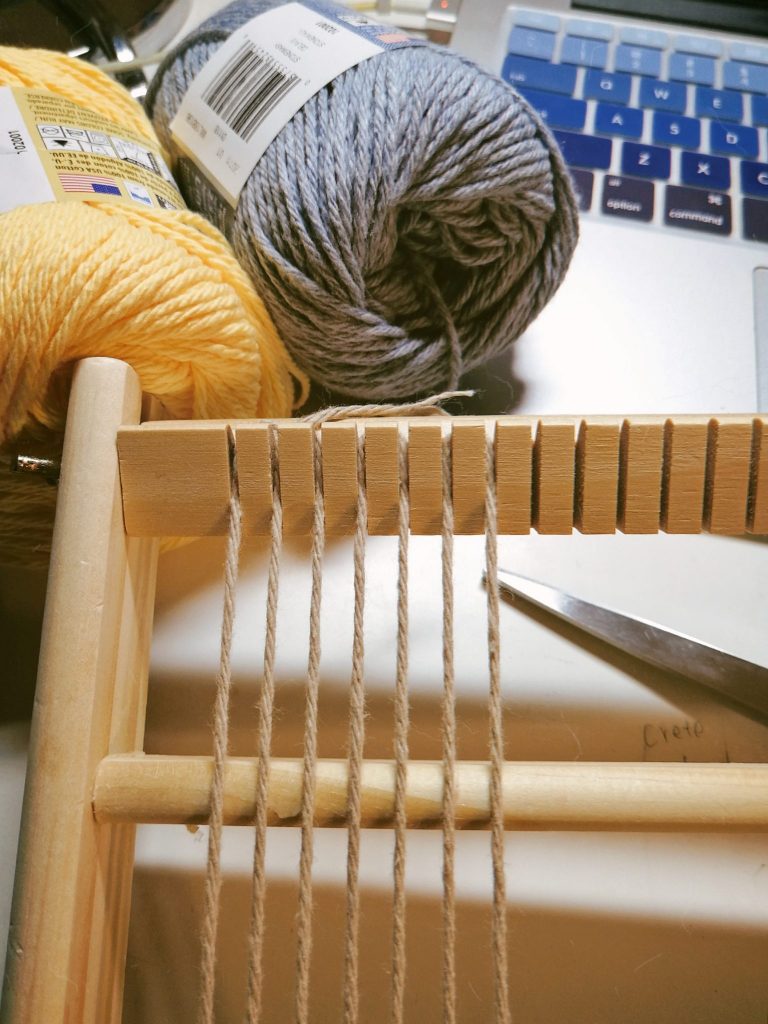
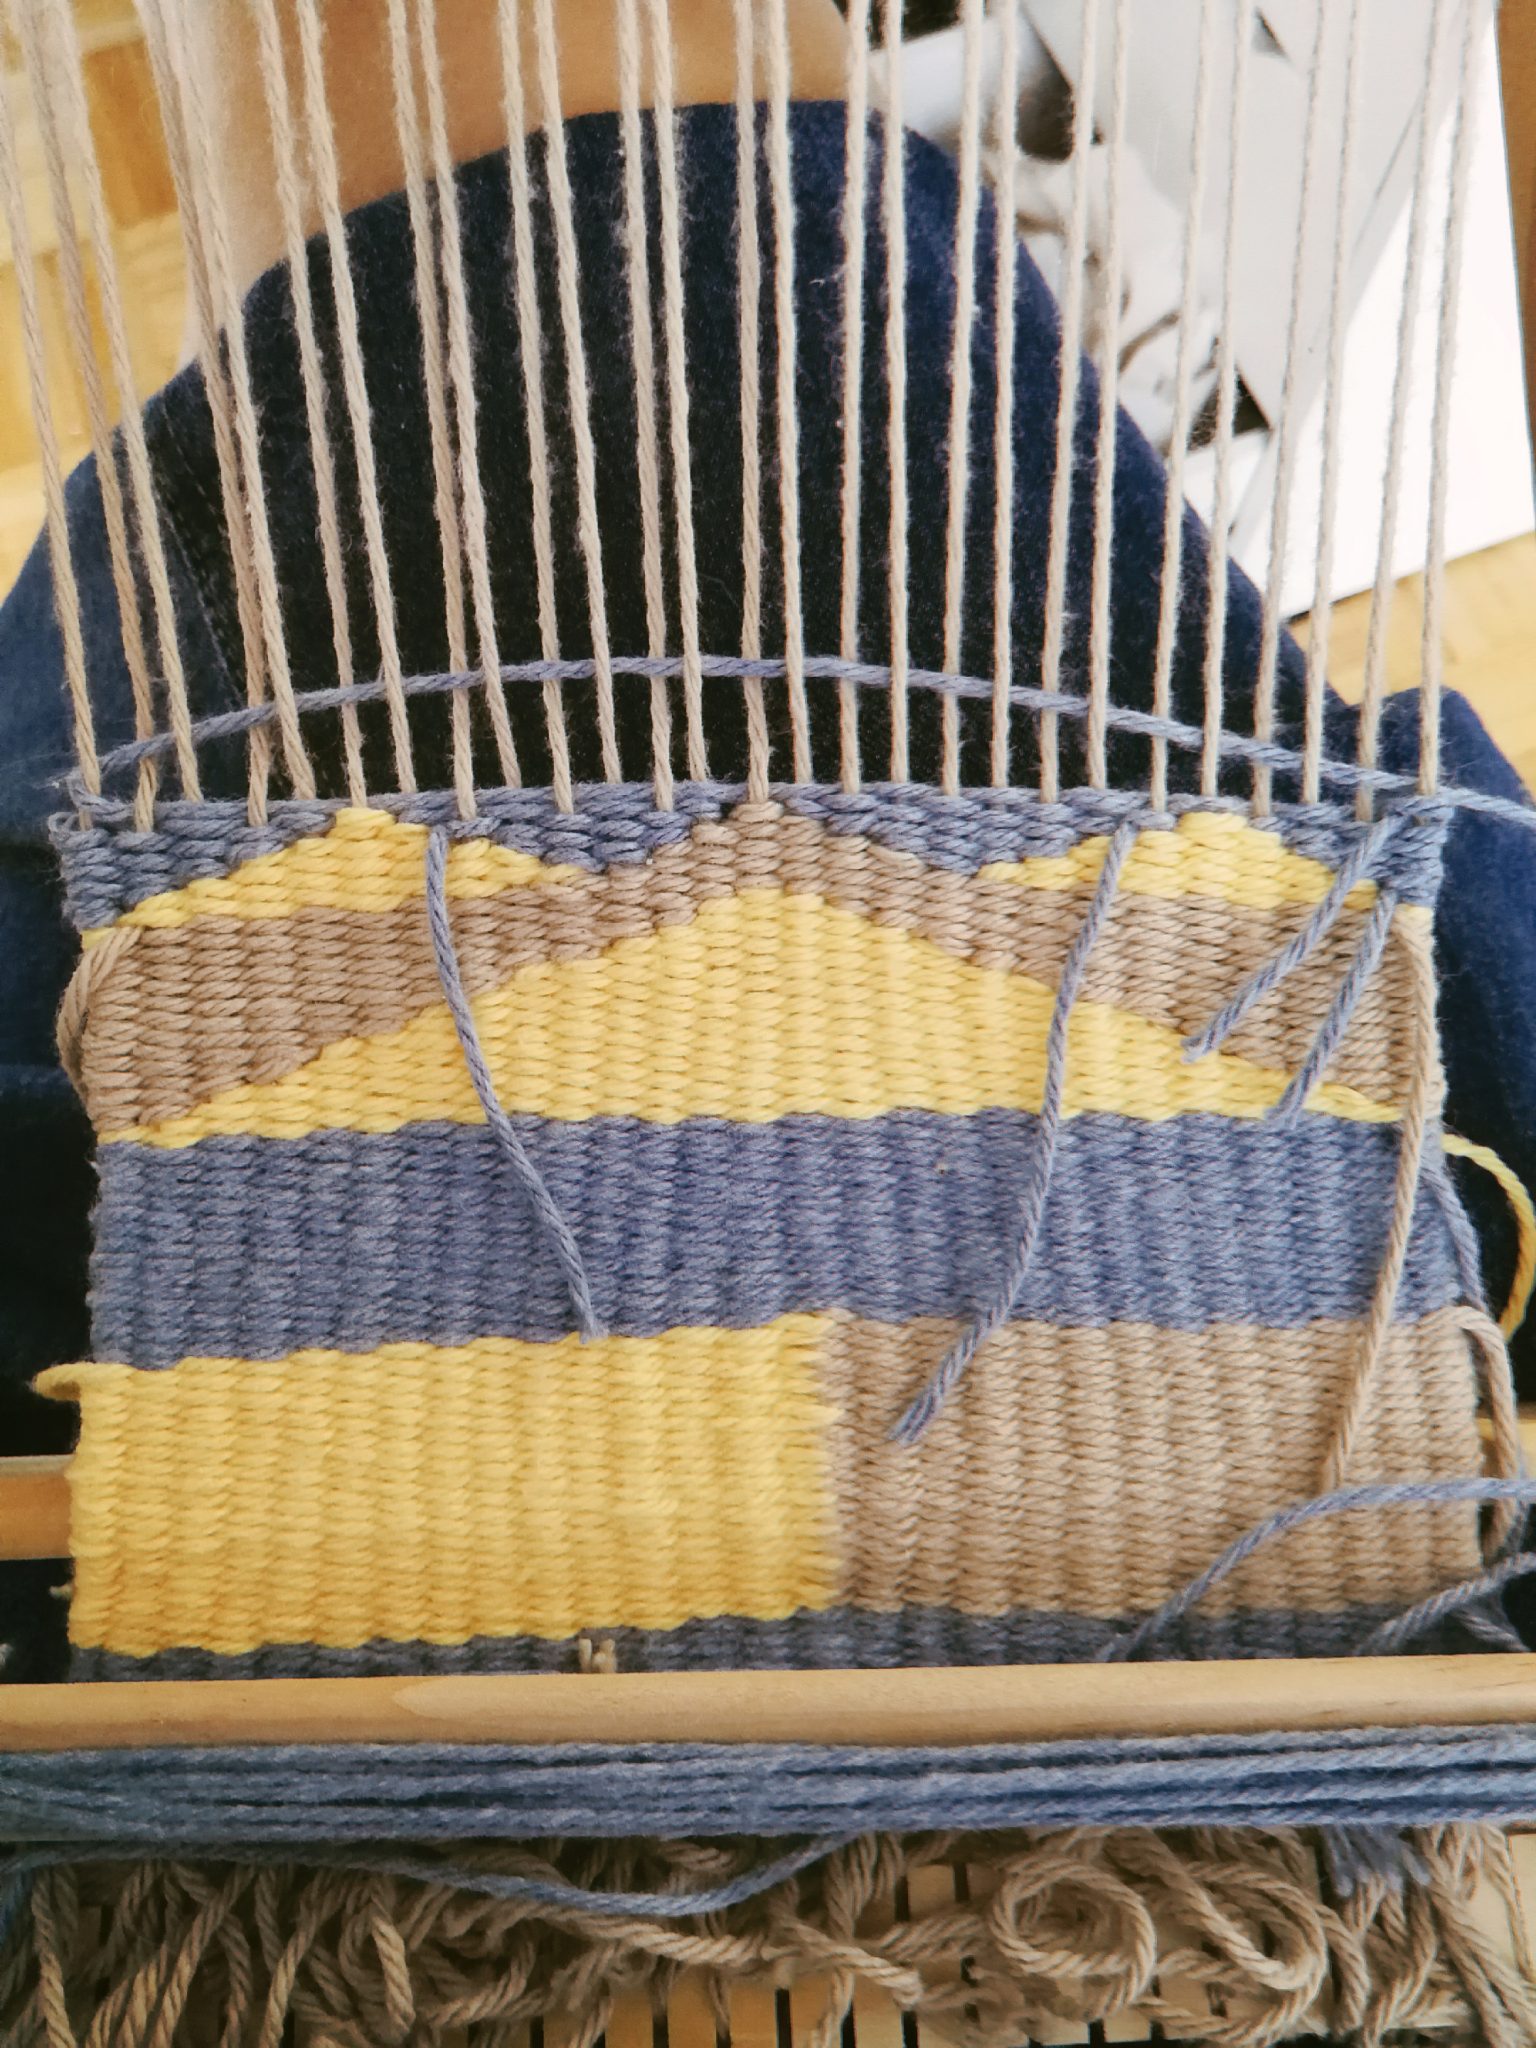
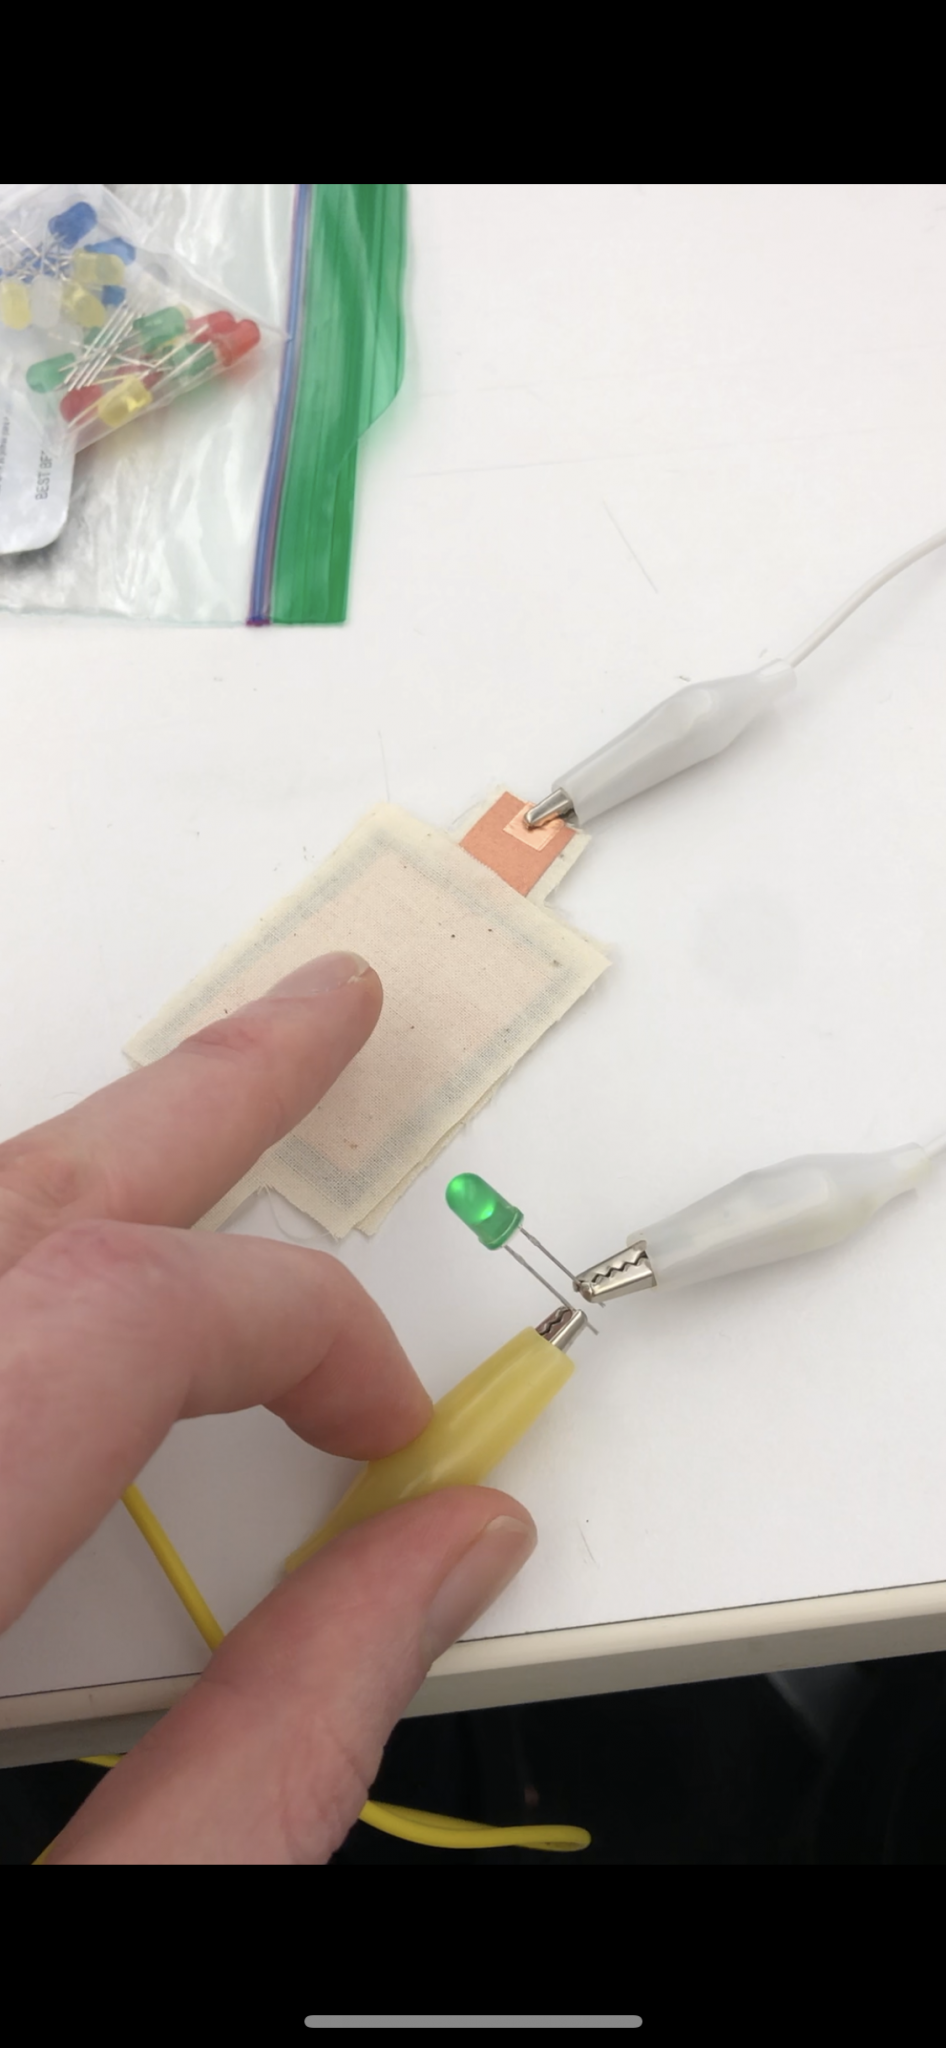
The first picture is of the progression of my thinking about how I would like to make a pressure sensor. The second are my pattern pieces. The third was my first test of the pressure sensor working.
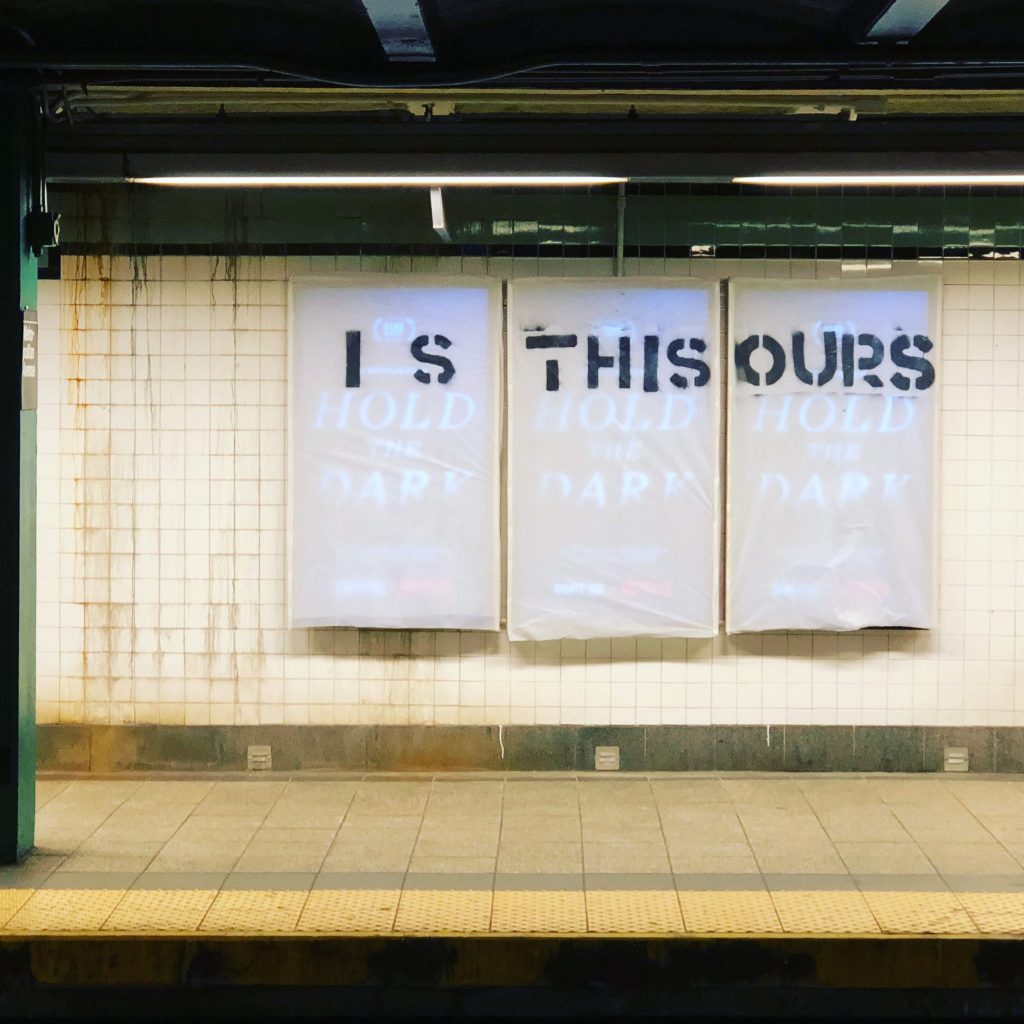
Part 2:

The craft I chose to learn was woodworking. Woodworking is something I’ve been interested in for long time so this was the perfect opportunity! I also was able to combine this with my 3D project for Ideas In Form. It was nice because I was able to get pretty into basic wood working principles. I used band saws, panel saws, table saws, chop saws, and drill presses to create hinged frames to hang on top of digital ads in the subway system. Attached is a picture of the frames installed in the subway.

I would classify my practice at the moment as an artist, hacker, designer, and craftsperson. The art for me comes first with hacking, designing, and crafting working in service to the art. I imagine as I become better at the physical, and digital making of things I will feel less like a hacker, but maybe not. The feeling of being a hacker may depend on the type of art that I am making.

My favorite new tool is DEFINITELY the table saw, it’s such a versatile tool, and while it looks scary, and is dangerous, it is so so SO useful. I loved working with it. The smell of the wood shop is also one of my favorite smells. I would still say my all time favorite tool is still my mind, and its ability to always learn new things.

I love learning a new craft and woodworking was no different. New crafts always have this habit of changing the way I view the physical world around me. I am now so much more aware of how wooden objects I see could possibly be made. I have to say the entire process was very pleasurable. The only thing that was frustrating was how clueless I felt the first day working in the shop. It’s been a while since I felt totally helpless in a workshop and it’s not a feeling I relish. If I were to give anyone advice about woodworking, I would tell them to plan to spend double the amount of time they thing is necessary on their first project. Everything takes forever when you’re new.