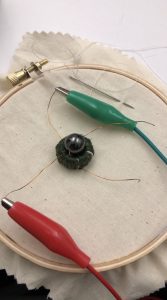
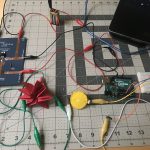
As we sped into Thanksgiving break gaining a much need respite before we were hit with the maelstrom of finals we created the final piece of structured homework for Computational Craft. Flip dots! I used an embroidery hoop, insulated copper wire, and a magnetic hematite bead to create the flip dot itself. To create magnetism within the wire, thereby inducing the bead to flip, I used a 9 volt battery. I connected with battery to the copper wire with alligator clips. Here is a picture of the finished piece and a video of it in action.
This week’s exercise focused on experiencing the properties of Flexinol, as a material with memory that changes its physical properties when it’s affected by heat.
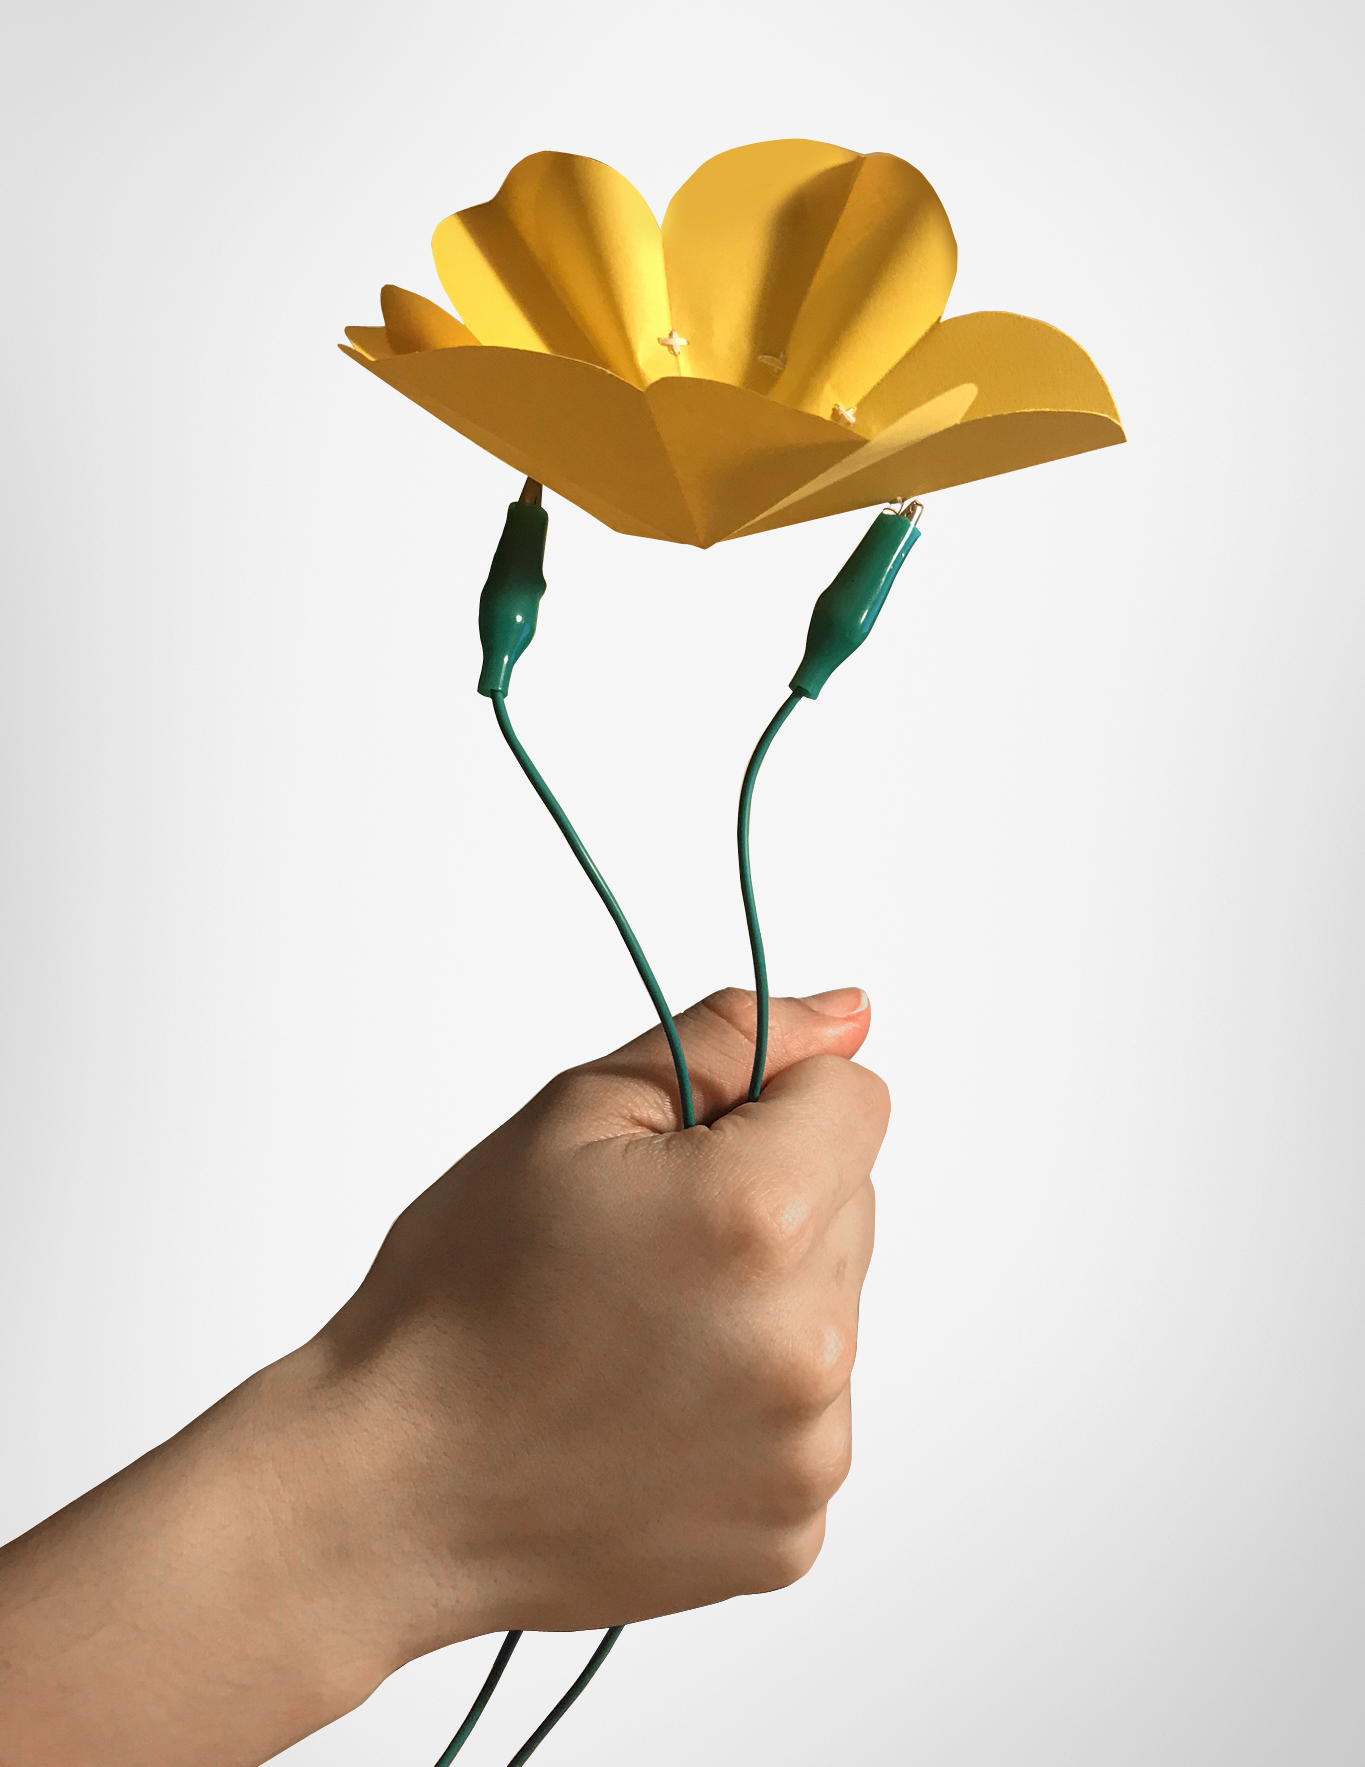
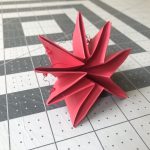
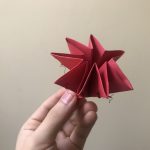
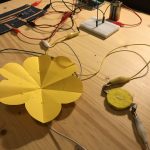
I decided to play with the concept of open/closed through the making of a paper flower. The first iteration (red flower) was not so successful since it was made using a very thick paper, as well as the geometries from origami generated a lot of resistance to the alloy.
The second iteration (yellow flower) worked perfectly; the paper was much thinner, and the folds help the Flexinol to change shape easily.
The Arduino code also allows to connect the pressure sensor and to control the moment in which Flexinol changes shape.
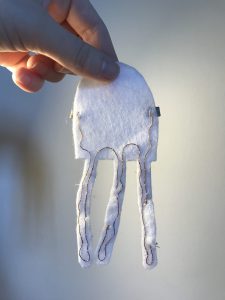
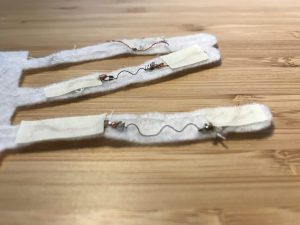
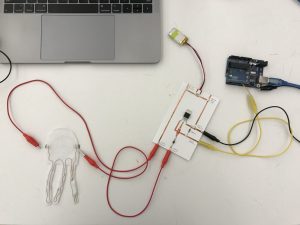
I attempted to make a fabric jellyfish, whose tentacles can be programmed to curl and relax using nitinol and electricity. As of class-time, I still need to do some debugging.
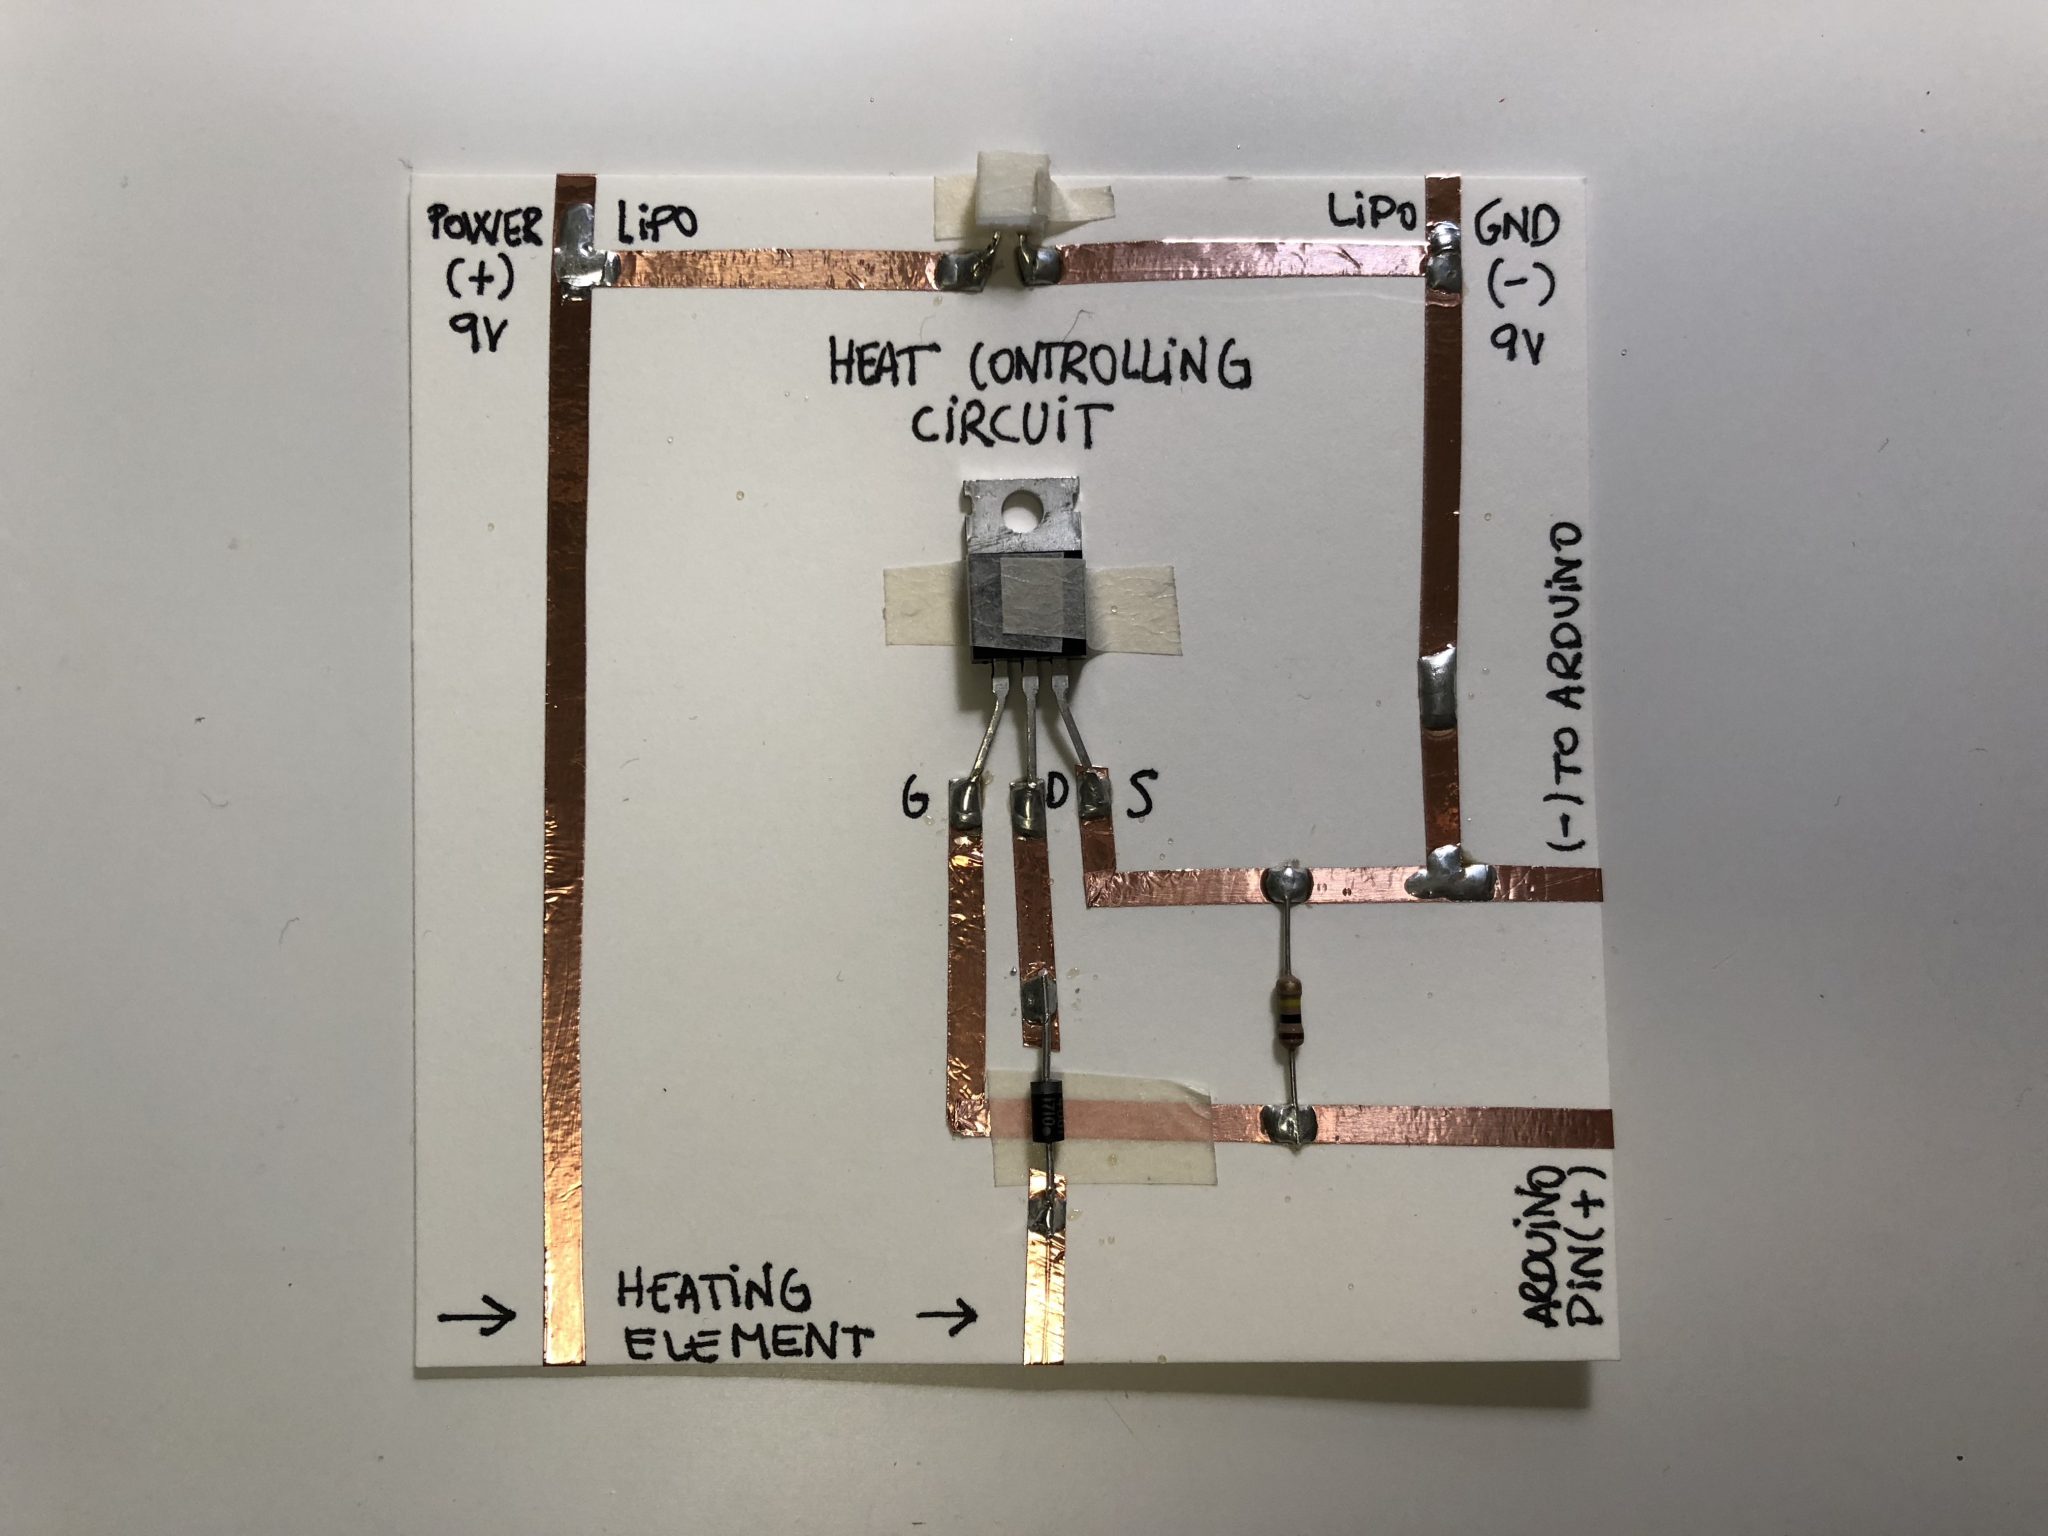
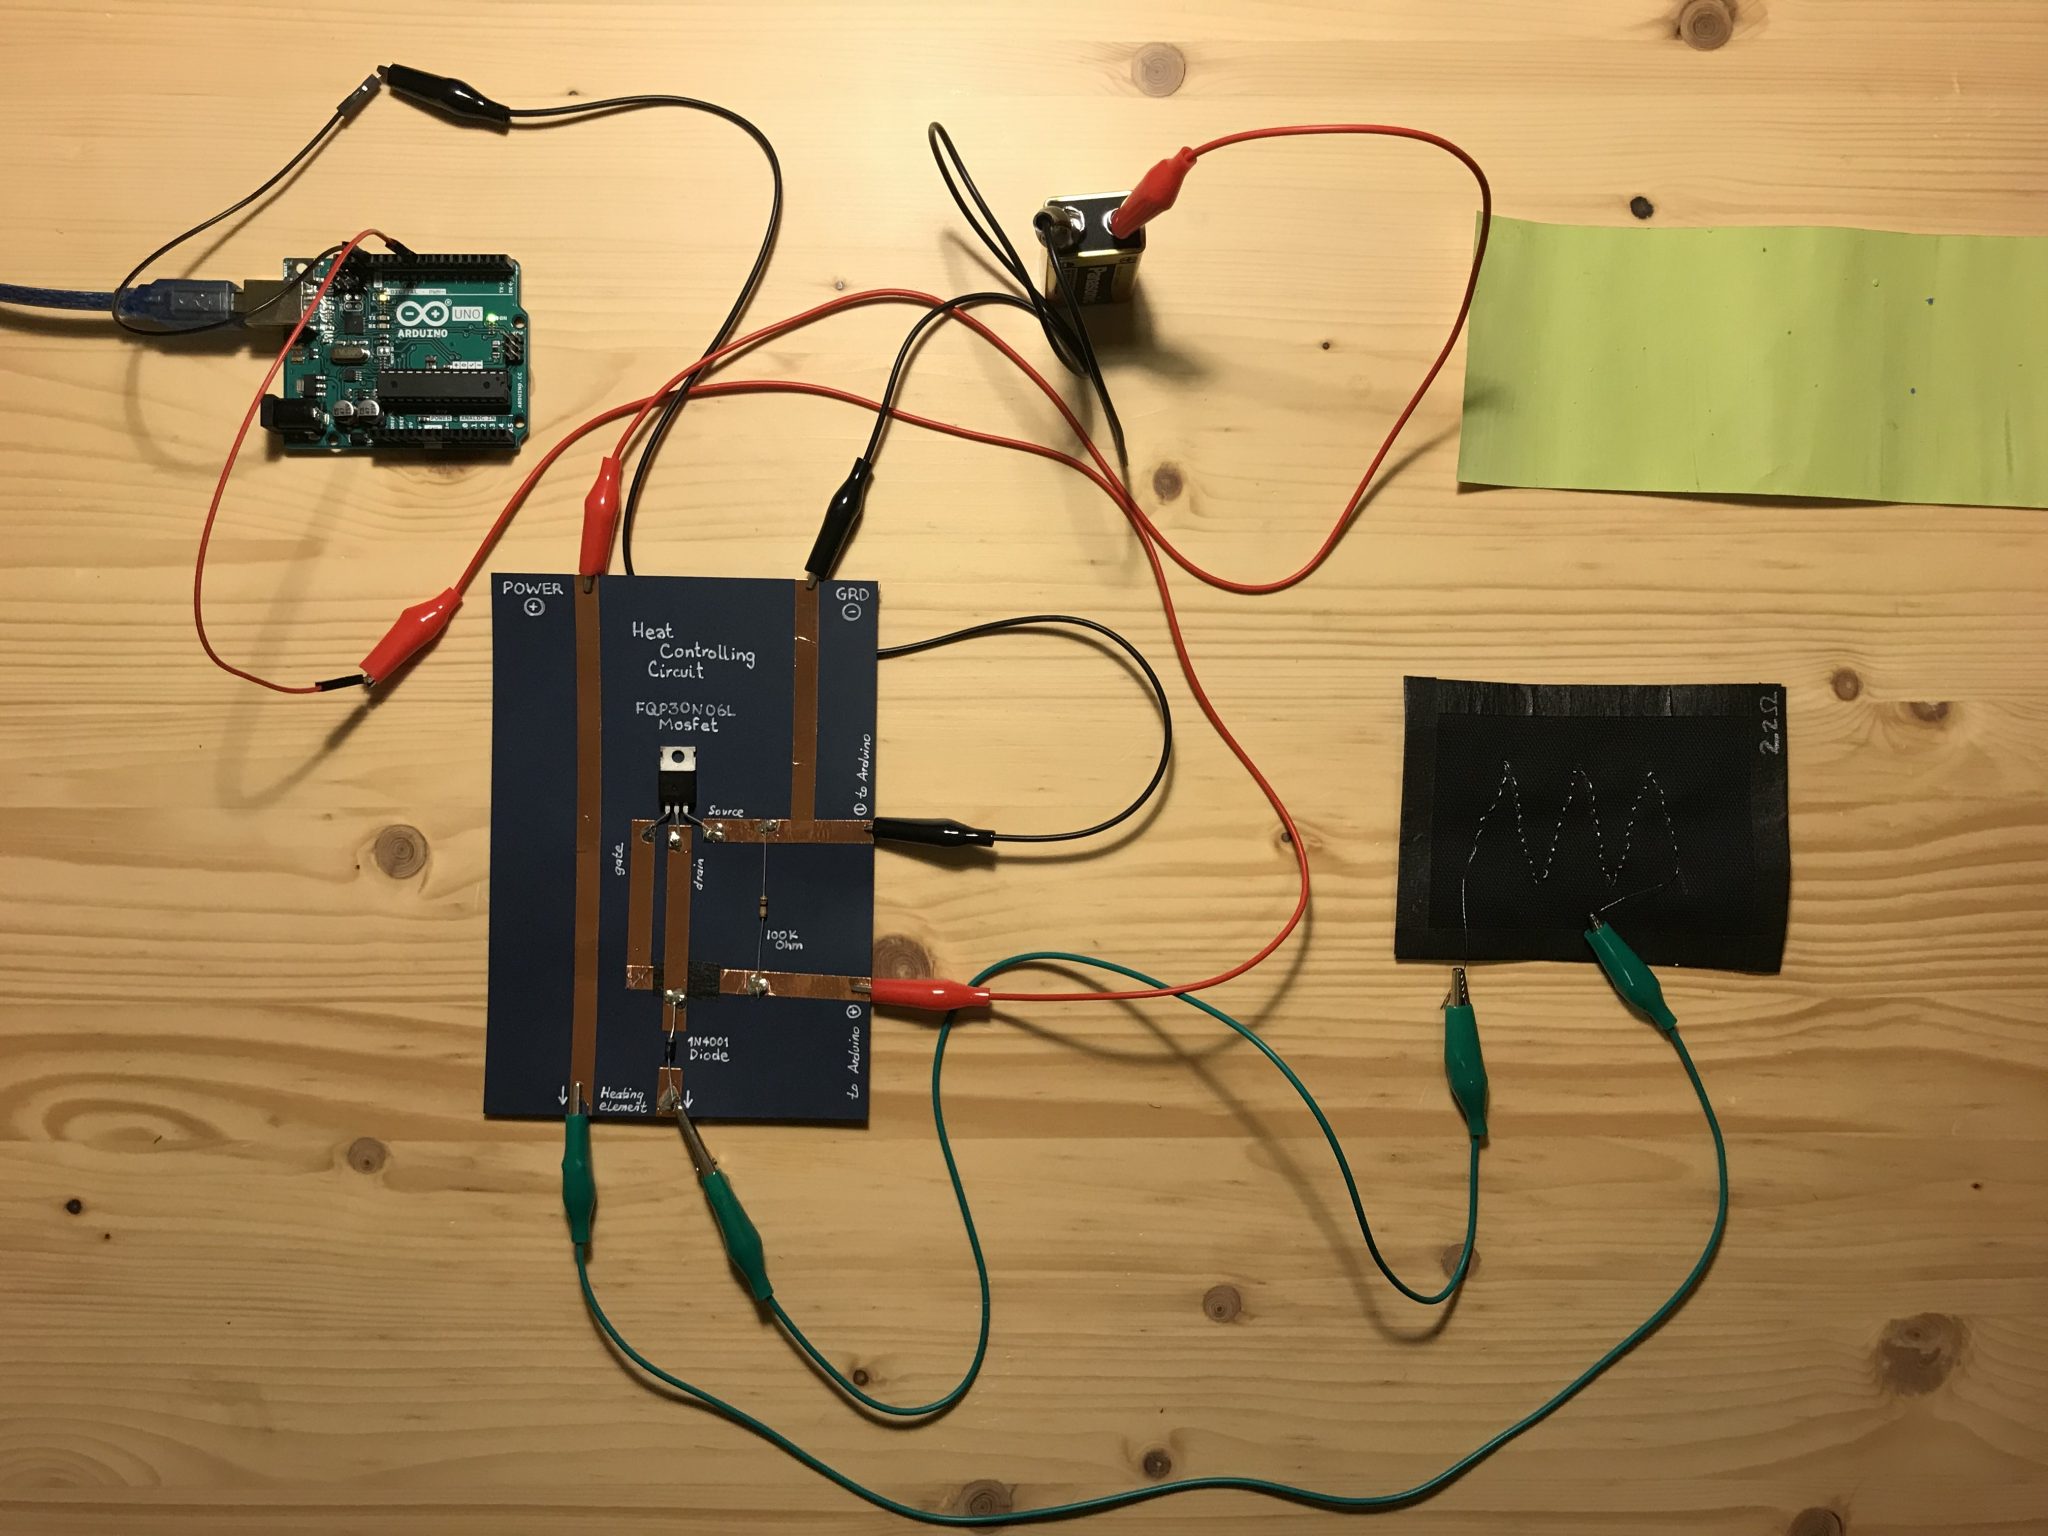
So far, I’ve confirmed that my “circuit board” (the same one from Week 10’s heat circuit) works, but I suspect I have some loose connections in my actual jellyfish circuit. I’ll further secure the connections, and update here with the working result. For now, some initial pictures:
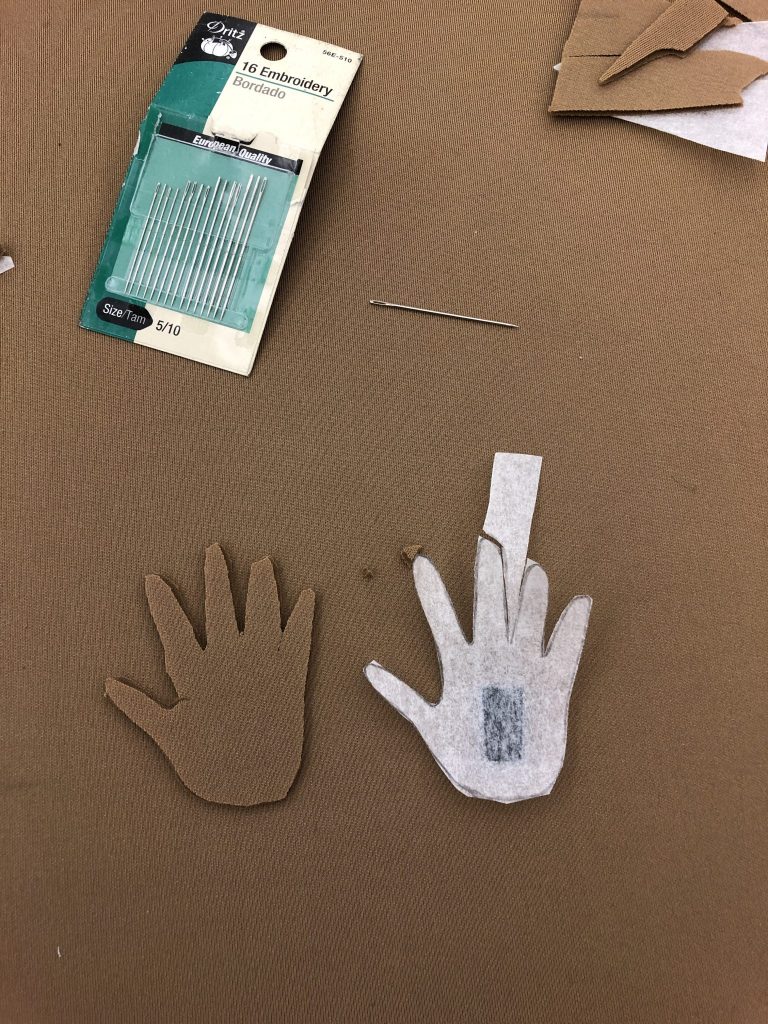
For this week’s assignment I decided to use a hand as my starting point. Mostly because the organic movement of the material could mimic a human hand somewhat.
Given that the material was quite short I couldn’t execute my original idea of making a hand that closed into a fist. Naturally this ended up being a good thing. Because of the length of the material I used it to make the hand lower it’s middle and ring fingers creating the sign for “I love you” in American Sign Language. I then used one of the pressure sensors I made earlier in the semester, and mapped the values it delivers to control the force that the two fingers lower with.
Final times! Woohoo! Here are your final deliverables:
DUE THURSDAY, 12/13
1) WORKING PROTOTYPE
You MUST bring your prototype to show – even if it is not working. If you require a specific environment, please email me.
2) PRESENTATION
You will have 7 minutes to present. This includes time for feedback, so structure your presentation accordingly. Your should include the following in your presentation ( in whatever order you like):
Concept
Precedents
User testing + feedback
Process documentation
Video of project demo
Challenges you faced
Future iterations
3) VIDEO DOCUMENTATION
You should make a short video introducing your project. It should include the title of your piece, your concept, and a prototype demo.
DUE TUESDAY, 12/20 AT MIDNIGHT (I will not accept late submissions)
1) BLOG POST
Create a short post on the blog with The link to your Instructable.
Text of your project description from the Instructable
Any other documentation links.
A short reflection on your process. What were your wins, challenges? What did you learn?
Where would you take it next?
2) INSTRUCTABLE
Here are the components you should have:
Title. IMPORTANT: Make your title descriptive or catchy so it easy for people to find. If you have a more abstract title, include a subtitle. For example, Vague textiles VS Vague textiles: Using thermochromic ink to change fabric surfaces
Intended audience. Who is this for? Beginners? Textile coders of the 23rd century? Elementary afterschool STEAM club? Let people know what prior knowledge they need so they don’t have unreasonable expectations before jumping in.
Description of the project. Write a few sentences on why you made it, what it does, what you hoped to accomplish, challenges you might have faced, and where you would take it next.
Materials list. List the materials you used and link to where people can purchase. Here the materials list for the class. Email me if you cannot find a link to a material we used.
Video documentation. Include the video described above.
Steps to make it. Write all of the steps needed to recreate your project. Include images or diagrams to supplement.
Circuit diagram. Be sure to include a circuit diagram or drawing.
ASSESSMENT GUIDELINES
I will assess your project by the following criteria:
Ideation, Concept, and Design
Incorporates computational concepts discussed in class
Able to translate ideas/concepts into project form within a given environment
Thoughtful integration of design elements
Presents functioning prototype.
Presents working documentation if was unable to get working
Synthesizes design and technology to create interesting and contextually significant work that makes contributions to the domain
Process + Materials
Thoroughly documented according to class guidelines
Uses materials and processes learned in class
Synthesizes materials and processes to make relevant contributions to field
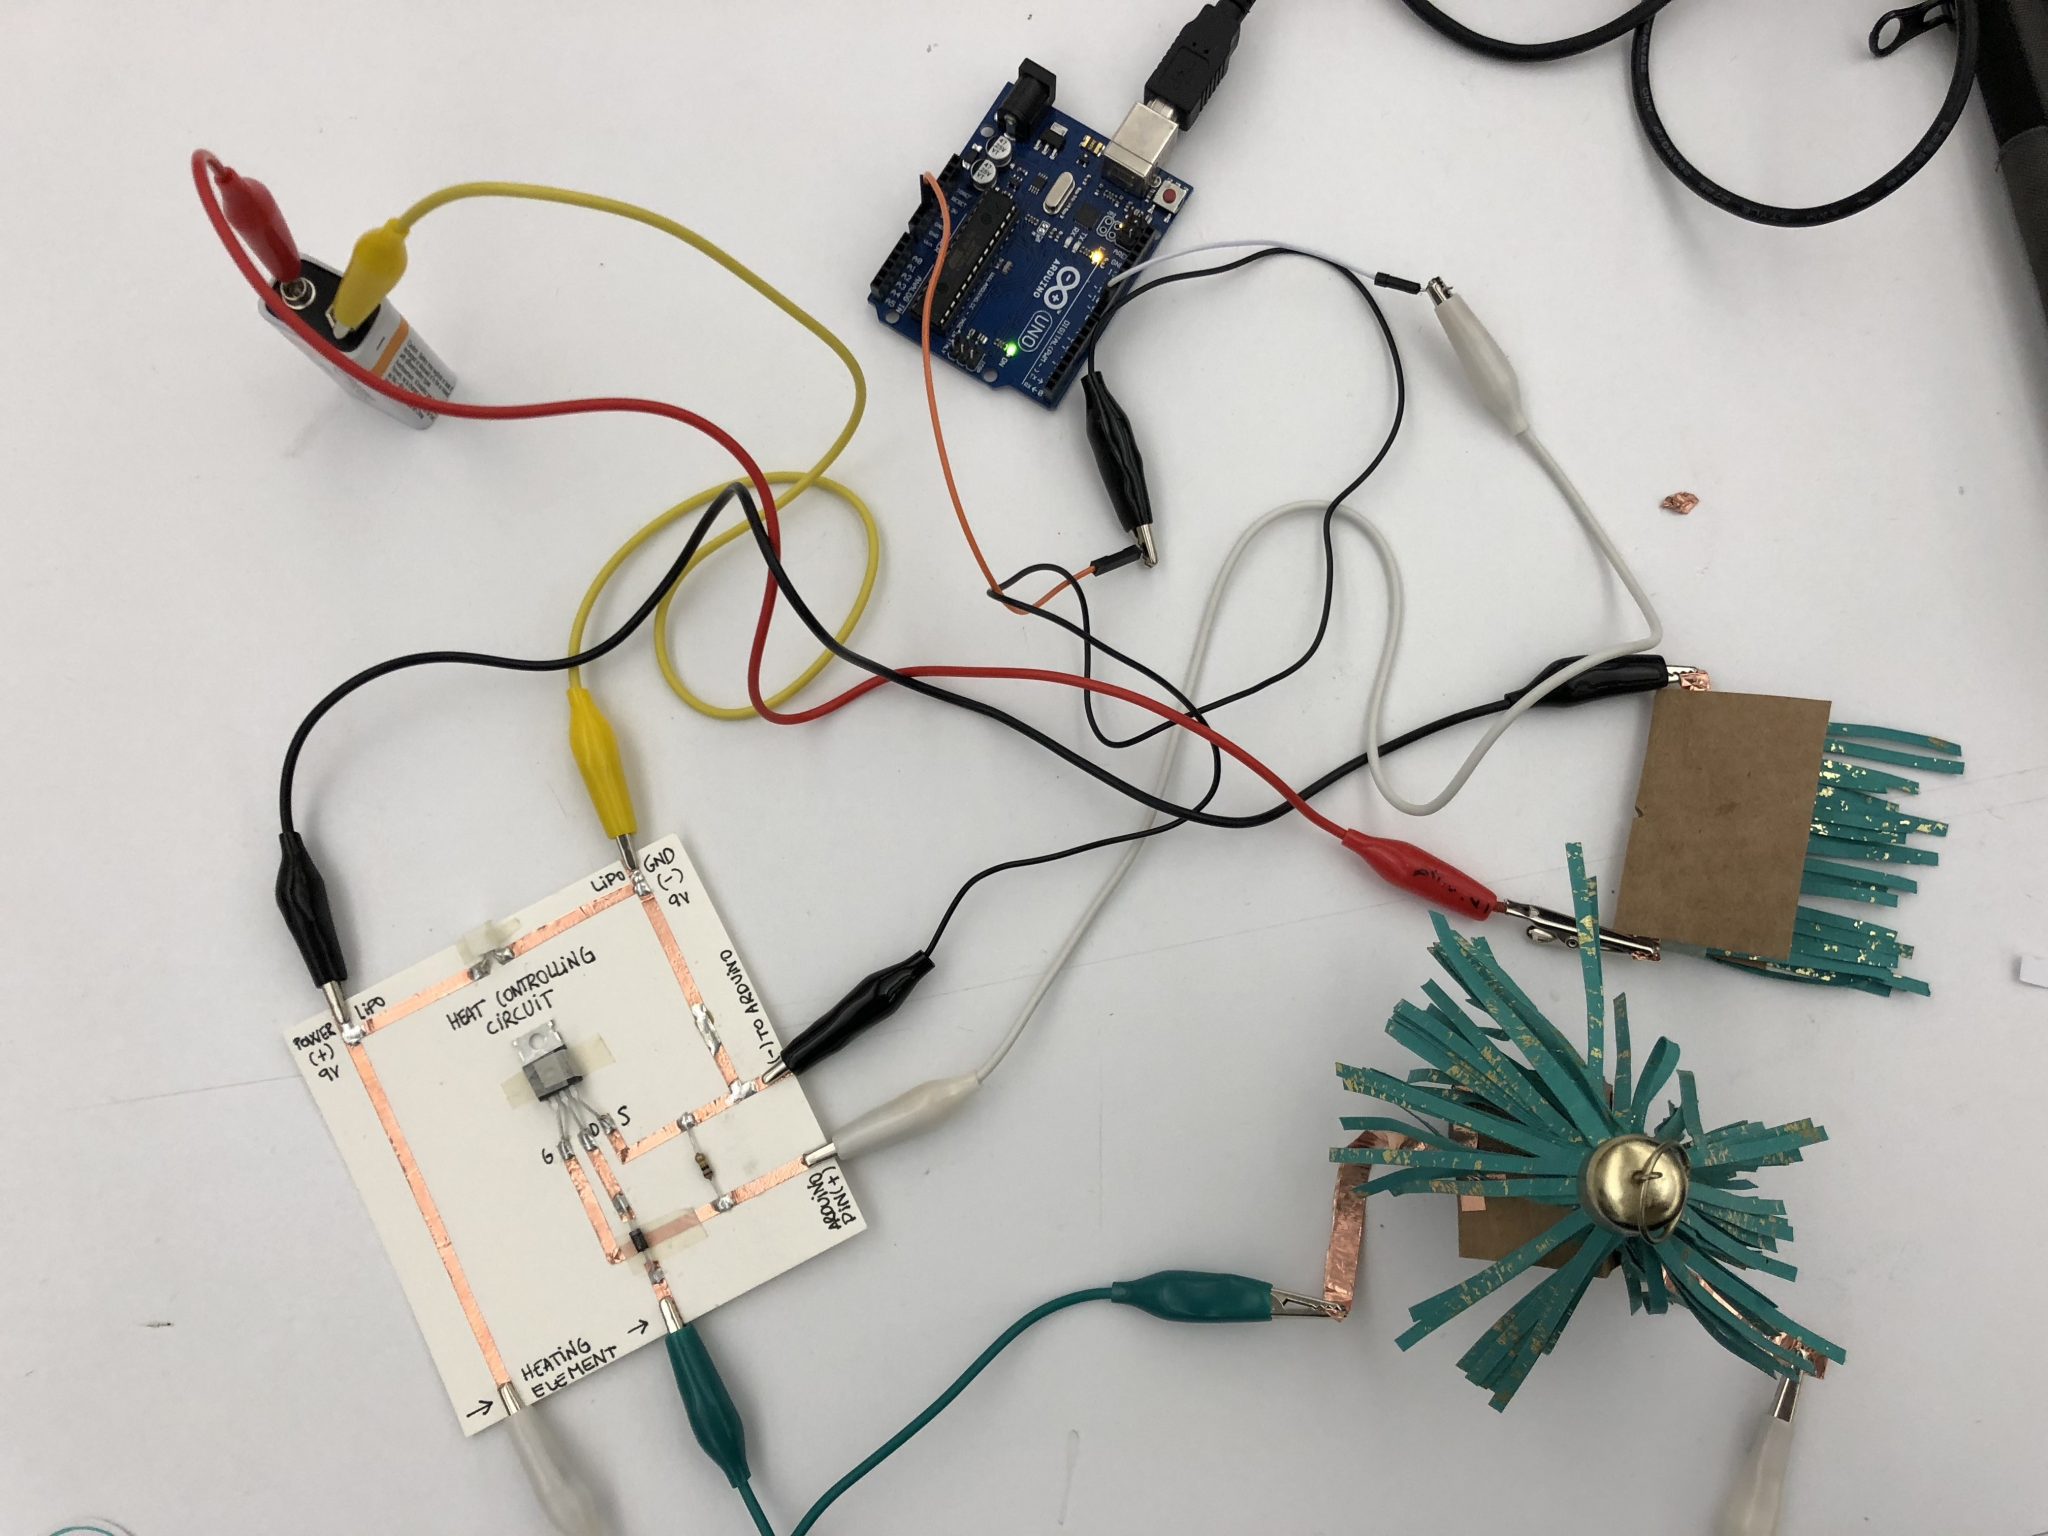
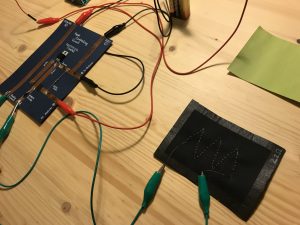
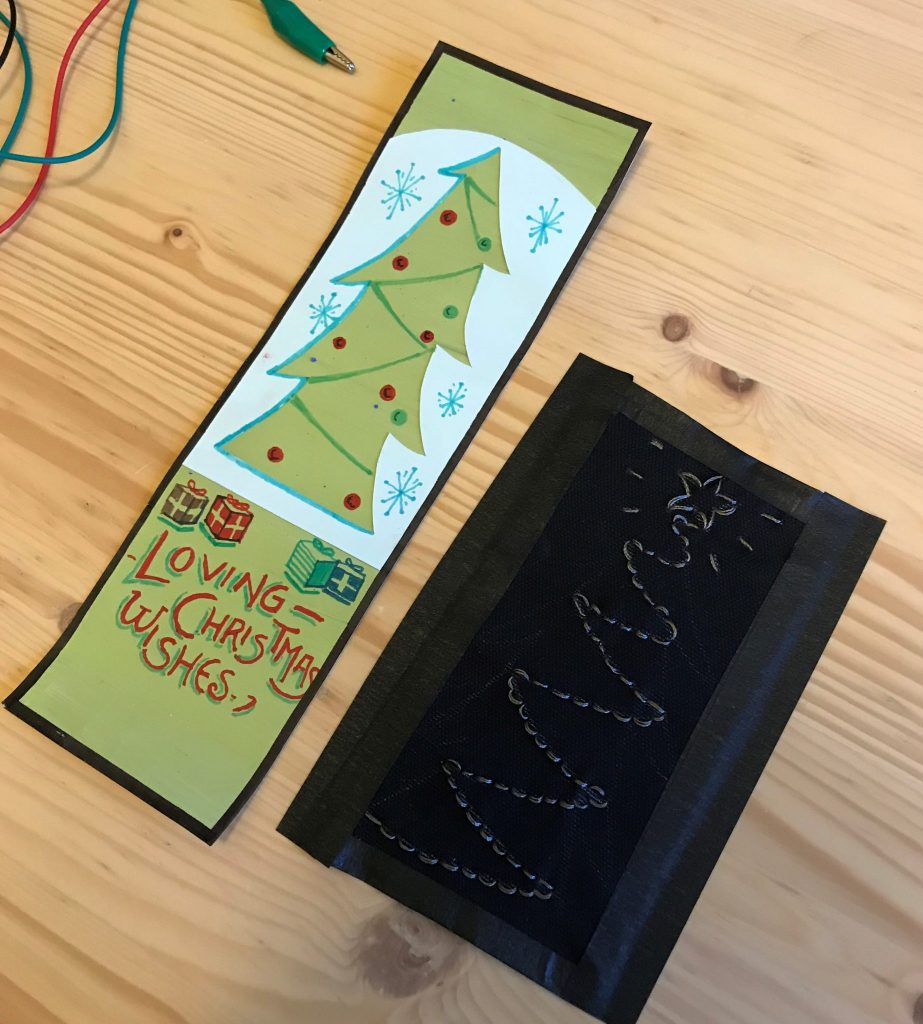
My idea for this project was to bring to life a tiny Christmas tree. Winter season is here to stay for a couple of months but Christmas trees will join our households just for a couple of weeks. I was planning on keeping the tree alive by interacting with it.
This is the circuitry, heating circuit + swatch + breathing tree +9V battery.
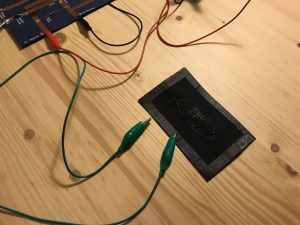
Detail of the breathing movement when applying current.
After some failed attempts this version kept the movement quite subtle but smooth. However, the connection of the Flexinol wasn’t strong enough. So I had to reinforce it.
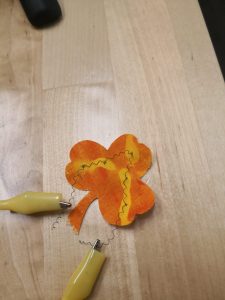
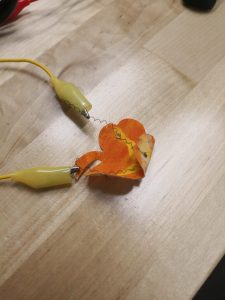
For the exercise for week 11, I combined the shape memory alloy with the thermochromic ink, and the sensor I used is a pressure sensor. The circuit was turned on when I press the sensor and the alloy started to move. I was trying to mimic the motion of leaves becoming dry in the fall and changes color at the same time.
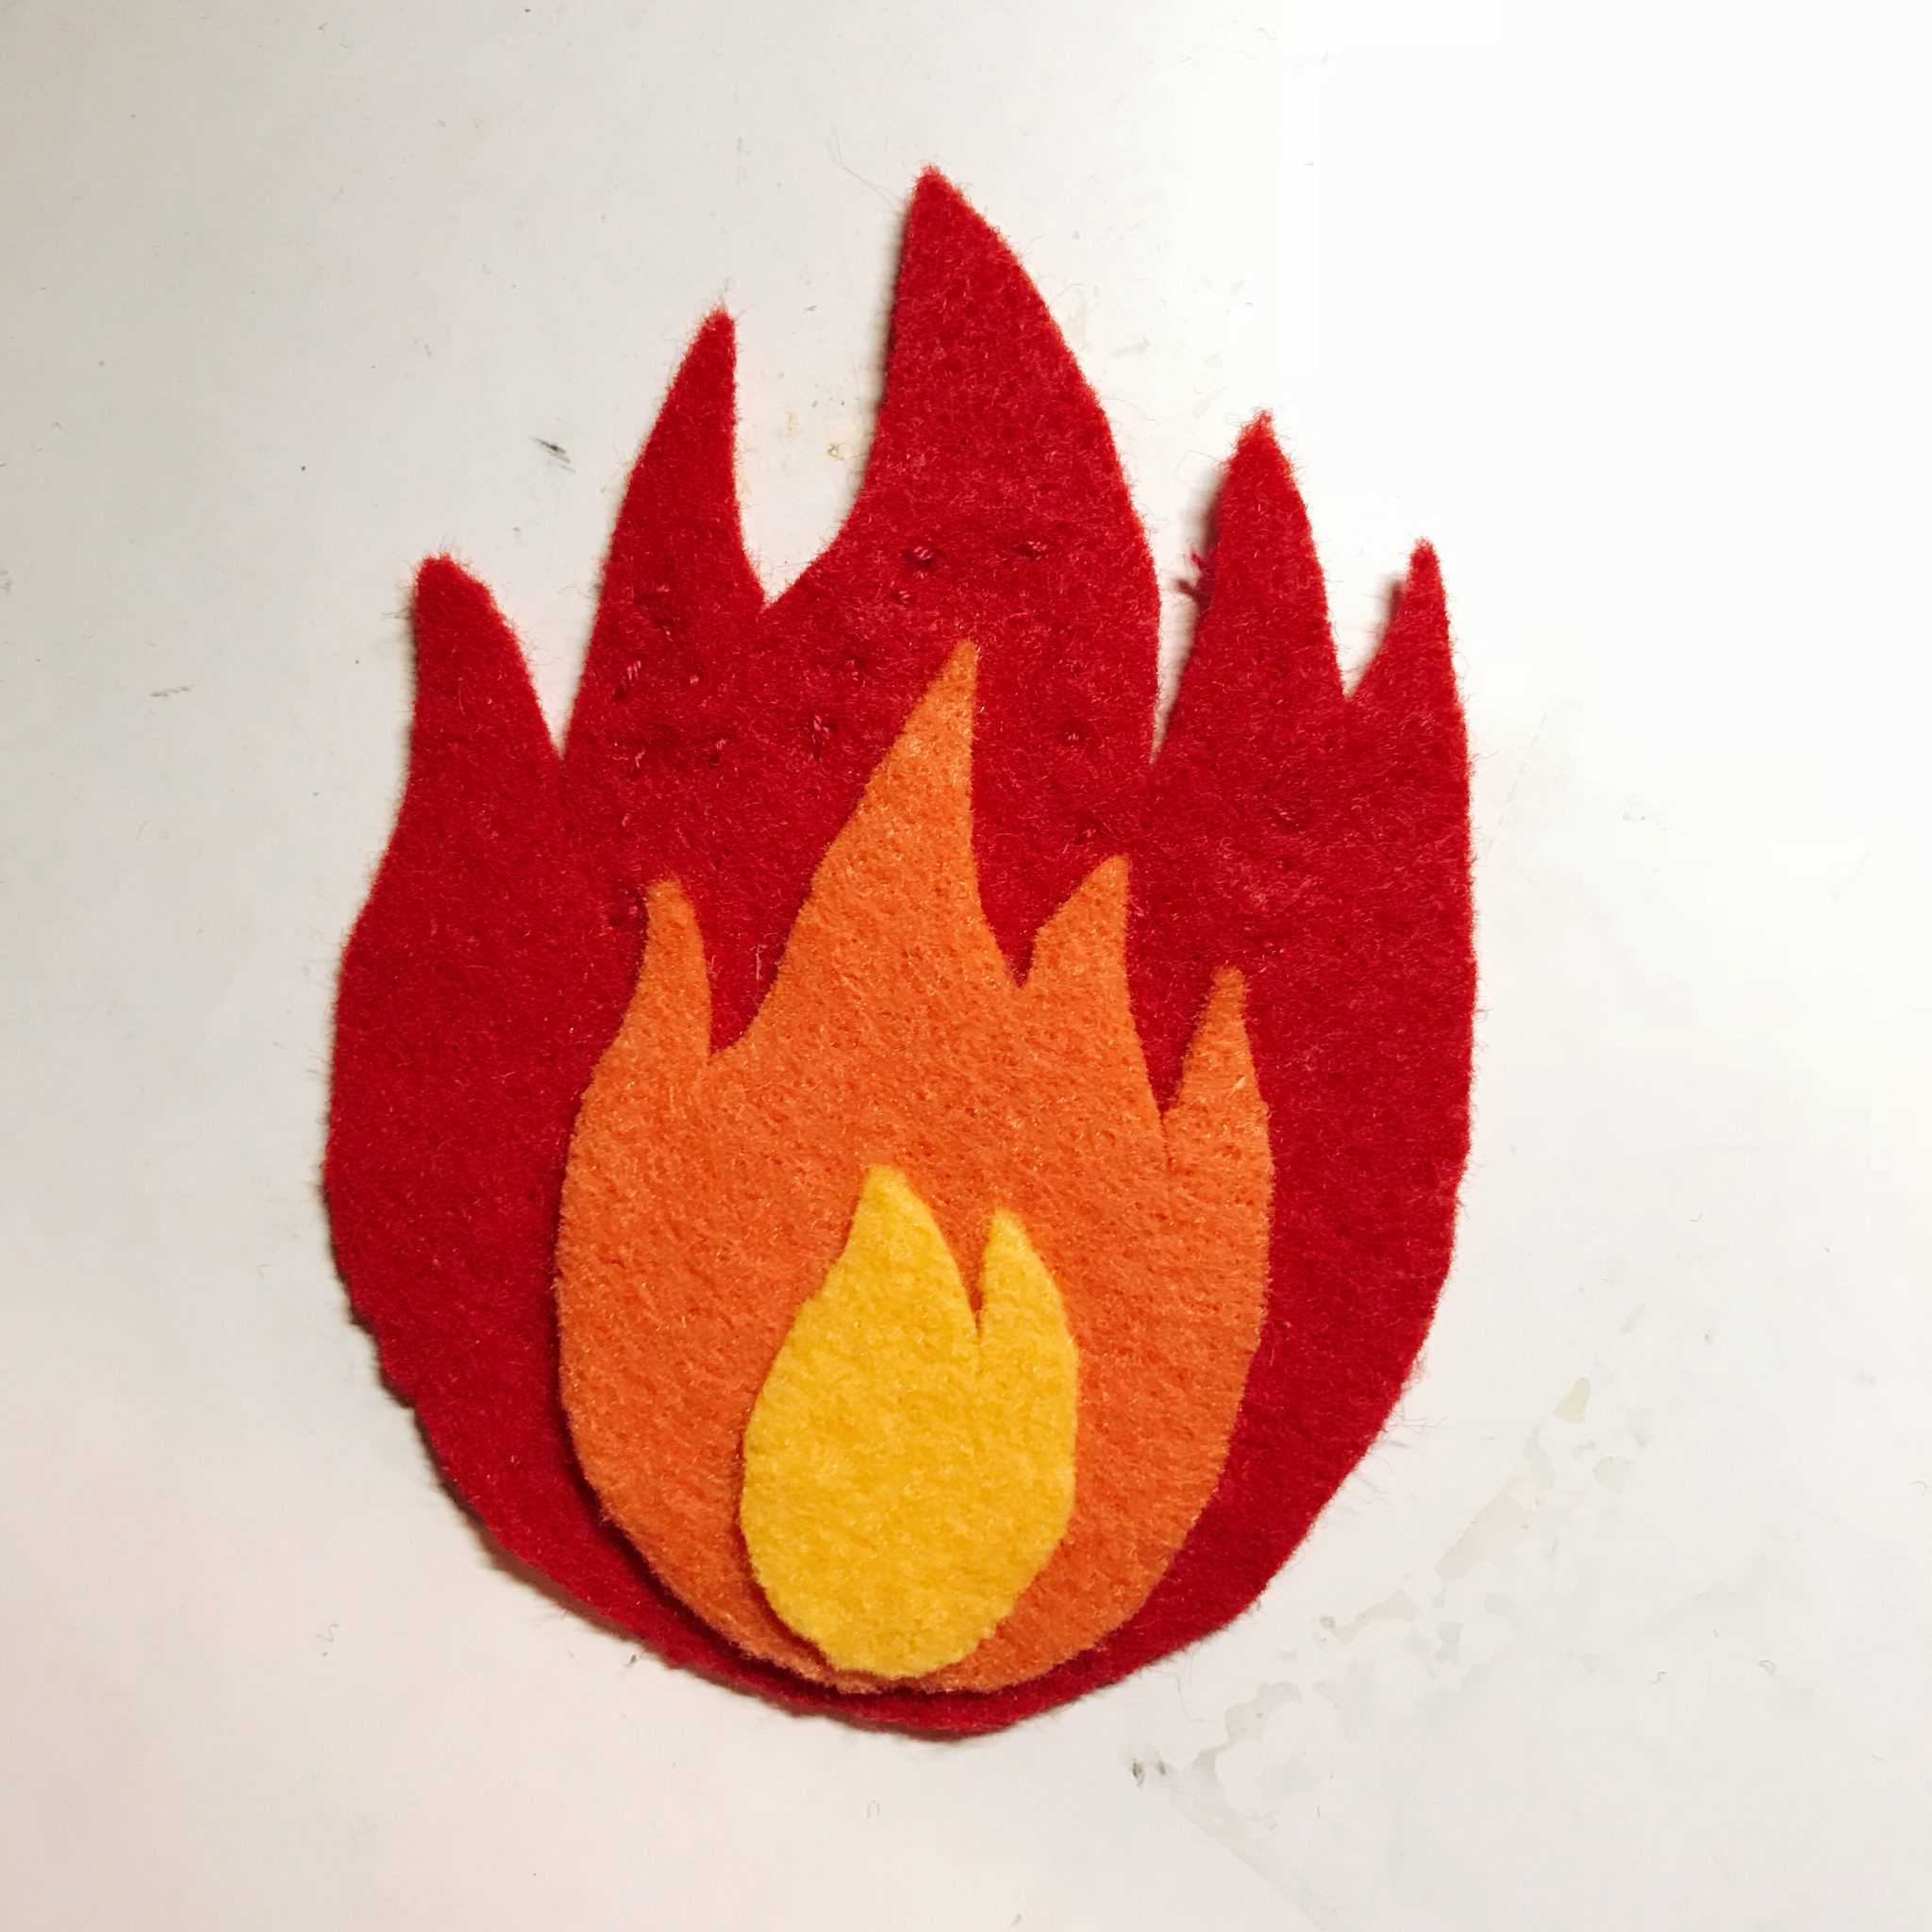
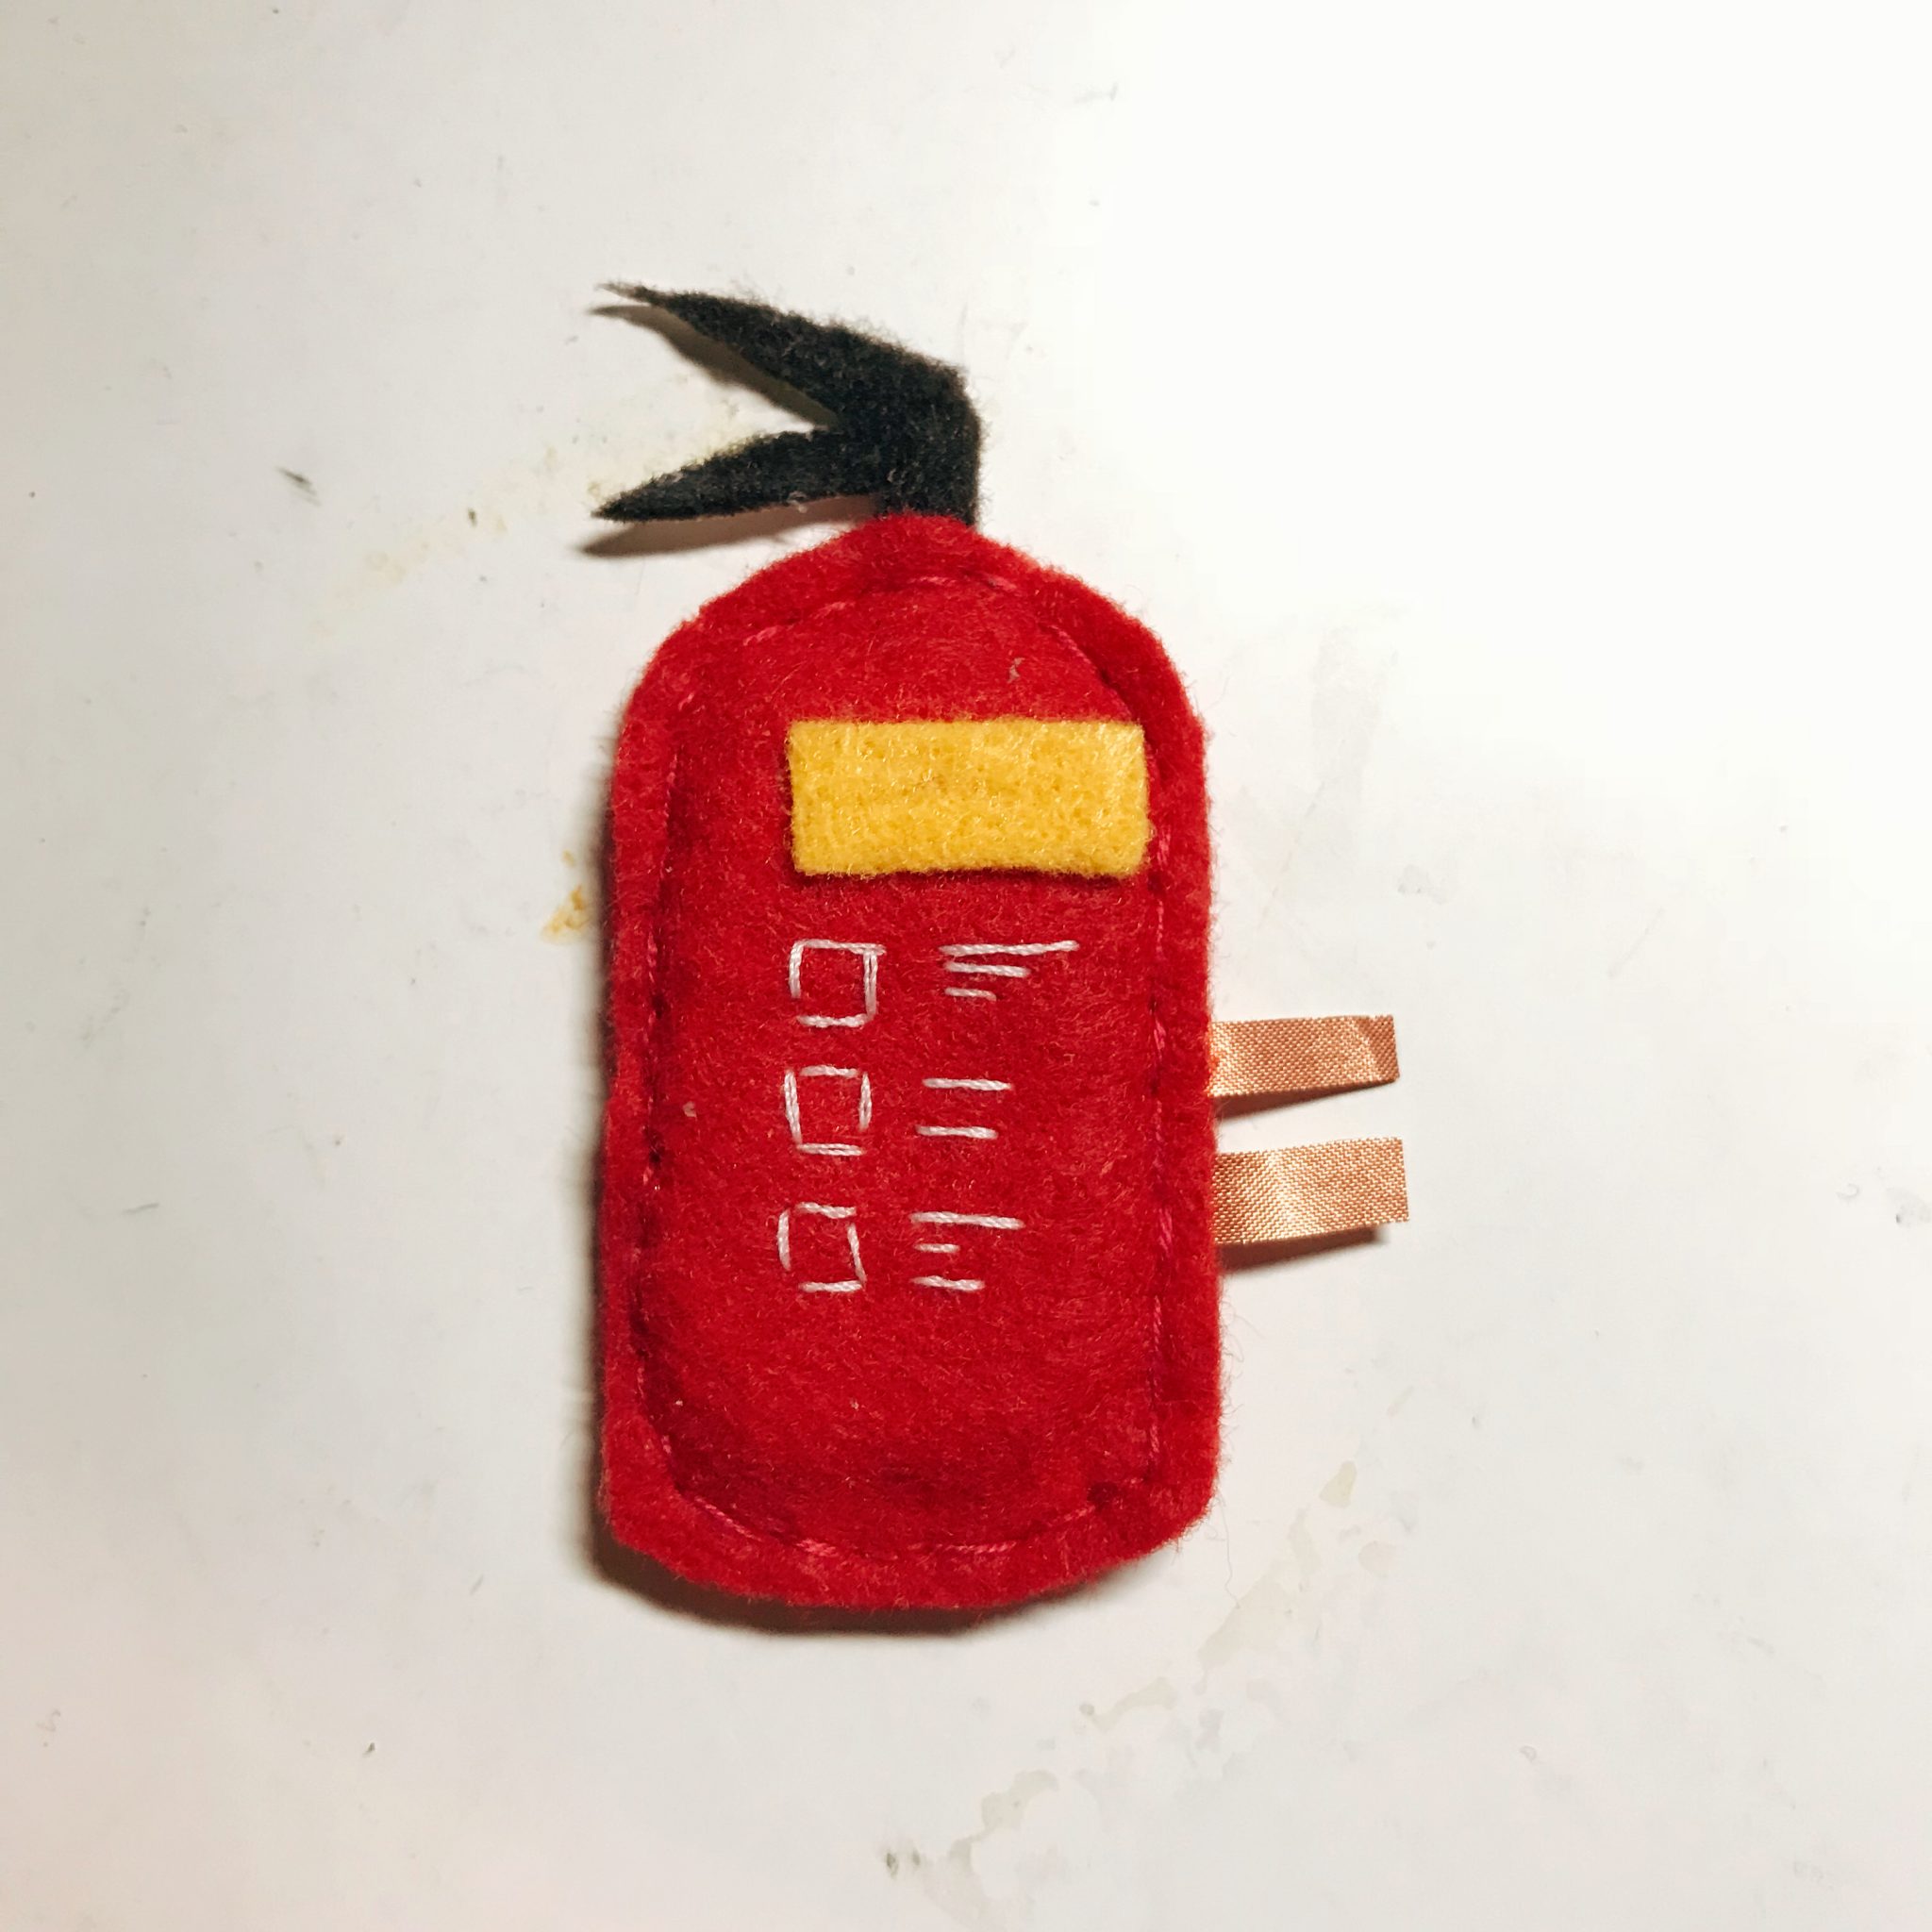
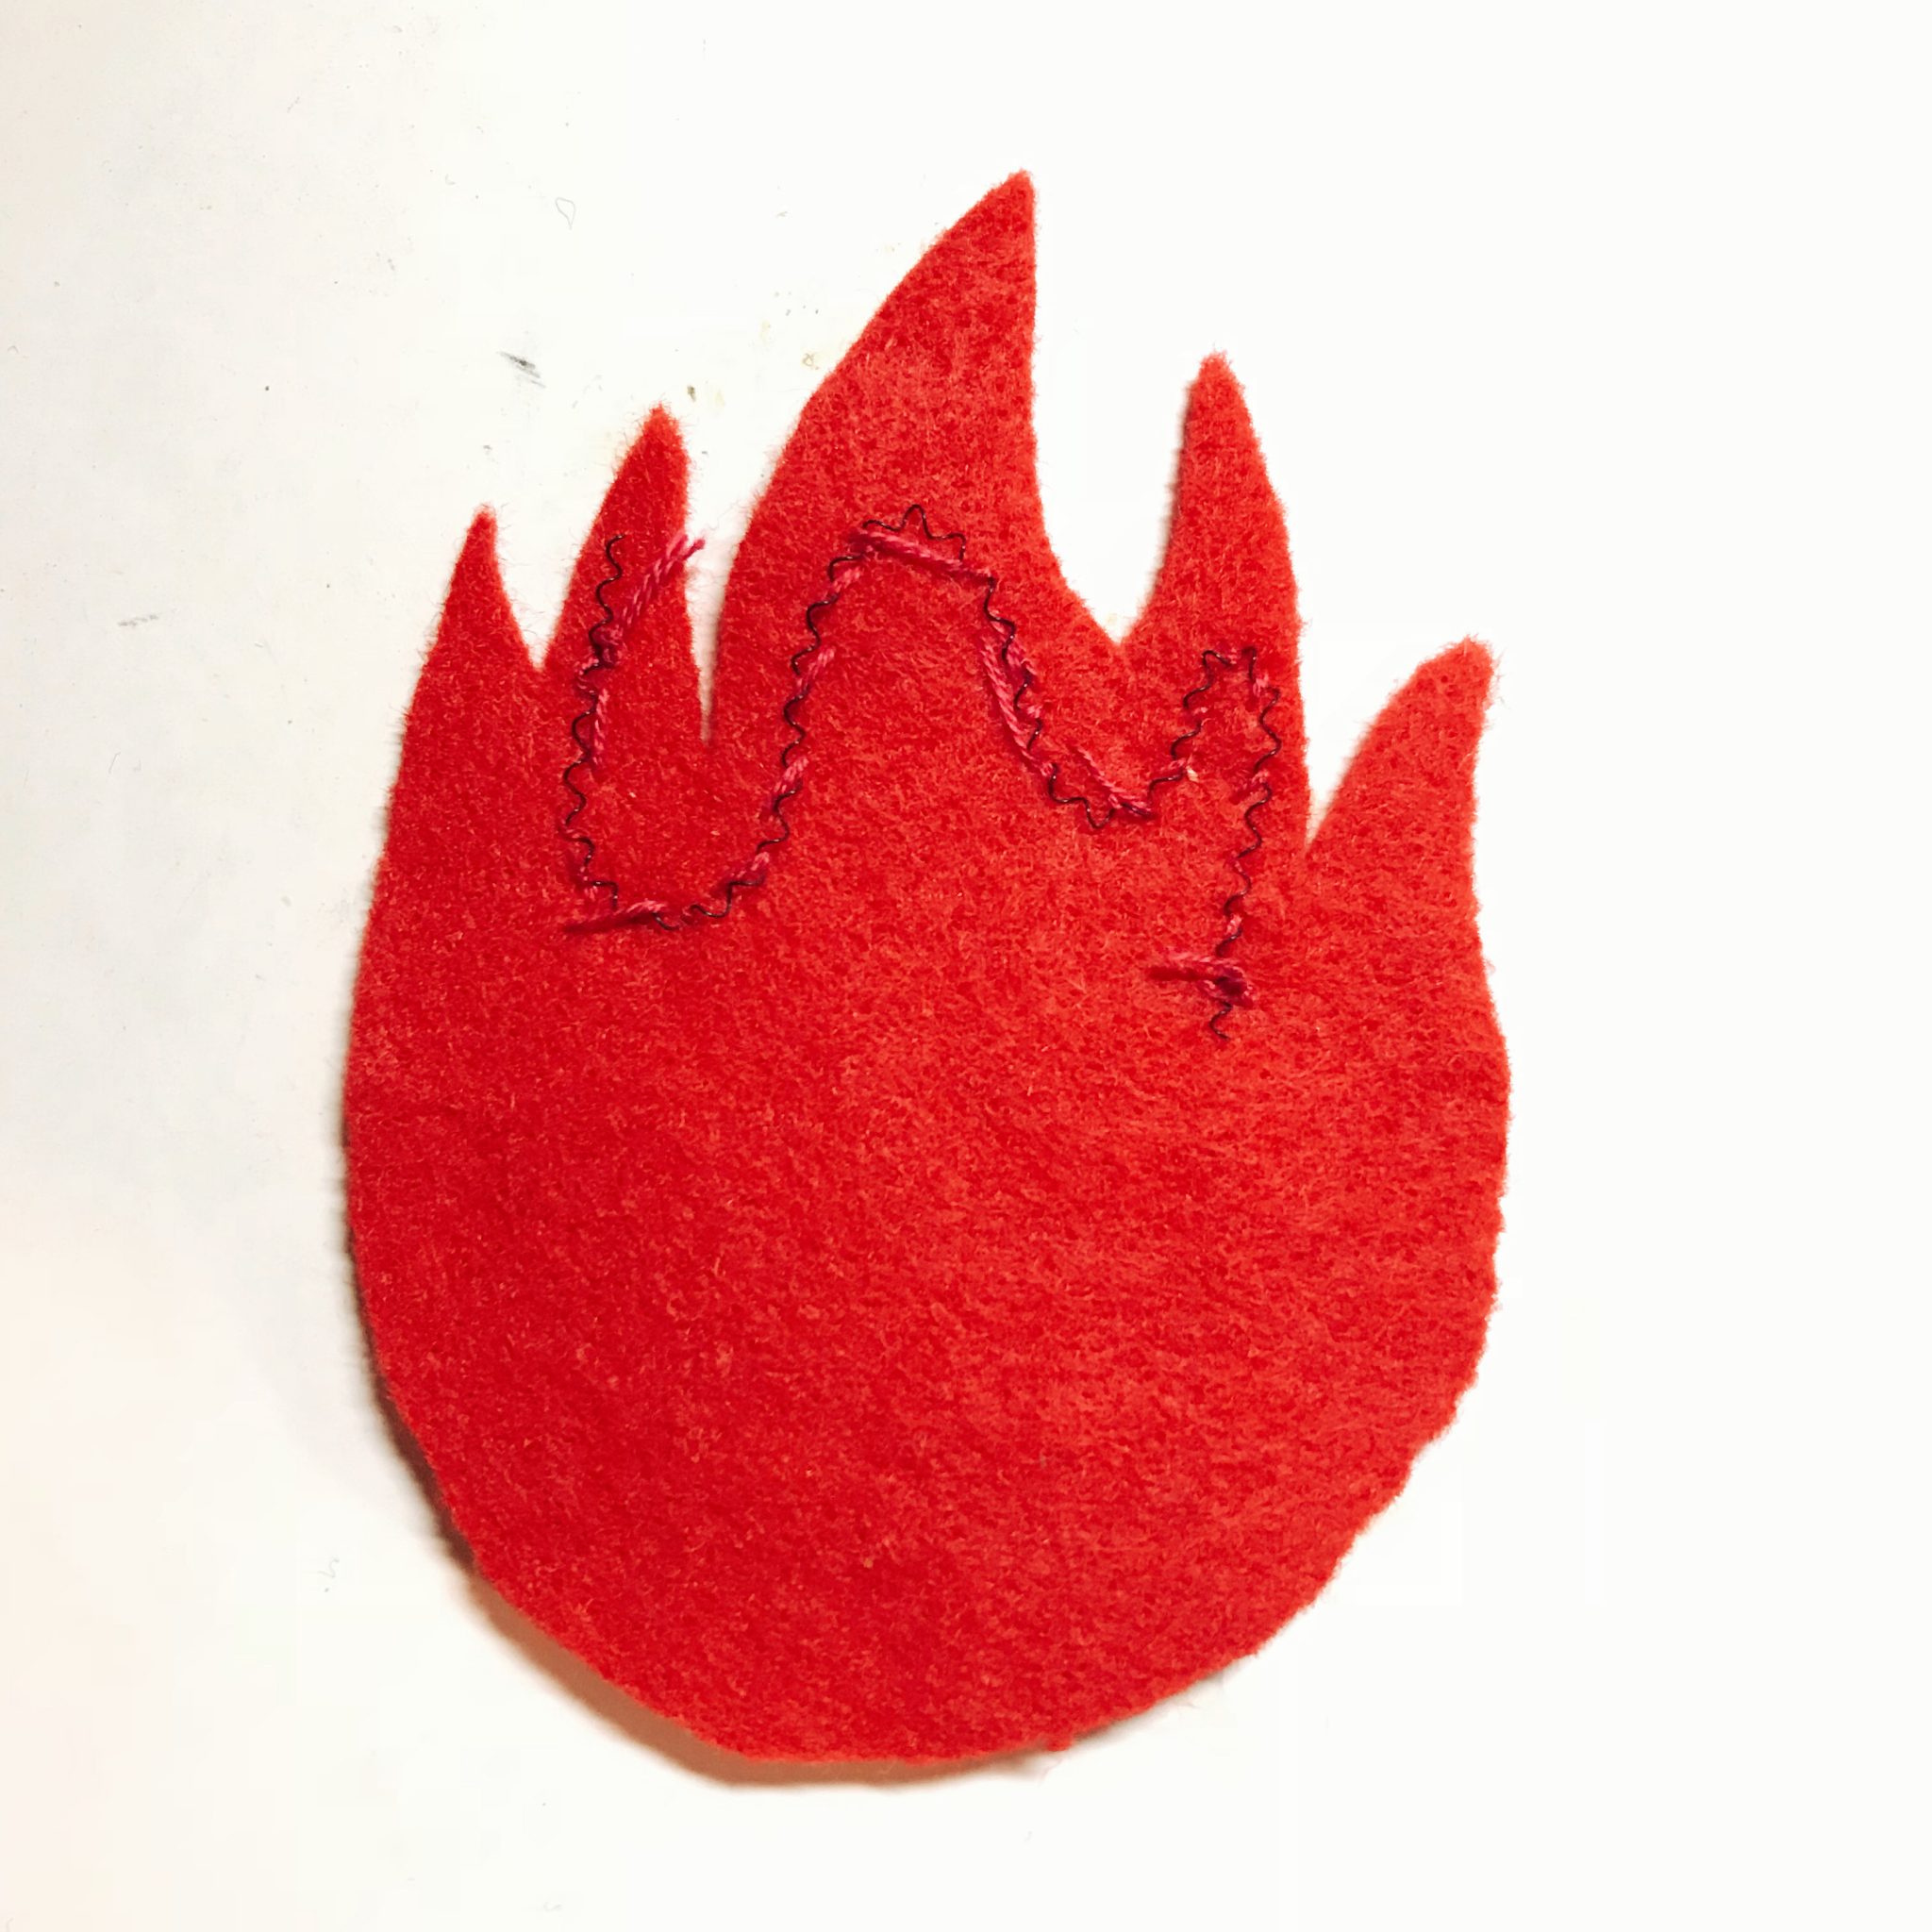
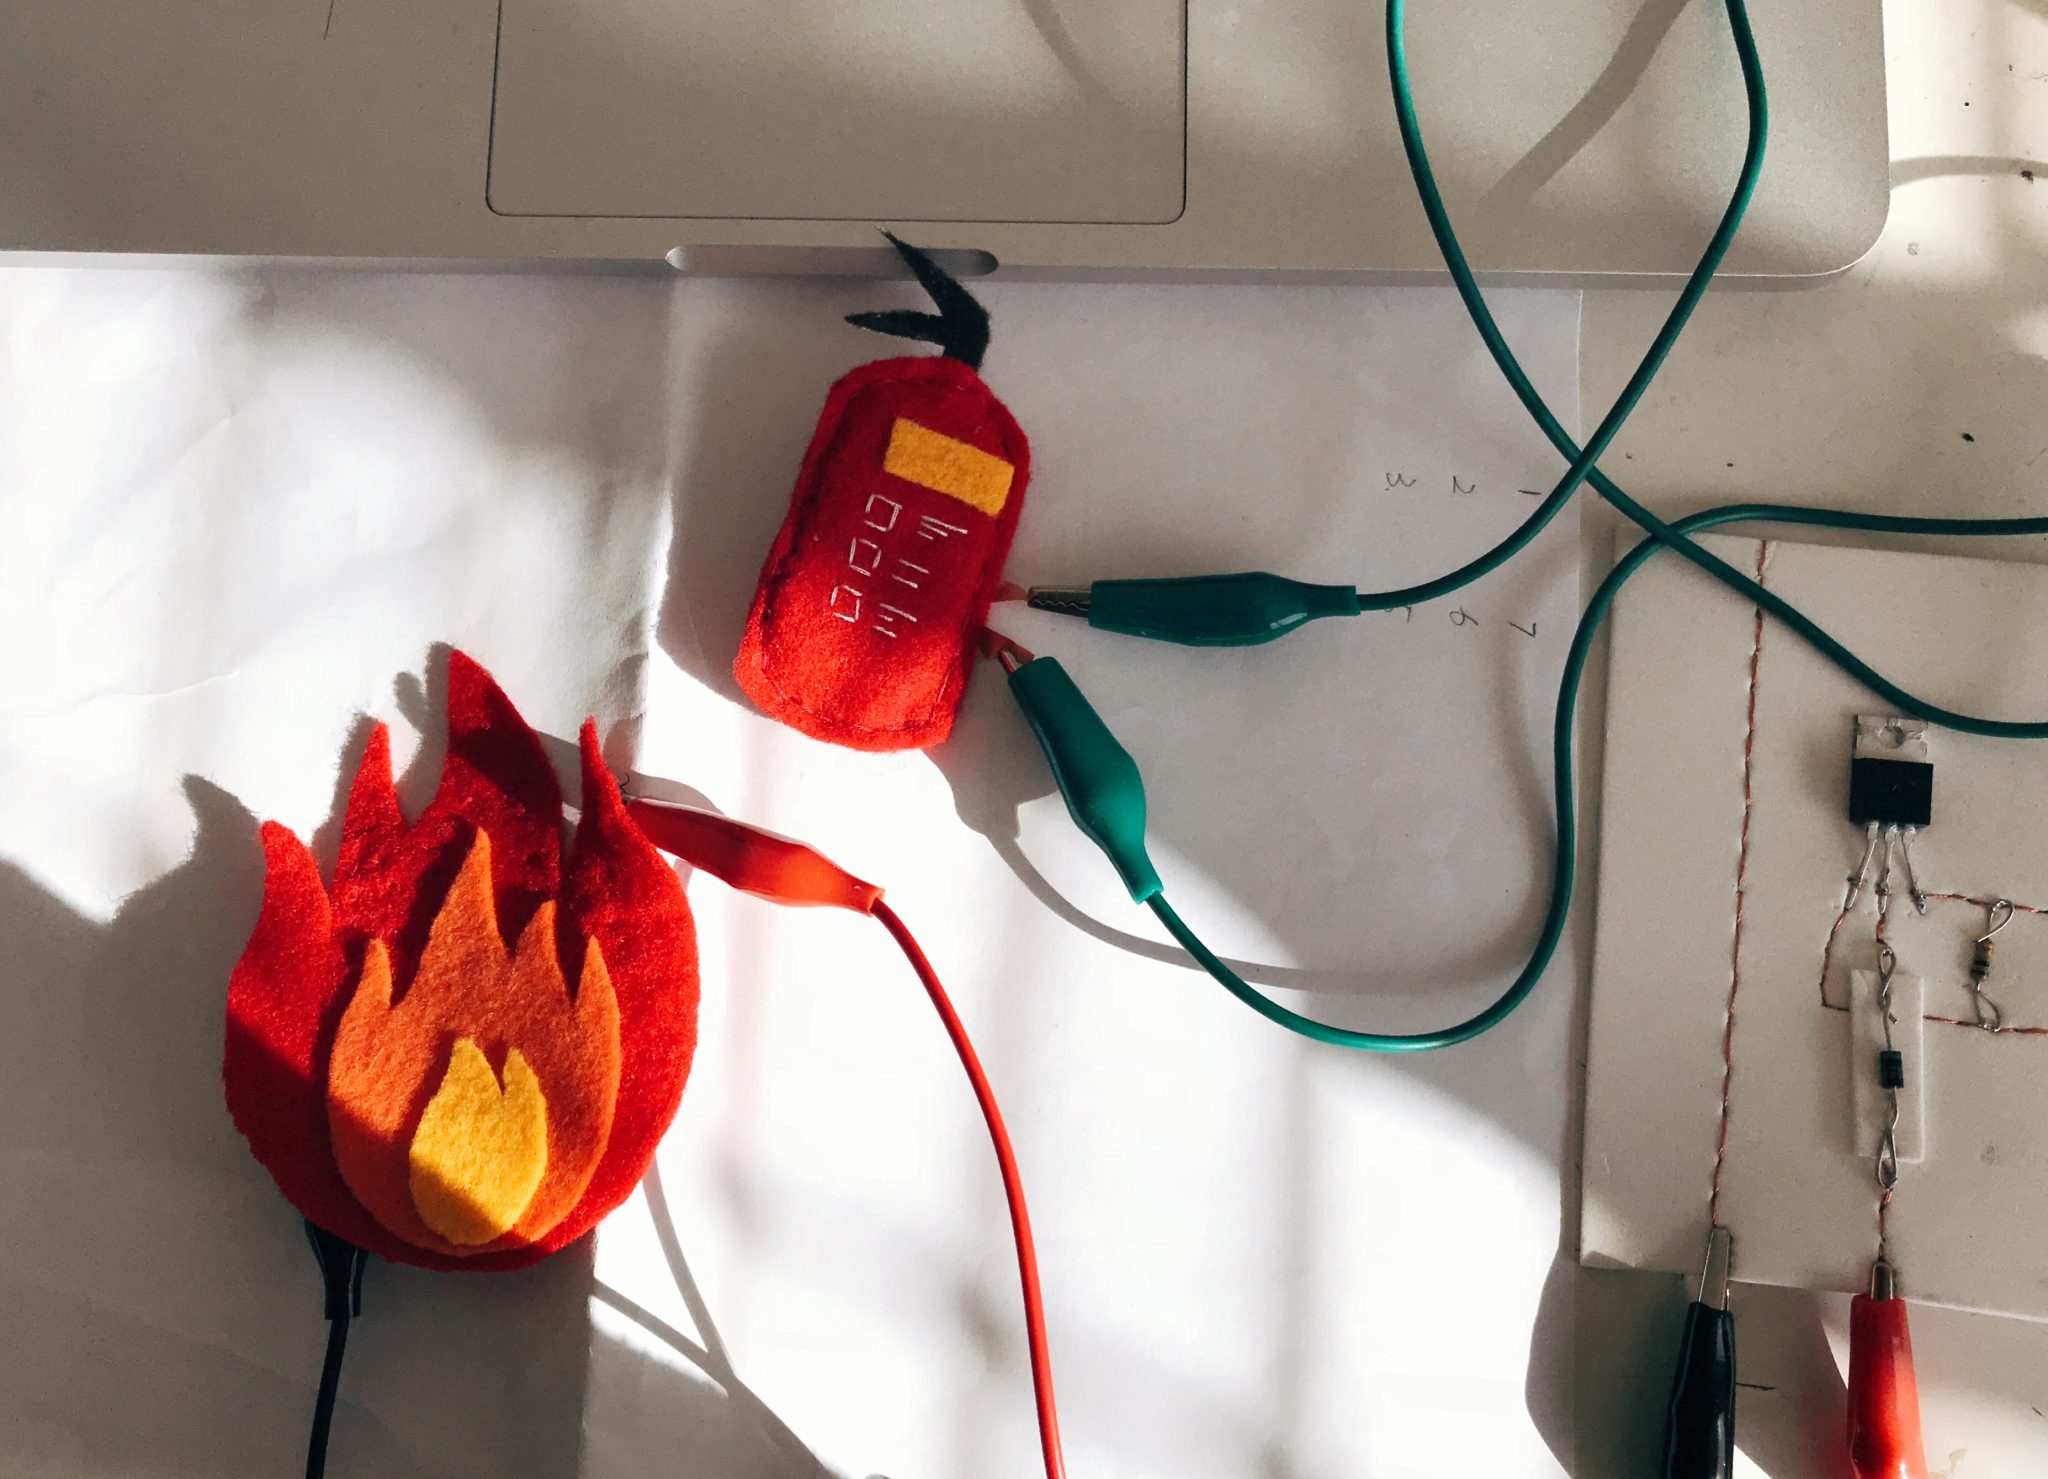
Here are the fire extinguisher and the fire. I sewed the flexinol with the red felt to get the fire. And the fire extinguisher is a soft button that I can press it to connect the Arduino circuit. The inspiration came from the motion of the flexinol which reminds me of the sparkling flames. So I decided to use the fire extinguisher button to trigger the fire. The button can be pressed to put out a fire.
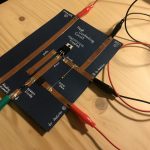
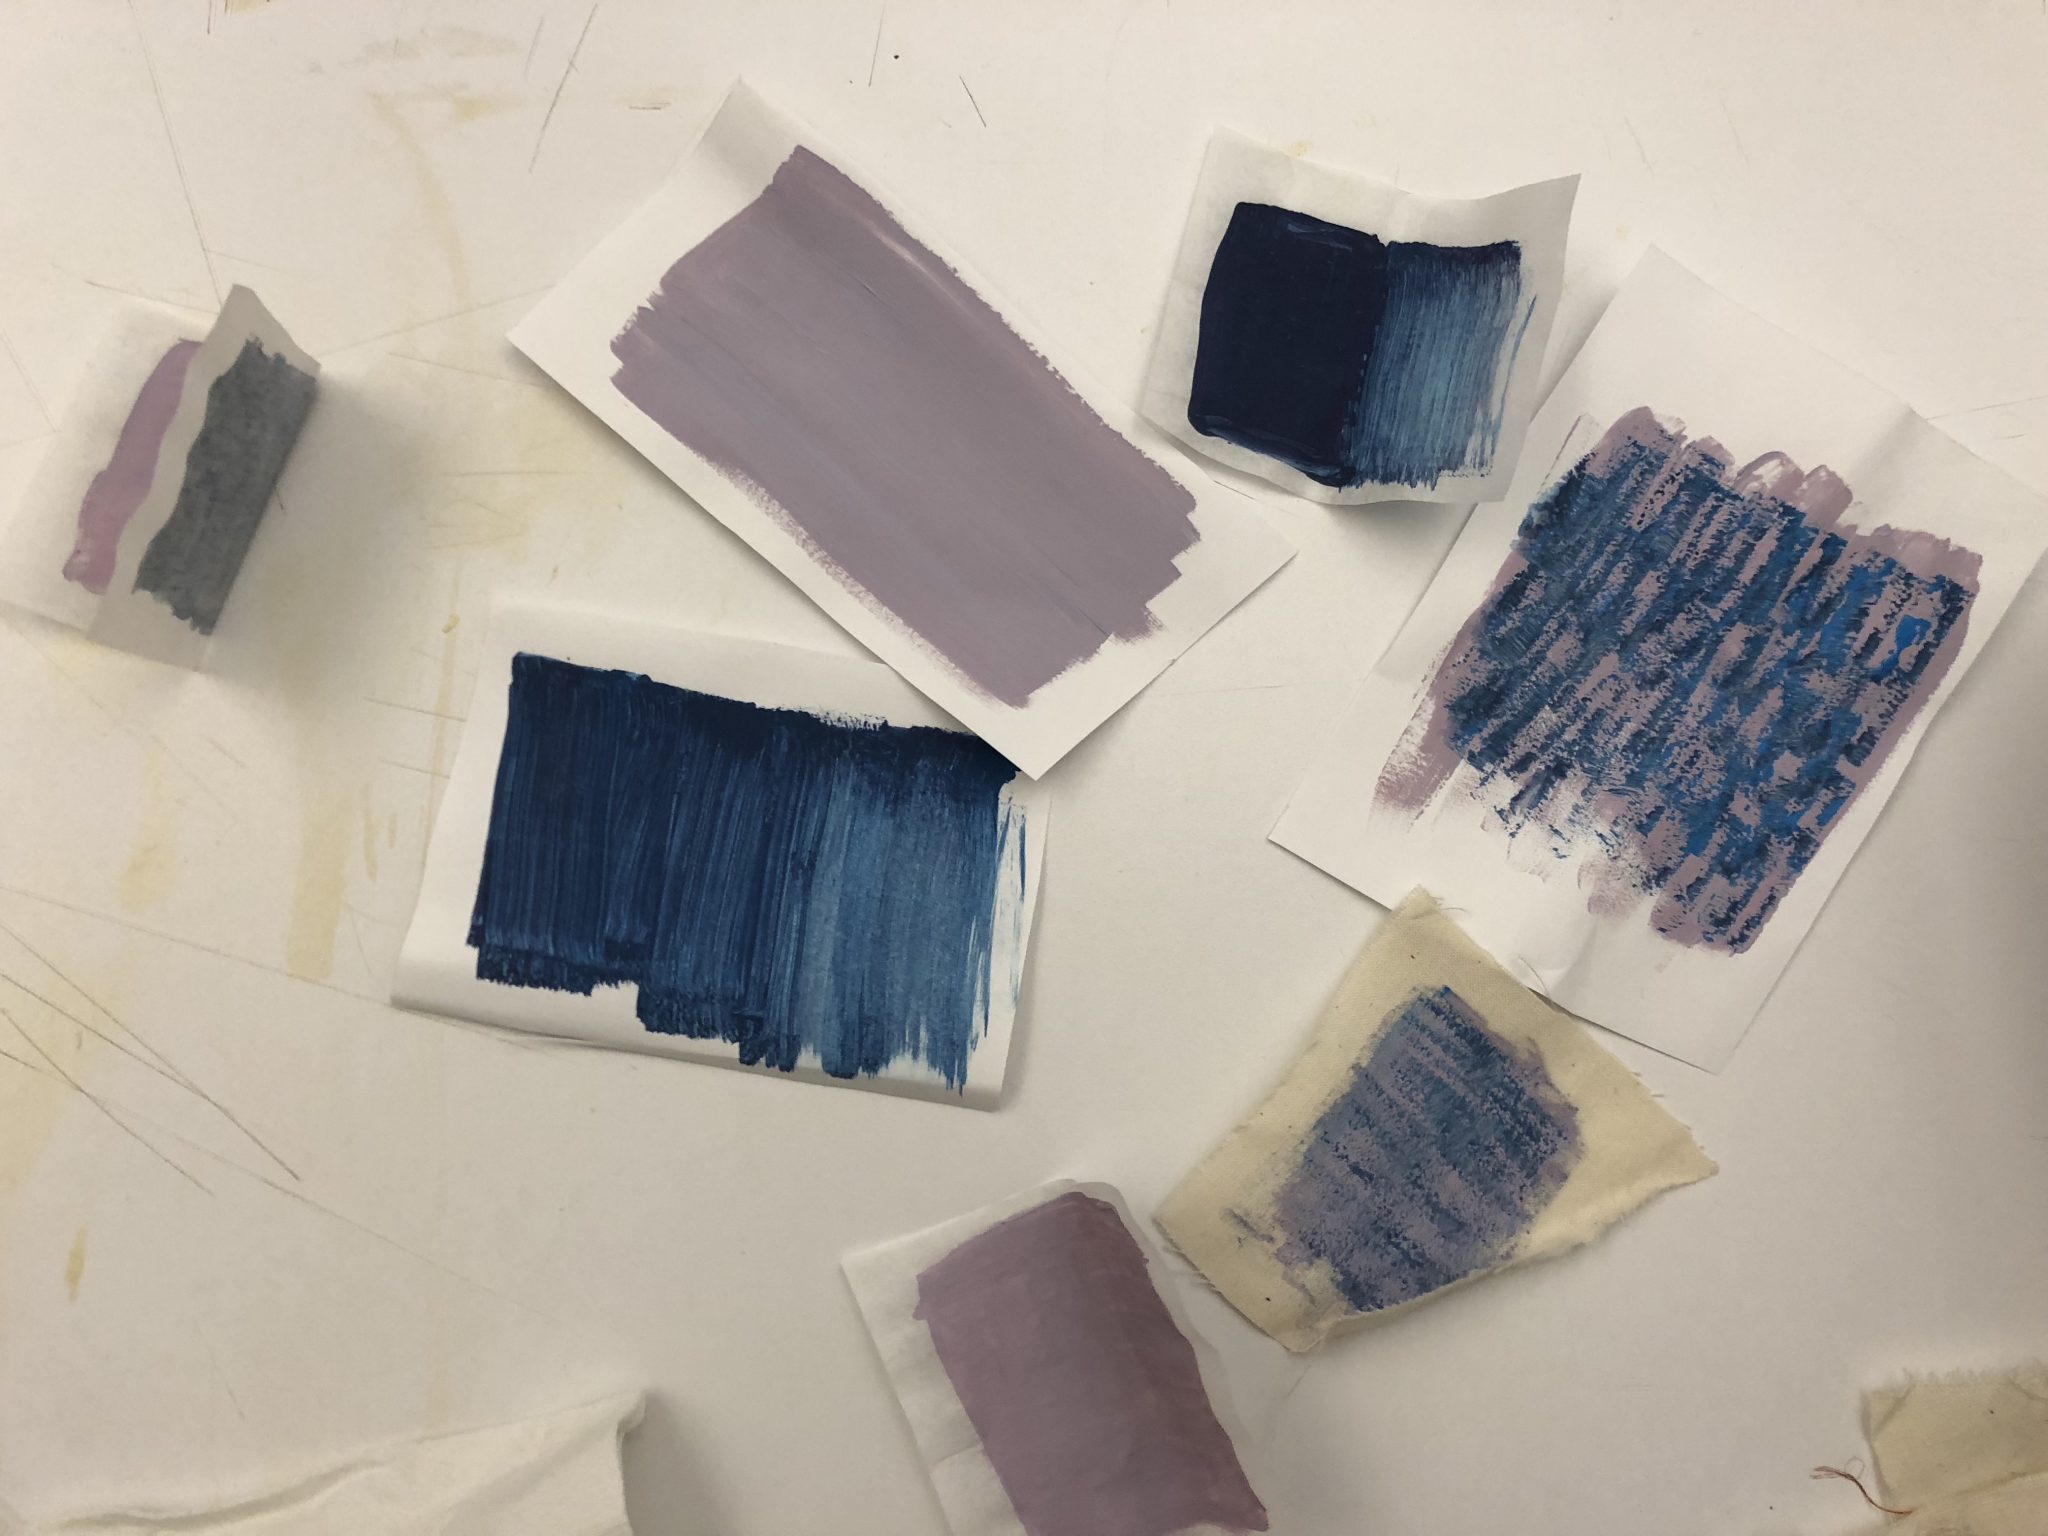
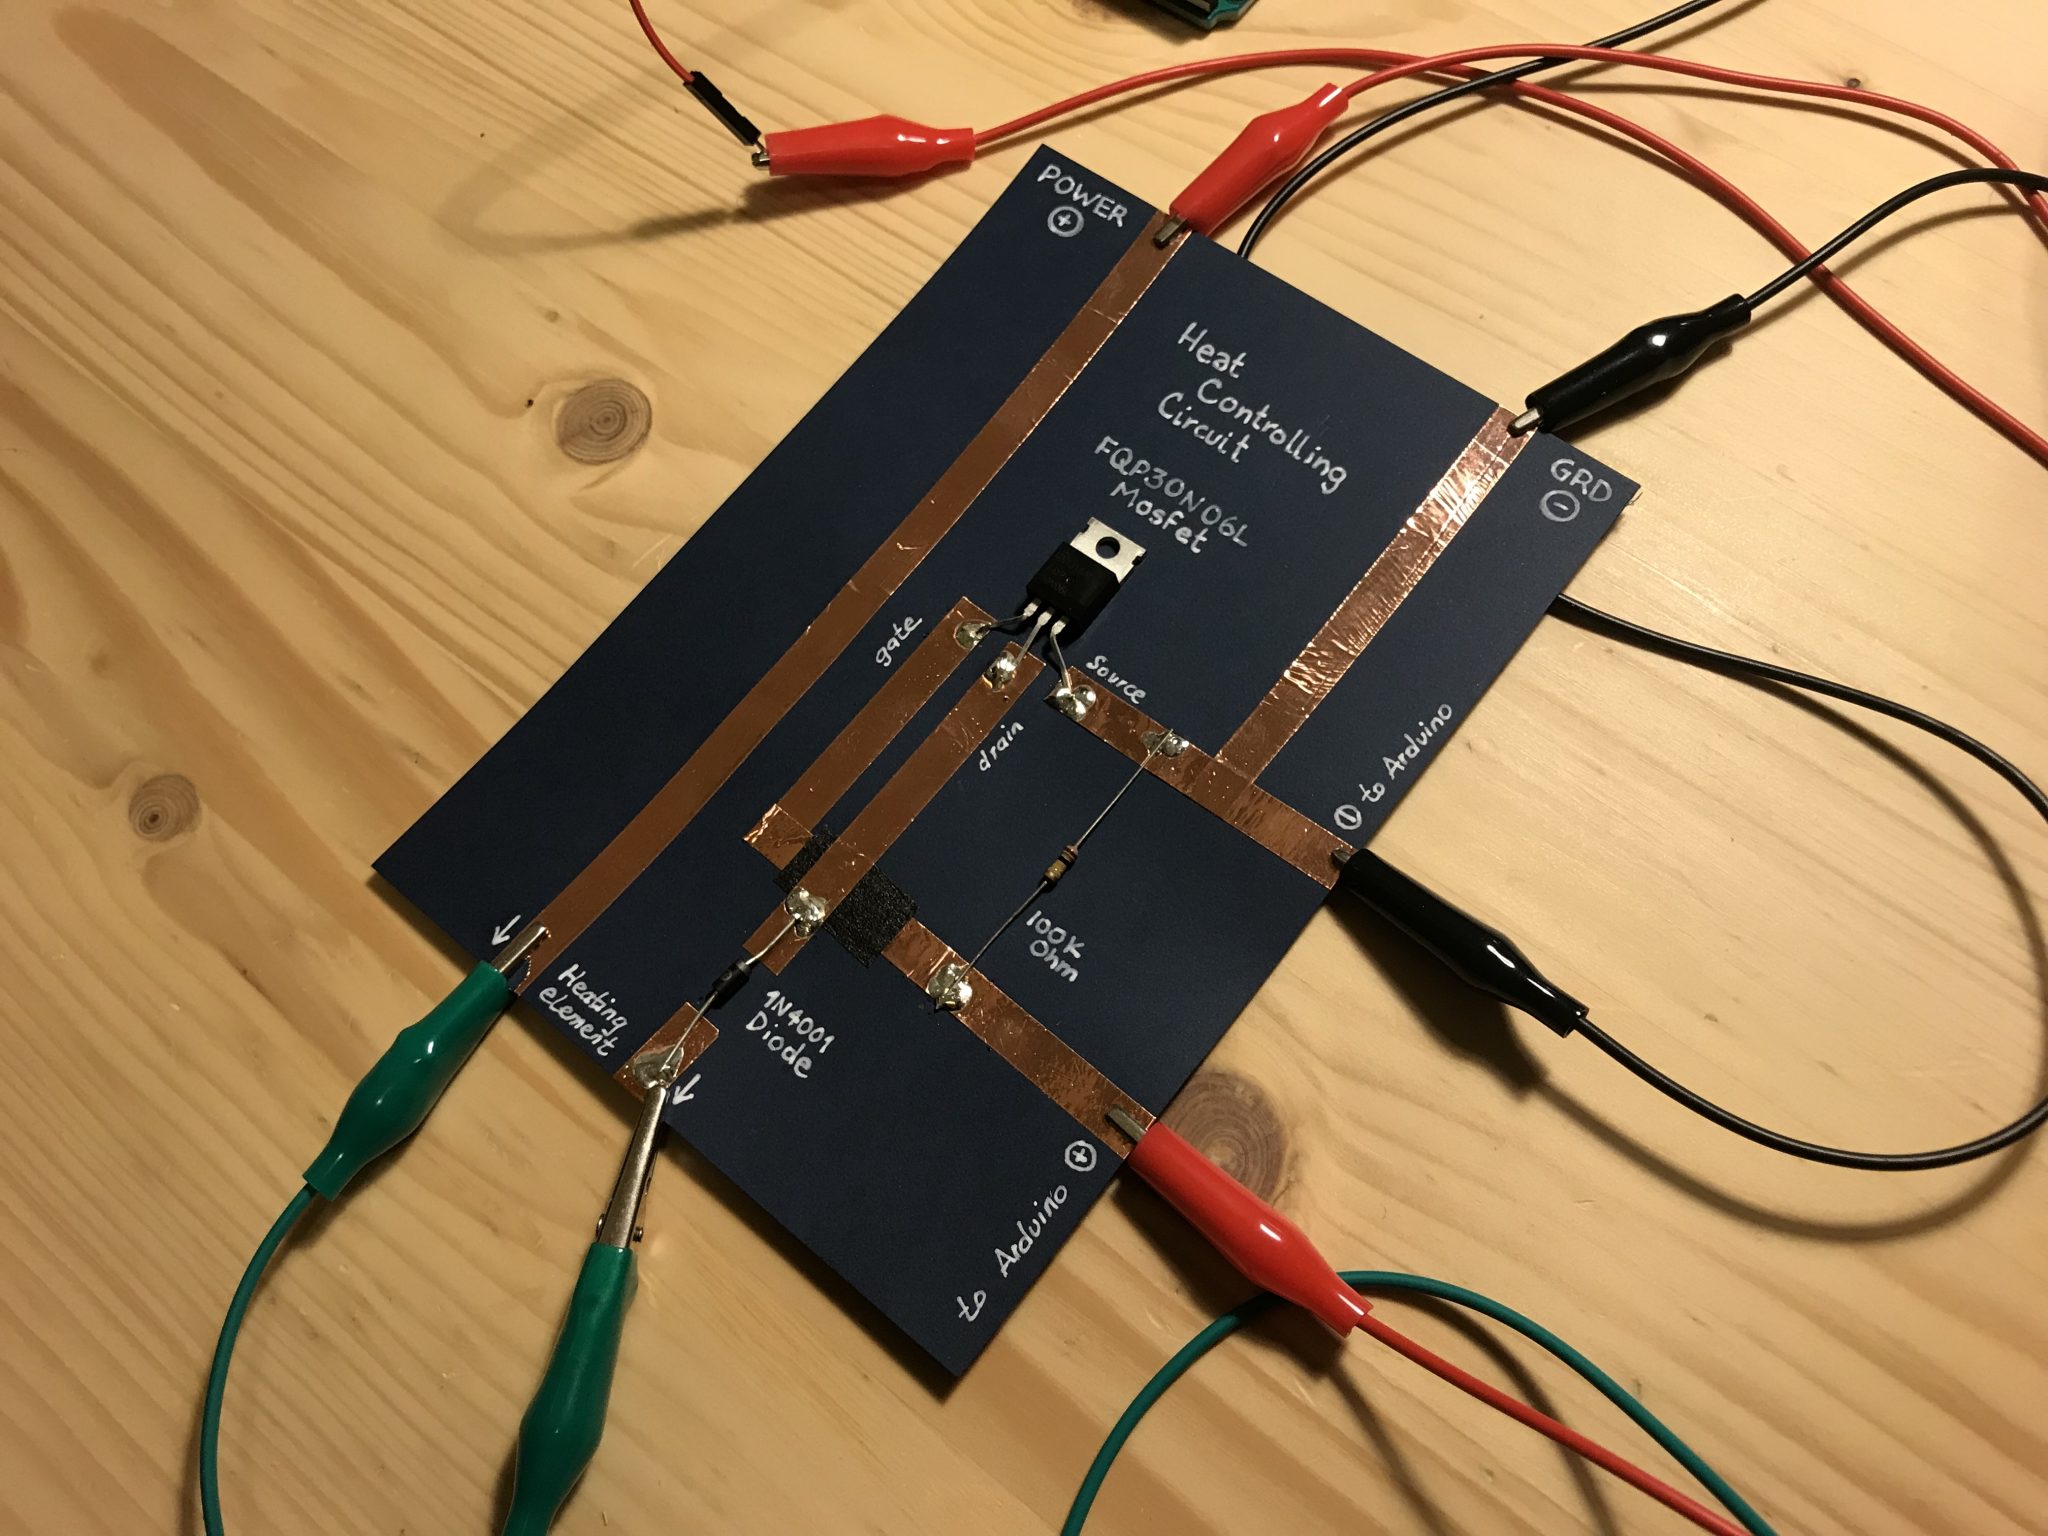
In order to work with Thermochromic ink, it is extremely necessary to perform tests with different colors and volumes of pigments. For example, I didn’t have any luck using yellow Thermochromic Ink; if it is used with a clear pigment, the contrast is very low and the change in temperature is not perceived; If a dark pigment is used, the powder is not sufficiently strong to clarify the mixture and create enough contrast.
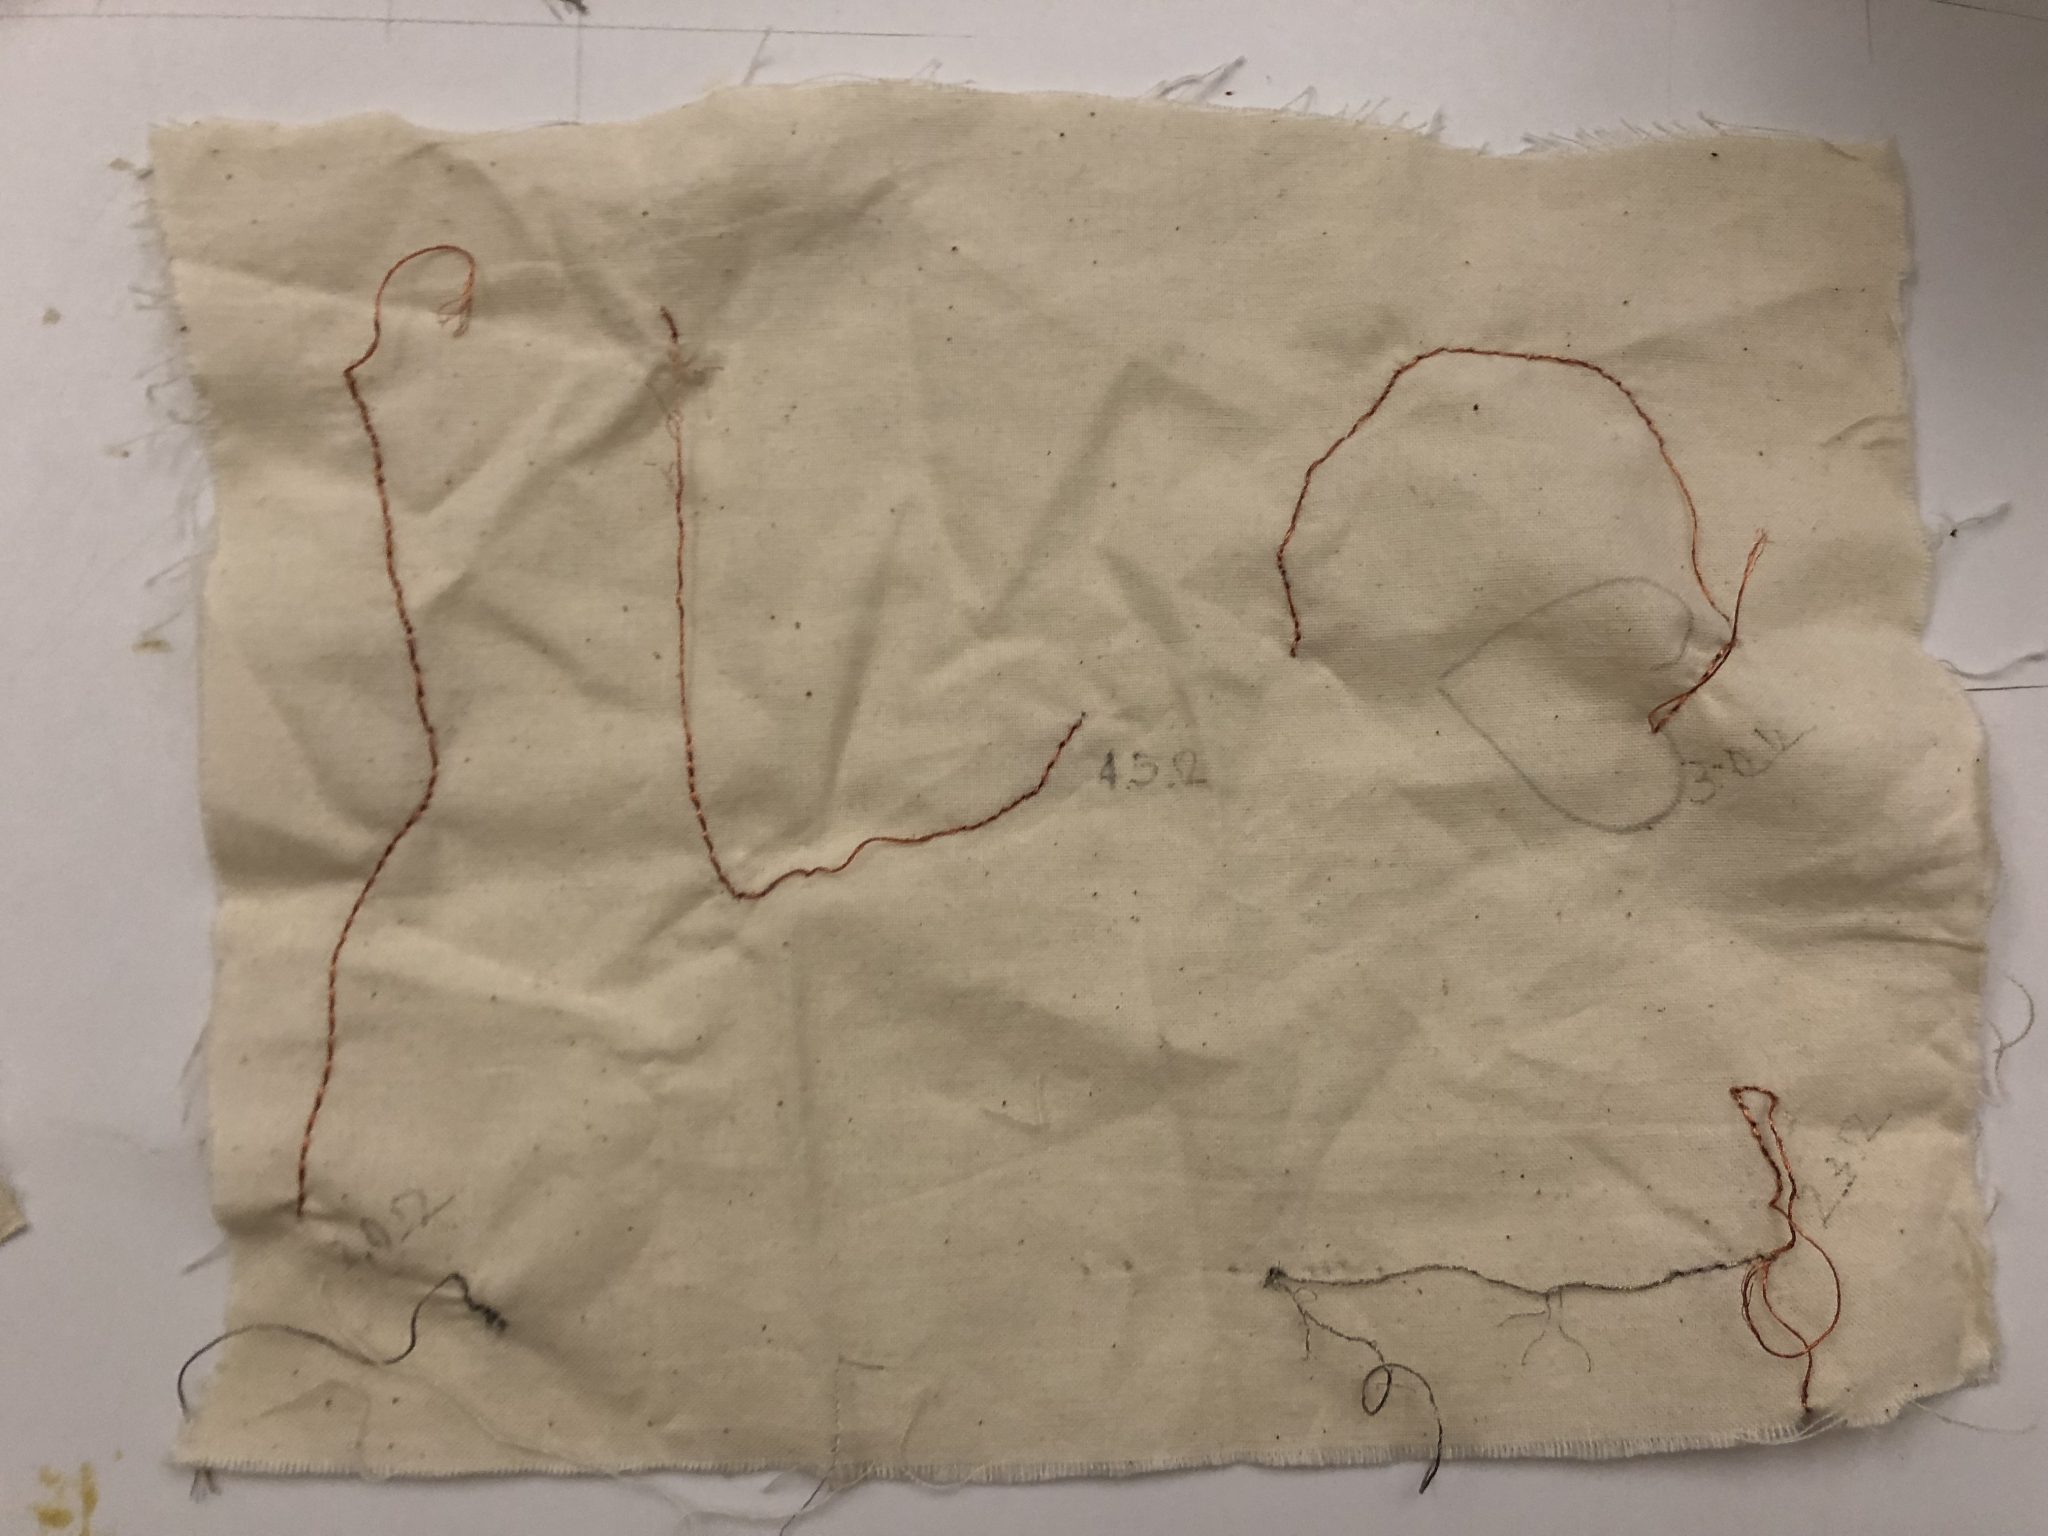
Conductive thread worked perfect to generate an approximate resistance of 22-23 ohms. Enough to be used with a 9 Volt battery and create enough heat to affect the Thermochromic Ink. Of course, combinations of powder of high contrast colors is highly recommended.
For the I wish I could have explored another mini-project (a VERY premature idea for the time of the year, I’m sorry!), But I had to use the resources I had in hand, and this seemed a decent answer. The idea here was to allow the transformation of color to showcase the Christmas tree lights and star.
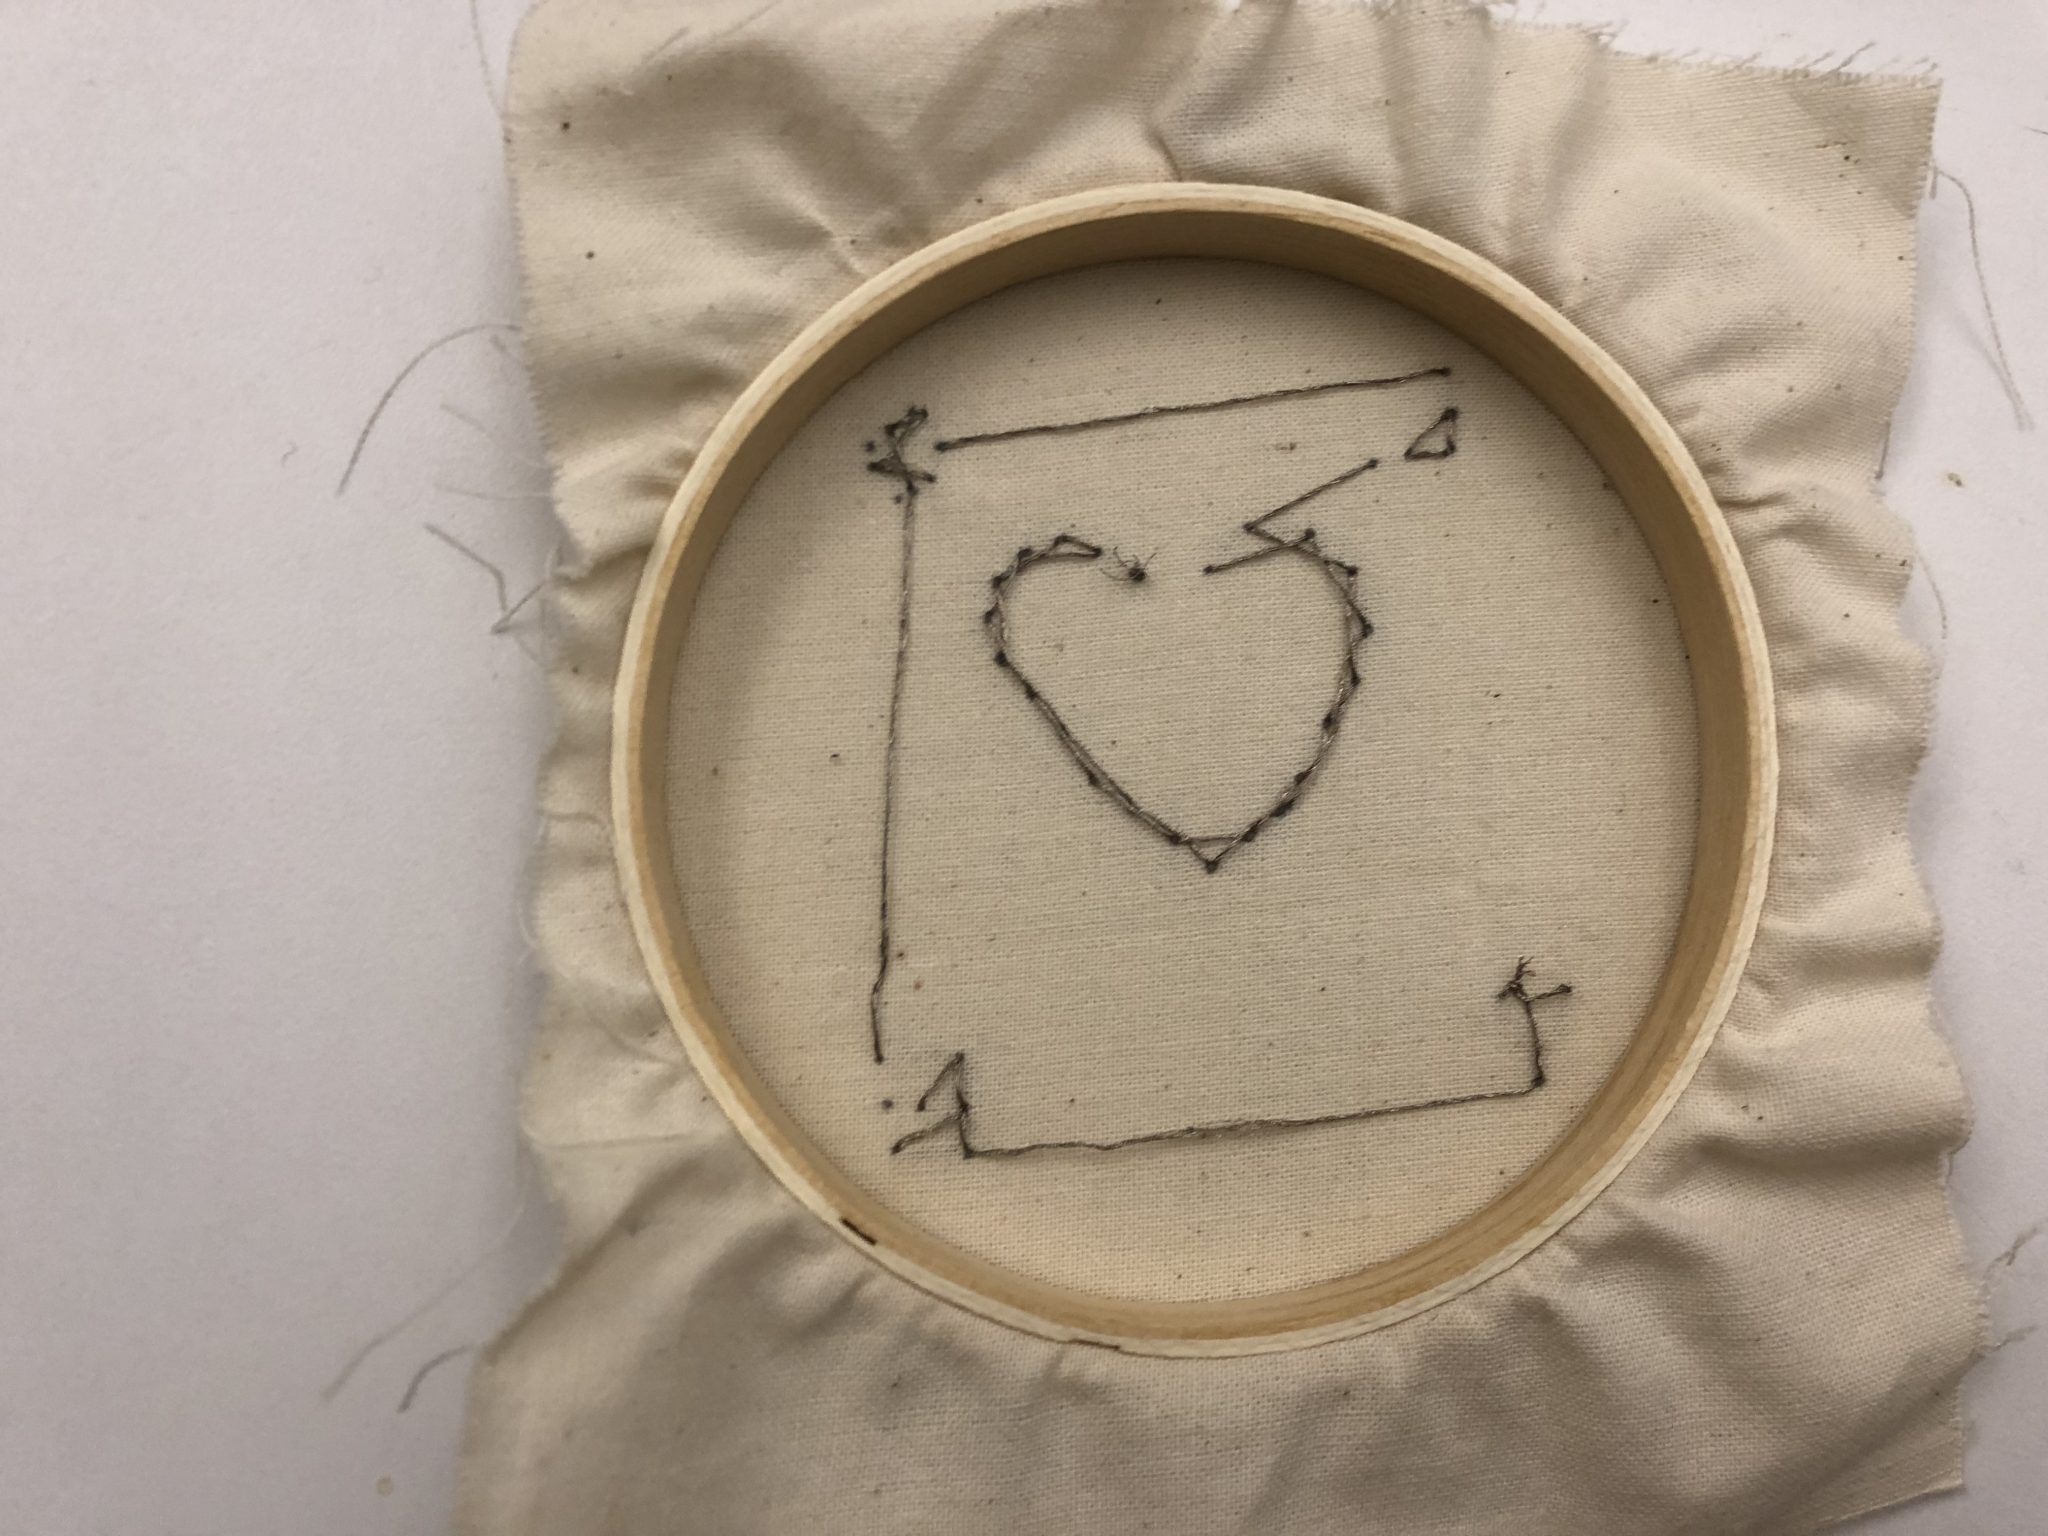
I really love doing circuits with paper or fabric with the intention of illustrating connections (using notes and symbols). I find enchanting the look and the educational sense of them. I just imagine having many of these nodes that could be combine in multiple ways.