Category Archives: Uncategorized

Week 7: Controlling a DC motor and LEDs using a keyboard

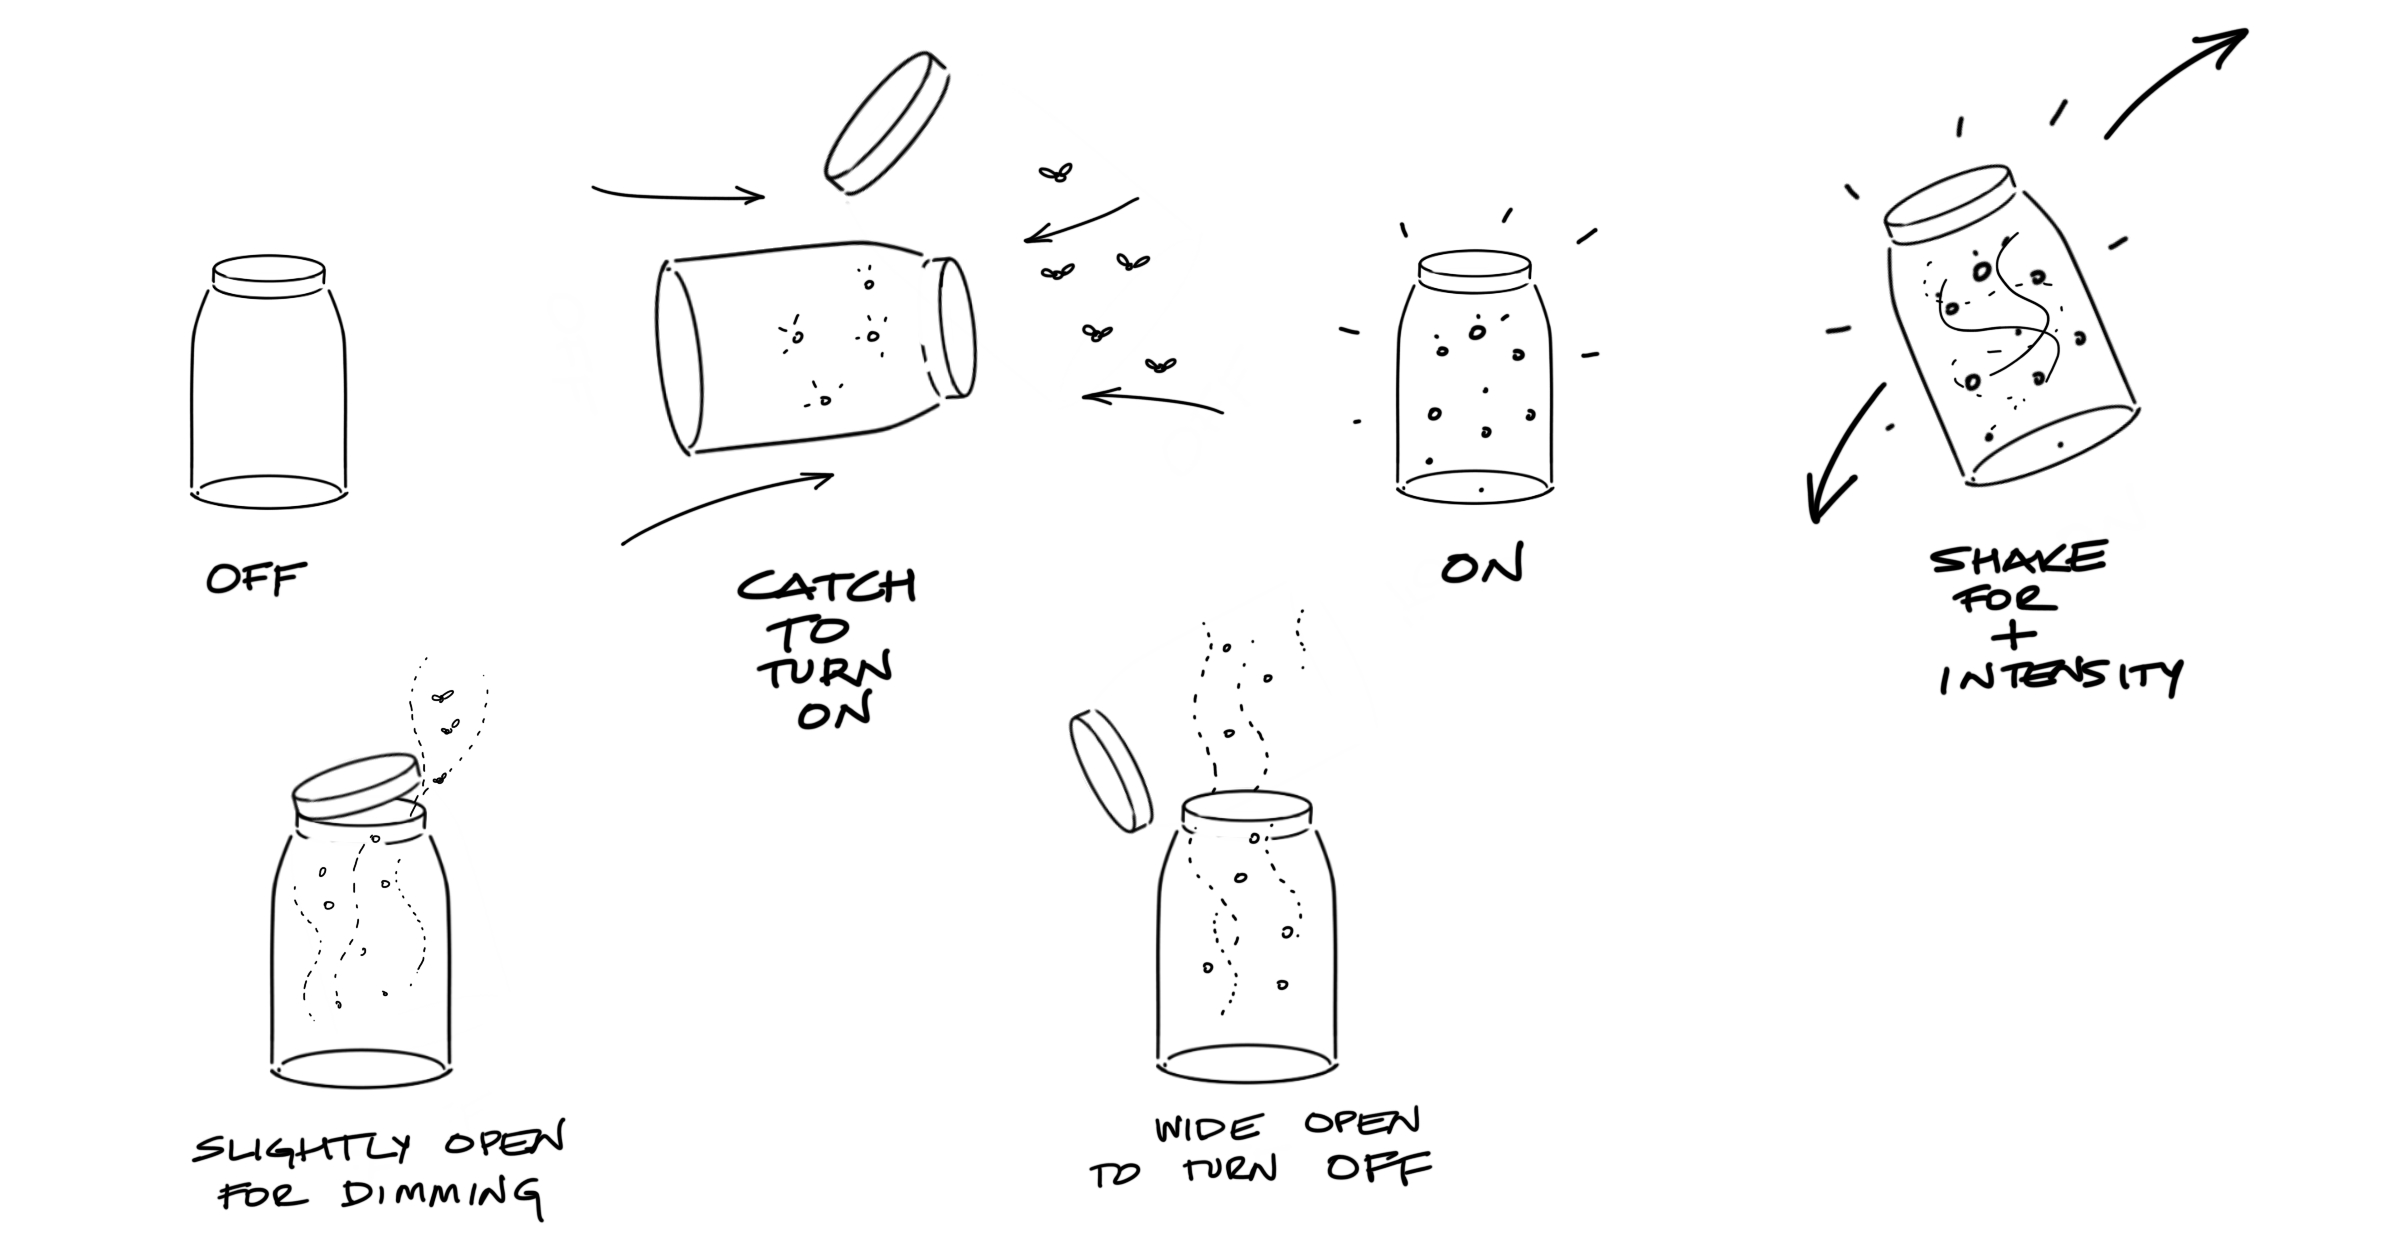
This week’s assignment was to use one of the wireless technologies we had learned in class and apply it to an everyday scenario. I decided to make a remote- controlled smart room of sorts, where one could control a tube light (string of LEDs) and fan (DC motor). This was done using the example code that we did in class. For the second part, I wanted to use the Arduino Uno as the Arduino Leonardo, and operate these devices through the keypad. This turned out to be more challenging than I had anticipated and did not work out.


The part that I got right

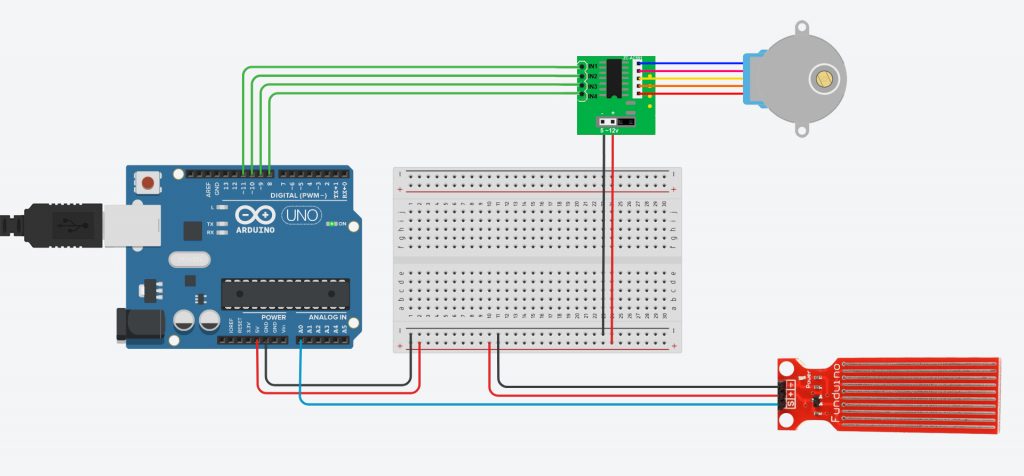
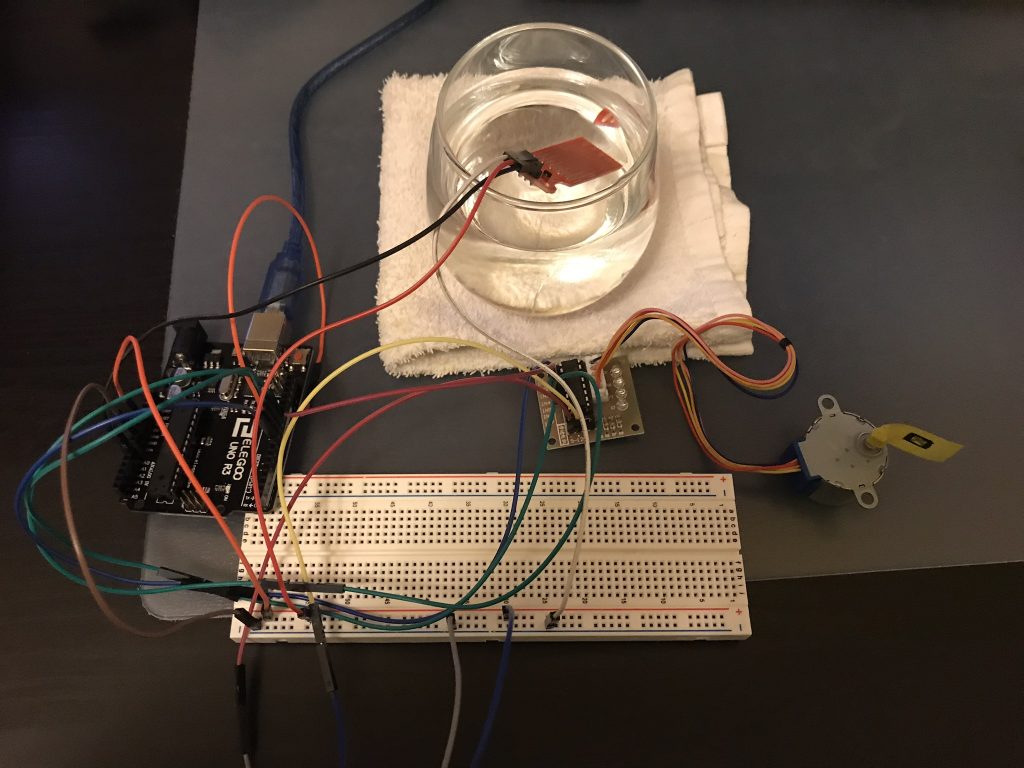
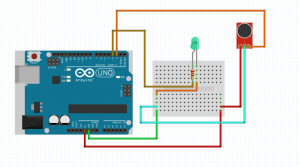
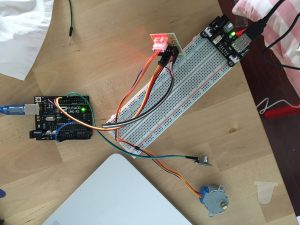
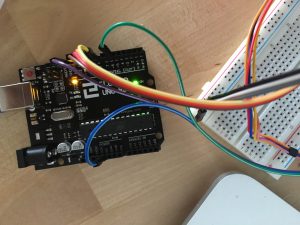
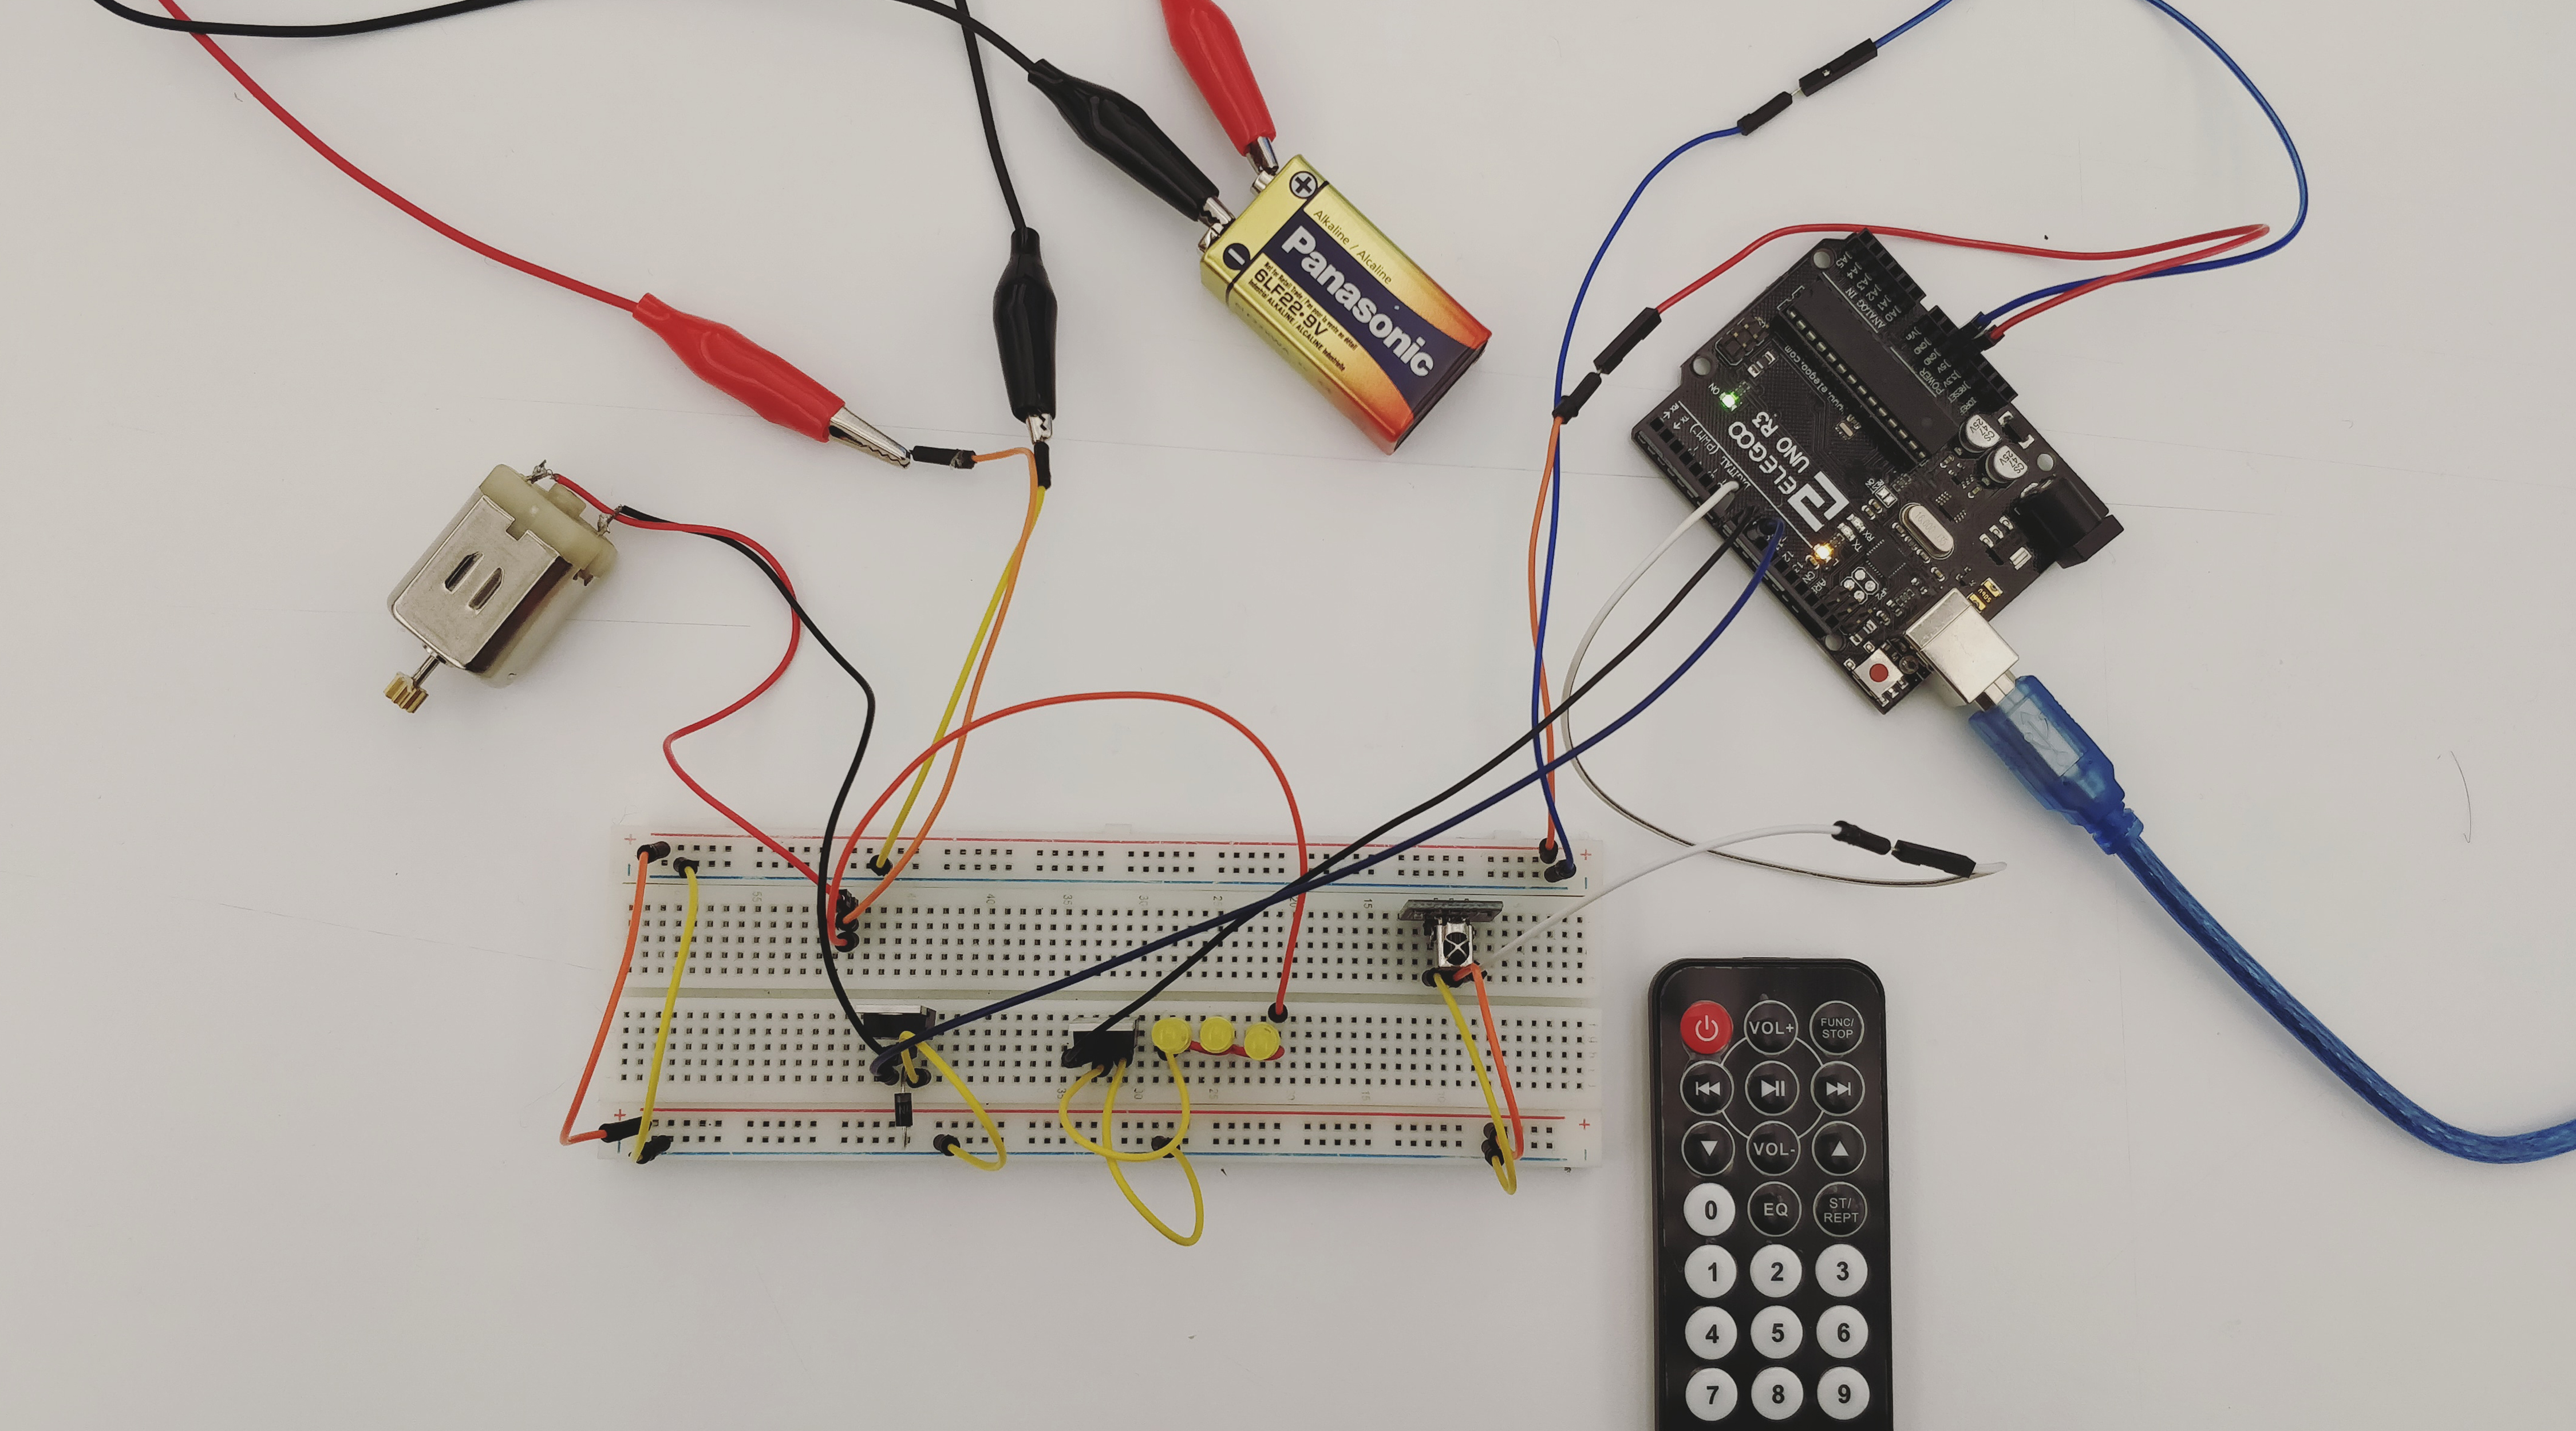
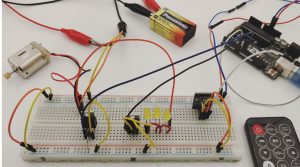
I was able to get the circuit to work by combining the IR sensor circuit with the circuit for controlling high current loads using an Arduino. The setup works when one uses a remote control, and I can control the LEDs and motor independently, but also run them together using the available power.

The part that did not work

Operating the circuit through the laptop keypad so that on pressing different buttons the different components would run.

What did I learn

  1. To use recent tutorials. A lot of the documentation around this topic is from around six years ago. I tried, unsuccessfully, to follow along with the tutorials only to realize that the hardware or the software had been modified/ was no longer in use.
  2. I realized the immense potential of the Arduino. For someone who is familiar with its inner workings, it gives a lot of room for experimentation.
  3. The importance of weighing in multiple factors before starting the project. The functionality that I was trying to recreate using the Arduino Uno is inherently present in the Leonardo. Moving forward, I will look at the time, effort, resources and cost involved in the process before choosing it over another alternative.

Continue reading

Final Project Proposal – DarioN (Week 10)

Project Description: 

I’m designing a lamp that leverage on the magical tradition of catching fireflies in a jar, as a playful and intuitive ritual to illuminate, dim and turn off the light. This projects also get support in the technical challenge of “making an LED fly”. The main concept relies from evoking memories as a powerful tool to make the audience engage in the experience.

Concept Diagram (Experience):

Schedule:

Phase 1. Research. Week 11. April 2nd – April 8th

Domain Definition and Analysis. Concept Statement Proposal. Define Audience and Context. 2D Sketch of the relation of a user with the possible design solution. Show the experience step by step (User Scenario). Creation of Concept Mood-boards and Inspiration. Prototype 1 “Look and Feel”. GIF – screen based – . This prototype would help to visualize the idea, and to quickly test how interested the audience may be to this experience. Precedents Research. Research on different Technologies and Tools that could potentially support the development of the project.

Phase 2. Concept Generation. Week 12. April 9th – April 15th

Prototype 2 “Look and Feel – Role” and User Test. Prototype with an actual jar (or something similar) and test the experience. How ‘Natural’ is it? Is it too complex? Too many steps? Ideation. 2D Sketches on Experience and Form (Aesthetics Language and Appearance)Project Development Plan. Technical Approach. Determine Materials. Design Refinement. Generate 2D drawings of the different views and sections of the final physical design to facilitate the 3D modeling.   

Phase 3. Project Development. Week 13. April 16th – April 22nd

Prototype 3 “Implementation”. Technology Test 1. Test with different LEDs, arrangements and sensors… After reviewing Prototype 3, create the final technical and functional mockup. This will be a highly functional mockup. Consider Implementation. 3D CAD Model of the jar parts and mechanics housing. Send for 3D printing.

Phase 4. Construction. Week 14. April 23rd – April 29th

After receiving all the 3D components, the final product will be assembled and adjusted in the shop. Final User Tests.

Phase 5. Presentation Preparation. Week 15. April 30th – May 6

Create 3D renderings of final product for final presentation (6 images).Photograph and video record User experience.

Material List:

  • Arduino UNO
  • Breadboard
  • Jumper Wires
  • Controllable LED Strips. Or. LEDs connected in a matrix (Charlieplex)
  • Power Supply

This is my vision on the technical execution. Any recommendations?

Precedents:

Infinity Mirrors by Yayoi Kusama. An interesting way of using mirrors and light to create an immersive experience of endless worlds.

Dreamlights Lamp. 

Similar experience of using light and movement. Having the jar being frosted to hide the mechanisms and leds is a good strategy.

Stepper Motor + Water Level Sensor – Dario N (Week 8)

Goal of the Project:

With this project, I wanted to explore a new and rare sensor as a trigger/switch for a stepper motor. In this case, I used a ‘Water Level Sensor’ to tell the Motor when to turn on and off depending on how deep the sensor was into the water. I wanted to challenge myself into going to use new tools and hardware.

List of Components:

  • x1 Arduino Uno
  • x1 Breadboard
  • x1 Water Level Sensor
  • x1 Unipolar Stepper Motor
  • x1 Stepper Motor H Bridge
  • Jumper Wires

Assembly Process:

To create this project, first, I checked that the water level sensor was reading the analog data as soon as a submerge it into the water. I simply connected the jumper wires to the 5V, the ground and to the analog read. Then, I connected the stepper motor to H-Bridge and into the Arduino to pins 8-11.

How it works:

The Arduino is constantly reading the input data from the Water Level Sensor. 0 means that the sensor is out of the water; as soon as it gets submerged the data start bumping up to approximately 400. I used this value to tell the stepper motor when to turn on.  It is also possible to modify the direction of rotation depending on the range of values from the sensor. There are infinite possibilities! I imagine using this scheme in applications such as in boats, aquatic designs. I quite like the idea of using the water as a trigger. What if the sensor is a trigger to create a musical instrument were the water is the medium?

Problems:

I had some issues with the coding part. The water sensor was giving me values every second when It was by itself. But as soon I connected the motor, it started reading every turn which is not ideal. I couldn’t solve this issue with coding. I had to increase the speed of the motor, so the reading happened quicker.

Arduino Code (File):

https://www.dropbox.com/s/vlz4gihrfu8y3ro/Stepper_Dario.ino?dl=0

Circuit Diagrams:

Resources:

http://engyfun.blogspot.com/2015/02/here-is-source-code-for-our-28byj48.html

https://github.com/joycemolly/stepper-motor-and-h-bridge/blob/master/sketch_mar13a.ino

Week 6 Xu- Translate sound into light

Goal:

I want to hook up the sound sensor to an array of LED lights which will beat with music, clapping or knocking.

Components:

– Arduino Board
– Sound Sensor
– LED
– 220 ohm Resistors
– Mini Breadboard
– Wires

Connections :

Code :

int soundSensor = 2;
int LED = 3;

void setup() 
{

  pinMode (soundSensor, INPUT);
  pinMode (LED, OUTPUT);
}

void loop()
{
  int statusSensor = digitalRead (soundSensor);
  
  if (statusSensor == 1)
  {
    digitalWrite(LED, HIGH);
  }
  
  else
  {
    digitalWrite(LED, LOW);
  }
  
}

Week 7 Xu- IR remote control a Stepper Motor


I want to control the stepper motor by using the remote control.
Use IR sensor to control the motor run or stop.

Core components

IR sensor
remote control
Stepper Motor
Stepper Motor driver board
Wires & jumpwires
Arduino board
Breadboard power supply

Circuit

How it works

Press UP: do a full rotation one way
Press DOWN: stop

Code :

#include <boarddefs.h>
#include <ir_Lego_PF_BitStreamEncoder.h>
#include <IRremote.h>
#include <IRremoteInt.h>

#include <Stepper.h>

#define STEPS 32
int Steps2Take;
int receiver=6;

Stepper small_stepper(STEPS, 8,9,10,11);
IRrecv irrecv(receiver);
decode_results results;

void setup() {
// put your setup code here, to run once:
irrecv.enableIRIn();
}

void loop() {
// put your main code here, to run repeatedly:
if(irrecv.decode(&results))
{
switch(results.value)
{
case 0xFF629D:
small_stepper.setSpeed(500);
Steps2Take = 2048;
small_stepper.step(Steps2Take);
delay(2000);
break;
// case 0xFFA857:
// small_stepper.setSpeed(500);
// Steps2Take = -2048;
// small_stepper.step(Steps2Take);
// break;
}
irrecv.resume();

}}