Goal: Create a circuit to light up a LED or control a Processing sketch using both a photocell sensor and an ultrasonic sensor.
If the environment is bright, the LED won’t light up.
If the environment is dark but the distance is far away, the LED won’t light up.
If the environment is dark and the distance is close, the LED will light up.
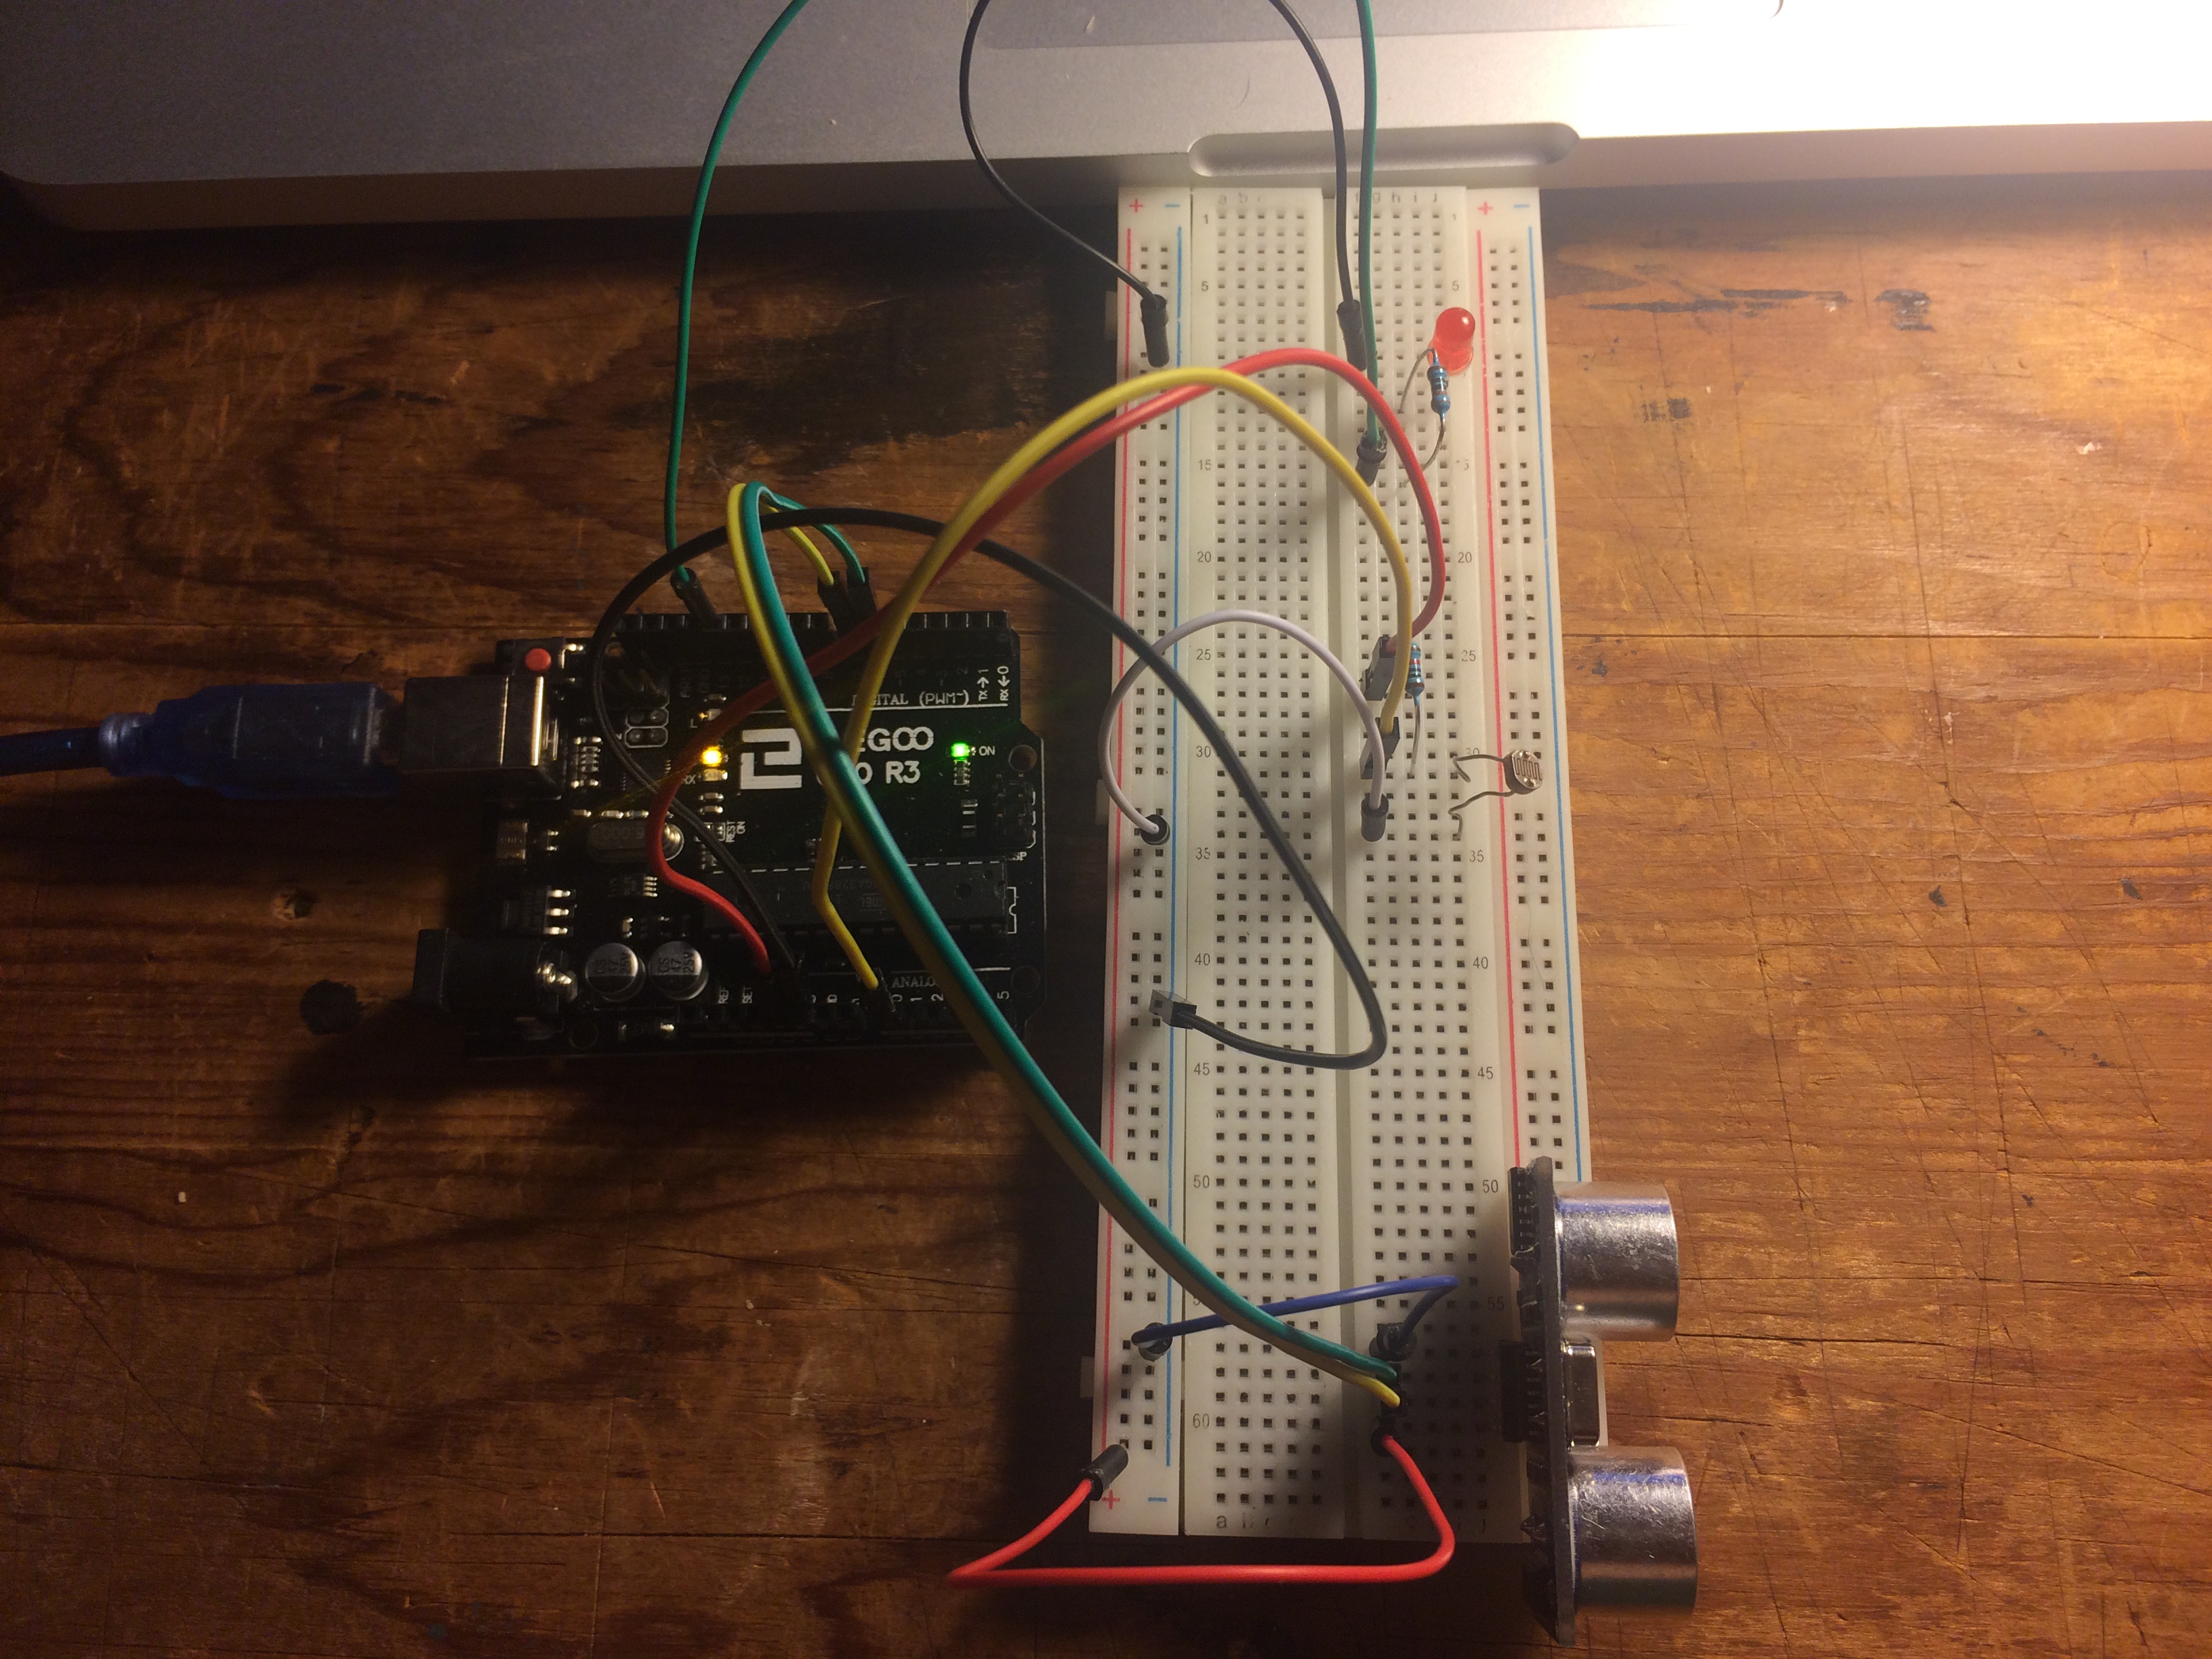
Components: Breadboard, 330 ohm resistor (x1), 10k resister (x1), photocel (x1)l, ultrasonic sensor (x1), LED (x1), jumper cables
Process: First identify your sensor ranges with the serial monitor. Then use the following code with those ranges input. As the distance and the light decreases, the LED lights.
I used the following tutorials to help with this assignment:
https://openhomeautomation.net/smart-lighting-arduino-photocell
http://www.instructables.com/id/Arduino-Distance-Detector-with-a-Buzzer-and-LEDs/
https://learn.adafruit.com/photocells/using-a-photocell
Circuit:
Code:
const int trigPin = 7;
const int echoPin = 6;
const int led = 13;
const int photocell = 0;
int light;
void setup() {
Serial.begin (9600);
pinMode(trigPin, OUTPUT);
pinMode(echoPin, INPUT);
pinMode(led, OUTPUT);
pinMode(photocell, INPUT);
}
void loop() {
long duration, distance, light;
digitalWrite(trigPin, LOW);
delayMicroseconds(2);
digitalWrite(trigPin, HIGH);
delayMicroseconds(10);
digitalWrite(trigPin, LOW);
duration = pulseIn(echoPin, HIGH);
distance = (duration/2) / 29.1;
light = analogRead(photocell);
if(light > 630 && distance < 120){
digitalWrite(led, HIGH);
}
else{
digitalWrite(led, LOW);
}
}
Use this code to determine your sensor ranges:
// Define analog pin
int sensorPin = 0;

// Setup
void setup() {
 // Init serial
 Serial.begin(9600);
}

// Main loop
void loop() {

 // Get temperature
 int sensorValue = analogRead(sensorPin);

 // Put temperature on the serial port
 Serial.println(sensorValue,DEC);

 // Wait for 1 sec
 delay(1000);
}