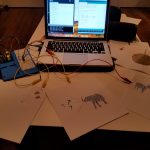
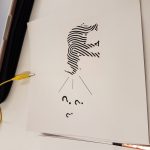
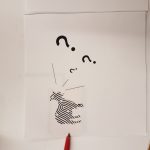
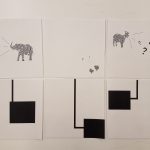
- Goal: The goal of this project was to create an interactive book that would play into both the physical and digital spaces. I chose to use light and sound from the digital element, Processing. Conceptually, this book serves is for a prototype children’s book to help very young ESL students learn the English onomatopoetic sounds of various animals. When children press the pages of the book, they will hear the sound of the animal displayed.
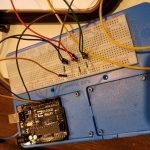
- Assembly: Jumper wires (7), 1 MegaOhm resistors (3), Conductive (copper) tape/ink, Arduino Uno, Breadboard, alligator clips (3)
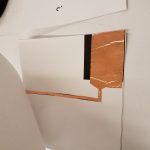
- How it works: There are 3 pages. Under each page, there is another page which has a portion of it covered with copper tape. The placement of the tape is based on where the user has been indicated to press which is shown as printed graphics on the top sheet. The other part of this process was connected the jumper wires/alligator clips to the breadboard. Once each of the wires and connected to both the press pads and the breadboard they are all connected via pins to Arduino. For this I used, pins 2, 6, and 8. Lastly, I added high-value resistors to each of the pins sensors (to affect drain time) and connected all of them to pin 4. Pin 4 serves as a way for Arduino to send out a signal to each of the sensors. The three other pins receive the data. Luckily, there is a capacitive sense library that does the math of listening for changes in frequency send out.
- Problems: The code portion was quite simple (thanks to the example in the capacitive sense library). The main problem that I had was in the Processing code. As you can see from the video the audio doesn’t play until after you remove your hand from the page. This was not my intention, as I want the sound file to play immediately as the signal is triggered. However, due to the Arduino code the serial port updating every 10 milliseconds, which is what is needed to quickly respond to input. But that also means that the sound file plays once every 10 milliseconds. To combat this I put in a boolean that tells the sound file to stop() if it is already playing (true) which means that it does play until the statement is false. Unfortunately, that only happens when the sound file is last triggered (or once your hand leaves the page and the threshold is longer activated)
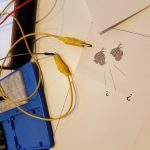
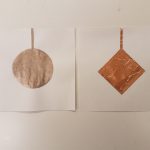
I also tested a few different materials; conductive tape (copper) and conductive paint (copper). Both worked well. The copper tape was fastest to prototype, but the paint allowed for more creativity.
PART 2:
I2C
The inter-integrated circuit communication protocol is intended to allow multiple “slave” chips to communicate with one or more “master” chips. This serial communication, like others, allows for data to be transferred bit by bit along a single wire (SDA). This is intended for short distance communications. I2C is synchronous, so the output of bits is synchronized to the sampling of bits by a clock signal shared between the master and the slave. This clock signal is controlled by the master. The data or “messages” are divided into “frames”. Each message contains an address frame that contains the binary address of the slave and more frames that contain the data being transmitted. It also contains start and stop conditions, read/write bits, etc. With I2C you can also connect multiple slaves to a single master, up to 1008.
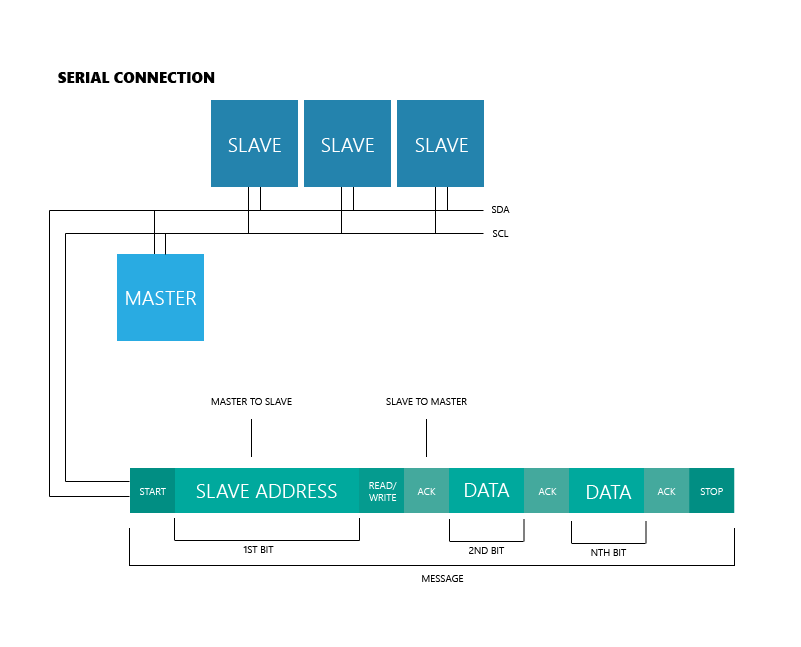
Because this allows for many slave devices to be paired with it, it works well when you want to pair several devices to one serial port. For instance, a single laptop computer communicating with several Bluetooth-enabled microcontrollers. This communication protocol is also helpful when using it in projects that use LED displays, barometric pressure sensors, or accelerometers.