CC Lab: Insects or Life Support

https://vimeo.com/51503035

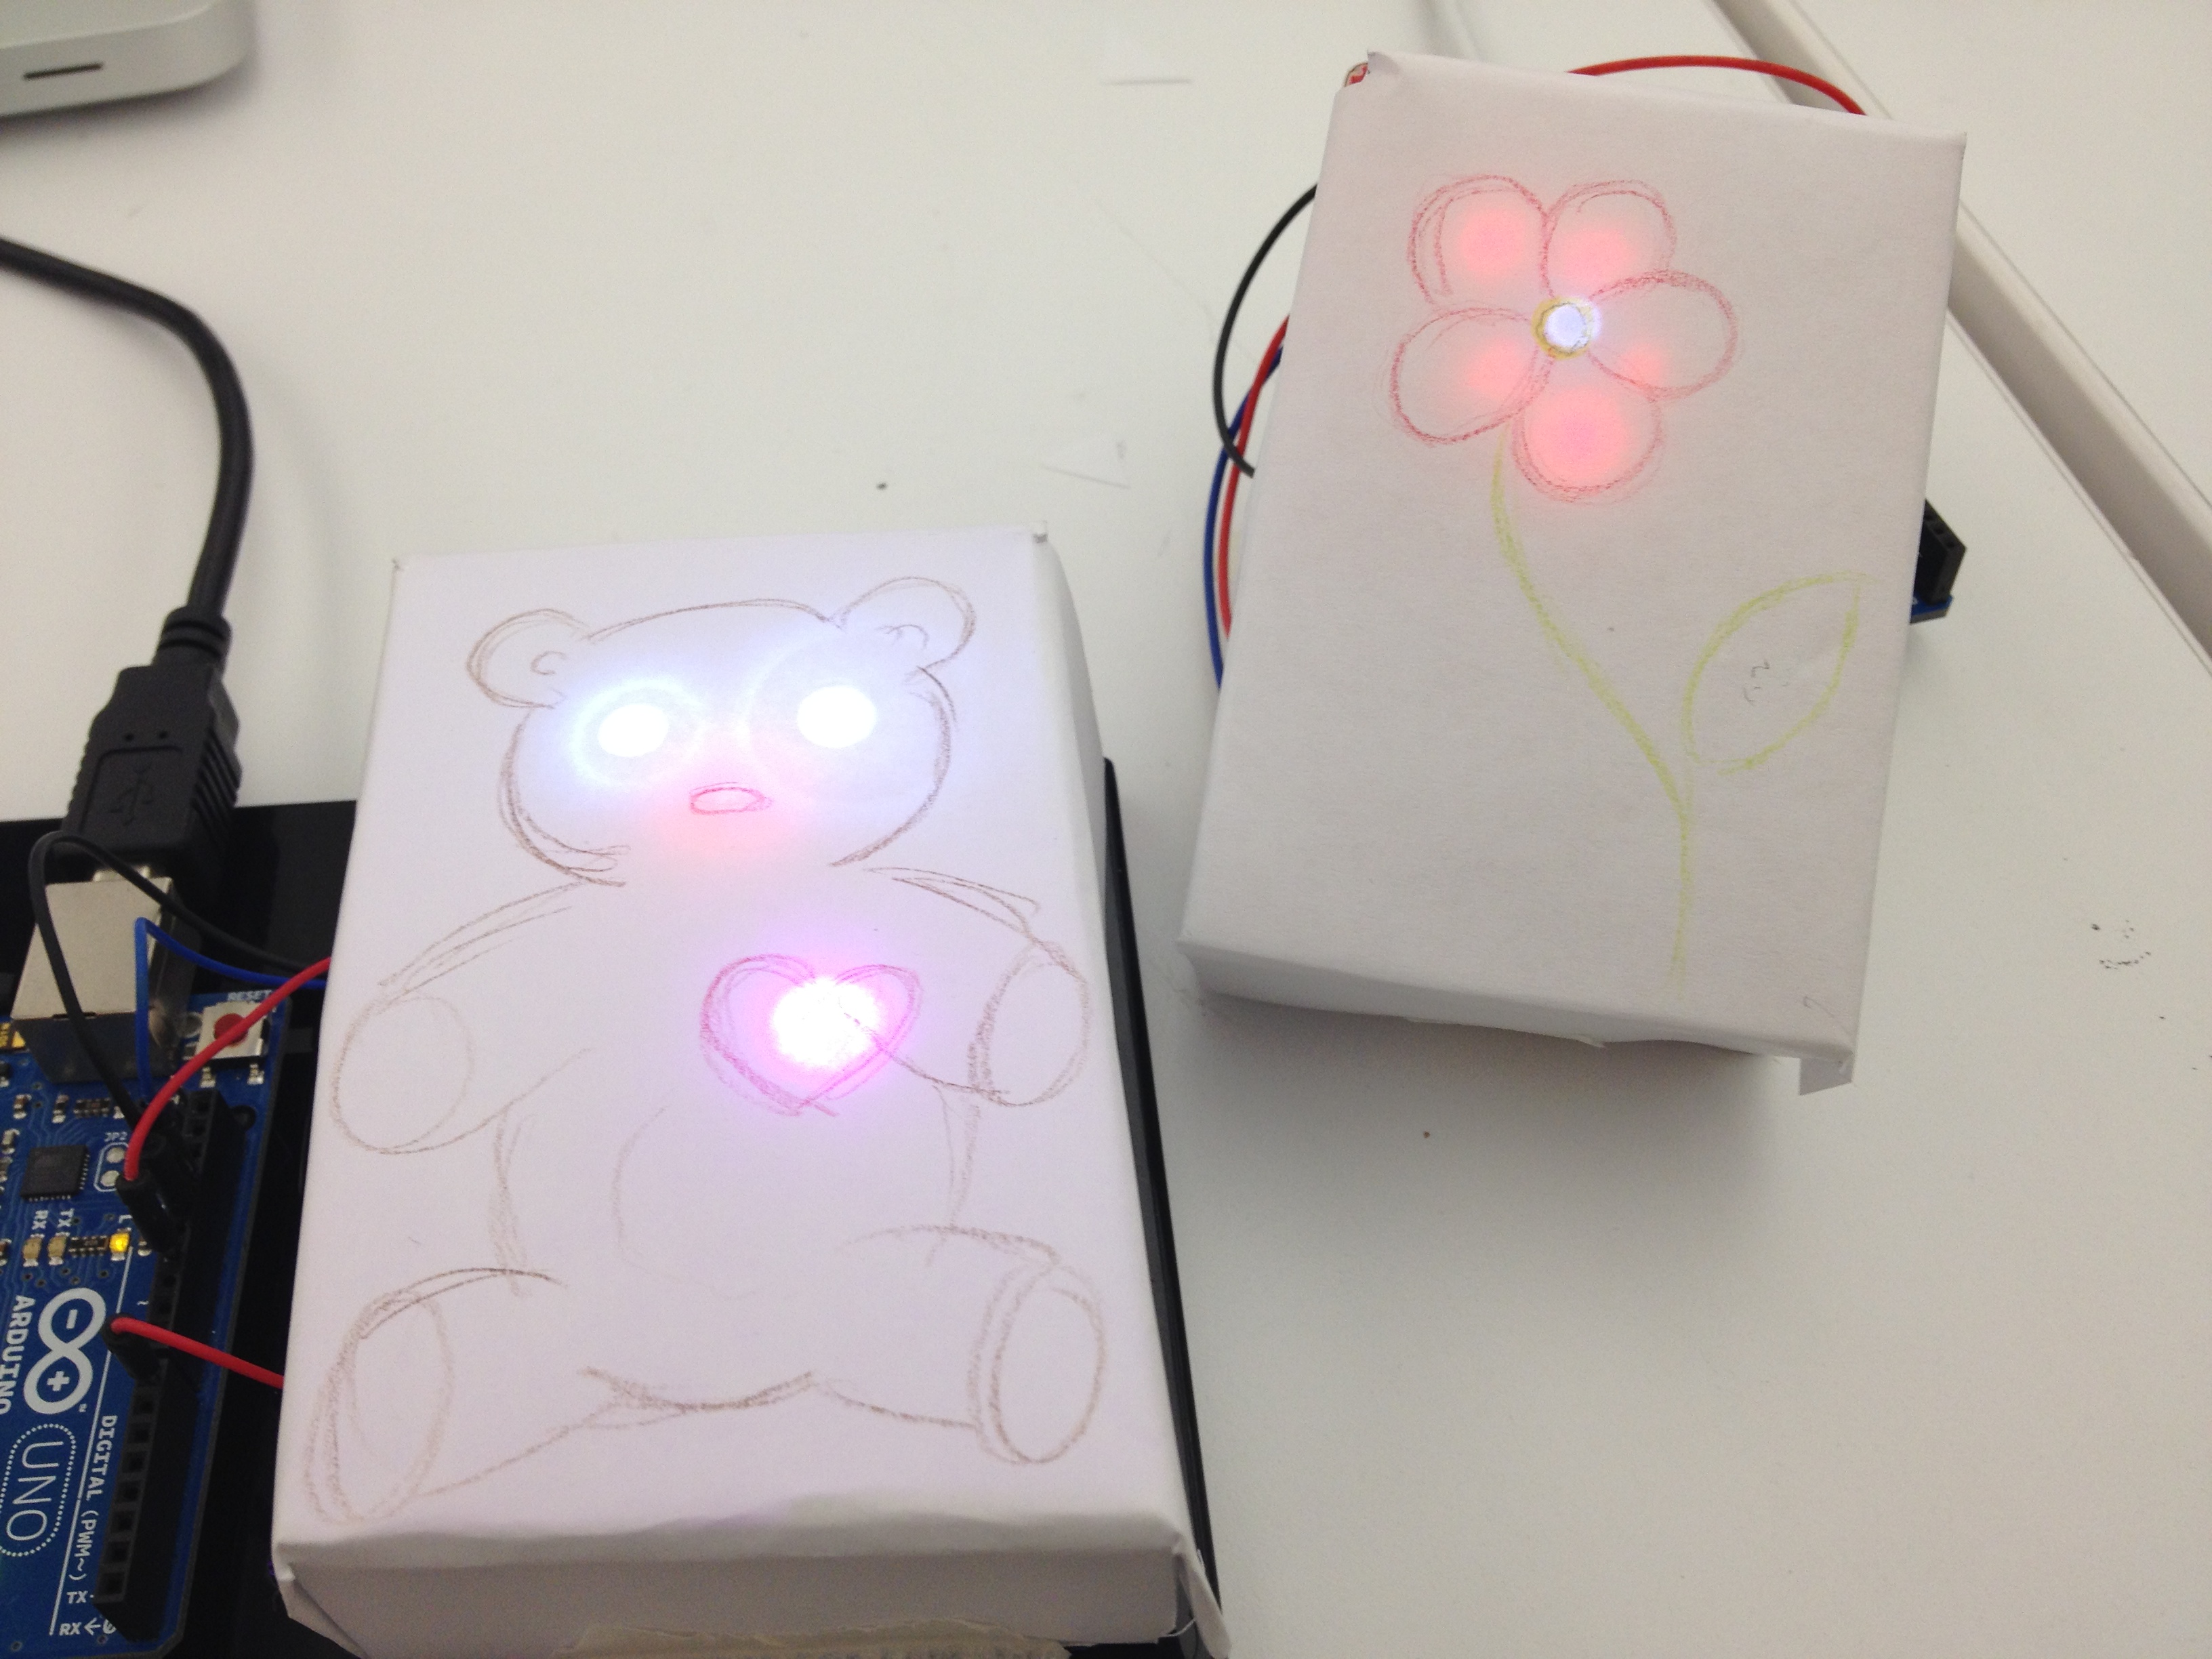
I meant for the beep to represent a heartbeat and the fading of the lights to represent heavy breathing, but after seeing my roommate’s reaction, I bought a second speaker so I could figure out how to make a convincing breathing noise. Still working on that, but I figured I’d post this. The idea of representing a heartbeat was interesting, though the beeping reminded me more of a patient on life support than an animal, which led me to figuring out a way to represent heavy, labored breathing.


Week7 – animal

I made an animal using Arduino and Arduino Uno for the first time. When I got the assignment, I had no idea what to make. But after seeing other classmates’ posts, I figured it out and made a crocodile. Actually, I saw crocodile character on the webpage so I used this character on my project.  I used 12 LED (3 red and 9 green) and I tried to connect ground, 9, 11 and 12. For next time, I would like to make one using a speaker.

Github(mov)

Github(Arduino Code)

Vimeo(mov)


int ledPinA = 12;
int ledPinB = 13;
int ledPinC = 9;
int brightness = 0;
int fadeAmount = 5;
void setup()
{
pinMode(ledPinA, OUTPUT);
pinMode(ledPinB, OUTPUT);
pinMode(ledPinC, OUTPUT);
}
void loop()
{
  analogWrite(ledPinC, brightness);
  brightness = brightness + fadeAmount;
  if (brightness == 0 || brightness == 255) {
    fadeAmount = -fadeAmount ;
  }
  digitalWrite(ledPinC, HIGH);
  delay(2000);
  digitalWrite(ledPinA, HIGH);
  digitalWrite(ledPinB, HIGH);
  digitalWrite(ledPinC, HIGH);
  delay(100);
  digitalWrite(ledPinC, HIGH);
  delay(300);
  digitalWrite(ledPinA, LOW);
  digitalWrite(ledPinB, LOW);
  digitalWrite(ledPinC, LOW);
  delay(100);
  digitalWrite(ledPinC, HIGH);
  delay(2000);
  digitalWrite(ledPinA, HIGH);
  digitalWrite(ledPinB, HIGH);
  digitalWrite(ledPinC, HIGH);
  delay(100);
  digitalWrite(ledPinC, HIGH);
  delay(2000);
  digitalWrite(ledPinA, LOW);
  digitalWrite(ledPinB, LOW);
  digitalWrite(ledPinC, LOW);
  delay(100);
  digitalWrite(ledPinC, HIGH);
  delay(100);
}

psychedelic hippopotamus

This weeks project  was my excuse to make a psychedelic hippopotamus:)

The code is here:

https://github.com/Sussesj/CC-LAB/tree/master/Animal_with_sound

Using sound and LED’s blinking, I couldn’t help but make an animal a little decentered from reality

So I wanted to make an awake moment and a waking up moment(two states)

I’m going to post the video tomorrow, seems that either my Hippopotamus is to small or my breadbord is to big at the moment:/


6th Assignment (Aduino)

Based on what I learned in CClab and Pcom, I made a fortune teller – arduino by myself.

While I was working on this, I almost gave up but i tried to connect again from the first part.

I am so happy that this project is exactly what I want to do at the first time.

I used 8×8 dot matrix to show emoticon.

there are 3 option (I used random function) led1, led2, and led3.

Once it start I used buttonPin which is pin7. if this button state is high, it generate random number (0 to 2)

this is my code.

vimeo video – fortune teller1

vimeo video – fortune teller2

this is the website that I convert to hexadecimal here

I found this drawing pixel generator website


int randNumber;
int val = 0;
int buttonPin = 7;
//Pin connected to ST_CP of 74HC595
int latchPin = 8;
//Pin connected to SH_CP of 74HC595
int clockPin = 12;
//Pin connected to DS of 74HC595
int dataPin = 11;
int count=0;
int led1 = 3;
int led2 = 5;
int led3 = 10;
byte test[8];
byte drawing1[8];
byte drawing2[8];
byte drawing3[8];
void setup(){
pinMode(buttonPin, INPUT);
Serial.begin(9600);
pinMode(led1, OUTPUT);
pinMode(led3, OUTPUT);
pinMode(latchPin, OUTPUT);
pinMode(clockPin, OUTPUT);
pinMode(dataPin, OUTPUT);
test[0]=0x7F; //01111111
test[1]=0xBF; //10111111
test[2]=0xDF; //11011111
test[3]=0xEF; //11101111
test[4]=0xF7; //11110111
test[5]=0xFB; //11111011
test[6]=0xFD; //11111101
test[7]=0xFE; //11111110
drawing1[0]=0×66;
drawing1[1]=0xF7;
drawing1[2]=0x7F;
drawing1[3]=0x3E;
drawing1[4]=0x7C;
drawing1[5]=0xFE;
drawing1[6]=0xEF;
drawing1[7]=0×66;
drawing2[0]=0×66;
drawing2[1]=0xF7;
drawing2[2]=0x7F;
drawing2[3]=0x3E;
drawing2[4]=0x7C;
drawing2[5]=0xFE;
drawing2[6]=0xEF;
drawing2[7]=0×66;
drawing3[0]=0×66;
drawing3[1]=0xF7;
drawing3[2]=0x7F;
drawing3[3]=0x3E;
drawing3[4]=0x7C;
drawing3[5]=0xFE;
drawing3[6]=0xEF;
drawing3[7]=0×66;
randomSeed(analogRead(0));
}
void loop() {
Serial.println(randNumber);
val = digitalRead(buttonPin);
digitalWrite(led1, LOW);
digitalWrite(led2, LOW);
digitalWrite(led3, LOW);
randNumber = random(1000)%3;
if (val == HIGH) {
if (randNumber == 0){
digitalWrite(led1, HIGH);
}
if (randNumber == 1){
digitalWrite(led2, HIGH);
}
if(randNumber == 2){
digitalWrite(led3, HIGH);
}
}
if(val == LOW){
digitalWrite(led1, LOW);
}
Serial.println(randNumber);
}


Sensors

In preparation for our next class, here is a list of sensors to get you thinking. Feel free to bring any sensors you want to work with. The structure of this class will be slightly different – a little more self-guided/small groups, so bring what you want to learn!

SEE

1. Photo cell Sensor

2. PIR Motion Sensor

3. Infrared Proximity Sensor

4. Ultrasonic Range Finder

LISTEN + sense VIBRATION

1. Tiny Microphone

2. Piezo Vibration Sensor

TOUCH

Capacitance sensing

Pressure sensors

Flex sensors

WEATHER

Humidity sensors

Temperature sensors

Barometric Pressure Sensor

POSITION

Accelerometer

Tilt

The bear and the flower!

Joint project with Jeannette Subero.
We thought of an interaction between an allergic bear and a flower. The bear’s nose gets redder and redder in the presence of the flower, since he’s allergic. The glowing flower is spreads its pollen and makes the bear sneeze.
We had trouble incorporating the two codes together – the “blink” and the “fade”. It seems that the delay order that the “blink” code gives, affects the “fade” as well.

Assignment for Week 7

Assignment (due 10/6)
1) Create a fortune telling device OR (I repeat OR – you have a choice here) an animal using at least 3 LEDs and analog or digital input. The LEDs should have at least two states or should use PWM (pulse width modulation).
BONUS: Enclose your device. Try to make it look like the actual object you are creating.
2) Write a short paragraph about the design decisions you made. What behavior did you choose for the output and why? For example, did you want to simulate an animal breathing or talking? Did you want to create a sensation of anxiety for the person being told their fortune?
You should also reflect on anything you found challenging or that you were successful in.
3) Document at least one person using or interacting with your creation on video.
4) Watch Massimo Banzi’s TED Talk:

POST INSPIRATION/RESOURCES!

Week 6

Questions:

I noticed a couple of things last week. I found it was very helpful to go through the basics of circuitry and how to calculate electrical currents. Completing the excursuses it became apparent the need to pick resisters that will not be to strong. Lastly, I really appreciated this assignment as I’m in PCOMP and found that this was a great basic lesson in circuits that I did not have.


Parallel:


Vimeo Link


Series:


**** I had a problem here because the resister was way too high.**


Week 6 Or Leviteh

LED’s = Pretty lights.
Are the red LED’s using up more energy than the other ones?
What does “behooves” mean?
I don’t get all the words for stuff, but they make sense when I see them in the calculations.

Videos and Pics:
Arduino 1
Arduino 2


Almost forgot github:

https://github.com/OrLeviteh/CCLAB-2012-OR-LEVITEH/blob/master/orarduinoforgit.001.jpg