When people touches the terrarium, the Leds start to blink mimicking living creatures breathing; a blue leaf slowly appears in the sand.
My target audiences are people who would like to appreciate unnoticeable beauty. I invite my audiences to observe all the common electronic components closely and enjoy the authentic and magical feeling of technology.
In this final version, I used Attiny instead of Arduino to save space. I also used a lot of colorful wires to create a messy, organic feeling.
To give a better control over the batteries, I used a battery holder of the coin battery and a detachable wire for the 9V battery.
For further iterations, I would like to explore the possibility of a larger scale and adding projection to it as Sheena form Parsons Paris suggested. I made another project called Grow that explores the connection between physical and digital world that related to Sheena’s comment. In this iteration I only used physical components because comparing to virtual images, people consider the physical components less authentic.
After fill in the sand, I found the touch sensing became less sensitive as before. I believe the resistance of the sand affected the sensing. But I already soldered the Attiny in the circuit so I can’t change the code to sense higher input.
My project, called I Feel Many Things During the Day, started from positive psychology, the scientific study of understanding optimal living that helps people thrive and live to their full potential as individuals and communities.
Positive design is designed for human flourishing inspired by positive psychology. It can and must be used to facilitate individuals to tap their inner potential and communities to flourish. Positive design does not neglect the deepest of all human needs: the drive to flourish. A well-lived life occurs in a material context utilizing logic to achieve the highest pleasure and meaning that one can experience emotionally.[4] Design does not function in a vacuum[5]. As a product designer, I believe that design has to consider social, cultural, and economic circumstances, but above all, new design and technology have to take the mind factor into account. “The artificial is by no means confined to technology. Today, it means the combination of technical systems, the symbolic realm, including mind and the realm of our transformations and transmutations of nature.”[6] Humans are beings that not only adapt to new environments and circumstances, but they are also transformed by them. In other words, humans are easily influenced by their environment. Positive design is not just a medium to reorganize existing elements, but a method and an efficacious device to create reality. We mold ourselves from the spirits that emanate form the objects around us to become a little as they are, even if we are not always able to see quite how objects make us feel. By designing new technologies and environments, behavior can be shaped, thinking regulated, therefore, reaching the core component of the individual, his or her emotional world. Positive design acts as a thread that links all domains used in my project.
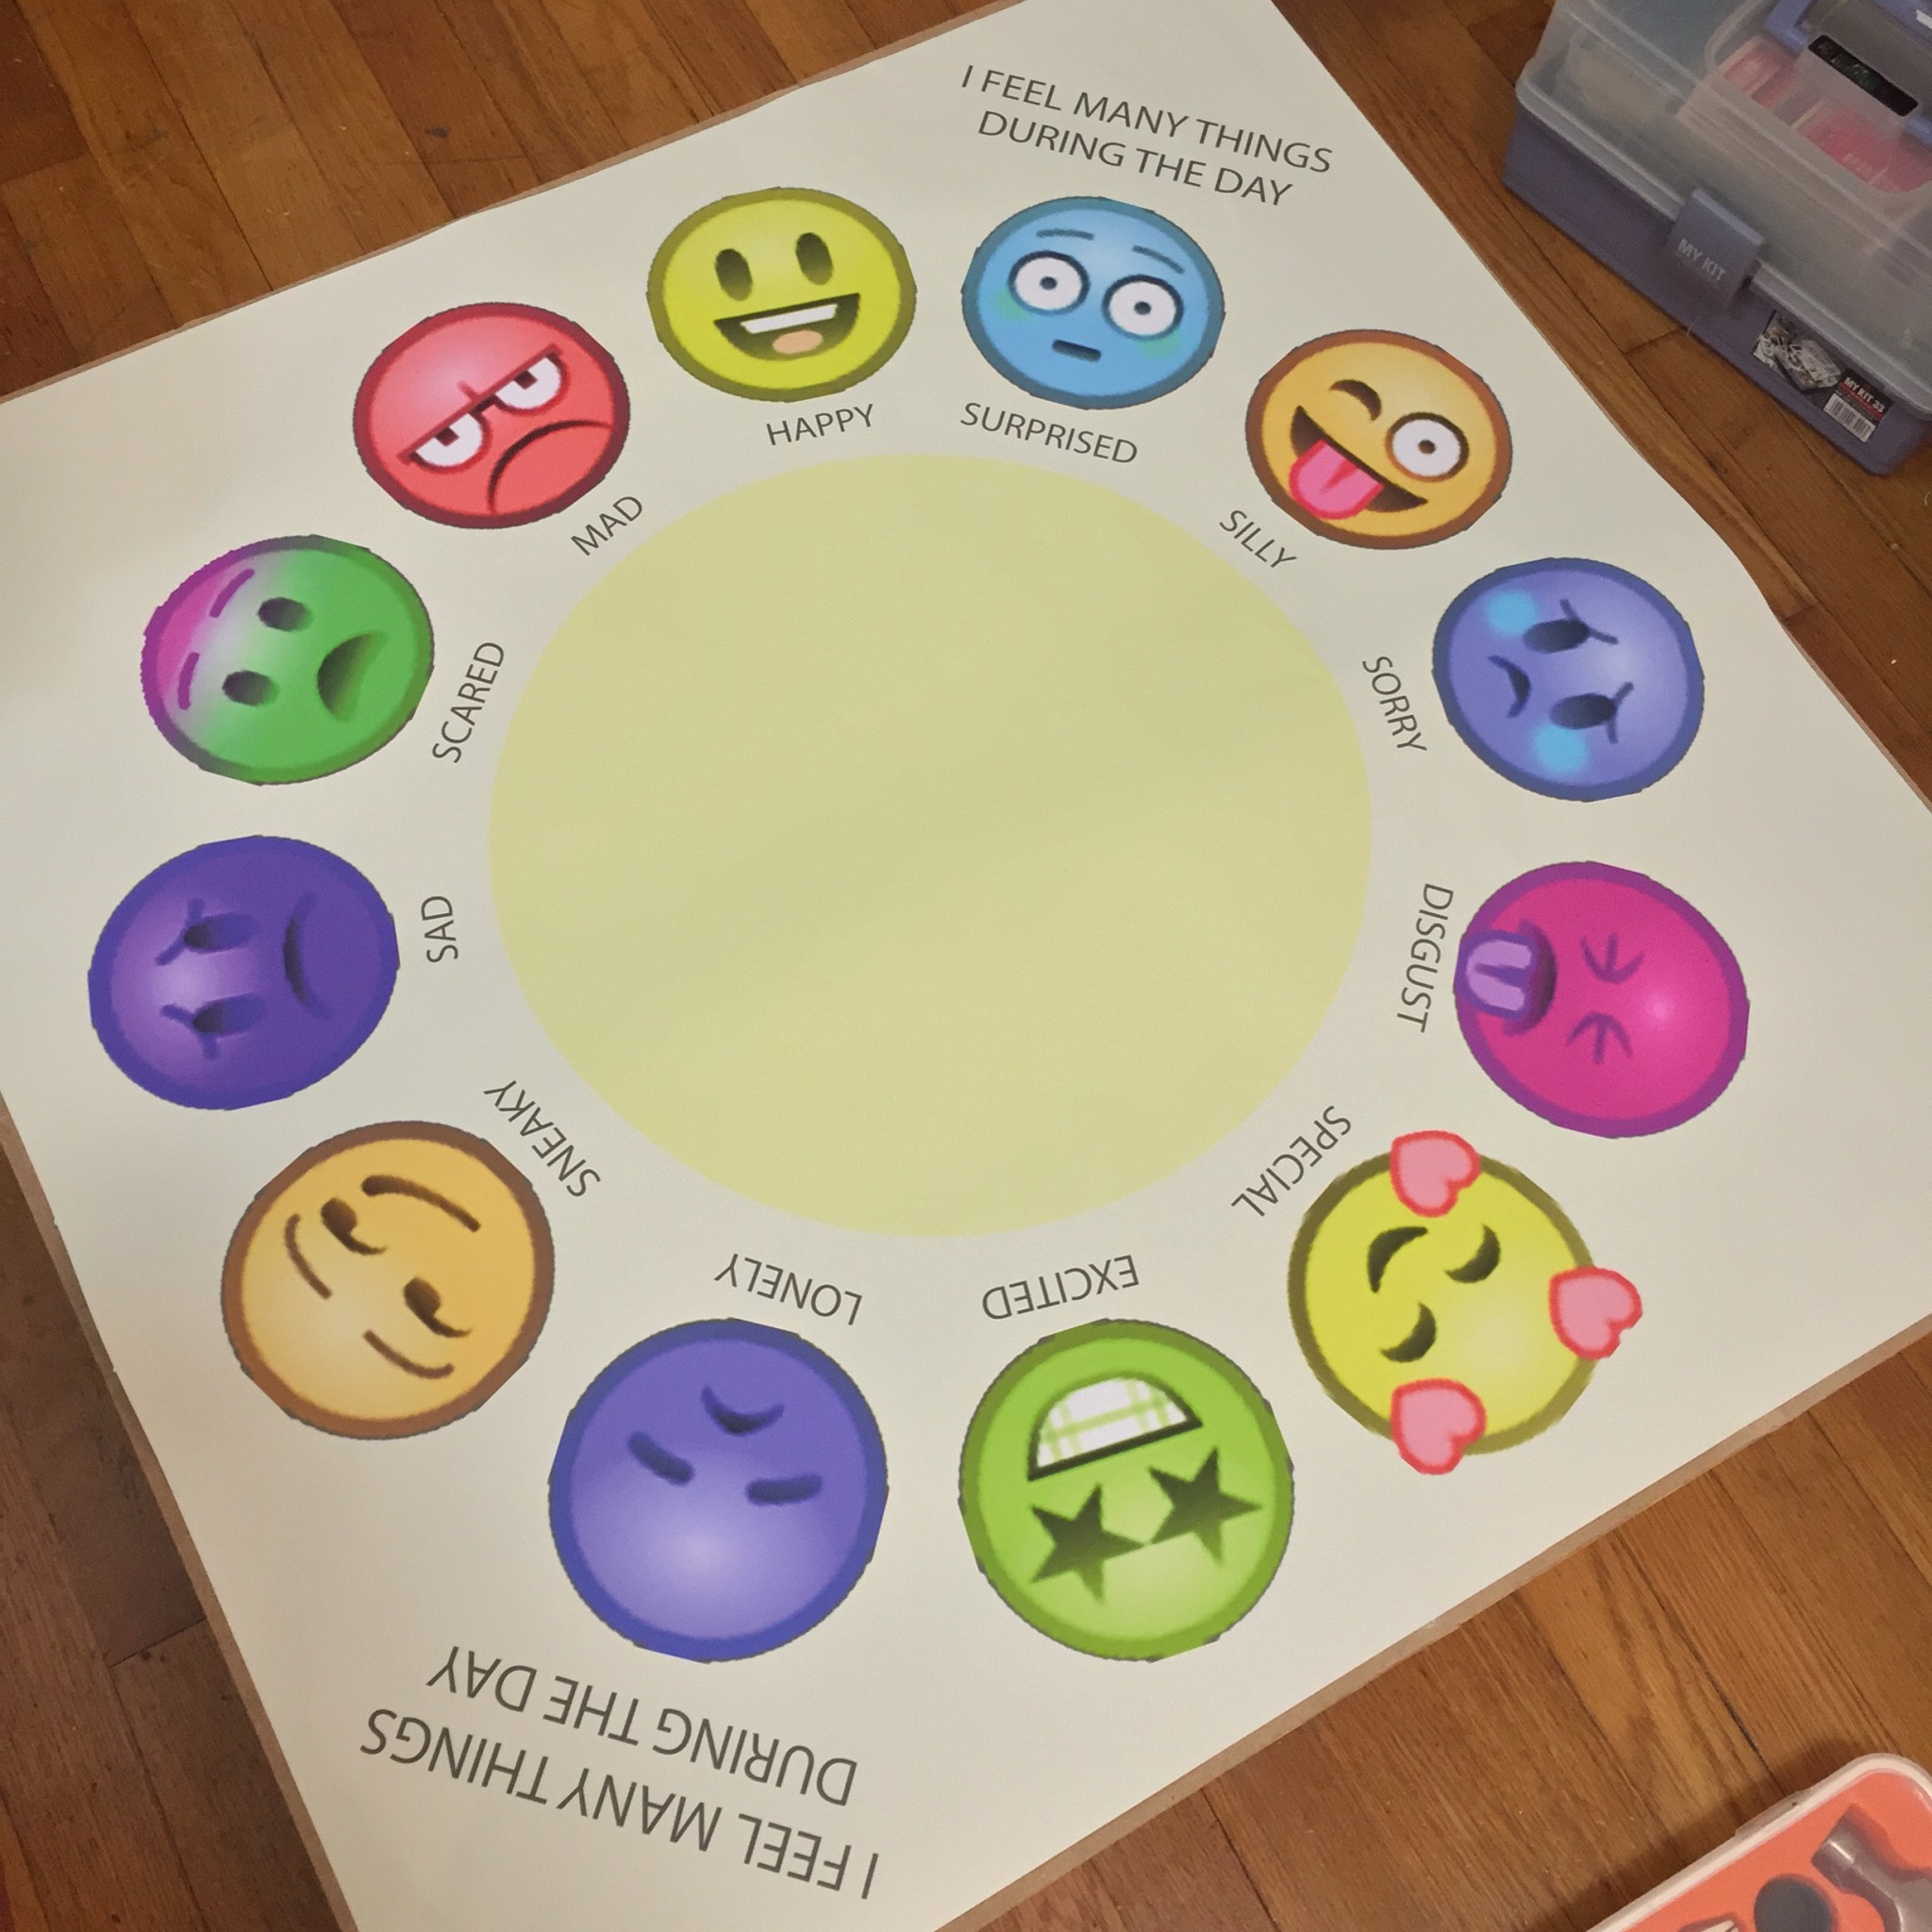
I Feel Many Things During the Day is a product that aims to educate kids ages between 3 and 7 to identify and express their feelings by listening to each story of feeling faces. Learning about emotions is in part an introspective activity, but most of it comes from social interaction.
In my project, kids who are ages between 3 and 7, learn about 12 emotional vocabularies, including sad, happy, fear, angry, surprise, disgusted, etc., that stimulate their cognitive development with therapists guiding kids to various emotional vocabulary experiences and to deeper conversations. In order for children to read social cues better with those around them, it is crucial for children to learn emotional vocabulary. It is first fundamental for children to read the affective cues of others and of themselves.[7] Differentiating among moods, for example, angry, sad, frustrating, and happy requires emotional vocabulary. When children have more abundant vocabulary, they experience more rewarding connections. So as to accurately grasp emotions in themselves and others, kids need to have vocabularies for those feelings, a feeling usage. In order not to miss all the different degrees of emotions in-between they have to practice a vocabulary of feeling words which sometimes kids do not have labels and definitions for those emotions. Children will tap and improve their verbal skills, learn what emotions are and how to behave when they feel certain emotions, further sharing their deeper feelings.
Processes of sharing their deepest feelings are therapeutic communication, an interactive activity through the face-to-face process that focuses on improving the physical and emotional well-being of individuals. Using this emotional vocabulary play mat enables therapists to induce kids to talk about their feelings easier.
Kids at the second stage of cognitive development,[8] significantly expand the use of language through internal representational systems to describe people, his feelings and his environment. Symbolic play likewise evolves at this stage, allowing the child to engage in pretend play using available objects to represent something else. The preoperational child is so engrossed in egocentric thought which limits the child’s view of the world to his own perspective, believing that this view is shared by everyone else. The child cannot comprehend that there are other ways of looking at situations and interpreting information. [9]
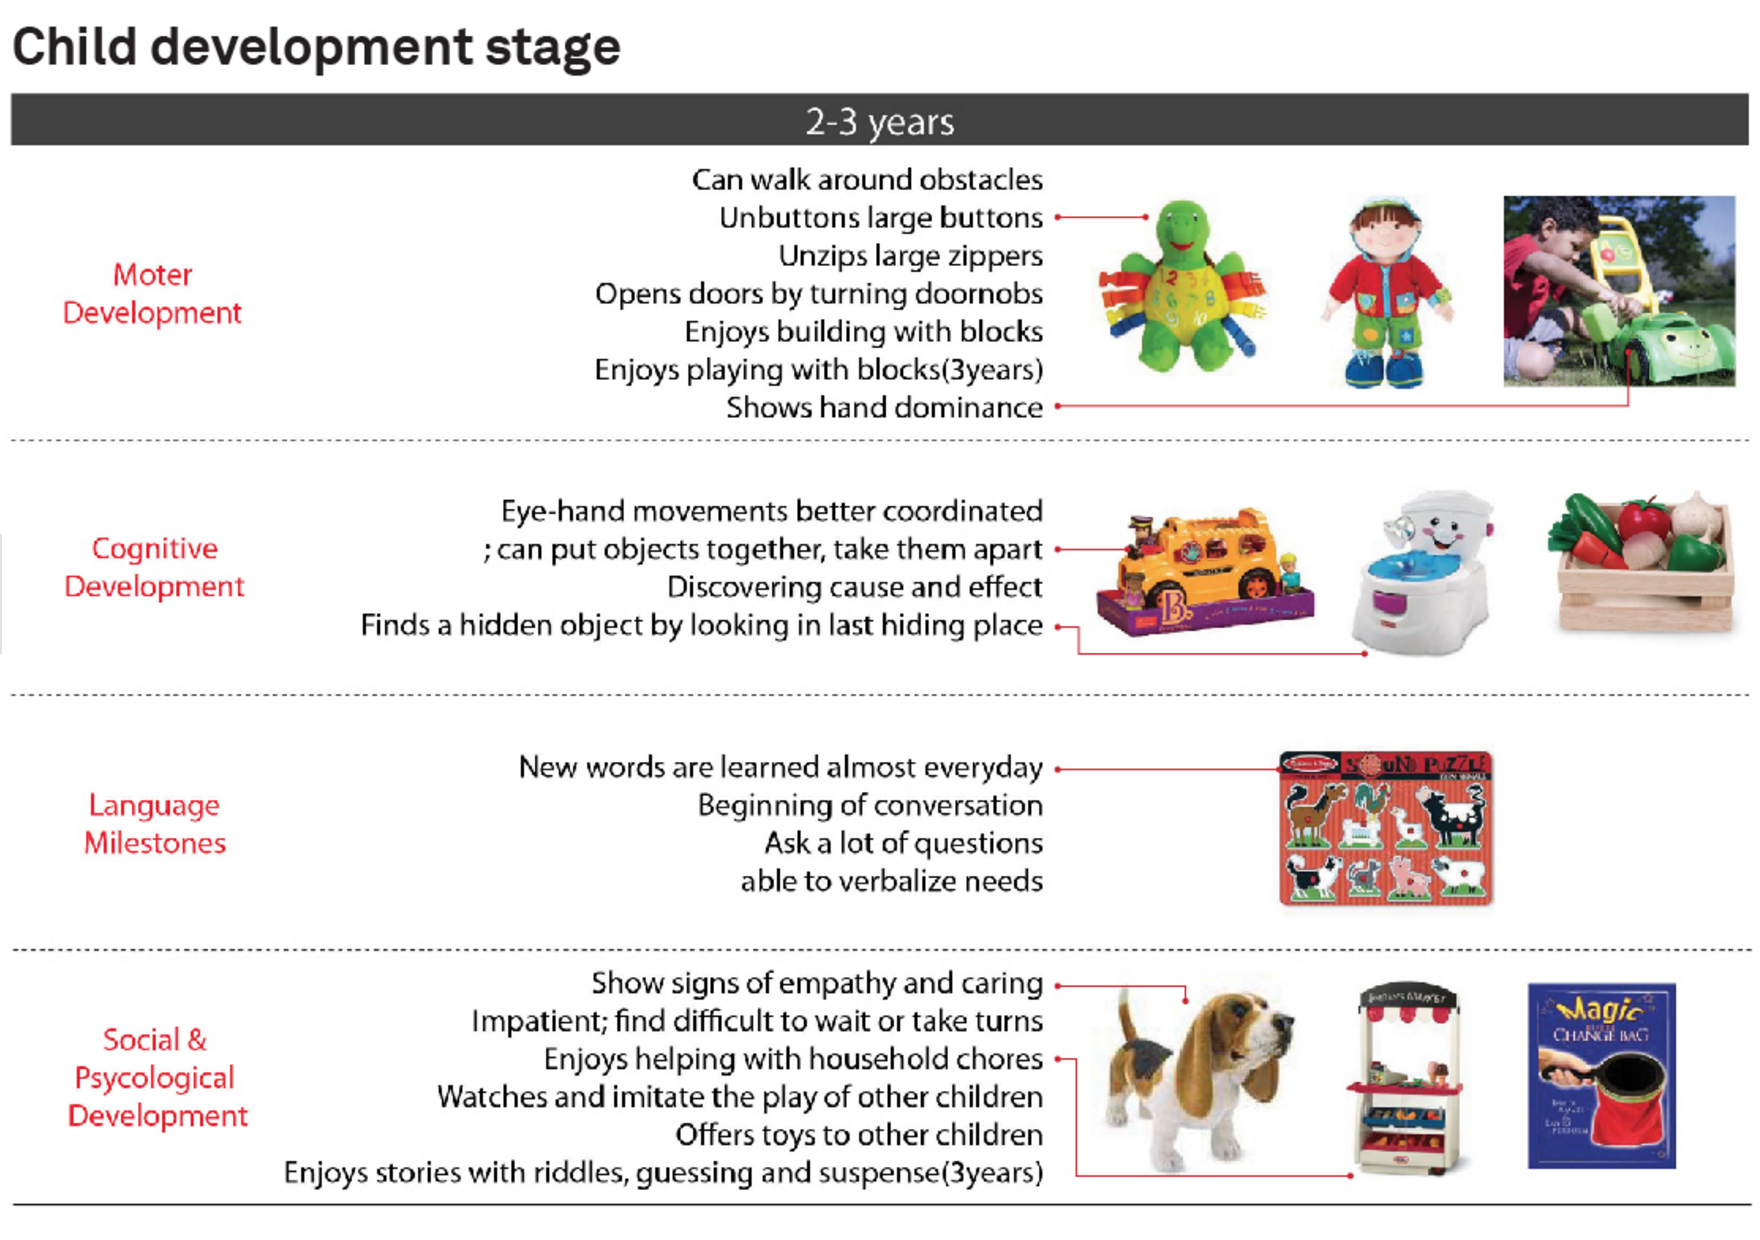
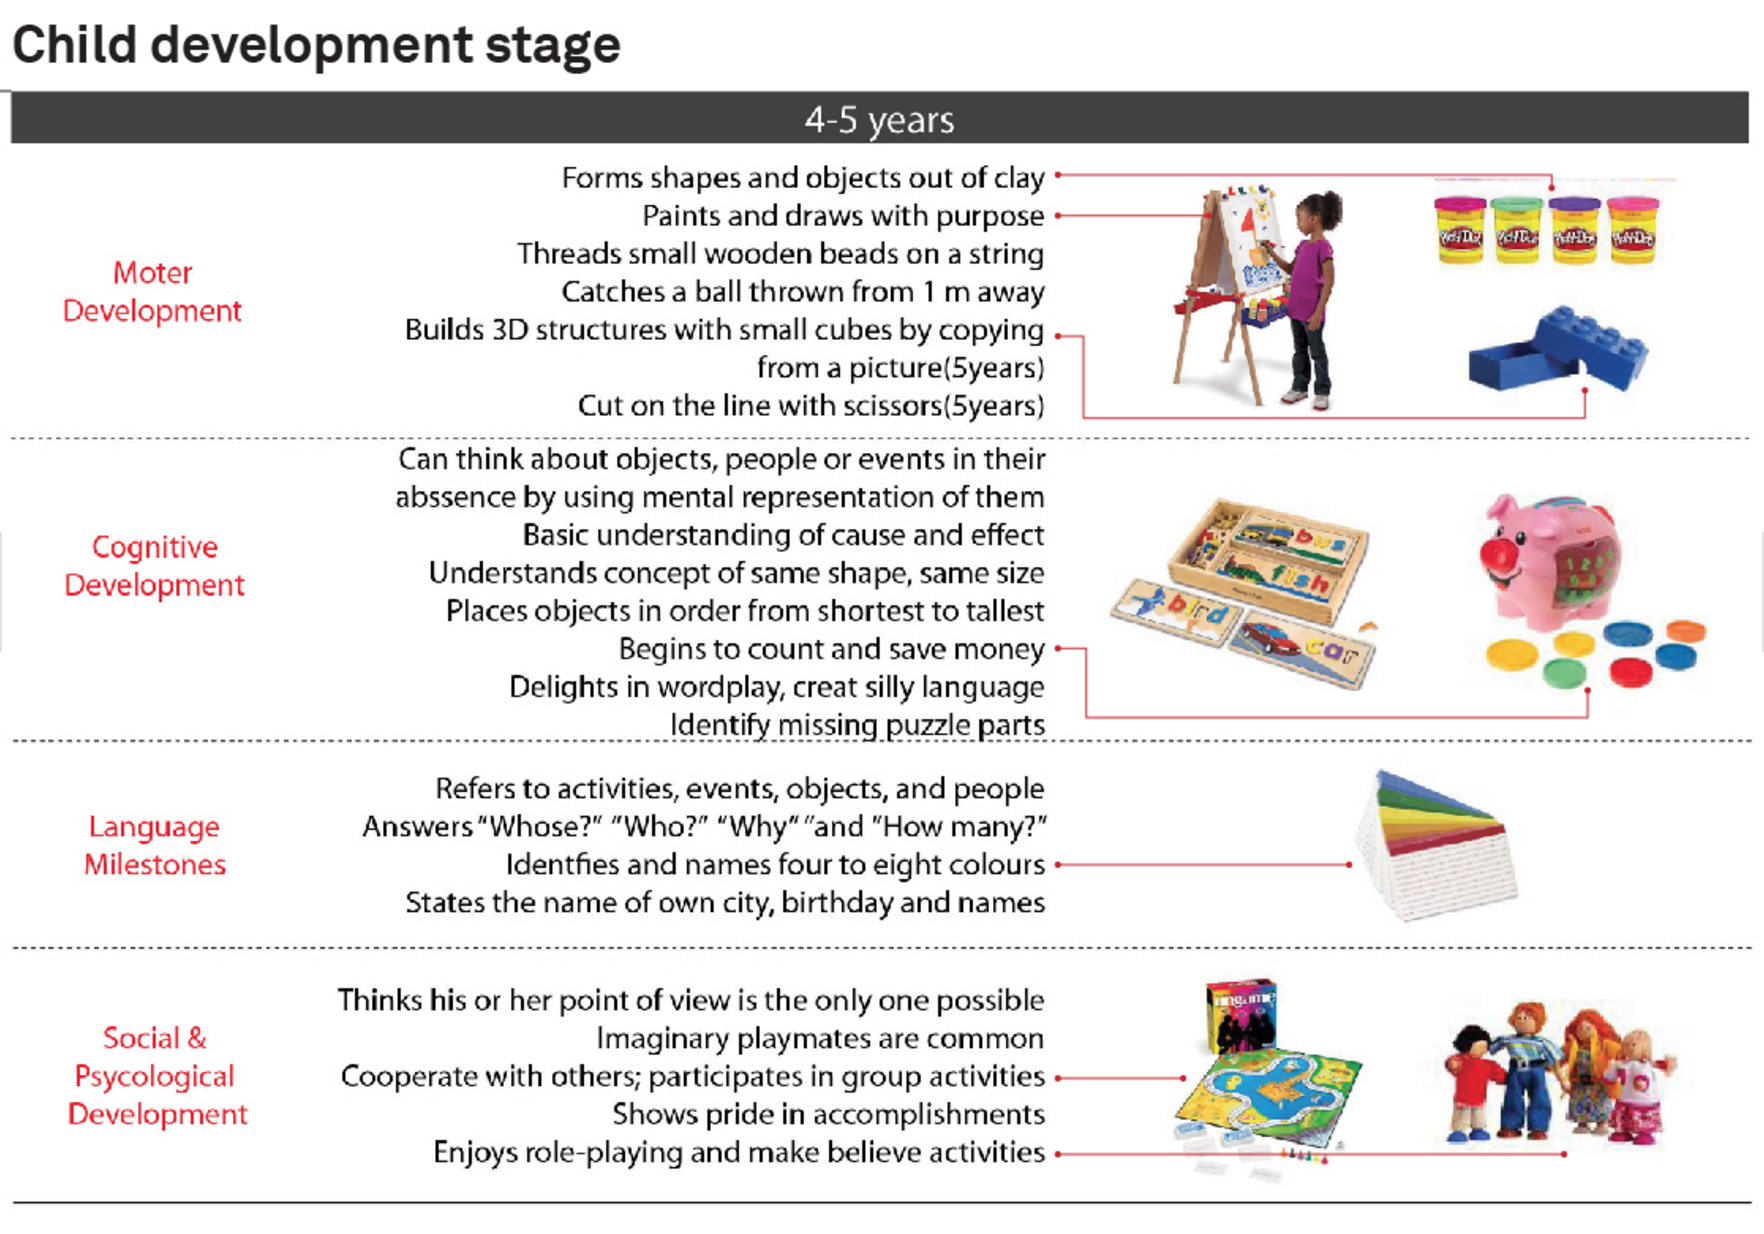
This is a product for kids. Hence, I had to think carefully about what materials I will use for my project, understanding of the kids’ tendency. I researched kid’s development stages.
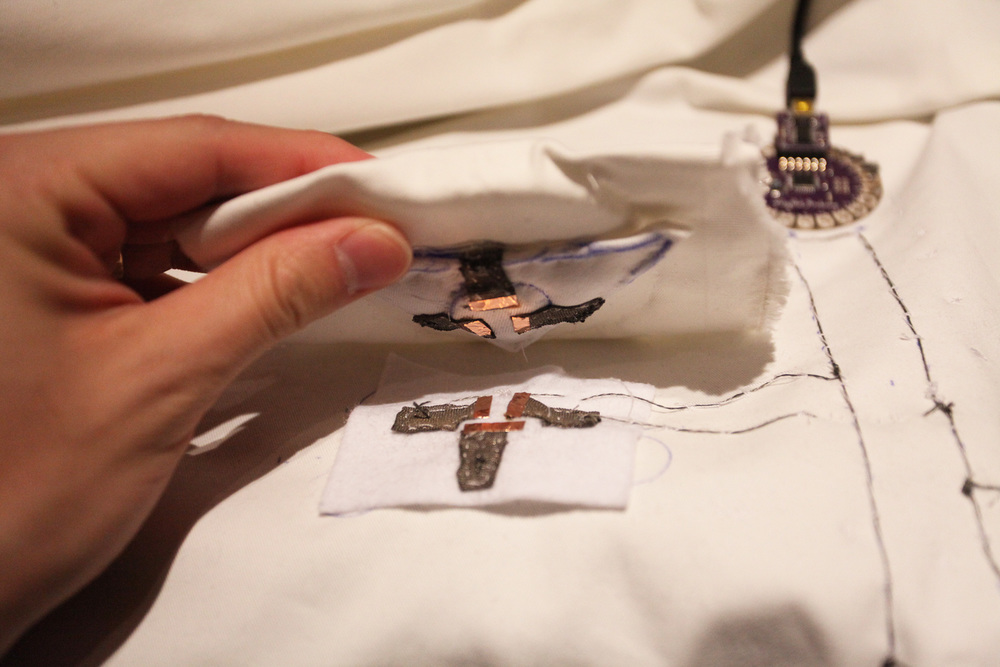
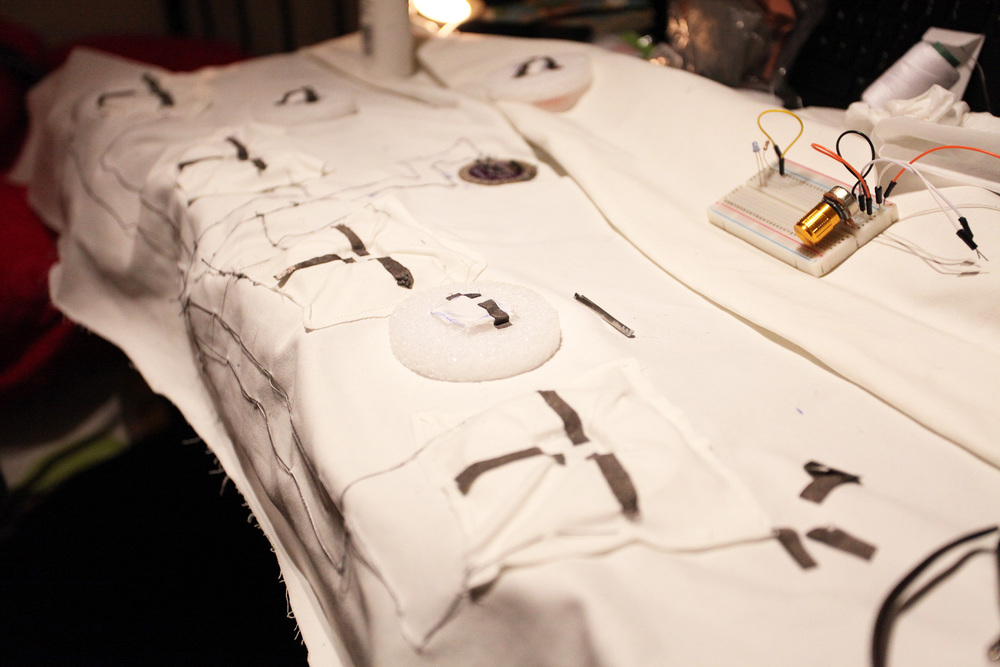
After the research I decided to use soft circuit. Using soft circuit and conductive materials allowed me to step closer to a toy design as a product. I found kids like emotional vocabulary play mat when documenting them. Because of felt’s vivid colors of face and rugs like texture above soft circuit built with conductive inks and wires, my project gives a sense of comfort, familiarity and safety.
Goal of I Feel Many Things During the Day.
I Feel Many Things During the Day touches personal significance. This educational product is not just traditional product design focusing problem solving process, but focuses on one’s personal long or short-term goals: having better connections between parents and kids, expanding emotional vocabulary, improving reading social cues, and learning how to behave when kids feel certain feelings etc. Through this emotional vocabulary play mat, parents, therapists, and teachers can also derive kids’ personal significance from the awareness of kids’ past performance or a sense of progress to a future goal. In this sense, People make use of products to achieve their goals. An alternative to traditional welfare economics, the “capability approach” proposed by Nussbaum[10] and San is an interesting example of an economic approach that focuses on personal significance. They judge prosperity looking at what people are able to do with their resources, instead of material possessions. It focuses on fulfilling the individual’s goals, nurturing their personal fulfillments.
[6] Clive Dilnot, “Design As Future-Making: Reasons To Be Cheerful,1,2,3…* (Or Why The Artificial May Yet Save Us)”
[7] Gail E. Joseph, Ph.D. & Phillip S. Strain, Ph.D. Center on Evidence Based Practices for Early Learning University of Colorado at Denver, Enhancing Emotional Vocabulary in Young Children
[10] Nussbaum M. C. (2000). Woman and human development: The capabilities approach. Cambridge, UK: Cambridge University Press
Future Iteration
Adding different stories
A disadvantage I found is that kids can not play often this play mat because kids would not get excited when they know all the stories behind the faces.
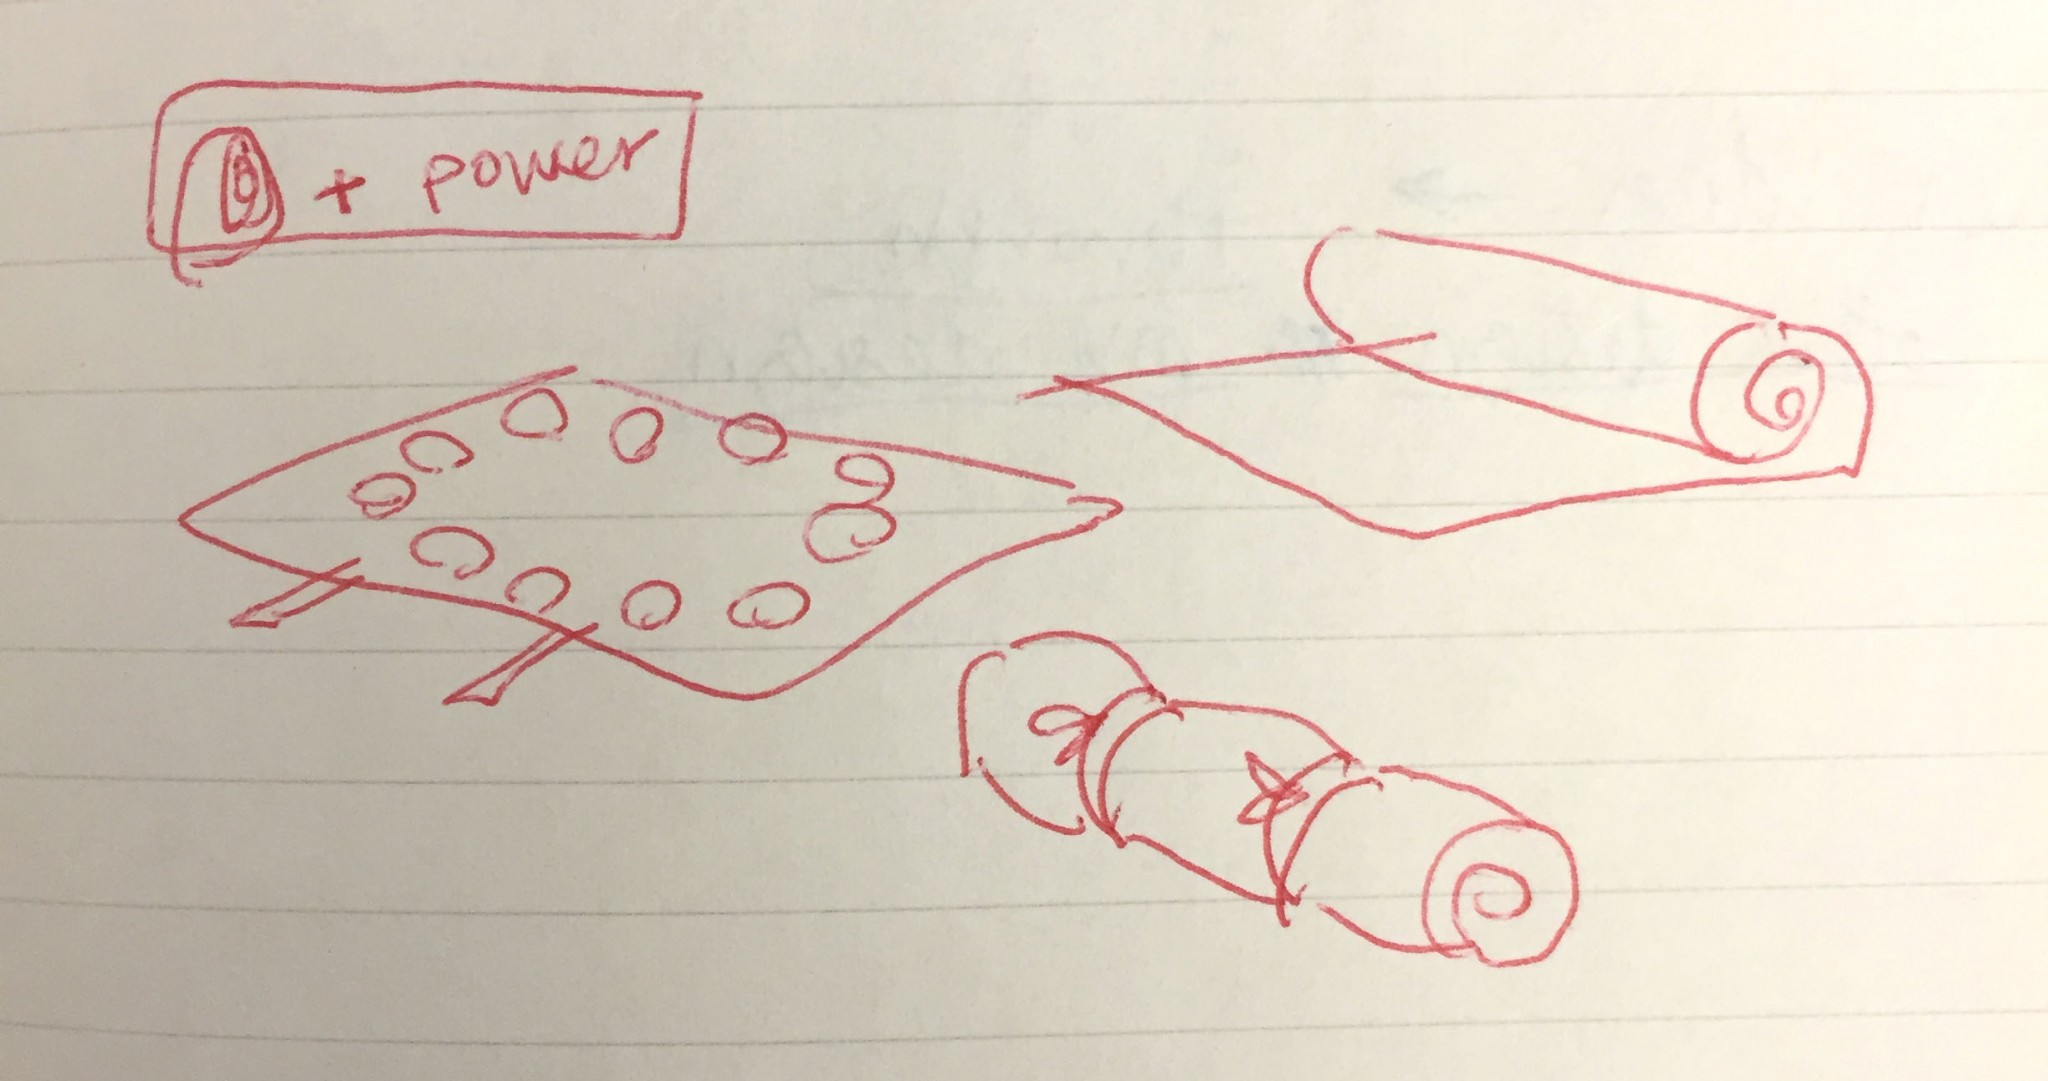
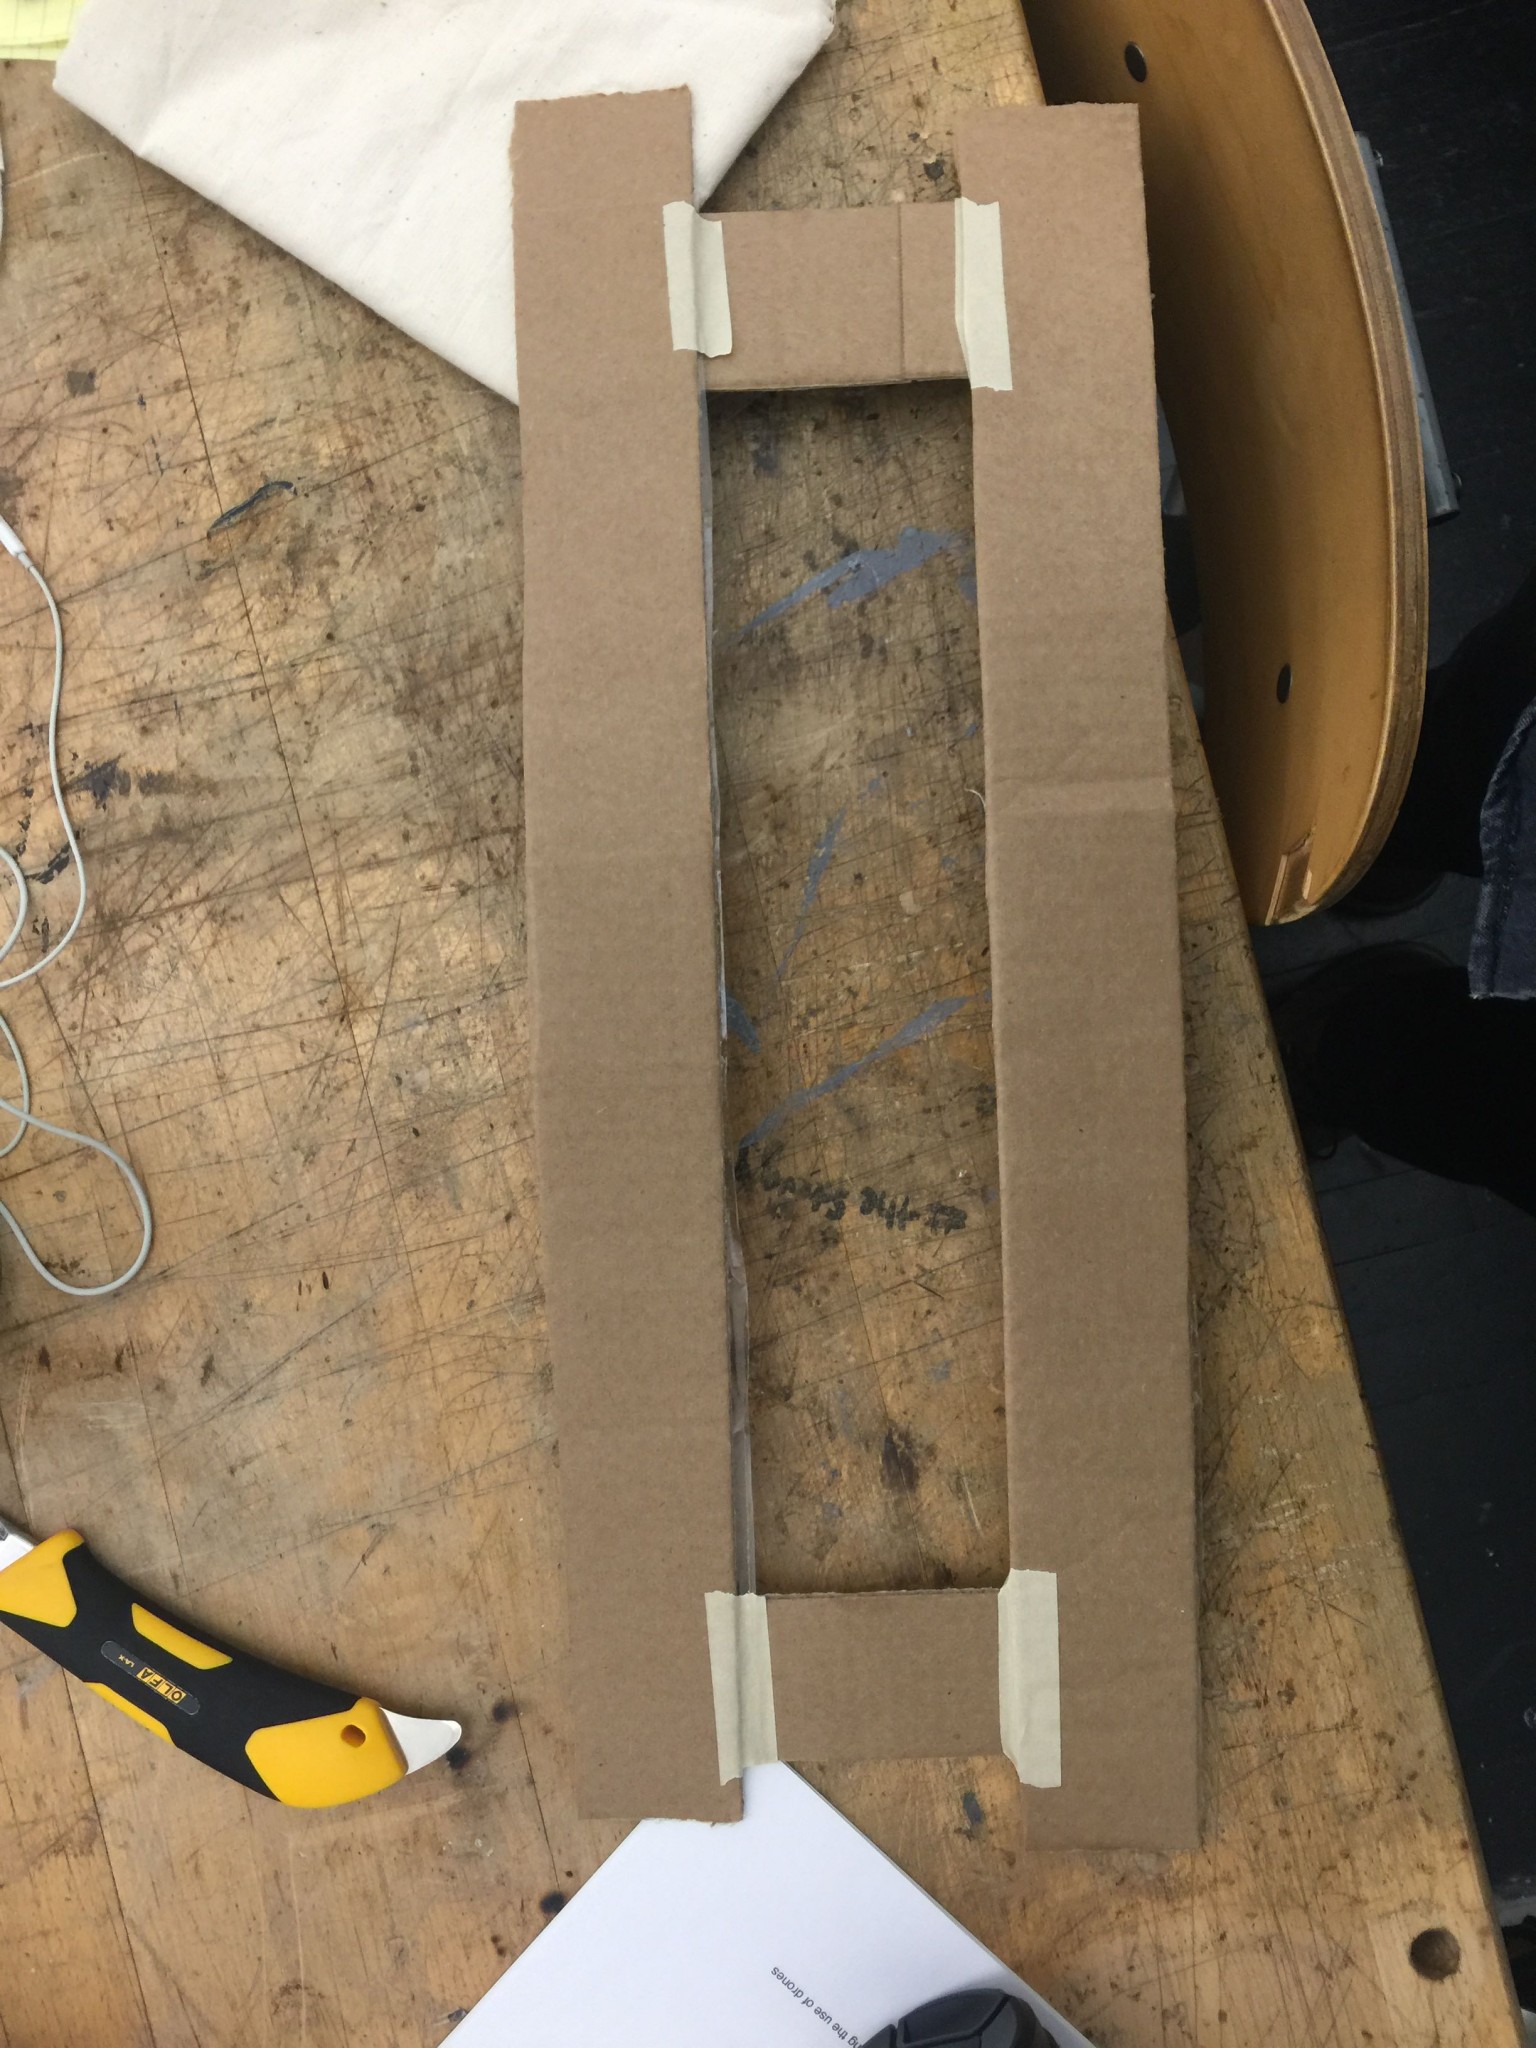
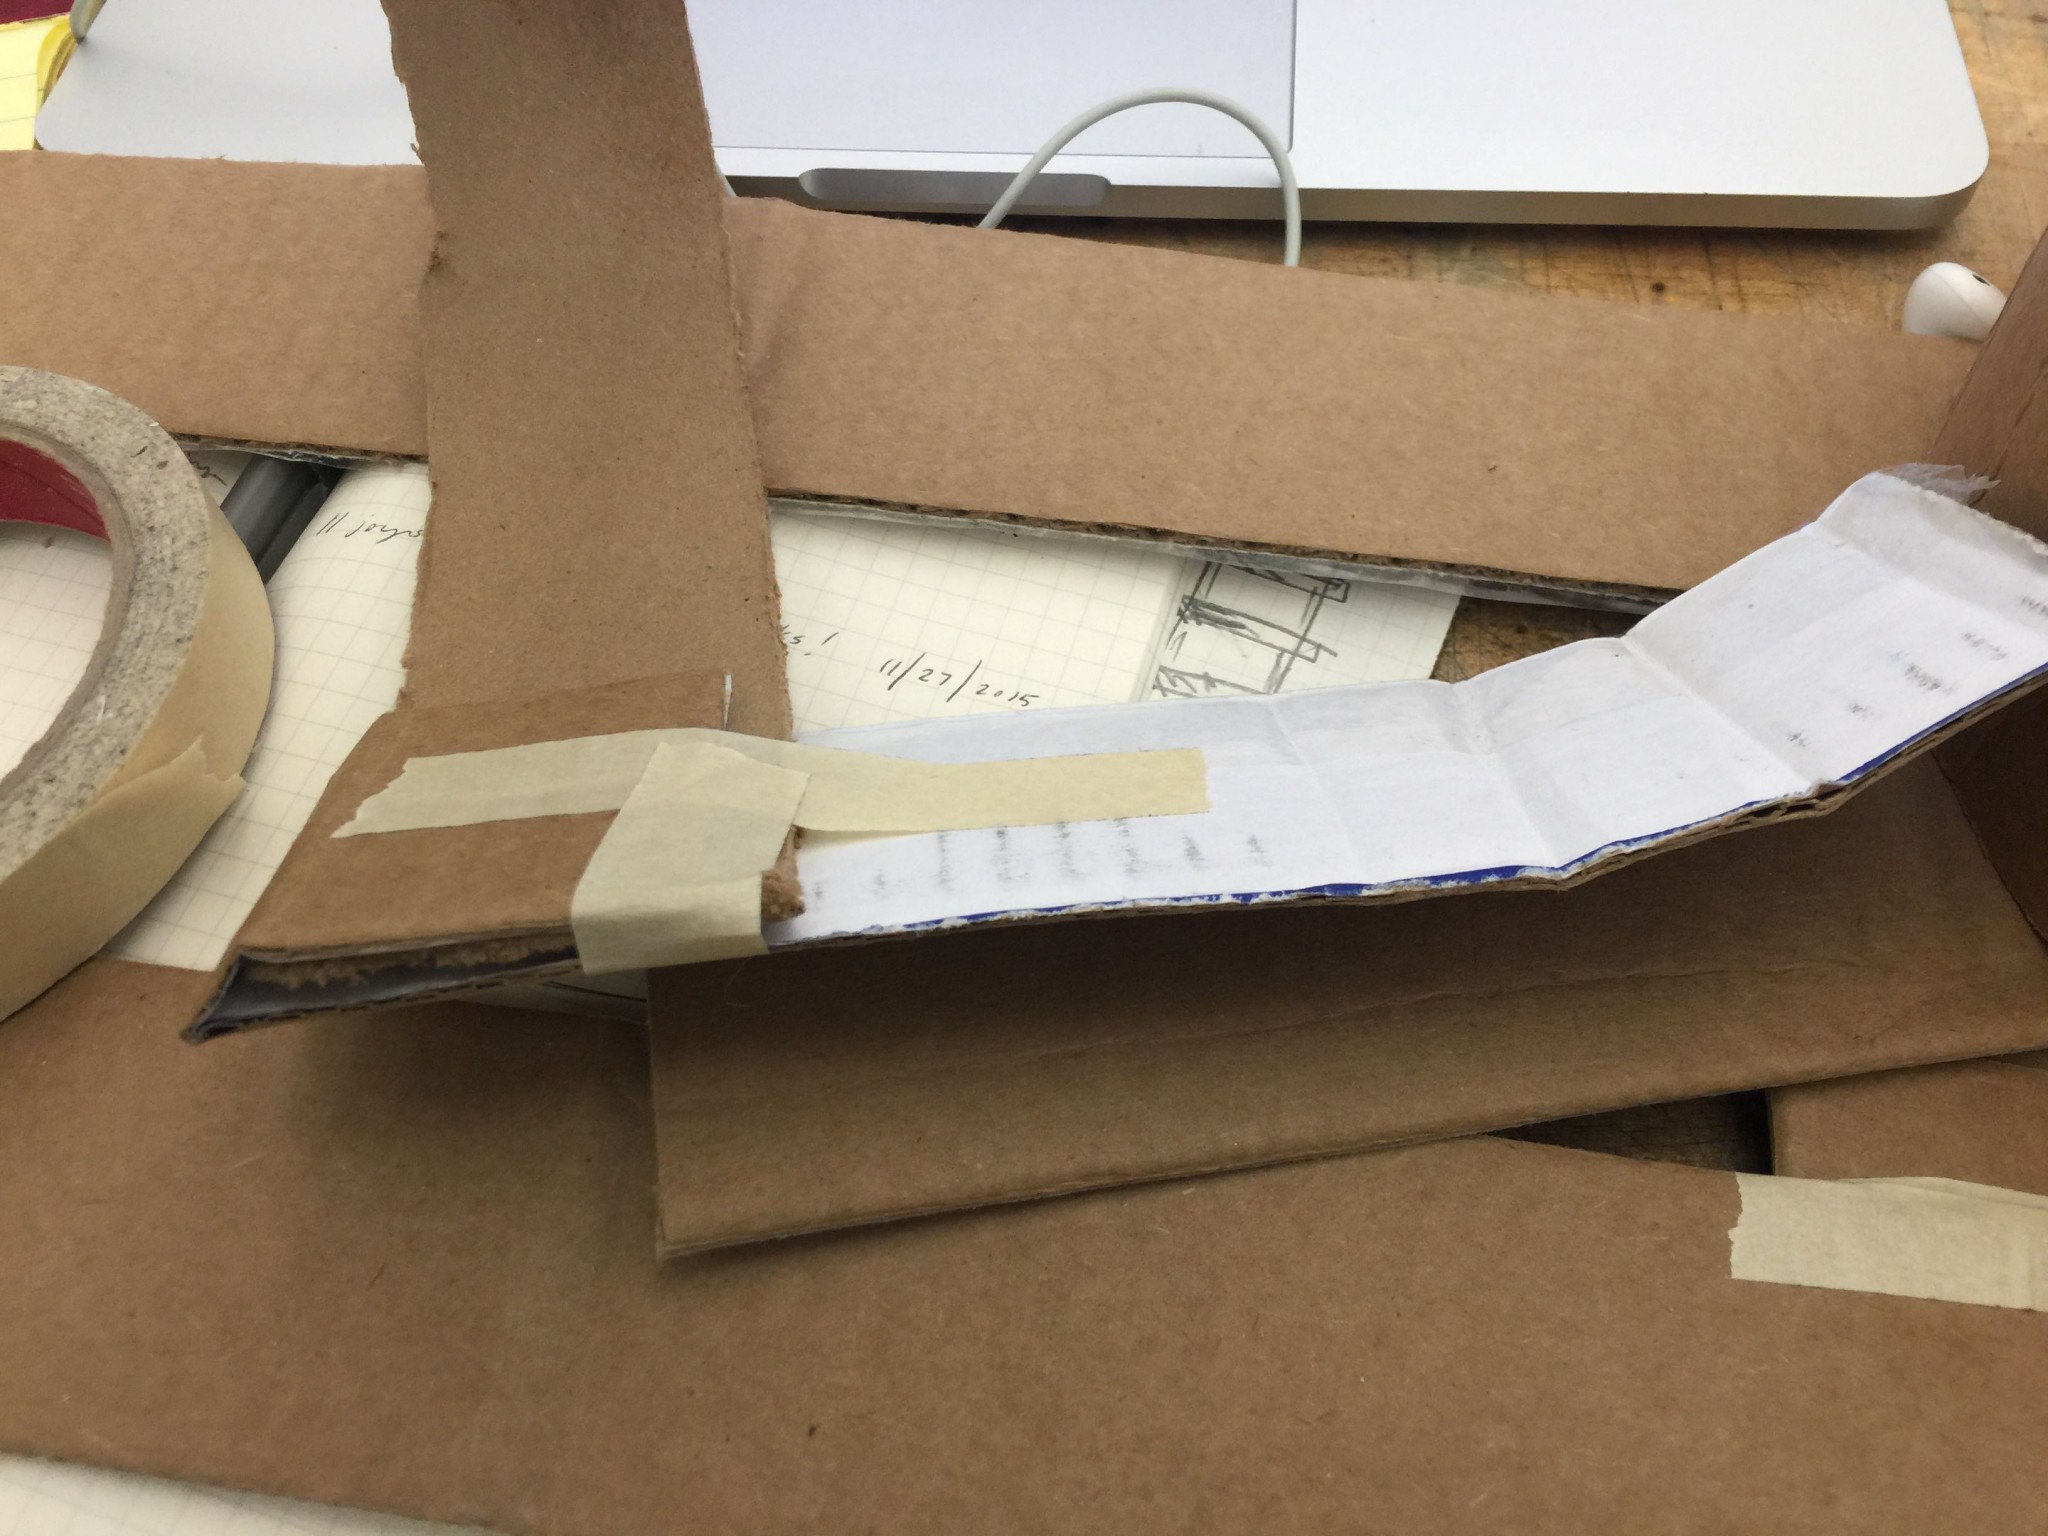
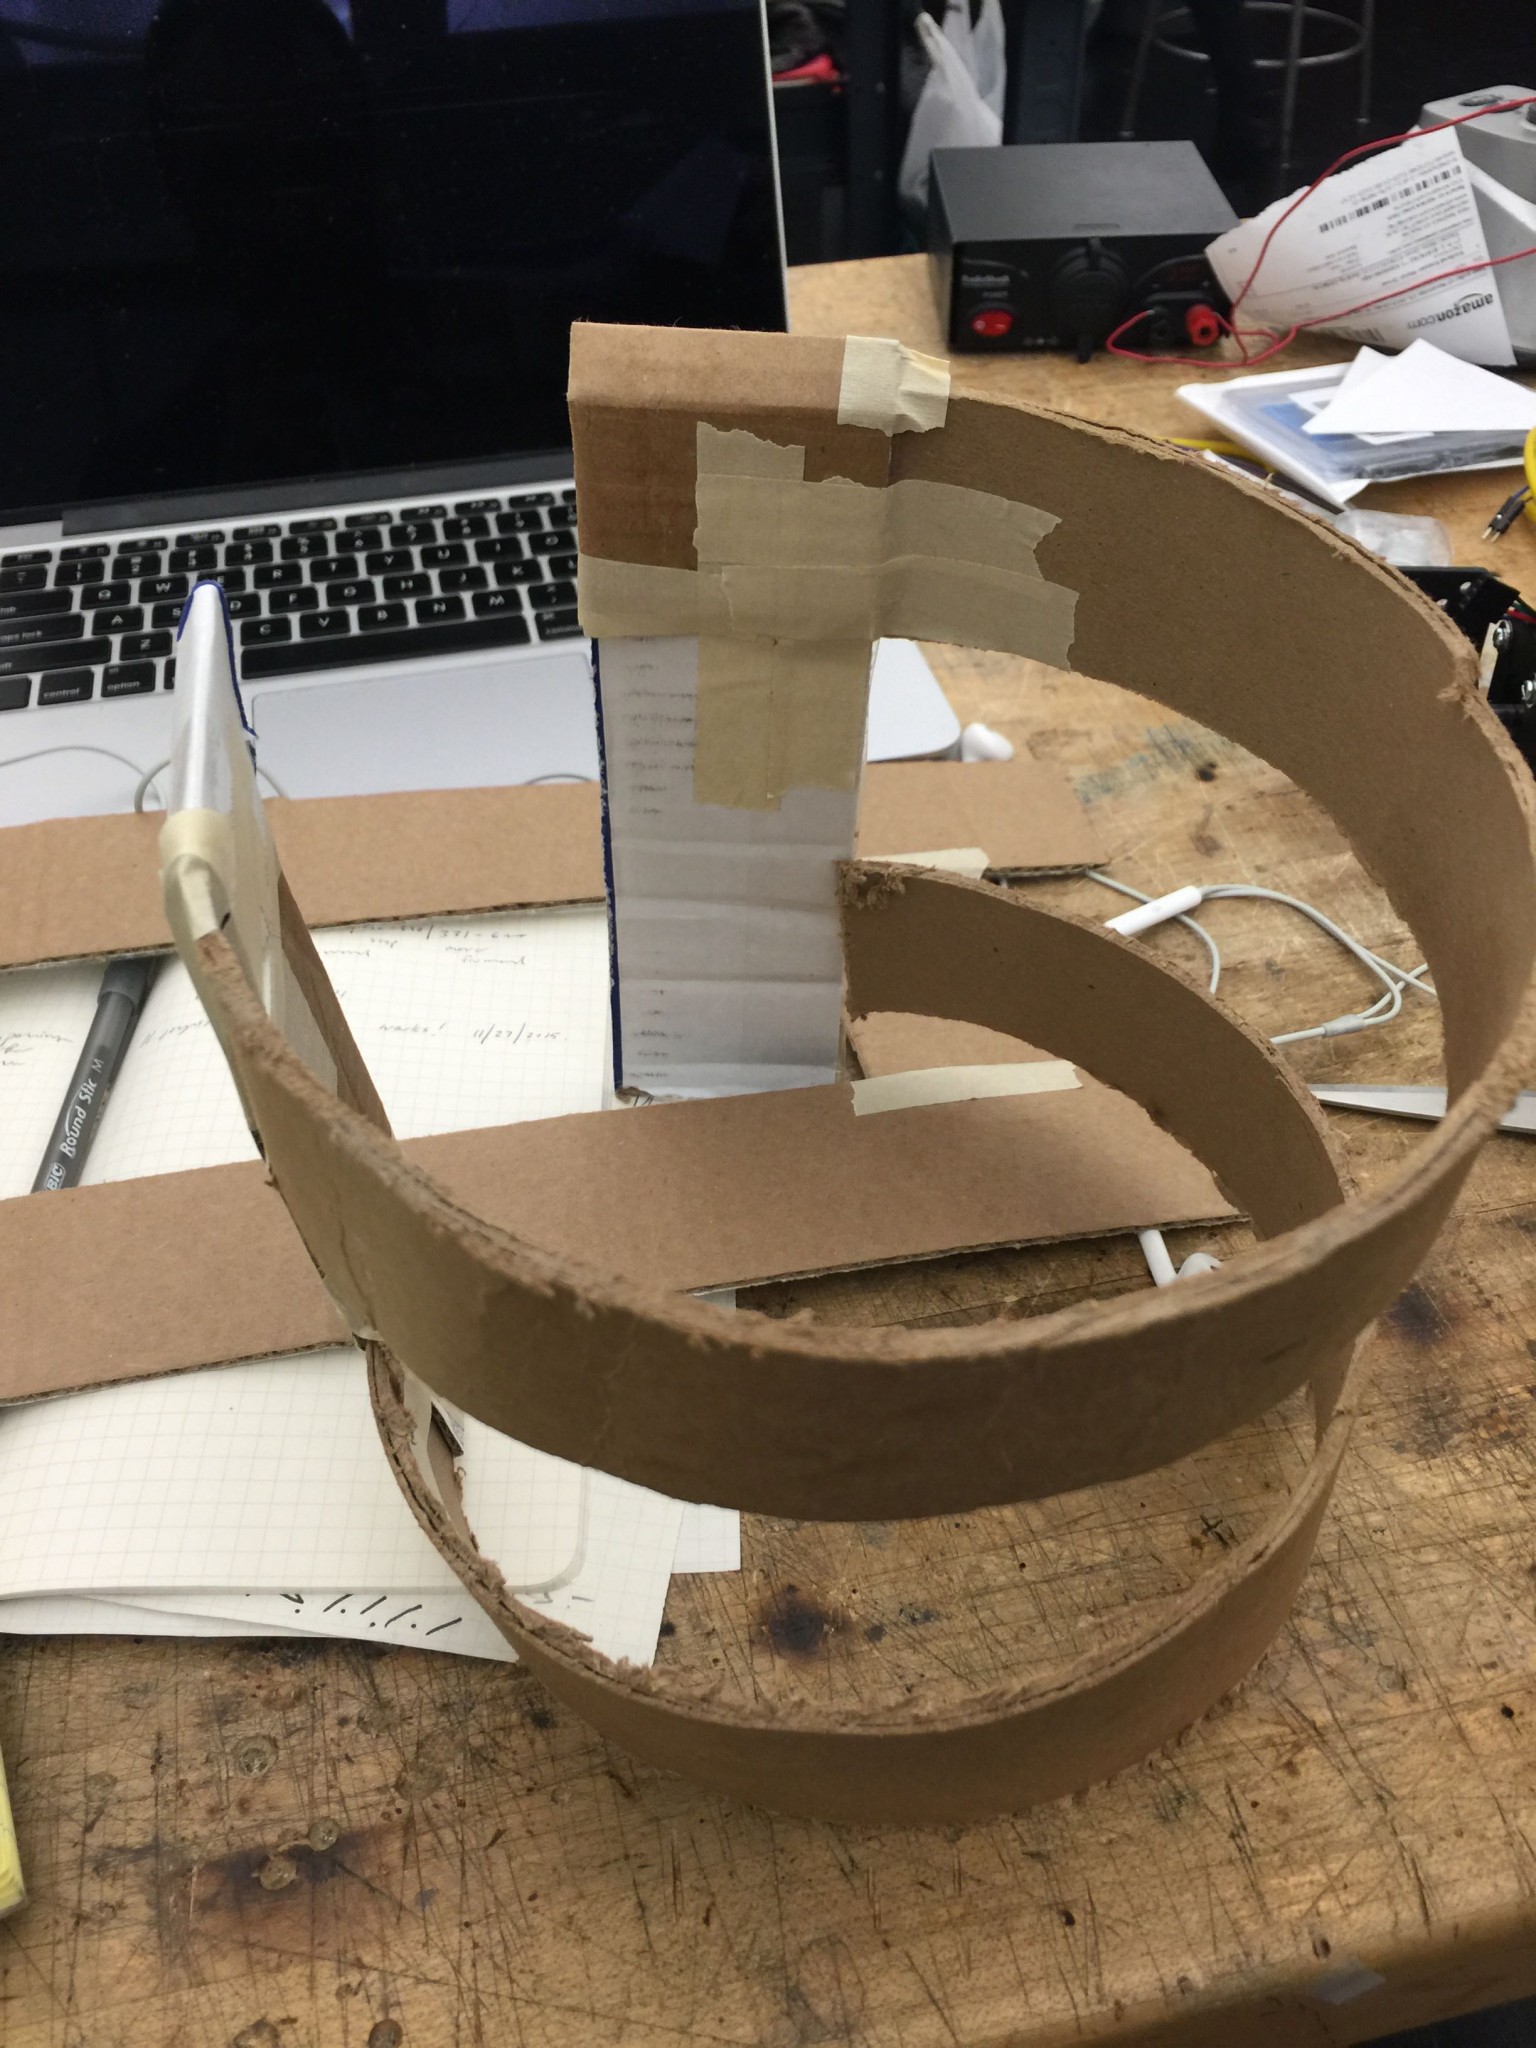
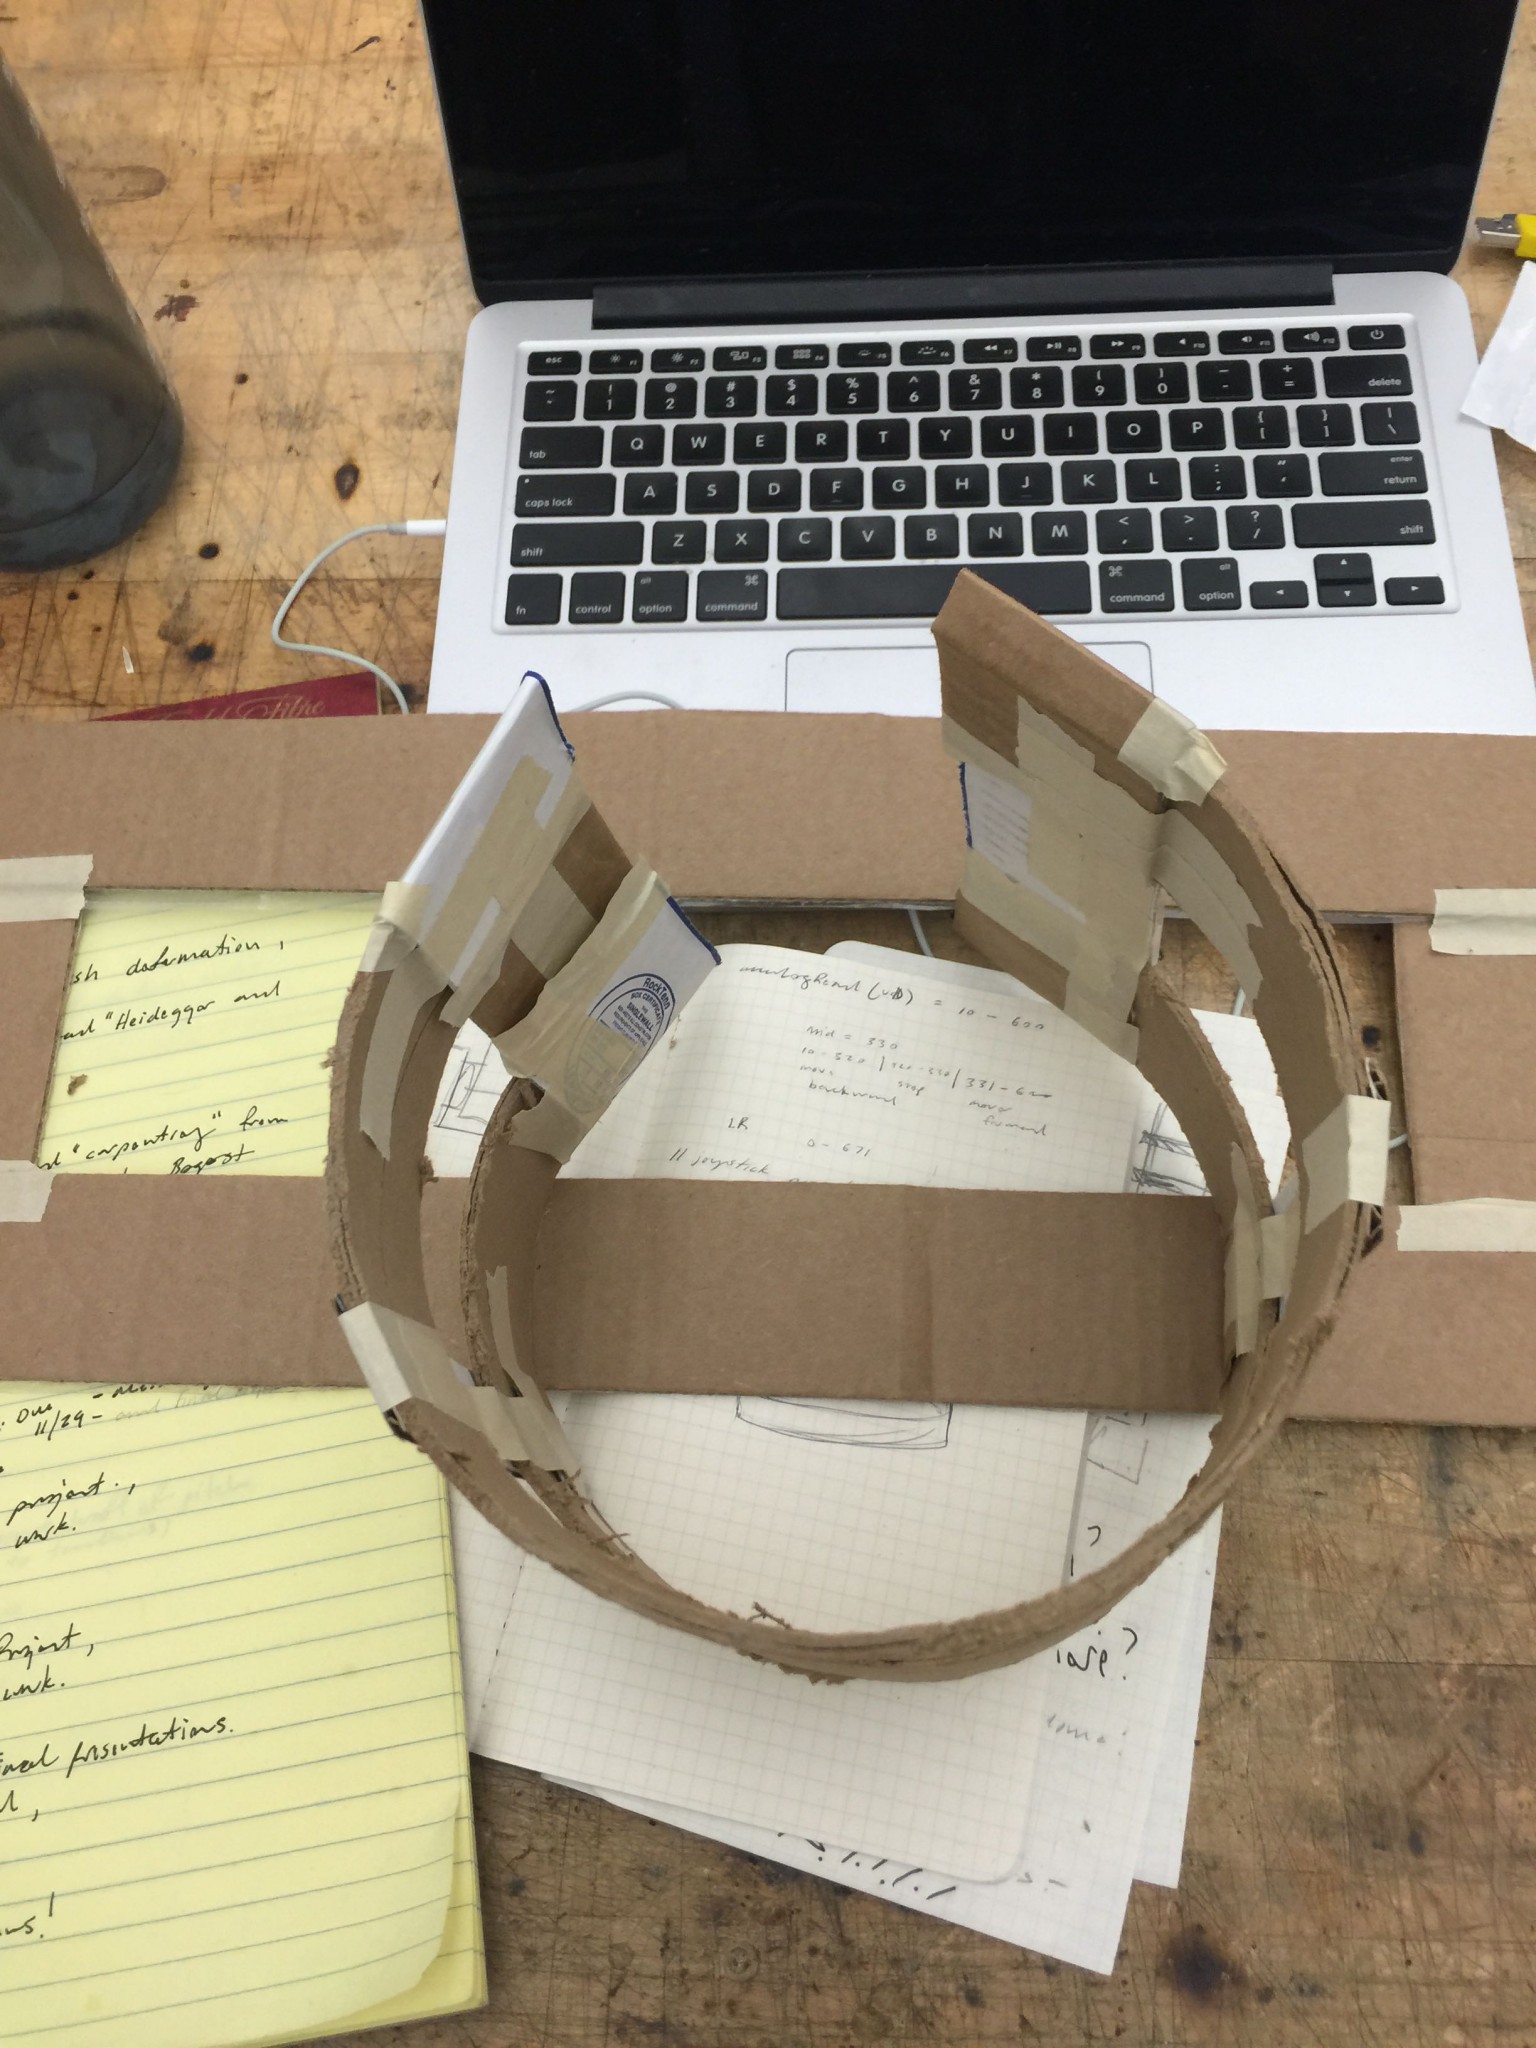
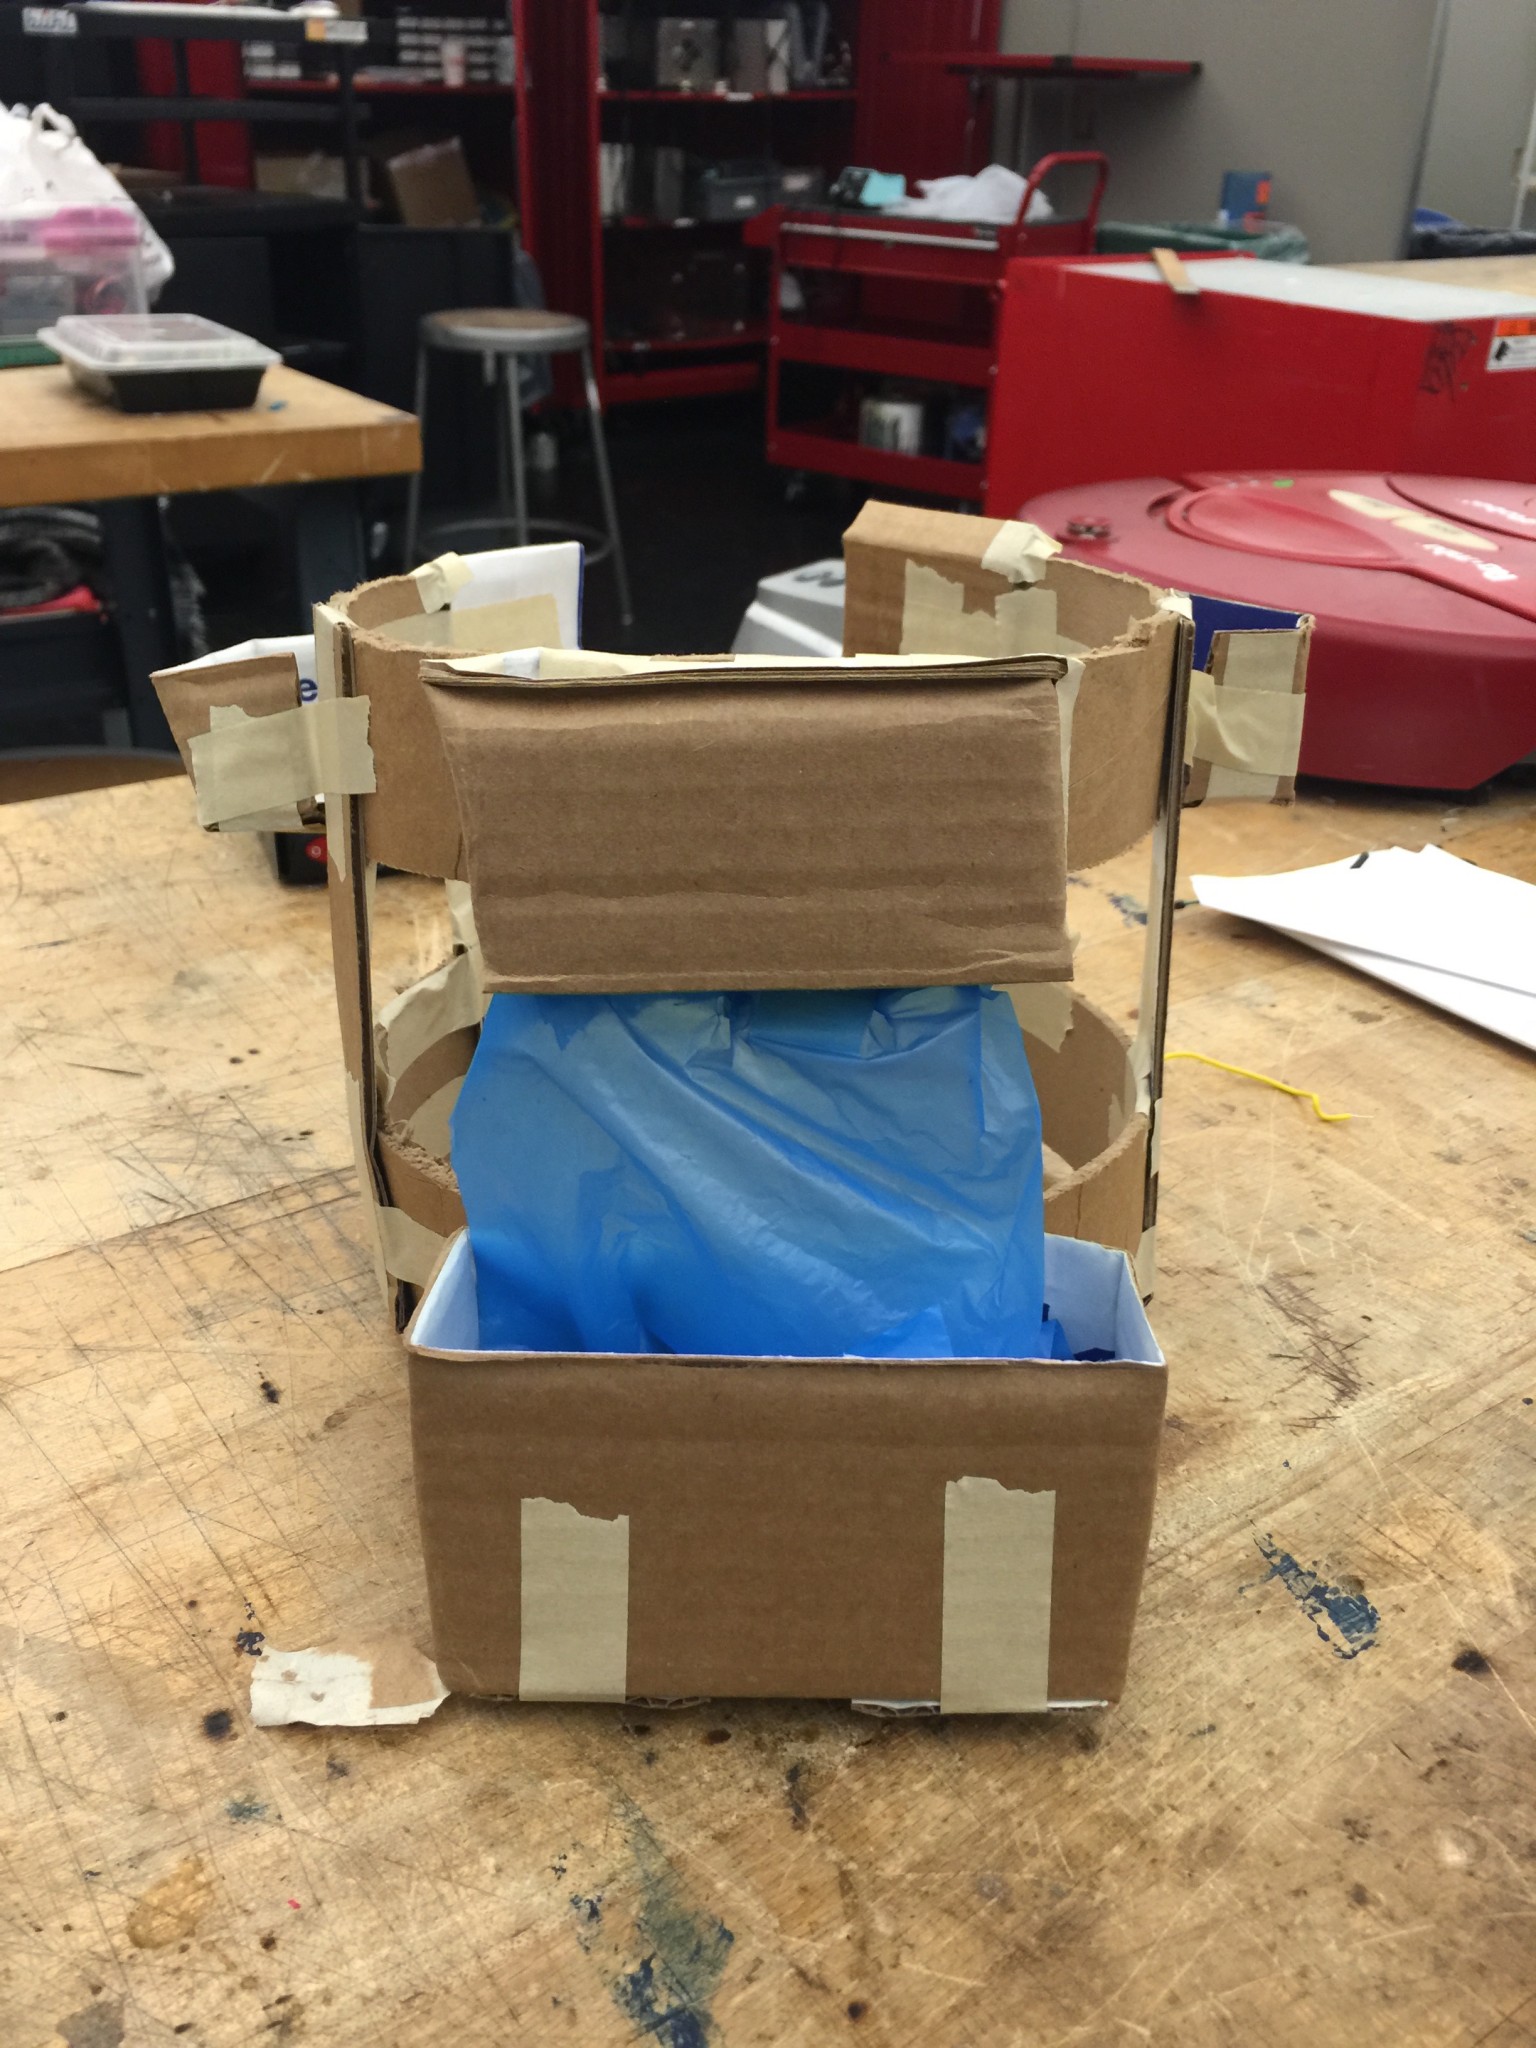
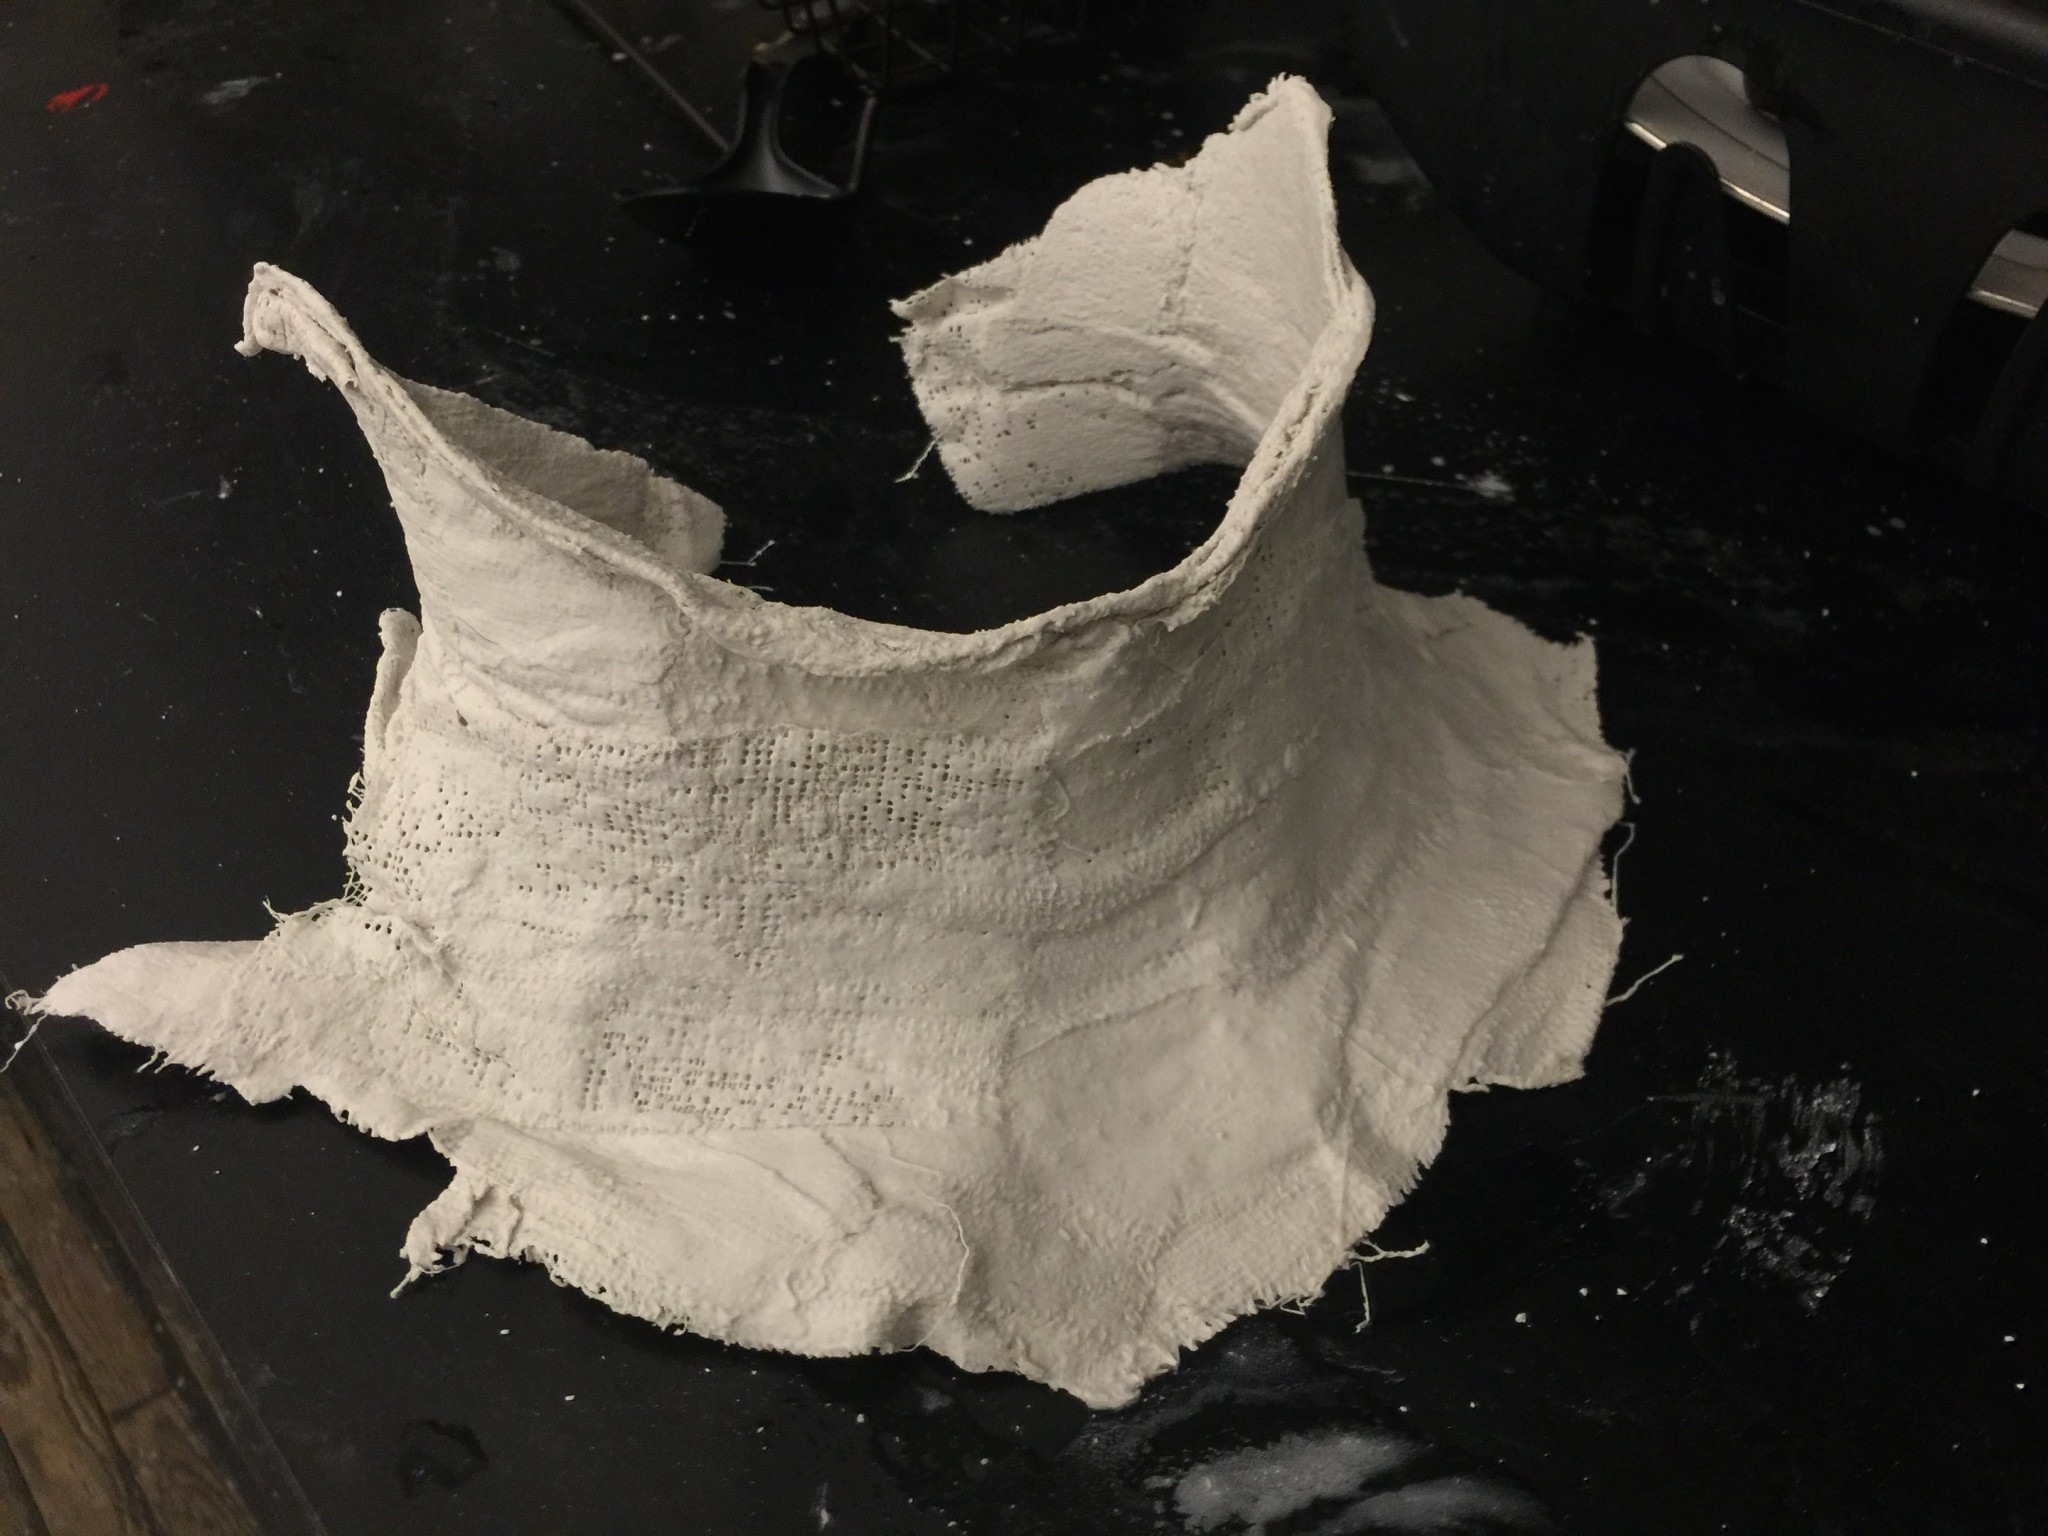
We started with a rough cardboard prototype to get a size and positioning reference.
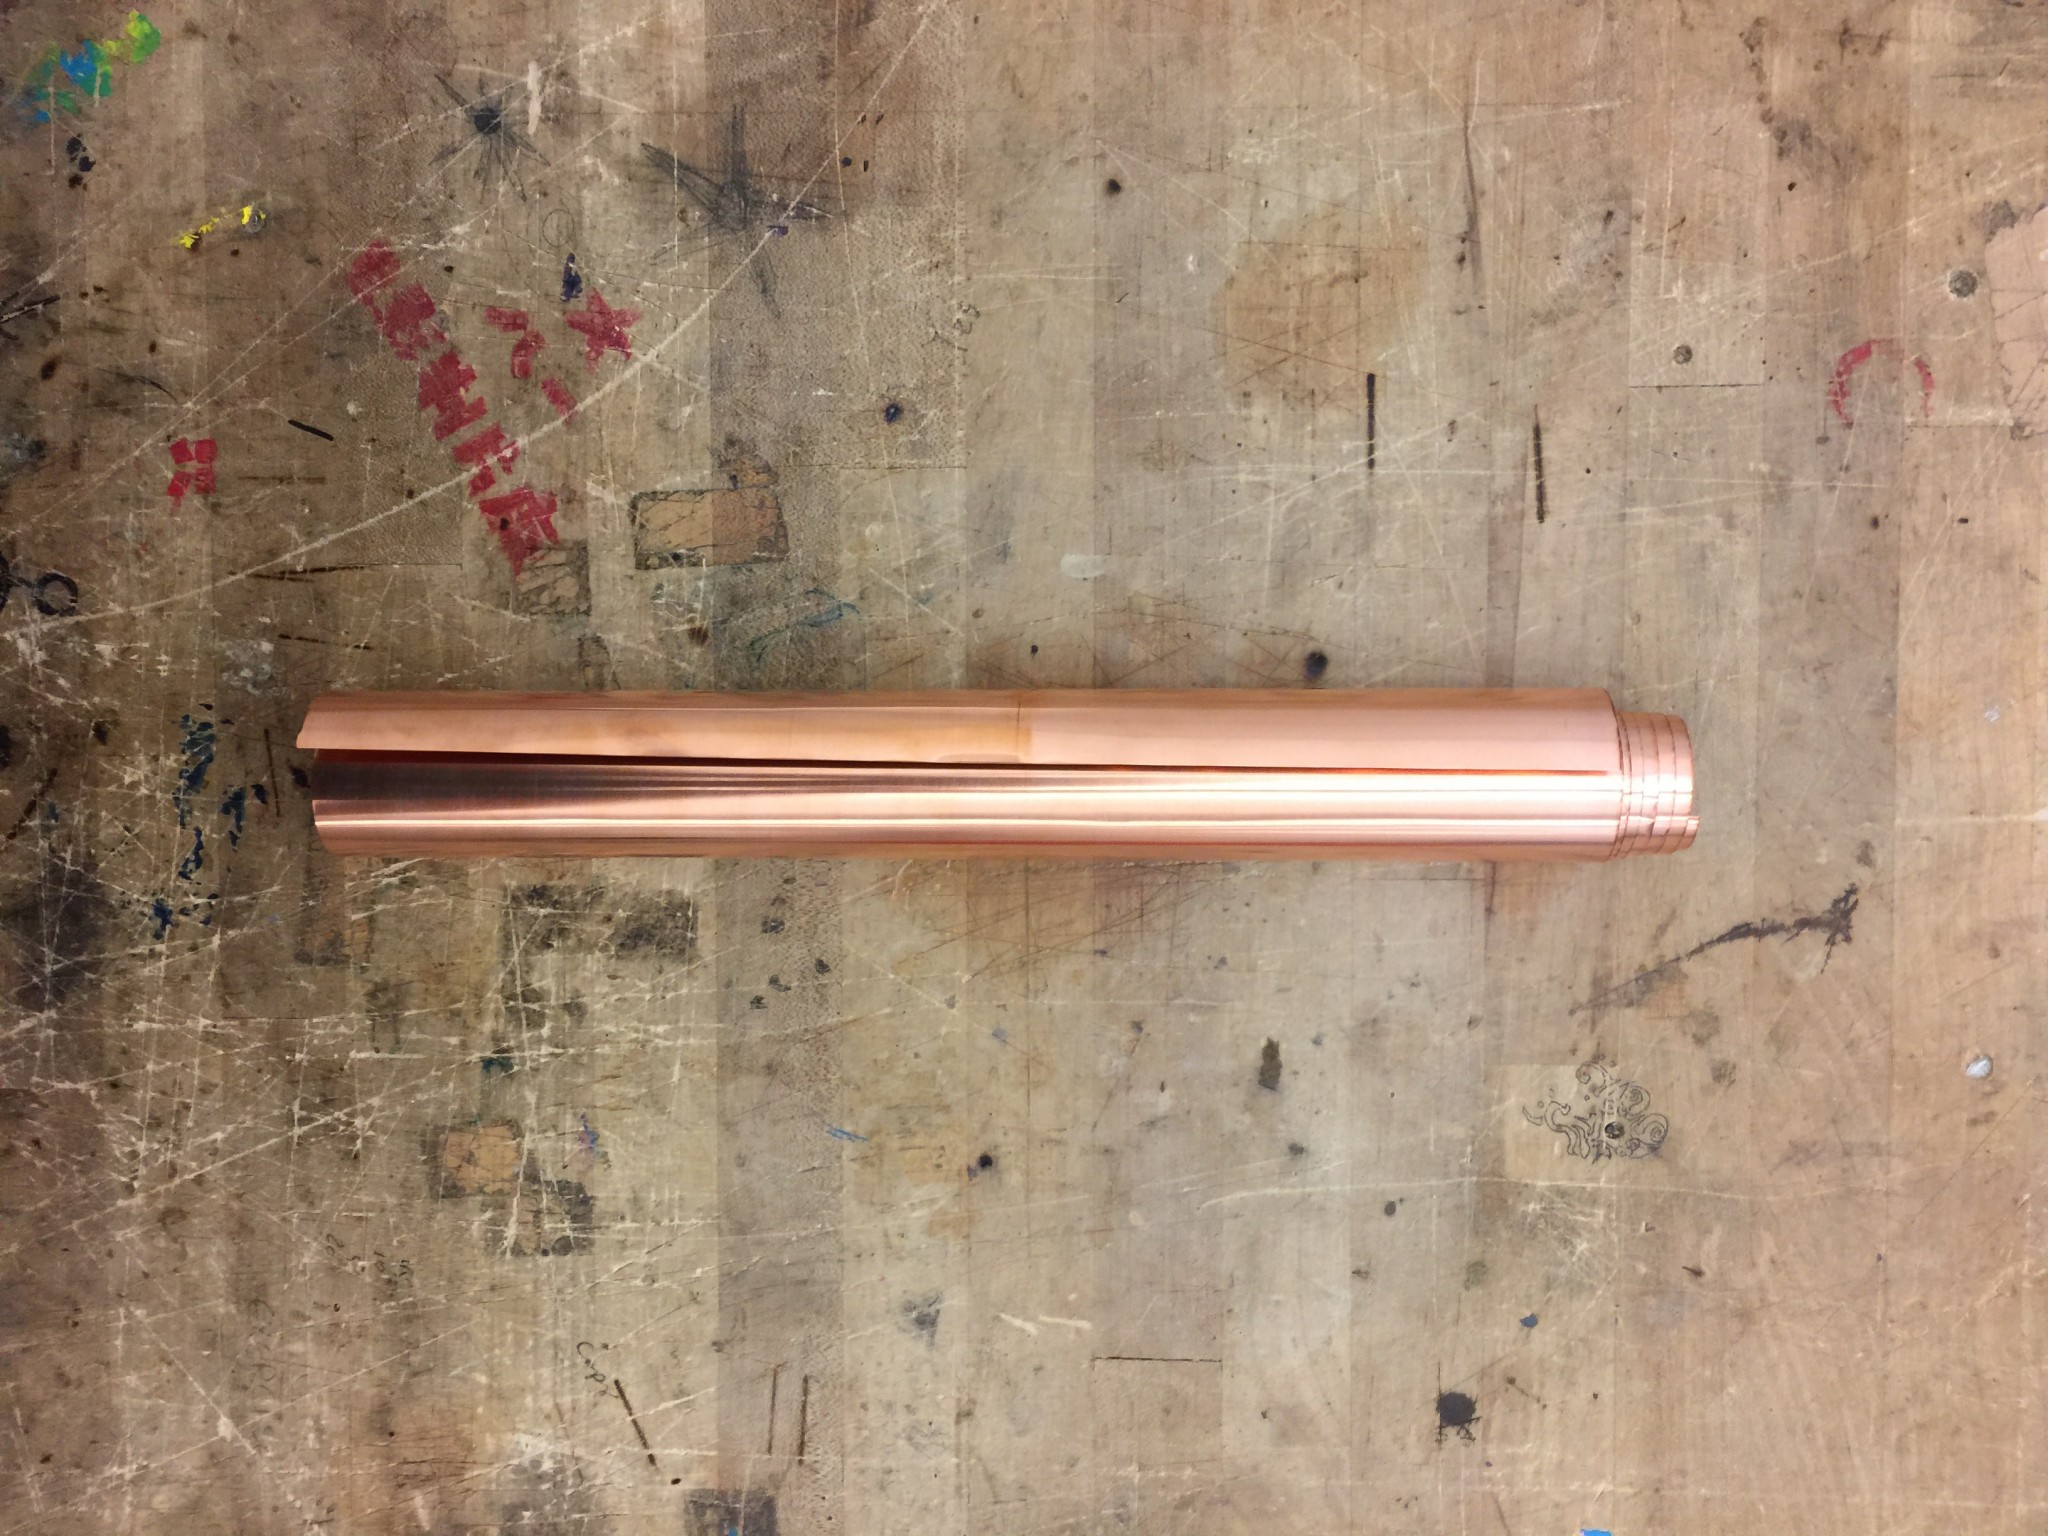
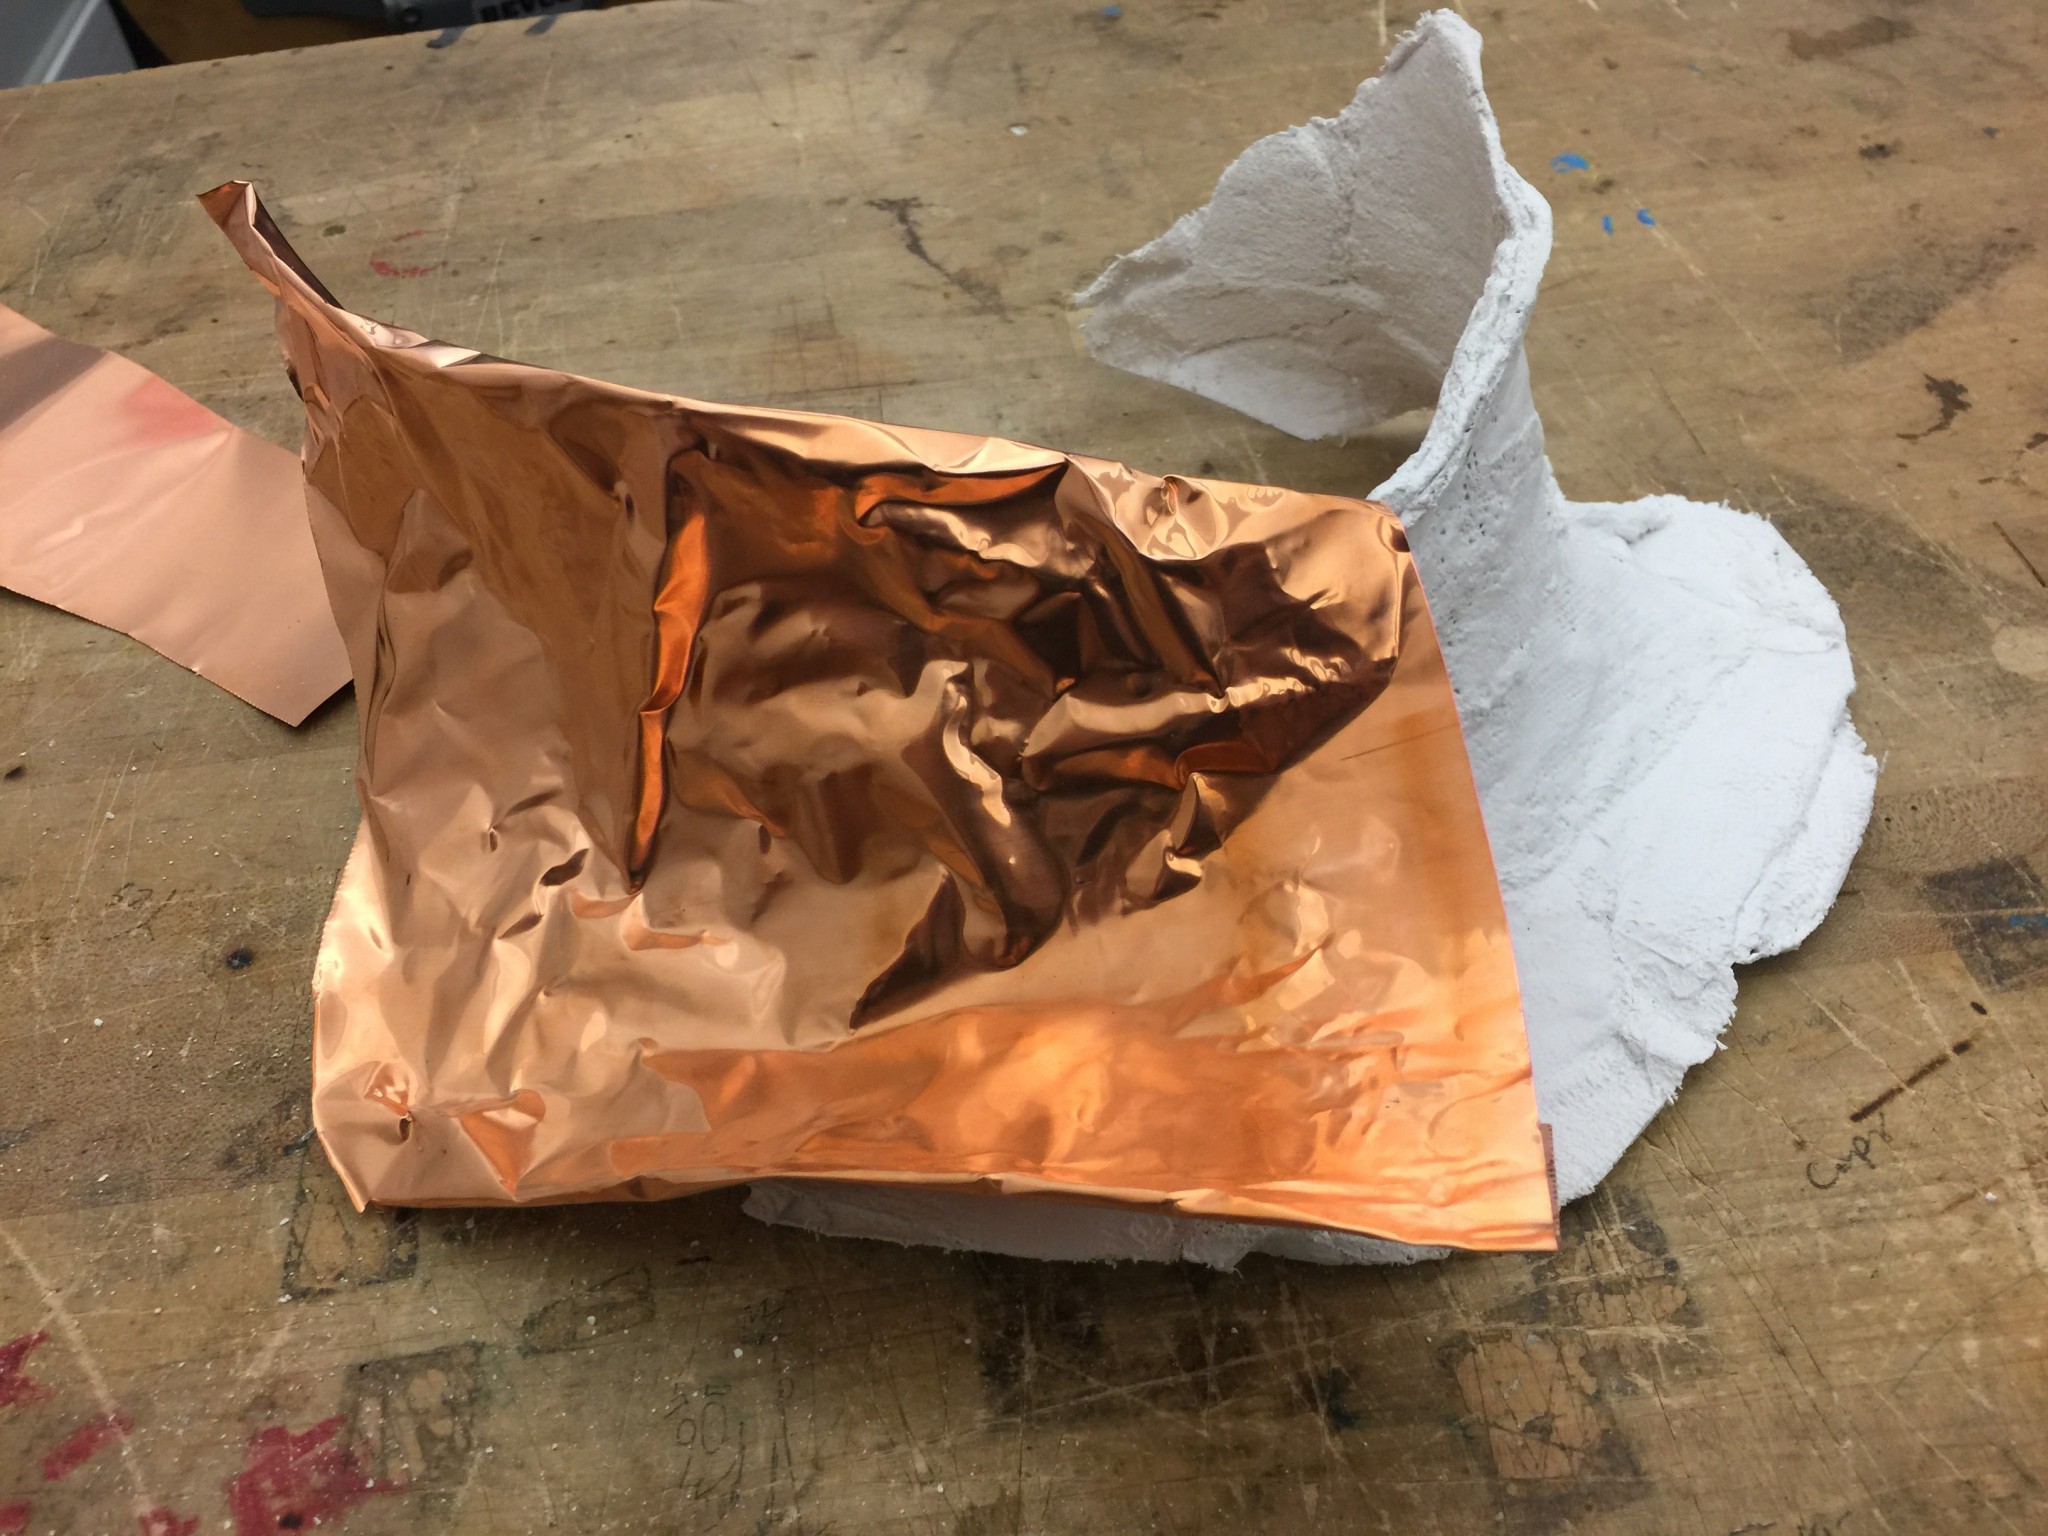
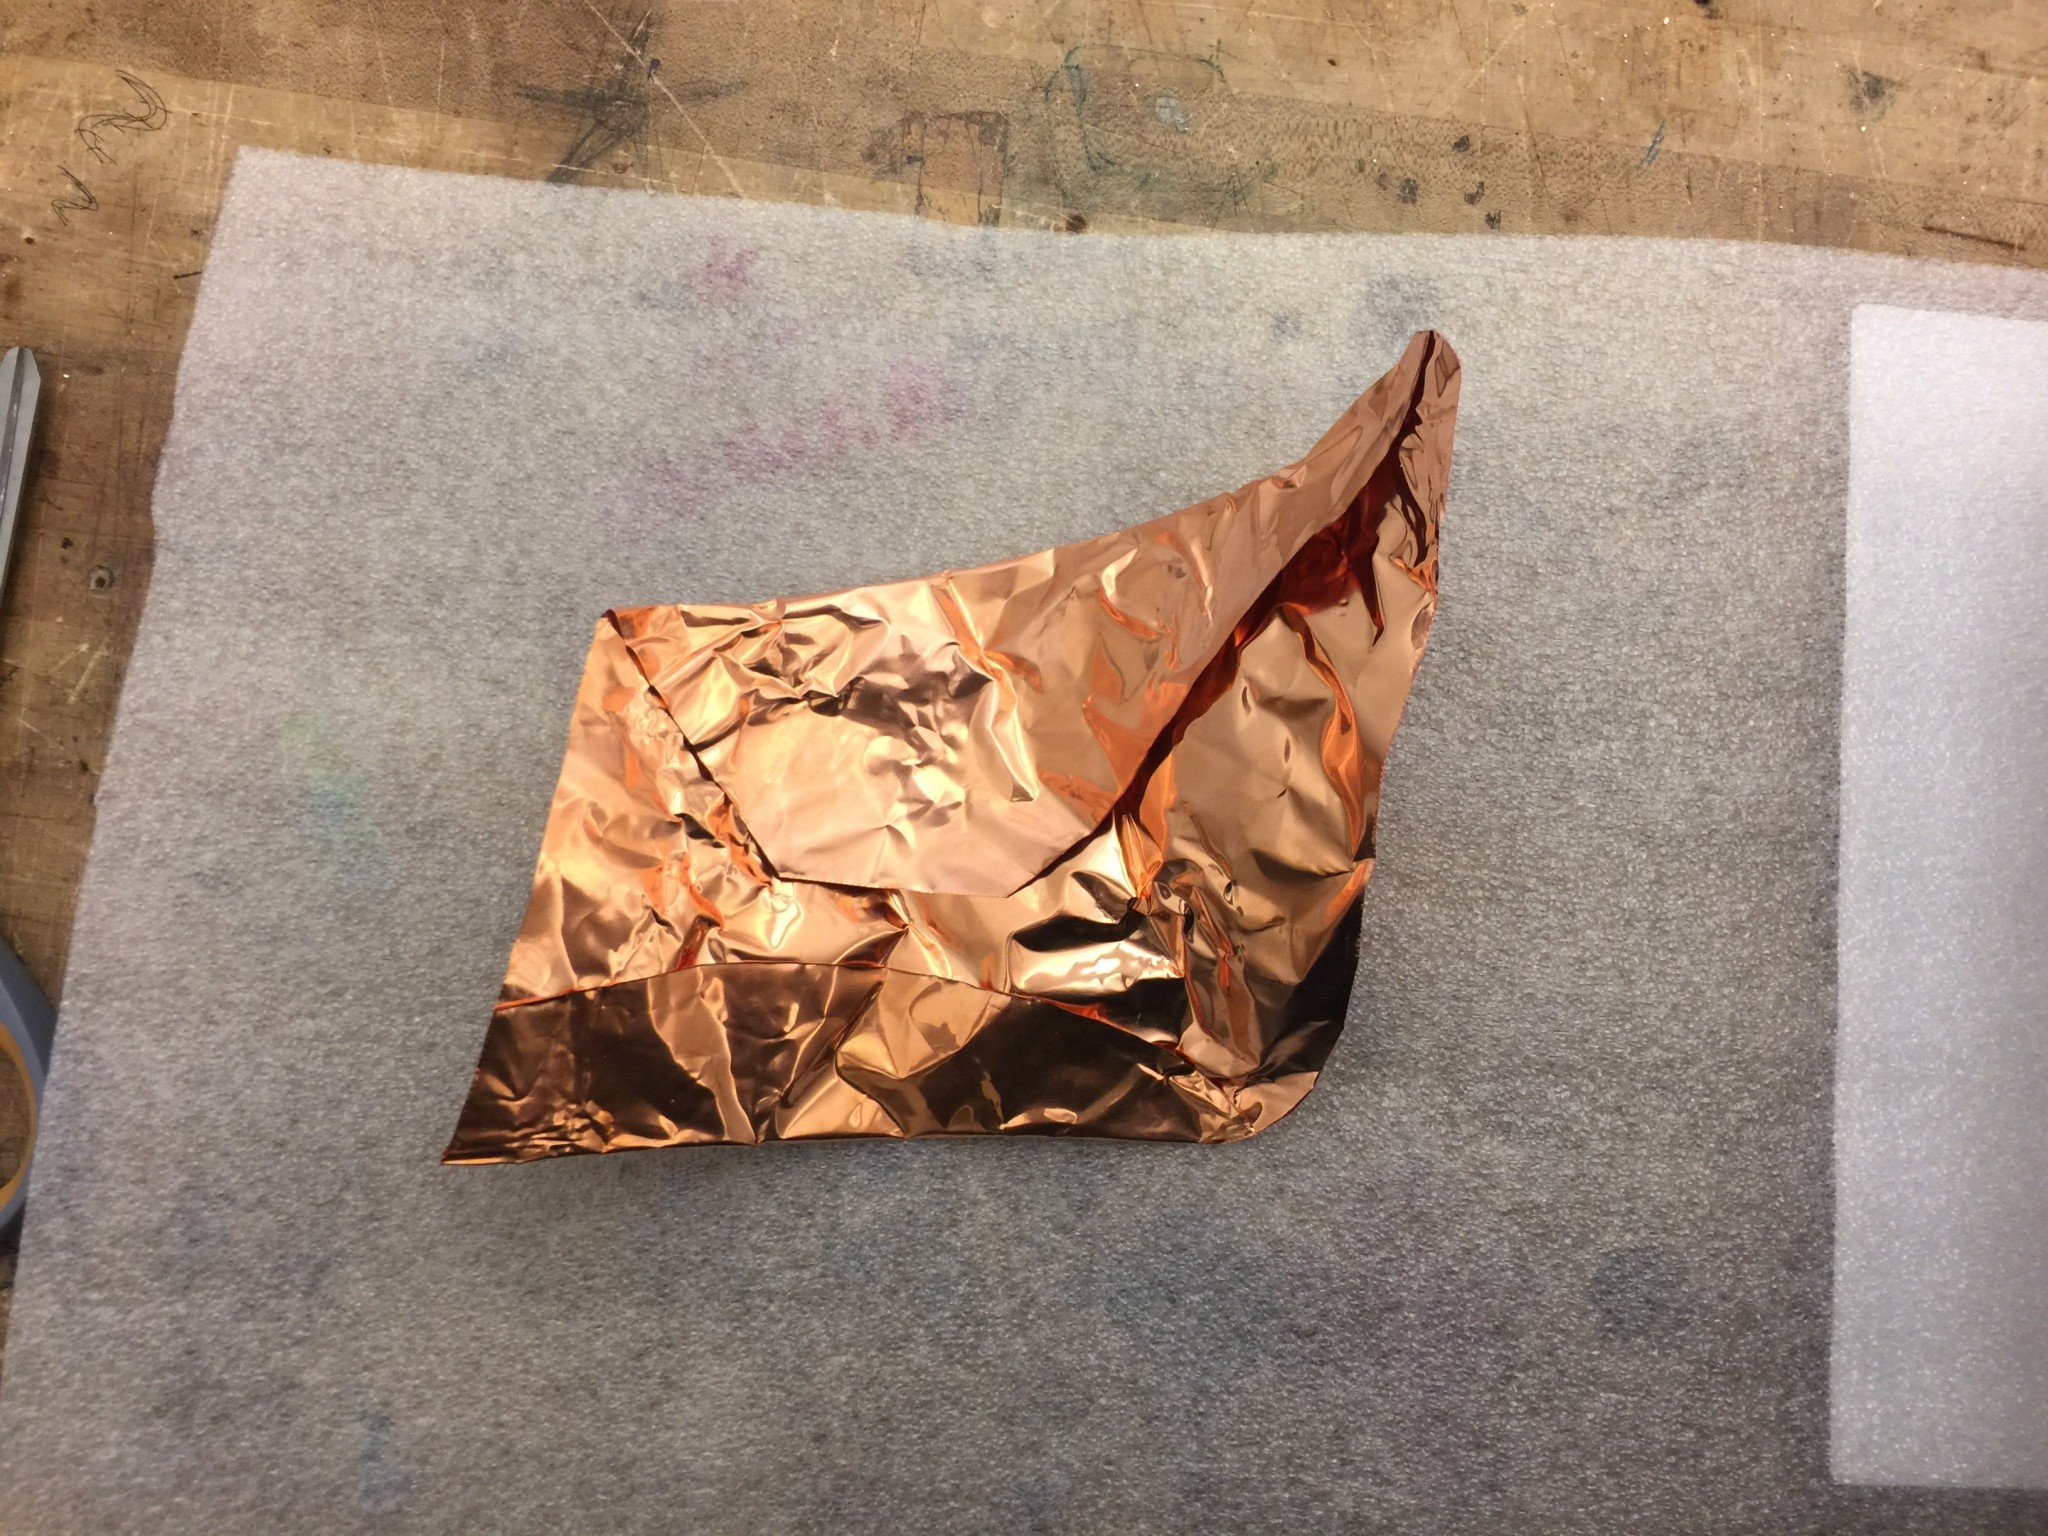
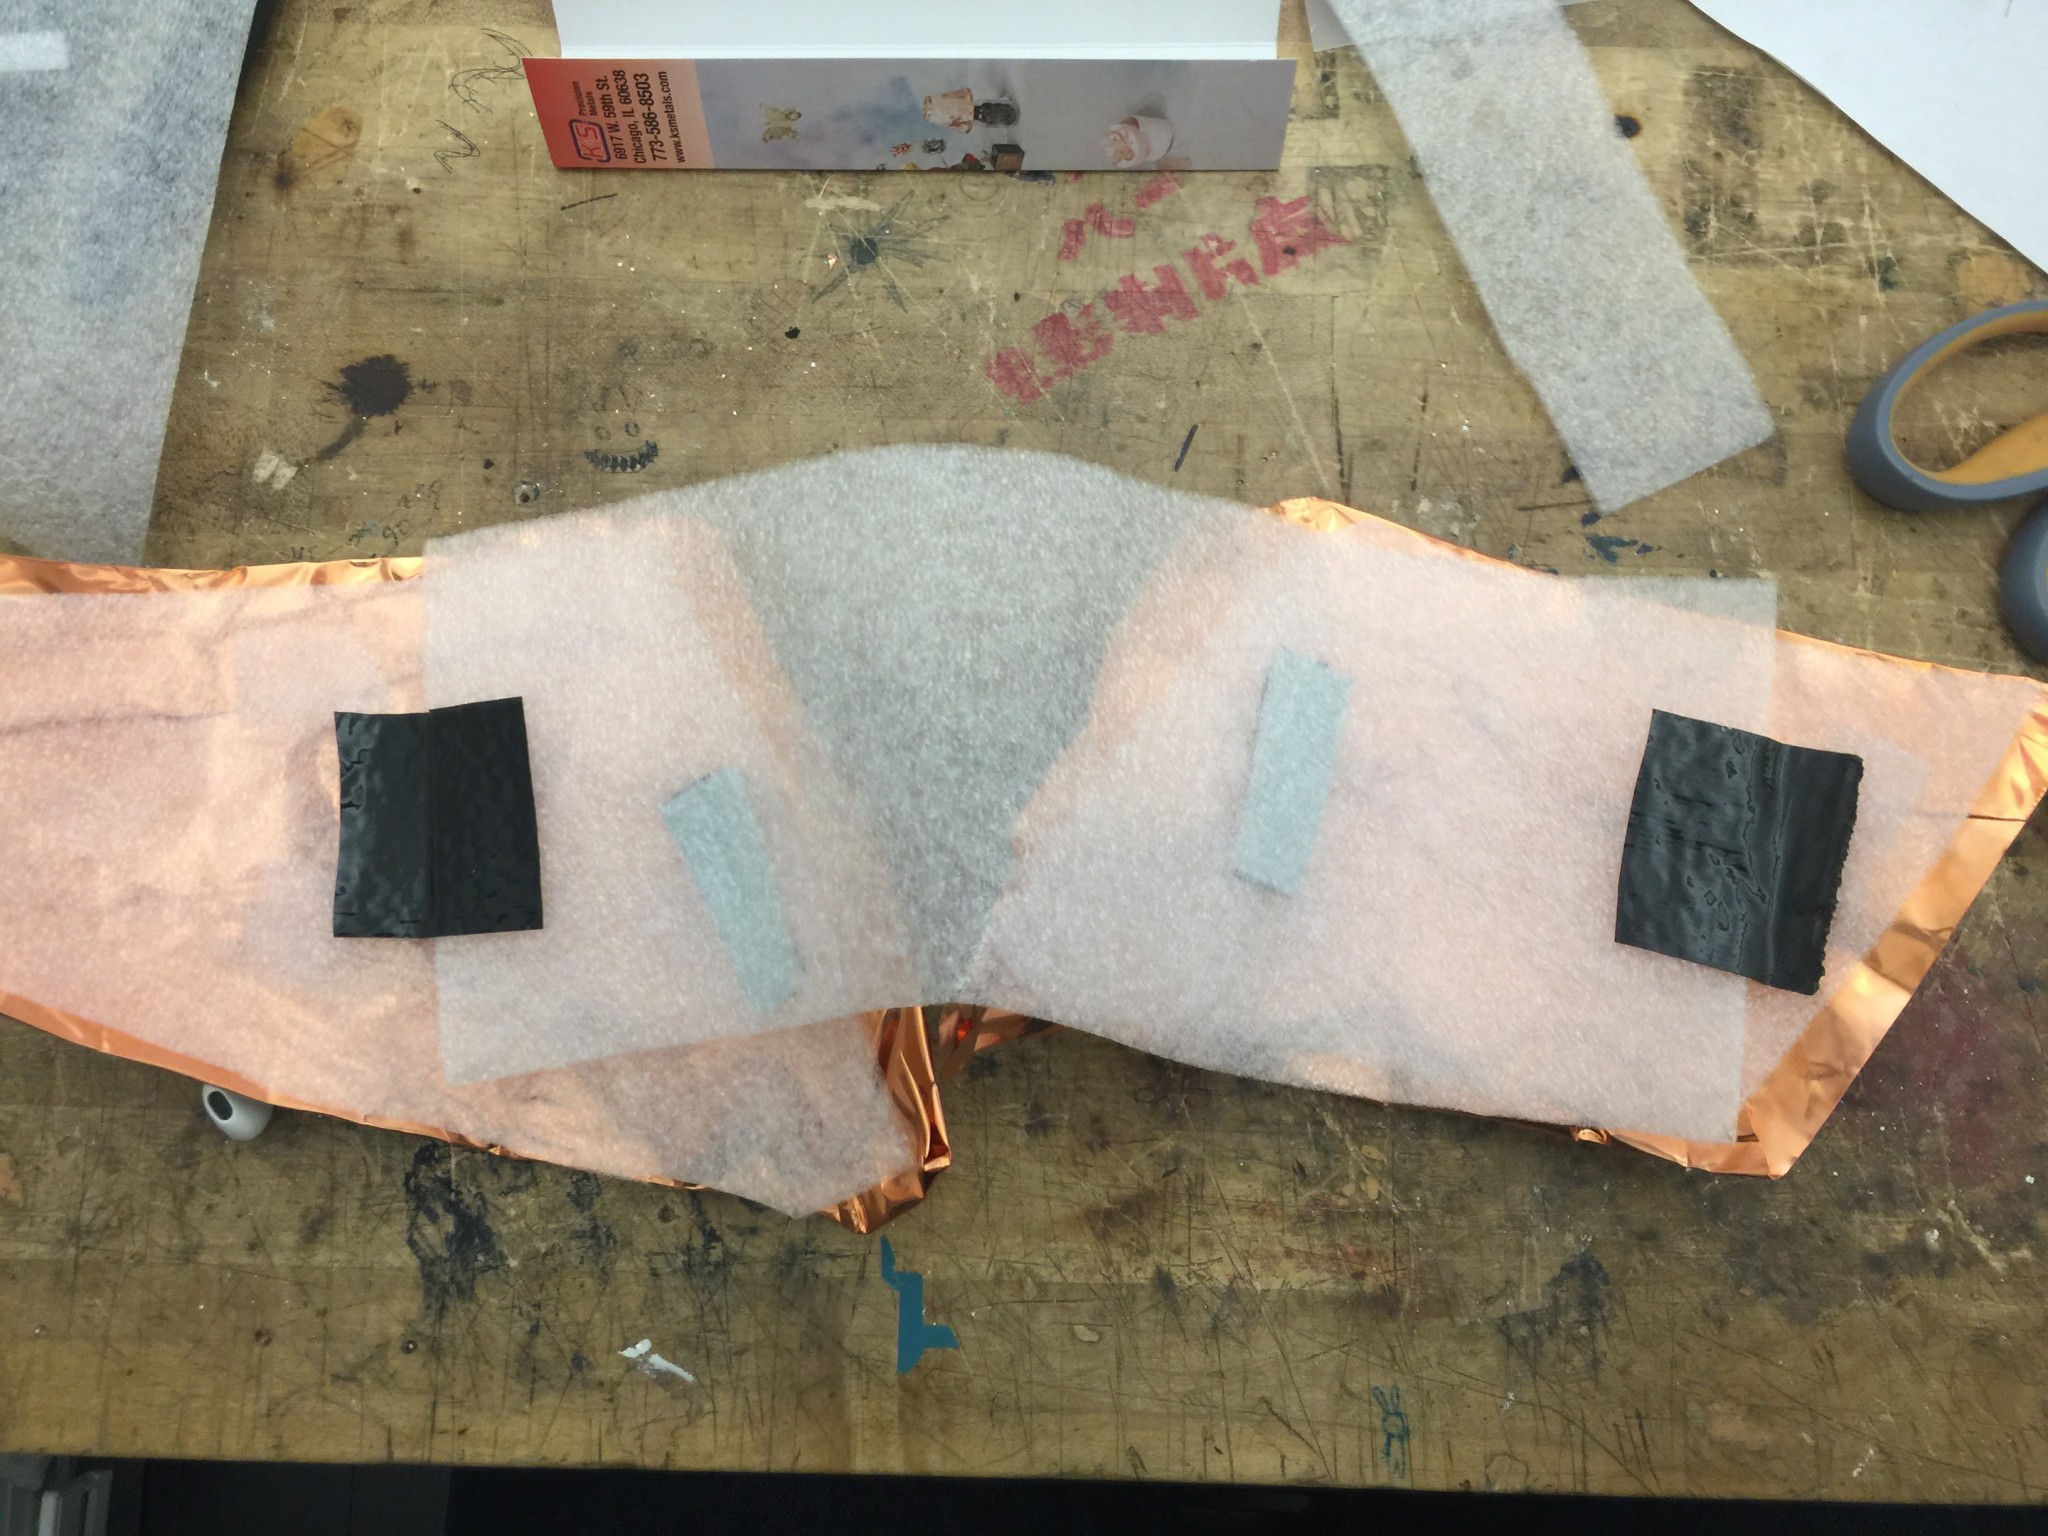
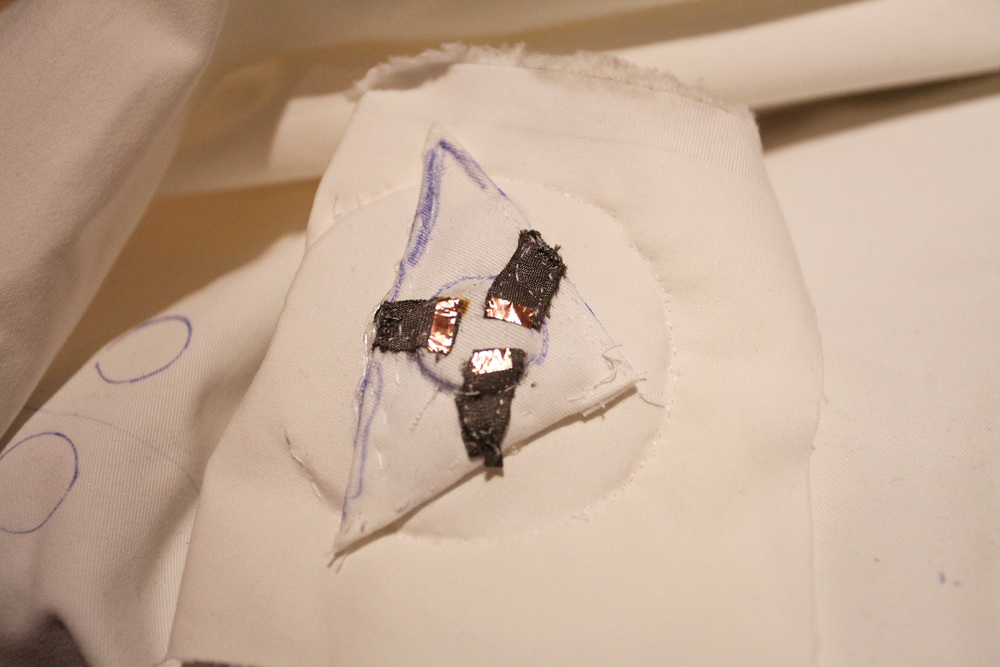
From there we began working on a neck piece that would control and/or turn on the helmet device. It consisted of materials such as plastic, metal (aluminum and copper) and foam.
Here we used the PVC pipe to shape the form of the metal to best fit our needs.
Below is the plaster moldering process.
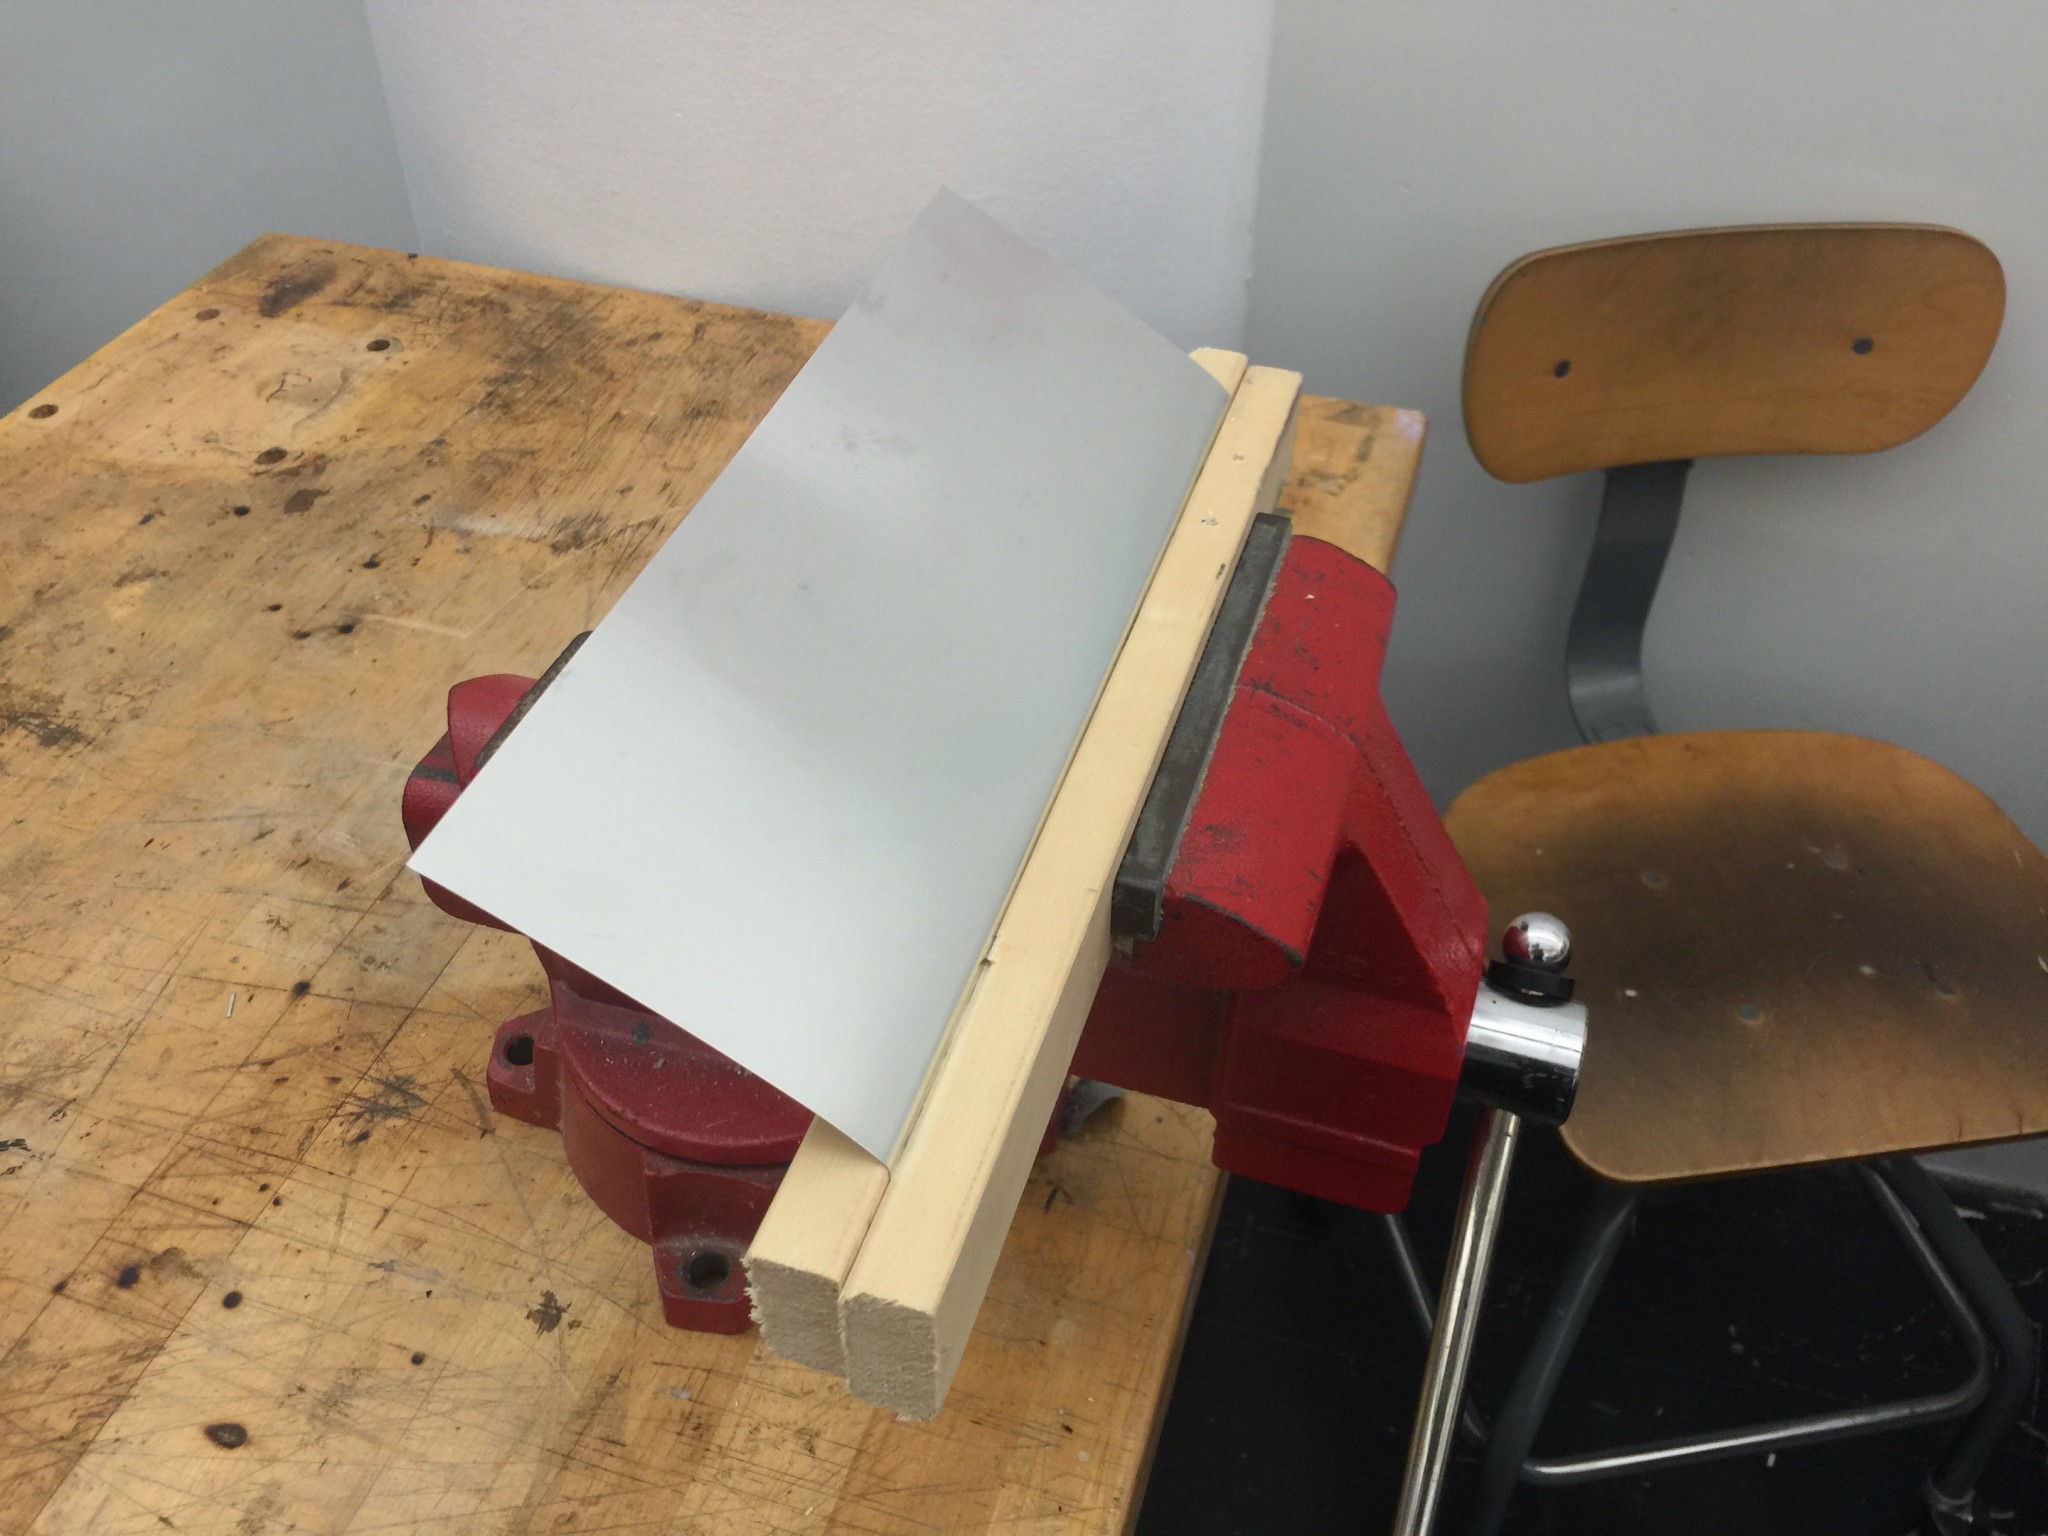
Here we moved to using .003mm copper sheets.
Finally we began working with a capacitive touch sensor
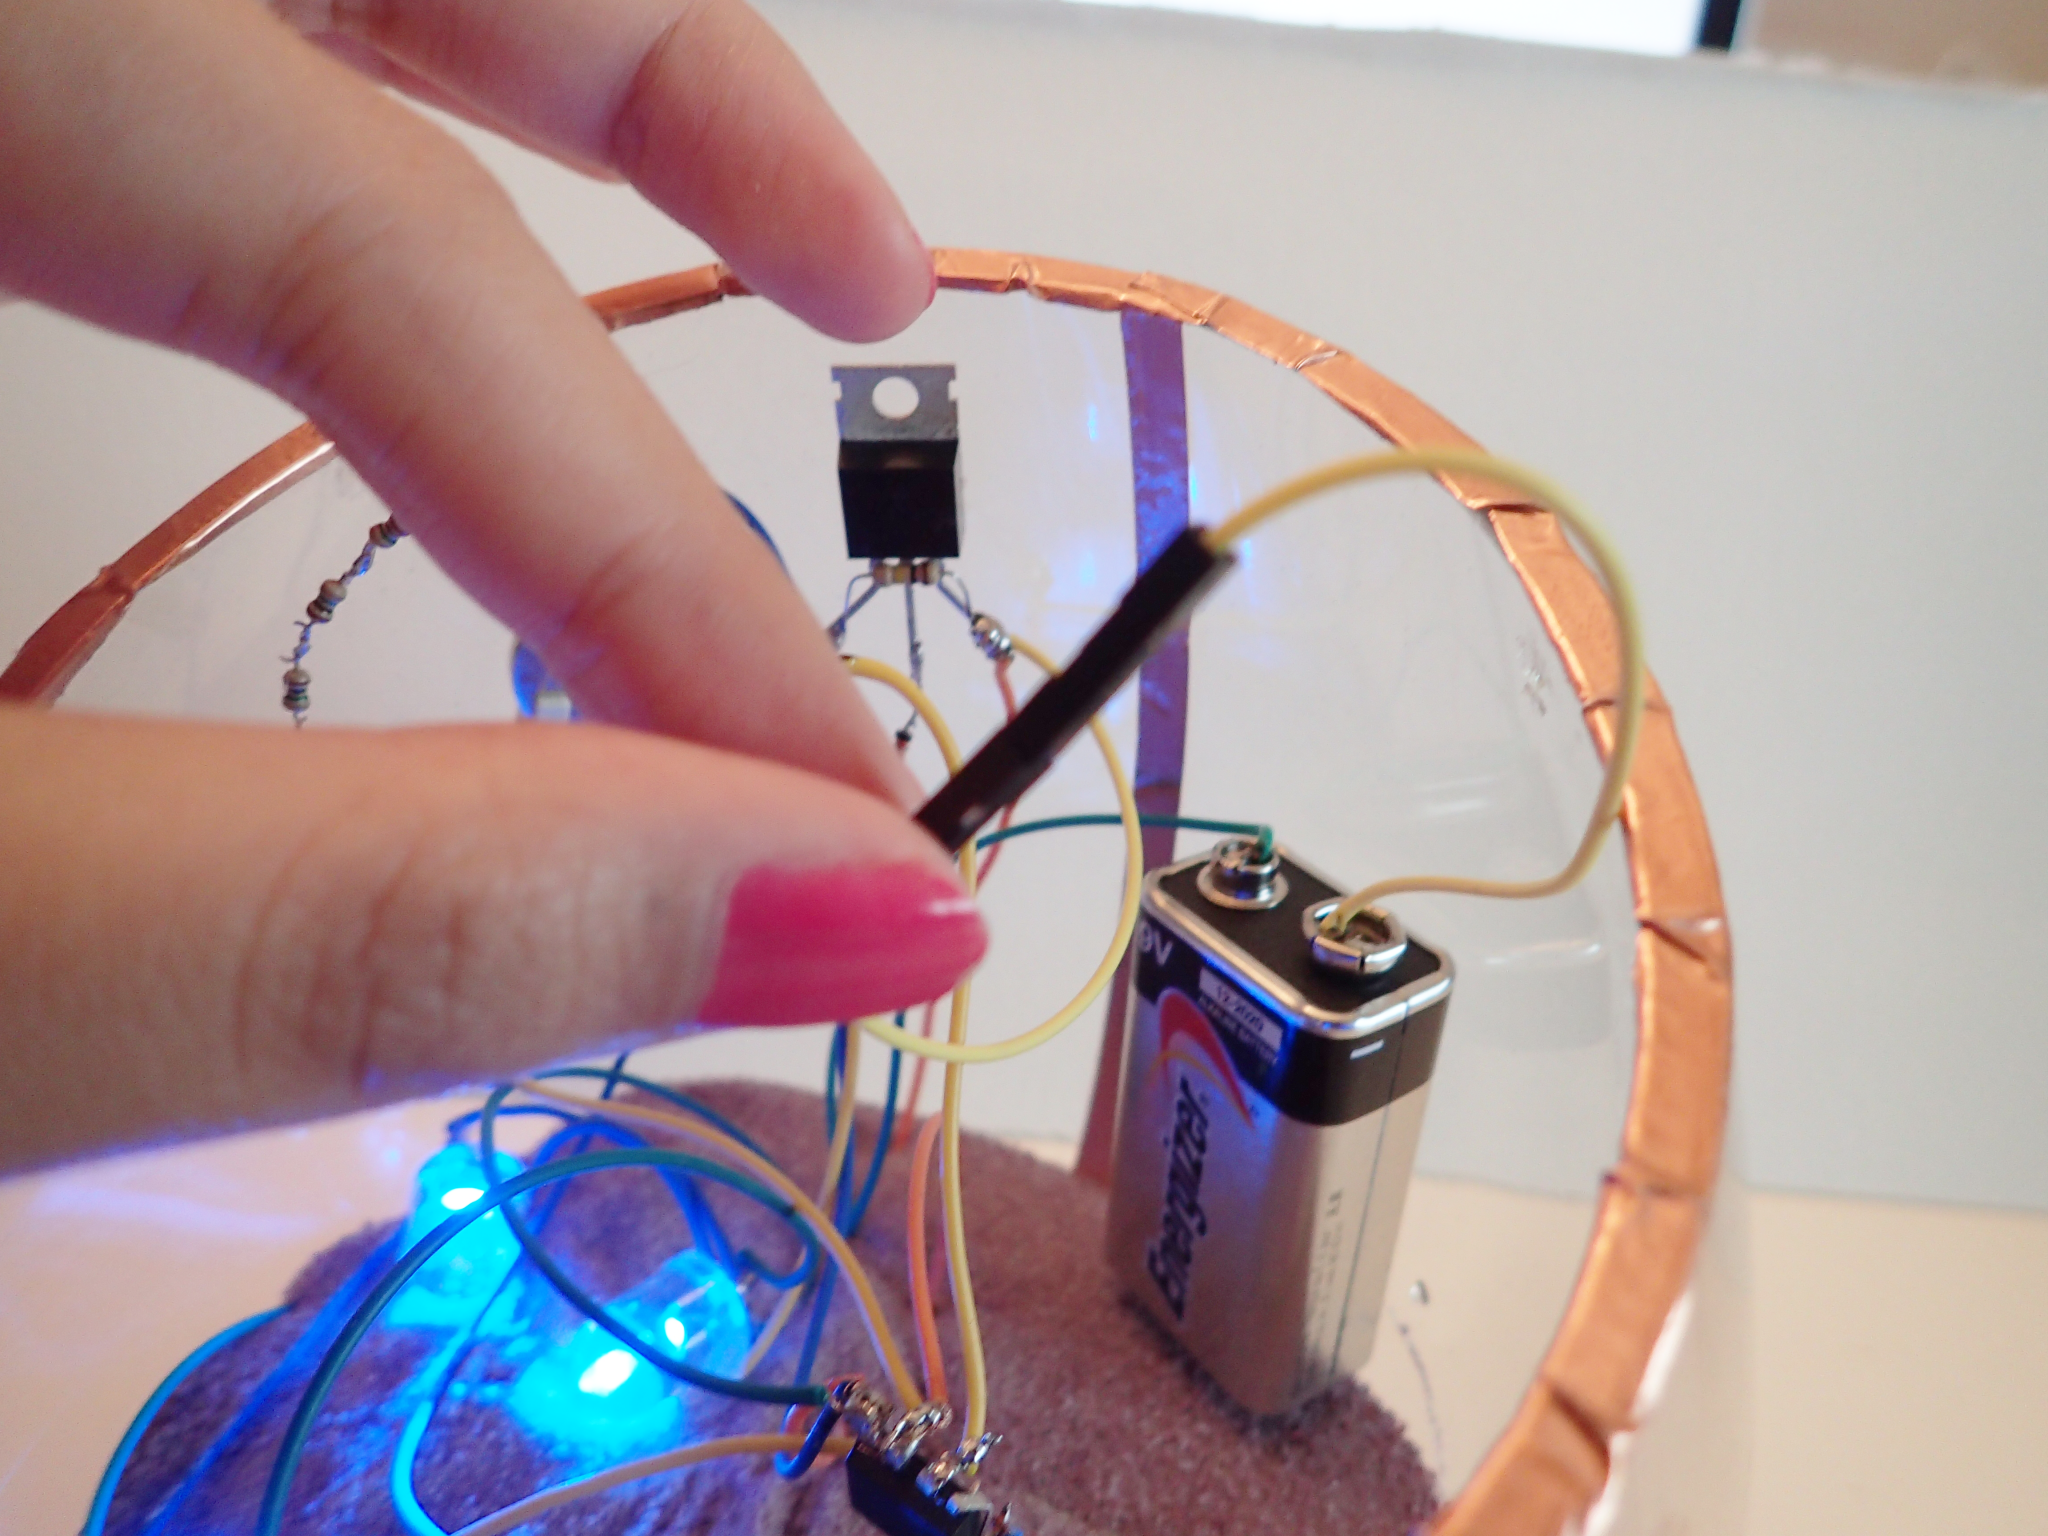
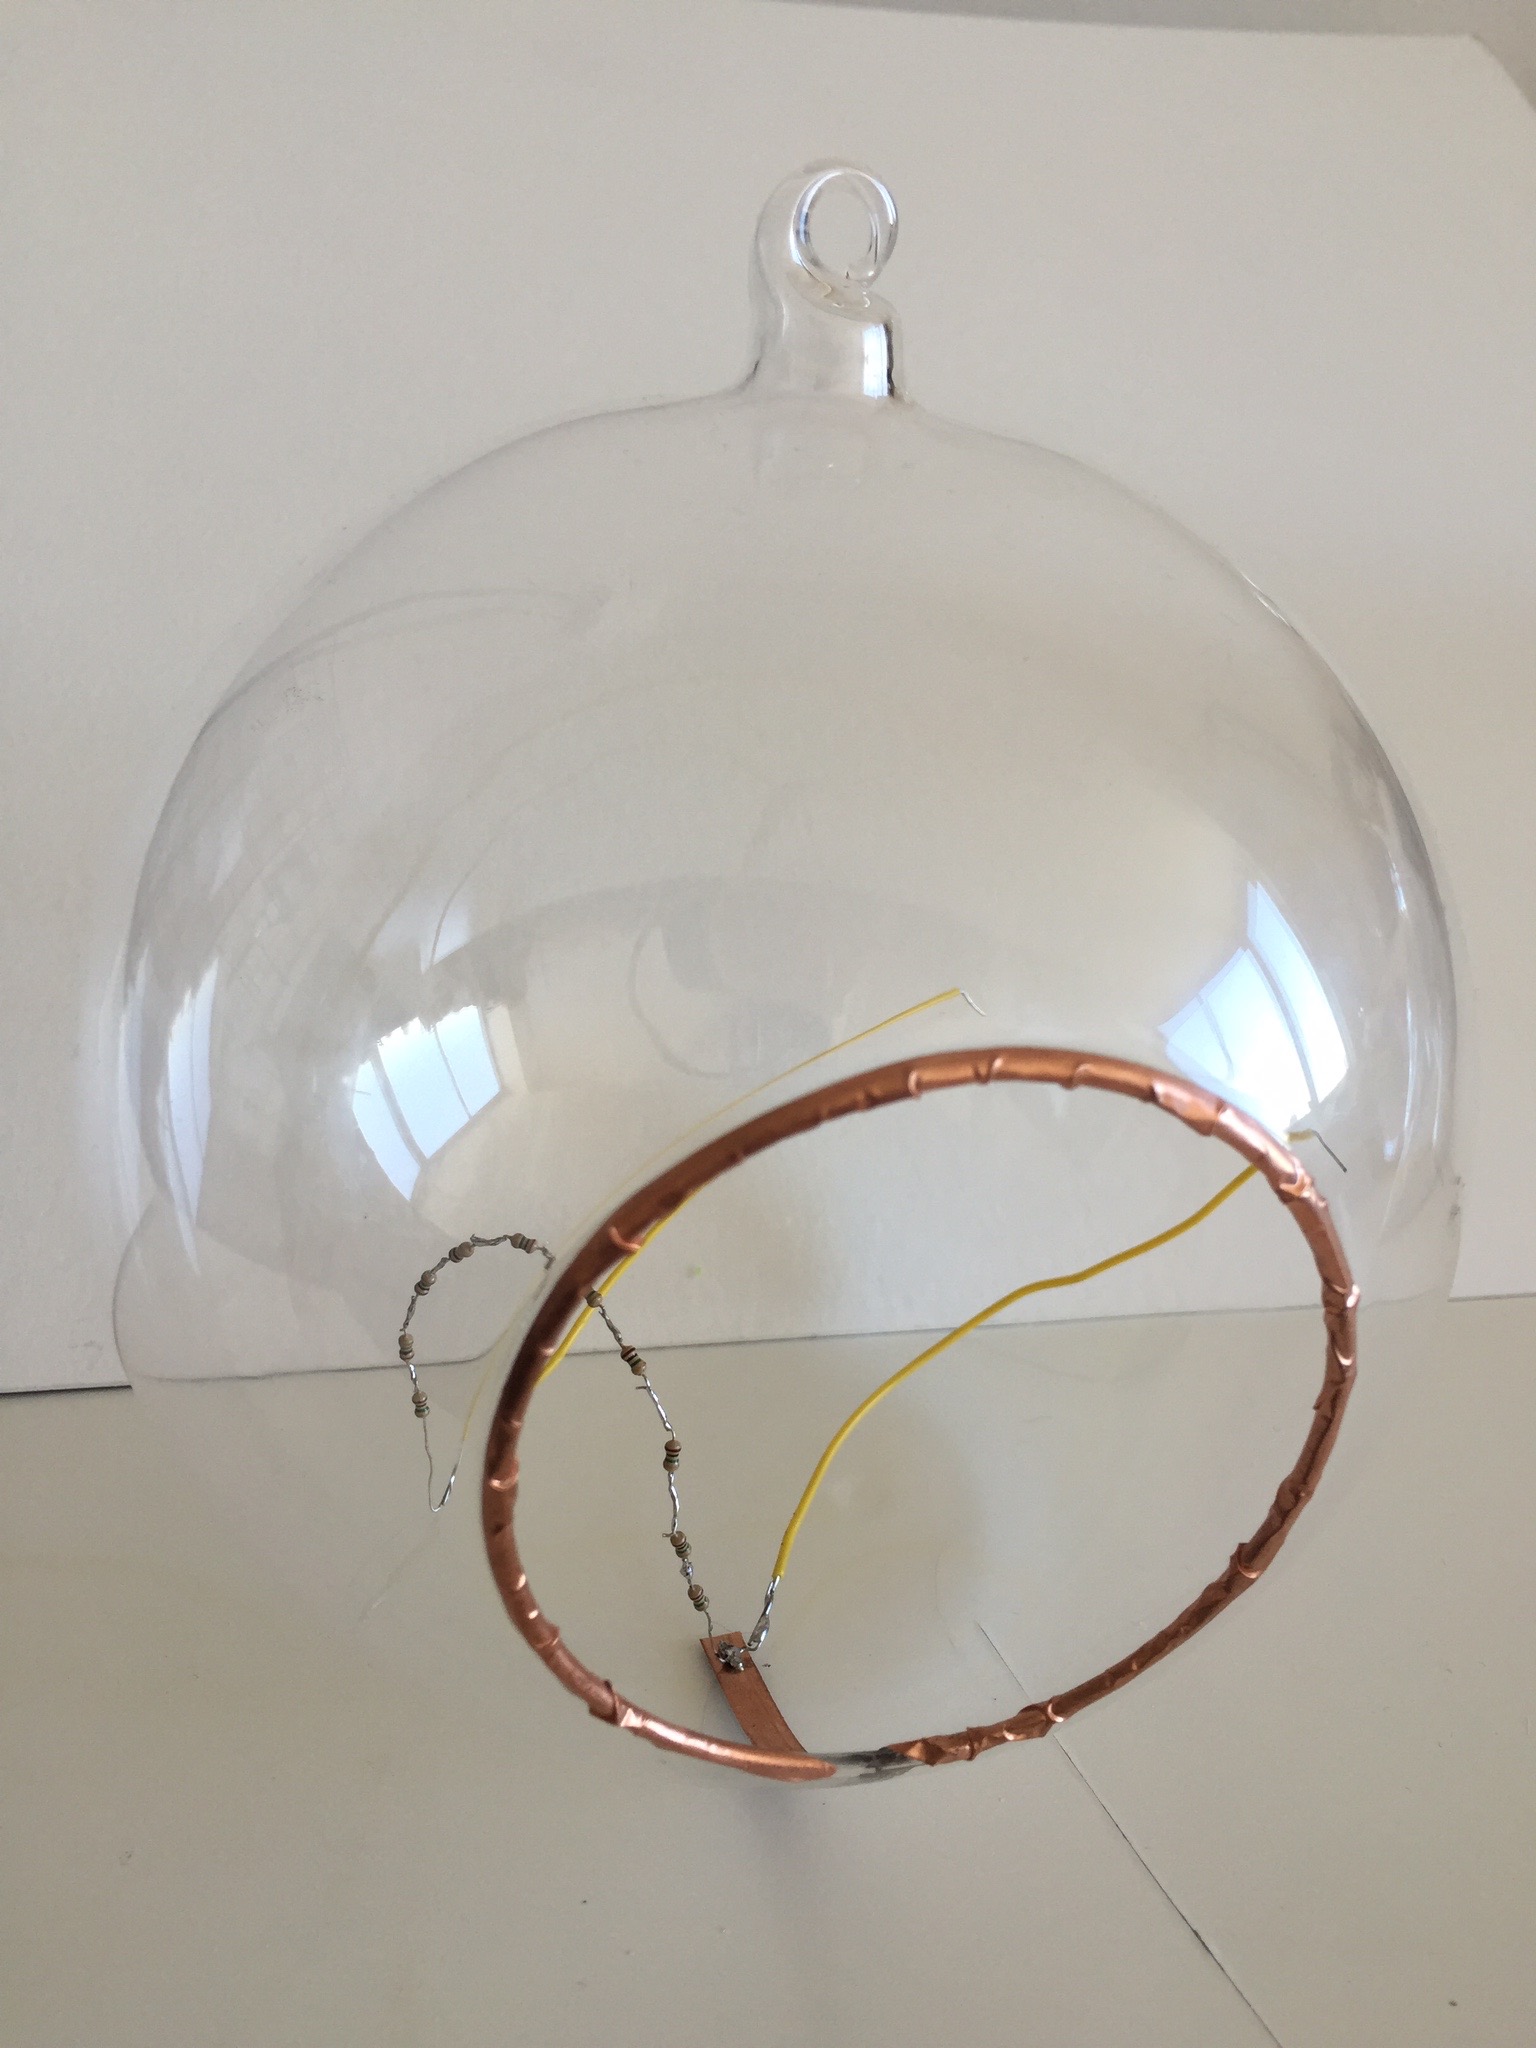
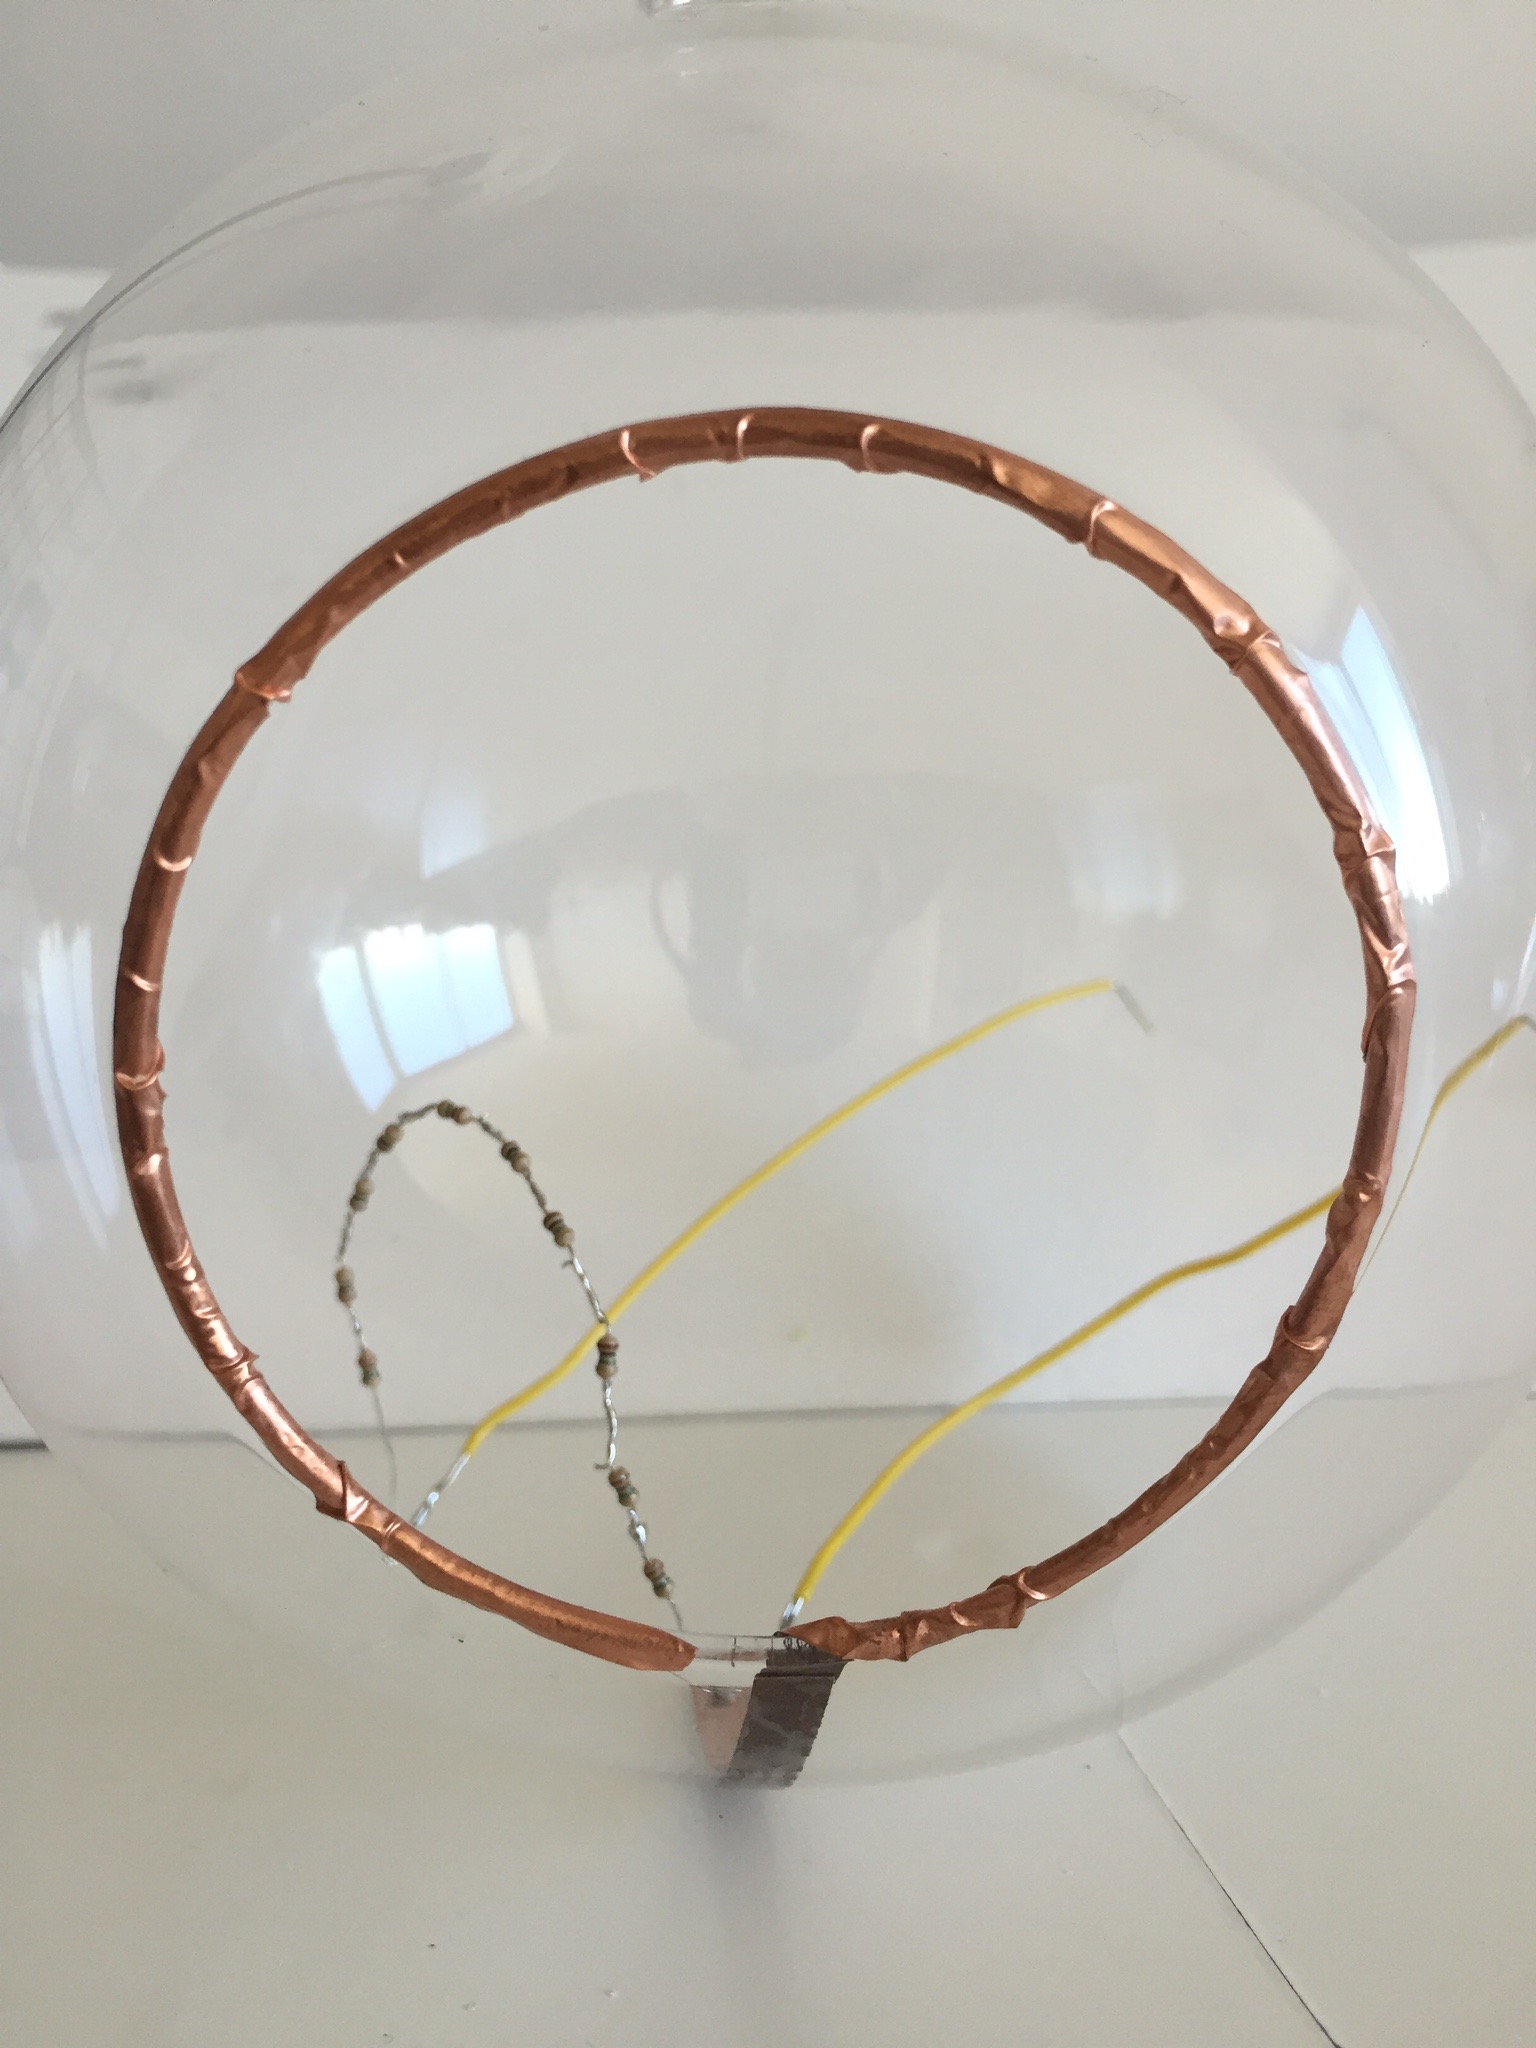
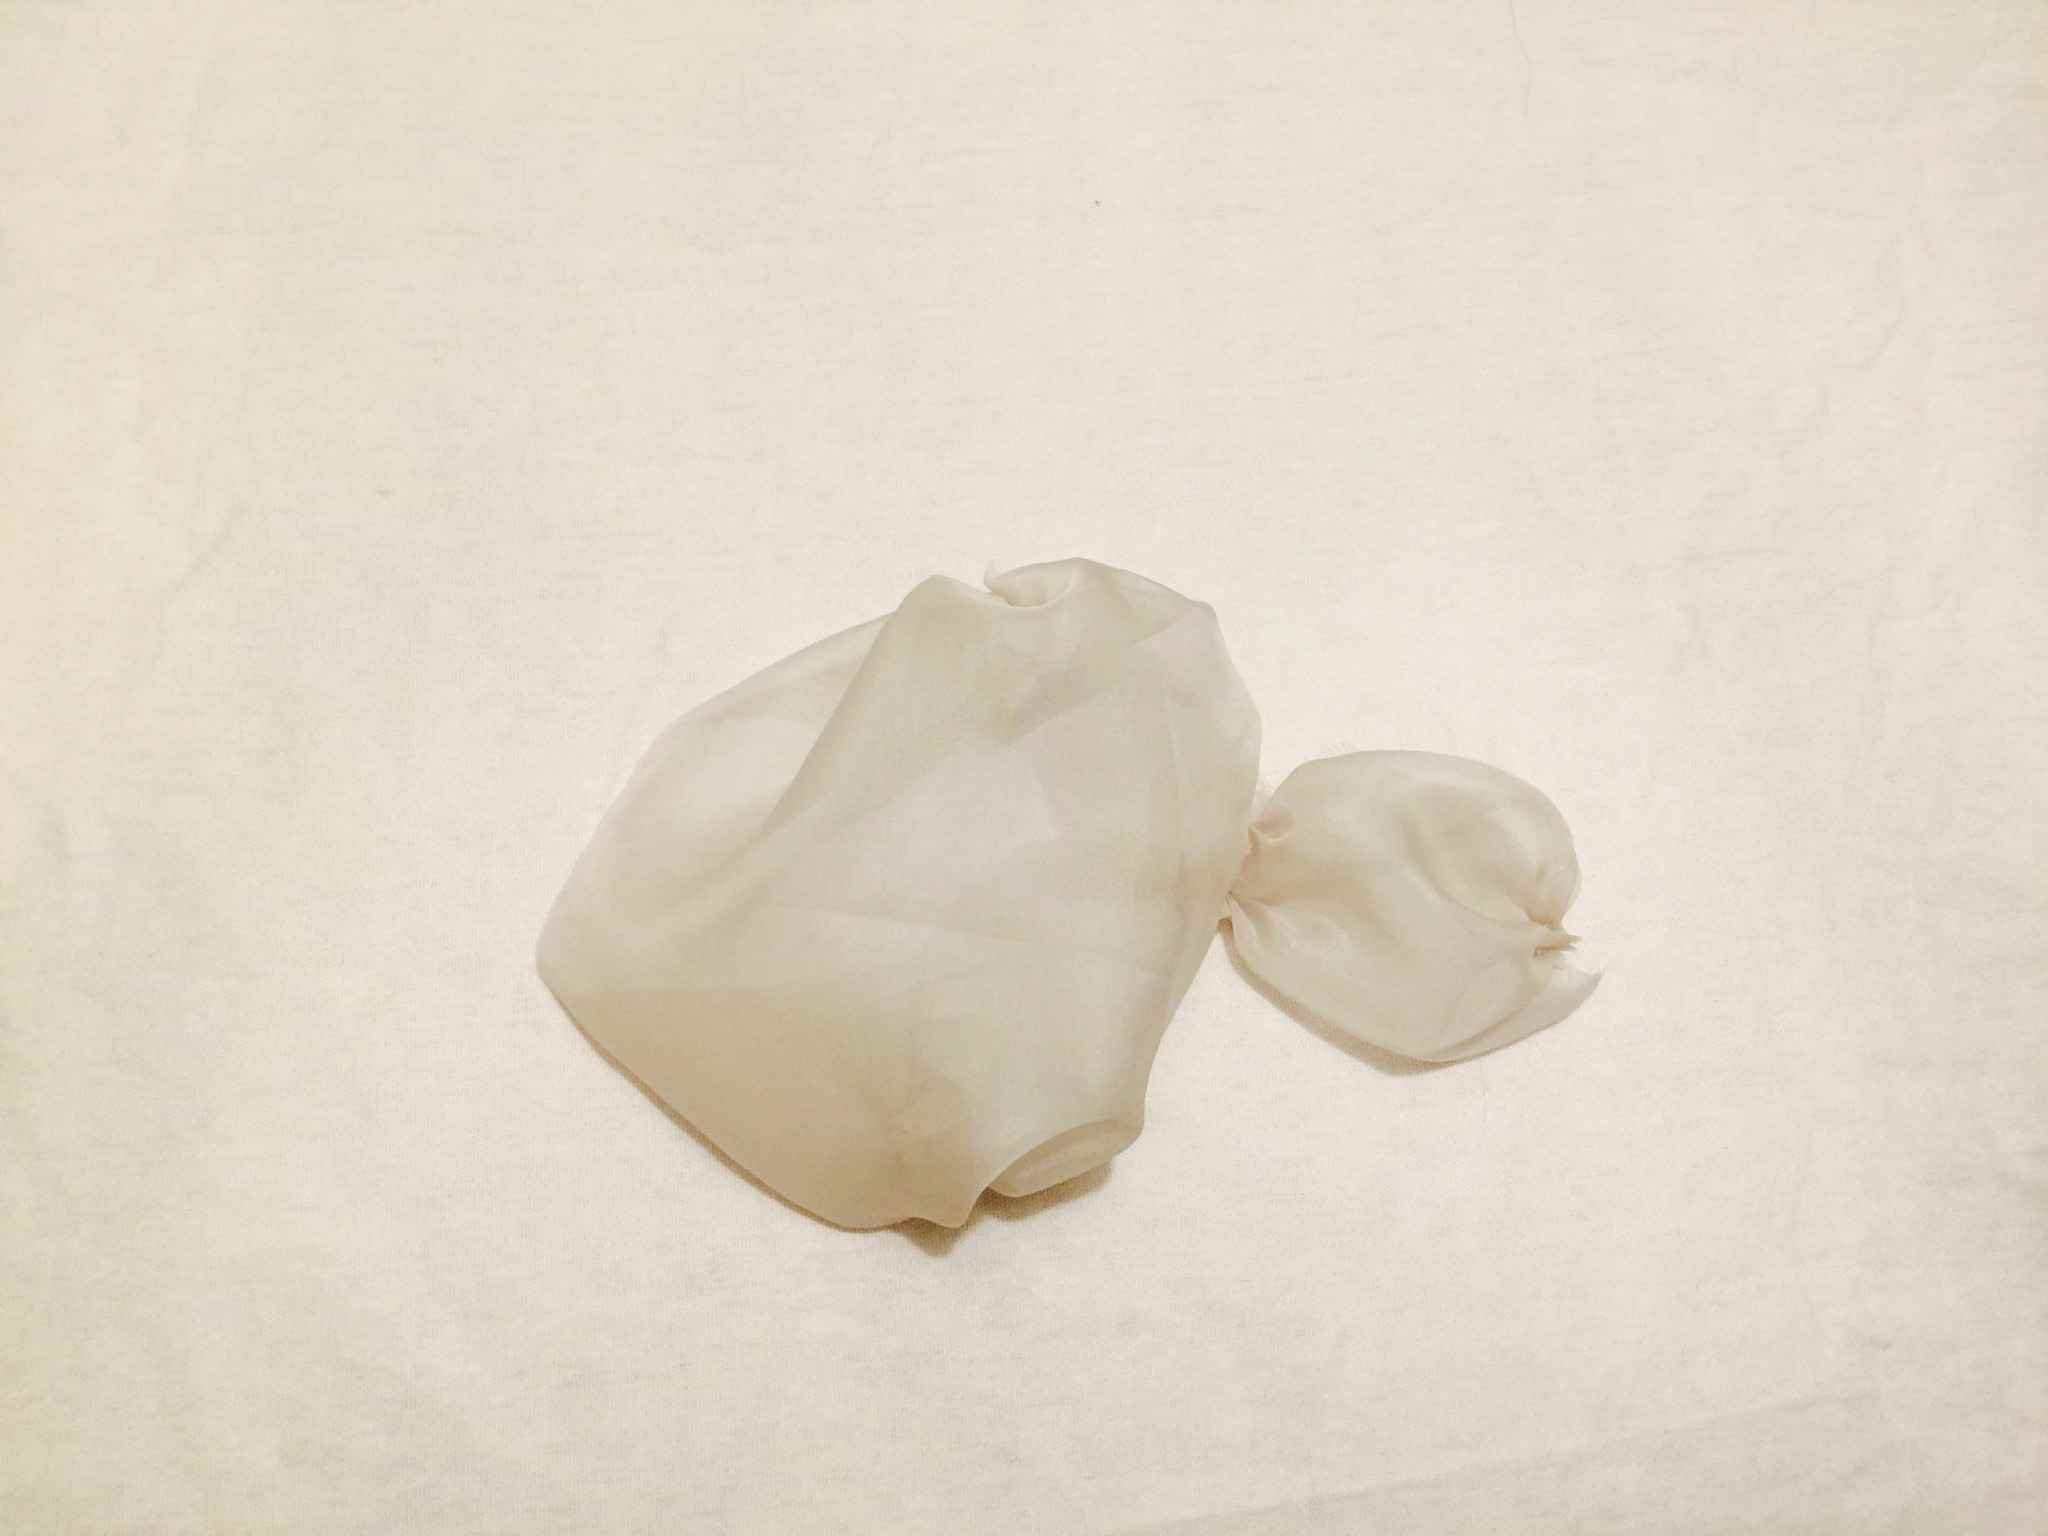
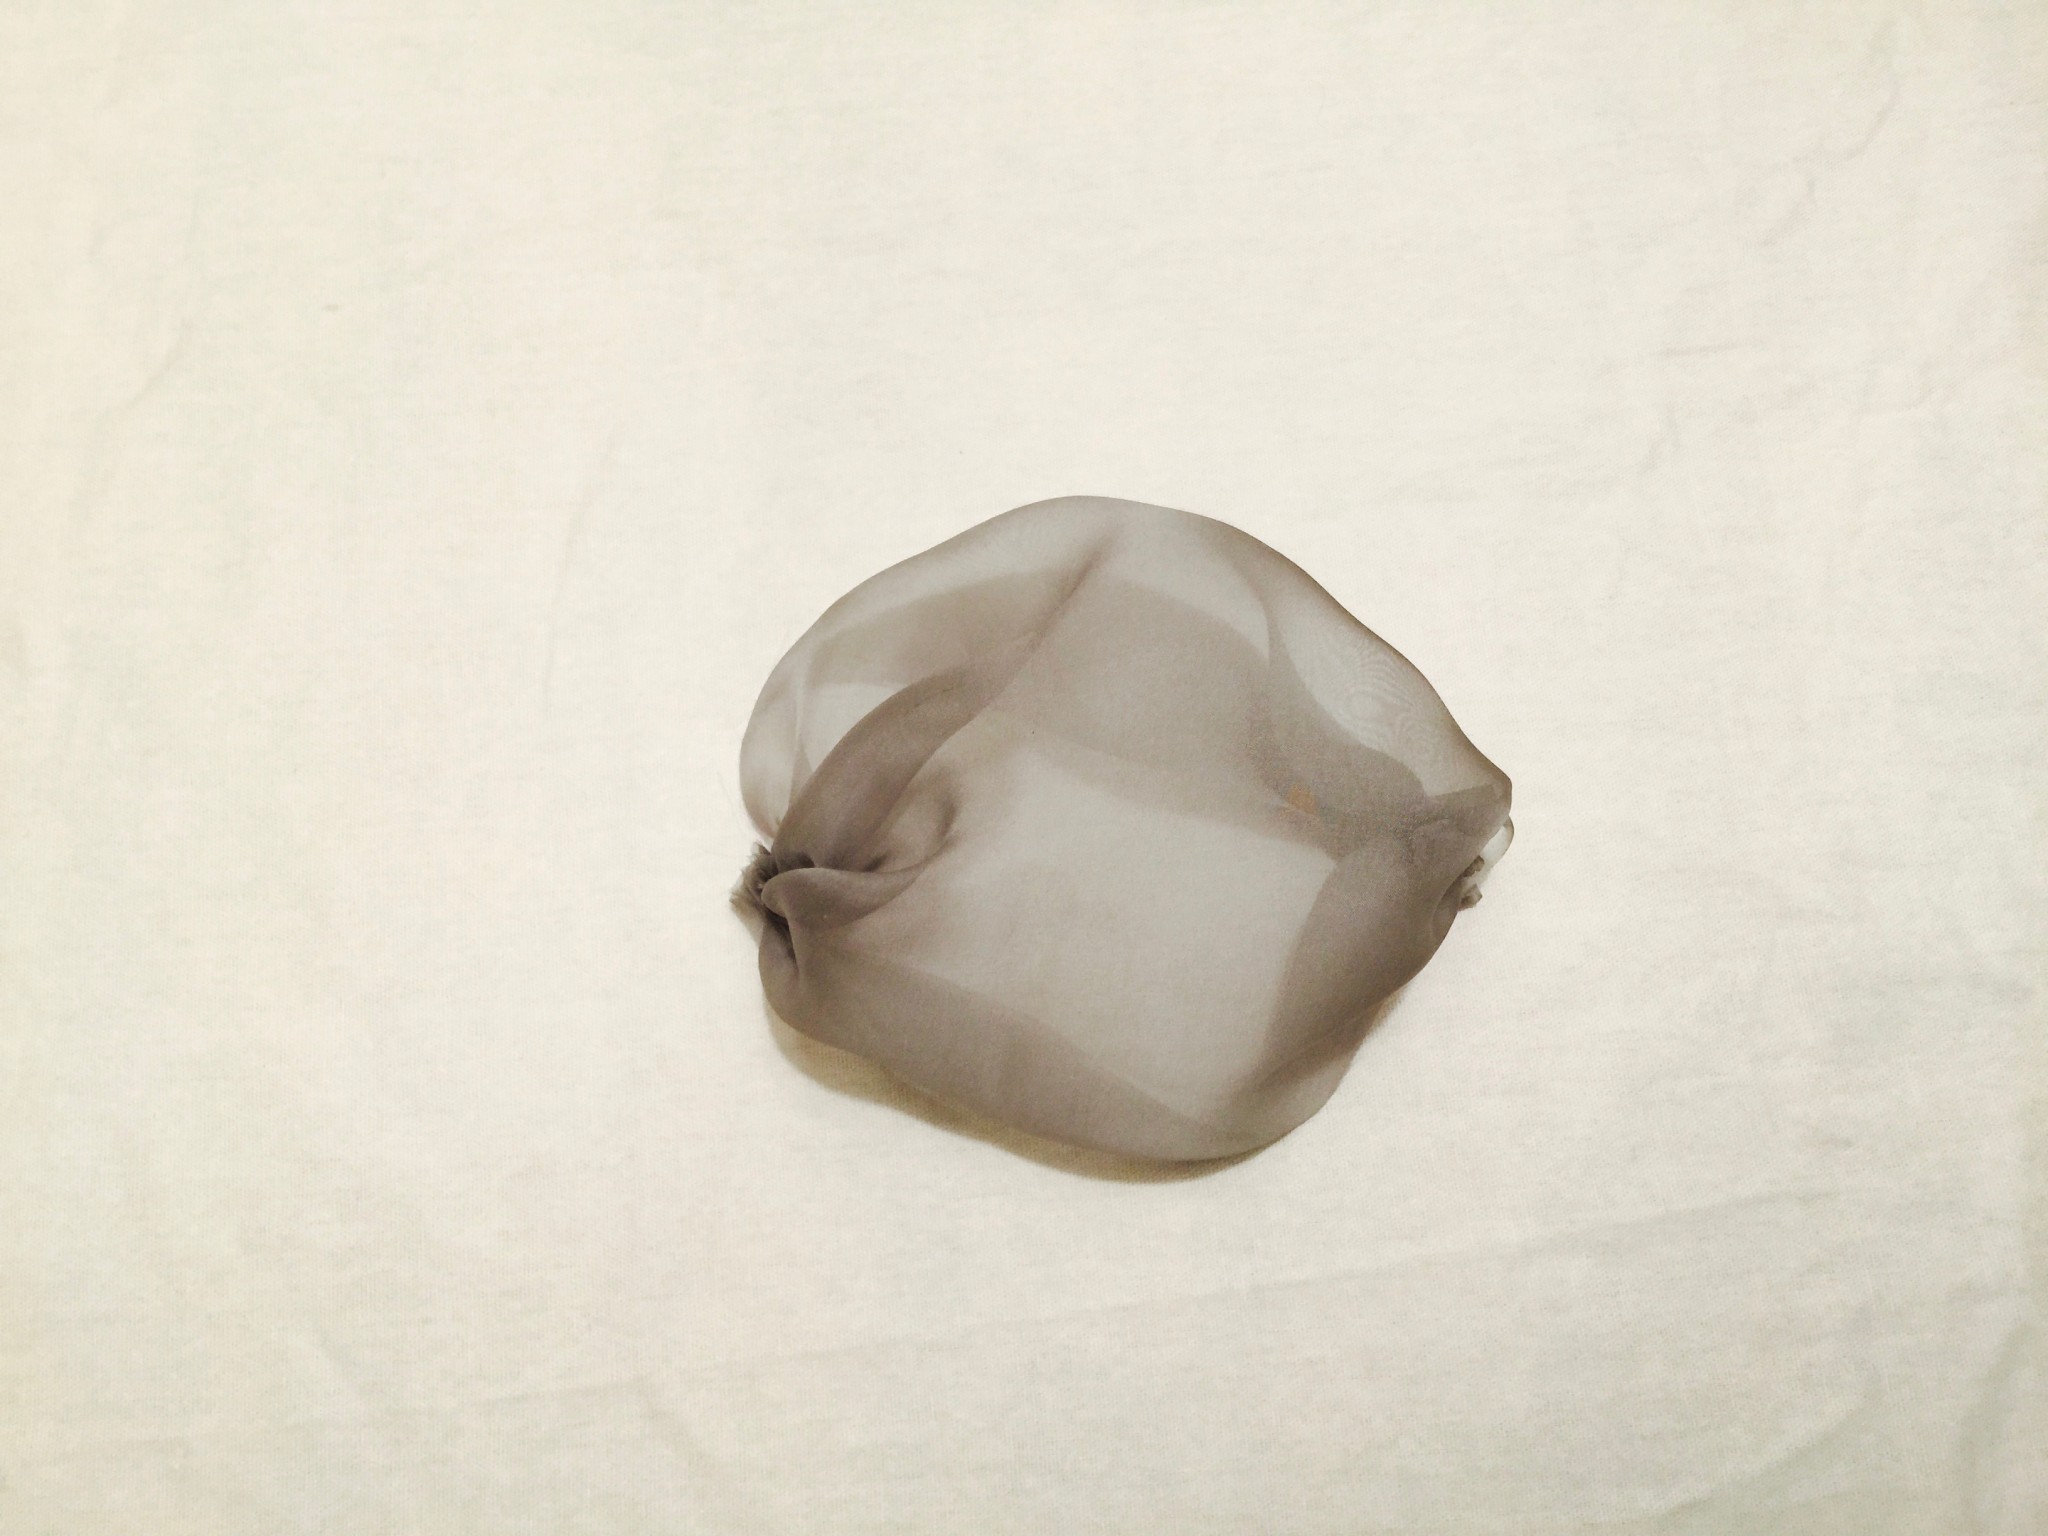
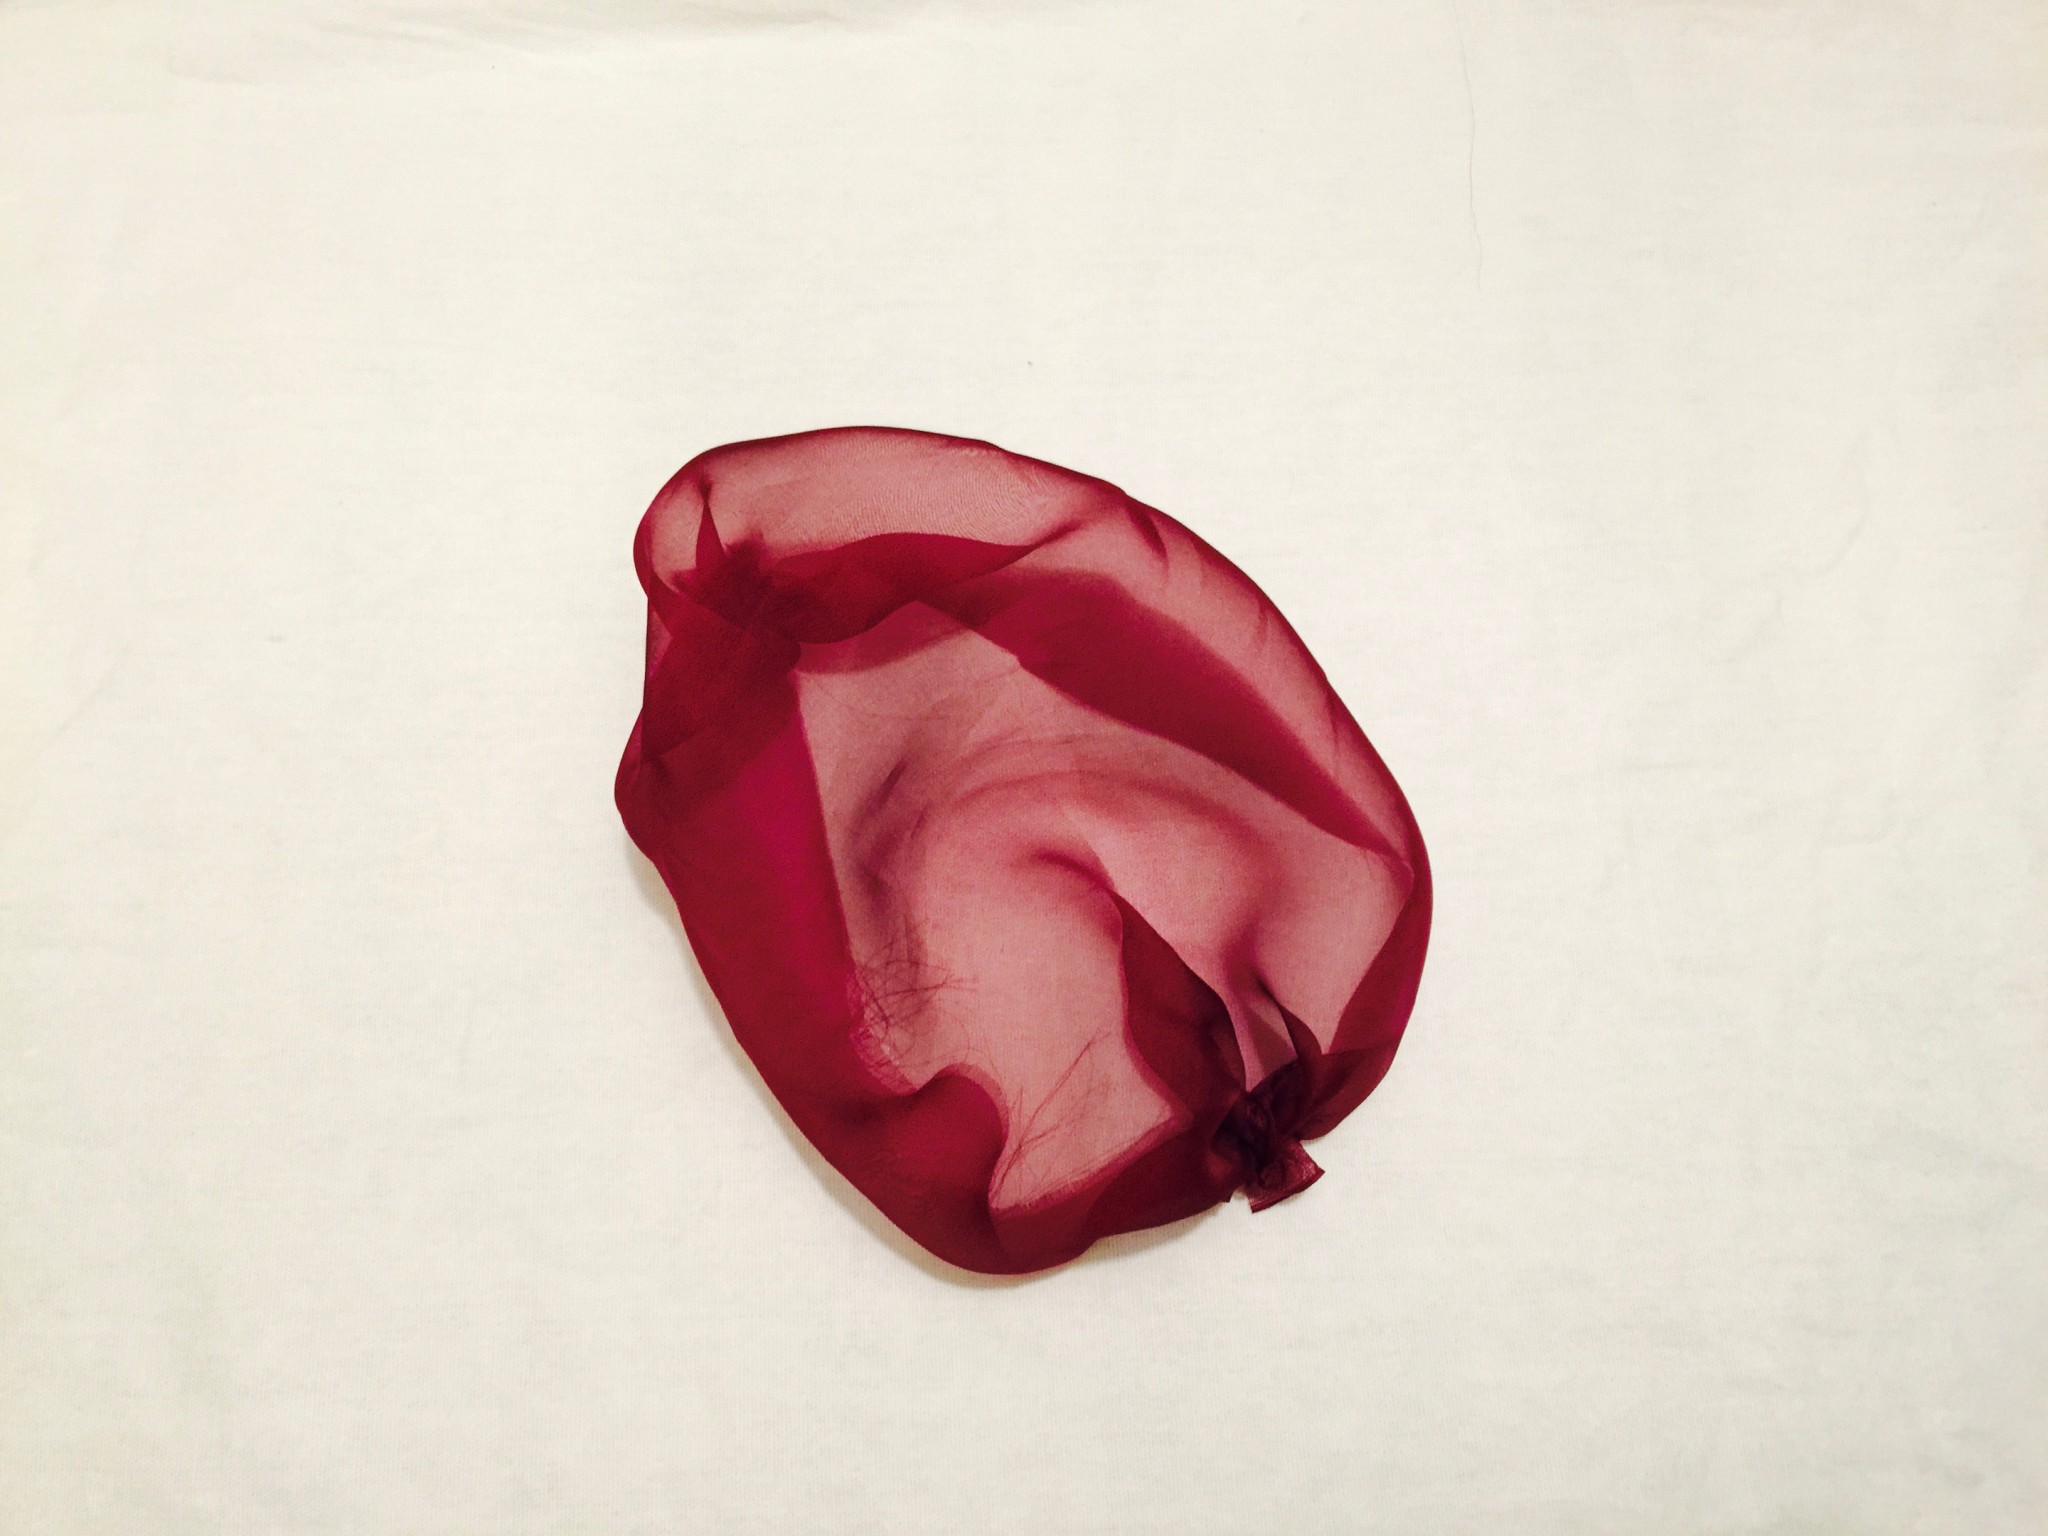
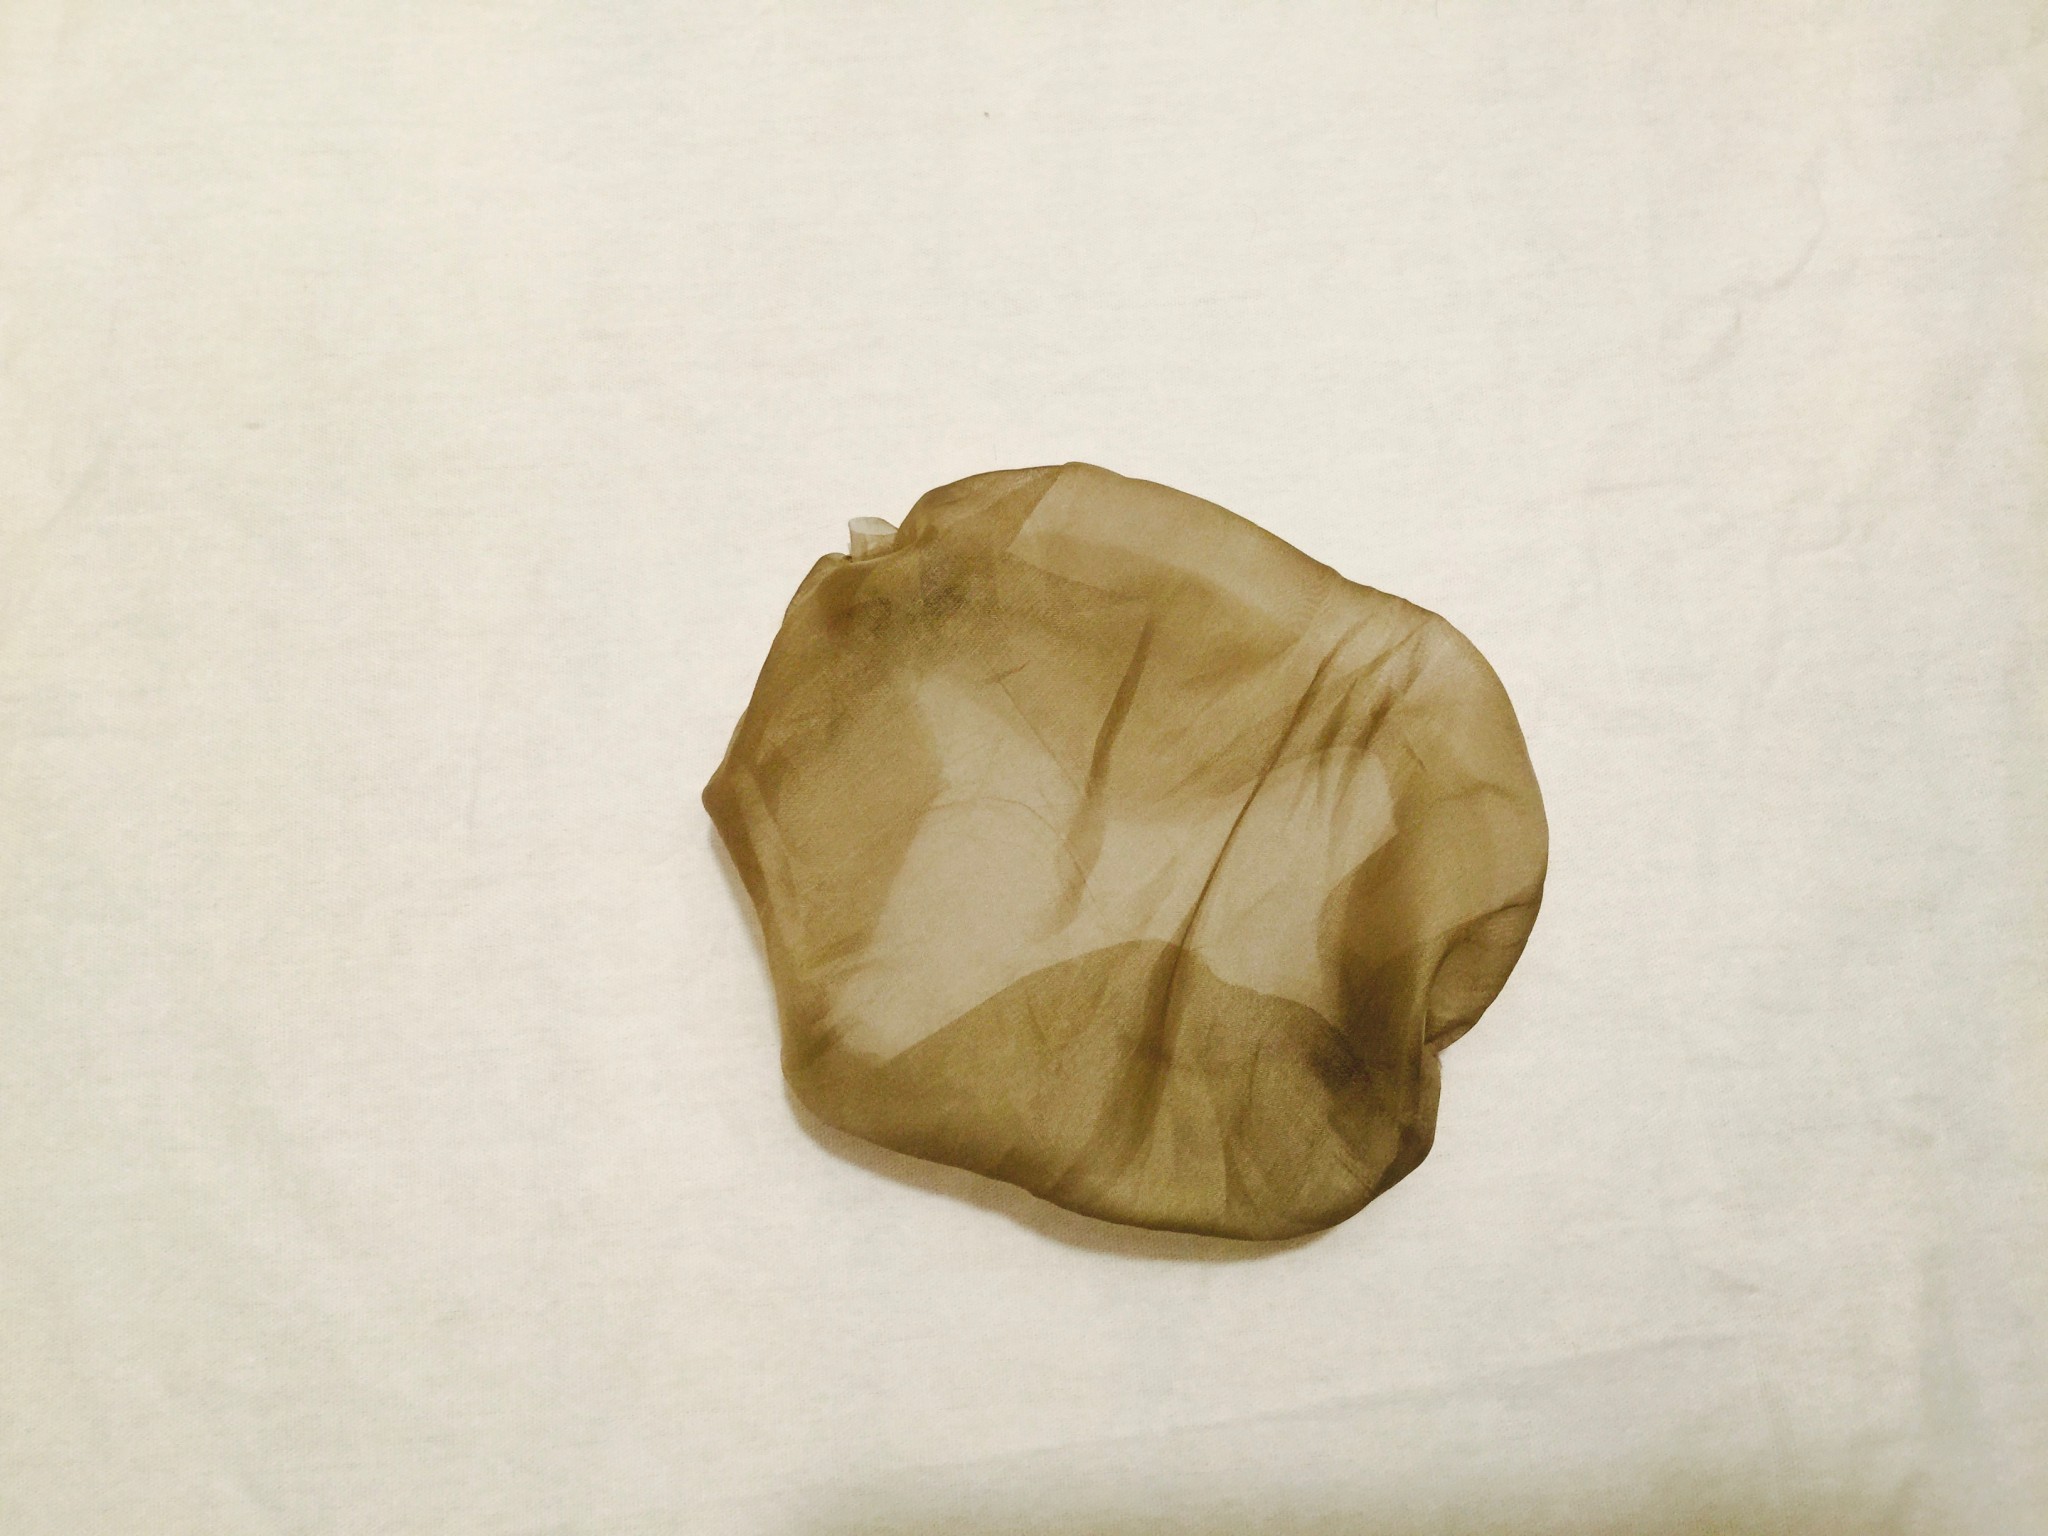
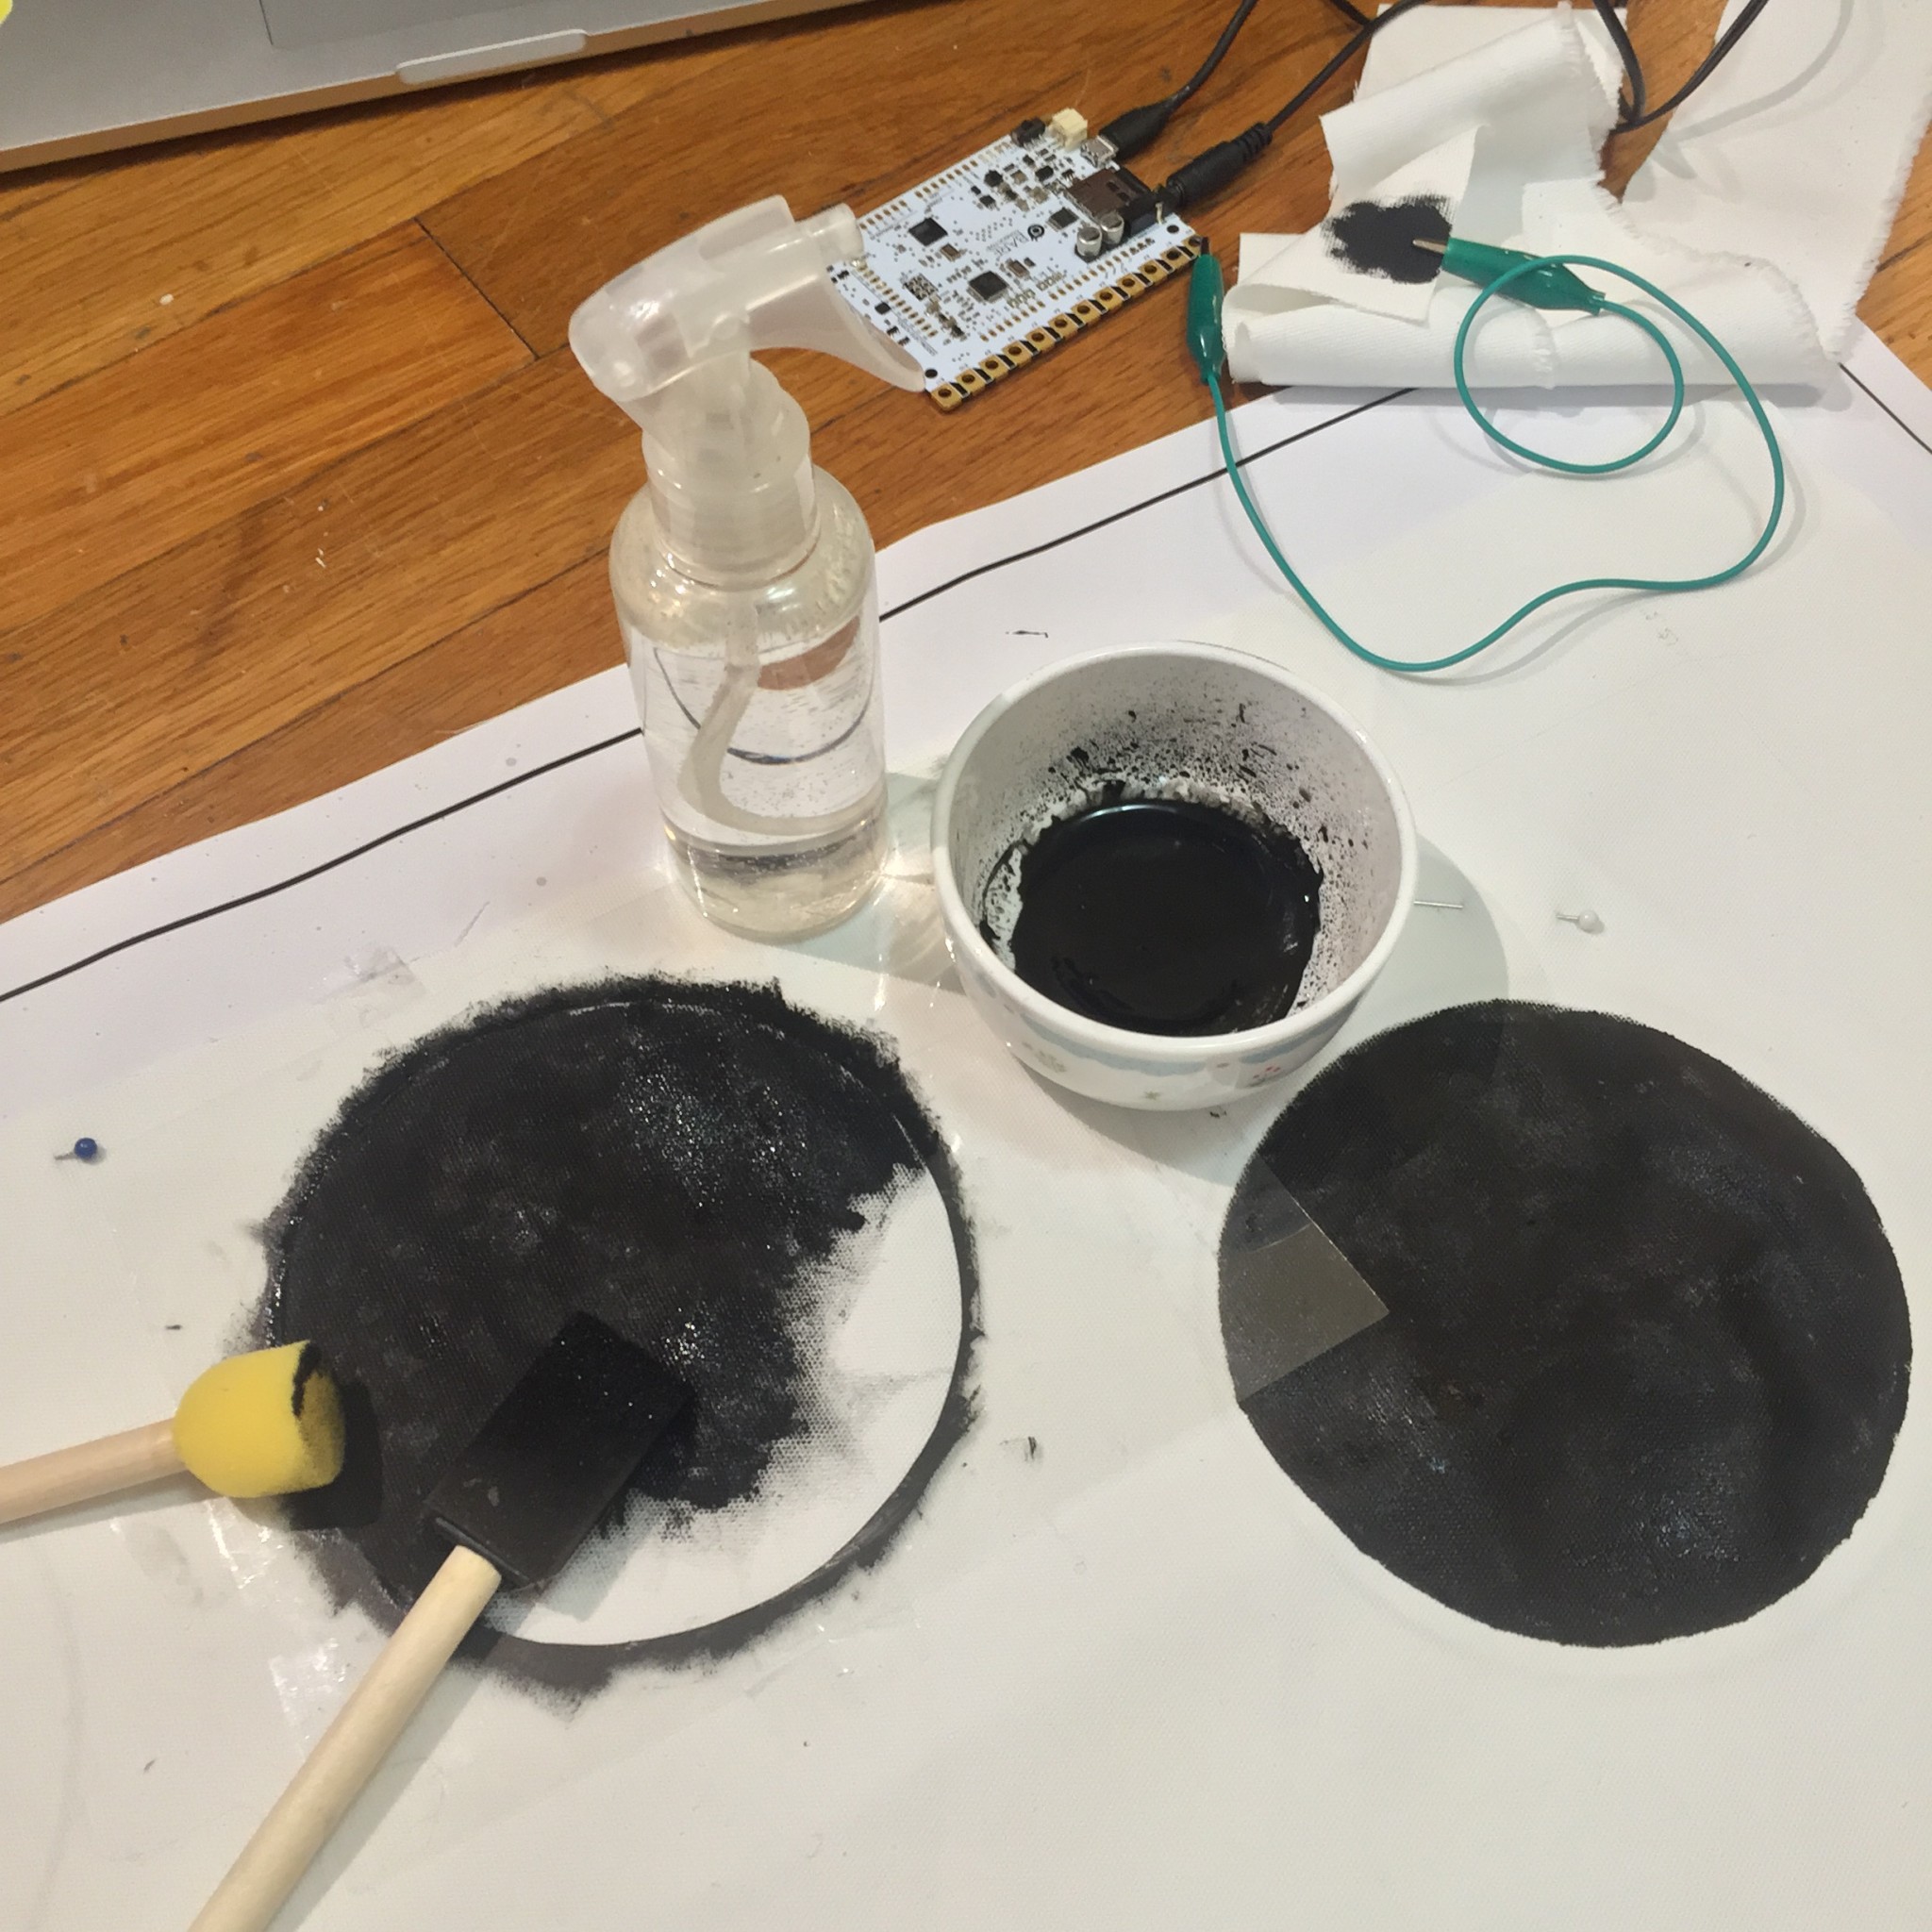
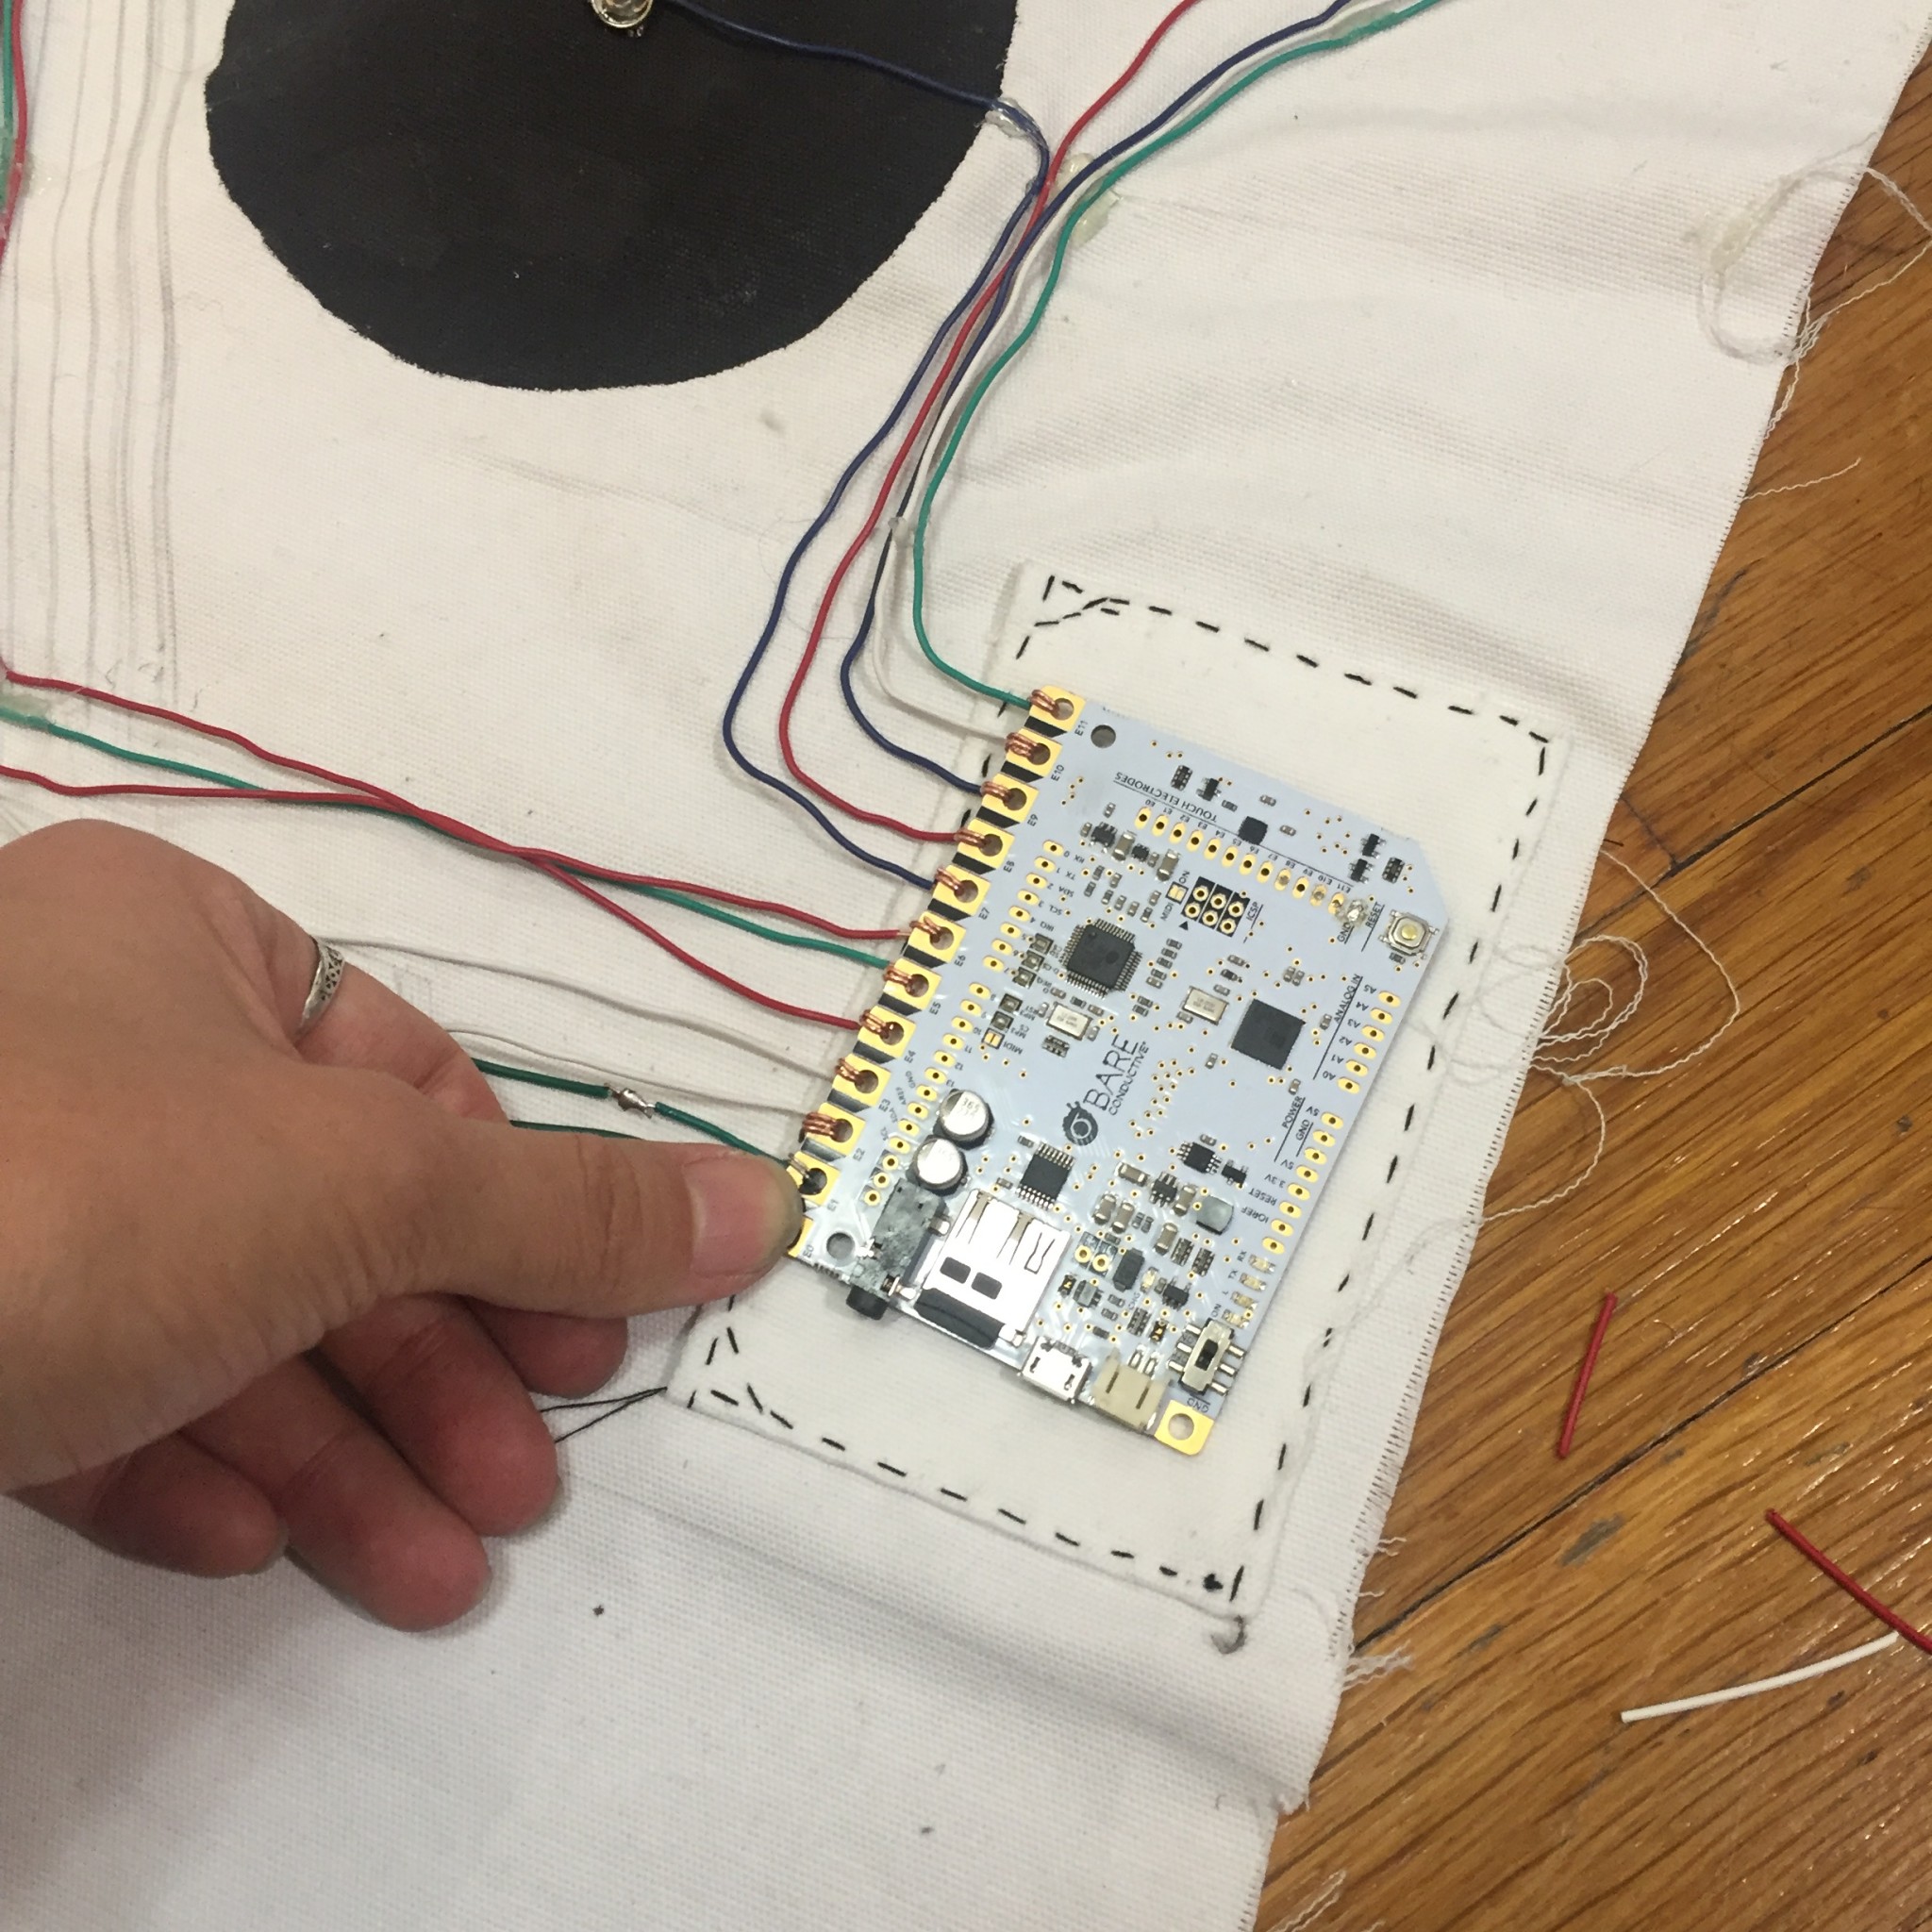
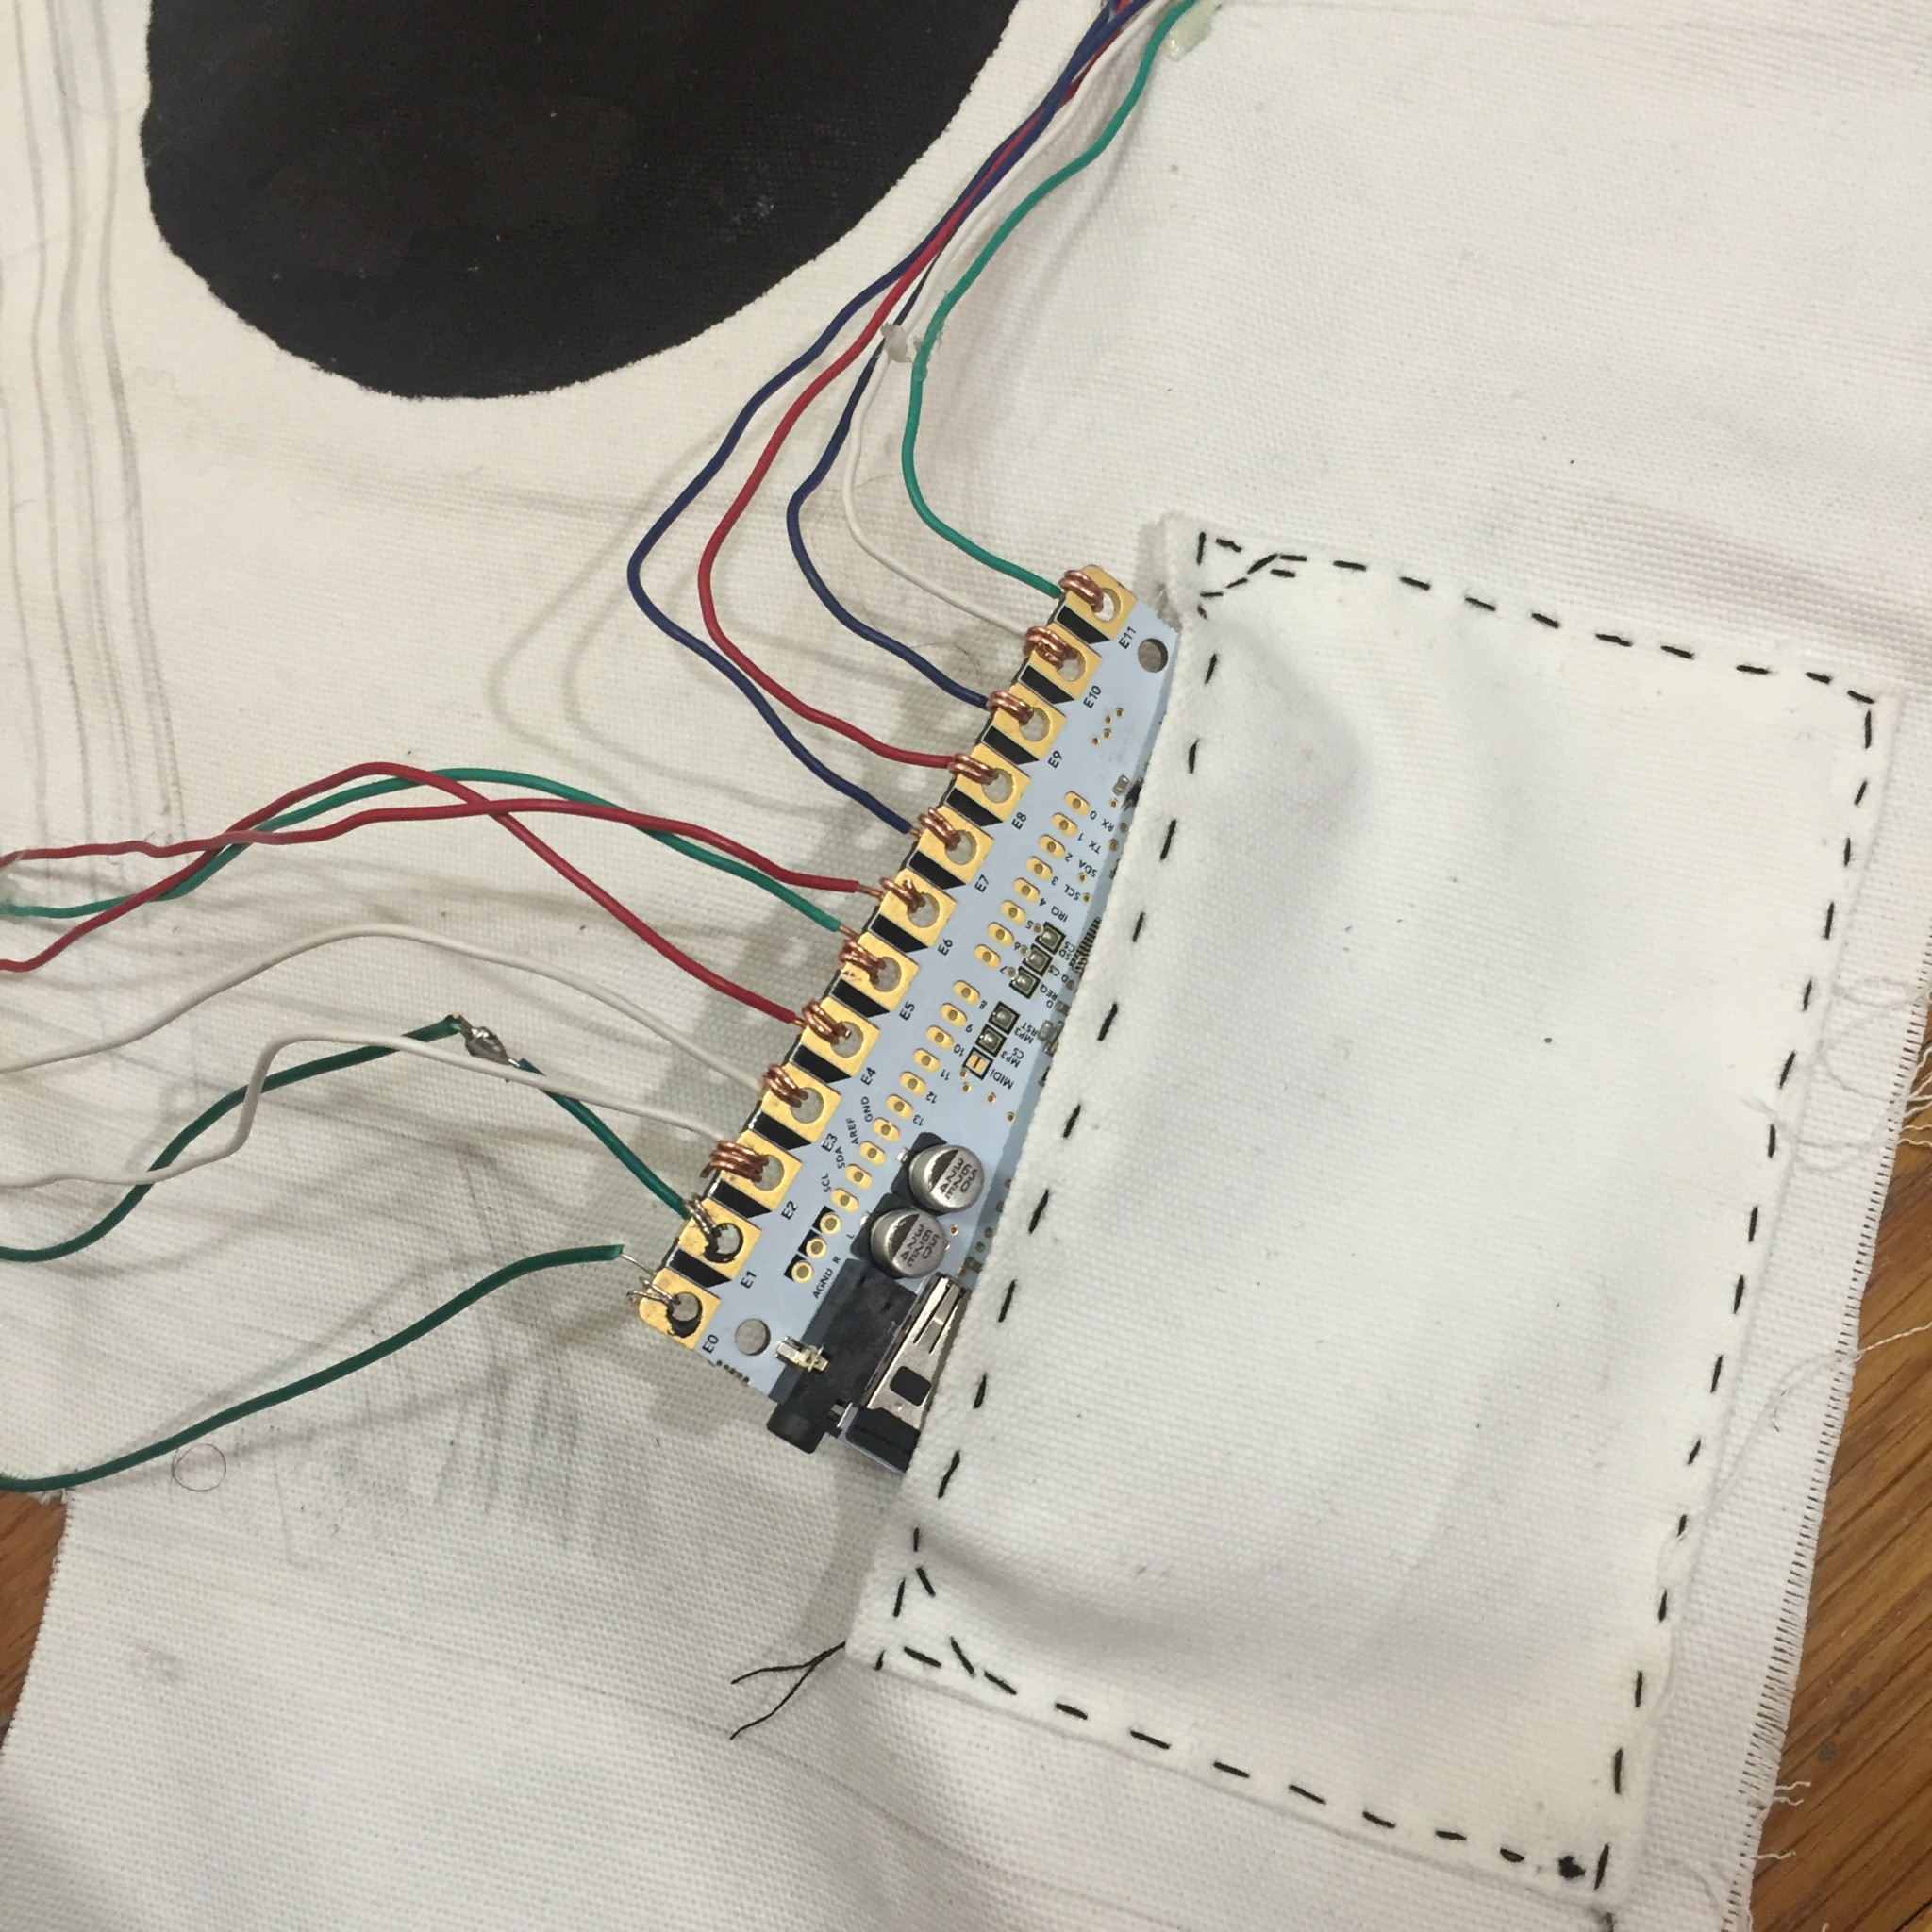
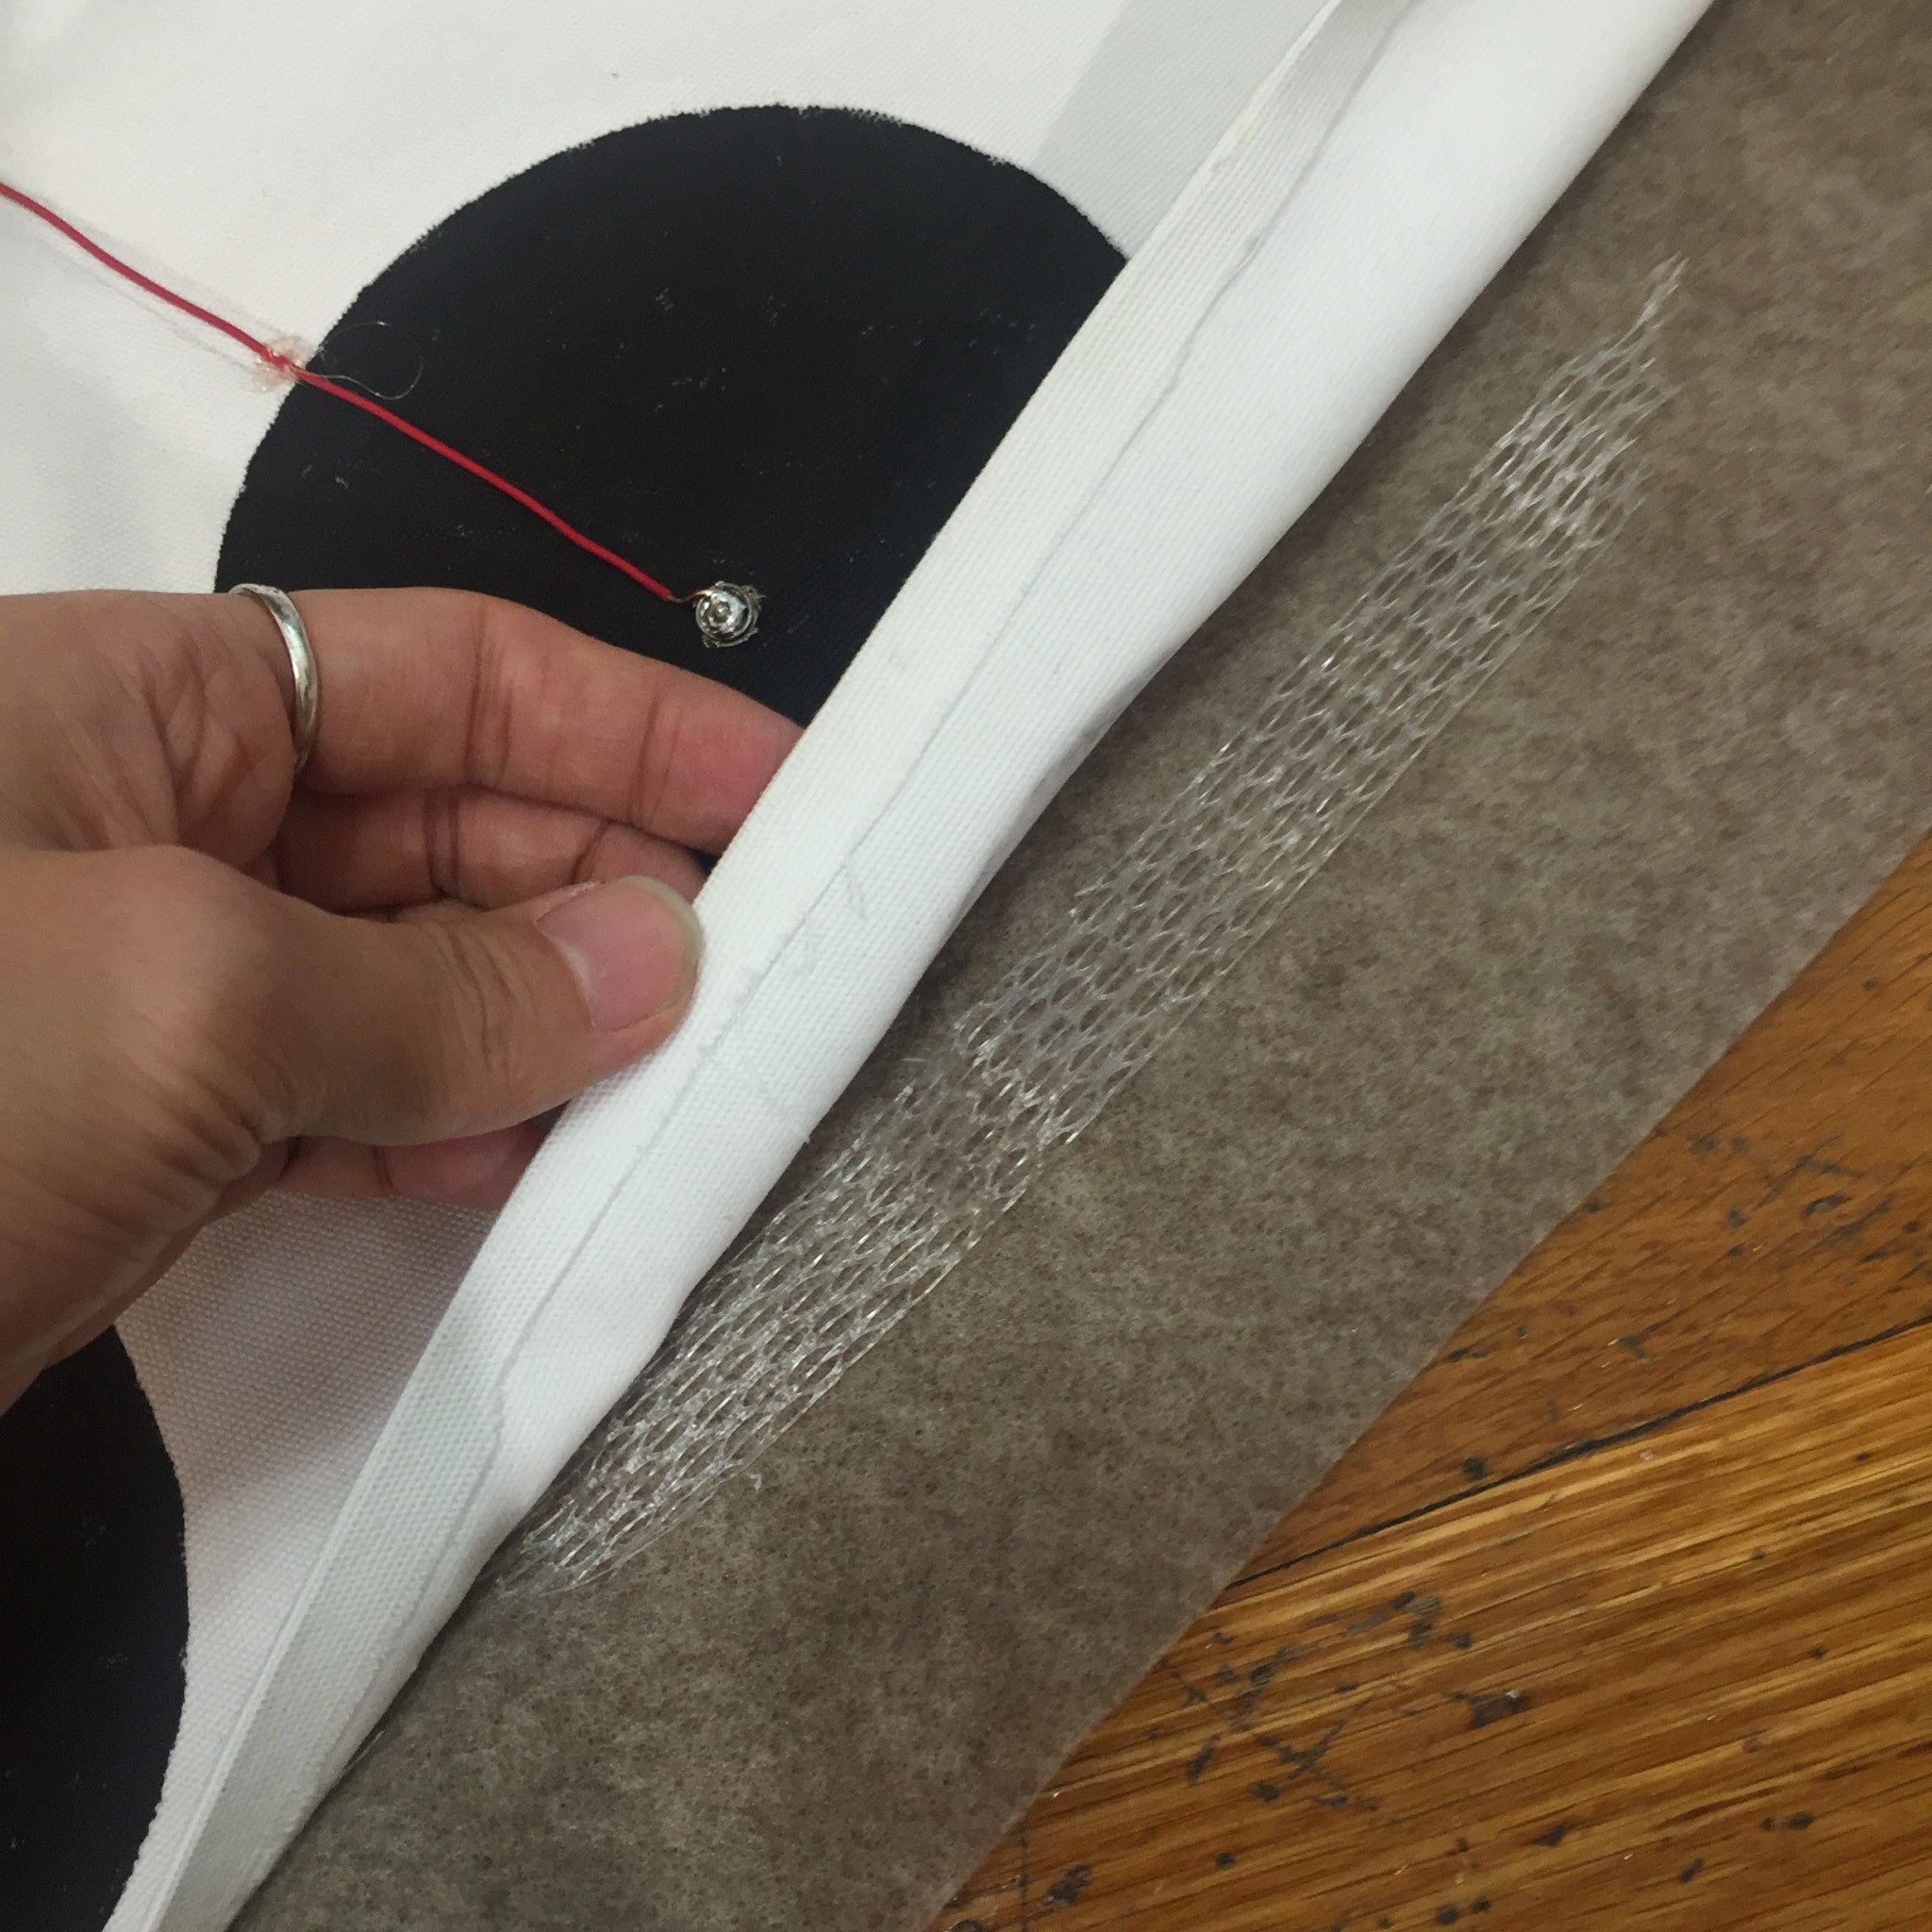
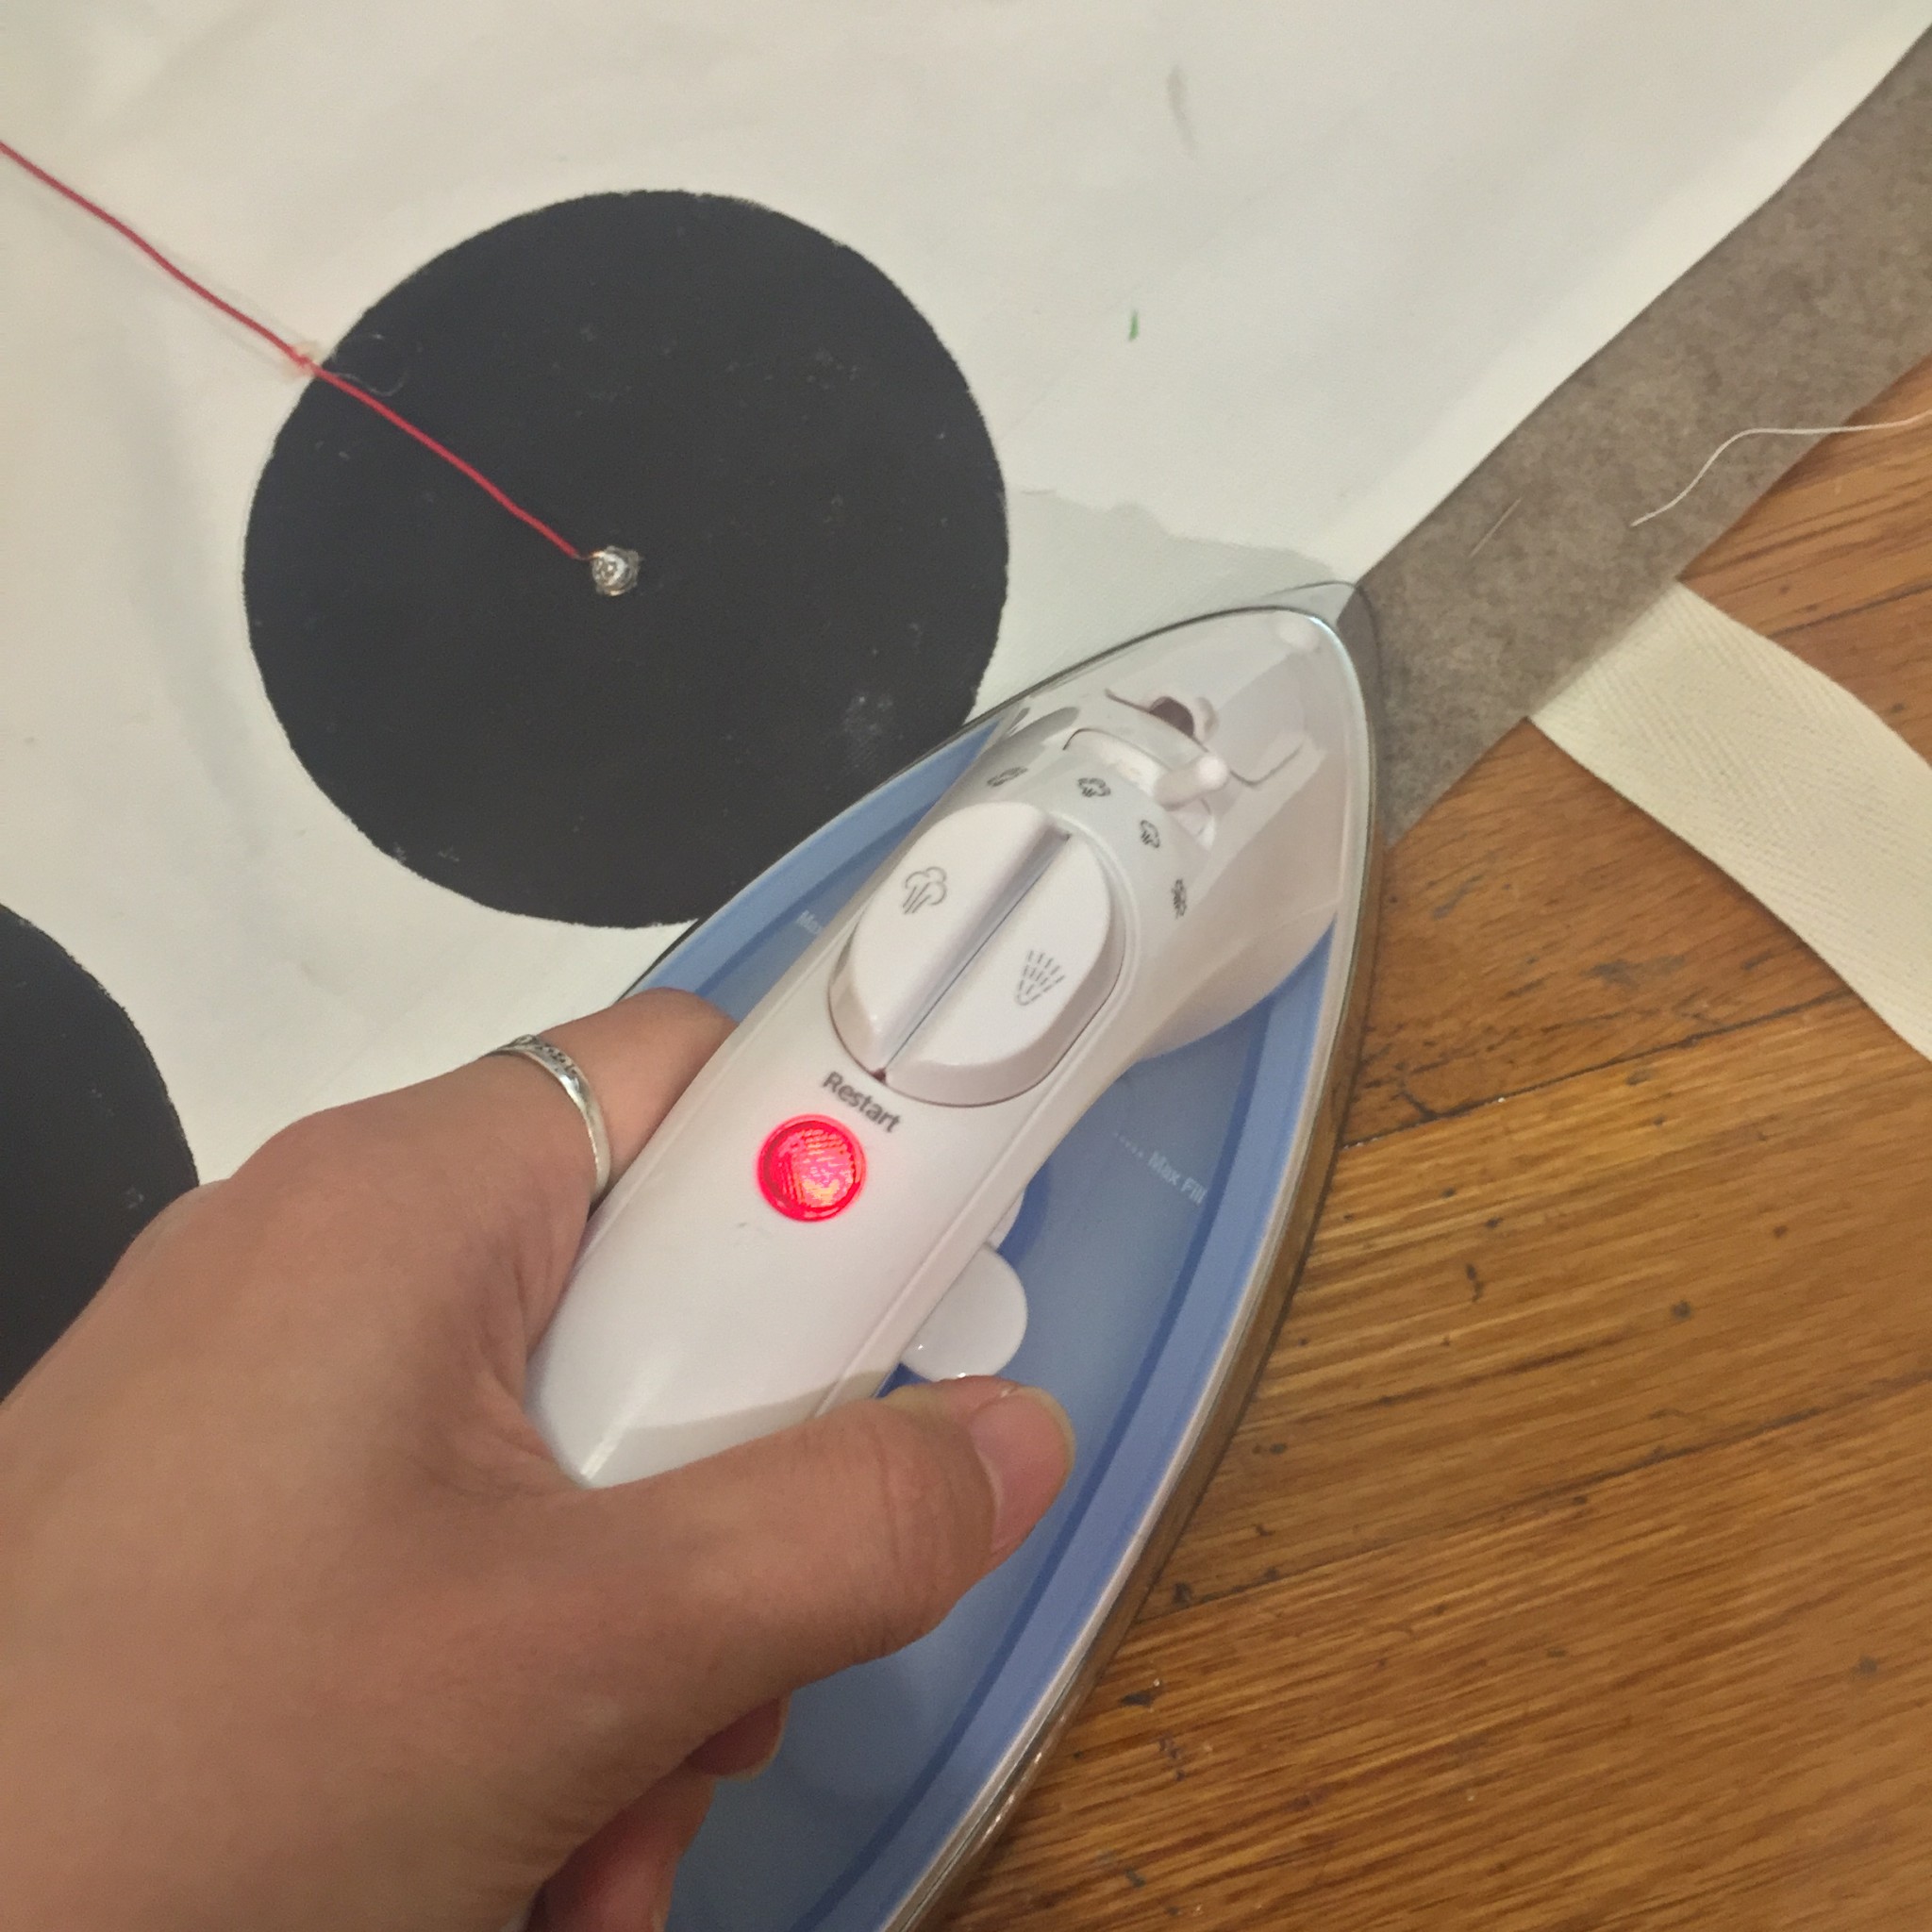
I’m creating an interactive electronic terrarium. Normally, people put plants or plastic plants in terrariums to create a small concentrated nature environment. I think the interesting point of a terrarium is the glass vase isolates the ordinary objects from the real world and frames the objects for people to take a close look. My idea is to include electronic components into a terrarium for people to appreciate the aesthetic aspects of technology. Also, I also want to express technology is alive in another way.
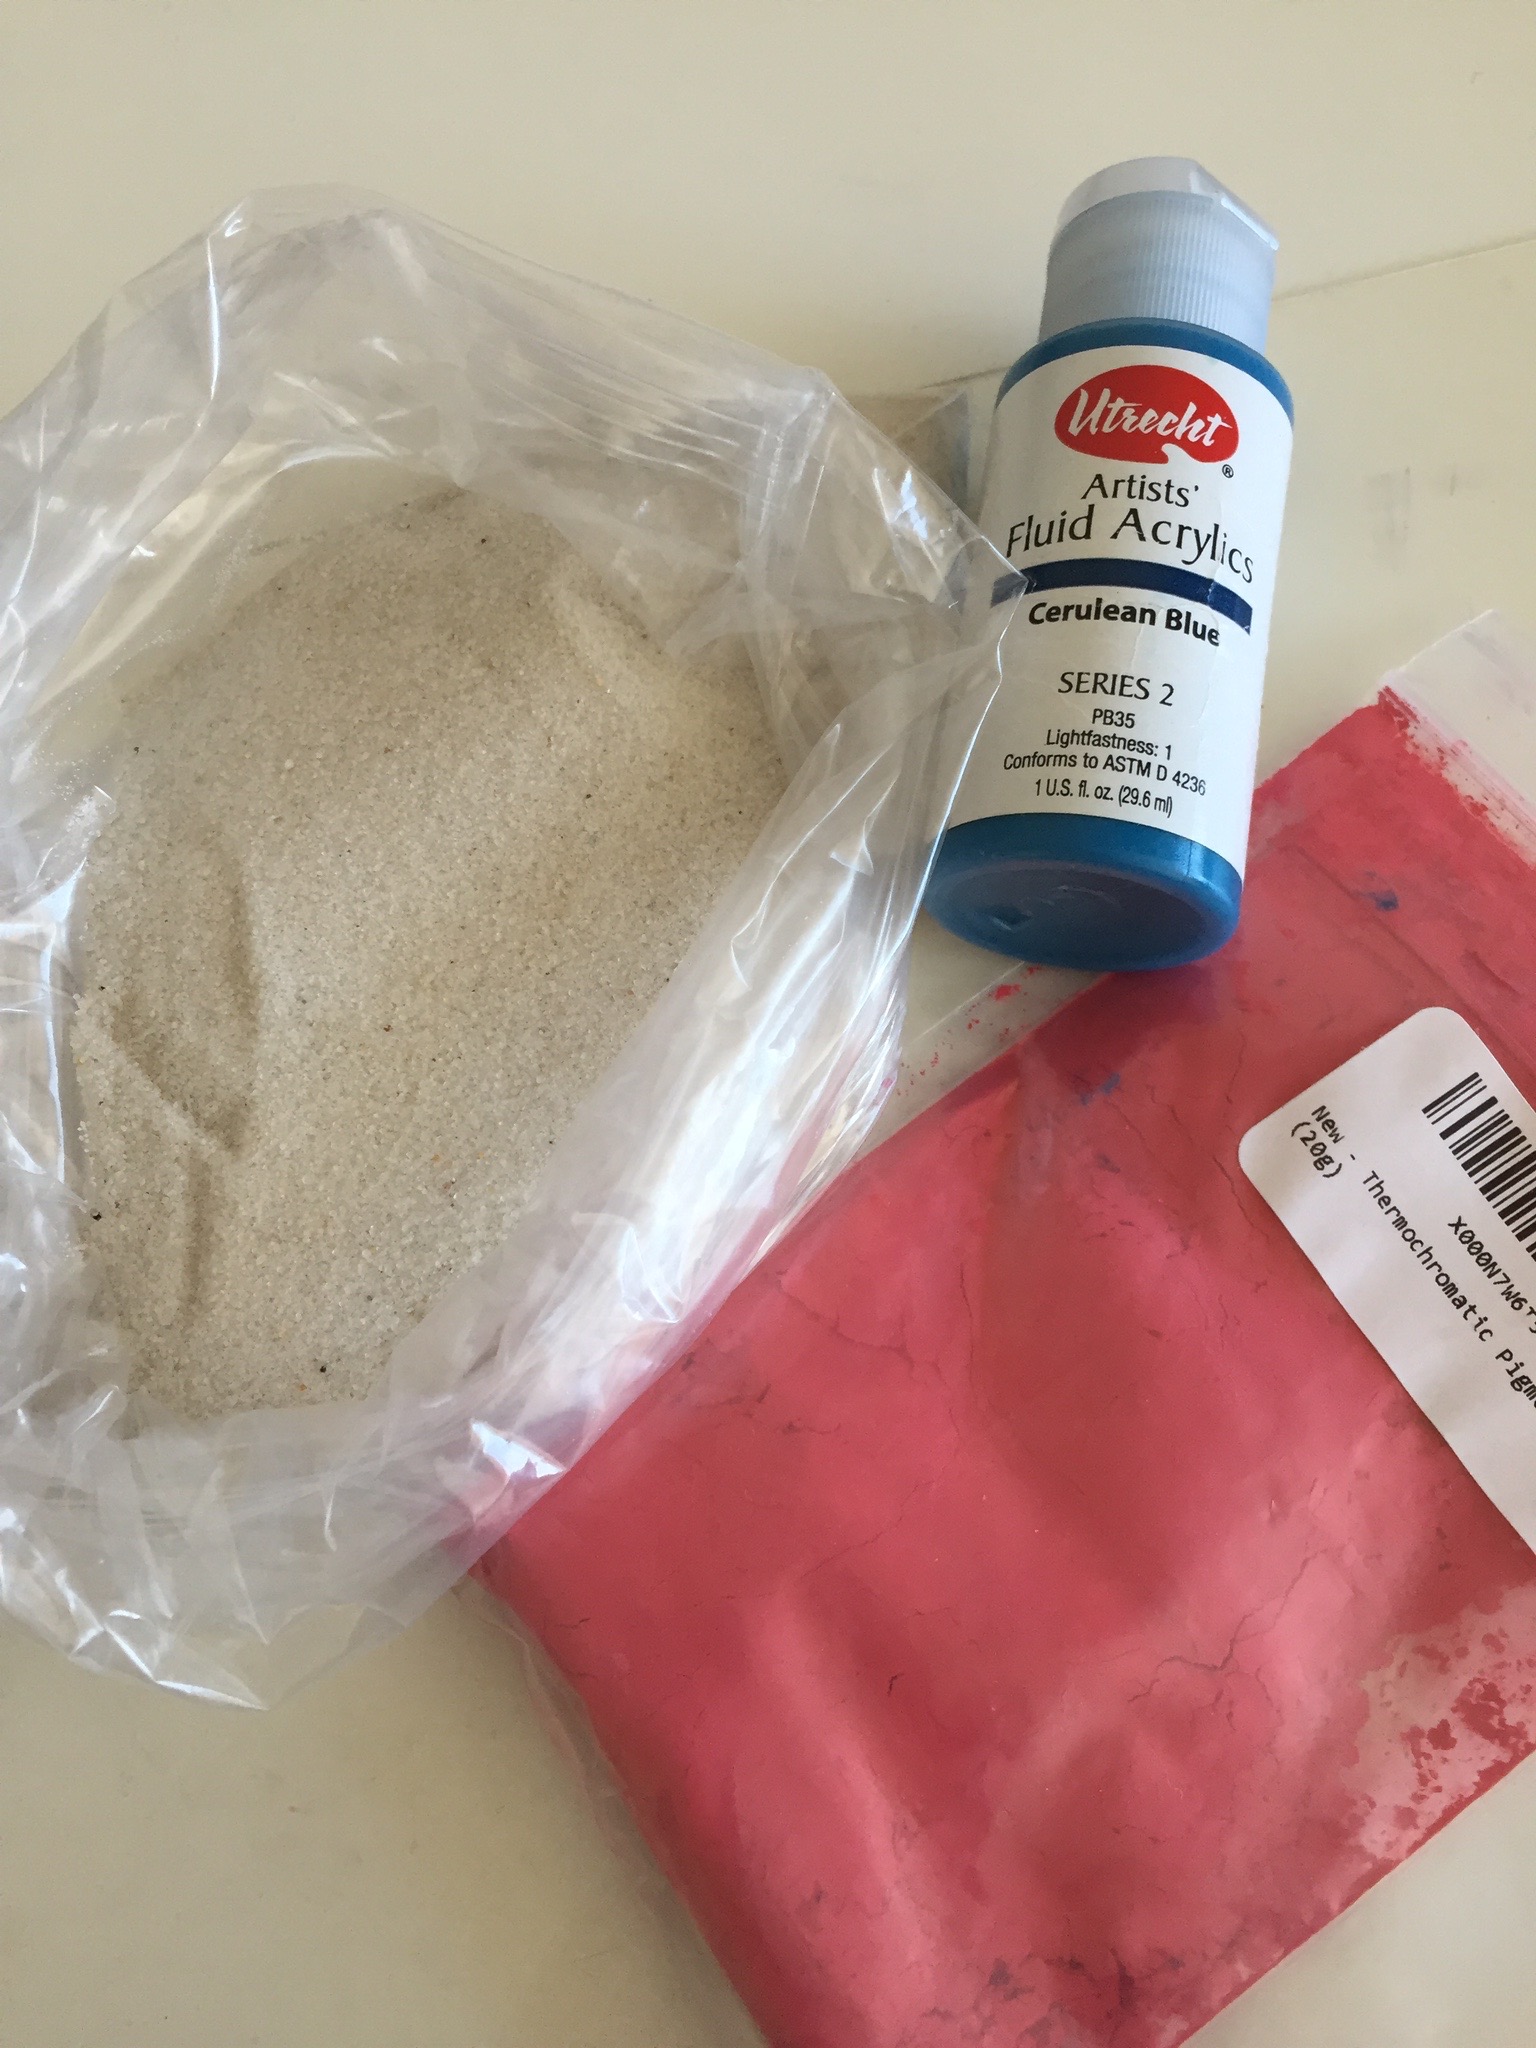
I’ve been working on creating a base of color changing sand. Everything worked outside the terrarium. But the terrarium I got is too small — the Arduino and the battery already took most of the space. I’m going to get a bigger one this week.
Process:
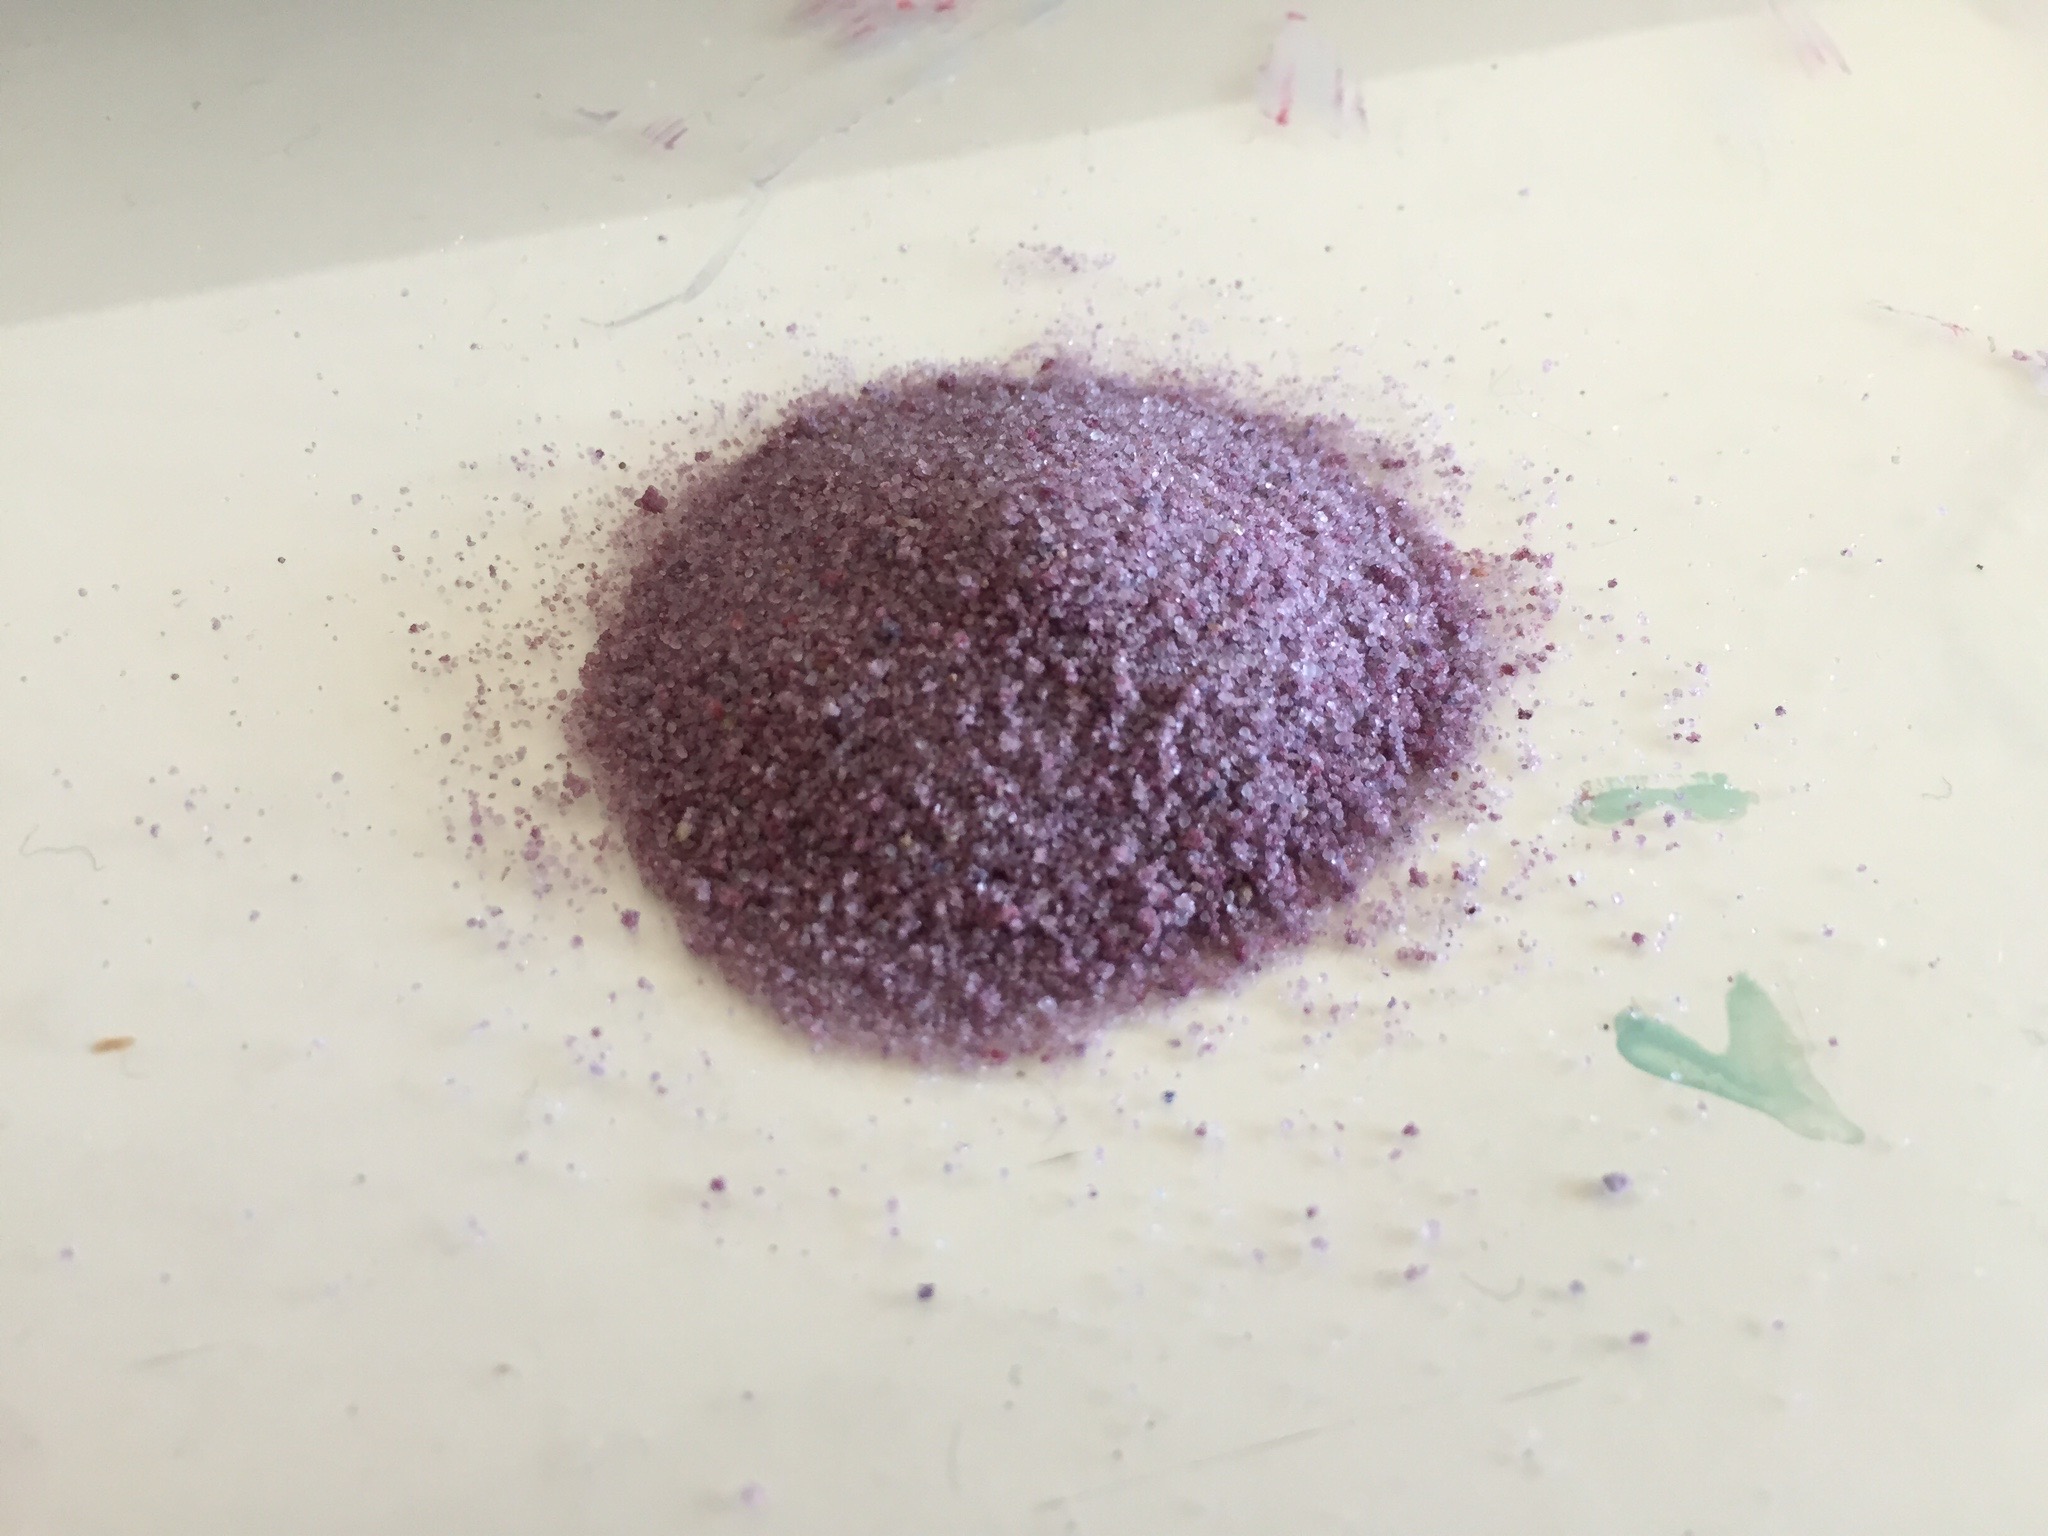
1. Dye the sand
I mixed red thermochromic dye with blue paint to create this purple sand that turns blue when heated.
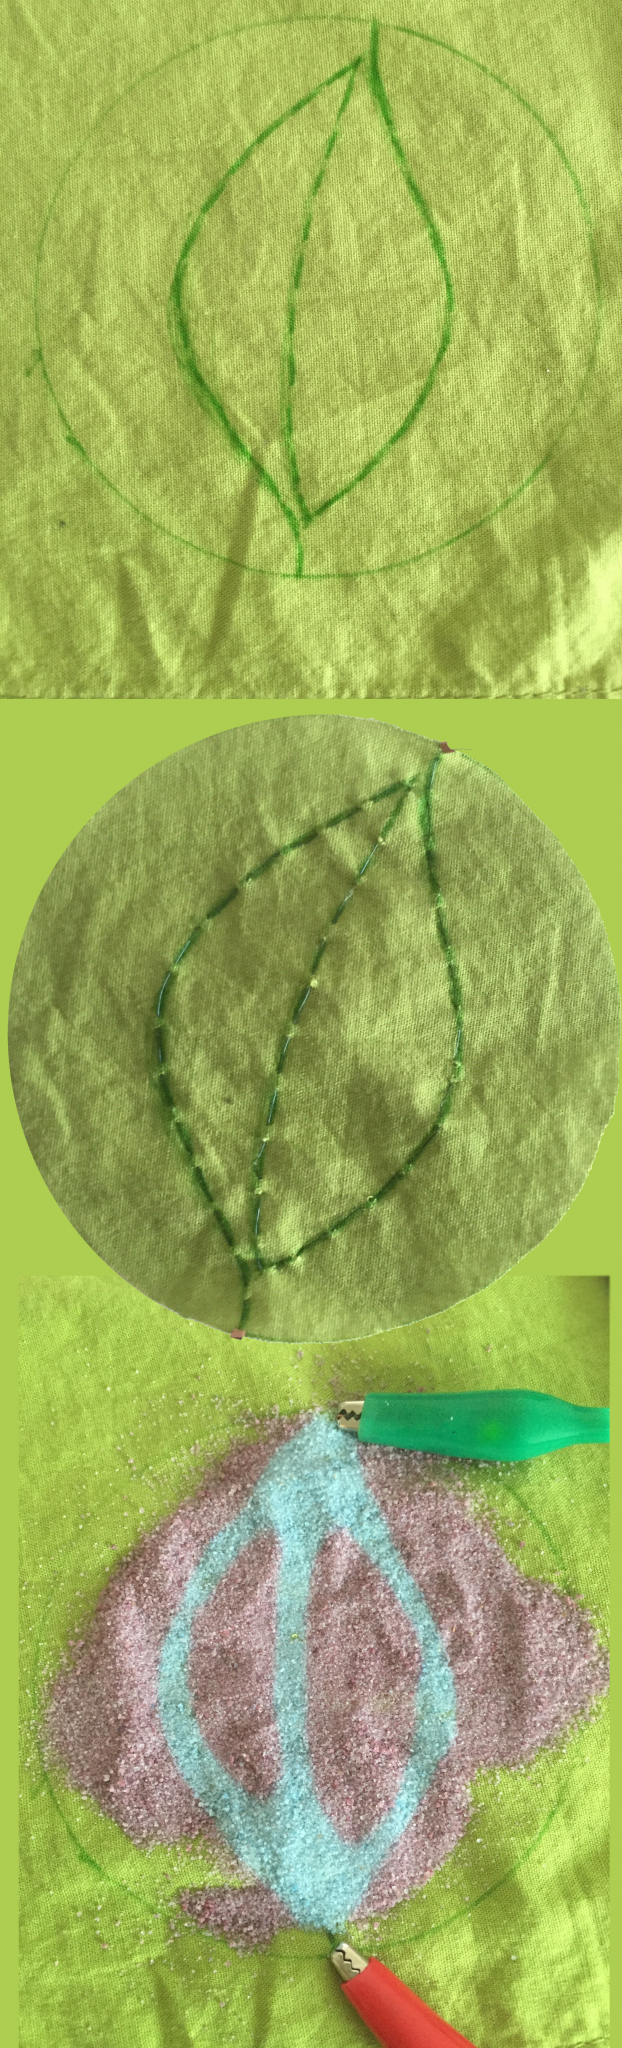
2. Sew the Flexinol into a pattern
I chose a simple shape of leaf for a clear result. Also, the leaf brings a sense of nature into the project.
3. Capacity sensing terrarium
I soldered several 1M ohm resistors together for capacity sensing. People looking close to the terrarium triggers the effects. I chose peek into the terrarium as the interaction is because it’s a natural respond most people will have without any instructions.
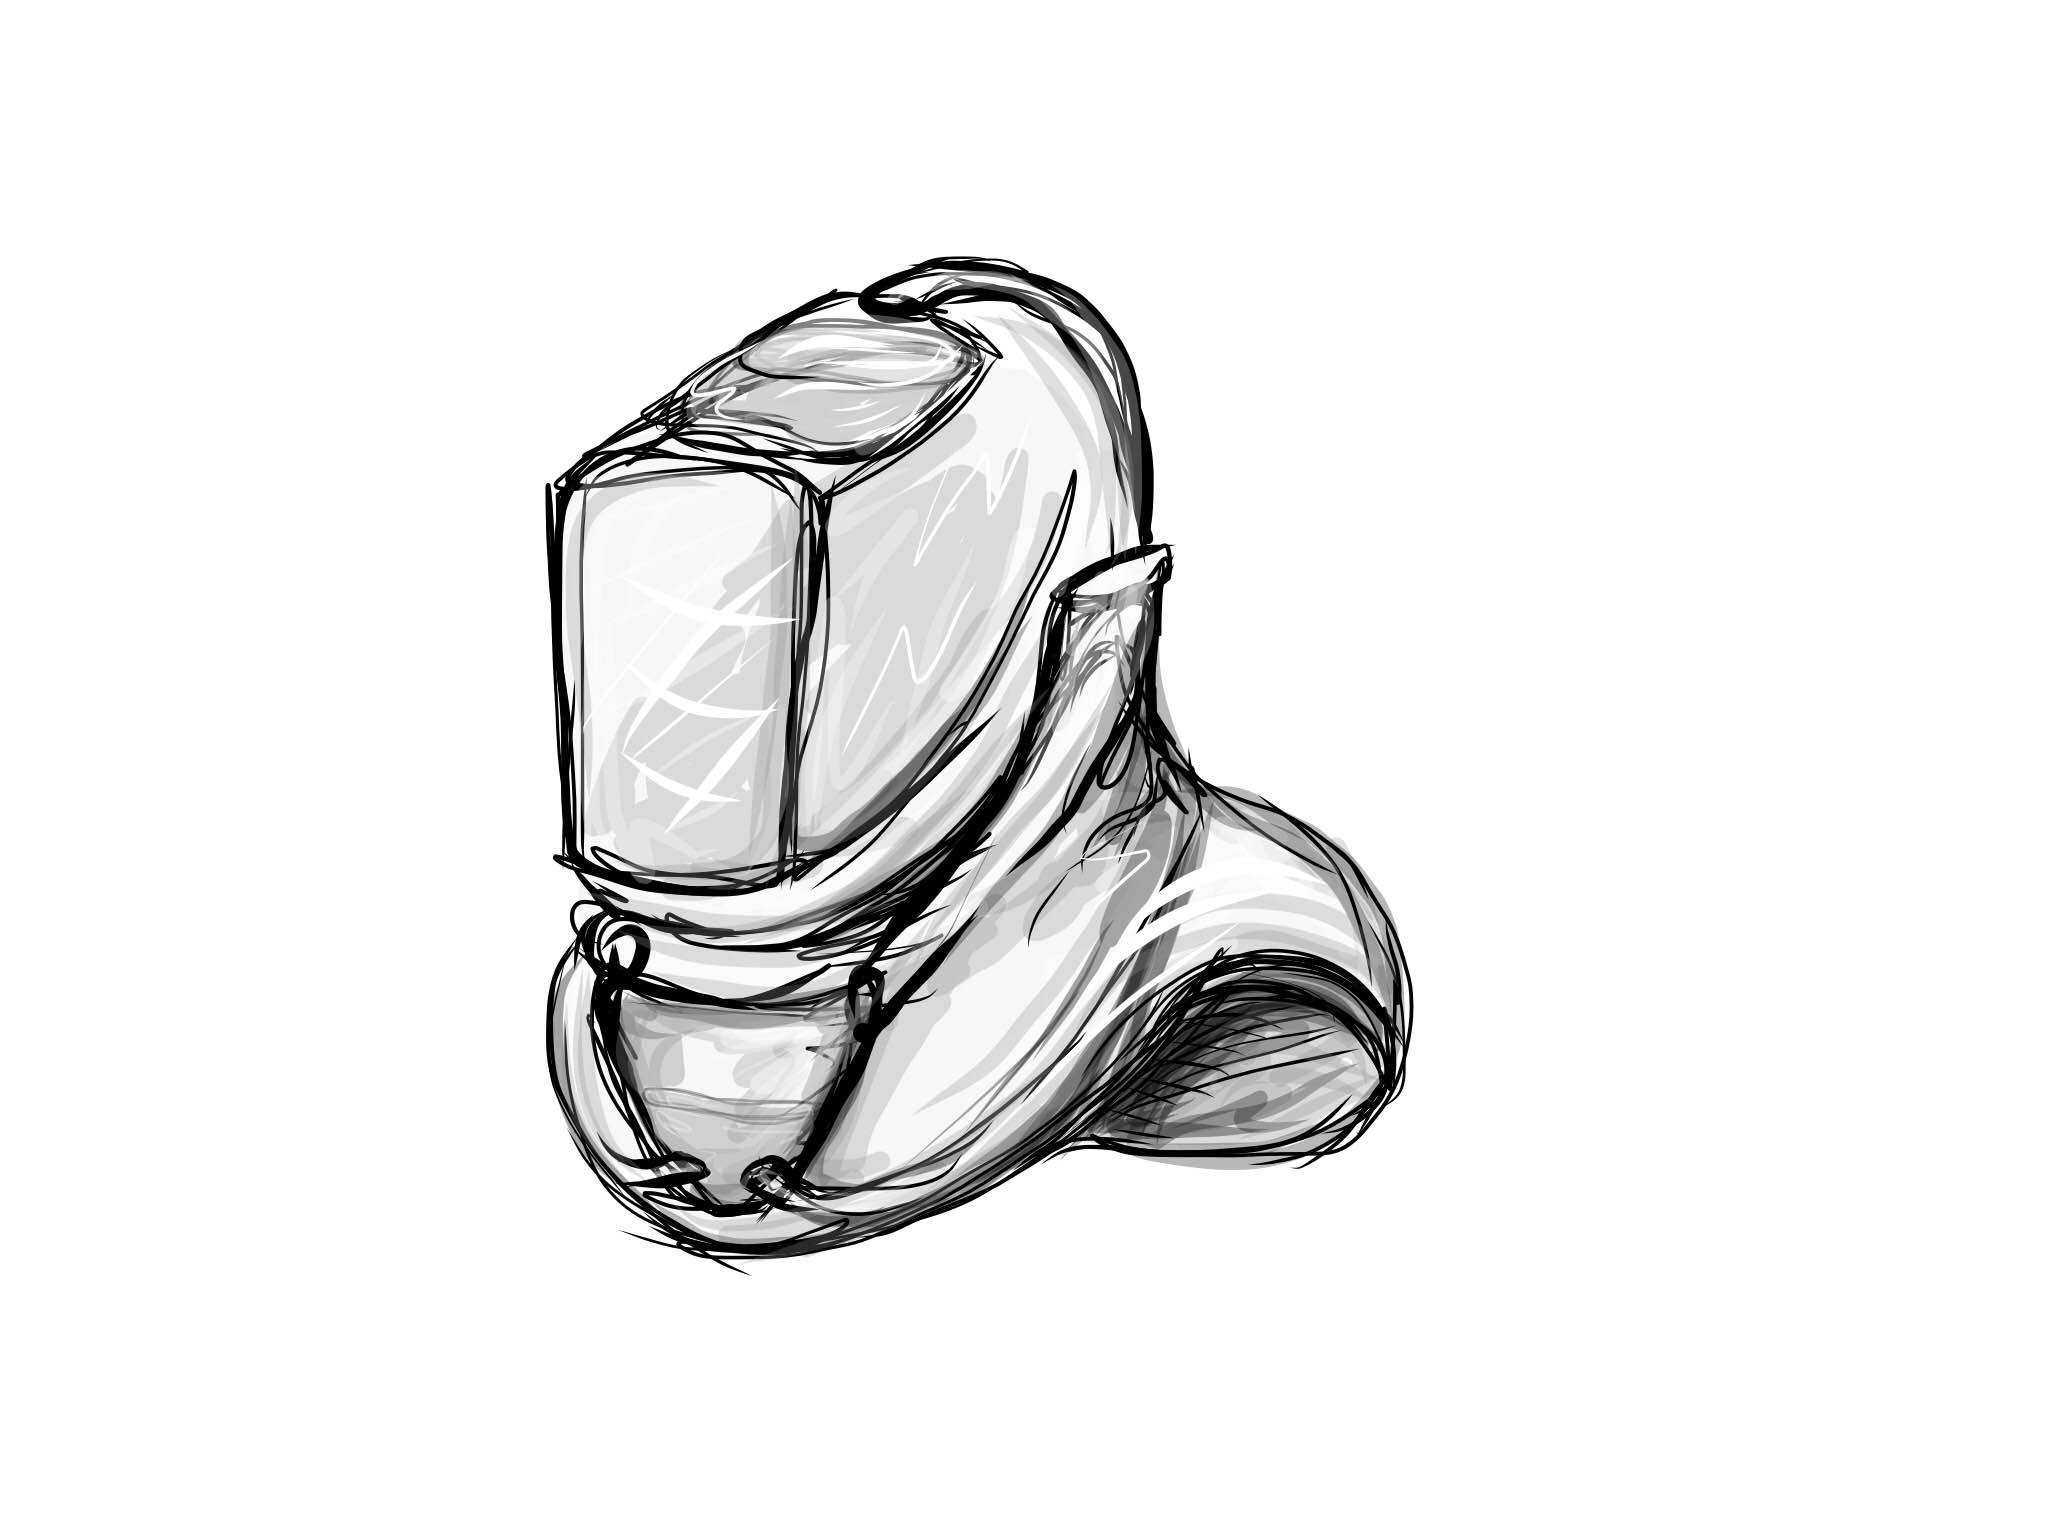
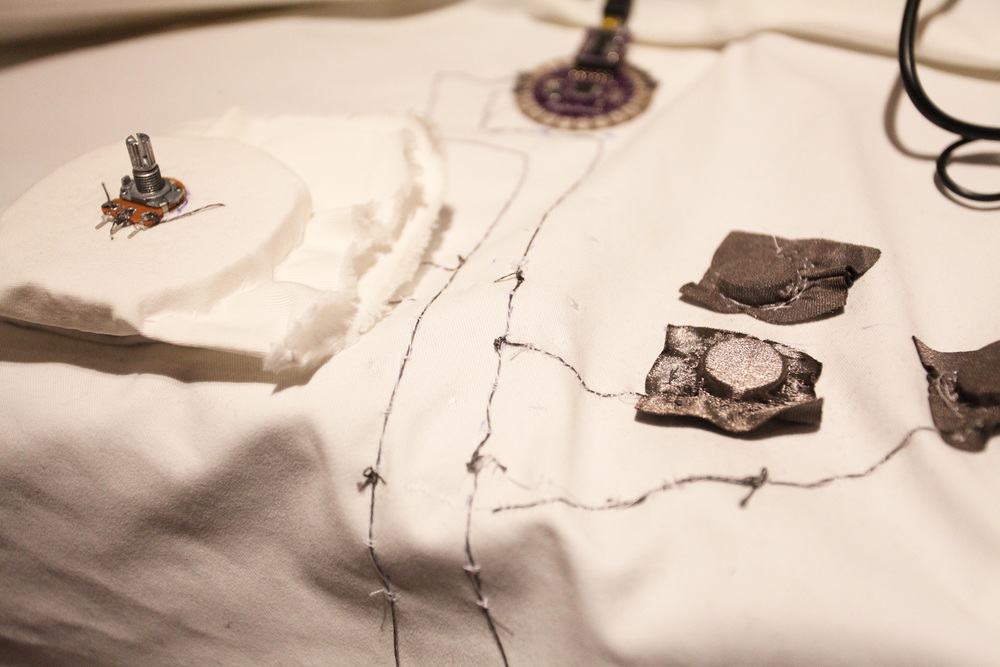
Our project is a wearable piece or collection of pieces that explore the relationship between sensory-based perception and memory, experimenting with the idea of how experiences are encoded into memory through the senses and what might happen if these senses are altered, augmented, or limited by the worn artifact. Our project’s initial iteration will use water to interfere with perception (visual and aural) in order to convey this sensation of the altered experience of the present that is also representative of the fading memories of the past.
To begin, users are presented with a helmet/head covering. The front of the helmet contains a clear plate or viewport, allowing the user to view their surroundings. Though their ears are covered, users are still able to hear. Once the helmet is on, water begins to trickle down the viewport. As time progresses, more and more water runs down through the clear plate, obscuring the users’ vision. Simultaneously, water droplets fall into small metal disks next to the users’ ears. With two senses affected by the passing of time, the helmet begins to simulate the blurring of experience and fading of memory.
So far, we have been experimenting with different materials – including plaster of paris and copper sheeting – and different ways of initiating this sequence of events. We would like this prototype to possibly be one of a few variations, all of which would occupy the same sort of “universe” and would address different ways of altering experience and memory through the senses.
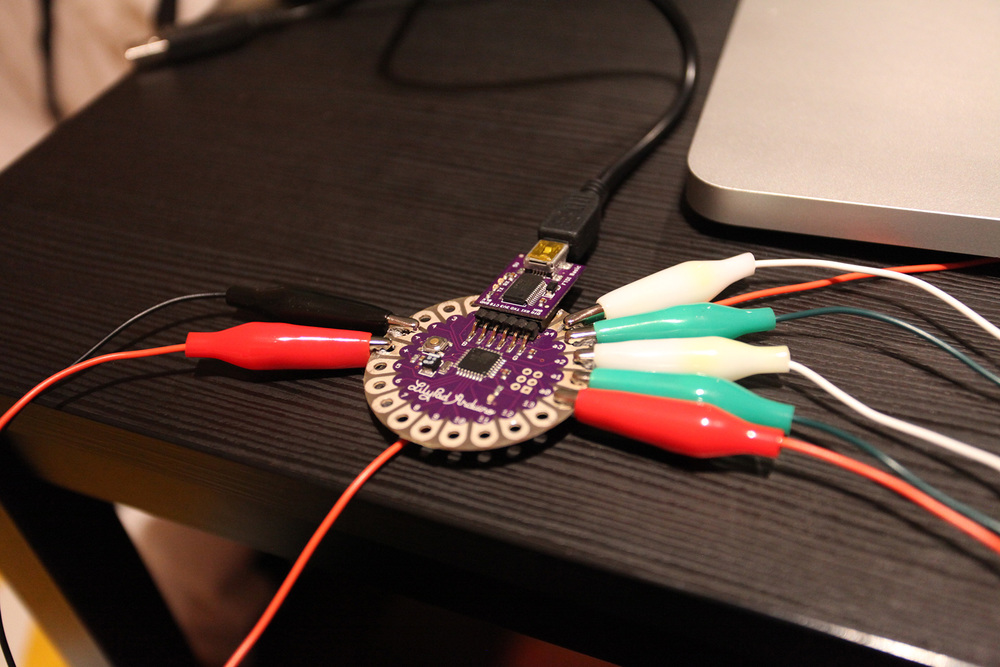
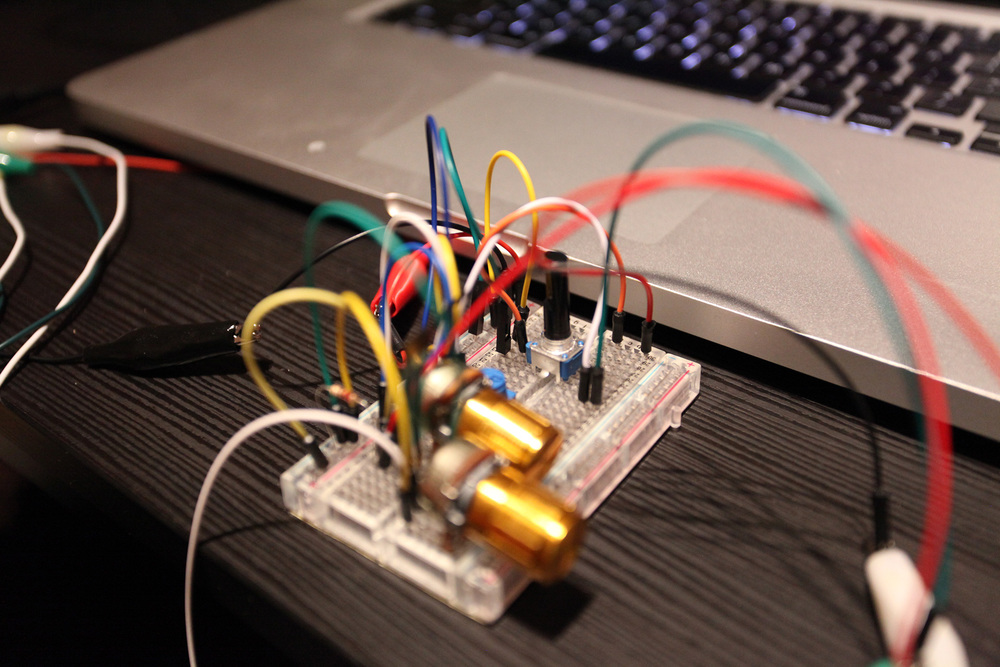
It’s a drum machine fabricated as a table runner. It’s an exploration in soft circuit and new instrument.
I wanna create a new drum machine that helps musicians (users) break through their habit to create music. So hopefully it can give more opportunities for creating fresh music. I have made a MIDI glove last year. It is more for easy playing. But after that project, I realized instrument is not for easy playing, It’s more for fun and providing more opportunities to break existing habits.
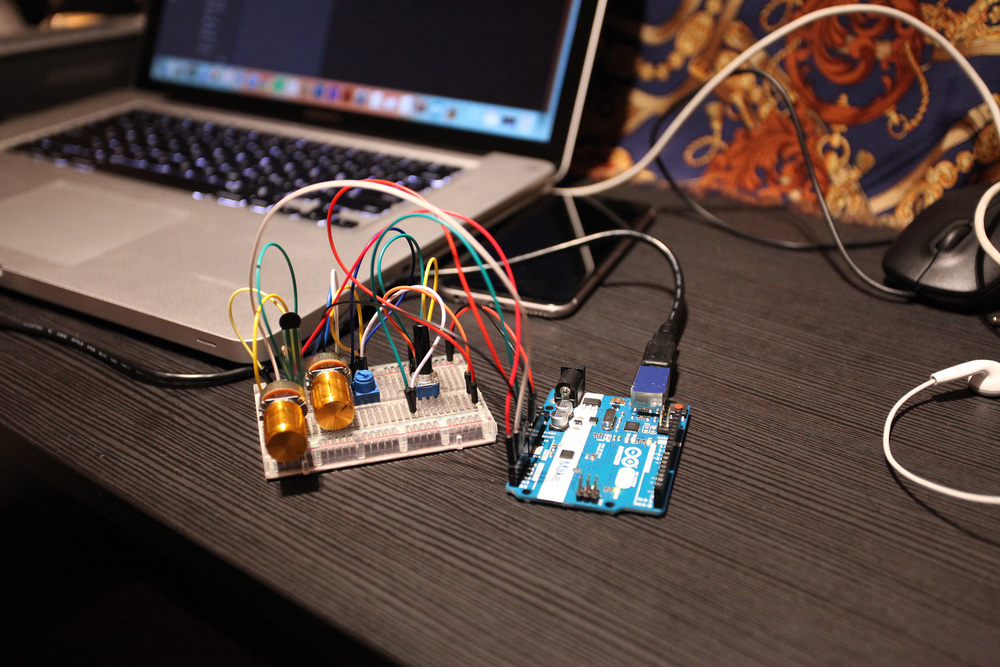
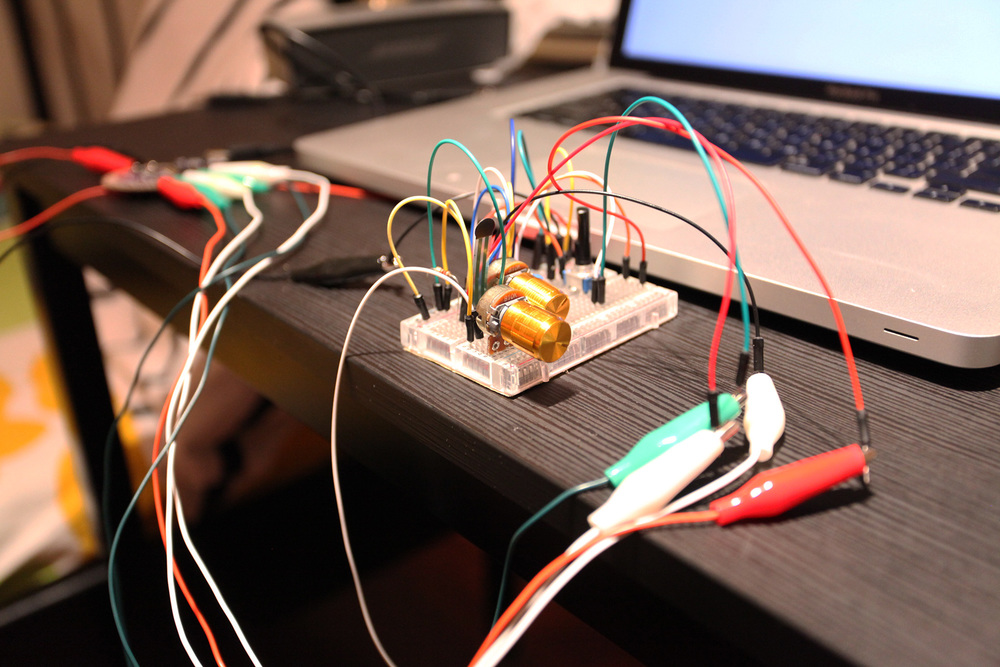
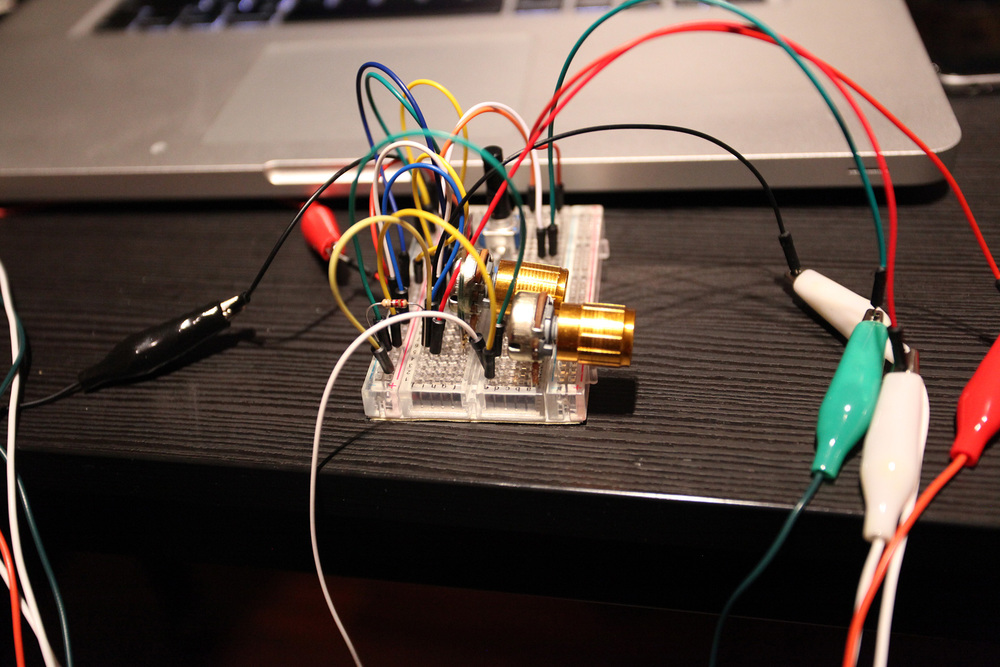
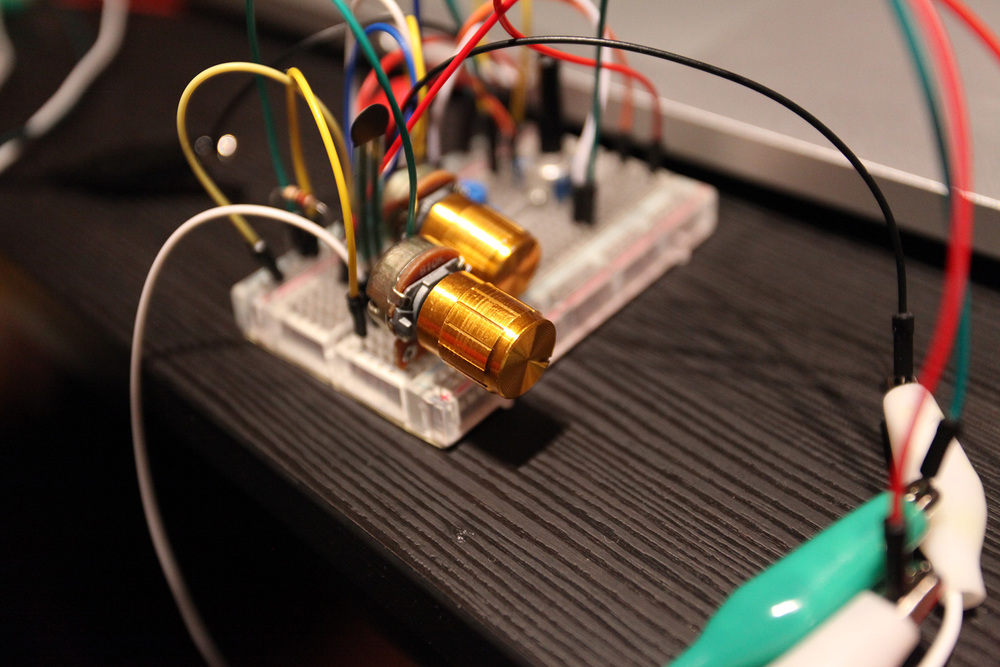
For the technology part, there are 4 potentiometers and 1 press sensor cooperating through Lilypad Arduino. Each potentiometer connects the main circuit by magnet. Arduino can send signals to GarageBand for creating sounds. This drum machine can play sounds in sequence and loop. By rotating potentiometers, it can change different sounds in each position for creating new sequence patterns. By pressing press sensor, it can switch the 4 sounds to another 4 sounds. We even can pull potentiometers out from the main circuit and put them back to different positions for making new sequences. So it can help us create more different sequences for fresh music.
In Class Feedback
I was suggested to use one potentiometer to set sounds for each position. For example, I can set a value on the first position by attaching and rotating potentiometer. Then set another values for the second and following positions. That is a interesting way for triggering sounds. But I think if I can use multi potentiometers to change sounds on each position, that will be faster. Besides, I am also limited by time. So I keep my original idea.
Here is the documentation for my design process. The video below is testing the function part on breadboard. The drum machine can trigger sounds like this finally.
The video below is for testing the connection on soft circuit.
The video below is for testing the potentiometer on soft circuit.
Then I changed the way for connecting modules. I tried 3 ways for connecting potentiometers with the main circuit. Finally I find the most suitable one in my 3rd prototype.
Now I have done the main circuit. I’ll make the potentiometer modules in the following days.
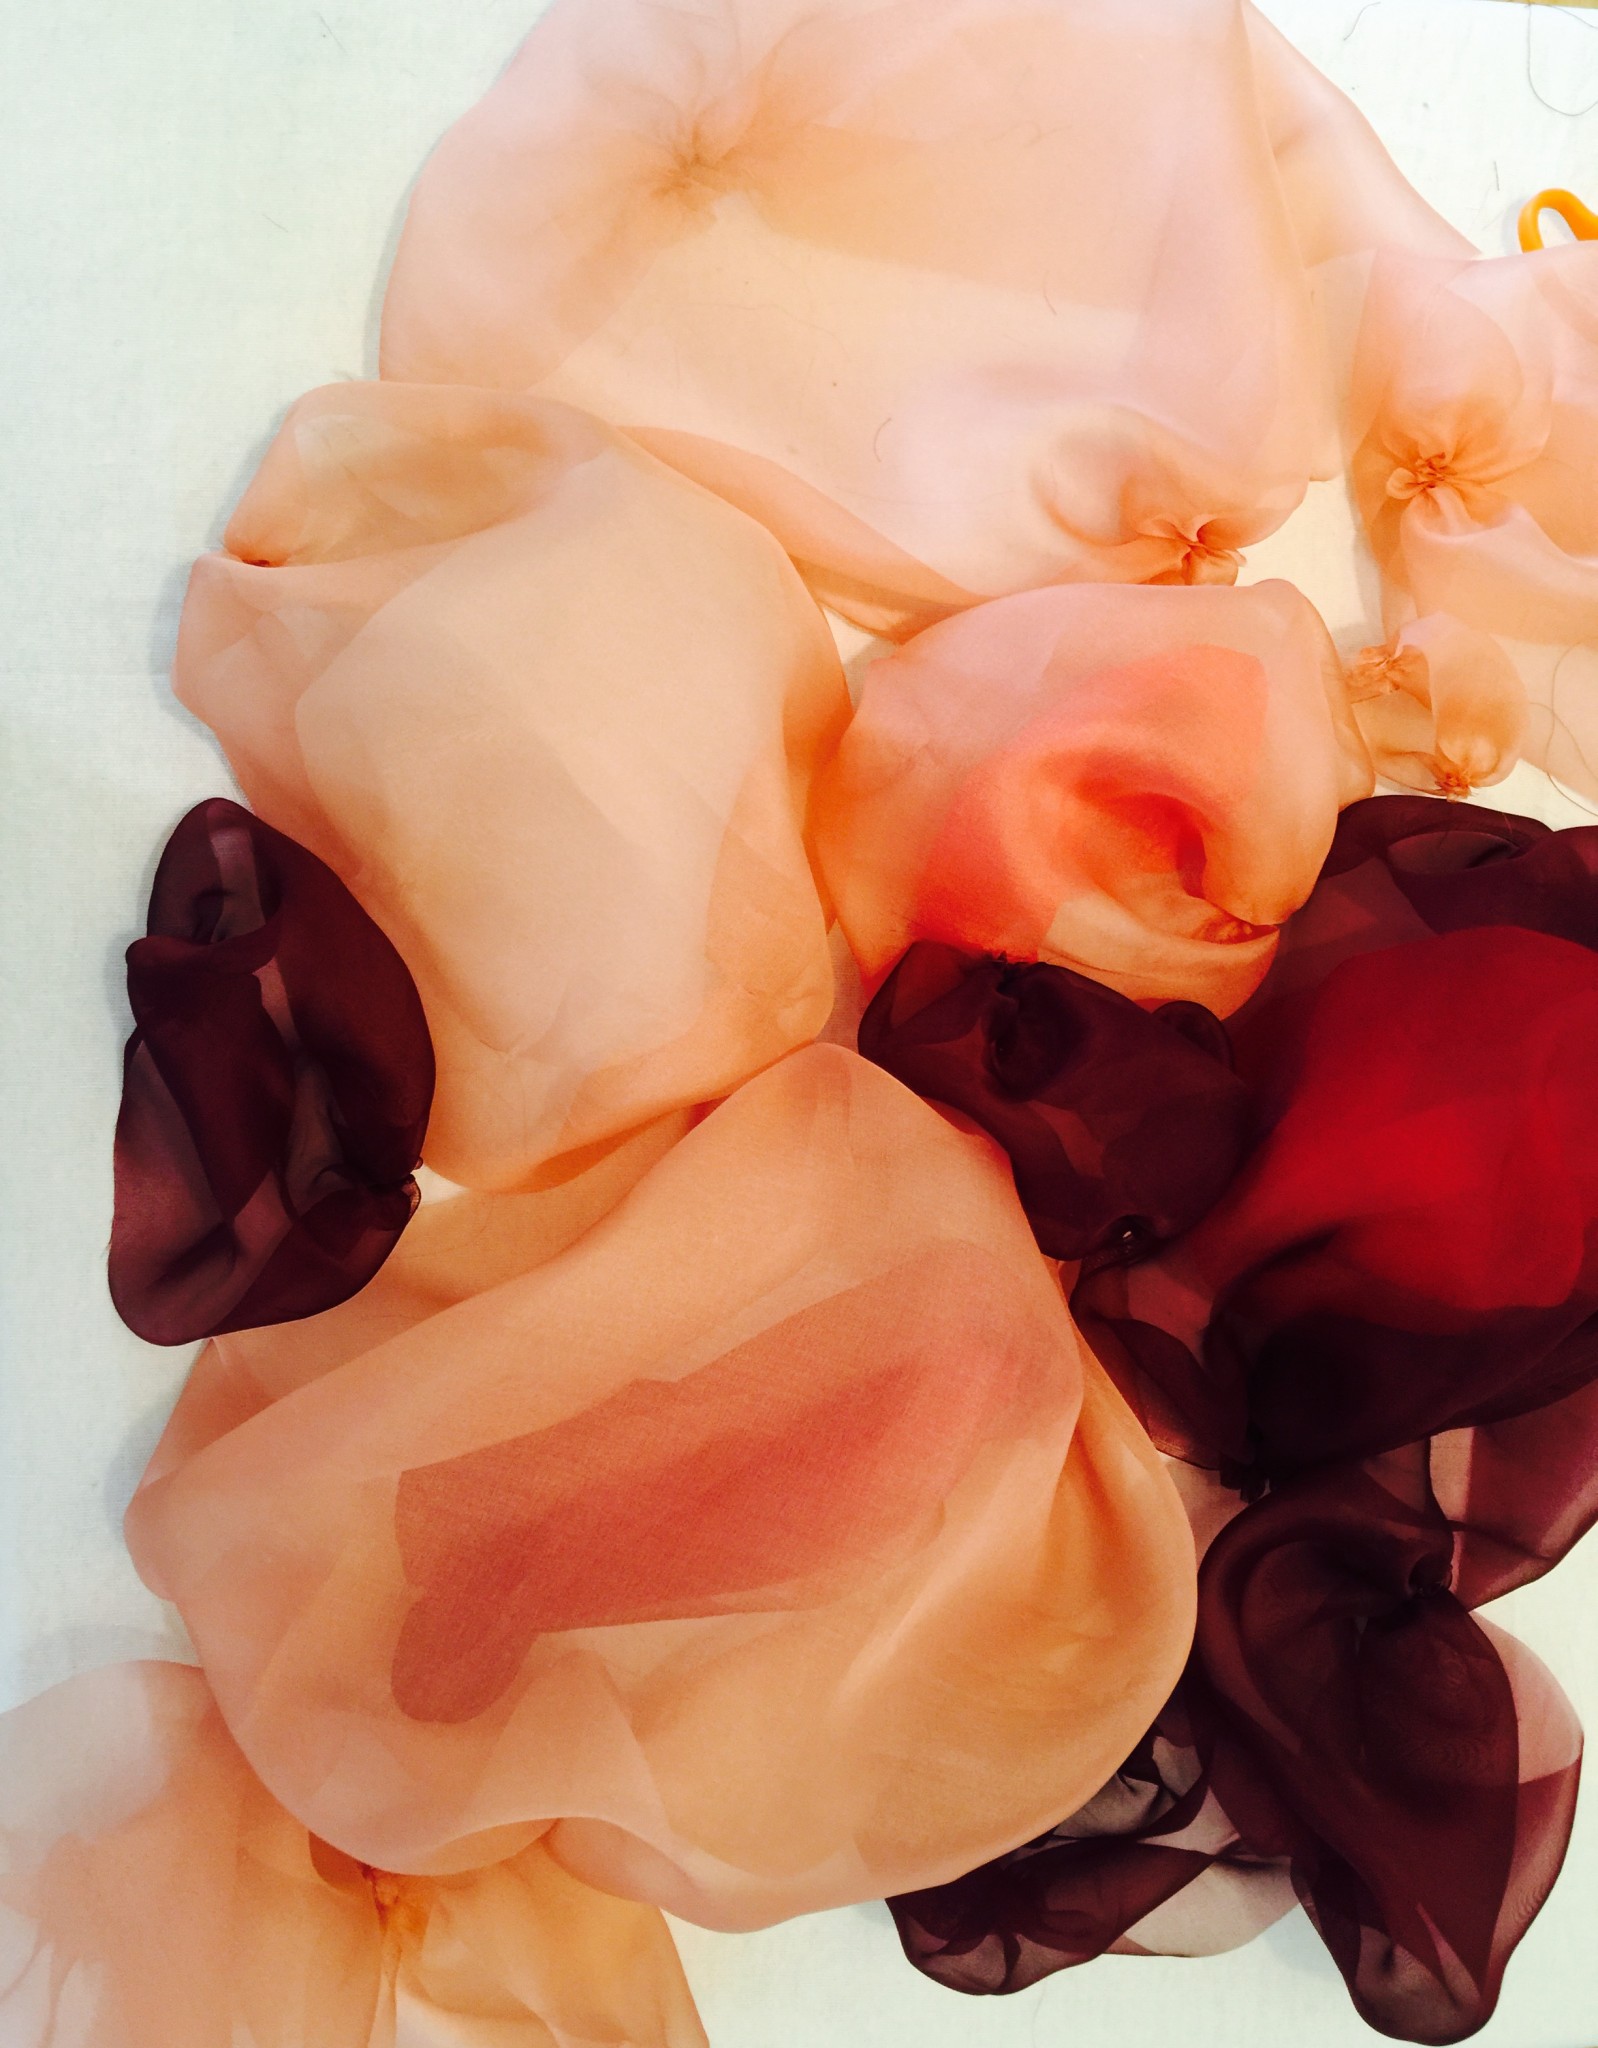
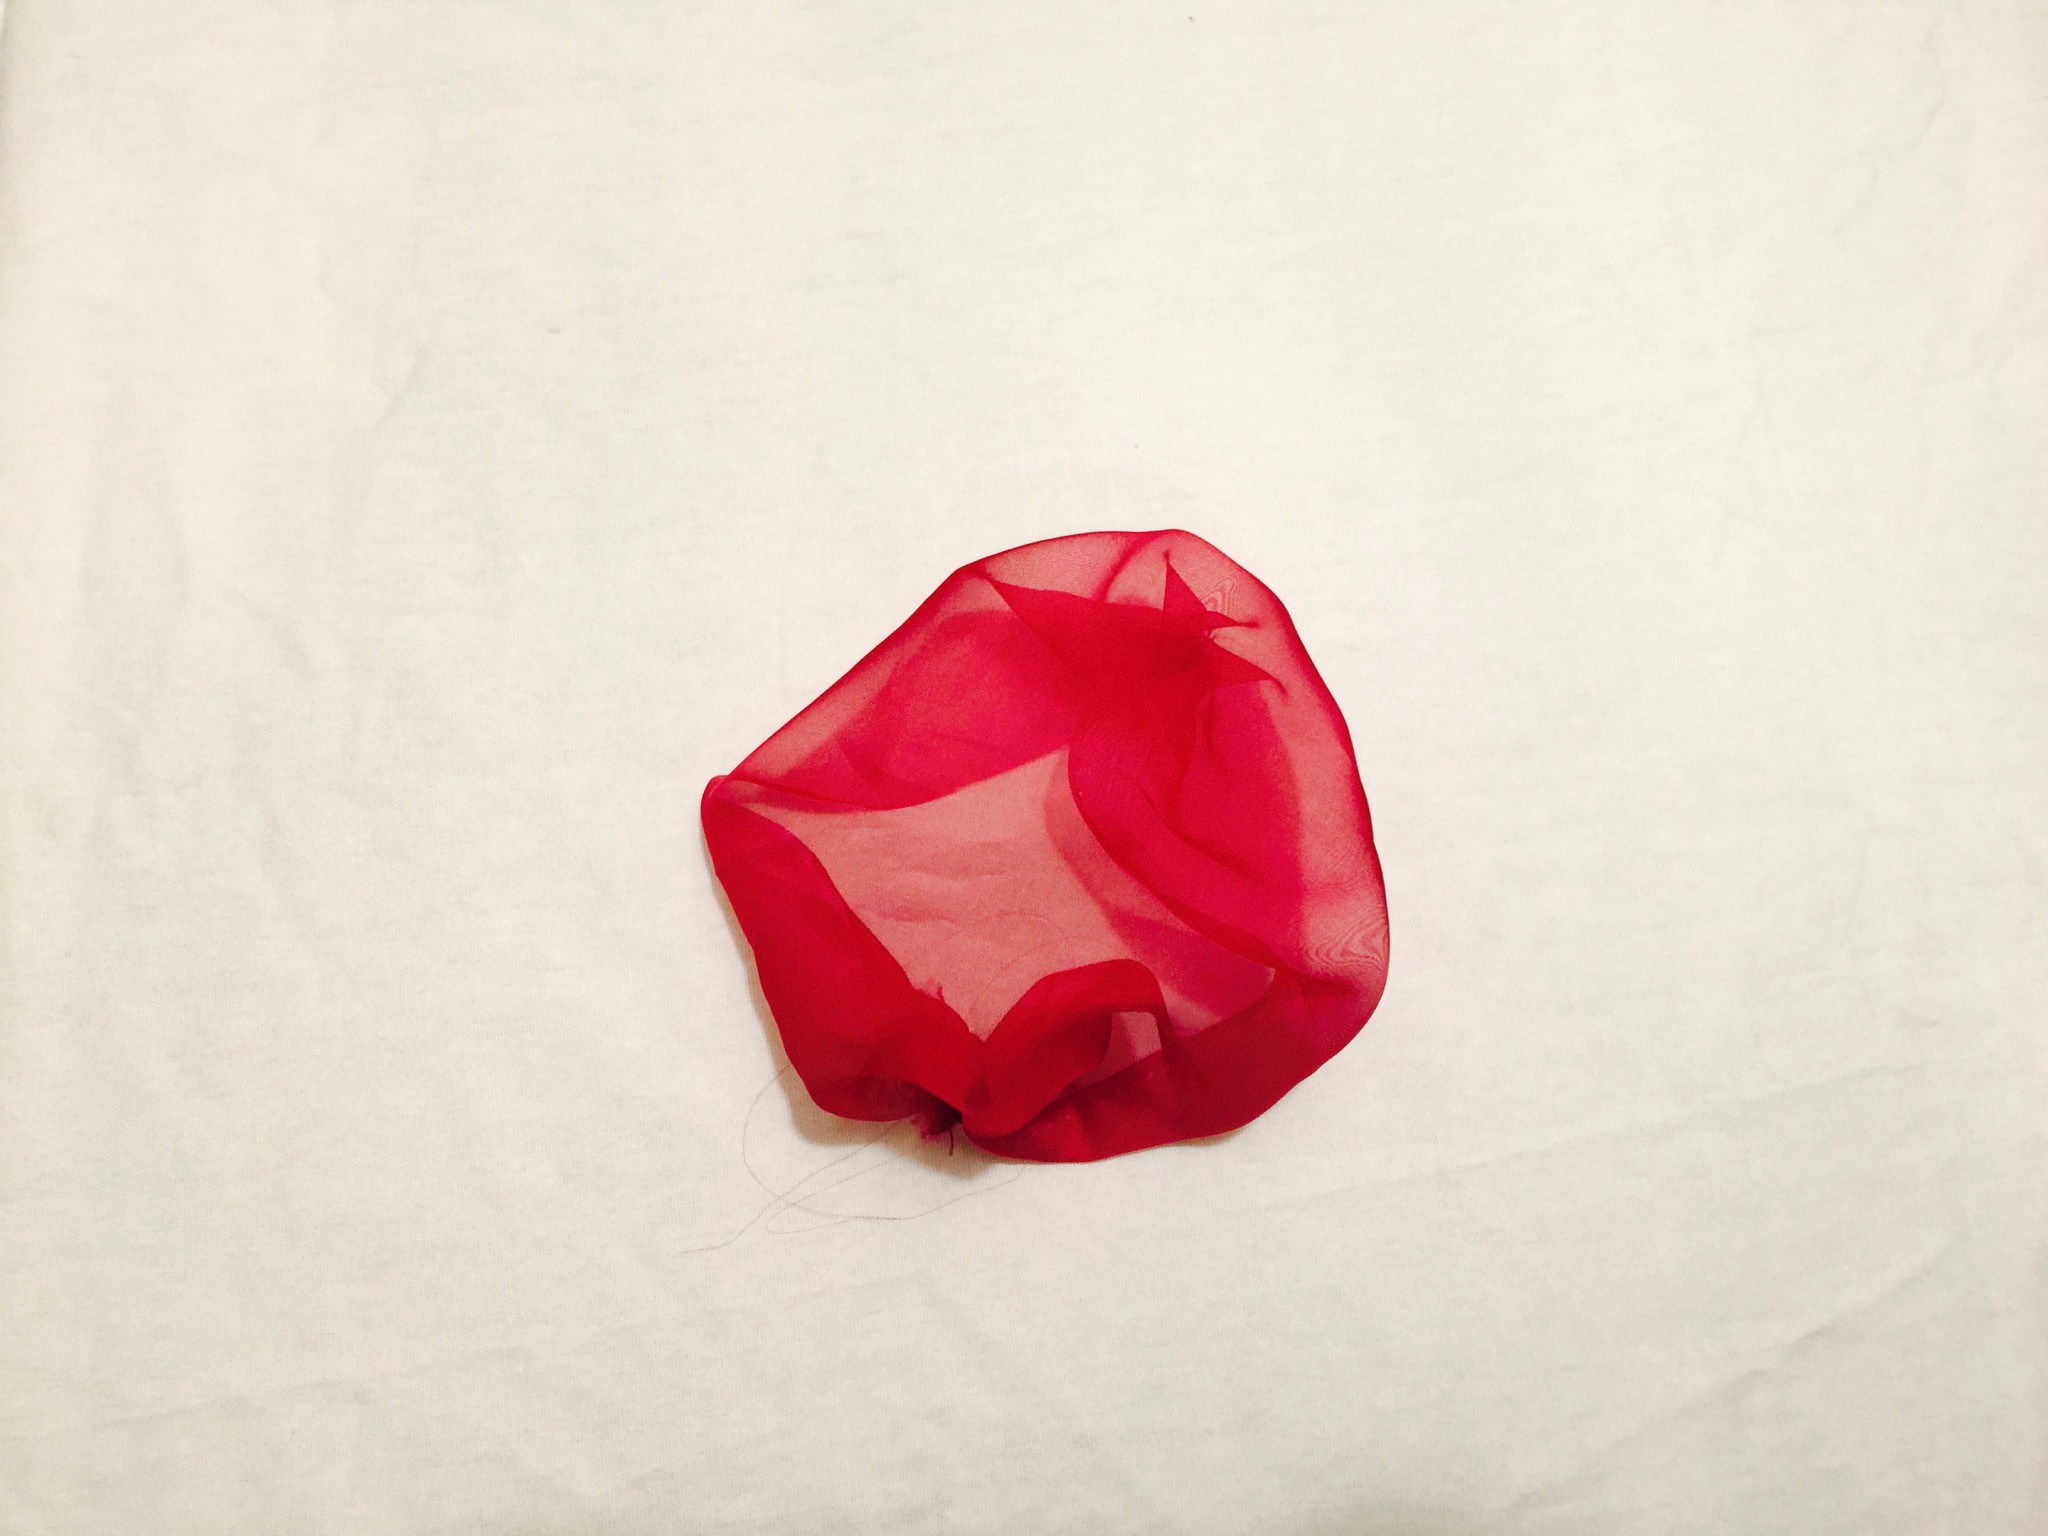
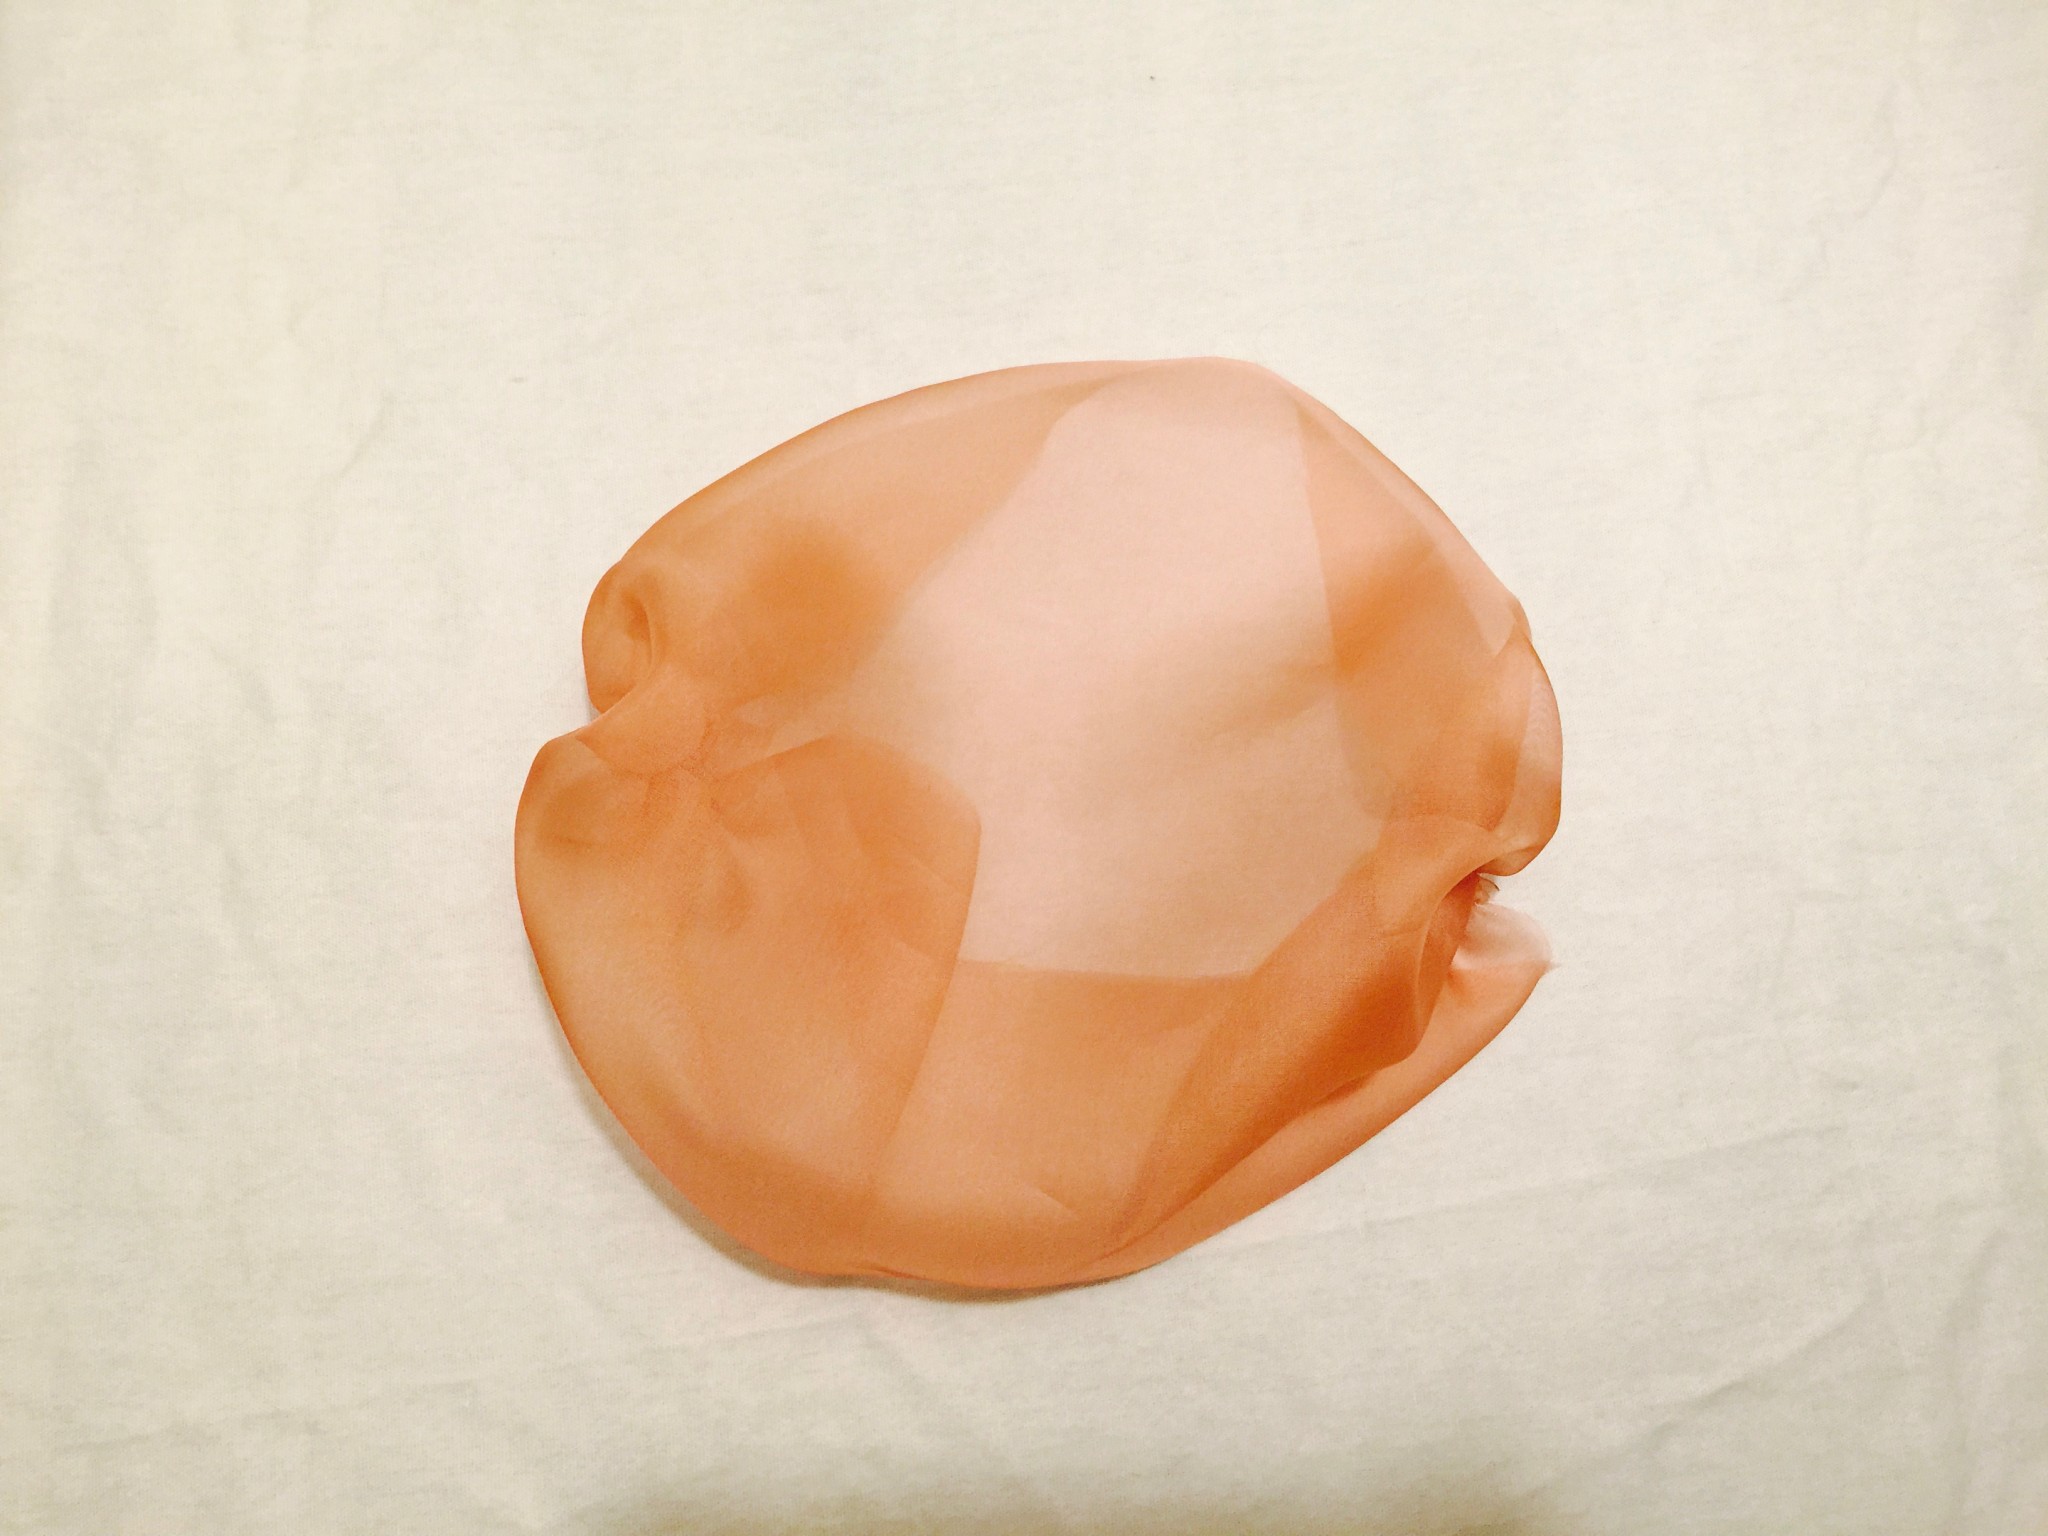
For the Computational Craft final project, I am creating an interactive installation use silk organza as the material to make a large scale living creature, through participants interact with this living creature to simulate that human’s sexuality reaction. There will be two three parts of the project- Stroke sensor, silk organza bubbles and blowers behind the bubbles. The whole pice would be look like human’s internal organs. When participants stroke the Stroke Sensor, it will trigger the blowers start blowing the bubbles being inflate and shrink like breathing. I envision this piece will give participants a very uncomfortable atmosphere and very private experience, I wanna my piece visually looks very creepy so that it can make people feel disturbing.
At this present time, people tend to forget their identity and view of life because of their environment. This being the different people who surround us, the fast-changing technology and society that force them to move forward too quickly. People don’t have much time to think about who they really are, what they like to do, and consider what they really want to do. Sometimes they forget about thesethoughts in their daily lives, and are likely to just blend into their environments.
For the final project, we will make a memory box for people who need to be reminded of their beliefs and identities. When a person touches outside the box, the sound and voice will play by showing the images from their memory on what they want to be reminded of. During a person listens to the sound and voice in the box, the images on the memory box will fade away. That means the images are being absorbed as memories to the person. It would be private enough that each person could keep the memory inside the box, even though the images are displayed outside of the box which other people can see.
This project will use a soft sensor, soft circuit, Thermochromic Pigment, and magnet to represent the memory and to make the sound speaker. When the box senses someone expecting to get some experiences, it can use the body heat and heart rate of a person to reveal their memories as images.
Feedback in class
We got good feedback from our classmates and professor. They told us it is a good concept and idea. They asked us where to install the memory box. We decided to place it in the living room because it is the center of the house and a comfortable place. The images that will be shown on the box will be abstract, which is not too obvious and better than real pictures or exact shapes.
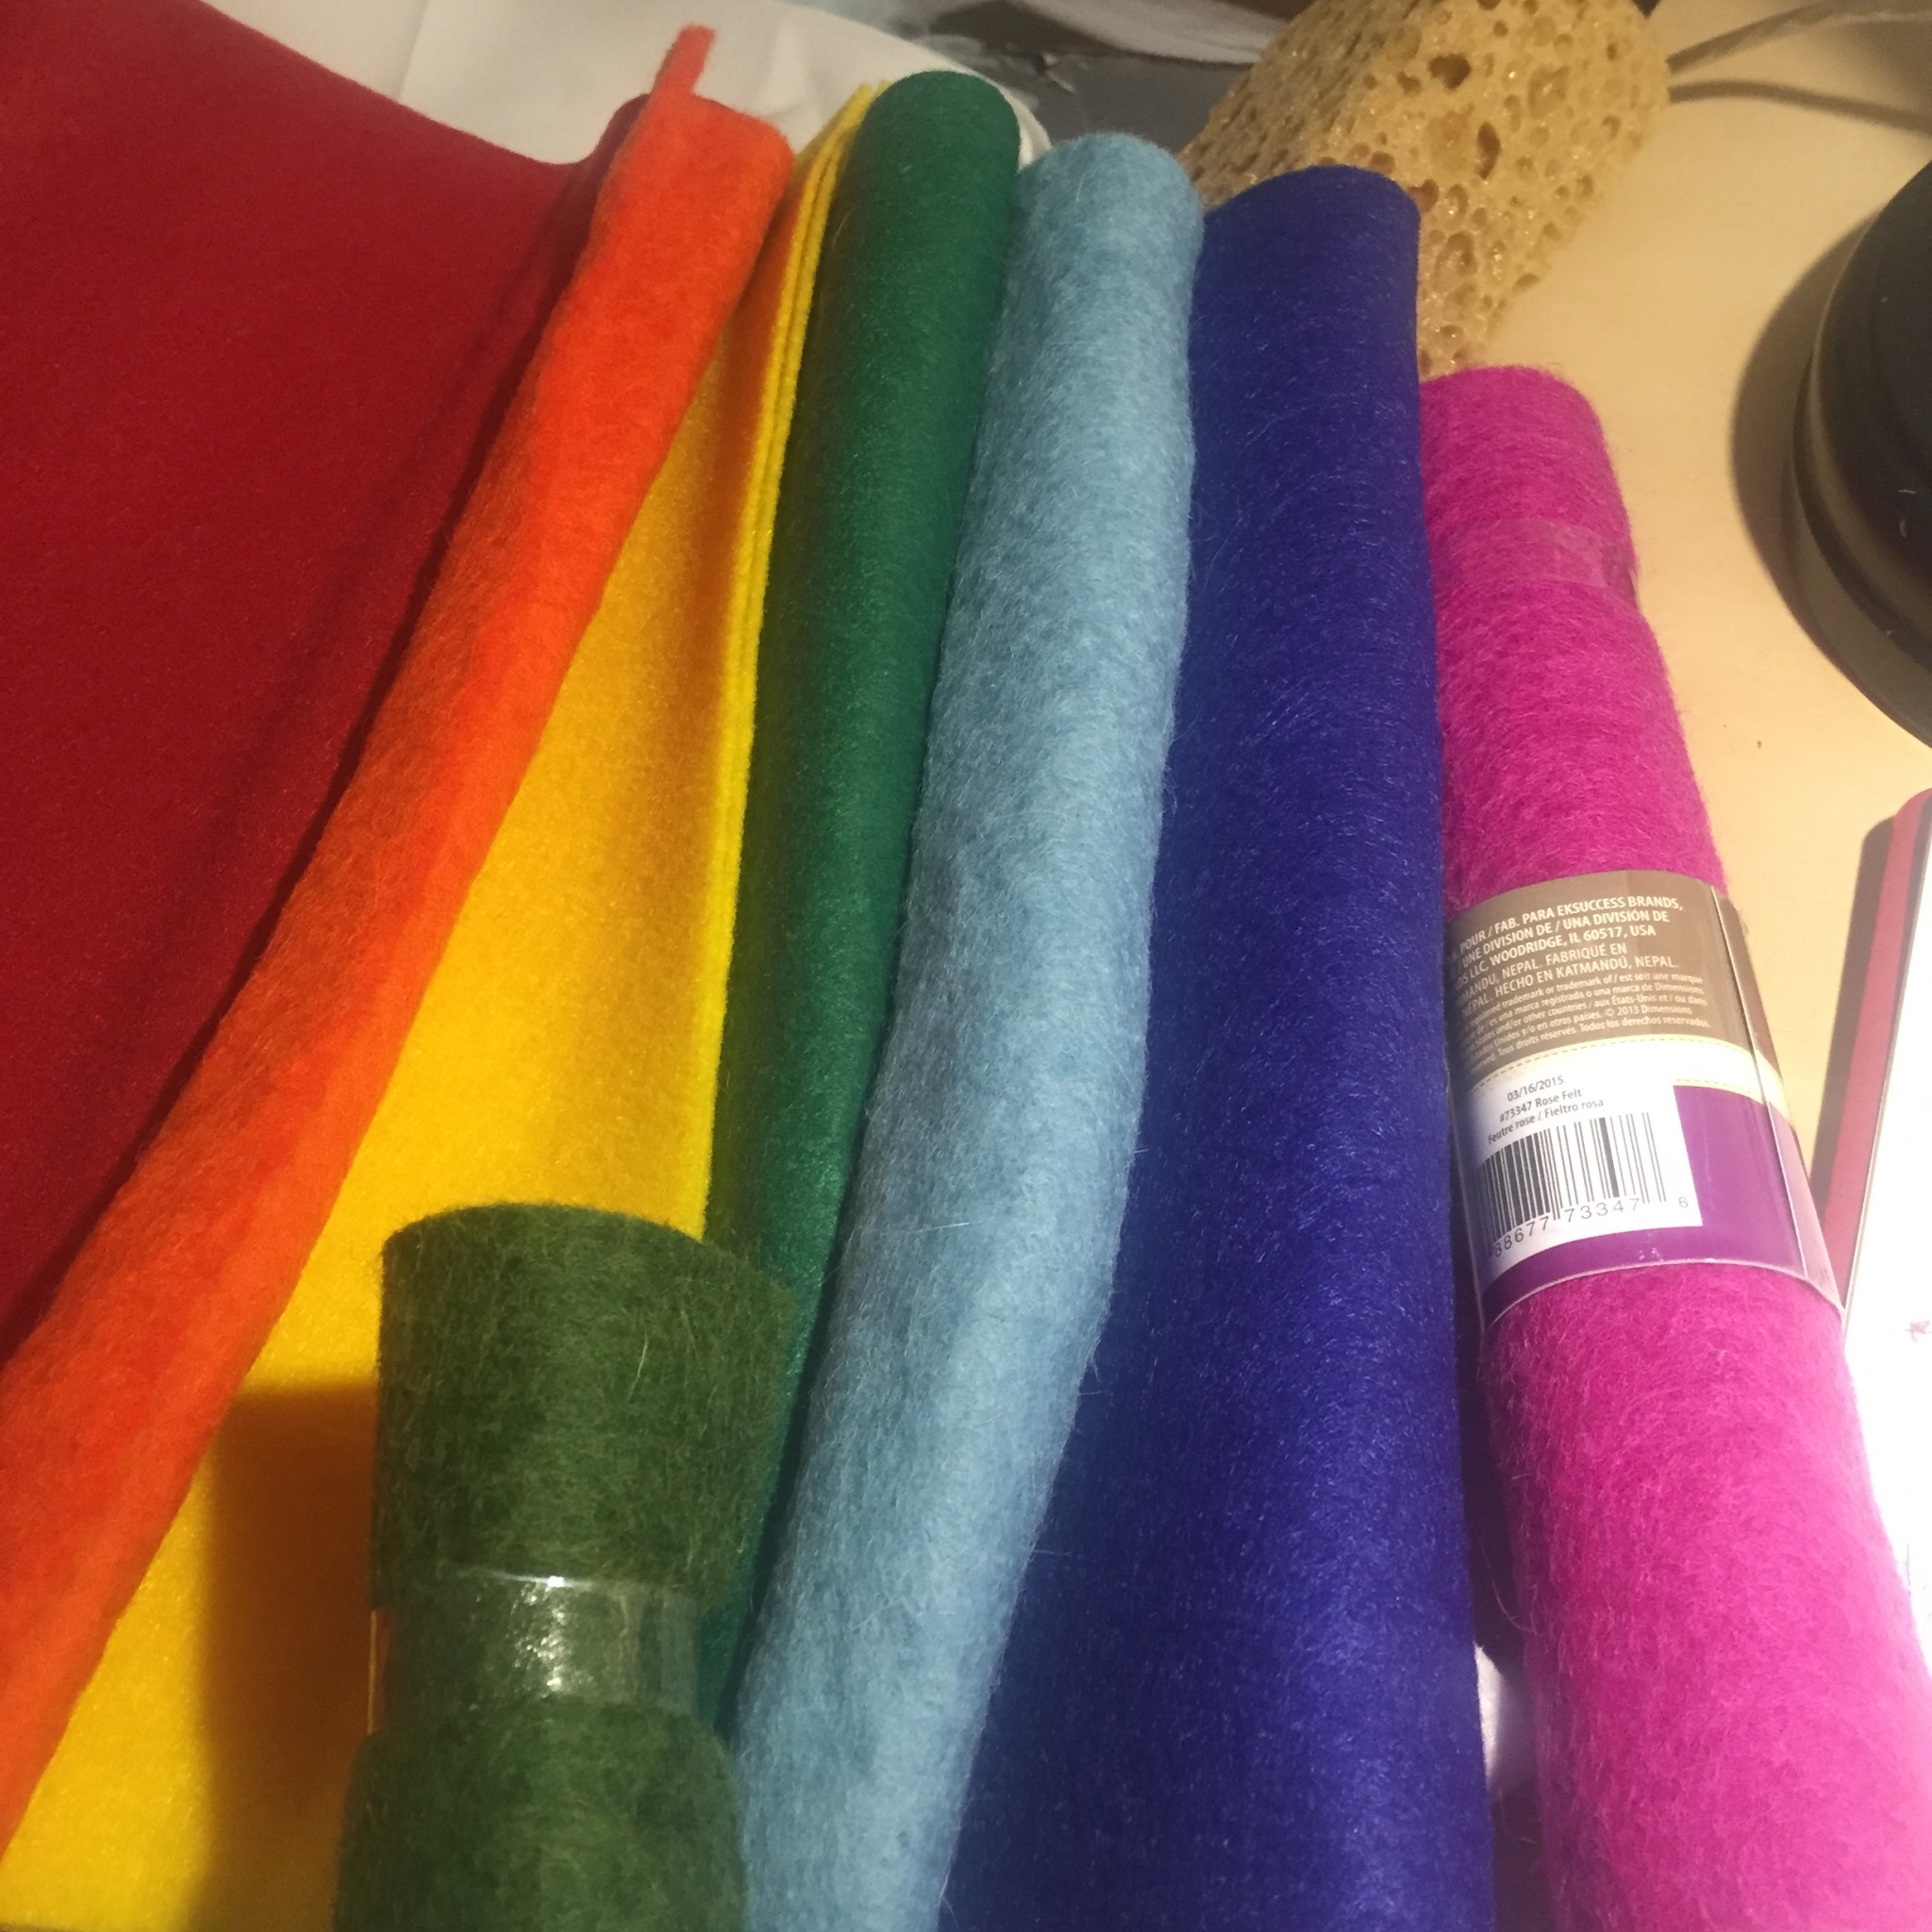
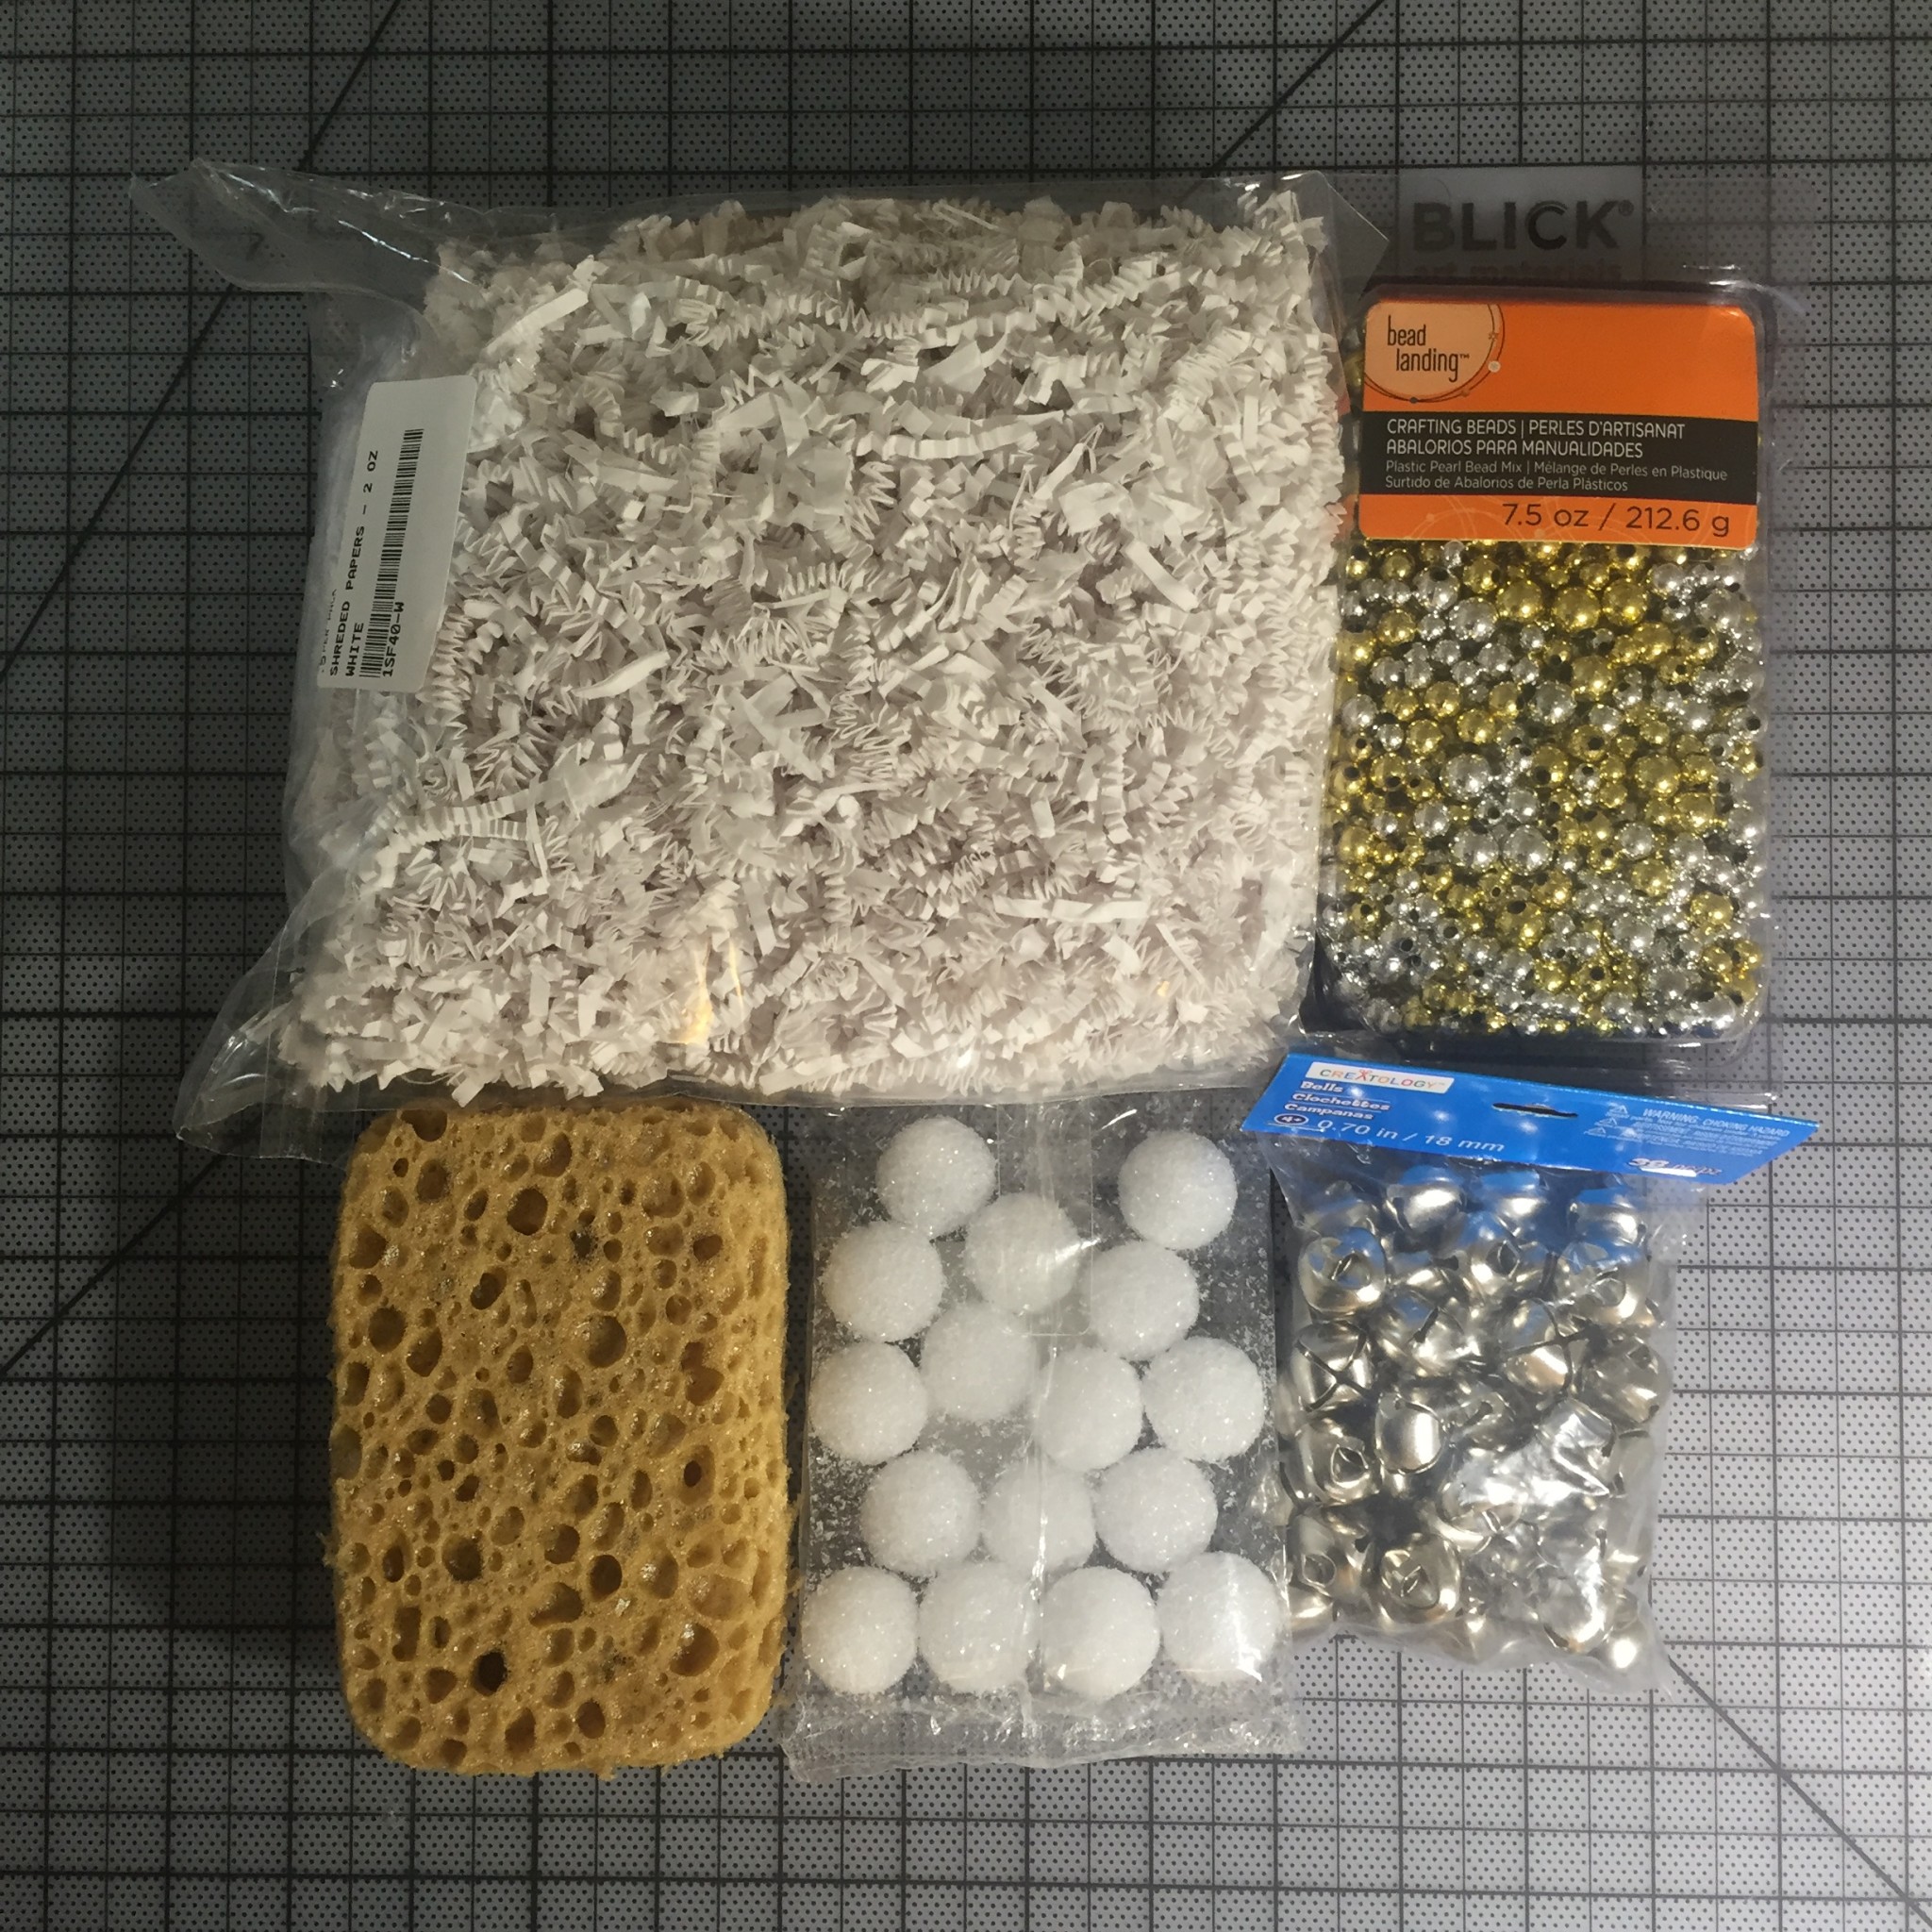
Big(36″ x 36″) and small(12″ x 12′) felt sheets – polyester and wool
Wool roving rolls
Feltworks replacement needles and multi-needle / embroidery needles and threads
An Embroidery hoop
A sponge or a felting mat – it helps smooth needle-punching works into your base fabric
Pins
Cotton
An Iron and a thin fabric scrap
Iron-On Adhesive
Poppers and conductive threads
A solder
Hot glue gun
Conductive ink and stencil sponges
A table lamp
Foam sheets
Hook wires
A plier
– You can buy materials for fletwork at Michael’s and Amazon. (Tip: If you joinMichael’s membership, it will send you discount coupons)
Sketch
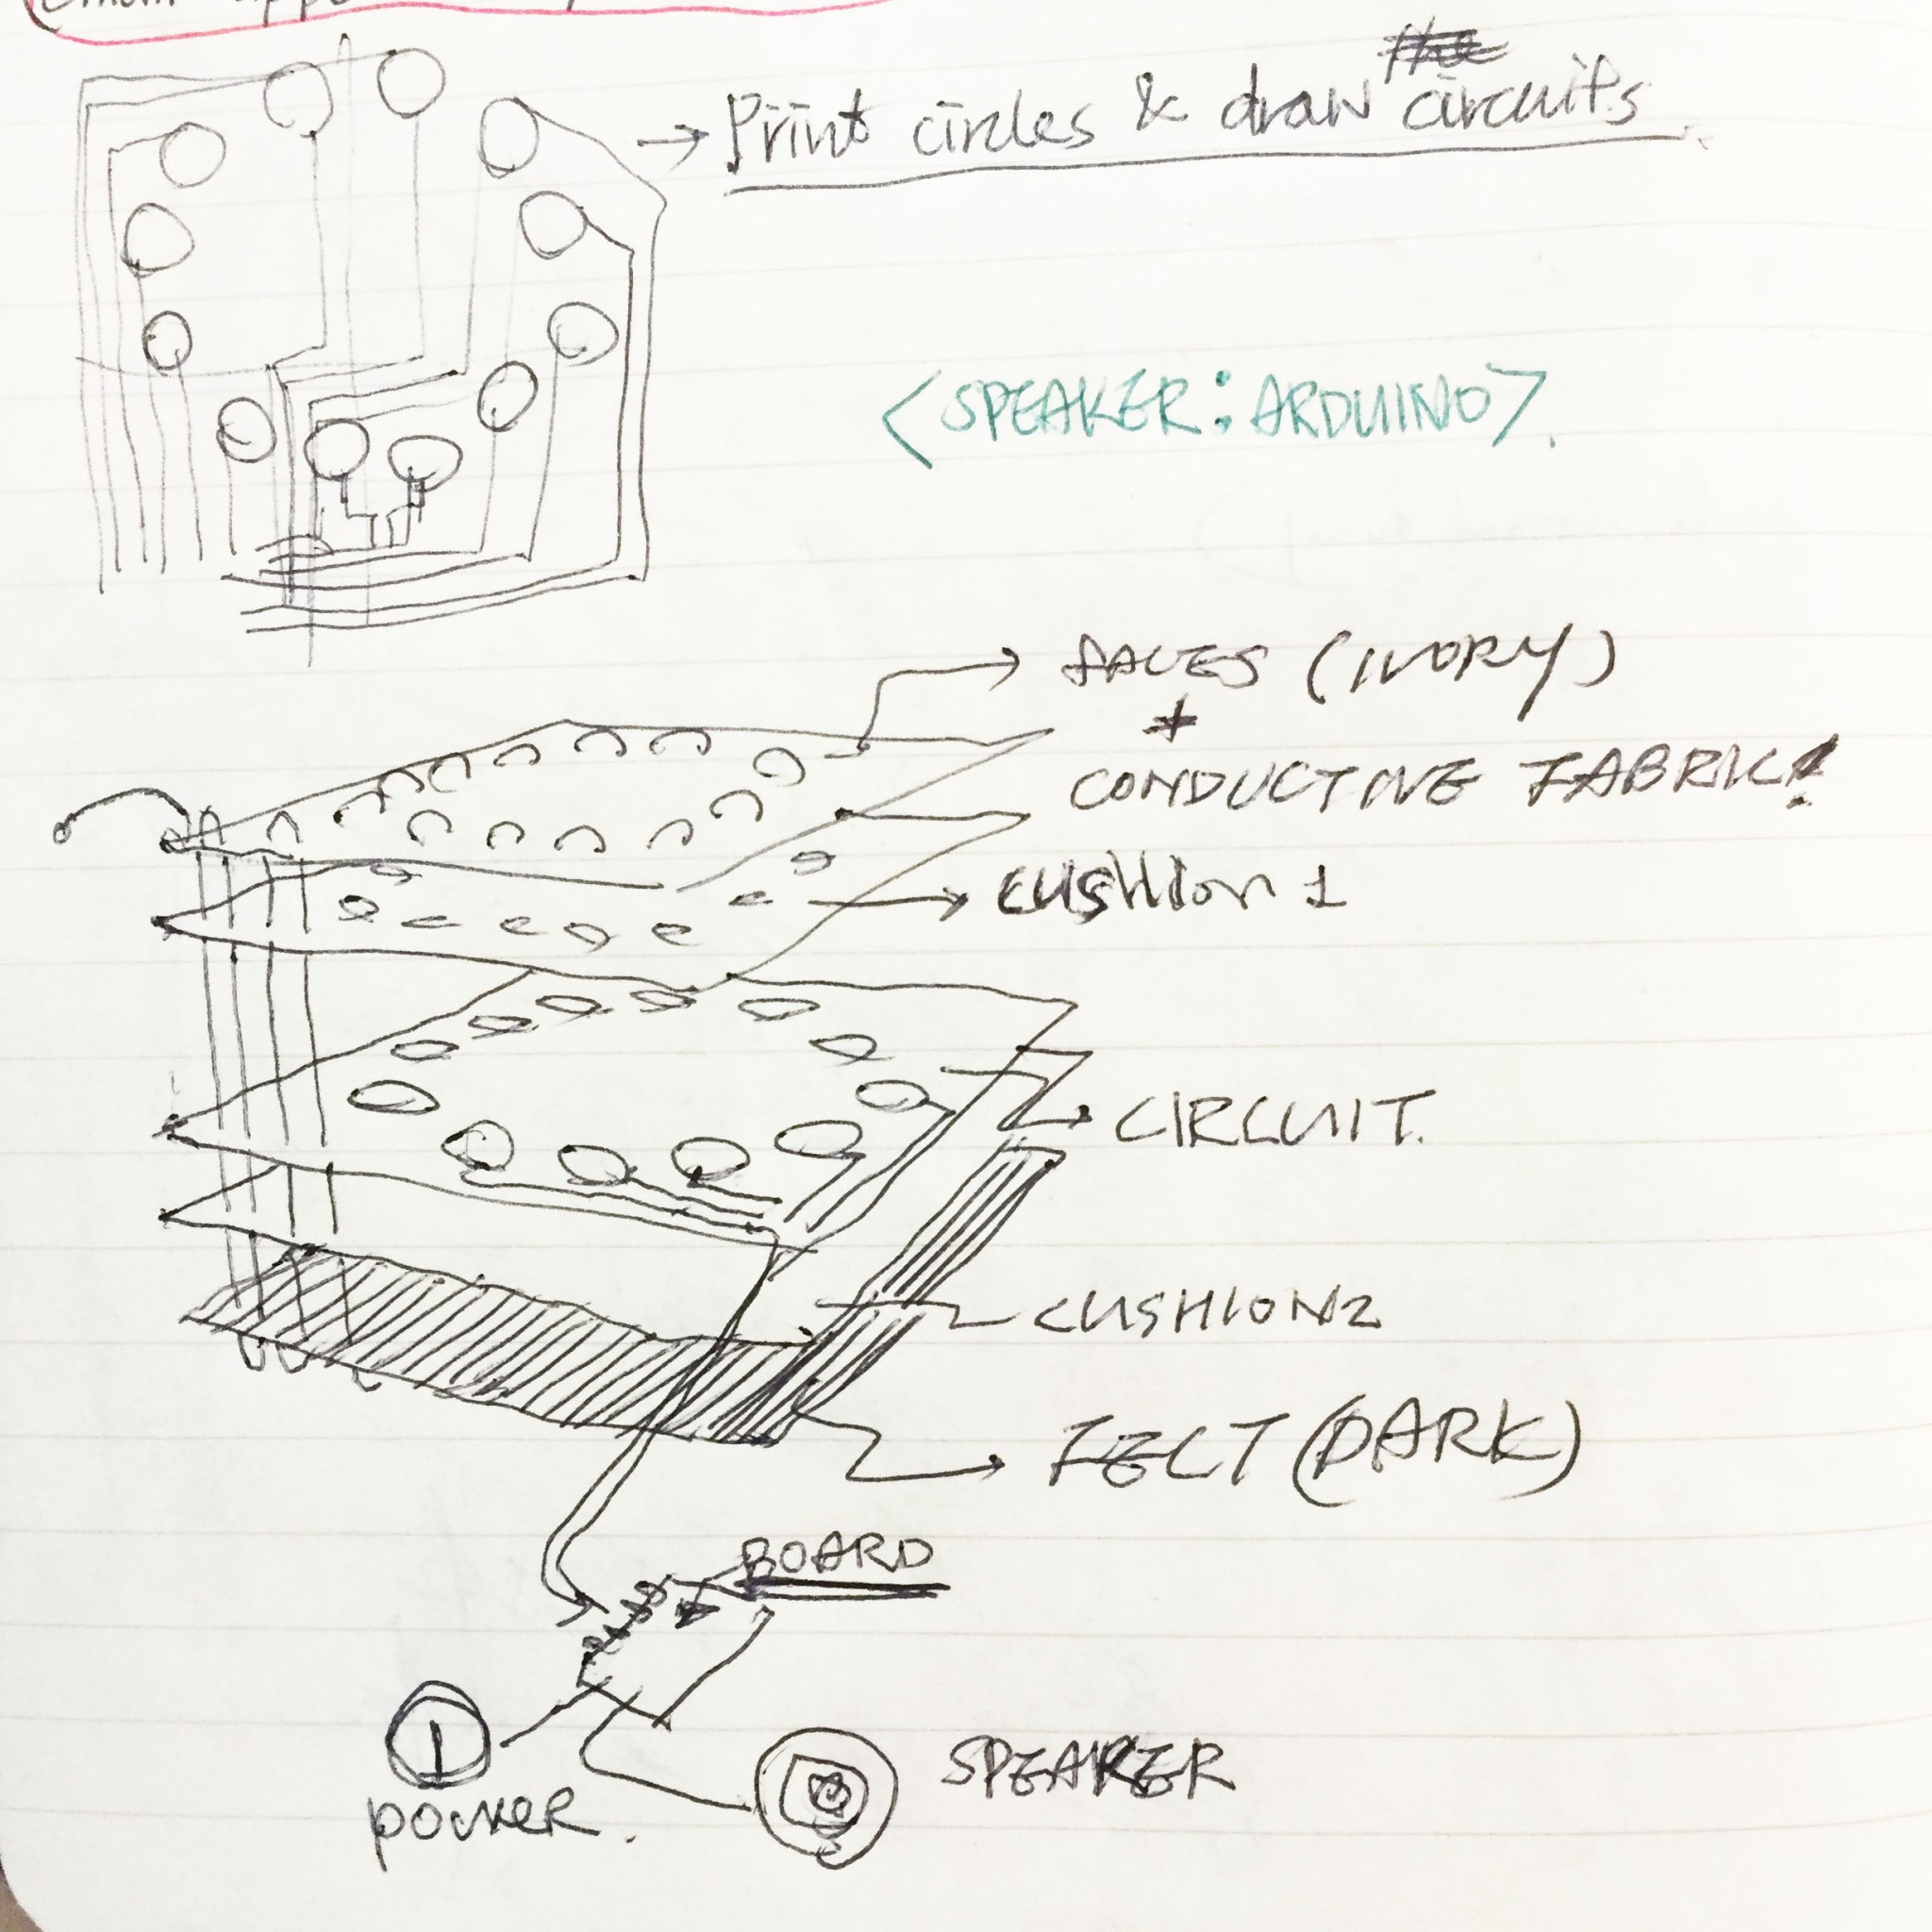
how to build circuit and put all layers together
Ddesign Execution
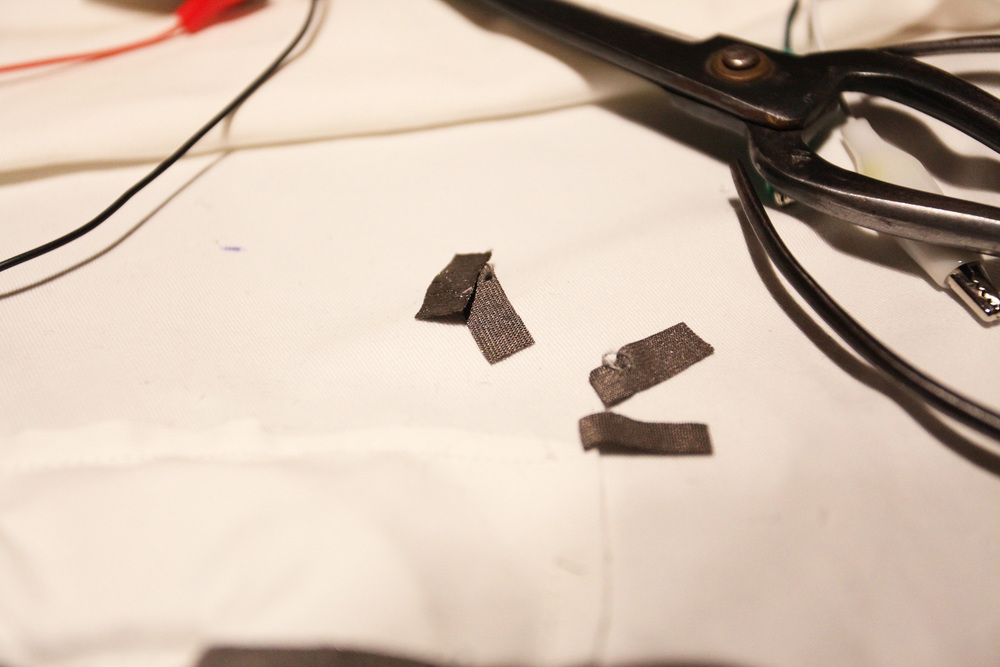
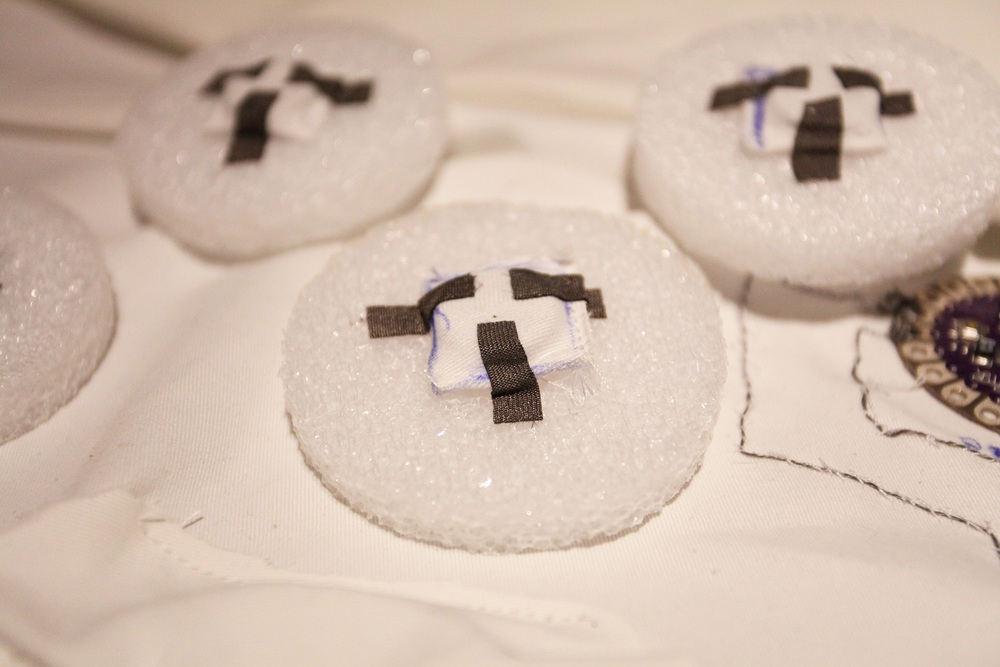
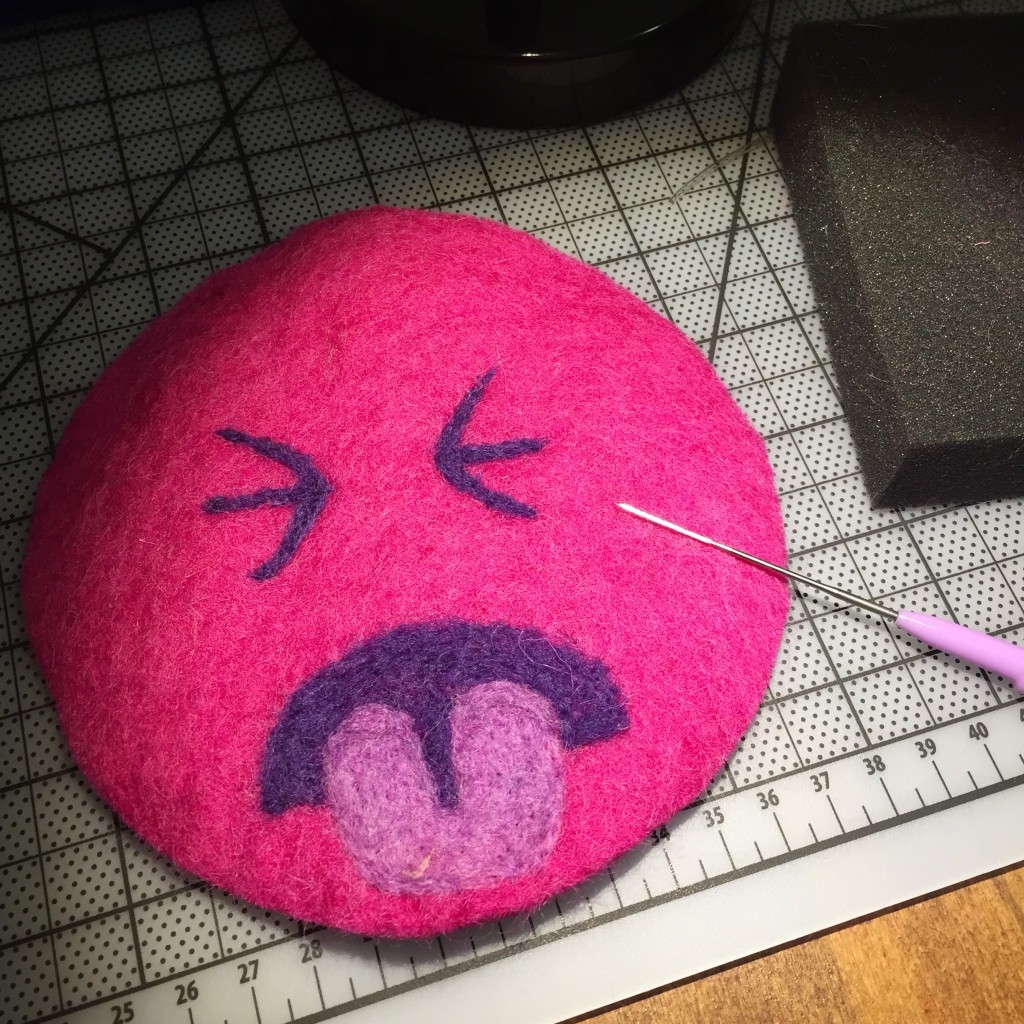
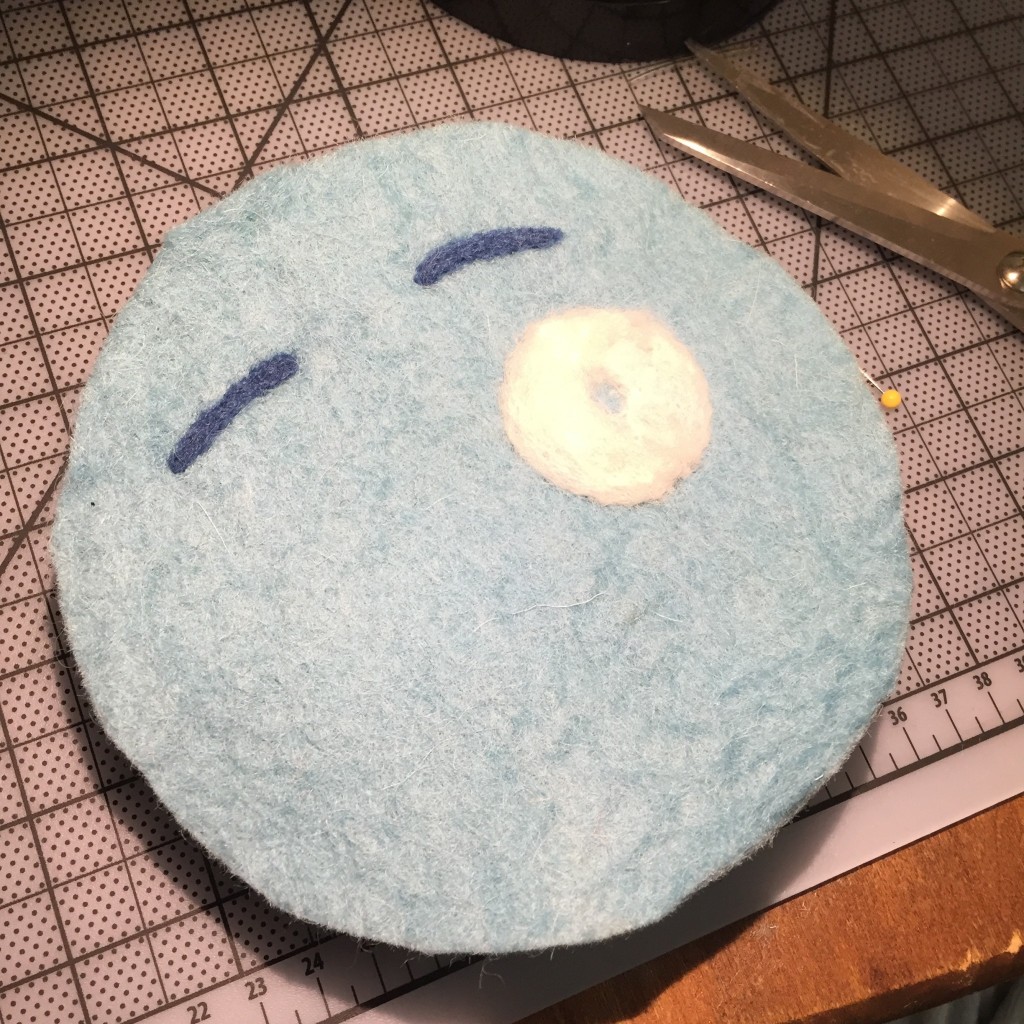
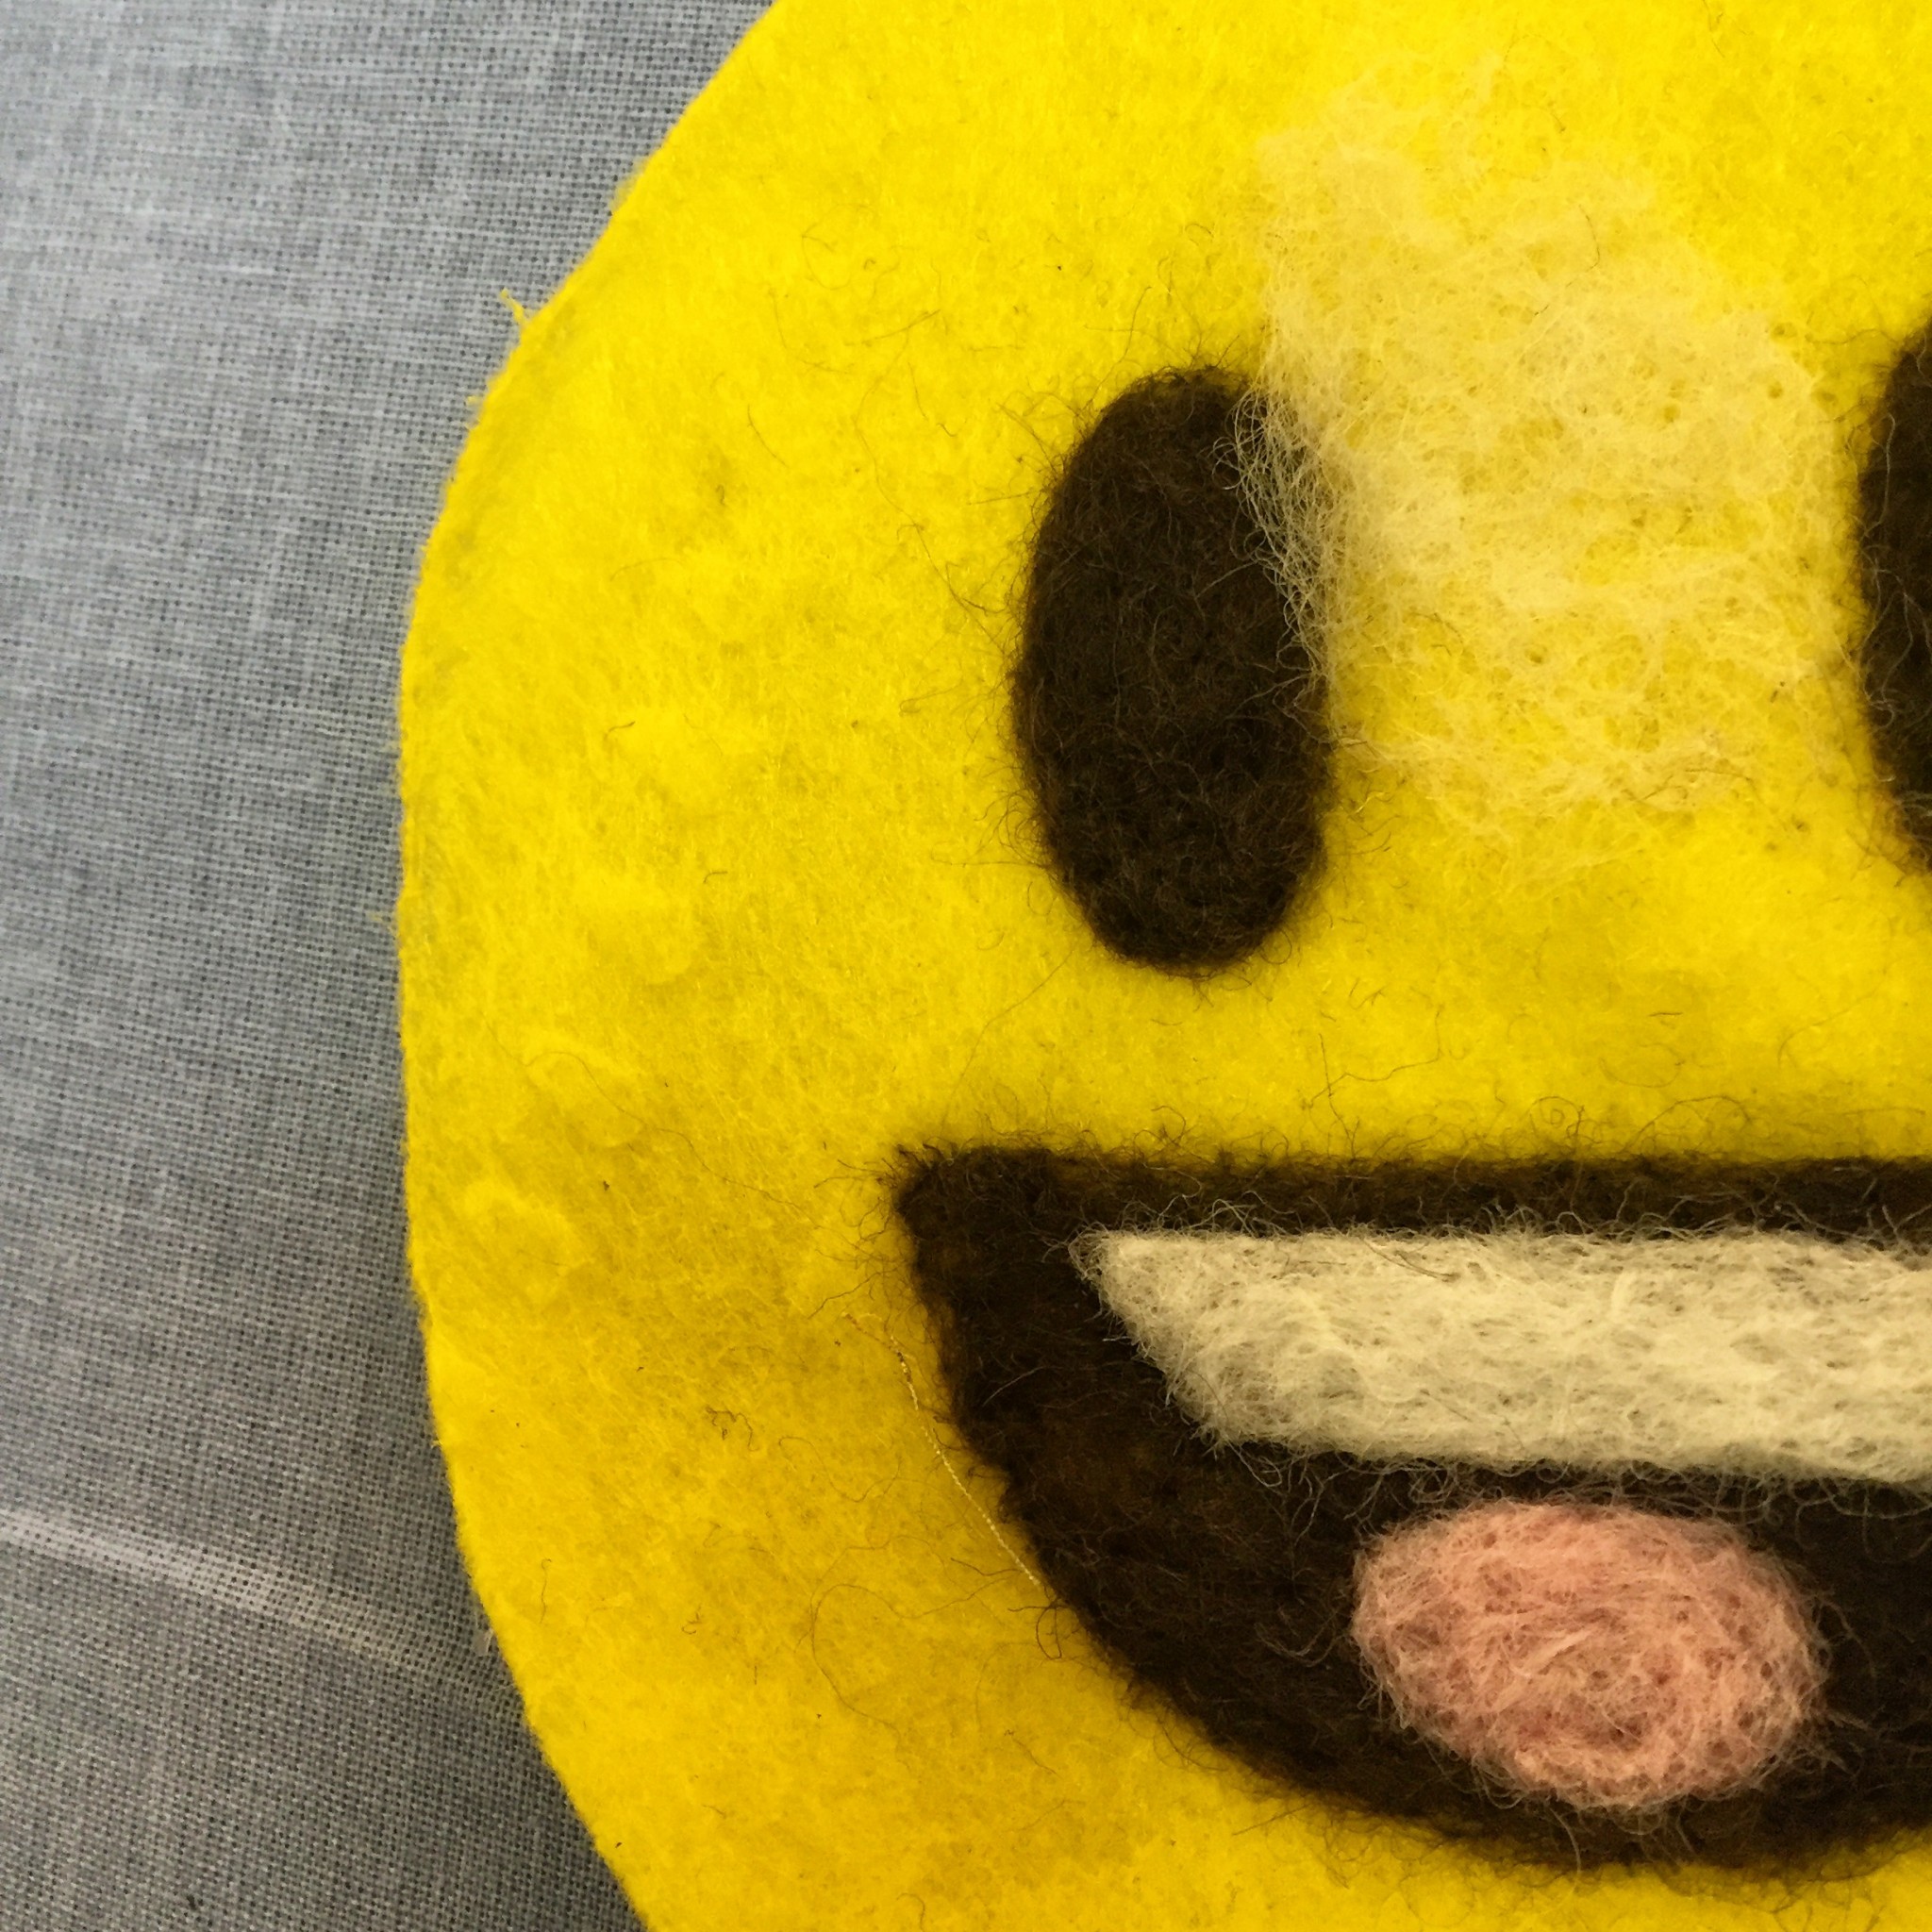
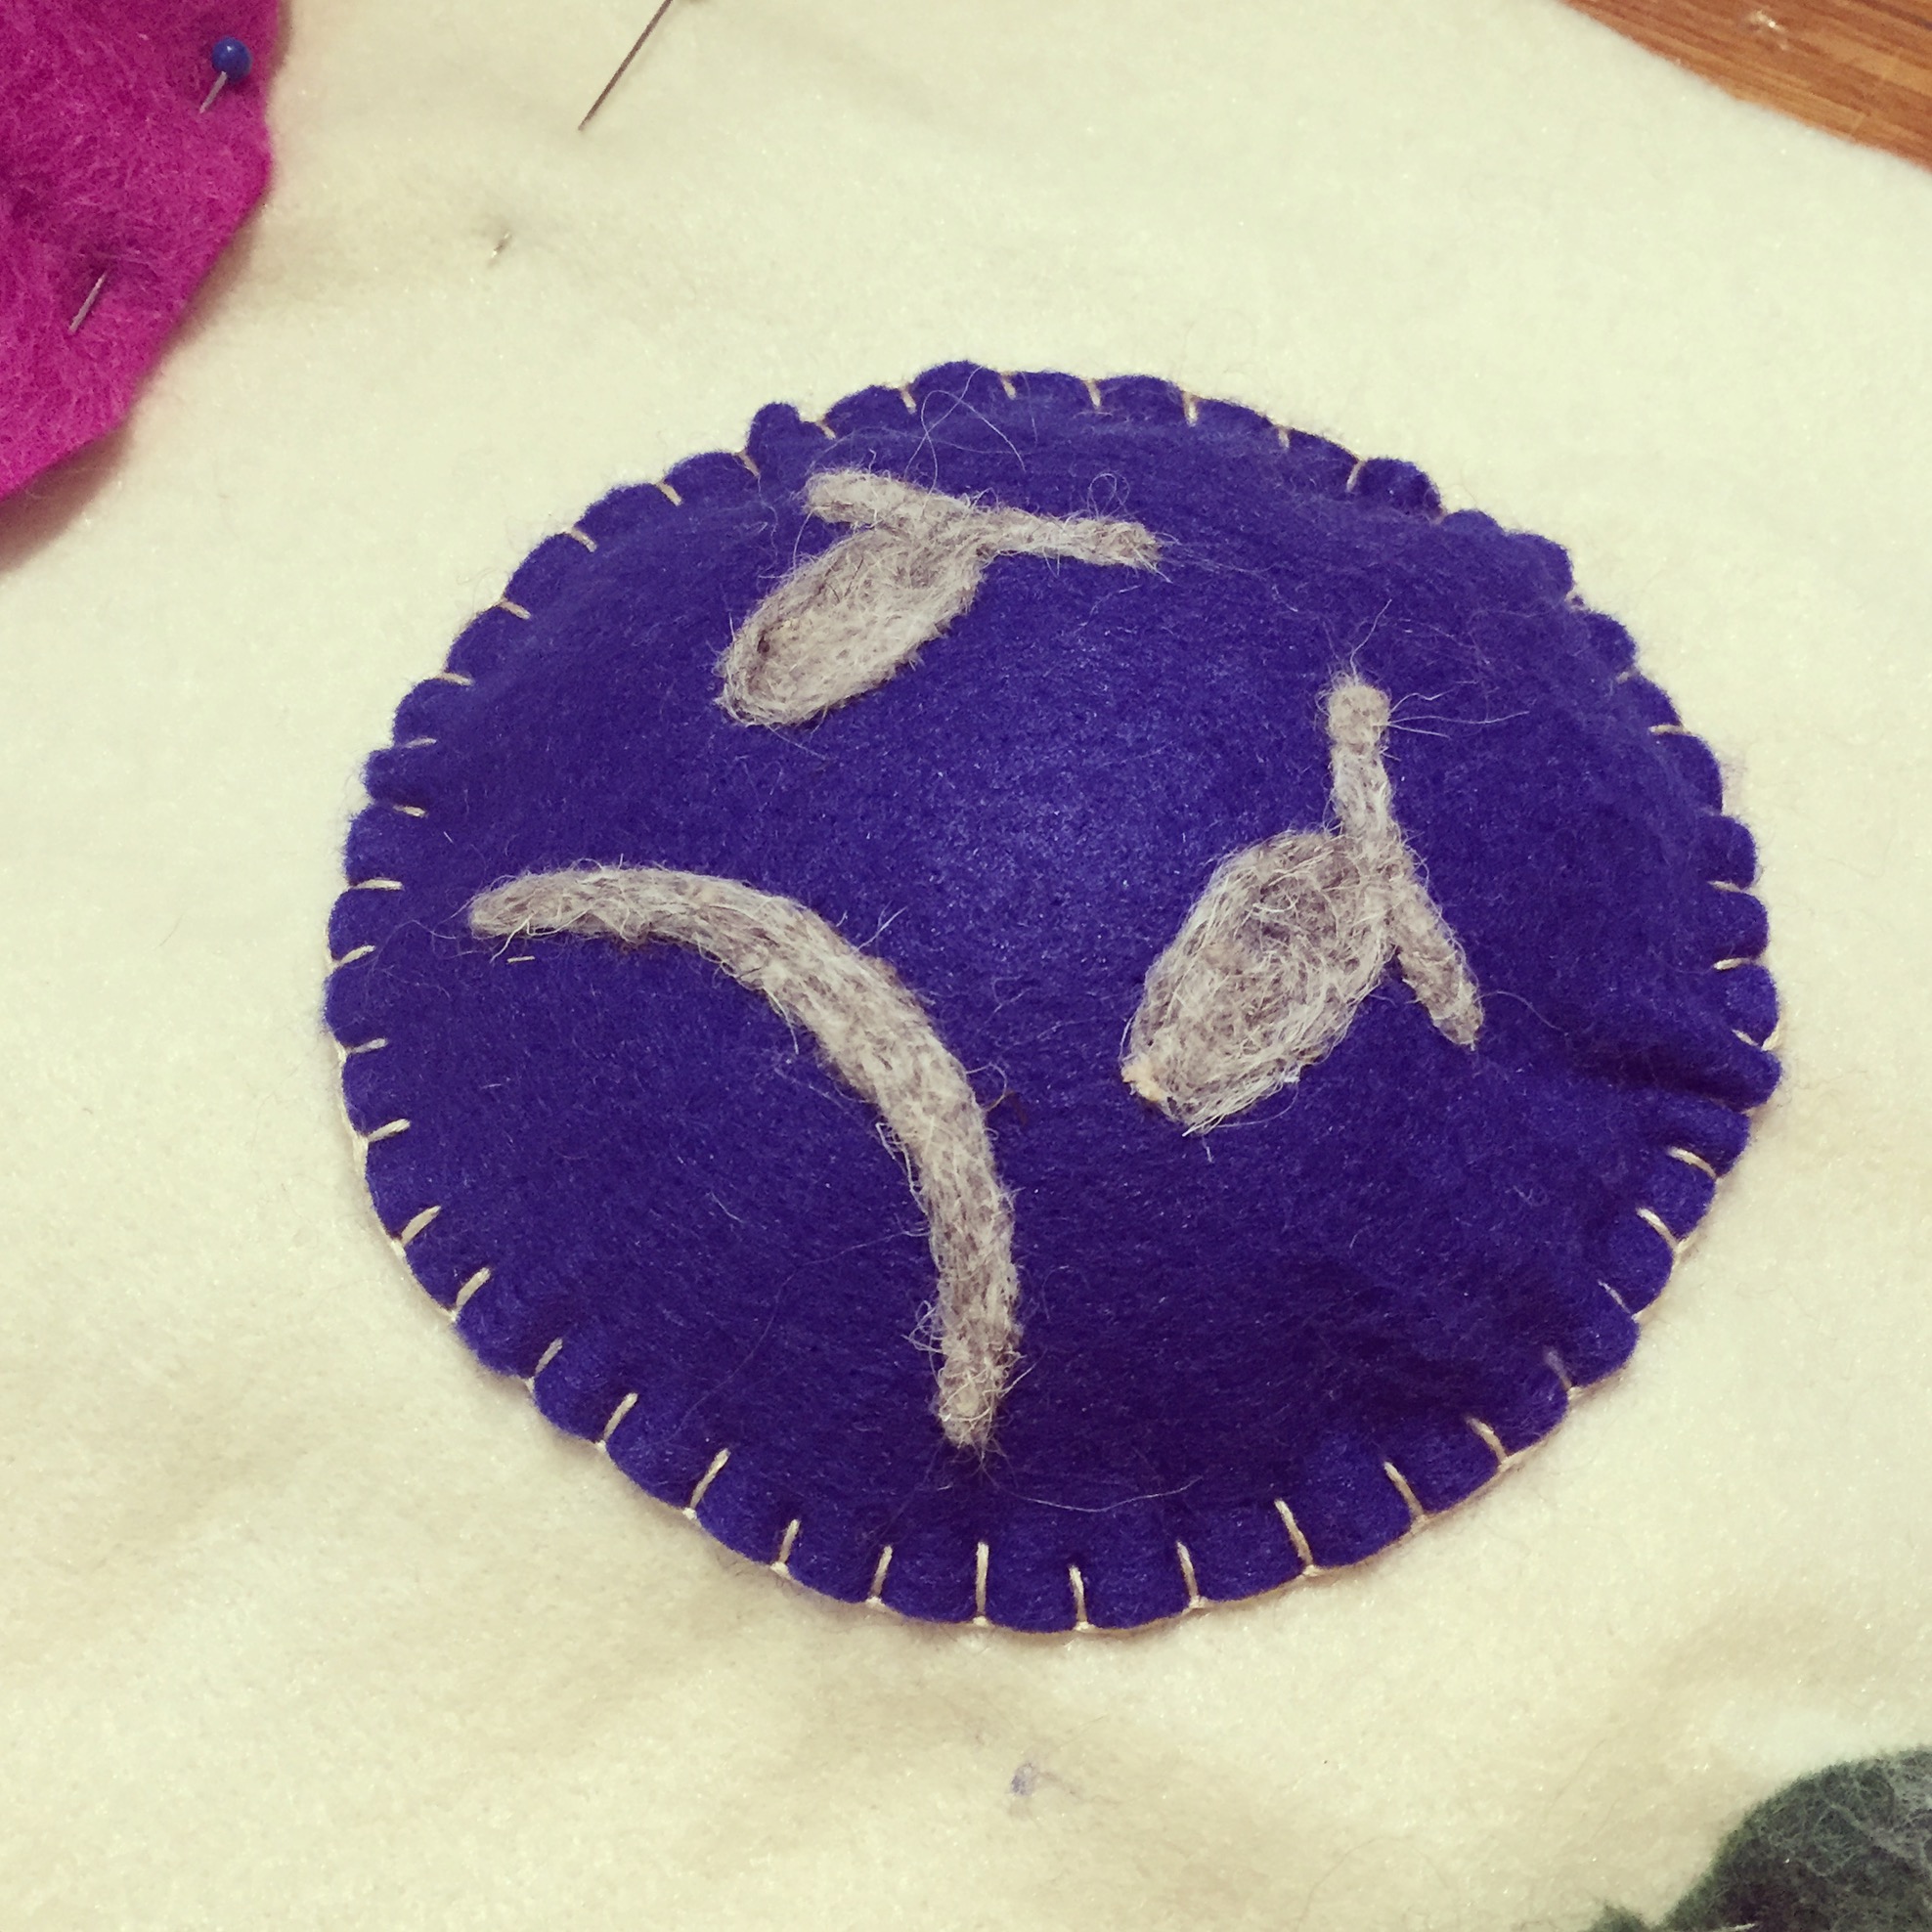
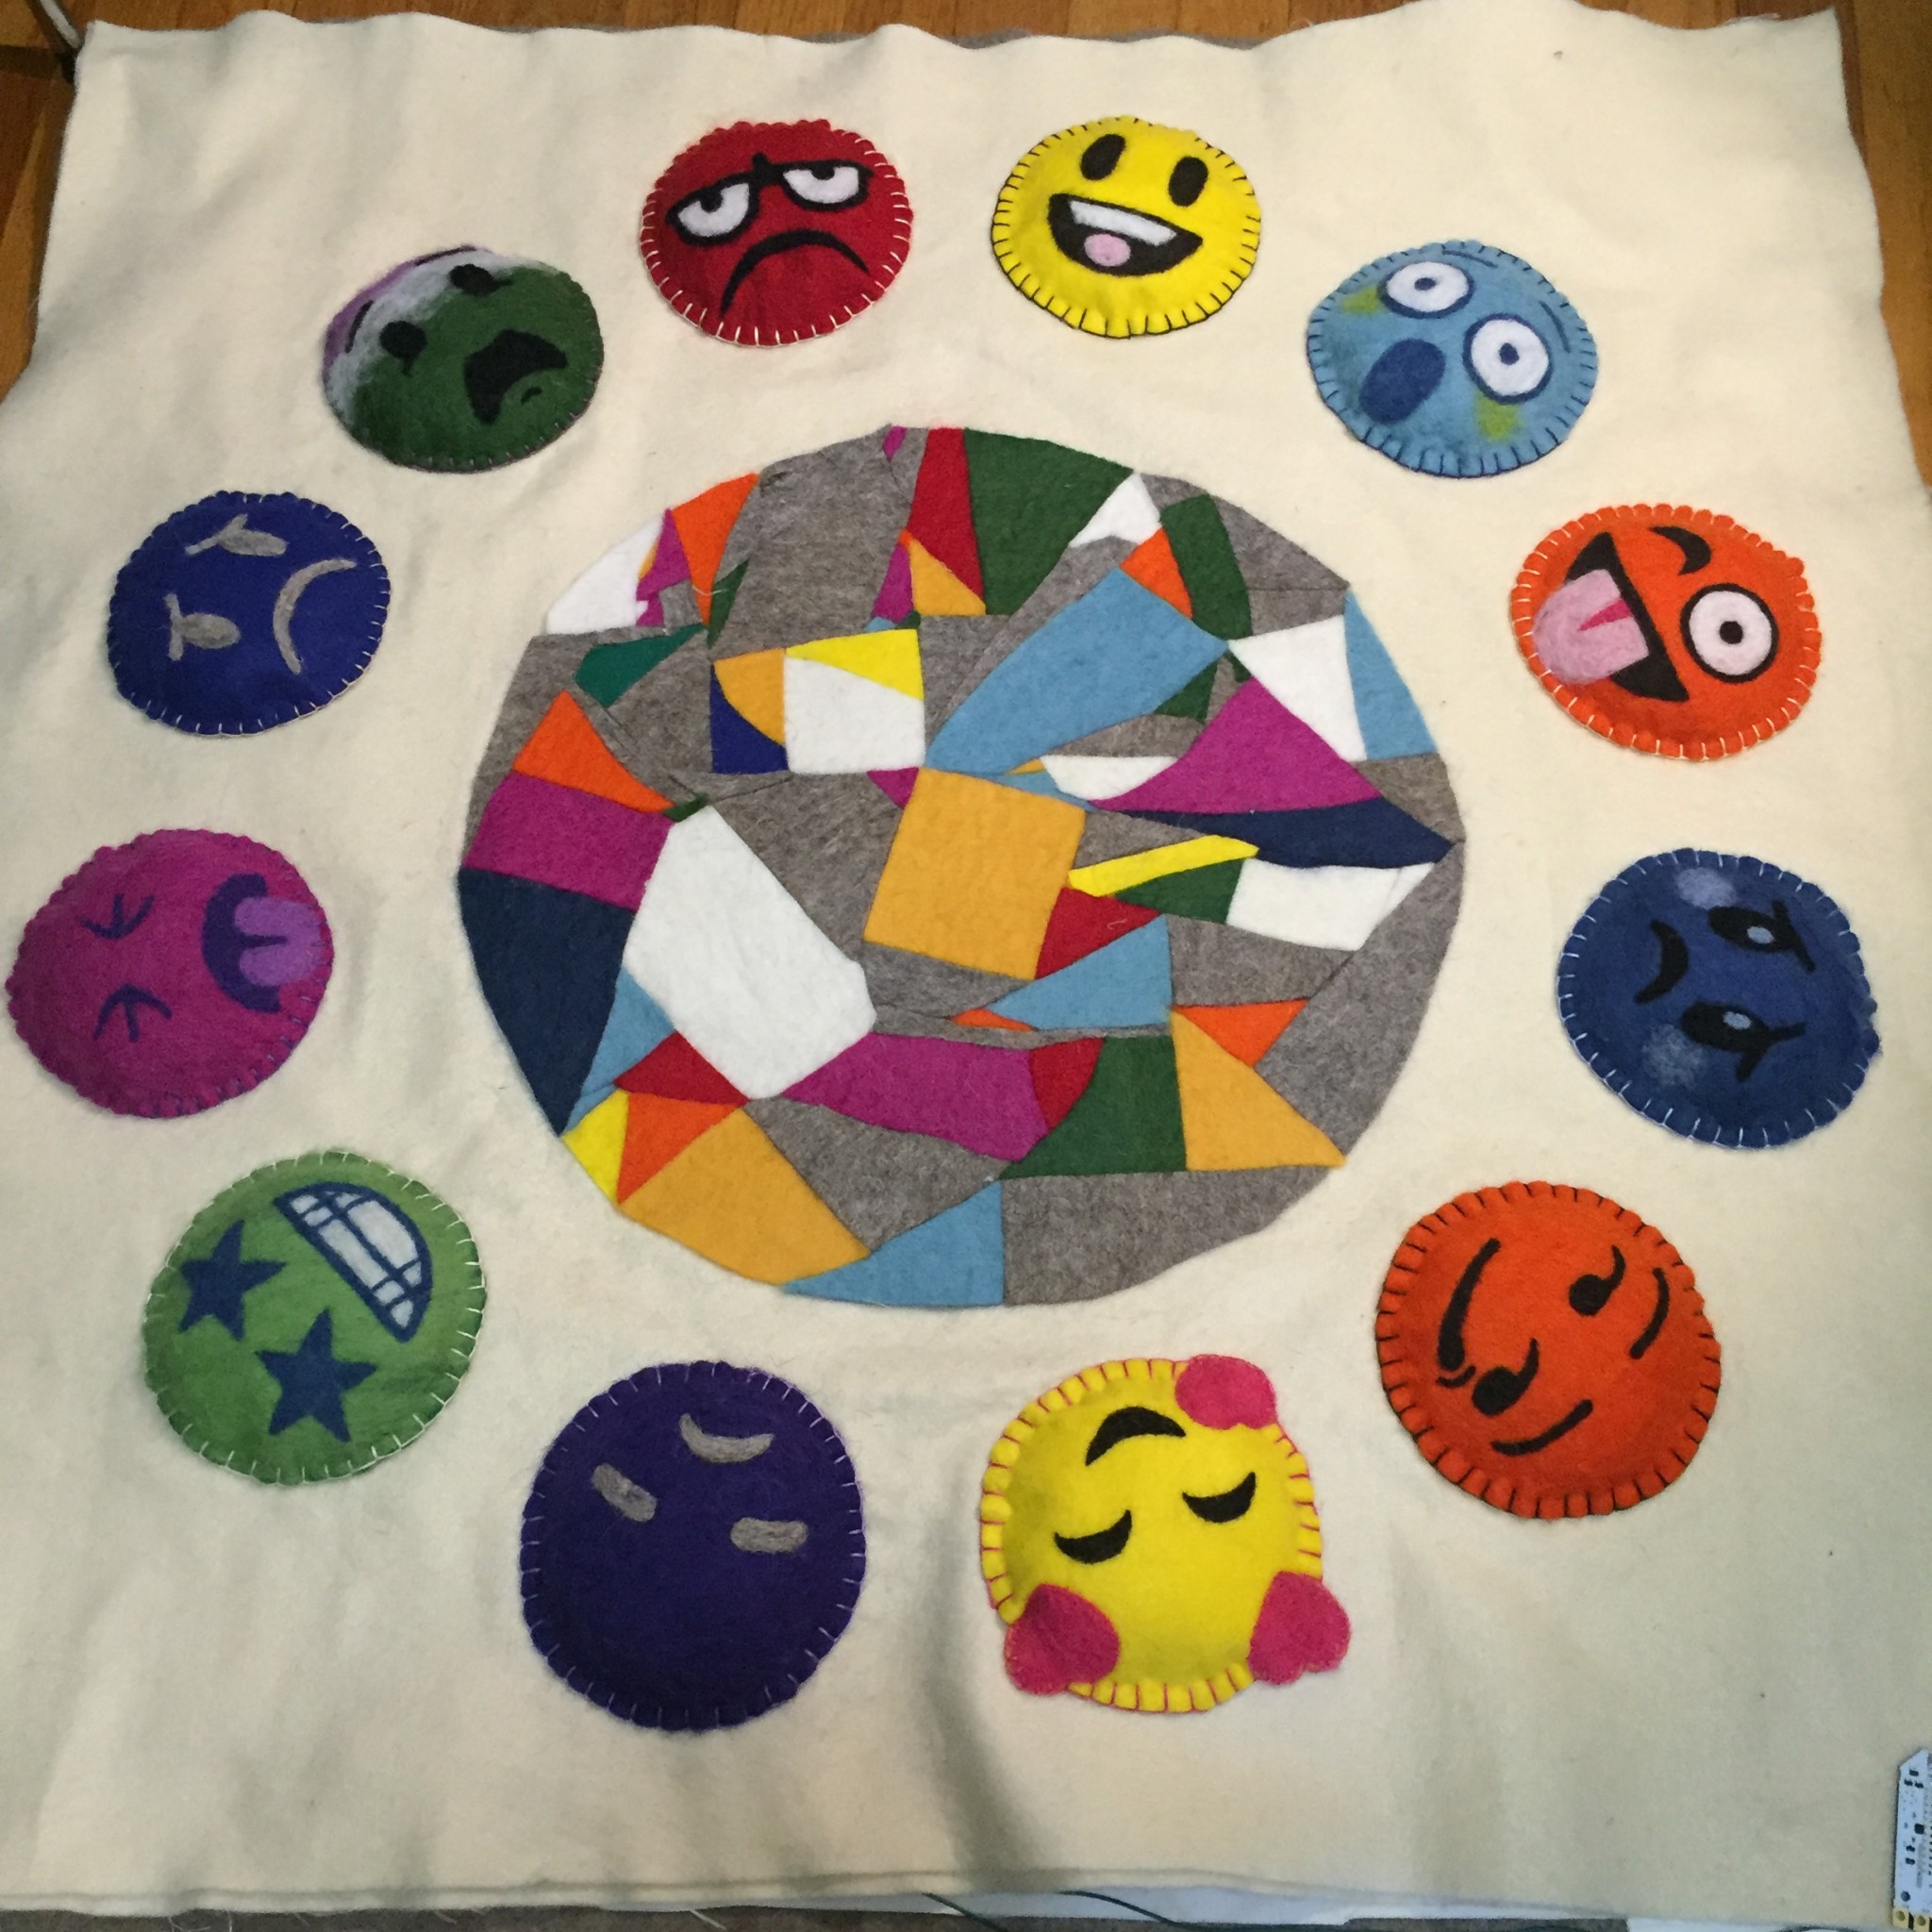
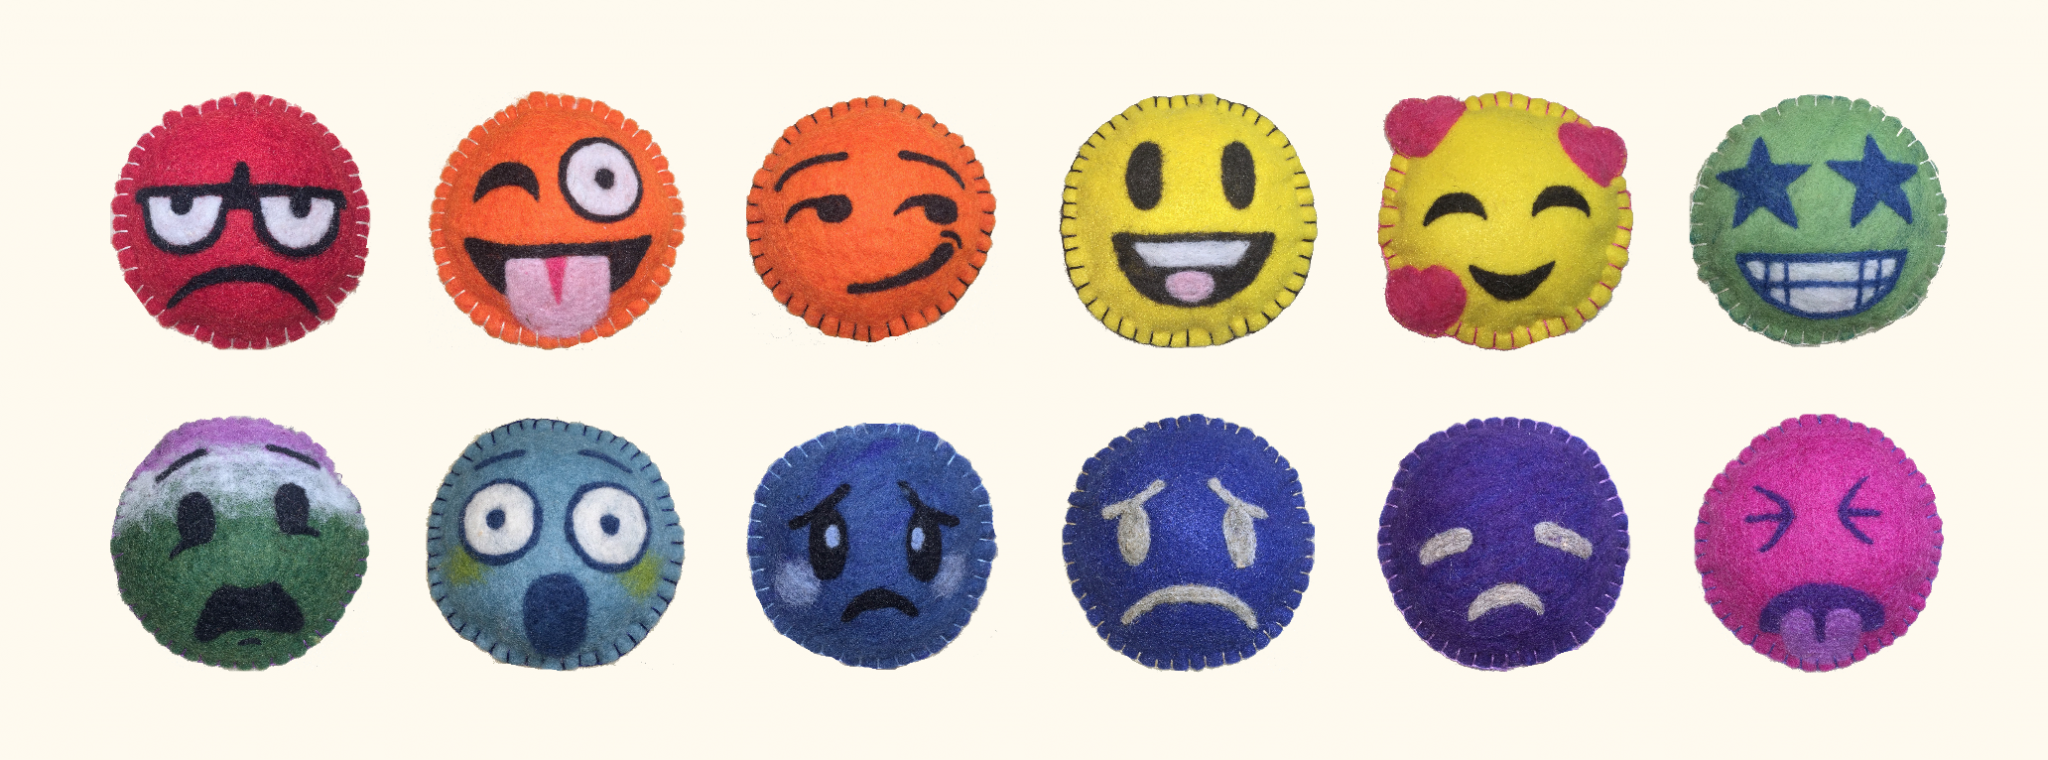
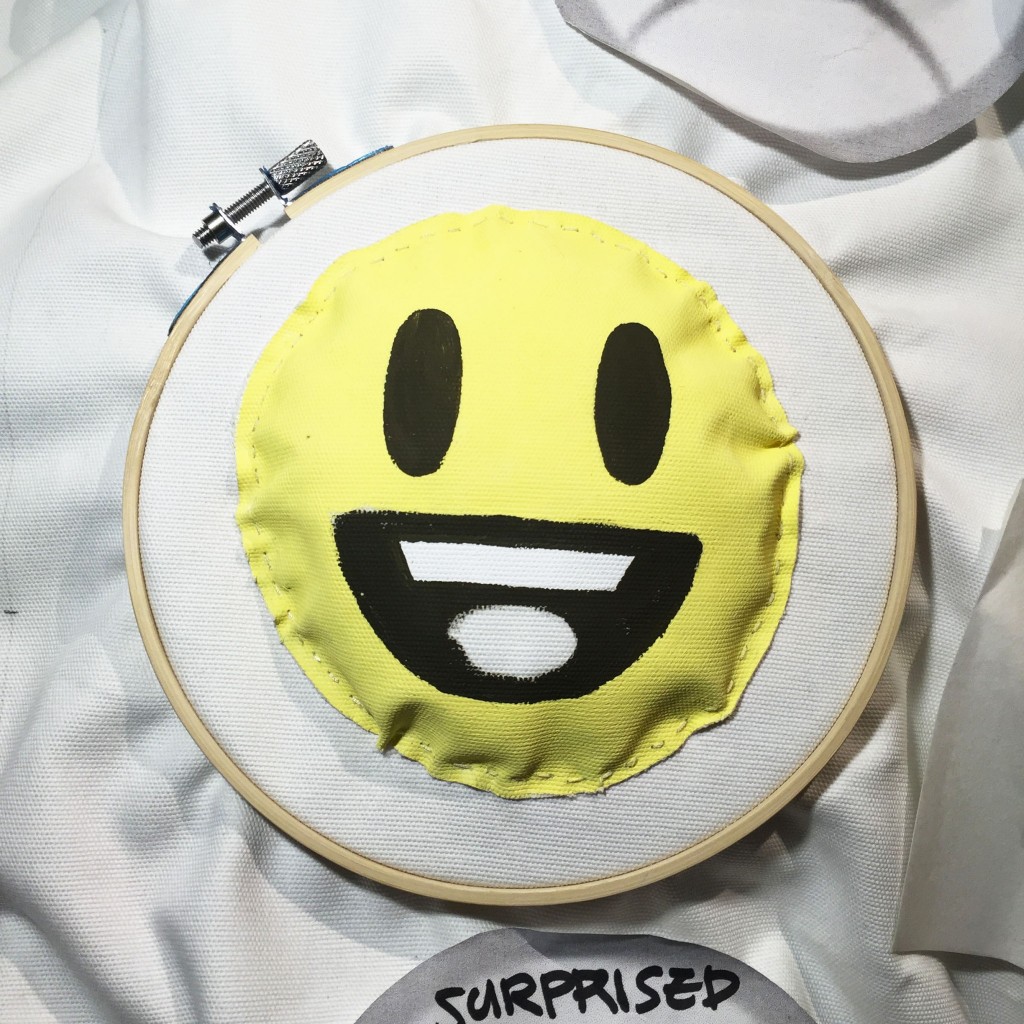
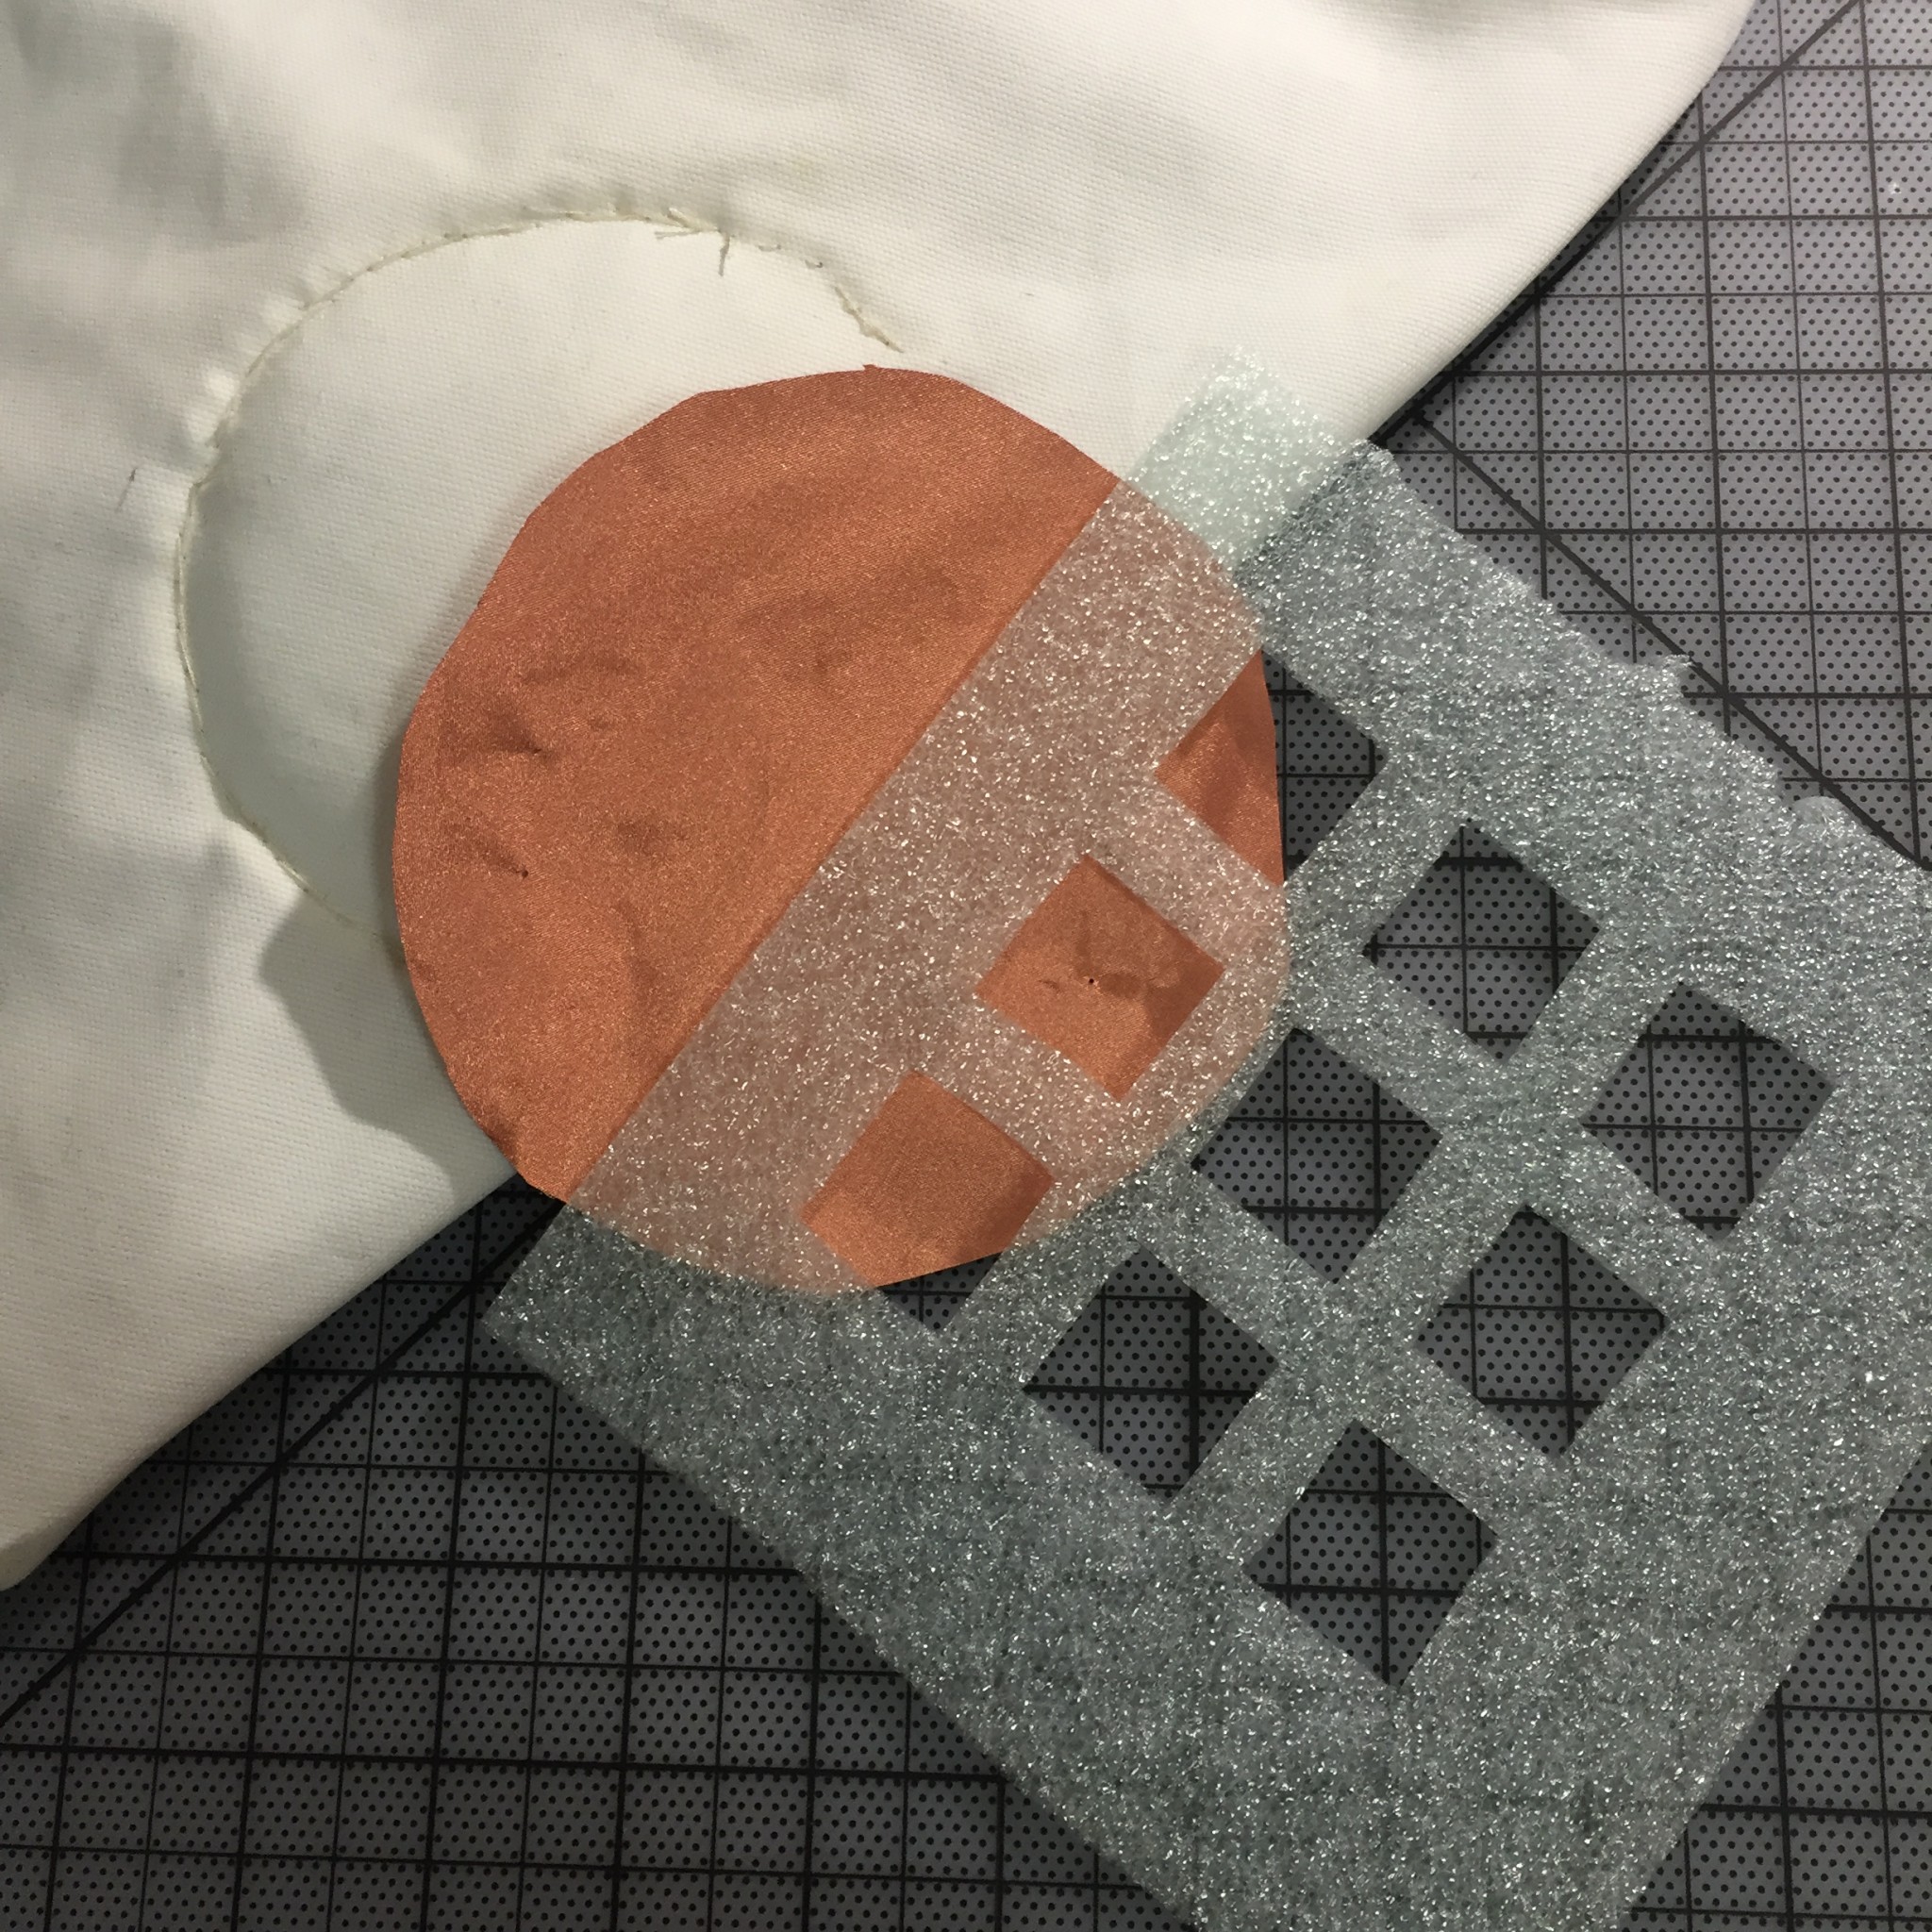
Cut felt into 12 circles to make faces. With a felt needle ( there are different needles: coarse and fine) make patterns you want. Tip: keep poking!
This is the video of how I did felt work.
[TIP: When you cannot find certain colors in wool or polyester felt, don’t worry. You can add wool on other felts and needle it to make your own color. (Example: scared face with green color and Lonely face with violet below)]
If you use polyester felt, be careful to use iron because iron heat will melt polyester felt. I knew iron heat melts it, but made this mark on Happy face. You need a thin fabric scrap and out it between iron and your felt to iron.
I learned how to blanket stitch through This video. It’s easy to follow.
[Embroidery threads and needles] let’s do blanket stitch. I used an embroidery hoop and pins to hold face onto top layer while stitching, which made work so much easier and fun!!
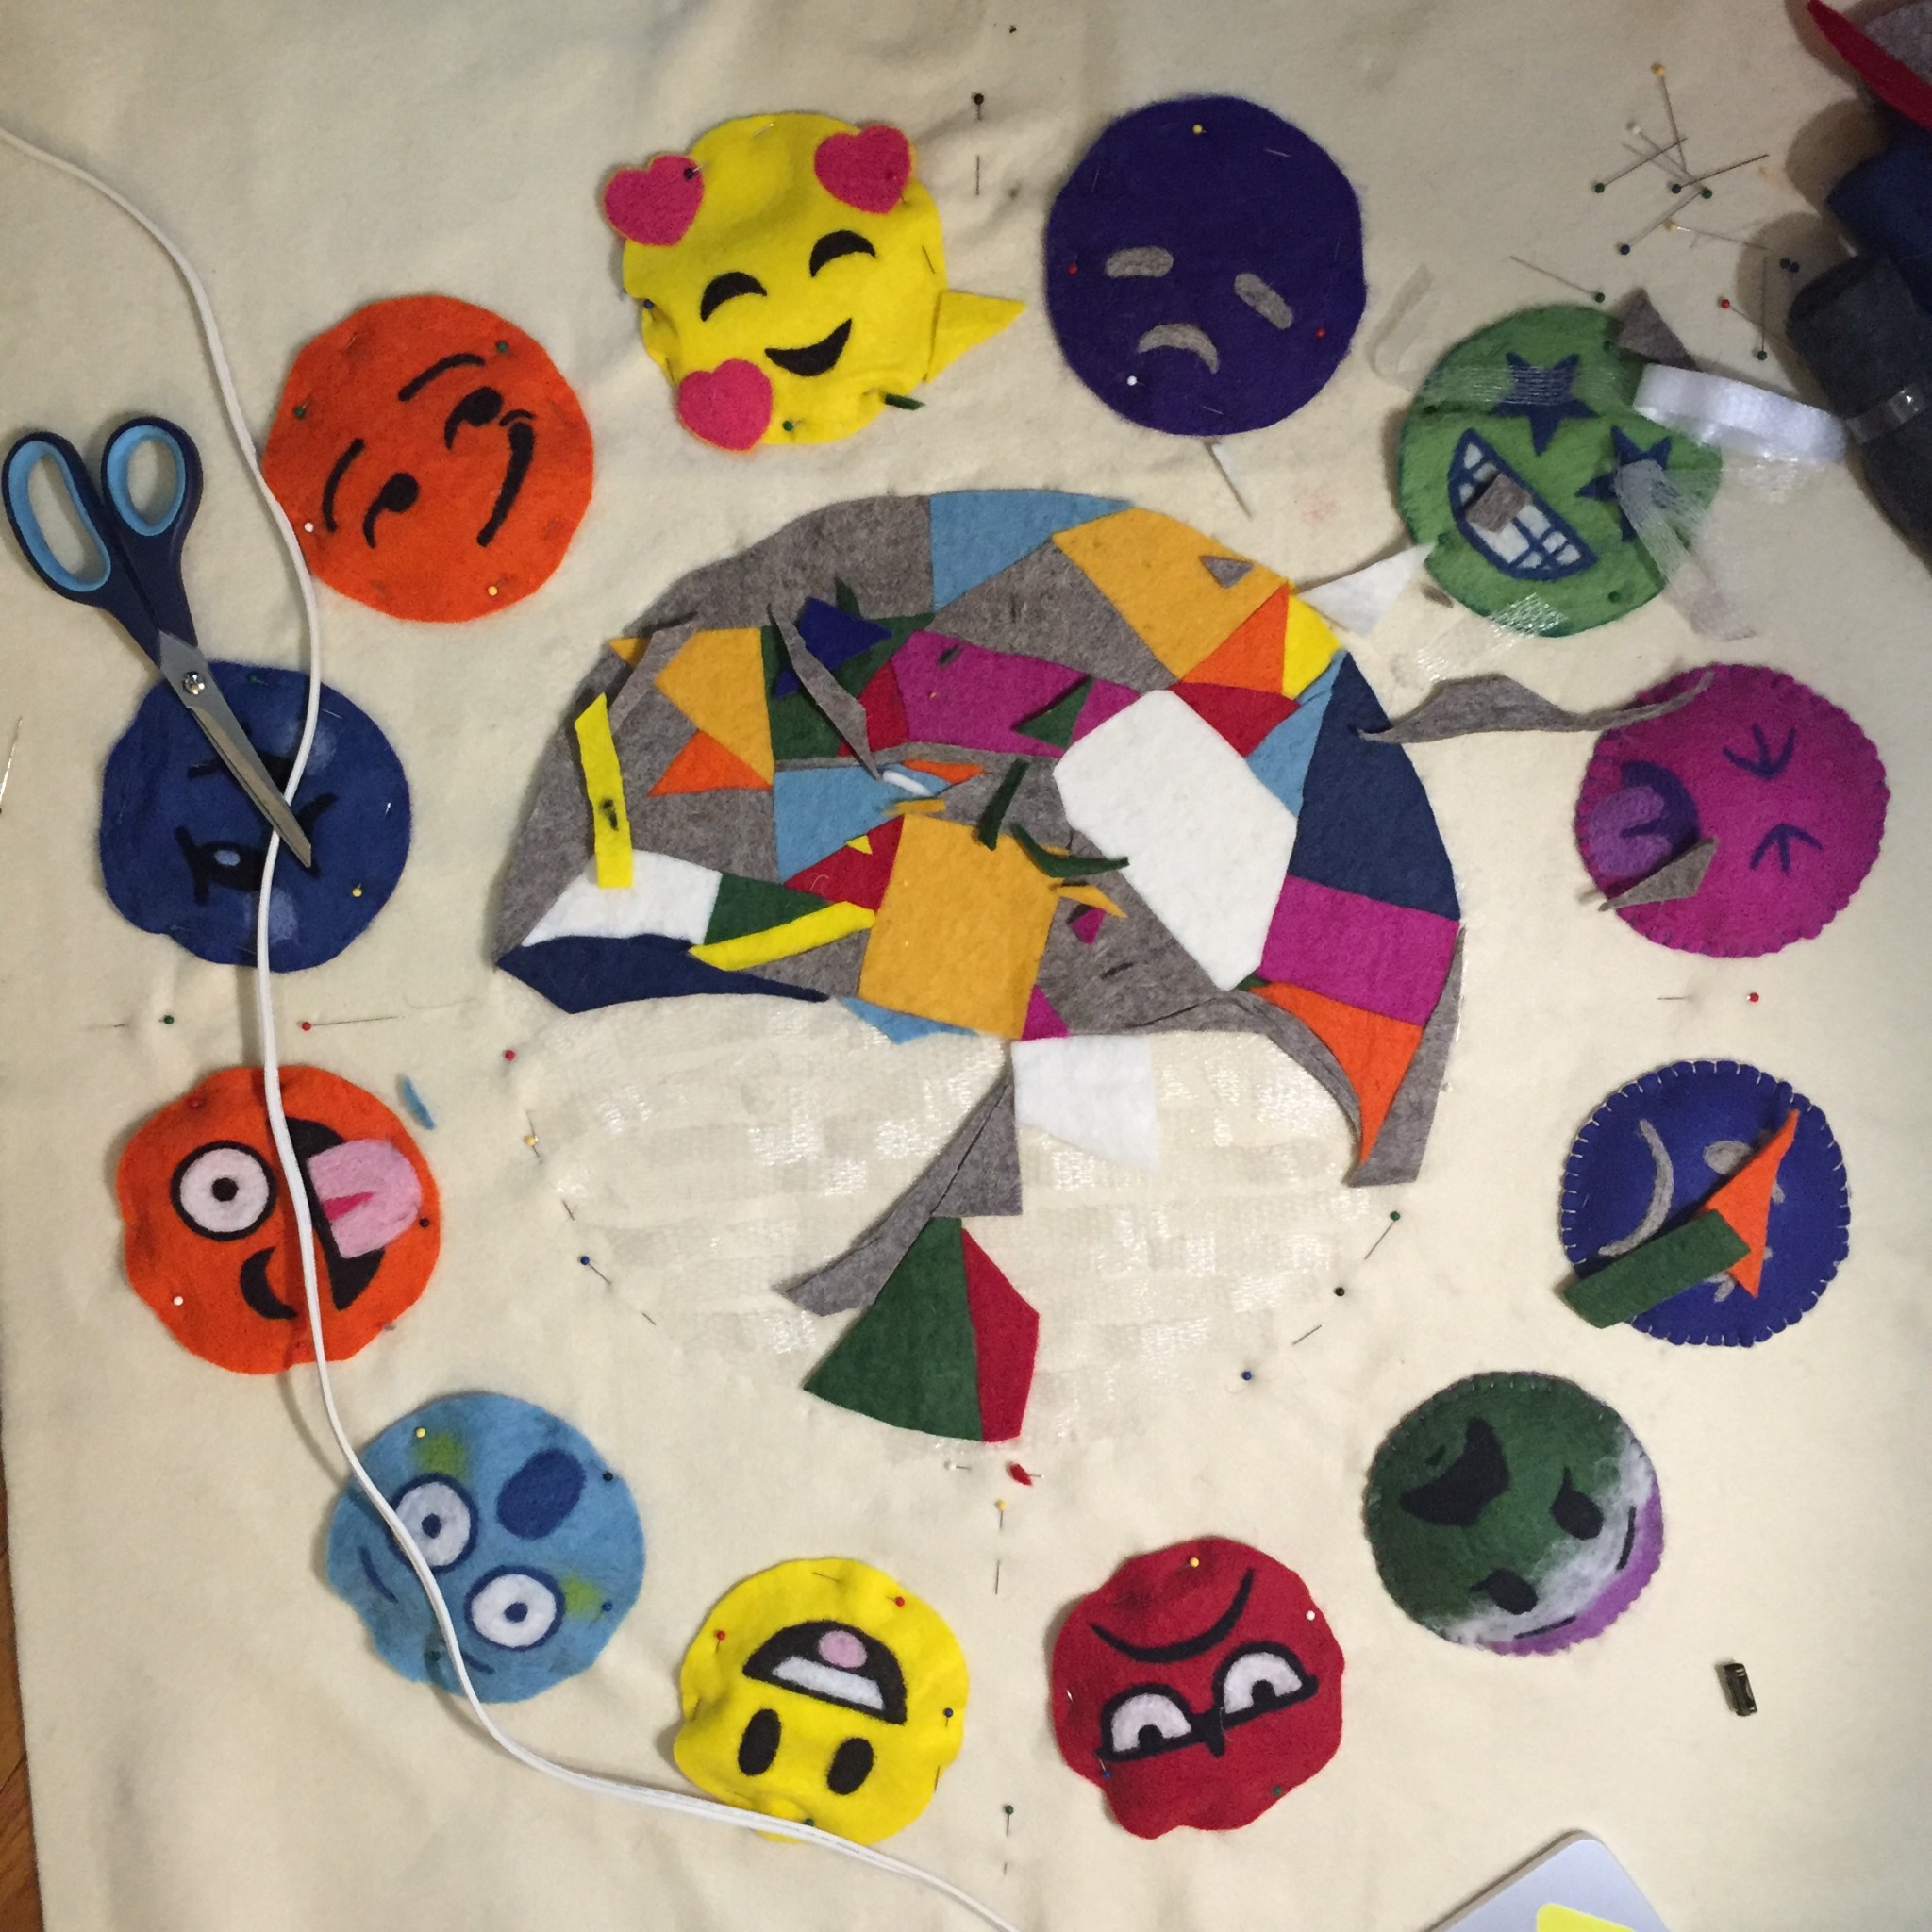
Aligned faces with the circle.
[Cotton puff] – Don’t finish blanket stitch!! Have to add cotton stuff to fill faces. THEN complete stitching!
With felt scraps. Made the seat for the kid in the middle of the mat. I used iron-on adhesive in order to put all the scraps together onto the top layer. It was way faster than stitching. [TIP: Use a cotton fabric scrap when ironing felt. If you use polyester felt, you MUST use a cotton fabric sheet to iron. If not, iron will burn your felt]
the top layer final
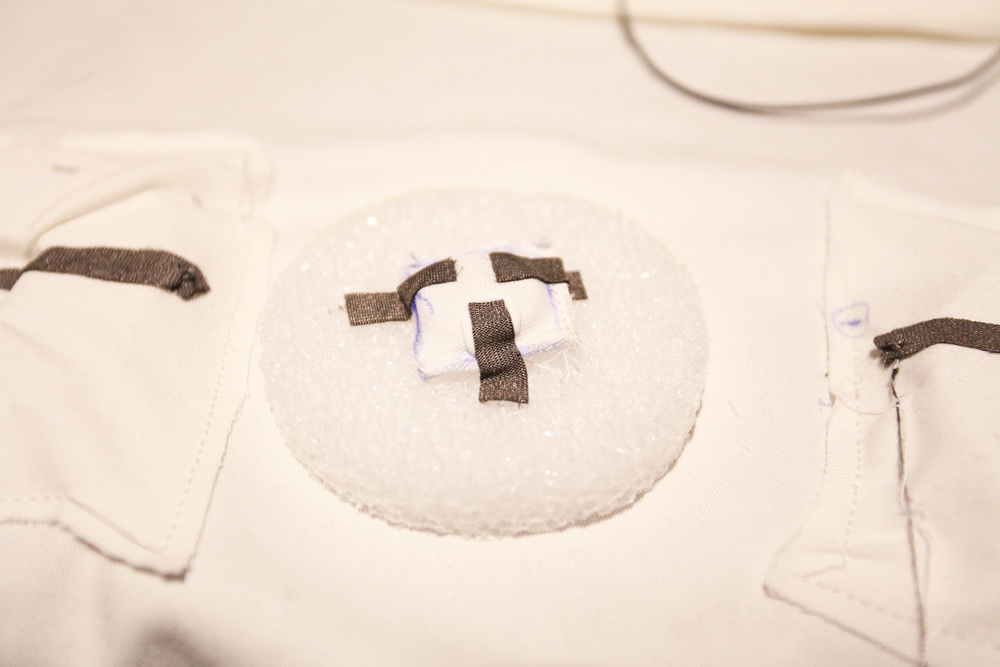
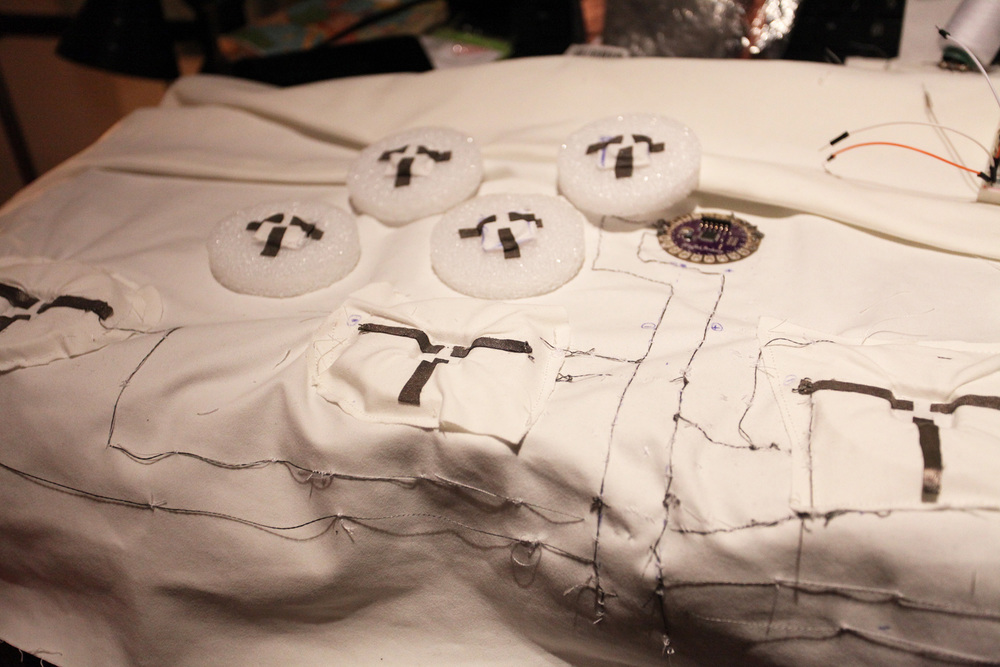
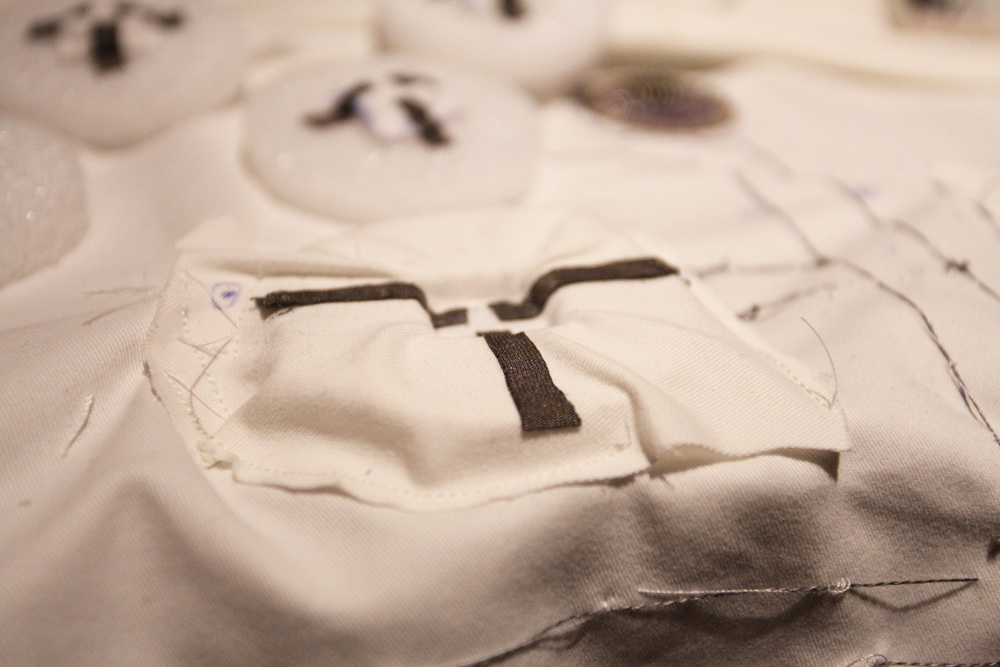
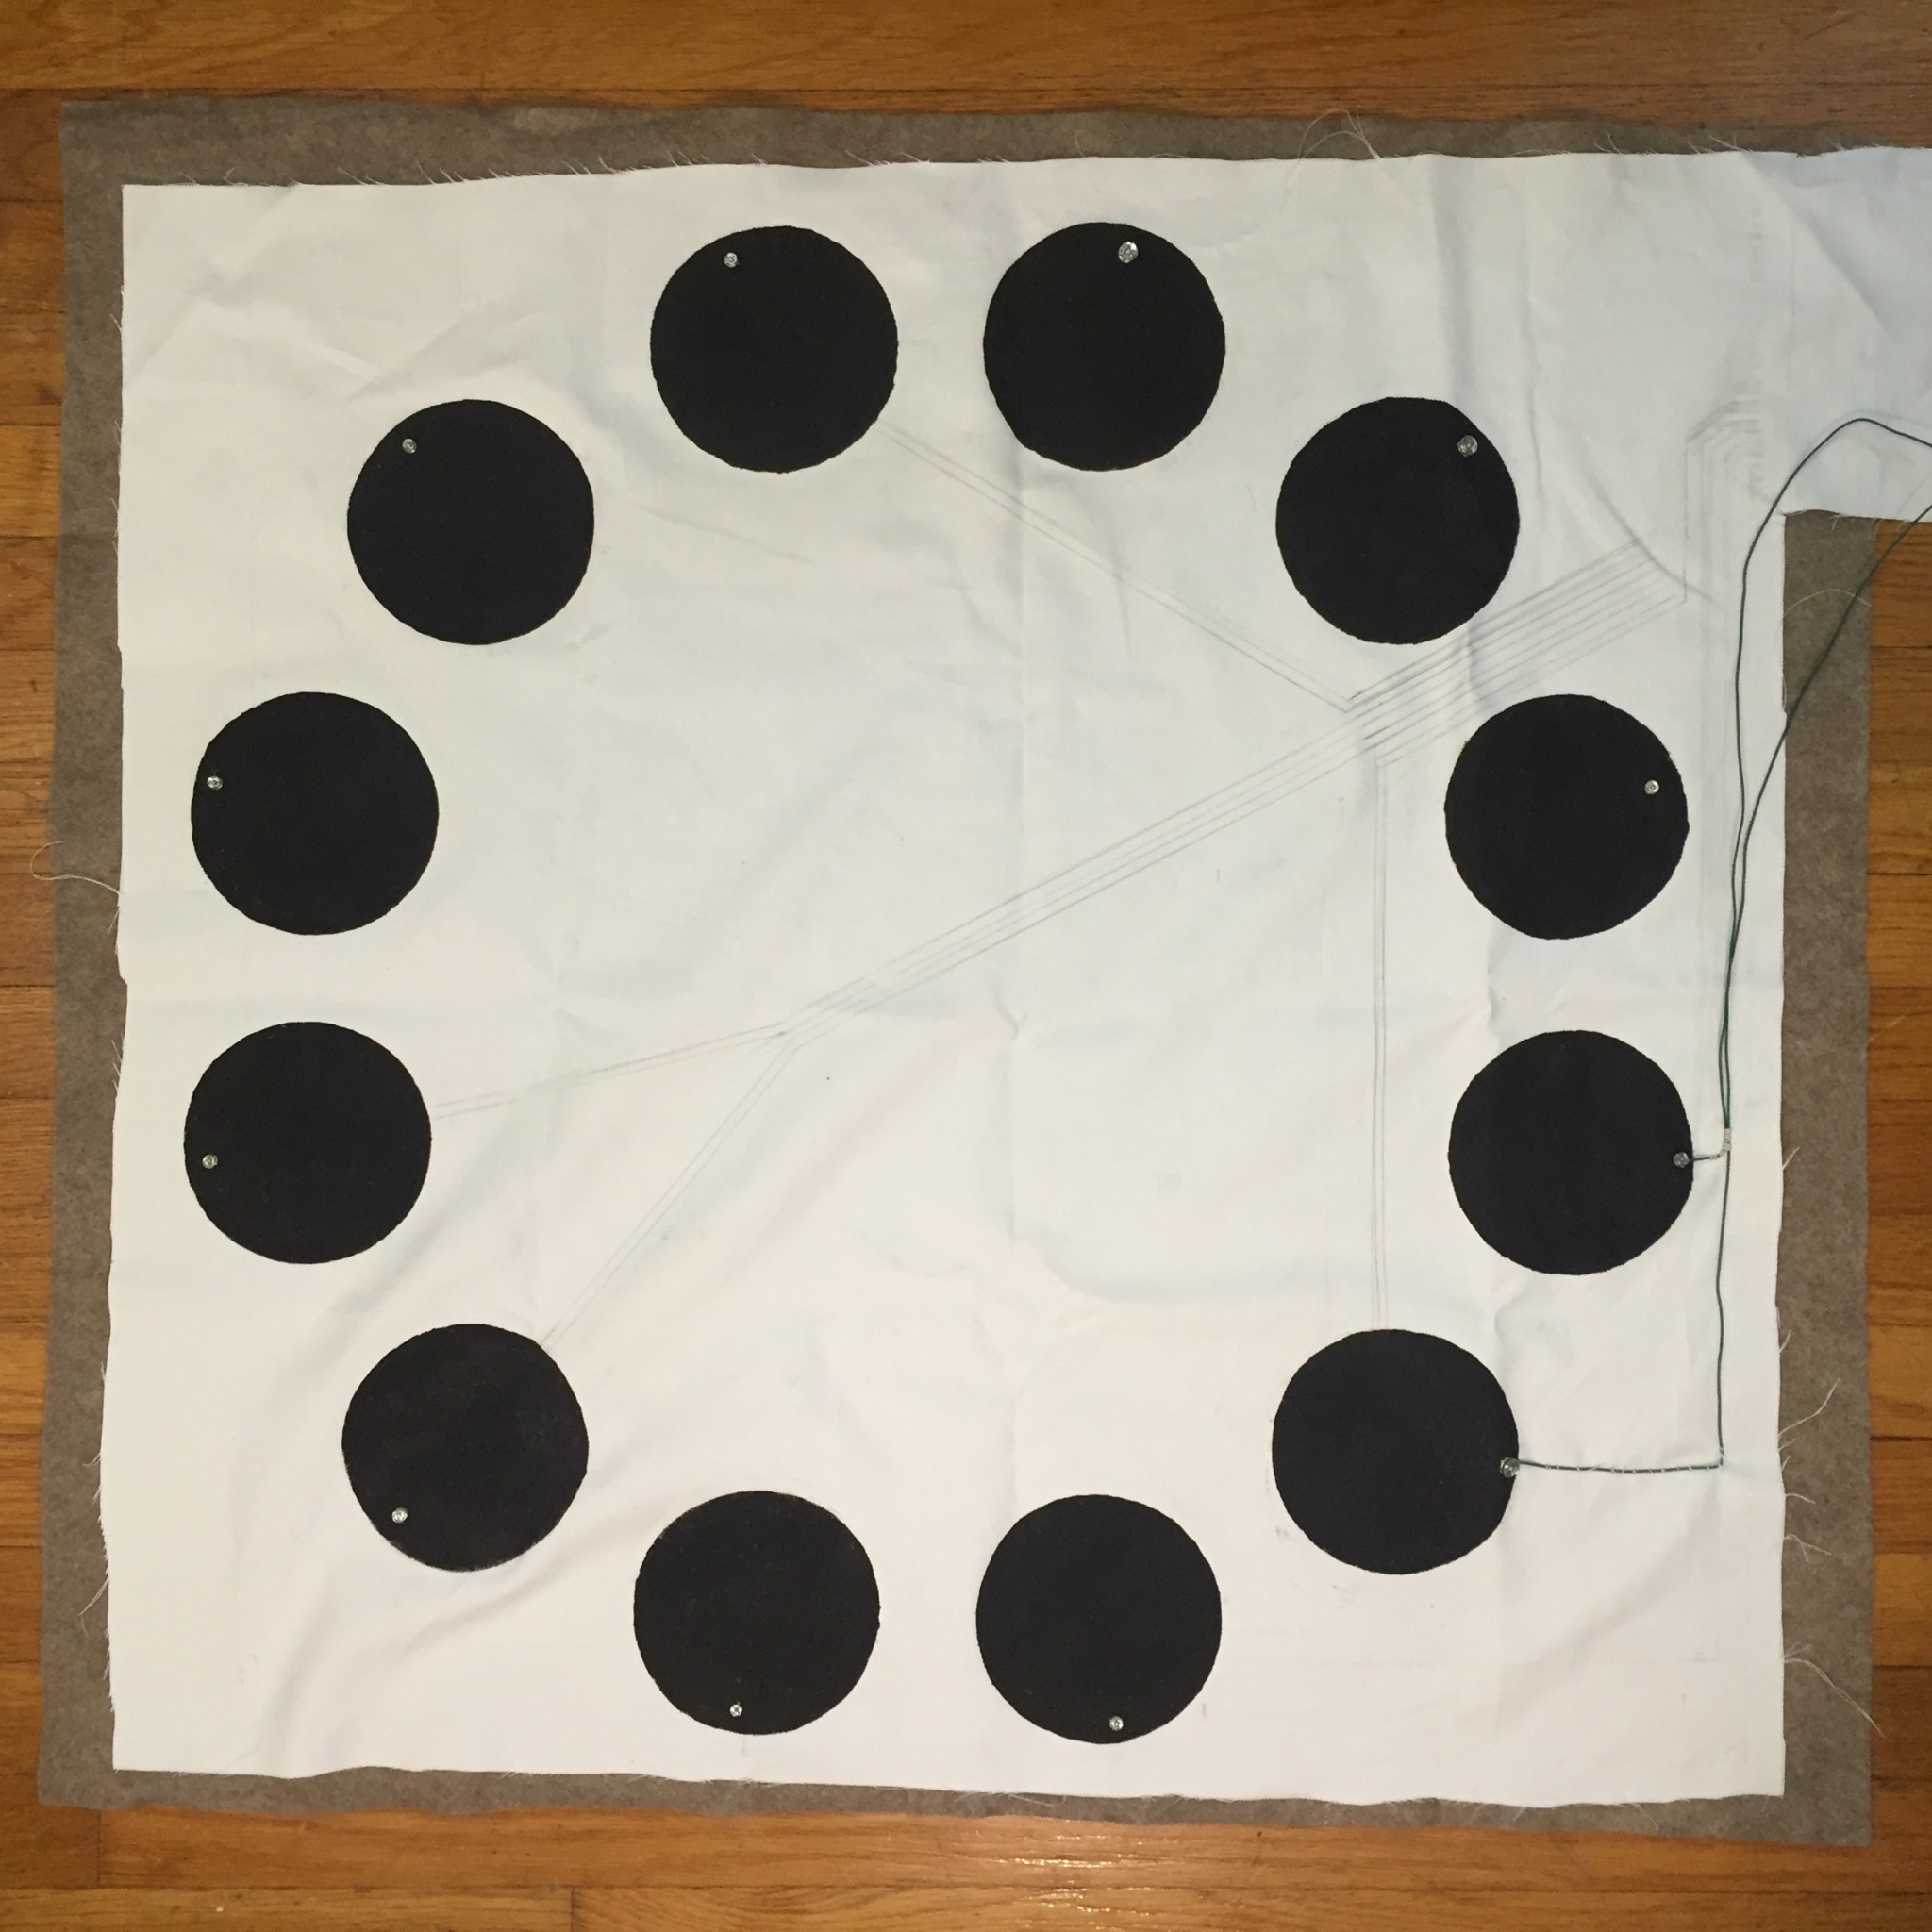
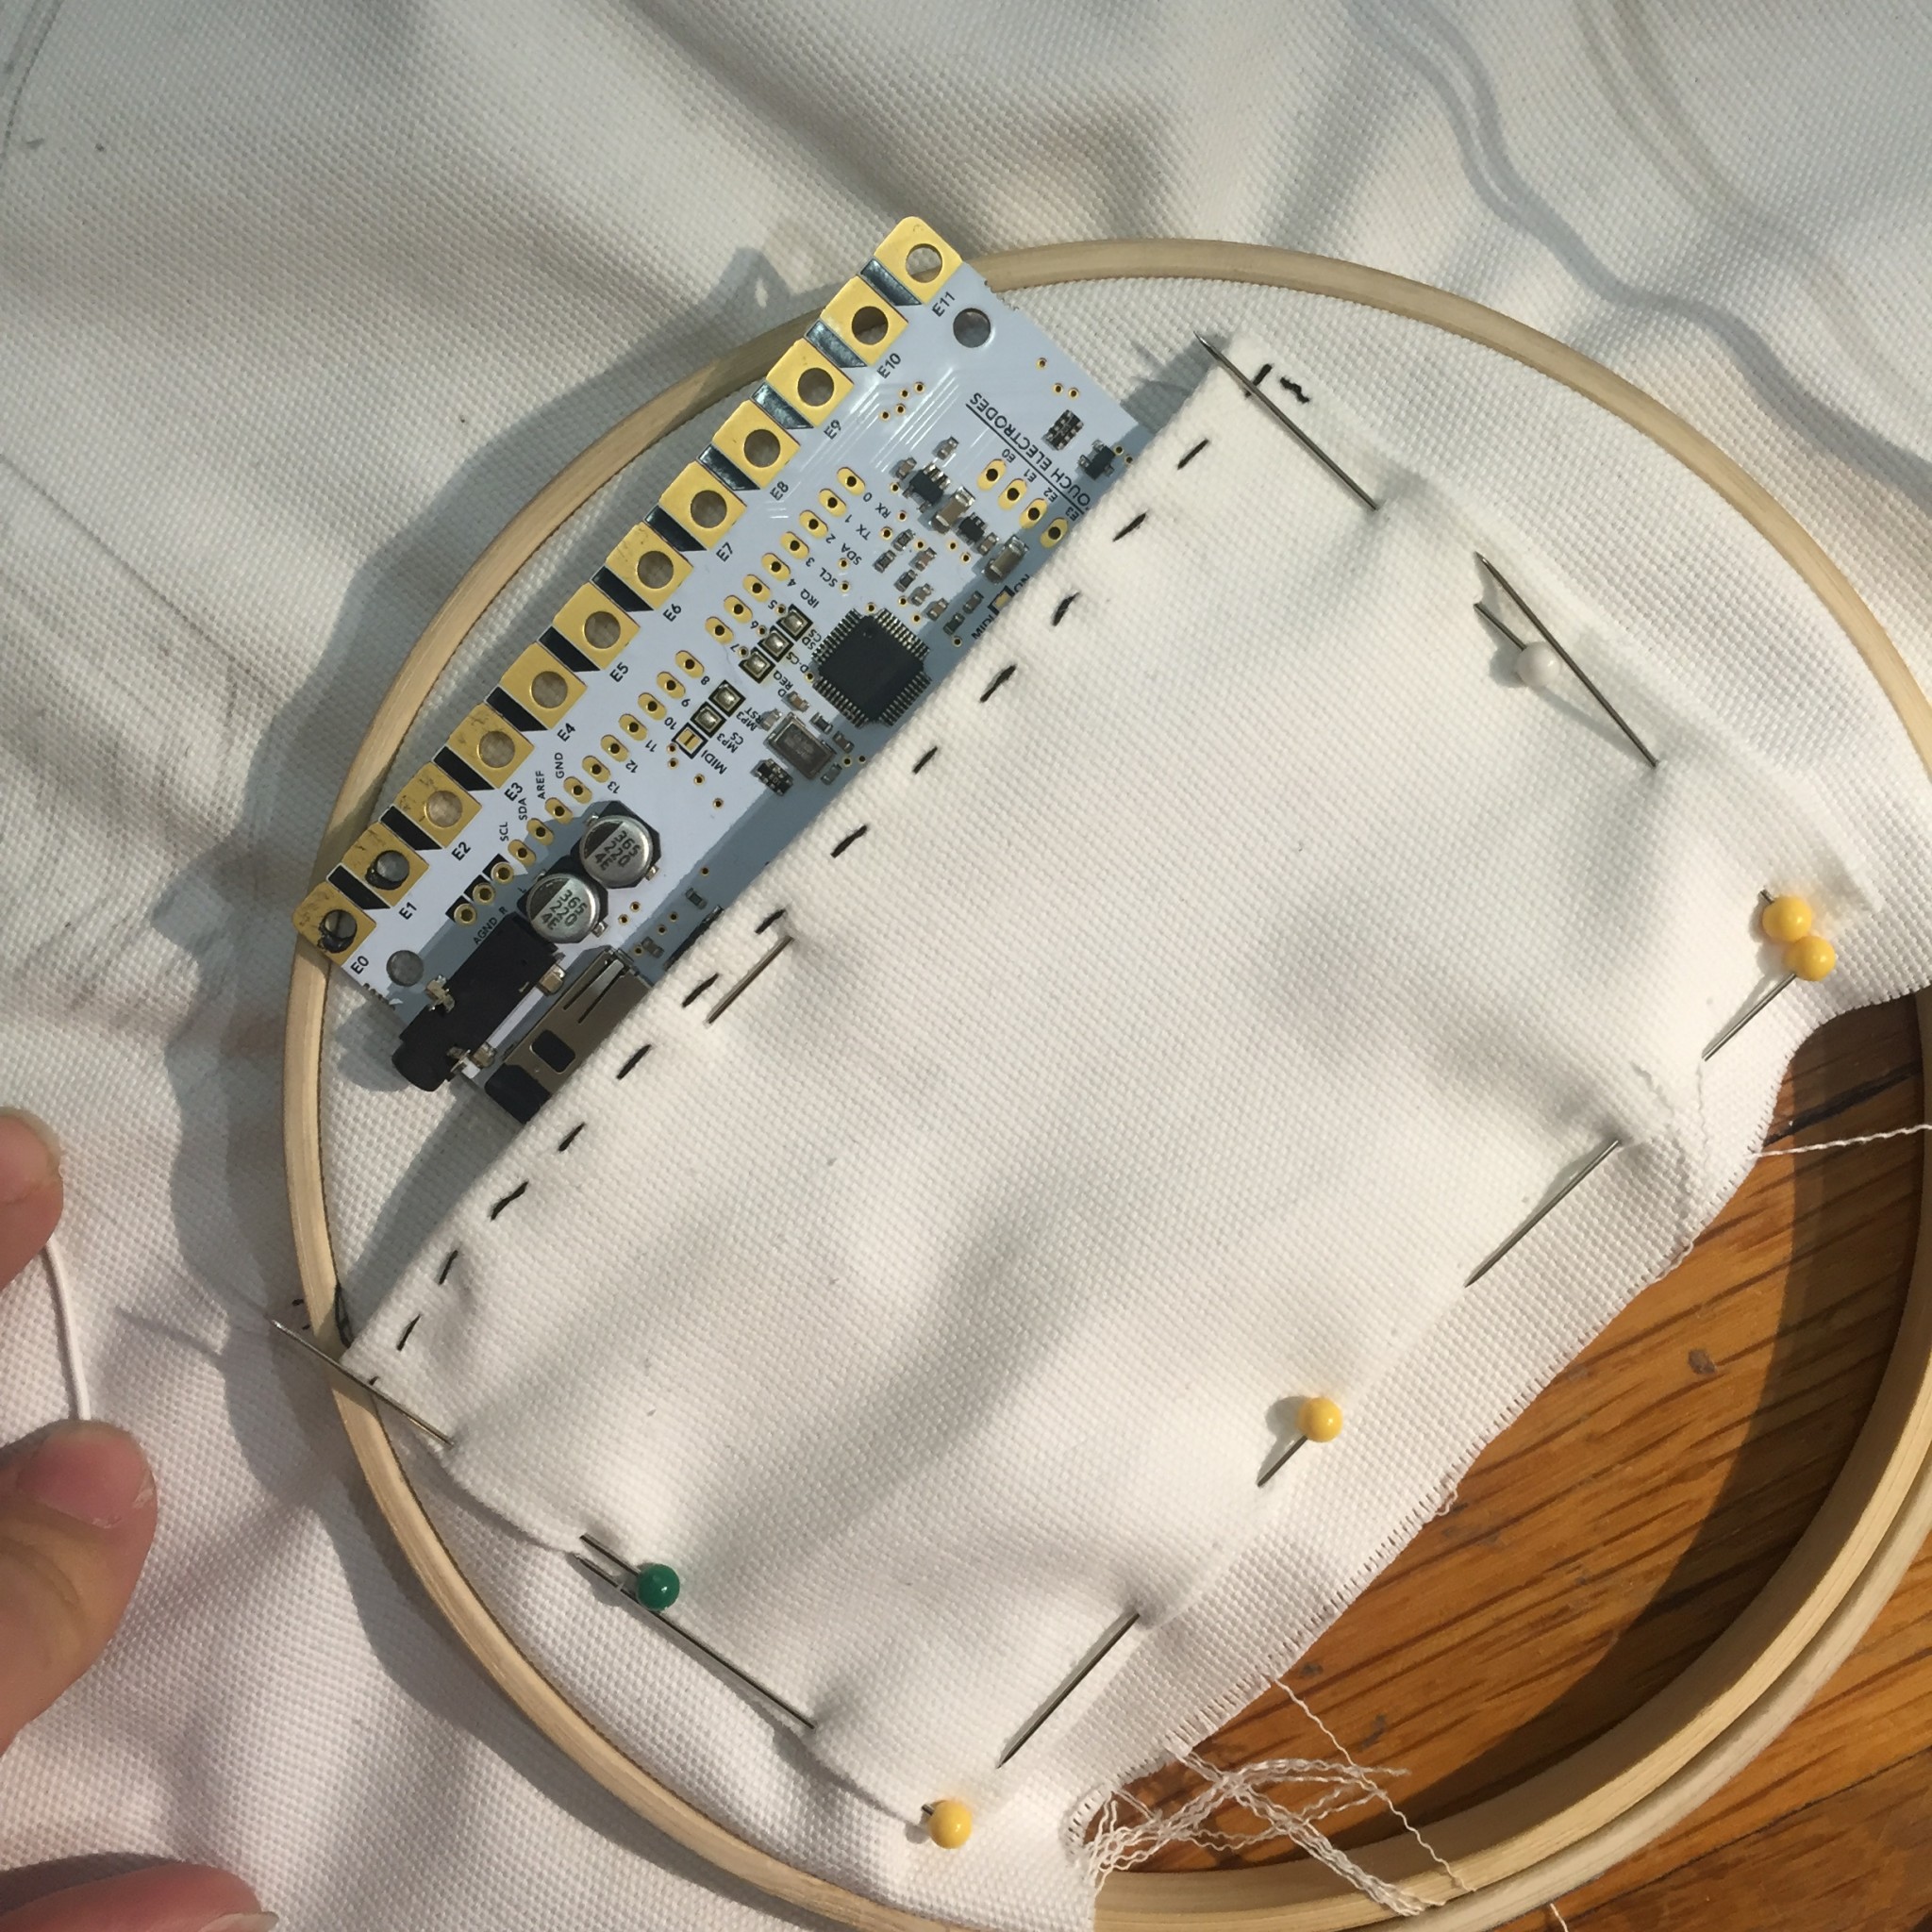
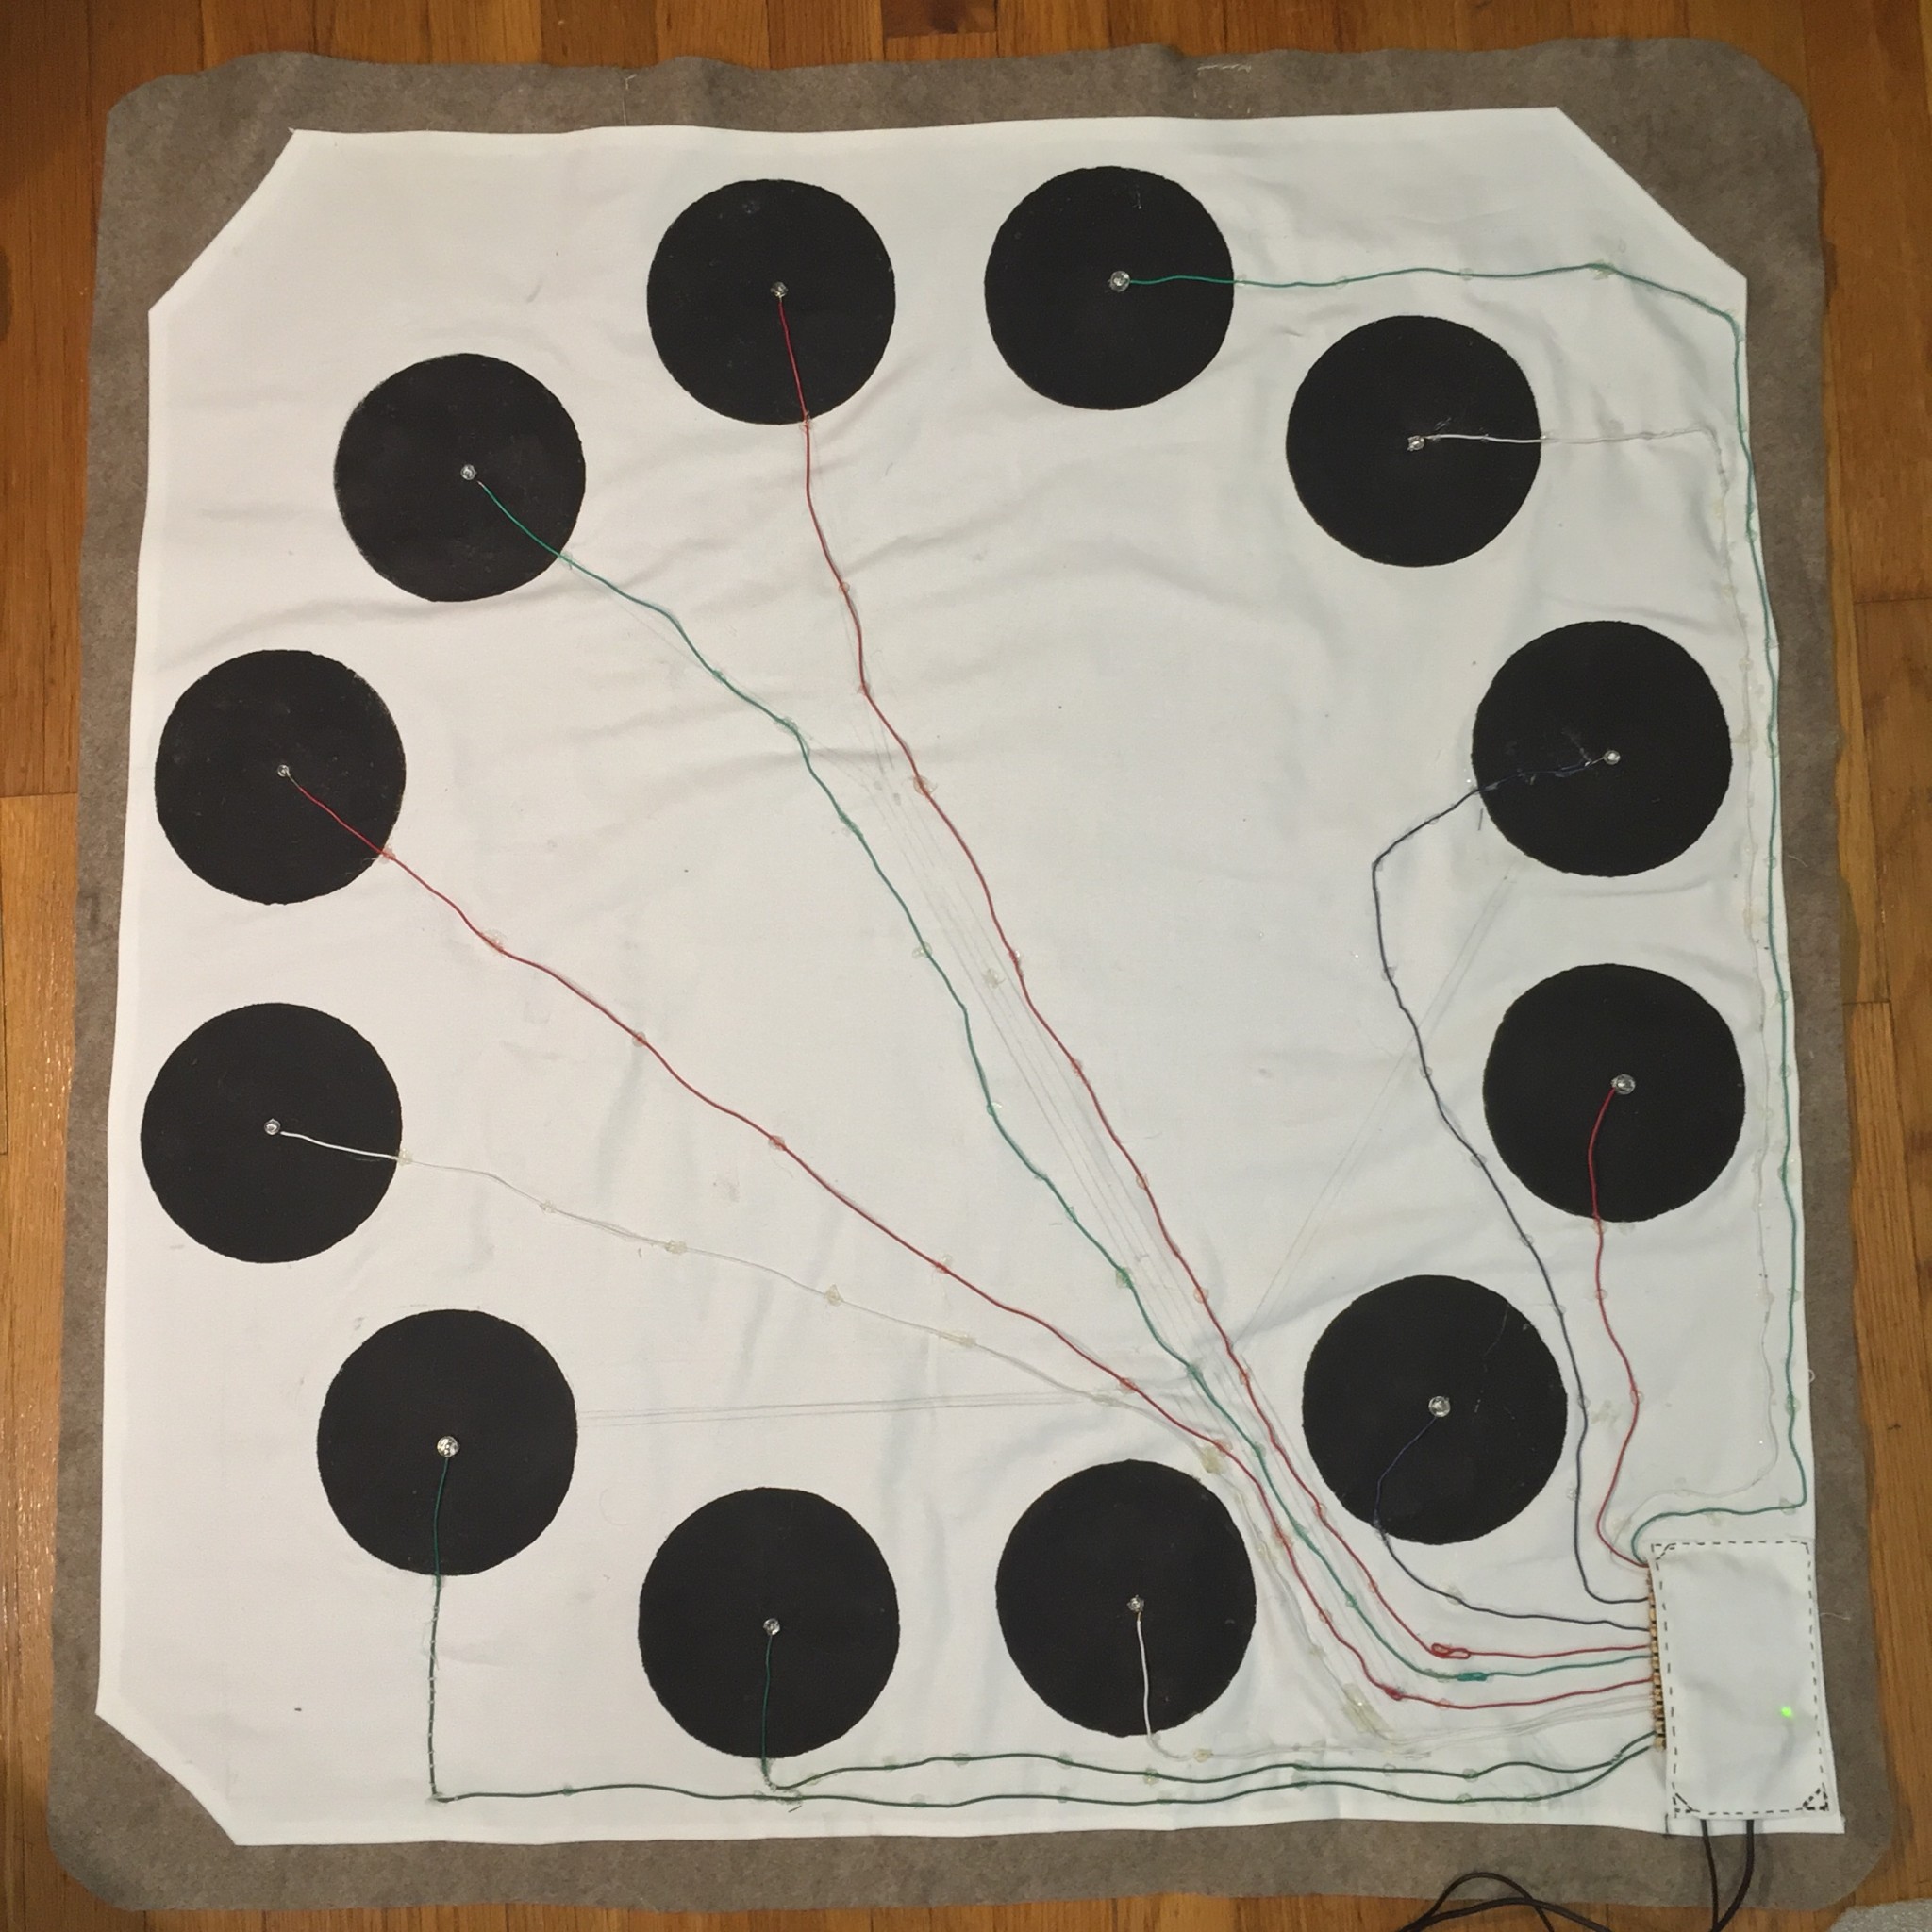
Process of Making Circuit
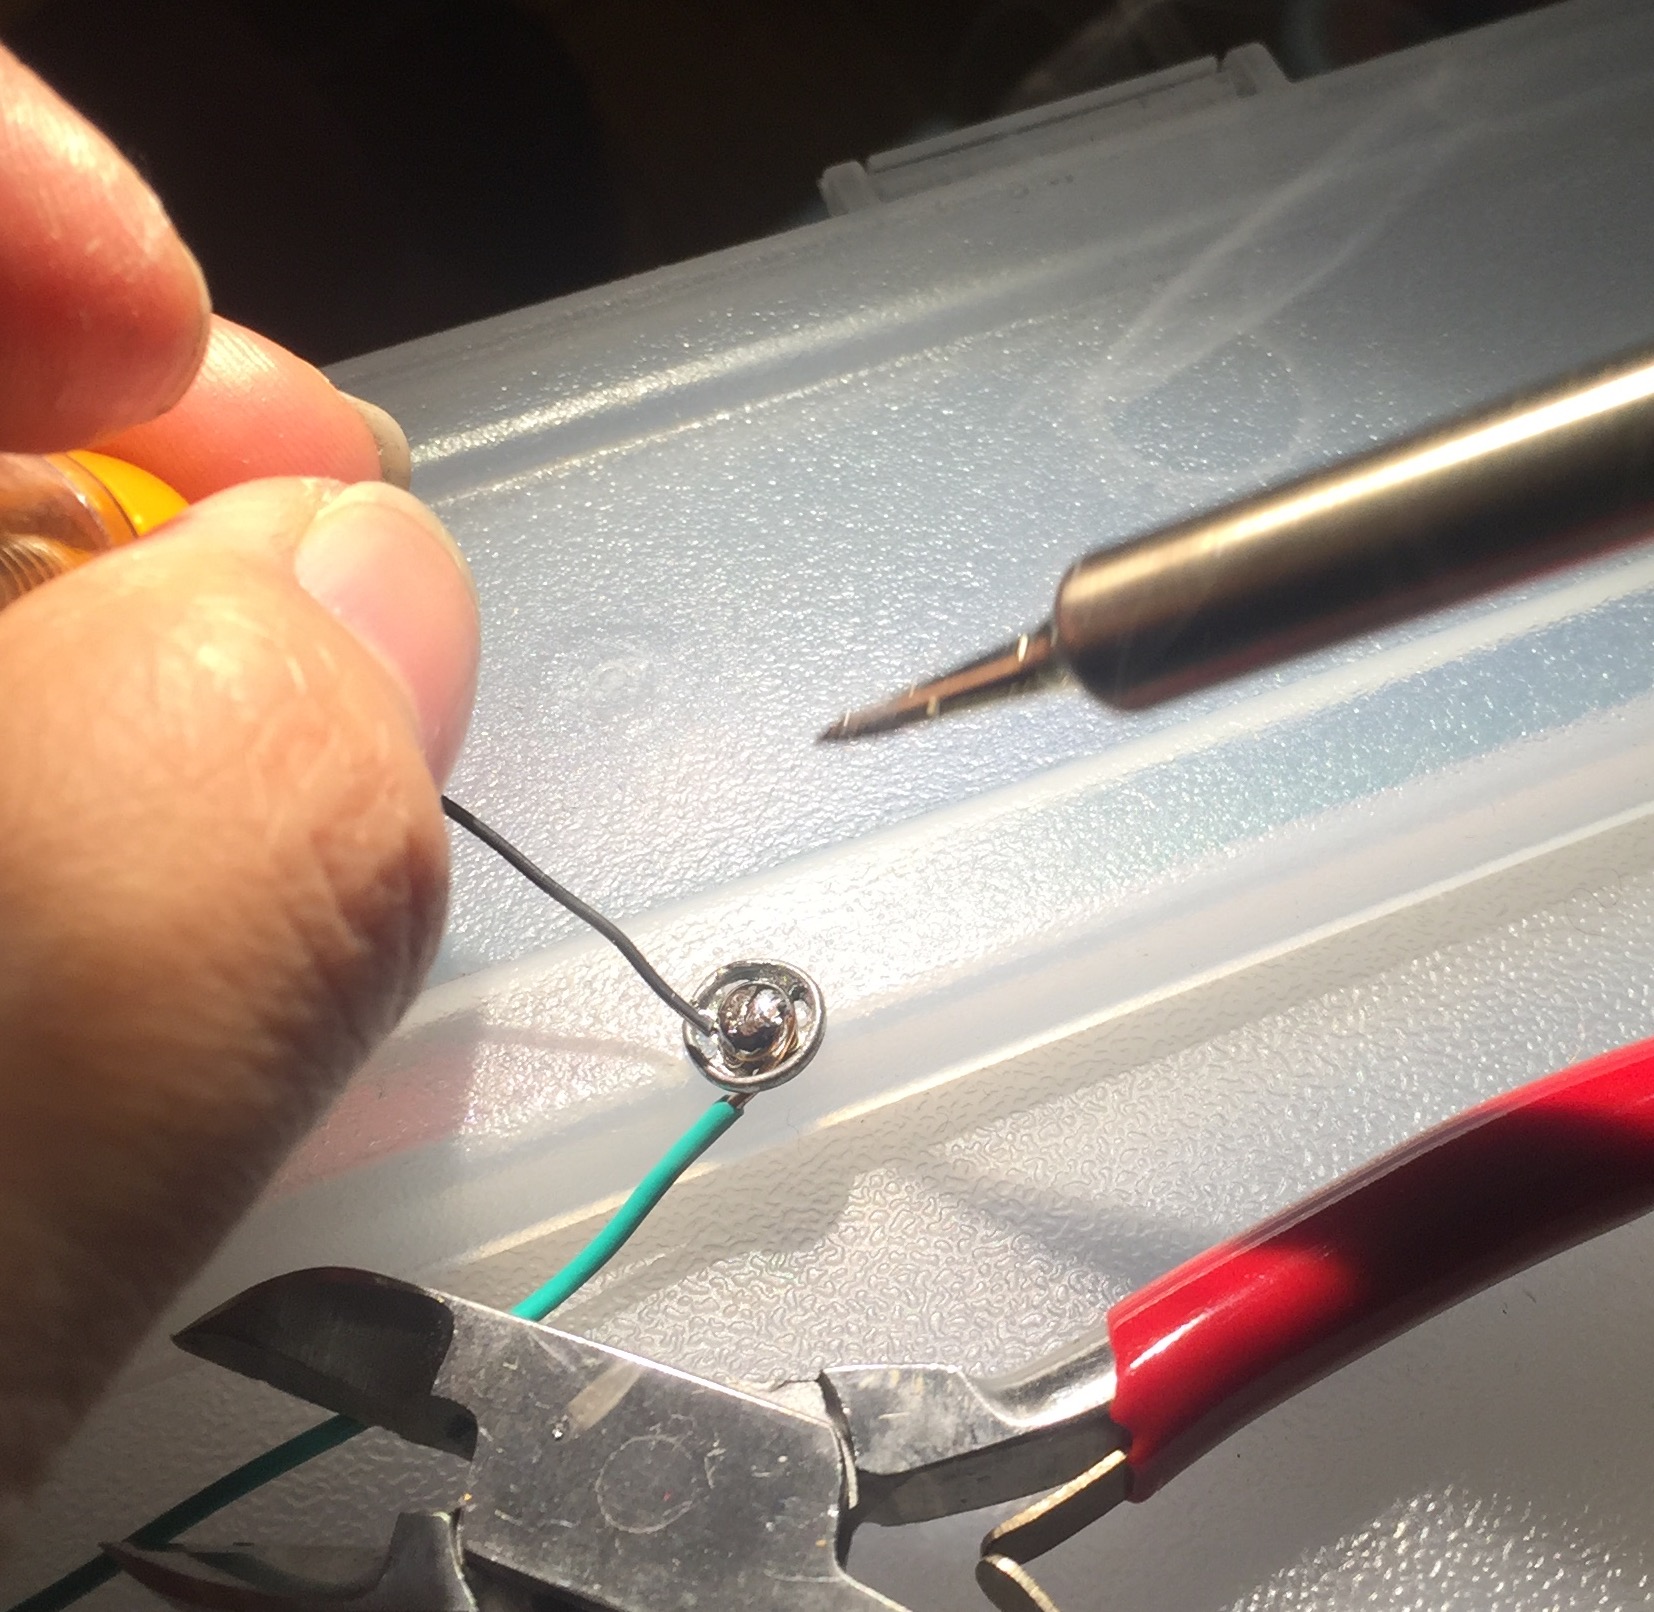
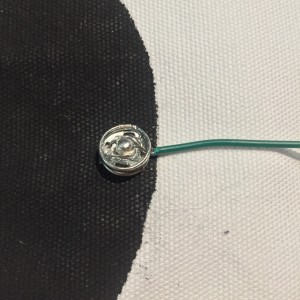
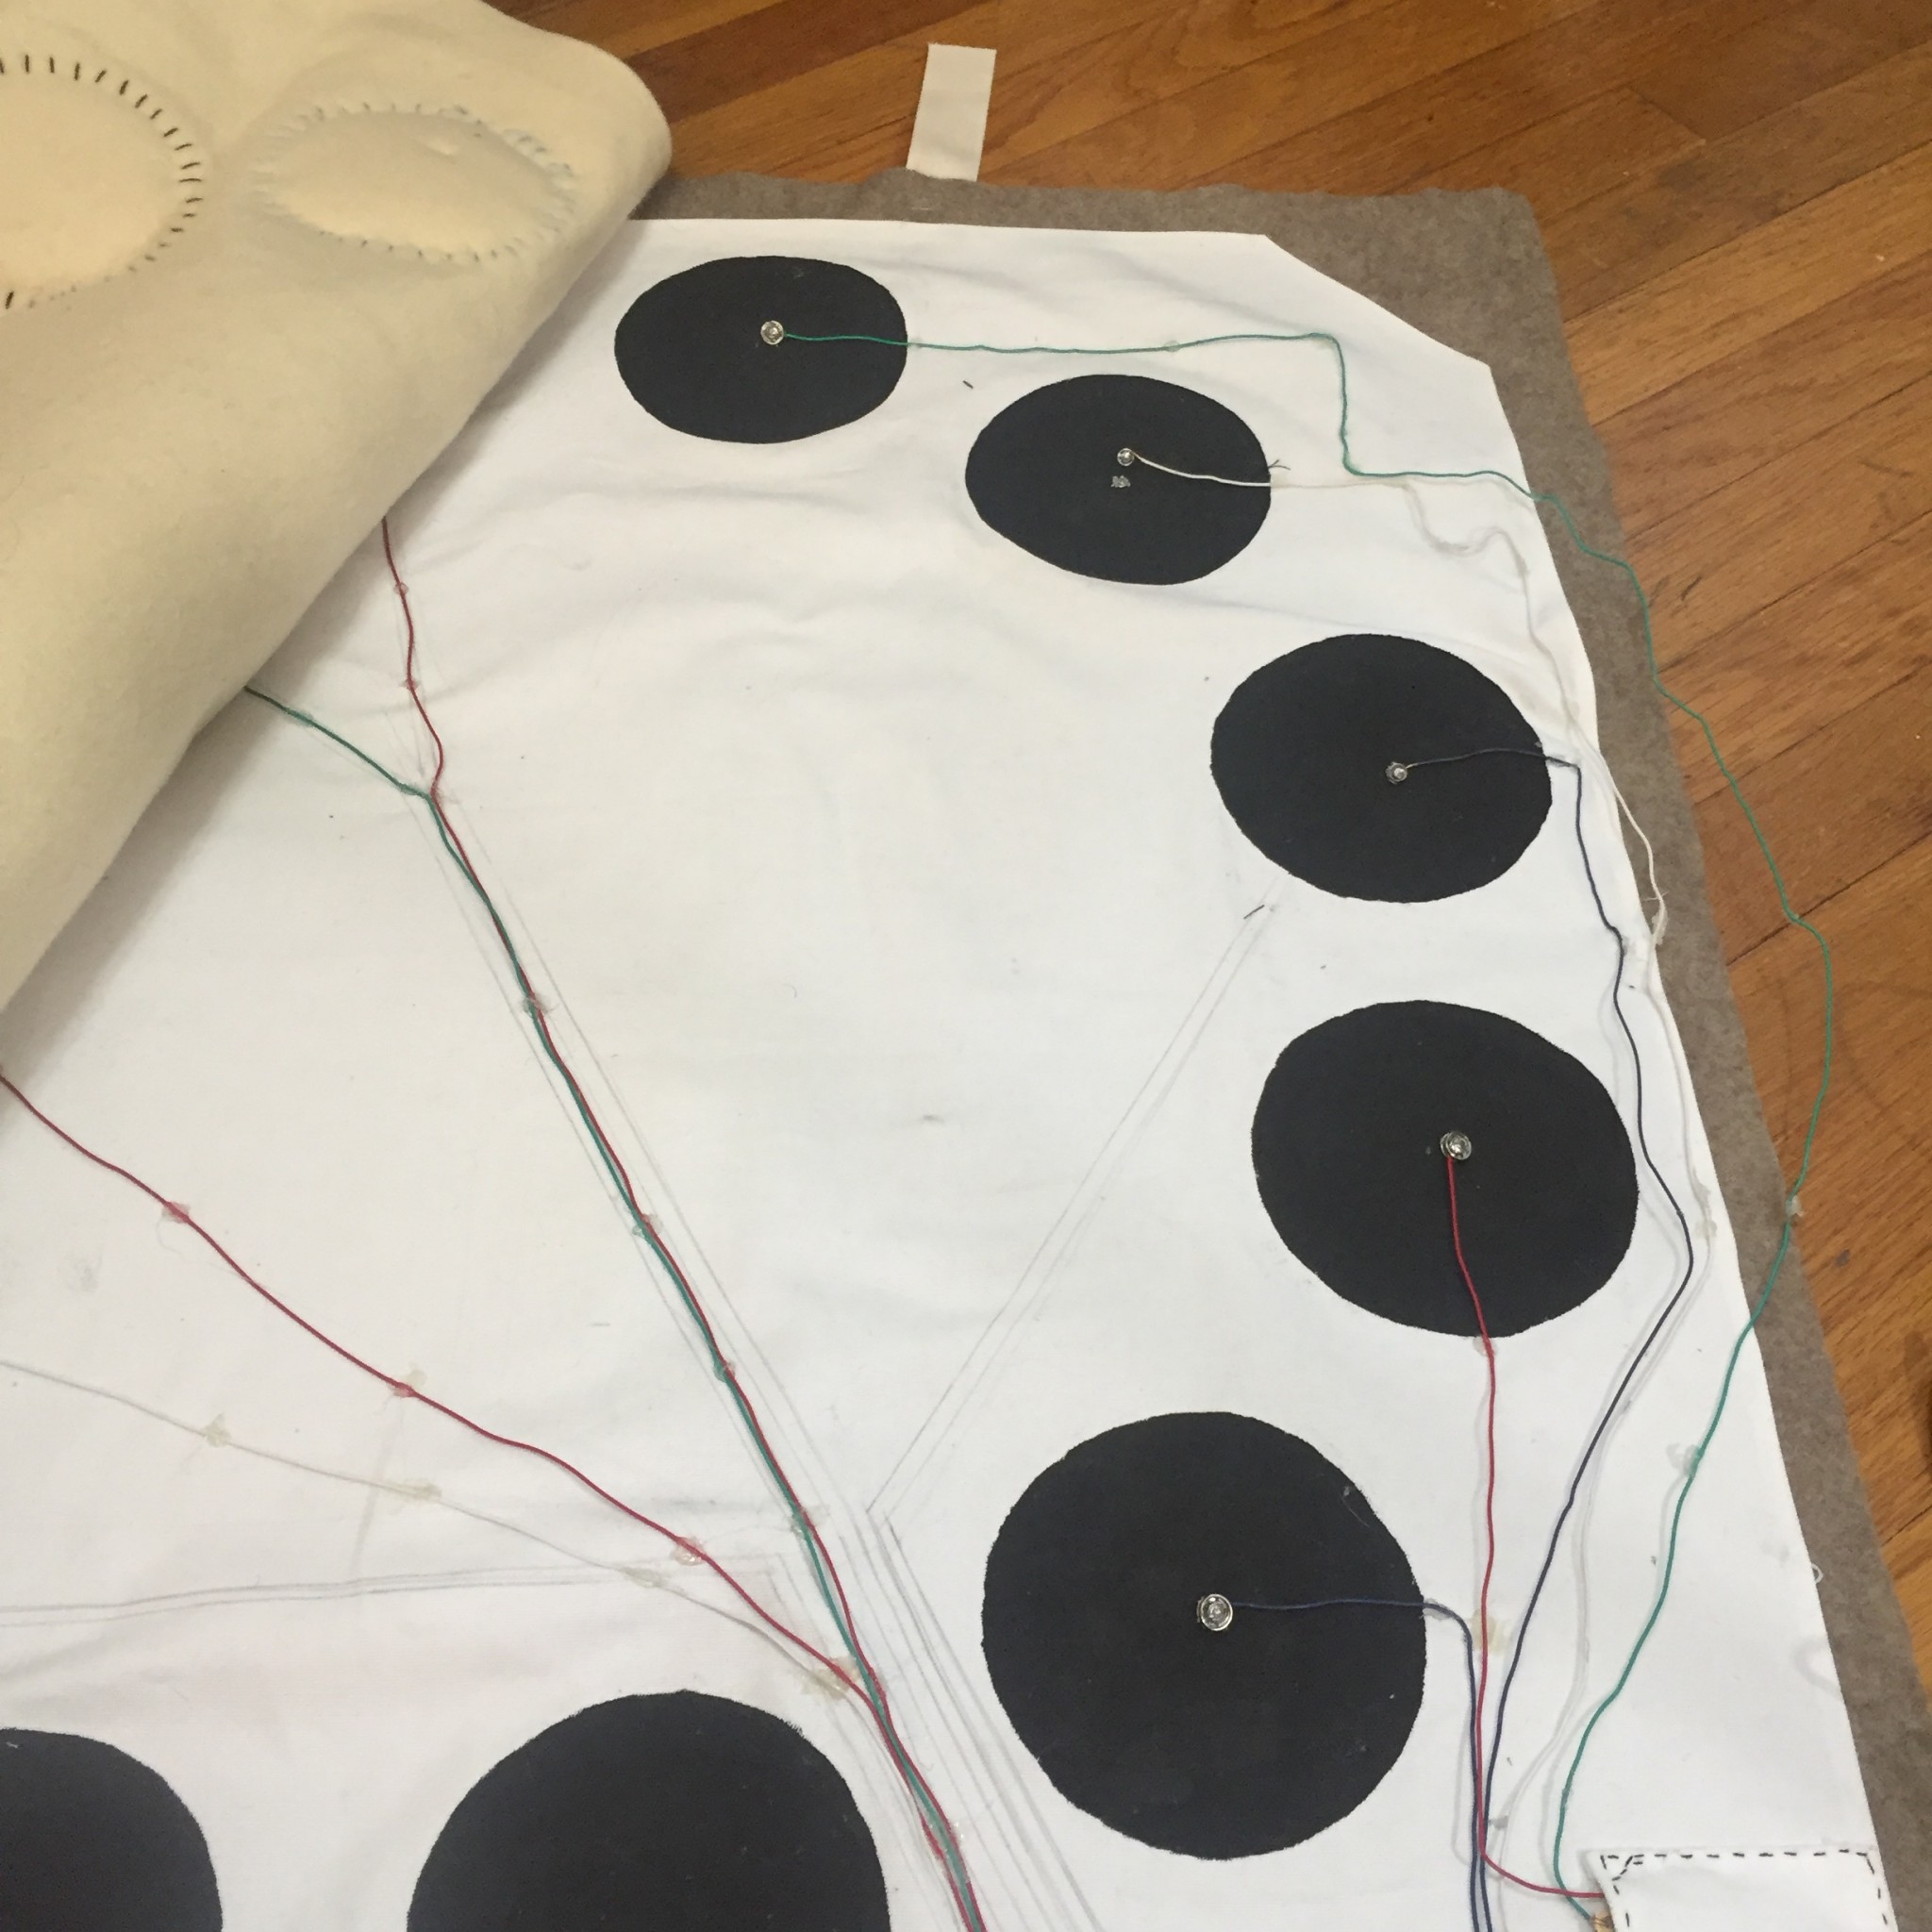
Sewed male poppers onto the fabric and soldered hook wires to female poppers
sewed hook wires connected from the board to the circuit to fix the wires onto fabric, in order for the users to make fold and unfold the play mat easier.
PROBLEMS
I found the FIRST problem when testing sounds as Jane, Charles and Wes pointed out when the group feedback: on the underbelly of the project, the wiring and mechanics.
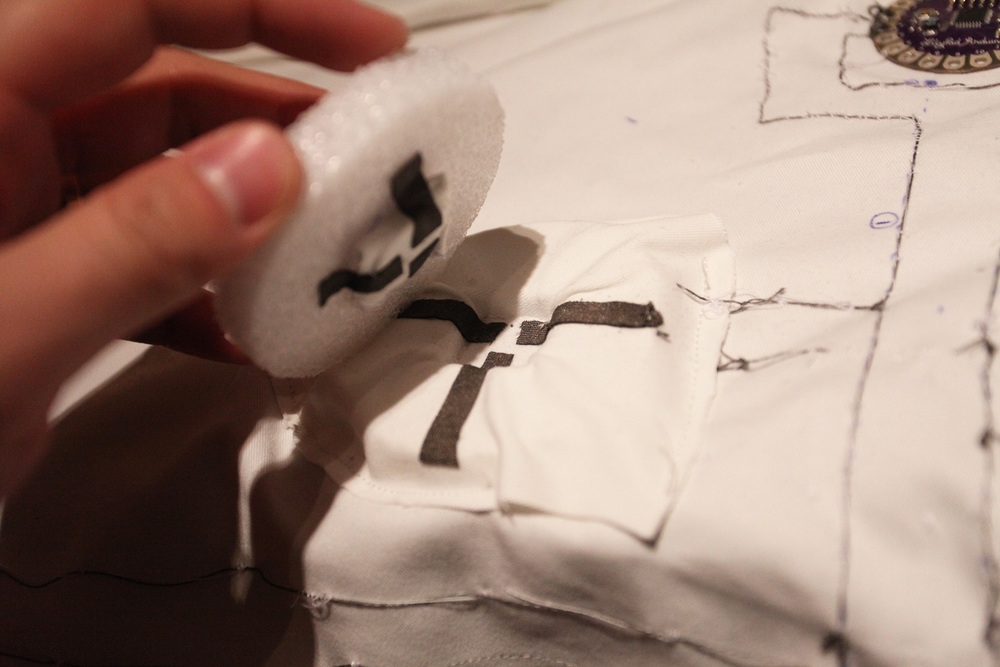
Connectivity between under faces and poppers was unstable when people pushed faces because of popper’s location. Ichanged the popper position from the circle border to the center in order to enhance pressure sensors.
Used hot glue to hold wires in the fabric as a circuit. This wouldn’t aesthetically look good (future iterative: improvement necessary), but it anchored wires better in the fabric and it was better for usability. Previously I said, it was uneasy to fix wires onto the circuit fabric with sewing because they twisted and moved.
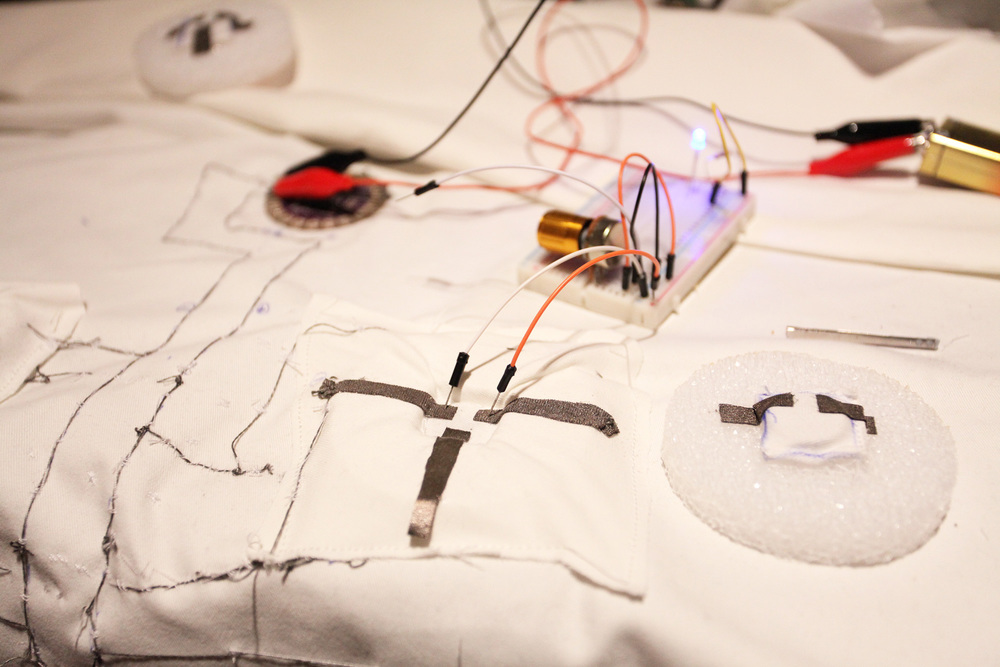
The SECOND problem was sound. Some sounds didn’t work, after connecting wires to the board and poppers. After investigating the circuit, I found the culprit of the issue. It was that wires touched each other, hindering inputs from flowing through wires. I used hookup wires for five faces and standard household wires for seven out of twelve faces. I found that faces with standard household wires connected to the board didn’t work, but with hookup wires did. Therefor, I separated each wire and fix each of them on the circuit with hot glue.
I tried to build a couple of circuits with conductive ink, conductive fabric and threads. But They didn’t work. The problem was the wiring underneath of the play mat. Due to the seat, when the kid sits on the seat, he cannot hear certain sounds that he is sitting and pressing buttons at the same time.
Wired each line to the board. Connected each wire to each signal on the board.
Made a pocket for the board not to move around the underneath of the play mat. It allows me to fold and unfold the play mat without worries about what if all the wires and the board are tangled.
Later I unstitched the left side of the pocket to make a hole for ON / OFF switch and speaker / headphone jack to reach to power sources.
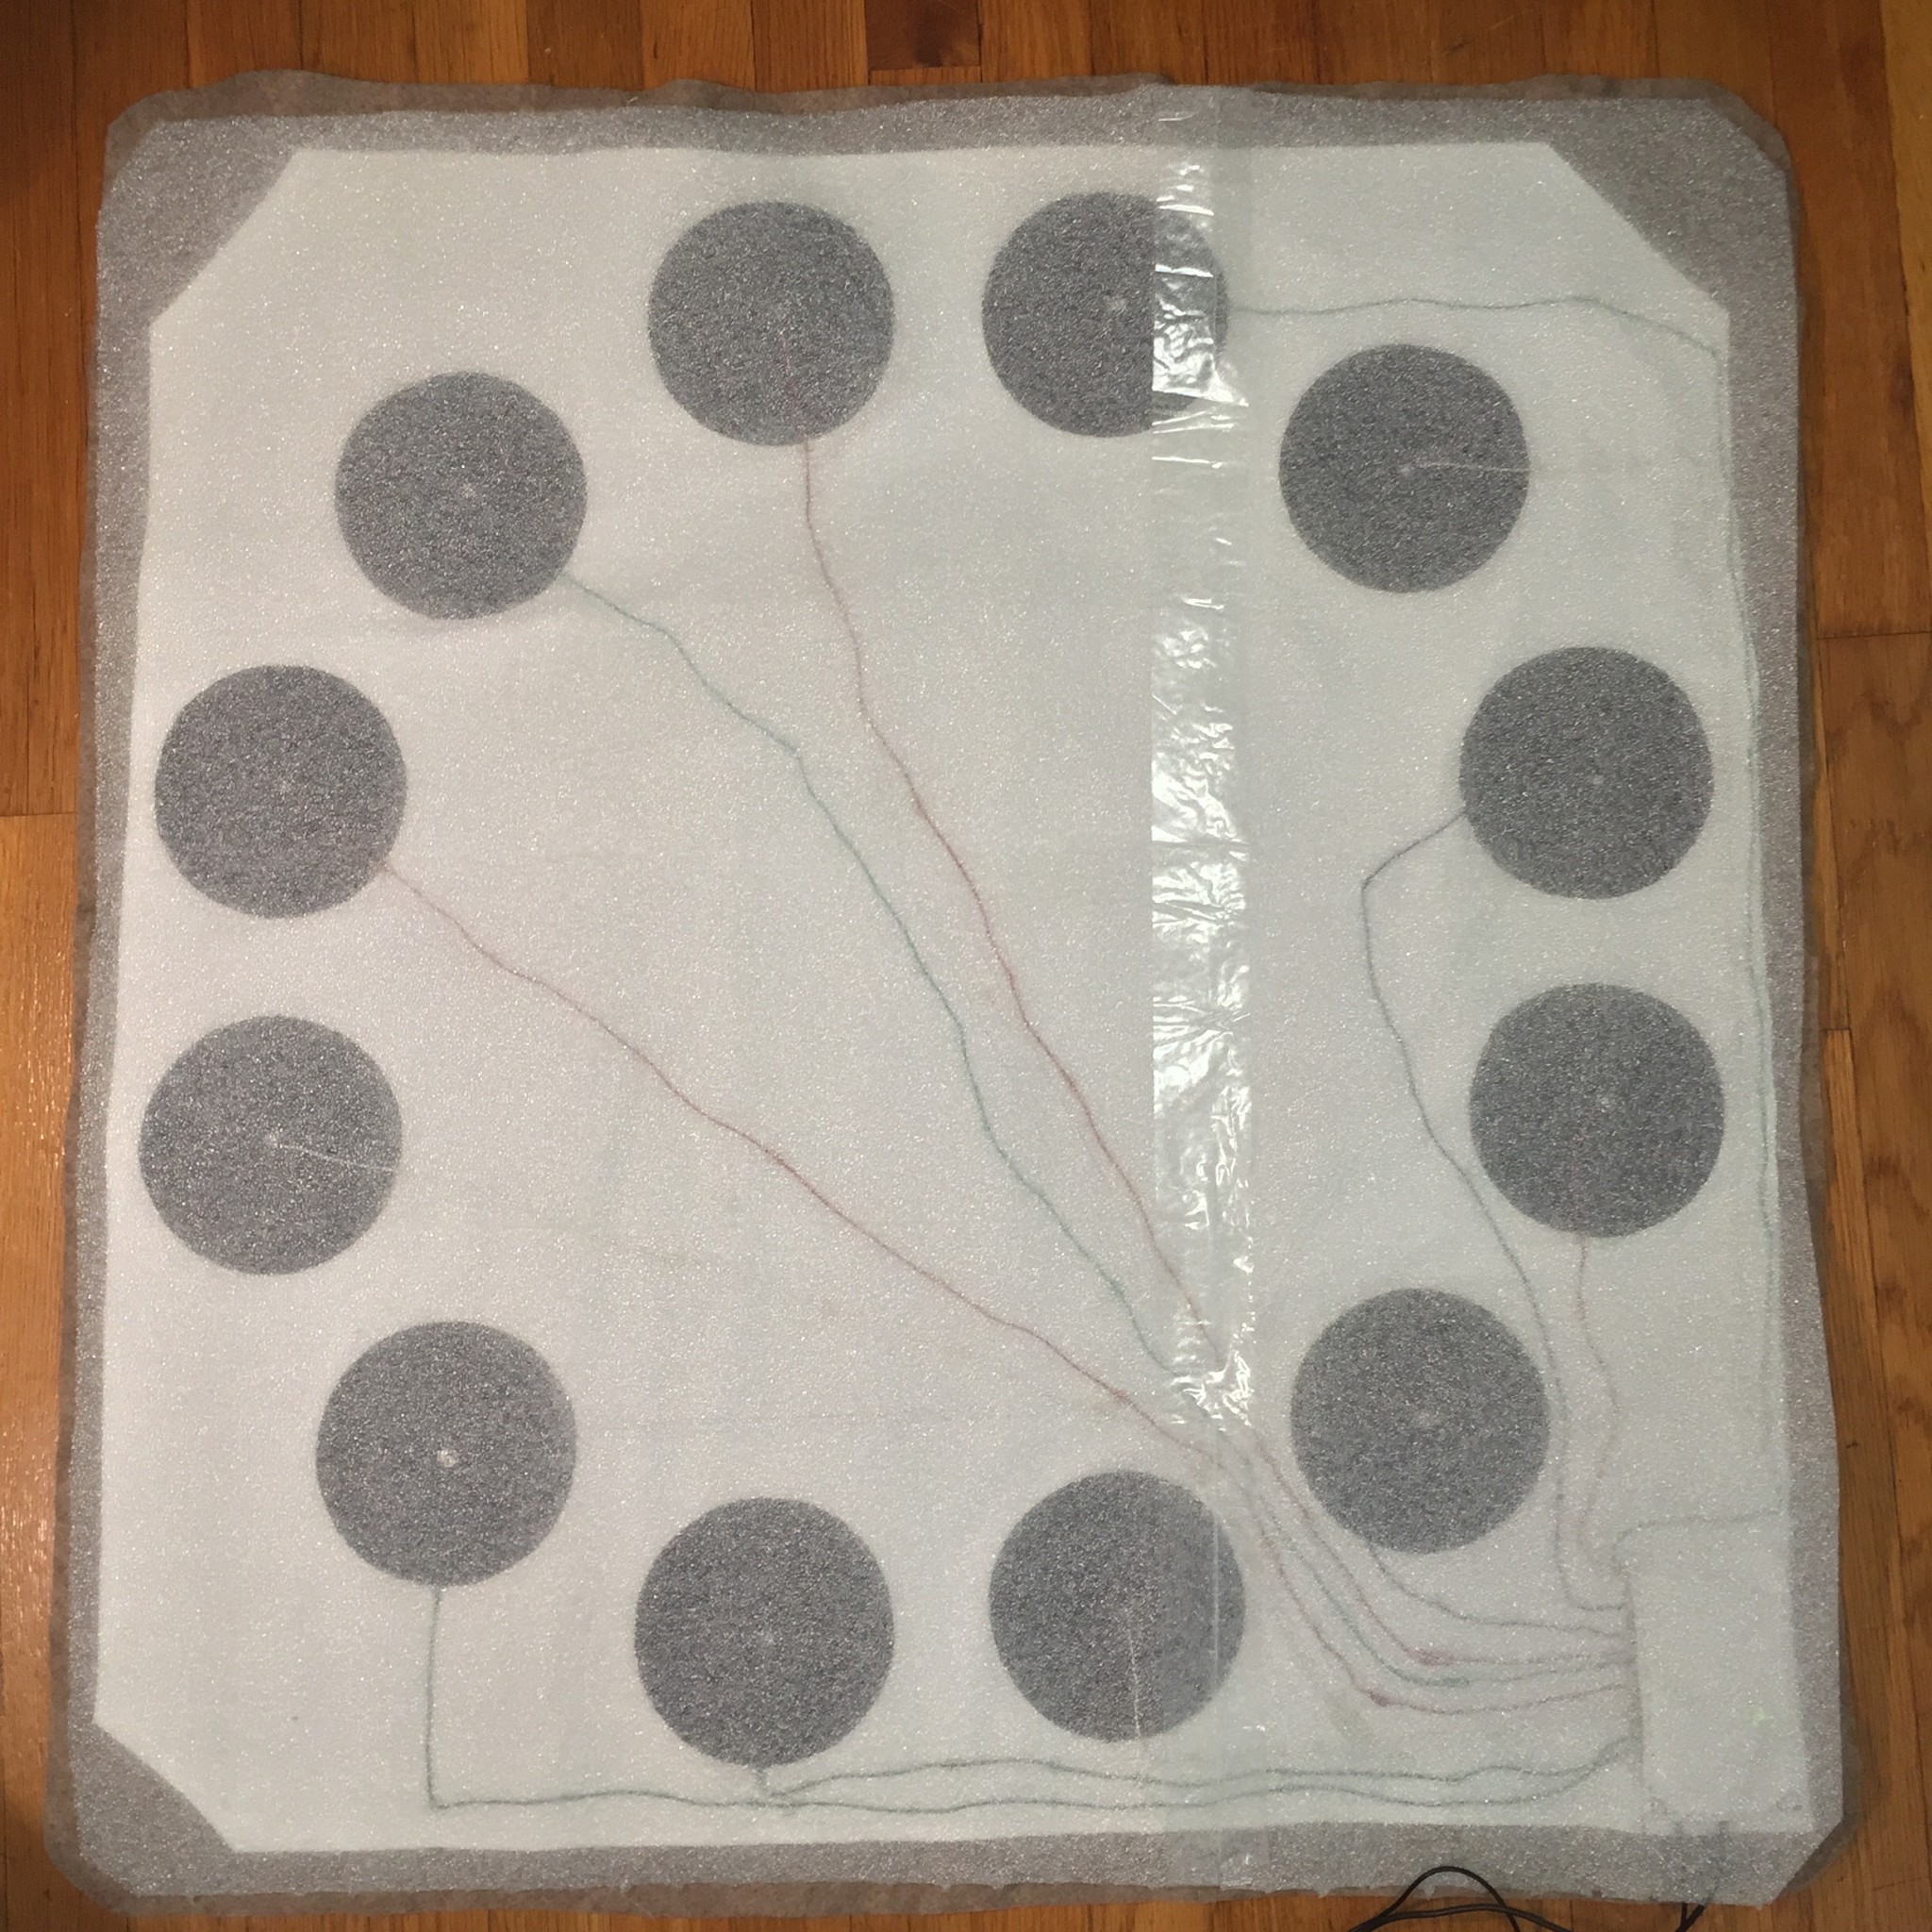
[Iron-on adhesive and iron] In order to glue the circuit to the bottom layer, I used iron-on adhesive and an iron.
[feltwork title] I printed and cut out the title and then used it to needle wool on the top layer which made my work look neat. [TIP] You could make different patterns as well as typography, which give you a lot of opportunities to create different designs.
Finalization
TOP layer
CIRCUIT
CUSHION
Narrative in emotional vocabulary
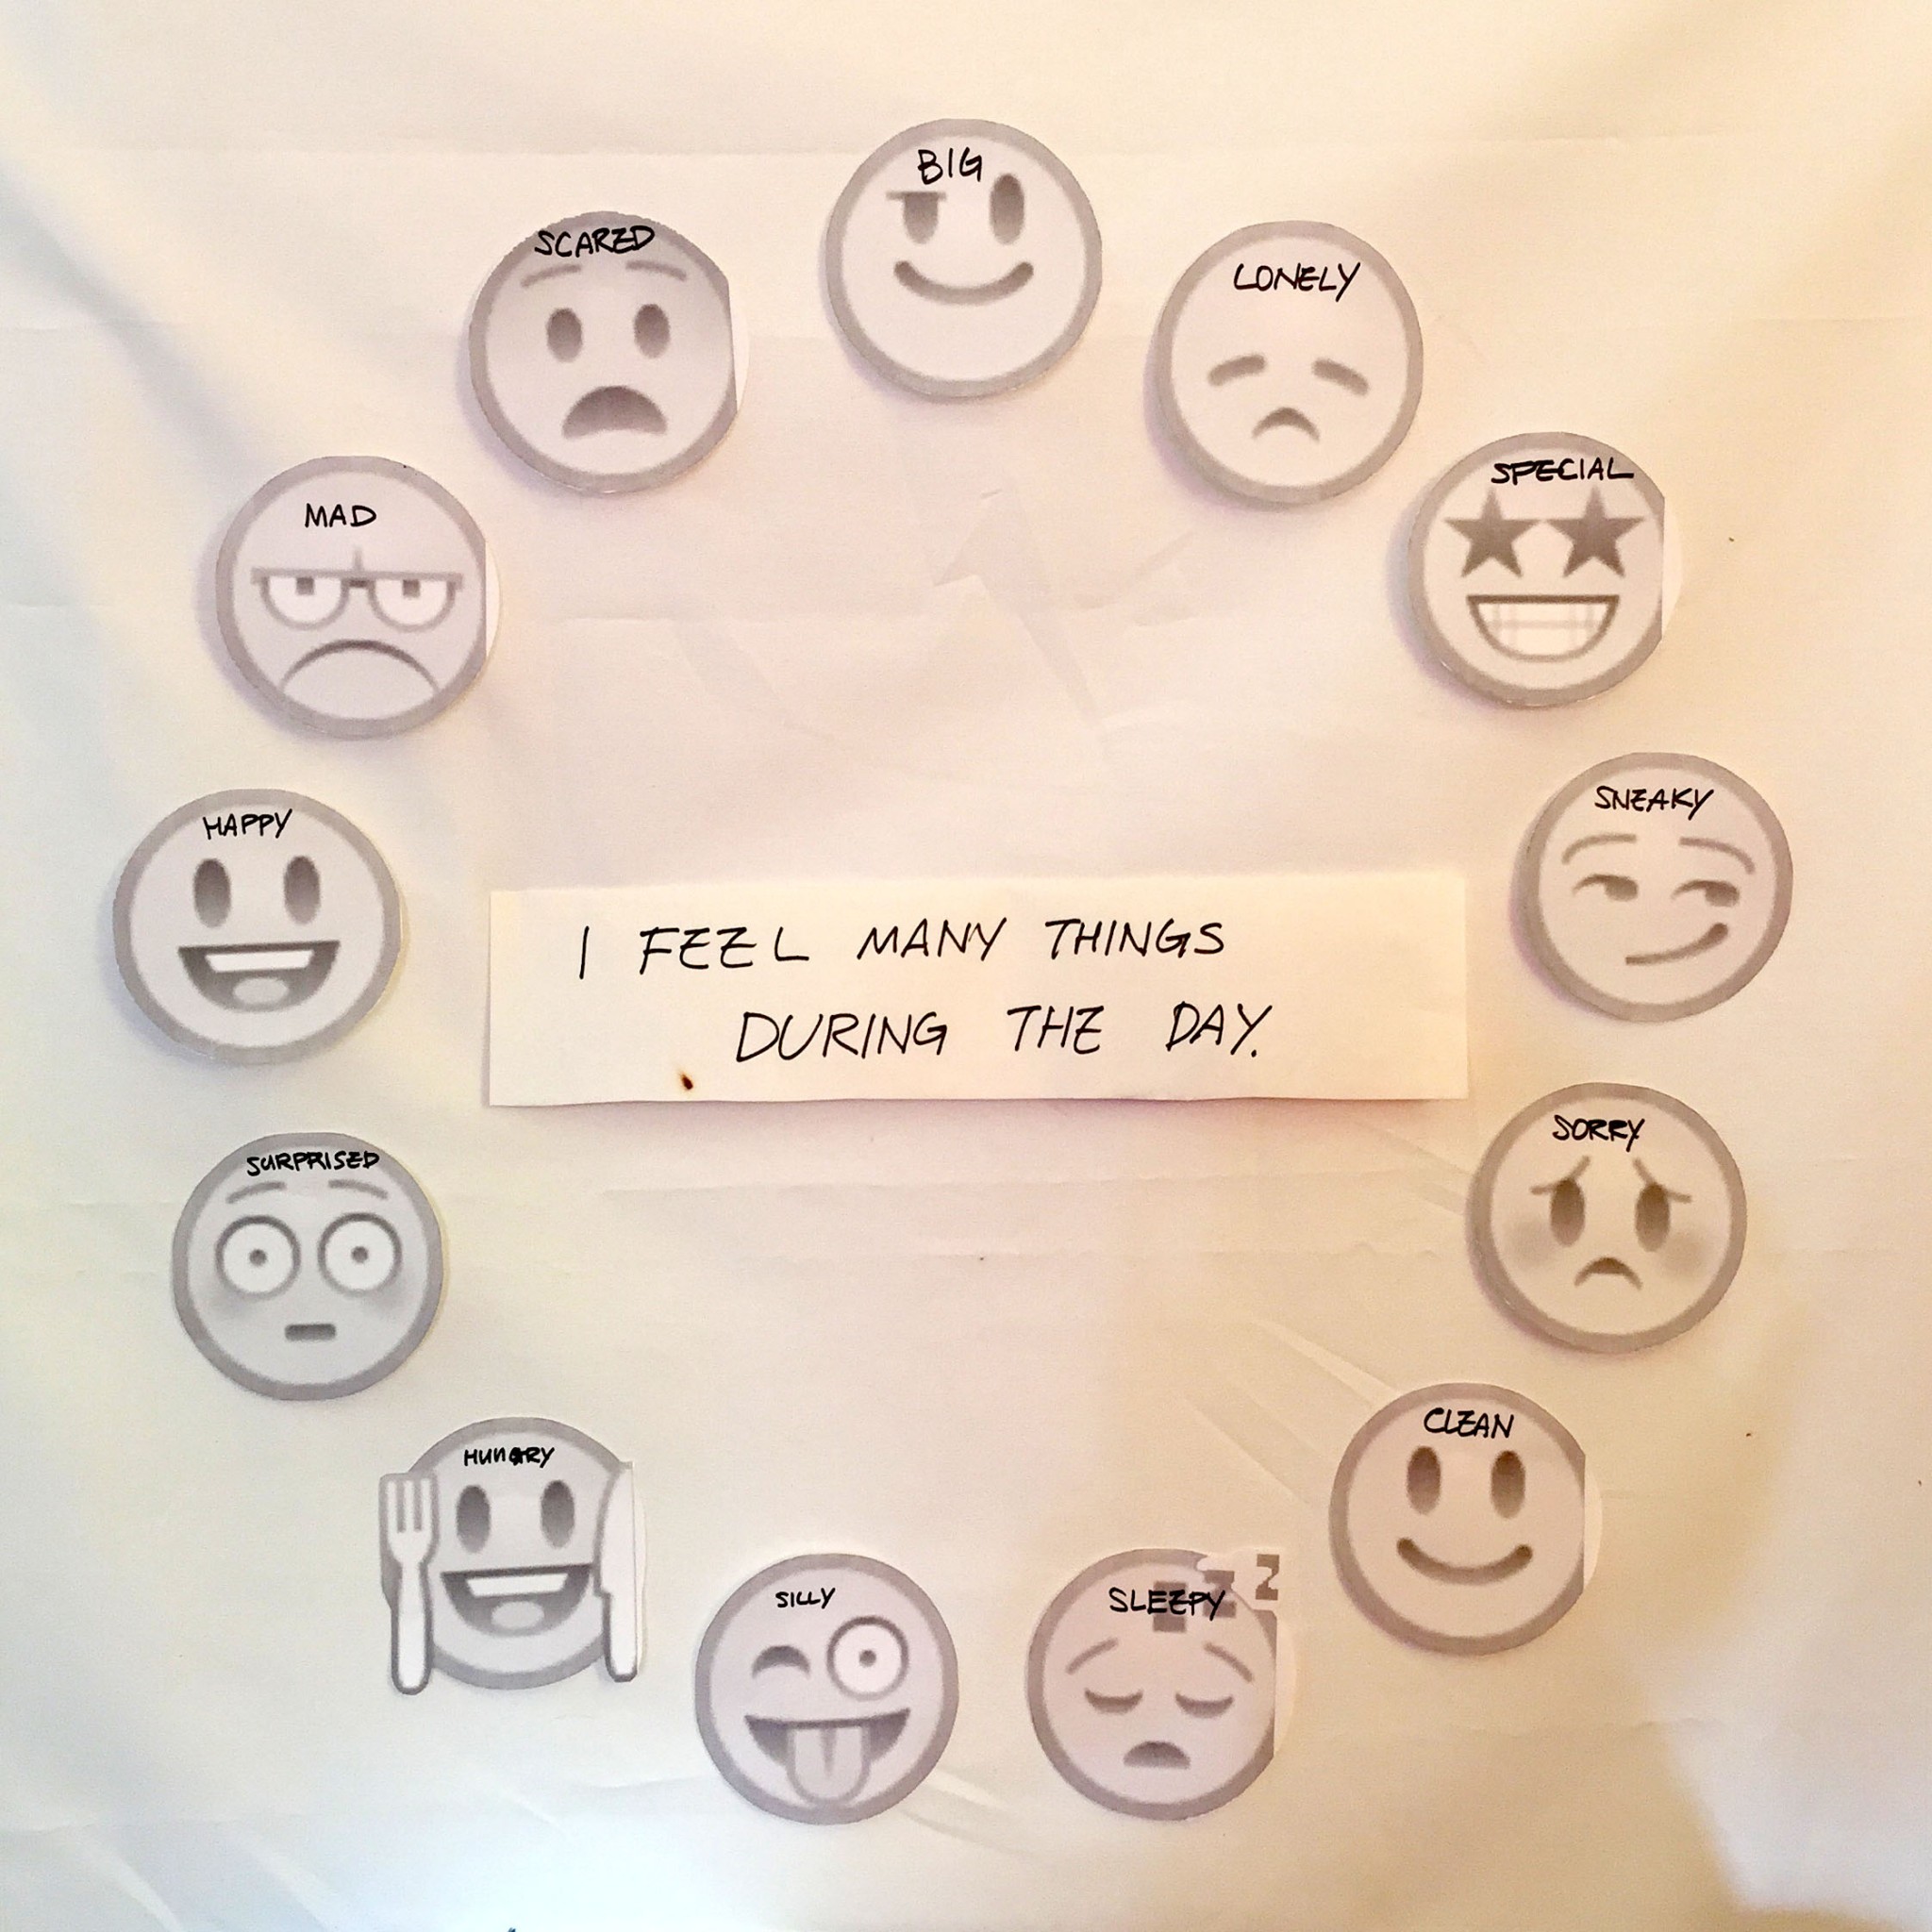
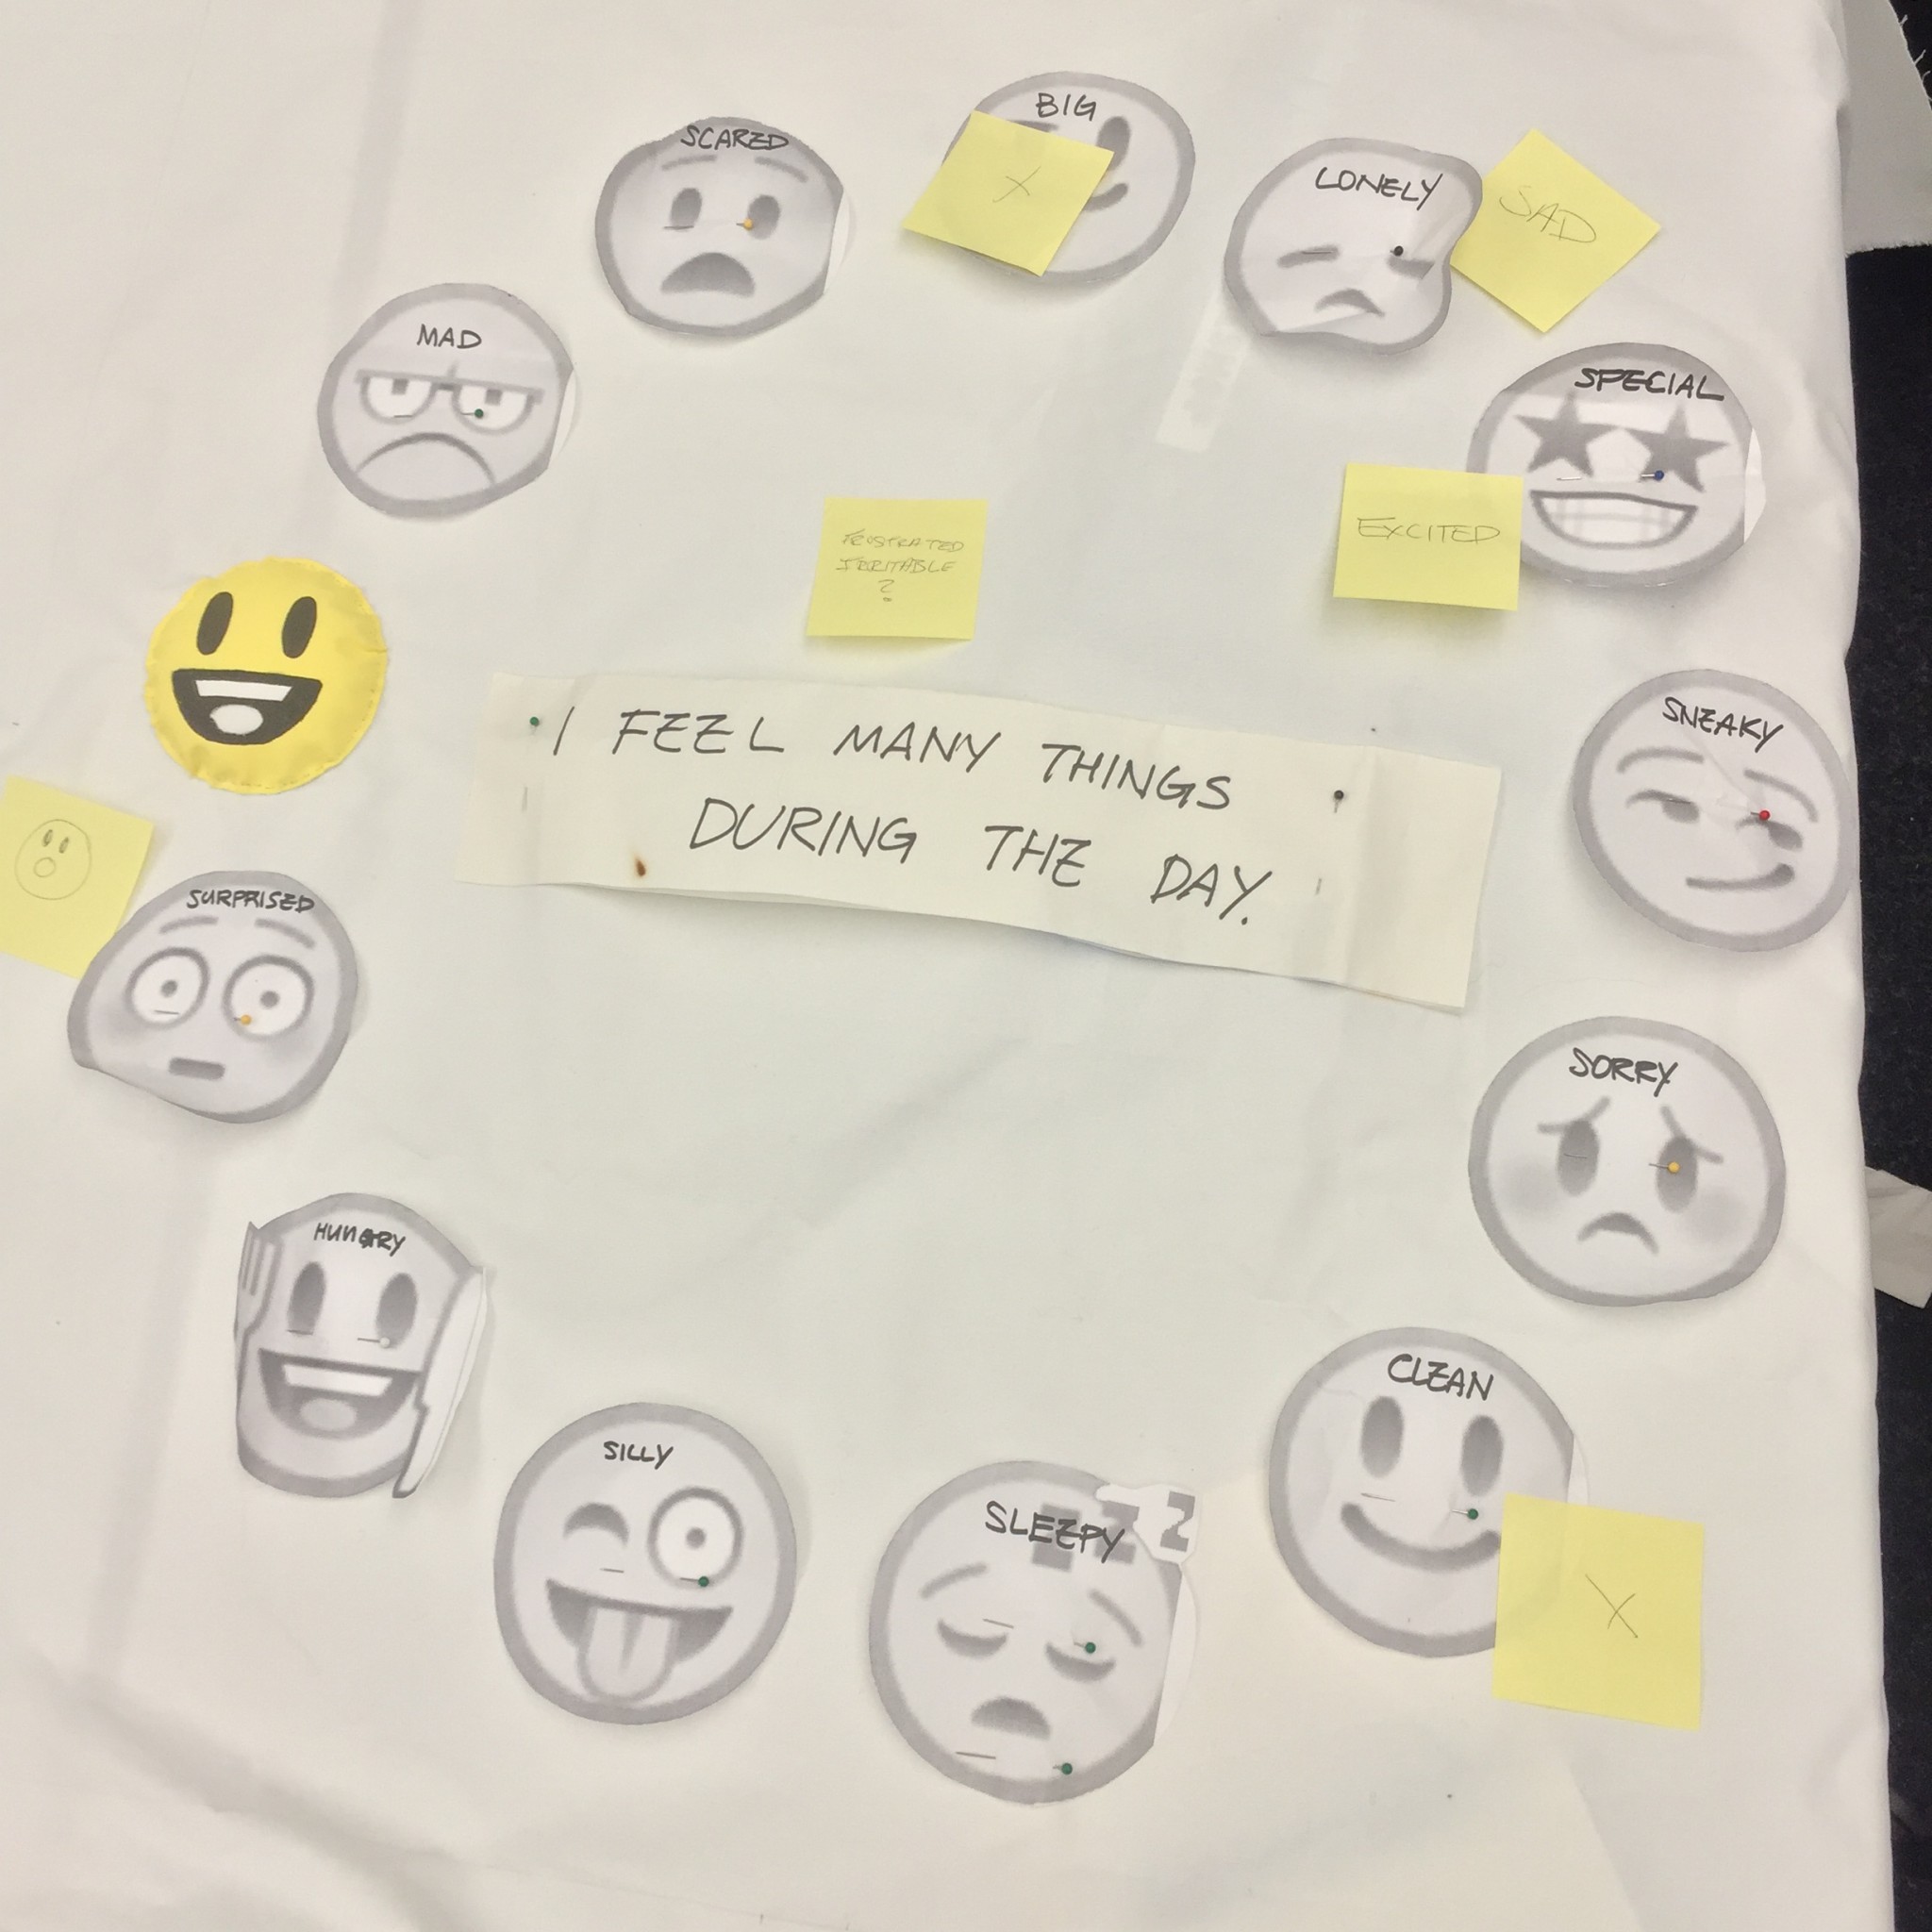
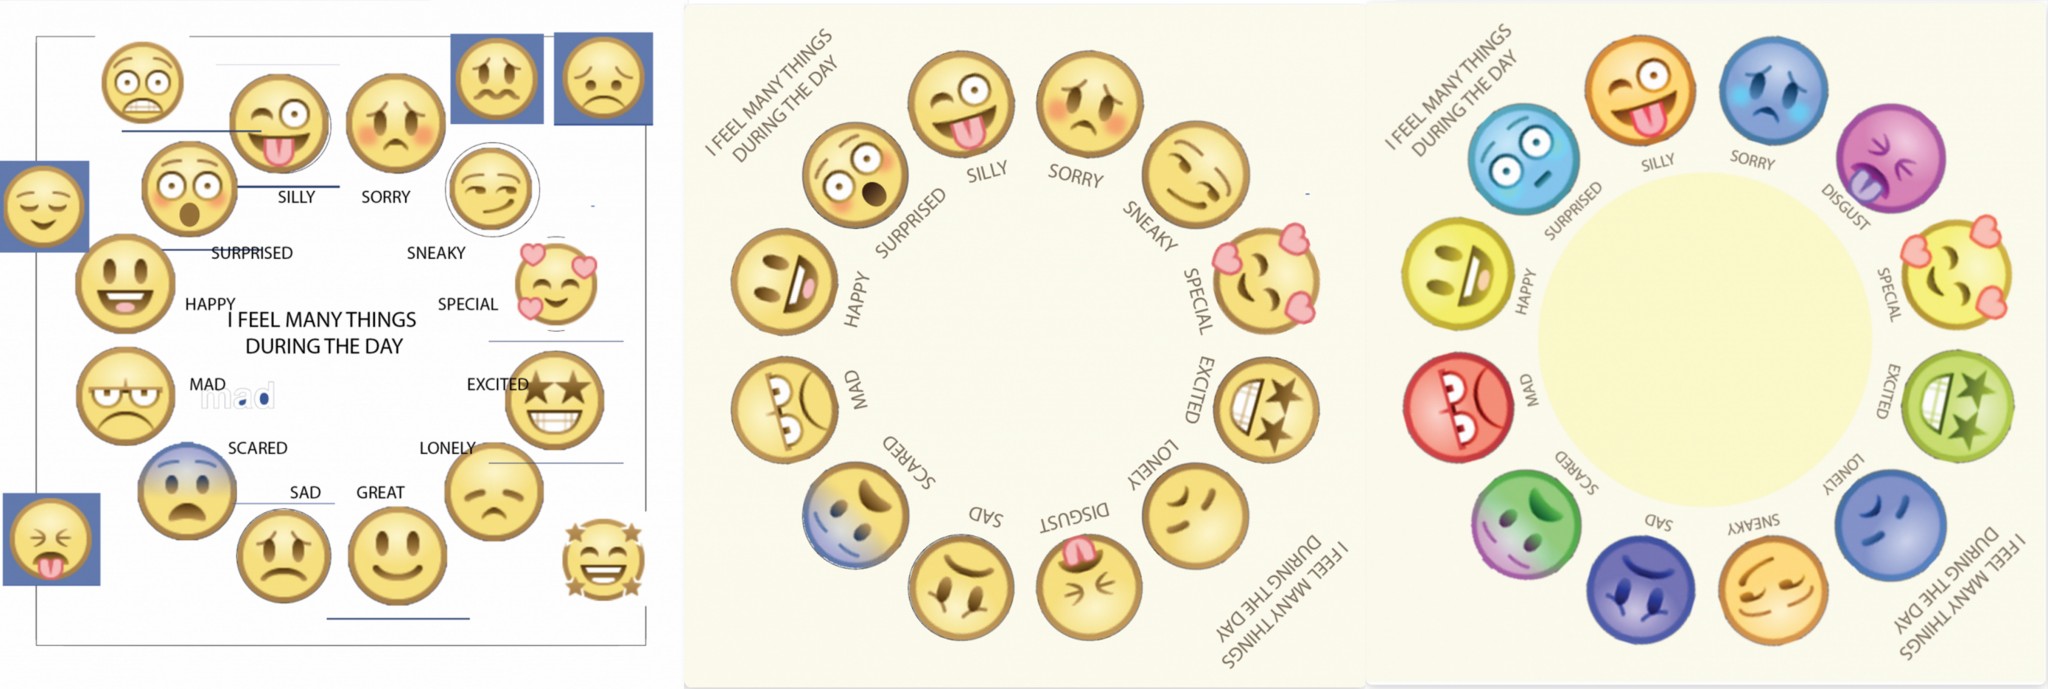
I selected 12 emotions out of 15 and Daniel J Edwards, a musical and voice actor in Pokemon(XY), Yu-Gi-Oh(Zexal Arc V) and Psychic School Wars (TBA 2016), recorded this script.
I Feel Many Different Things During the Day
When I tickle my daddy (daddy laughing) in the morning, I feel SILLY. When do you feel SILLY?
Before I eat breakfast (growling/rumbling), I feel HUNGRY. When do you feel HUNGRY
When I hear a loud noise, (door banging) I feel SURPRISED. When do you feel SURPRISED?
I feel HAPPY, (music playing) when I hear music. When do you feel HAPPY?
When someone takes away my bucket(/toy) (“GIVE THAT BACK!!”) I feel MAD! When do you feel MAD?
When a dog comes running after me (dog barking), I feel SCARED! When do you feel SCARED?
When my friend cries (sob sob), I feel SAD. When you do feel SAD?
When I help put my toys away (toy sounds), I feel GREAT. When do you feel GREAT?
When my mommy is on the phone (phone ringing “uhum, uhmm”) I feel LONELY. What do you feel LONELY?
When I think about what I want to be (“Oh oh oh!!” (something find)), I feel EXCITED. When do you EXCITEDfeel?
When grandpa visits (muack muack), I feel SPECIAL. When do you feel SPECIAL?
When I hide behind the couch (shh~~~), I feel SNEAKY. When do you feel SNEAKY?
When I hit my sister (“Hey stop it!” (annoyed)), I feel SORRY. When do you feel SORRY?
At the end of the day (YAAAWN), I feel TIRED. When do you feel TIRED?
When I see garbage on the floor, I feel DISGUSTED. When do you feel DISGUSTED?
Sanie’s feedbacks from Artisan Tech
Hi Binna!
your process is really well illustrated, detailed, and executed from start to finish. As a product, it works well aesthetically and catches the attention of children and adults alike. The pattern in the center is especially well done, and your care and handling of technique really comes through. Even your considerations for the childrens’ safety is spot on.
My only question is how did you come up with the sounds and the emotions for the faces (did you record/create them or take them from somewhere)? It seems that the voice recordings are a bit too detailed and might not be relatable to all children – is there any variation in the phrases? –
Overall amazing and beautiful work!
Q – It seems that the voice recordings are a bit too detailed and might not be relatable to all children / is there any variation in the phrases?
– My answer: a vocabulary of feeling words on the play mat should be detailed moments for kids to grasp and further use them. Hence, I got the ideas of narratives from daily life where kids generally experience.
I agree with what Sanie pointed out. I believe that the twelve audios with limited stories in each emotion could limit kids to fully understand and related to each situation.
I need to add more contexts for kids to perceive feeling words in accordance with meaning of behavior, contextualizing behavior, and consequences of behavior.
Iterative Prototypes of I feel many many things during the day
Prototype 1.
In order to paint faces with thermo-chromic pigments onto fabric and sew them on top fabric layer, I prepared materials.
Materials
Acrylic colors and binder
thermo-chromic pigments
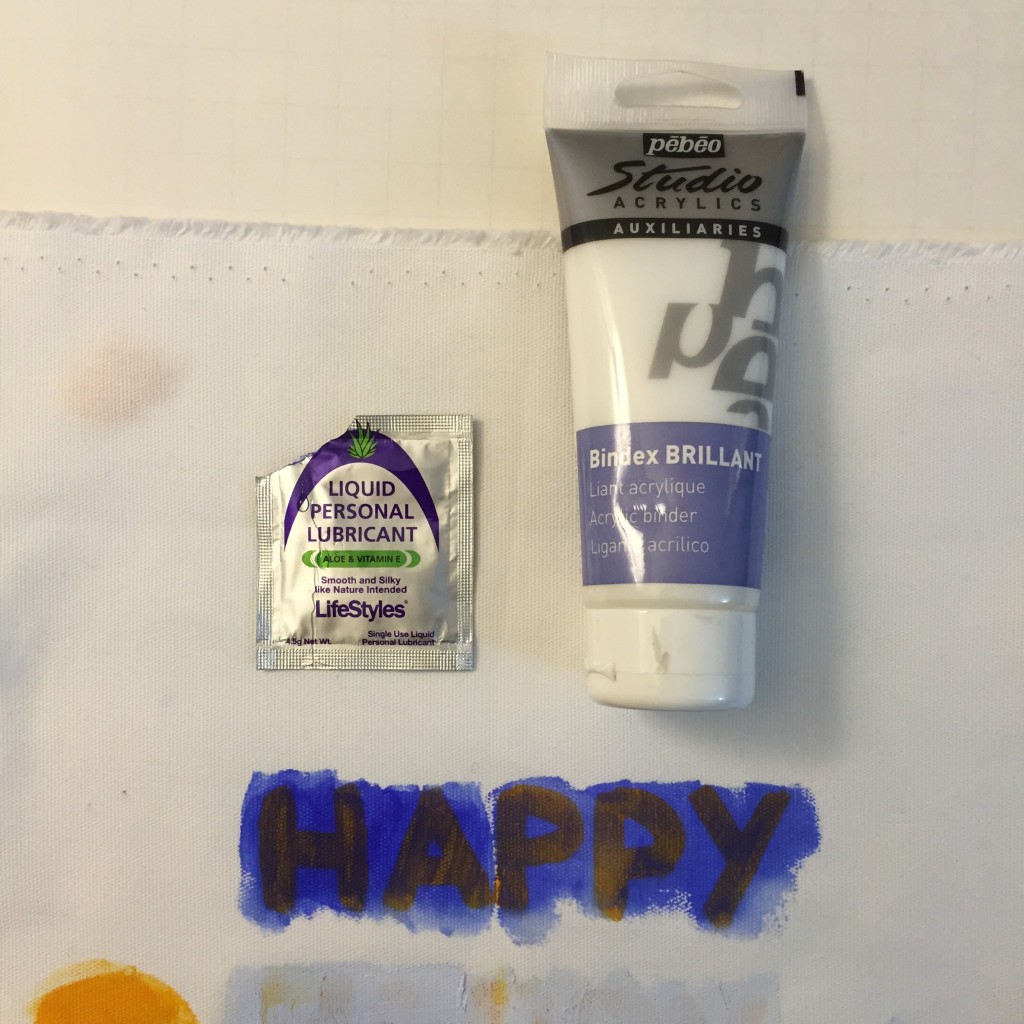
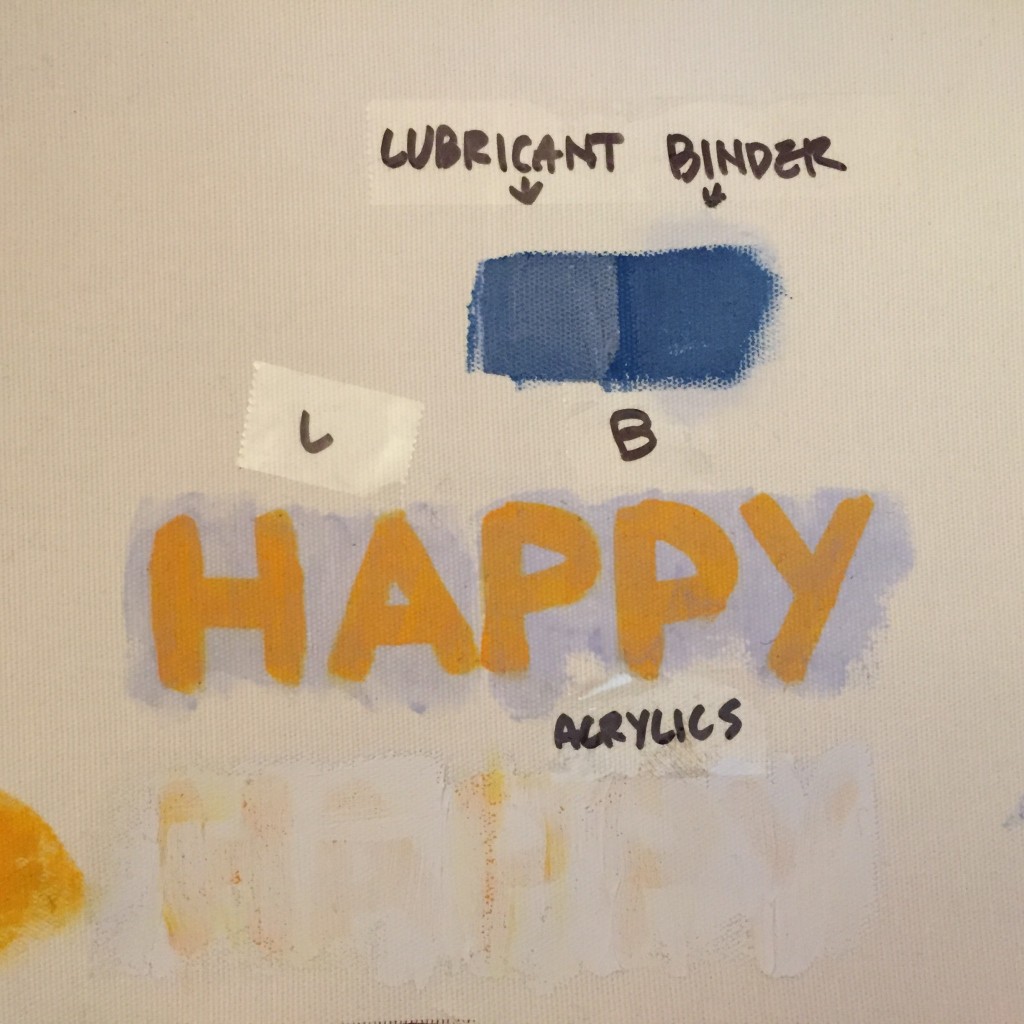
foil to mix thermo-chromic pigments and mixtures ( white acrylic color, acrylic bind and human lubricant) with disposable wood sticks or forks
2 yards of canvas
cotton puff
copper conductive fabric
needles and threads
pins to hold fabric and faces together
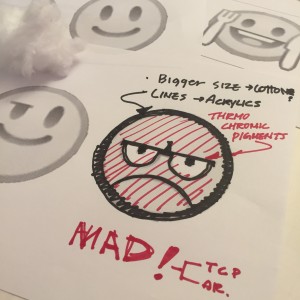
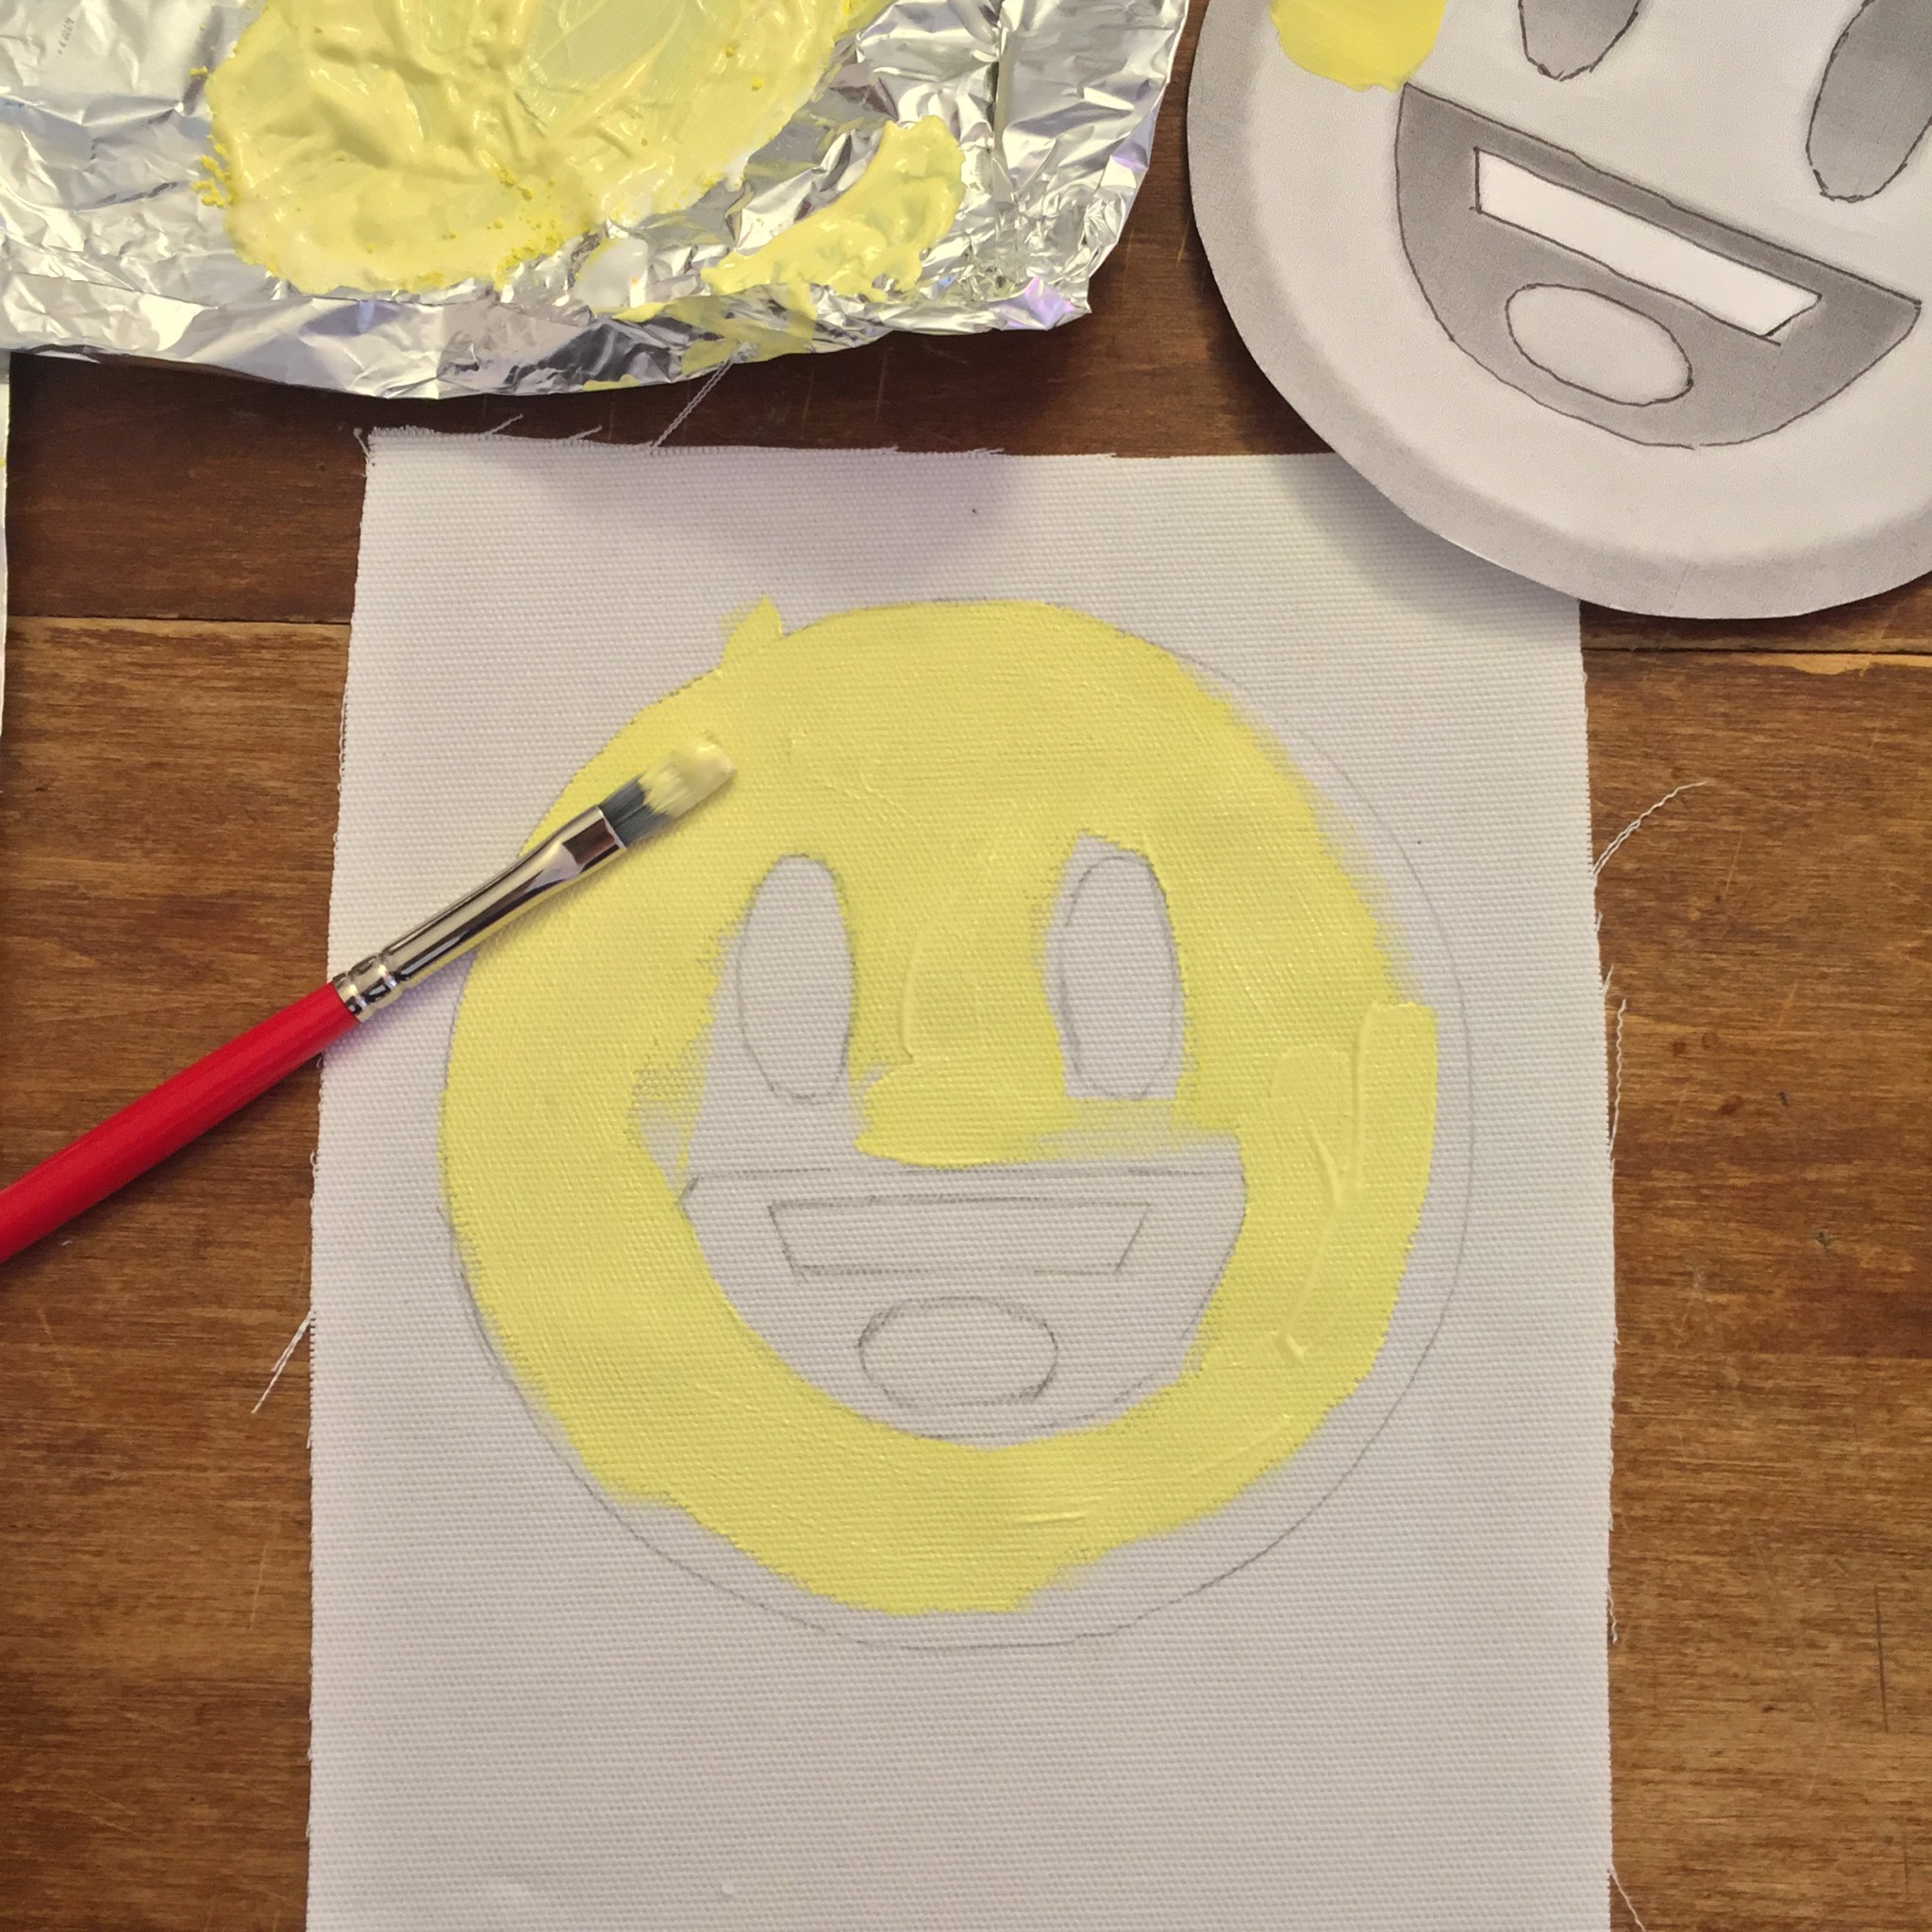
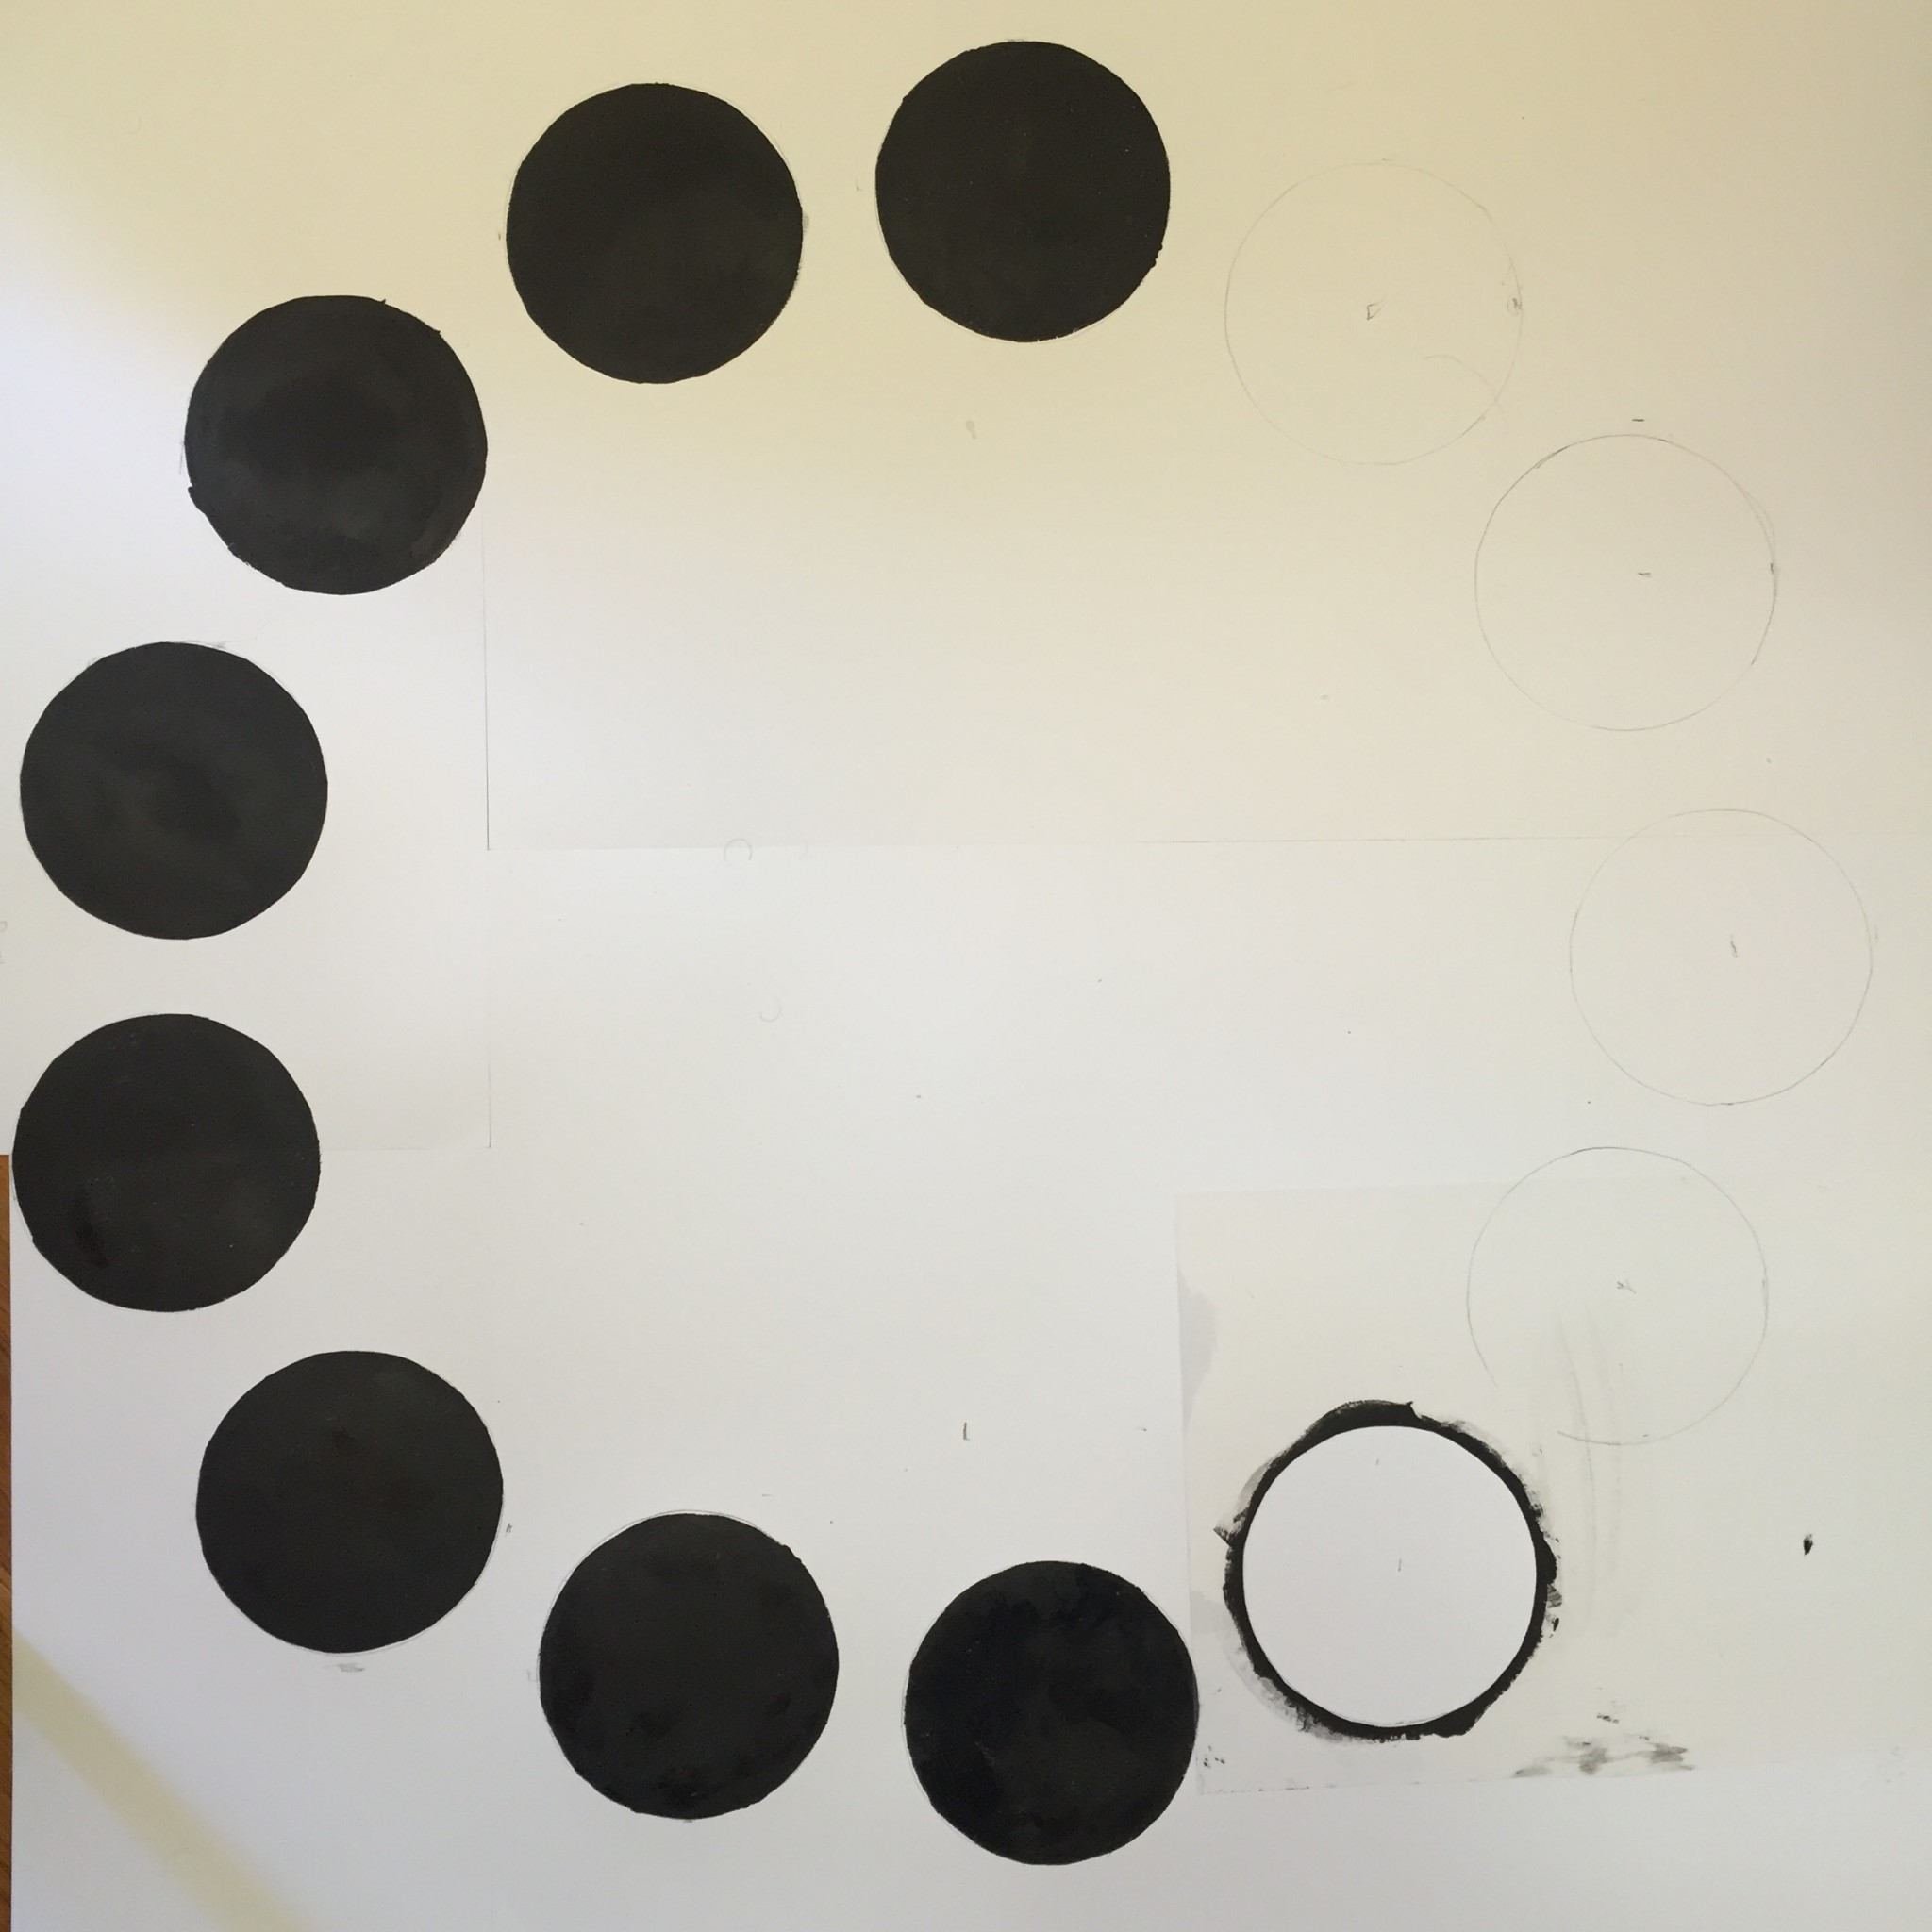
First step: I designed my play floor with faces. At the first prototype, It was 13 faces: silly, scared, mad, happy, surprised, hungry, sleepy, clean, sorry, sneaky, special, lonely, and big. I researched color scheme for faces and found color psychology. Yet ,I got confused because there were so many different ways of pairing up emotions with colors. I ended up using two color charts most frequently seen. I applied the one of them below to faces. However, later one of my classmates, Greg, told me that color psychology is not reliable because it is very subjective and its meanings are varied from culture to culture. Thus I decided to take just colors, not meanings, to contrast each face.
Next step is thermo-chromic test. I tested mixtures (white acrylic color, acrylic bind and human lubricant) to find out which mediums would keep thermo-chromic pigments vivider. As a result, acrylic binder was the best one.
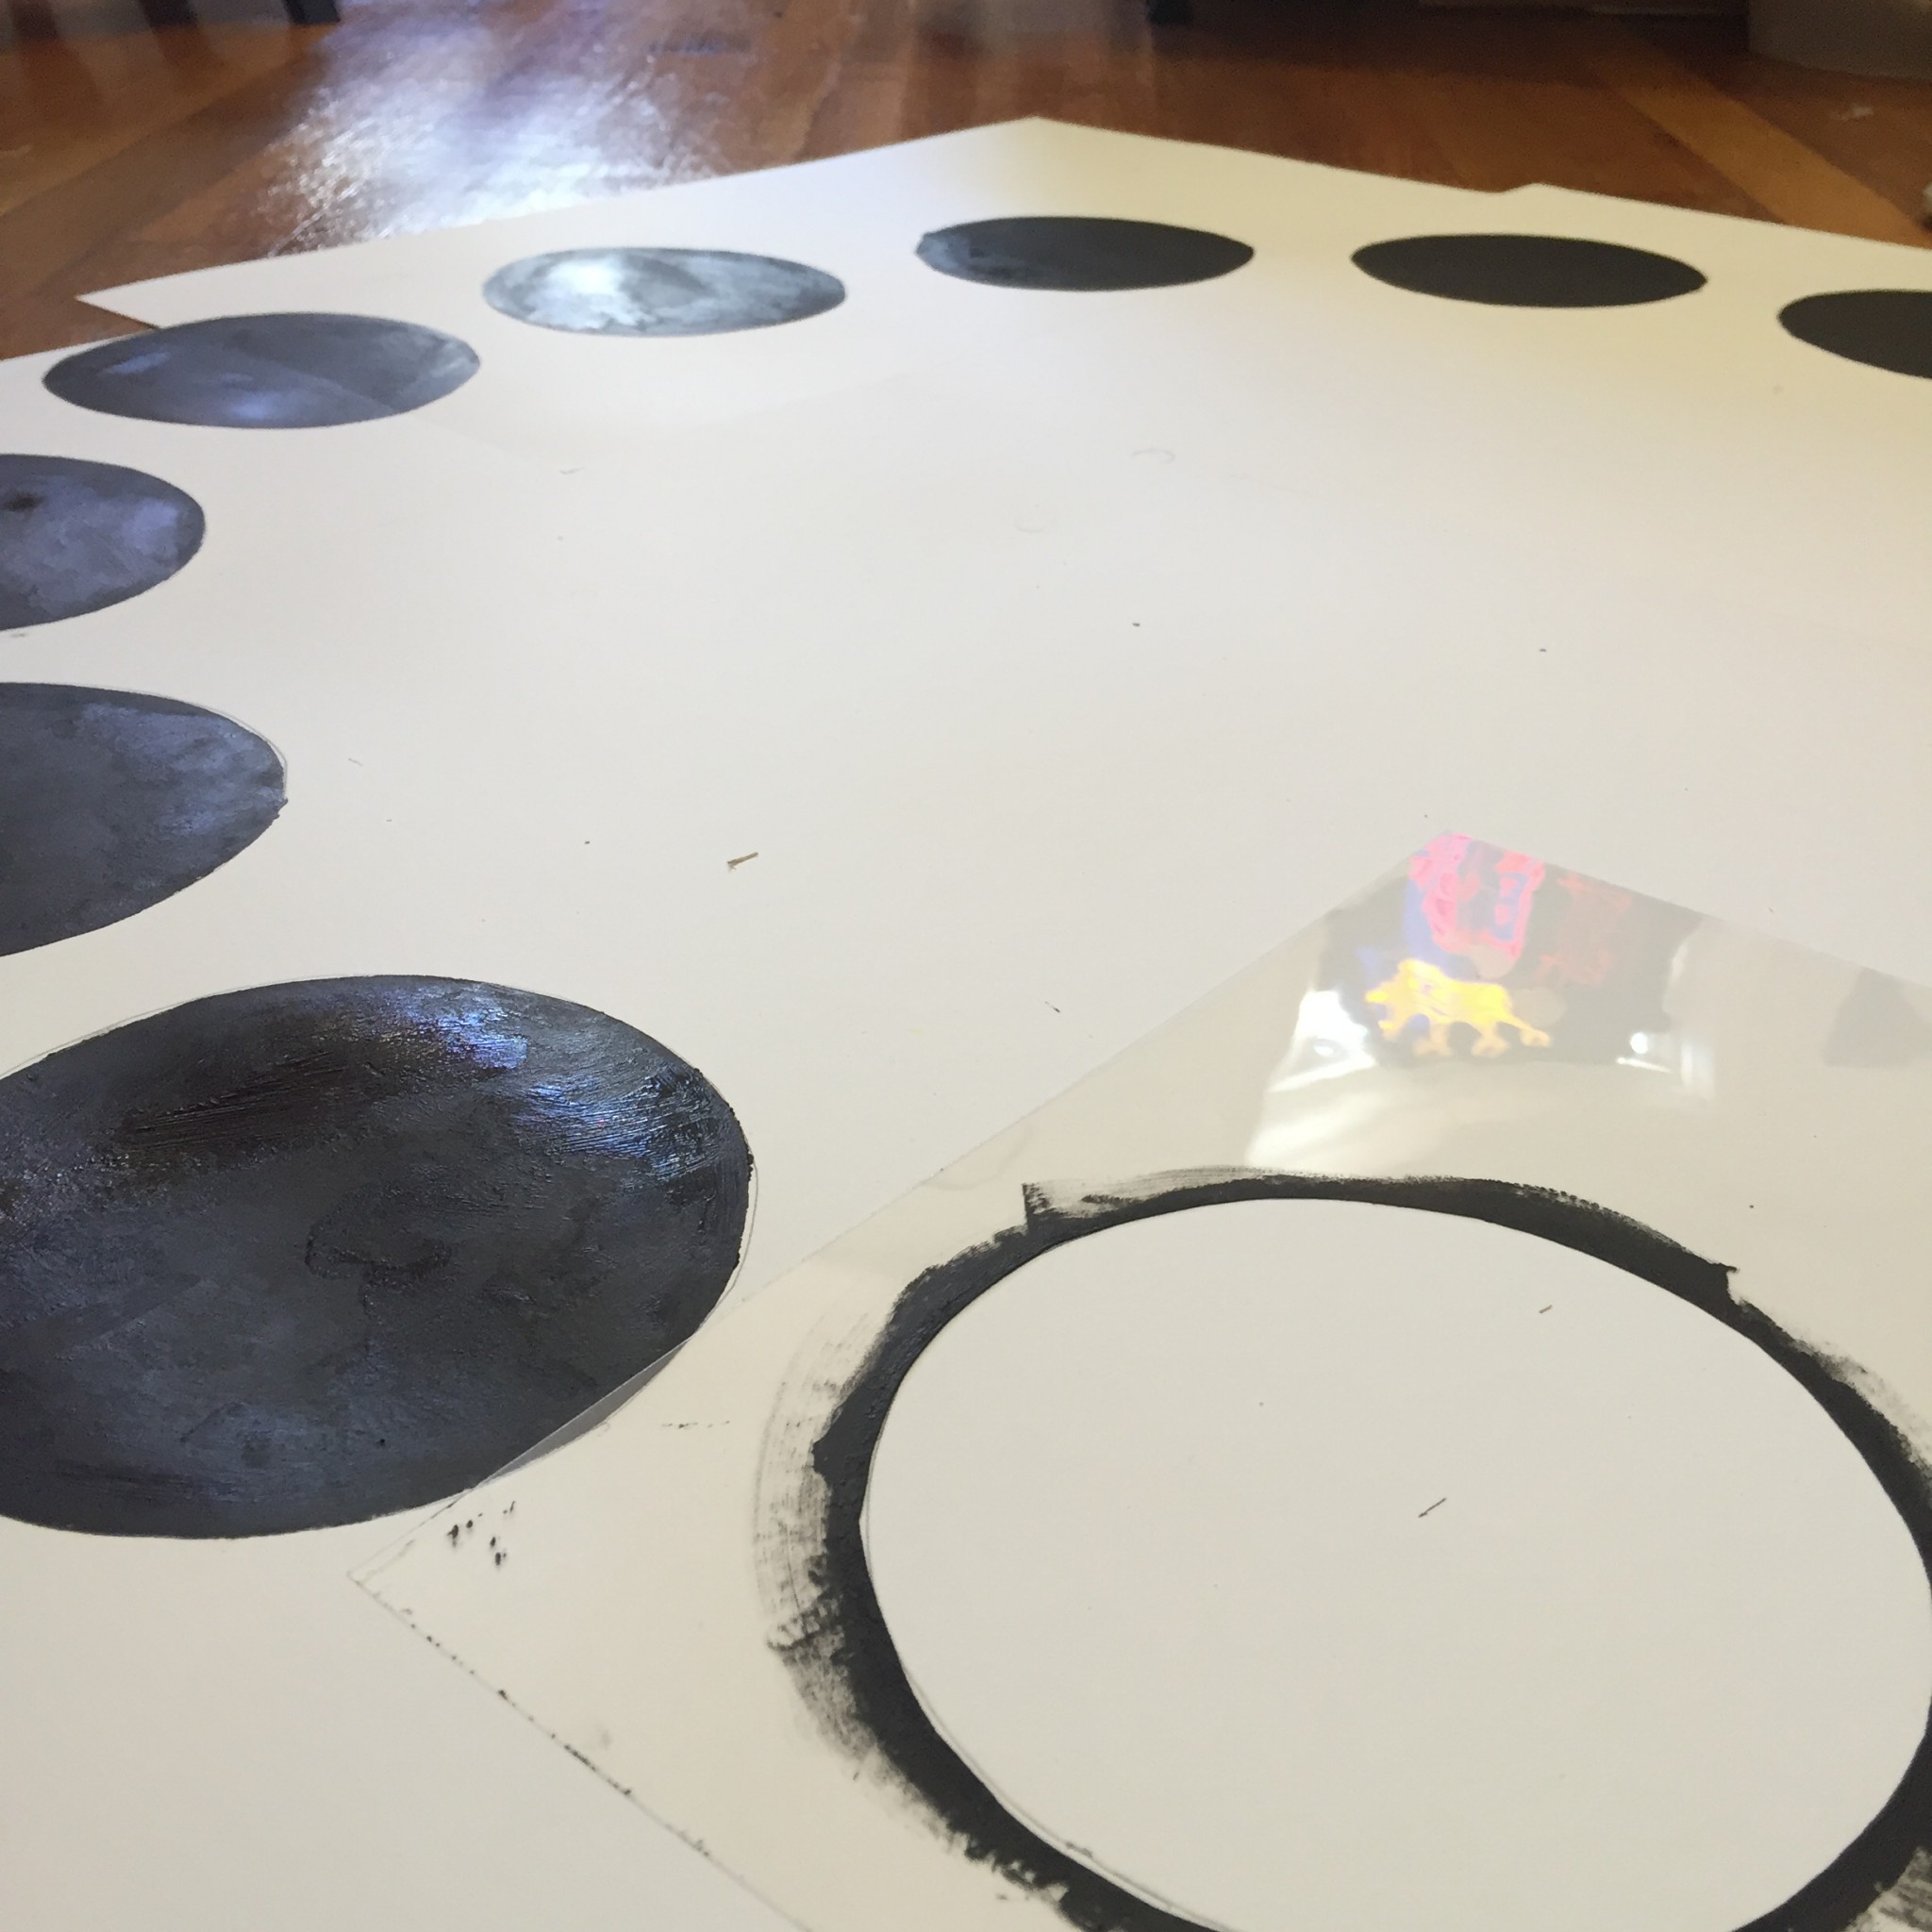
Then, I applied yellow thermo-chromic pigment on happy emoticon and painted eyes and mouse with black acrylic color. When paining the face, it took a while to color on it with a brush. After coloring step, I thought about using a sponge and stencil it would be a faster way. I sewed happy face on the top layer. I wanted to create the reaction that you can see the face color is only disappeared when you touch it, but eyes and mouth are still there.
I got some feedbacks from Major Studio 1.
Some face expression do not clear, so kids would get confused.
Dimension of my project is 35 x 35 inches and a kid could sit in the middle of it.
Change faces to look the middle of circle so a kid see the faces towards him when playing.
As I chose a thin canvas as a top material, thusI needed some material act as a cushion to keep children from getting hurt by the hard floor. In order to make sure the cushion layer between circuit and top cover work, I tested it worked well.
Also, I got more materials to stuff faces to give children different tactile experiences. Why I got them because I believed faces are not enough to attract children. I tried to touch, hit, and step on the faces filled with harder materials. I found some materials could hurt kids because some kids get really excited and could smash or hit on faces. I decided not to use different materials.
Painted paper circuit with conductive ink.
After making sure the testing circuit work, I painted the actual circuit on paper. I used a transparency film to fill out the ink.
Designs
Final design was faces with colors. each color on faces goes with each emotion.
I sketched how to build the floor and install board and speakers.
Structure
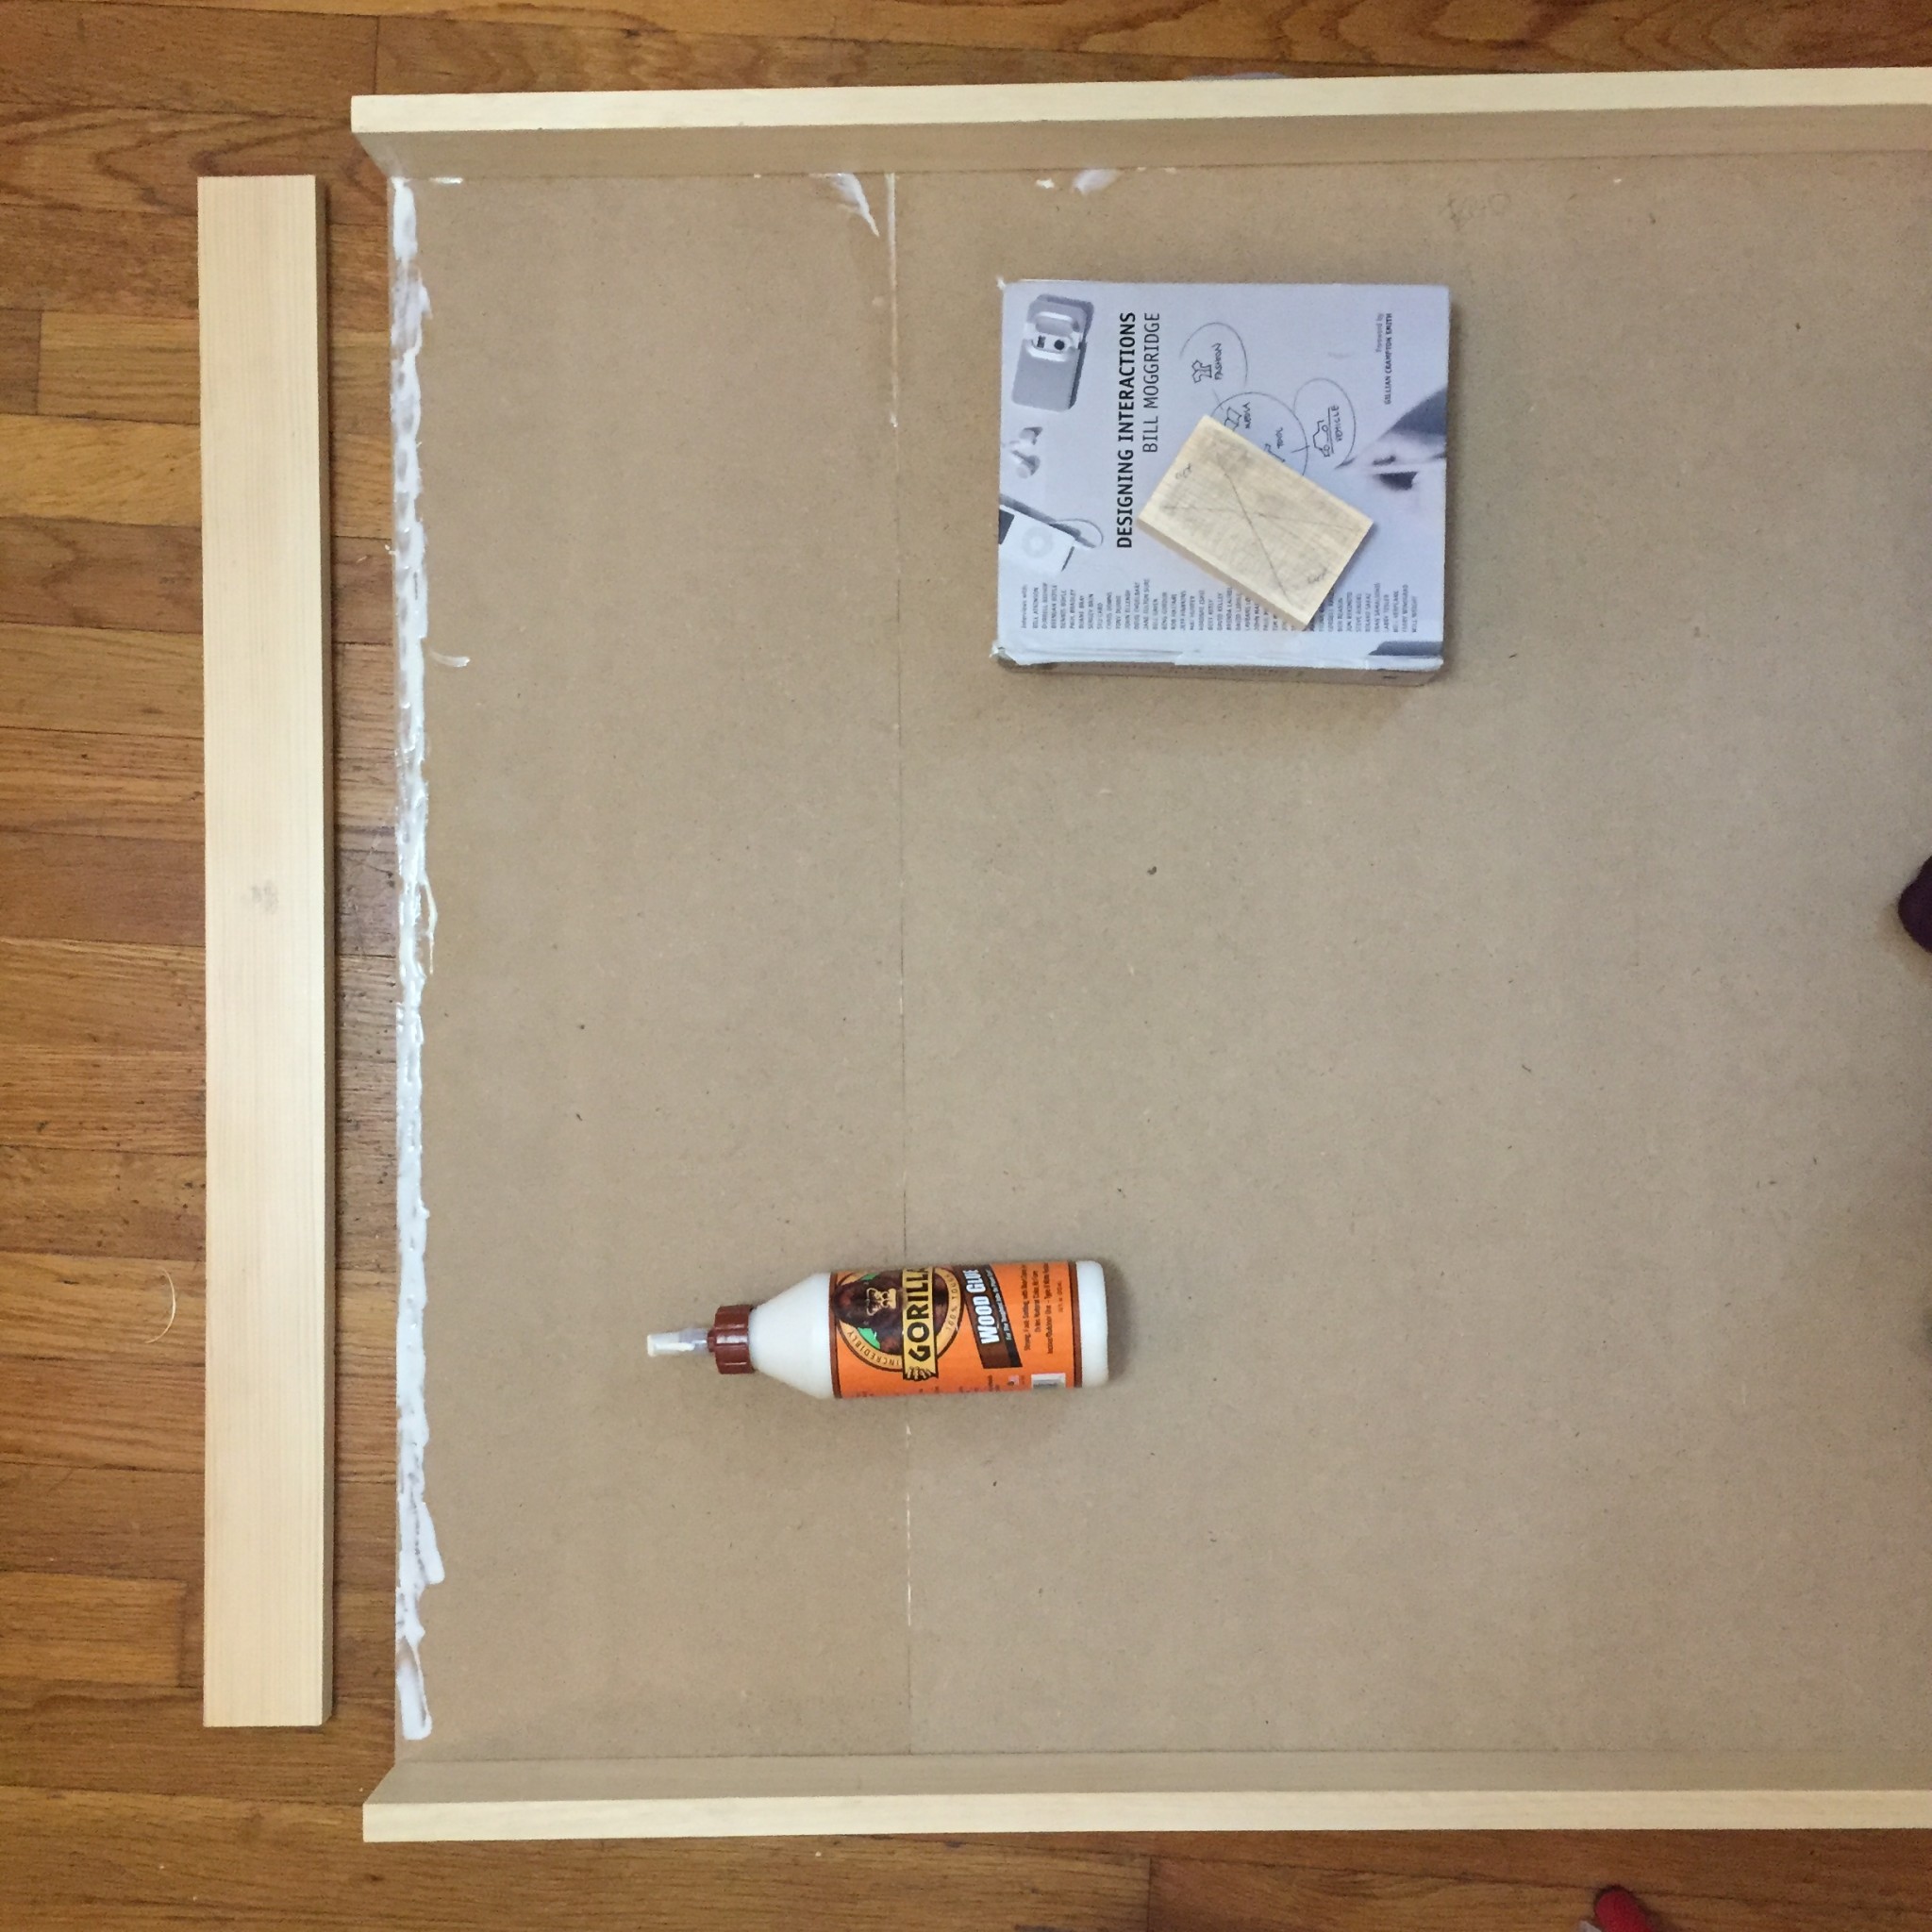
I brought wood panels to woodshop and cut them into pieces to build the floor and assembled them. Due to kids’ safety, I glued and nailed the pieces together to build a sturdy wood floor.
Soon I finished building the floor, I came up with an idea of making my project better. I don’t need the hard floor anymore. Instead, I could use felt or thick fabric in order to make a flexible play mat. It’s unnecessary to make the floor heavy. lol
Feedbacks from classmates
After playing with thermo-chromic pigments, I found that when it comes to testing hand and eye experience, the responses from faces weren’t immediate when kids touched them. Children are impatient. I have to think about how to keep their attention as much as I can.
Also Elizabeth said it would be unnecessary to use thermo-chromic pigments on my project. So, I started looking for different materials.
Jane, Charles and Wes
We loved your concept and where you were at in terms of progress. Our main comments were on the underbelly of the project, the wiring and mechanics. It looked like you were using copper tape which we had mentioned you need to just double check the wiring with every circuit. The other comment is using material on the bottom of the pad. Maybe carpeting or a foam?
Love the progress so far!
Max – I think your documentation is great. and the concept behind it is strong. and the aesthetic of the project is great. The only thing i would recommend you do is to keep your presentation short and sweet.
These are the feedbacks I got in class. Their feedbacks were all sweet and supportive. I focused on possible issue with making the circuit that will be set up under the top layer. I took an action to make the circuit to see how reliable the connectivity and sturdiness of circuit are. Also, I prepared foam layer so as to insert a cushion between the top and bottom layers for kid’s safety.
I contemplated in terms of audio, how to make the voice more relevant to the context where kids will be asked as well as who will be the users helping kids to talk. As I name my work emotional vocabulary play mat, this could play a role of therapeutic tool that assists to arouse their emotions they feel through the day and let children share their feelings with parents, therapists, and teachers.