A project I really enjoyed is the line of Sound Reactive dresses by Rainbow (Amy) Winters. She made two pieces, one that responds with nature like animations and another that animates more fractal shapes that she refers to as the “Picasso explosion.”
These dresses animate differently based off incoming sound, and I find the whole idea of reactive clothing like this fascinating. I am definitely not a huge fashion nerd, and my general getup is jeans and a t-shirt, but I am a science nerd, so the underlying tech of these pieces really fascinates me. I am also a sucker for anything geometry related so the Picasso dress really grabbed my attention. The dresses are made up of neoprene tubes, electroluminescent panels, as well as mirrors to blast out the colors and animations to the outside world.
The three classifications I feel most attuned to are coder, learner, hacker. I definitely used to identify with gamer, but as I’ve gotten older I find myself playing less and less games. In my younger days though boy was I a voracious consumer of video games, much to my parents chagrin.
I identify as a hacker in that I am great at pulling together things I’ve found that fit a project I am working on and slicing them up and retooling the bits to fit my need. I definitely don’t see myself as a hacker in the traditional sense of trying to break into computer systems, but rather the hacking I refer to is modifying and changing some basic bit of code of base project, and building off that to save myself the time of starting at ground zero. I feel this has suited my nicely as it’s allowed me to get more done for my coding projects since I can skip a few preliminary steps! This has been particularly helpful when coding animations as 99% of the time something similar has been done, so it saves quite a bit of time looking at the structure of those projects and then carving it up to suit my needs.
I classify myself as a learner because I am a voracious learner. Learning a new skill has always been something that engrosses me. I absolutely love diving into a new area, especially one that involves making something. This has served me greatly as I have taken journey that is learning how to code. With coding there is such a mammoth amount of different things to learn in the subject that I am never bored! The one downside to my appetite for learning new things is that I don’t always stay on one subject to truly master it, rather I have moved onto the newer and more exciting topic to learn.
Lastly I classify myself as a coder. It has been a rather long winded journey to get to the point where I consider myself a coder. My first coding class was in undergrad, and it was about as stale of a class as one could imagine. This severely turned me off from programming as my teacher made it more dull than doing microsoft excel all day. Flash forward several years when I was working with microsoft excel all day, hating life, I remember starkly thinking “man I wish I learned how to code.” My boss at the time turned me onto codeacademy, and away I went with igniting my passion for code. This really came to a head when I met my fiance Alex Samuel, who was plugging away in her first year at DT fresh out of the fashion world. She was doing really cool projects with both physical computing and software coding, while I was counting the hours in a day at my boring job. She hammered the fact that she had no coding background before entering the program, into my head and it really gave me the confidence to apply to DT. Flash forward a year an a half later and I am coding away, enjoying every moment of it. When I first entered DT I was big into pcomp, but as the year went on I got more and more into coding, especially openFrameworks. Now most of my projects are strictly code based, and I really enjoy the act of digitally creating art with the simple logic structures that make up software coding languages.
Favorite Tool:
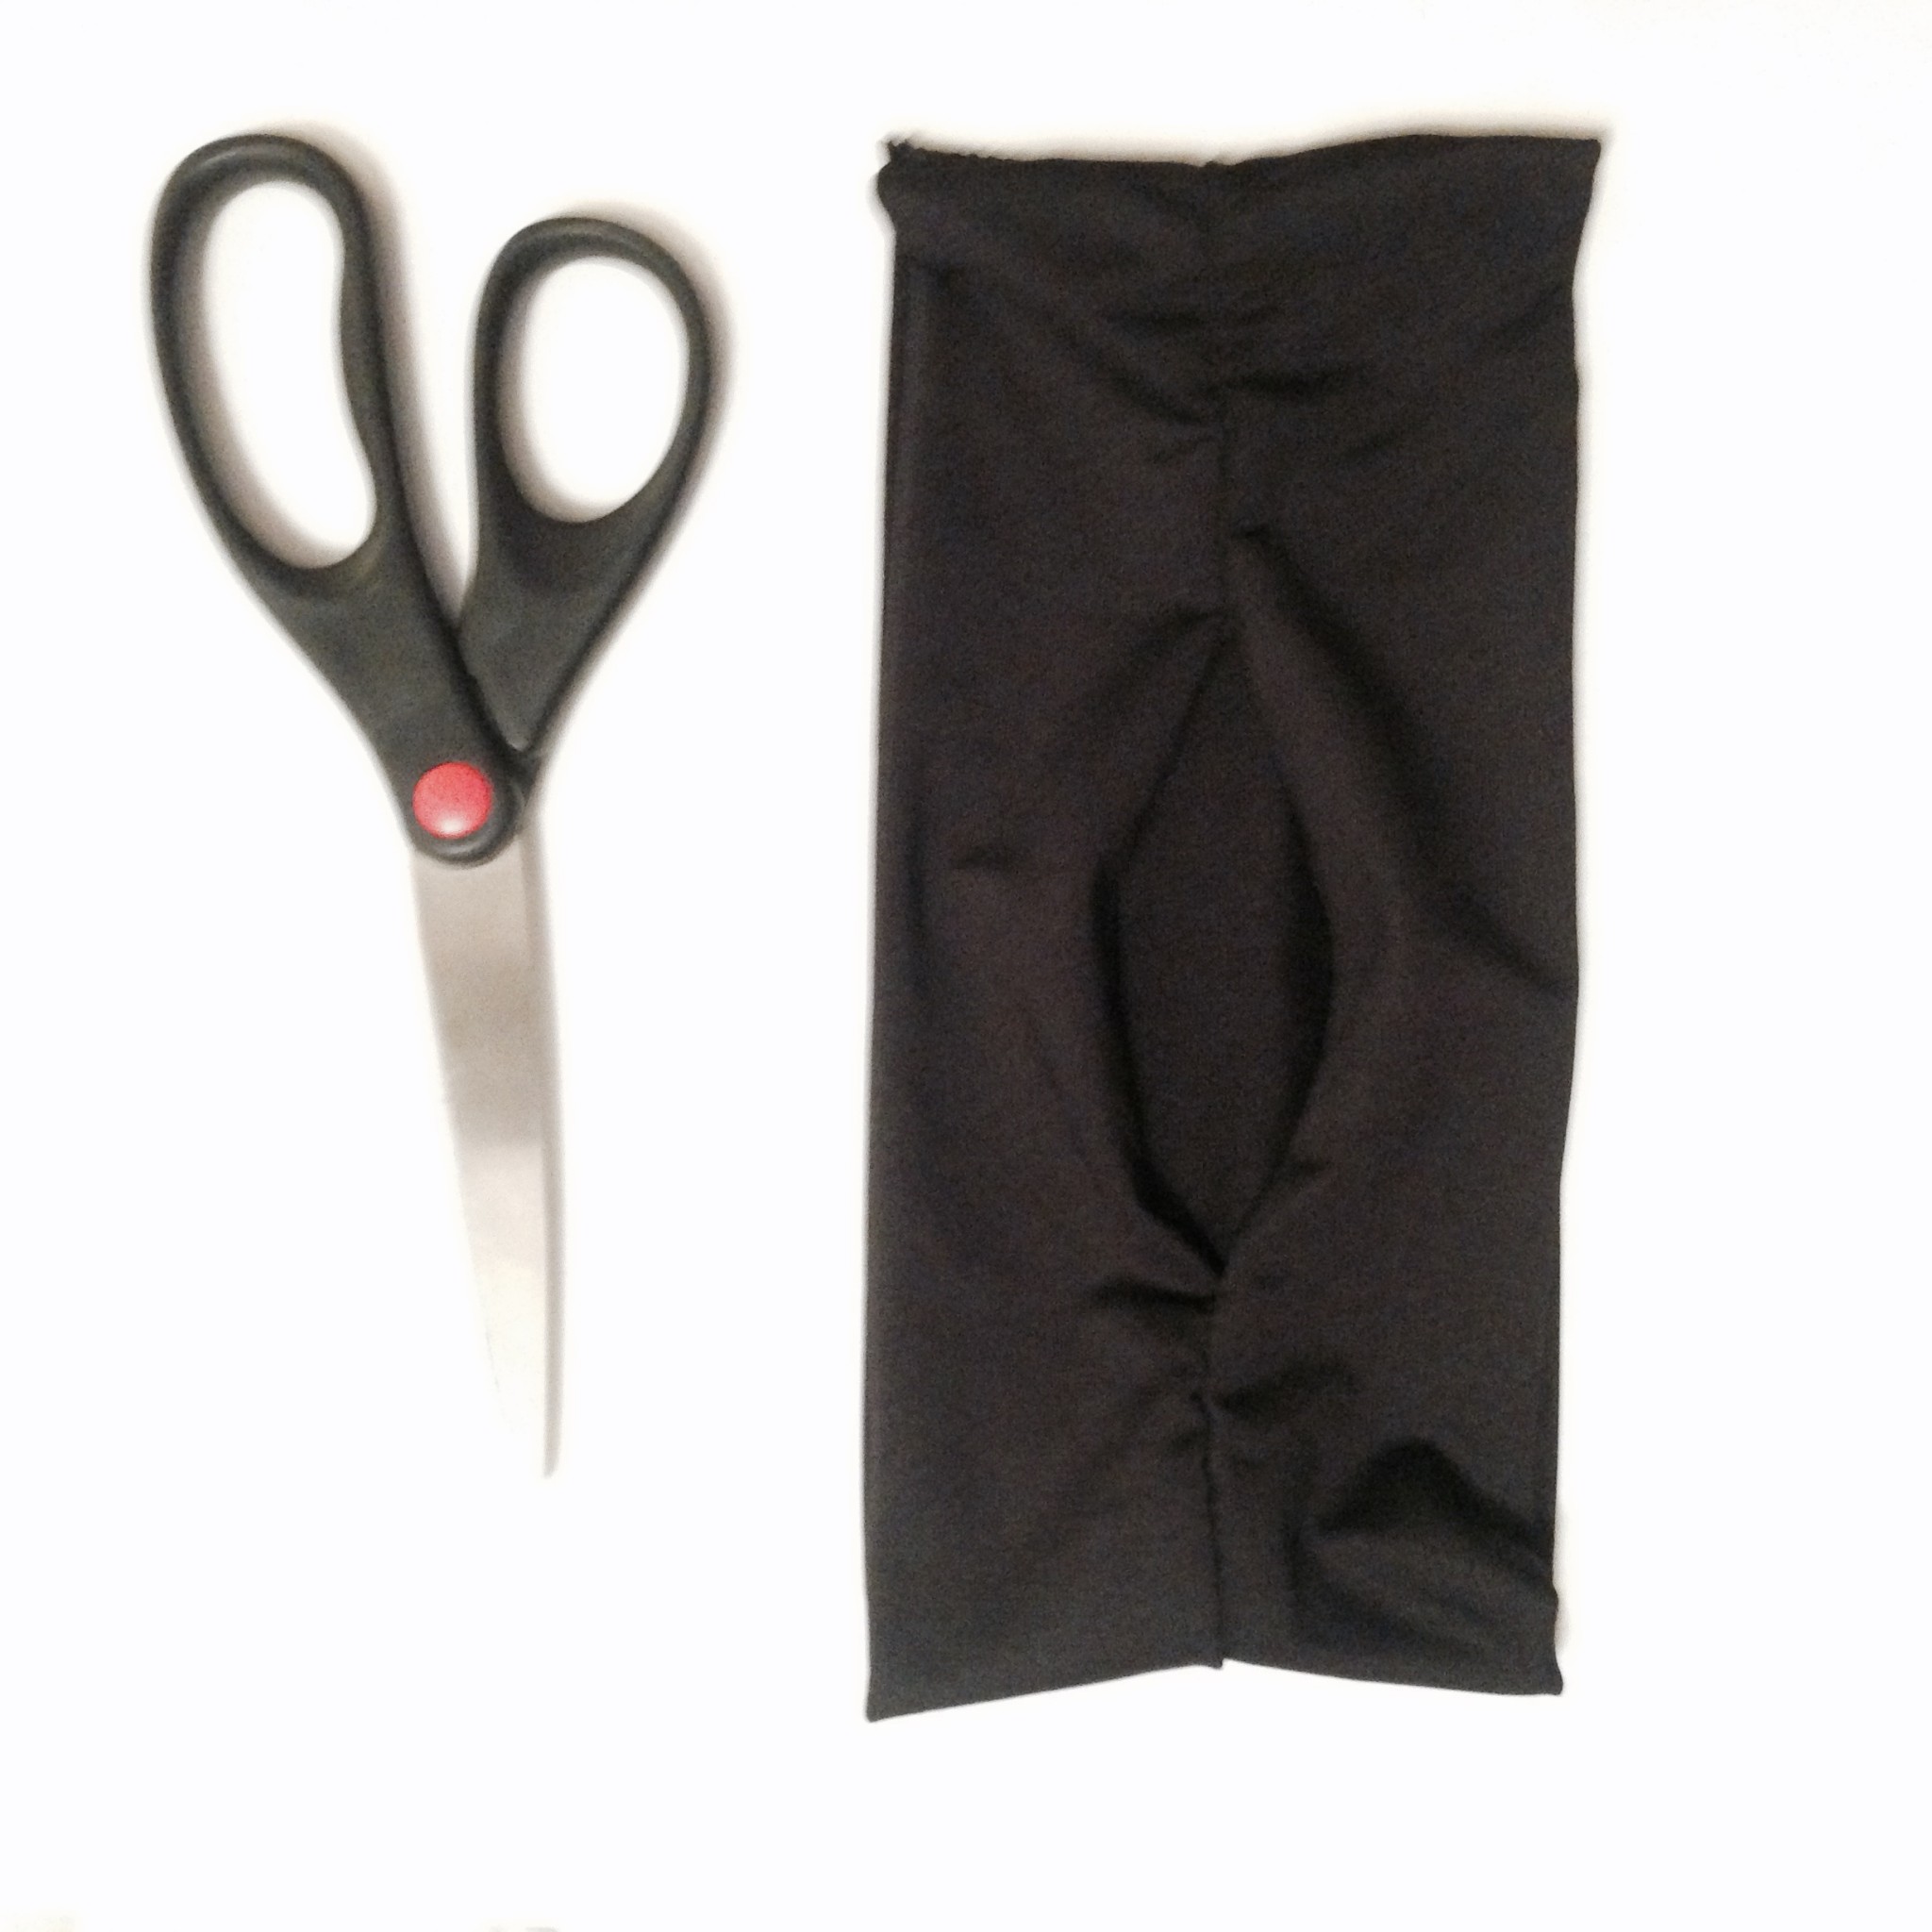
My favorite physical tool is (this may sound weird) a pair of scissors. With scissors I can shape a whole wide range of objects to suit my needs, from pcomp wires, thin tubing (with strong scissors!), to construction paper and cardboard. I love the ability to shape things to my exact needs on demand, and scissors are usually the best tool for this. When I got my newest phone I found that it required a smaller version of a sim card. Instead of going to the store right away I looked up a DIY way to trim down your old sim card and away I went. With meticulous and small increment cutting, I slimmed down my old sim card to fit my new phone. It turned out that the chip itself was not compatible with my new phone so it was all for not, but the act of modifying the old chip to perfectly fit my new phone was an enjoyable one so the time was not wasted. I thoroughly enjoy being able to mold things on my own and to my needs without having to purchase a specific object, and scissors are an incredibly useful tool for doing this.
Favorite Craft:
I thoroughly enjoyed learning how to needle felt from Sarah. It seemed like such a silly endeavor at first, and one that I thought couldn’t possible make little objects like in the picture, but I was quite amazed when after many minutes poking away at this ball of cotton fuzz, substantial objects soon formed. After this I began to find myself with wads of this felt in my bag as I constantly made little goofy items with it. It definitely was a painful learning process as many a time the needle would enter my finger instead of the felt and boy are those little suckers sharp as all hell. After quite a bit of trial and error my stabbing became more precise and the amount of blood drawn began to diminish. If I could do something differently when learning this craft, it would definitely be to have taken it slower. Rushing these little felt objects is a quick way to finger pain as the material is so loose at first you have to really squeeze it together with your fingers. This causes the area to stab to be rather small between your fingers so if you are careless you’ll often find yourself needling your fingers. Now in practice I don’t know how careful I would be if I got to do it over as I am a rather impatient person and one who likes to bull rush his way through new fields, so most likely I would have ended up with the same amount of scabs on my fingers even if I had the forewarning of the pain to come
400 years into the future, man has survived many hardships.The greatest of which being climate change.After the great disaster of 2100, when the seas turned toxic, and the temperature turned extreme, humanity was reeling.Crops would barely grow, and countless died as society all but collapsed.The last holdouts knew that man had to change his approach as the caretaker of the planet, and had to learn from their mistakes.Casting off the yoke of personal greed and progress at all cost, humanity began to rebuild.Central to this was solar power.Never again were we to rely on toxic chemicals and compounds to power our societies, as the road that lead to was one we did not wish to revisit. But the leaders at this time knew how fickle and short-sighted we as humans could be so they devised a plan to keep solar power central to humanities core values.Thus began the pseudo cult of light.
Light was soon held almost akin to god.Light was the bringer of life, as without light, plants could not grow.Without plants we could not feed ourselves nor our animals.Light is the banisher of darkness, and with solar power man banished the toxic hell that had become the world at that time.As the decades turned to centuries, this love of light became more and more the central focus of human’s belief systems.Due to this, sunrise became a spiritual moment for most people.As the morning light banished the darkness, people could start their days and lead their lives.Humankind was for the first time, peaceful and happy.The cult of light had done much for the well being of humanity.
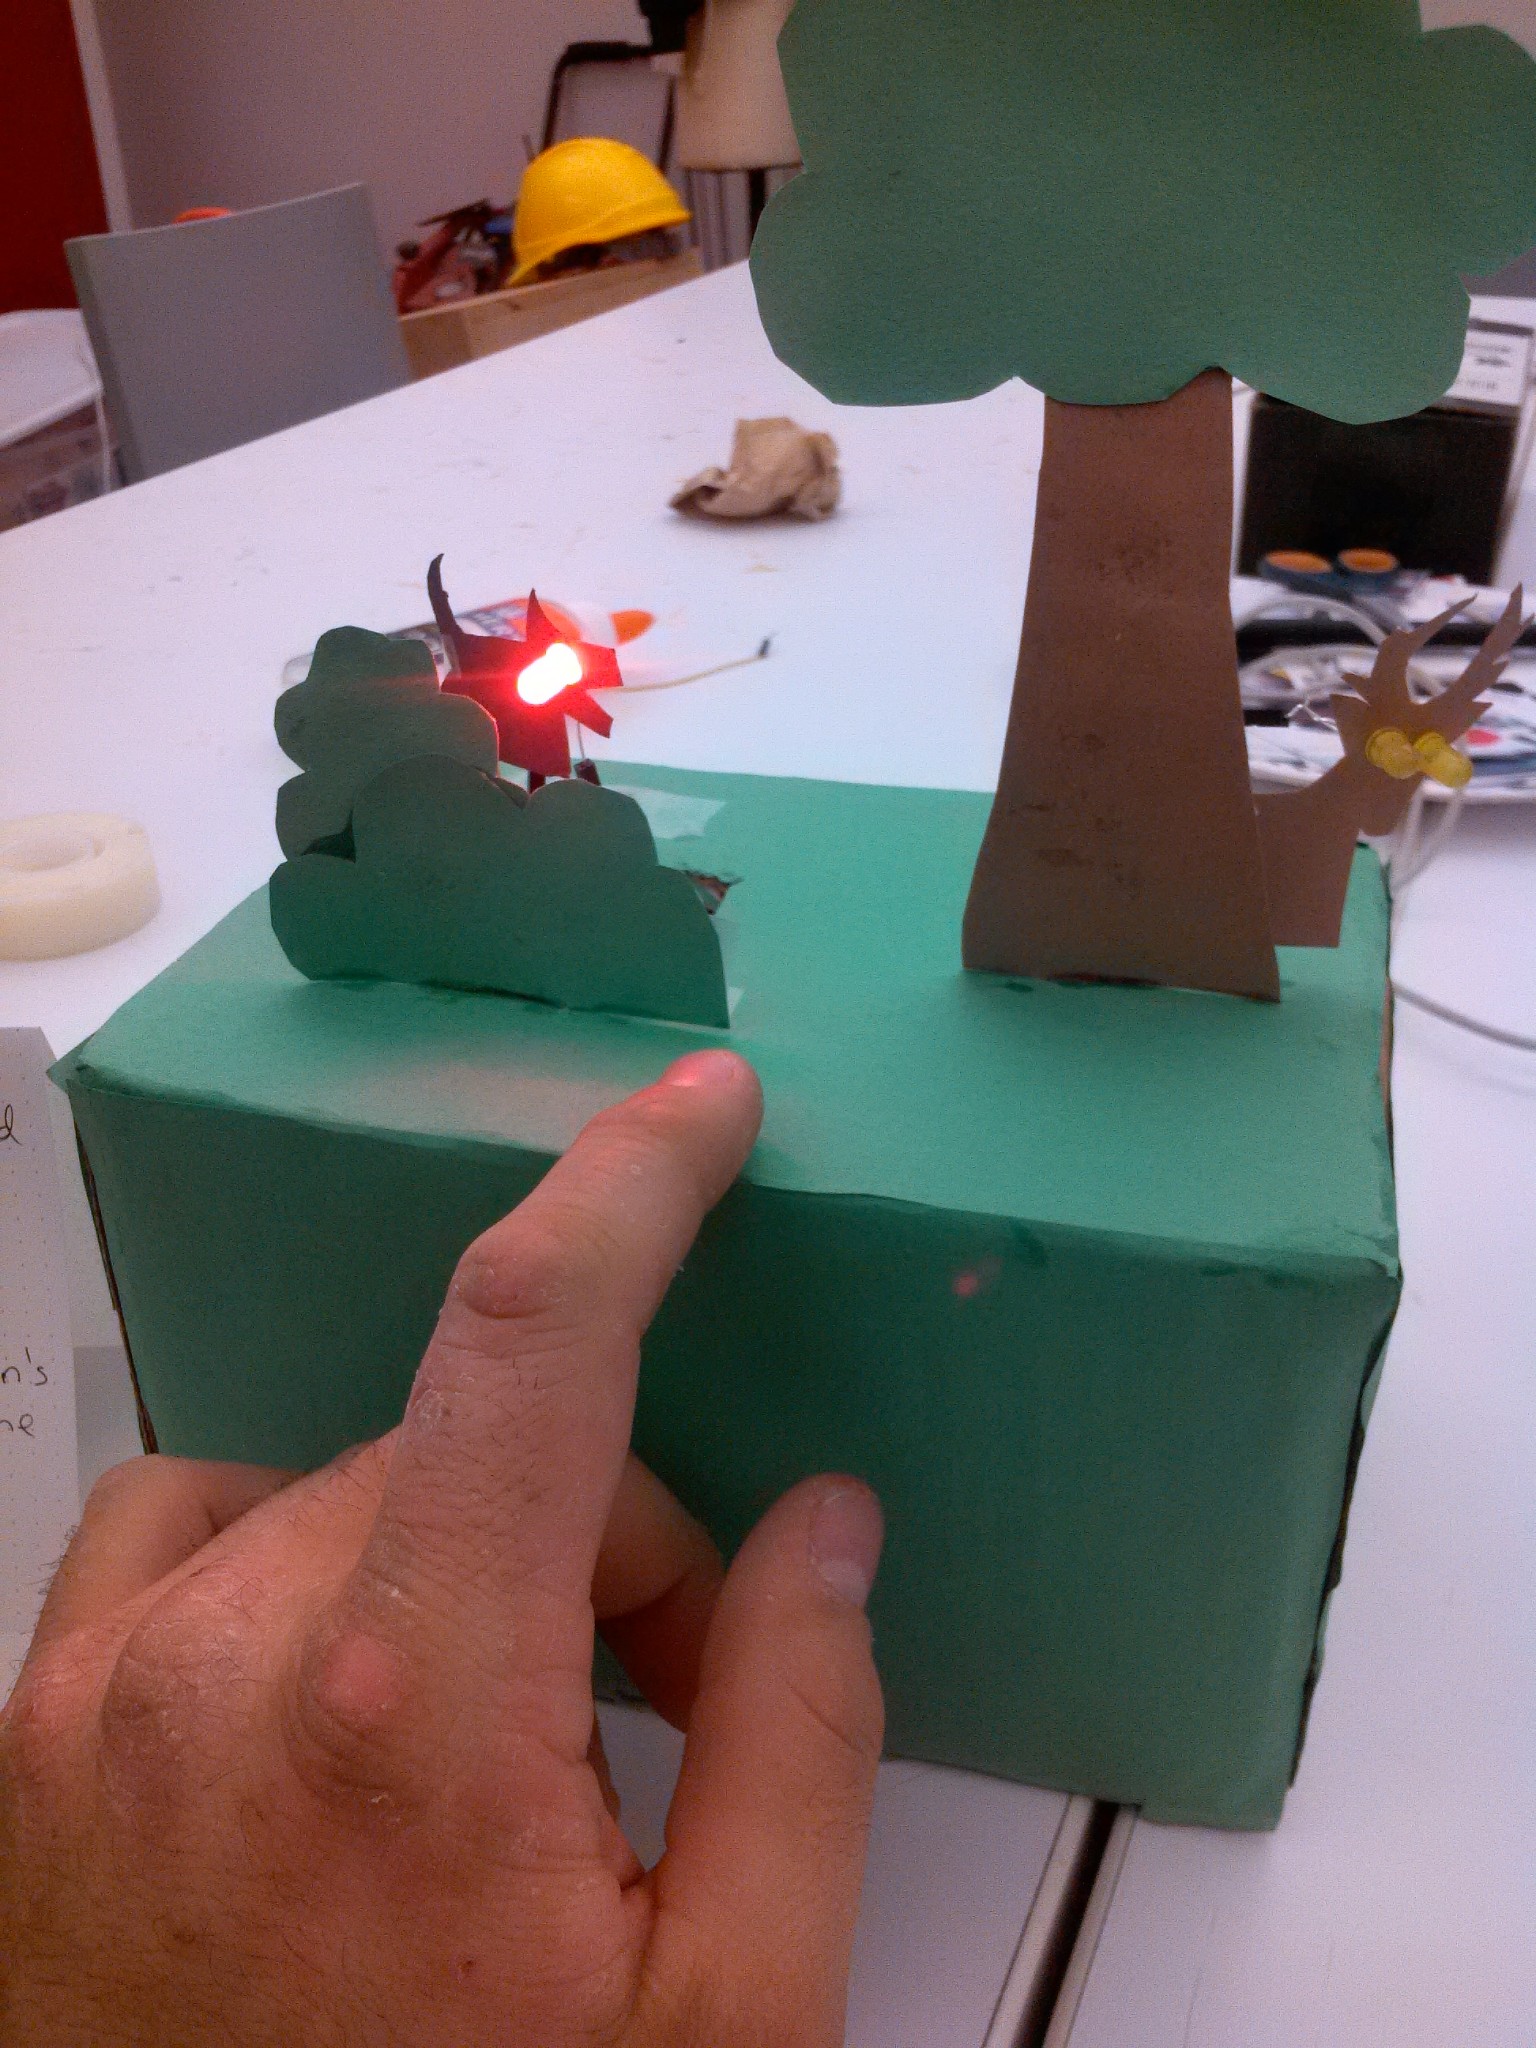
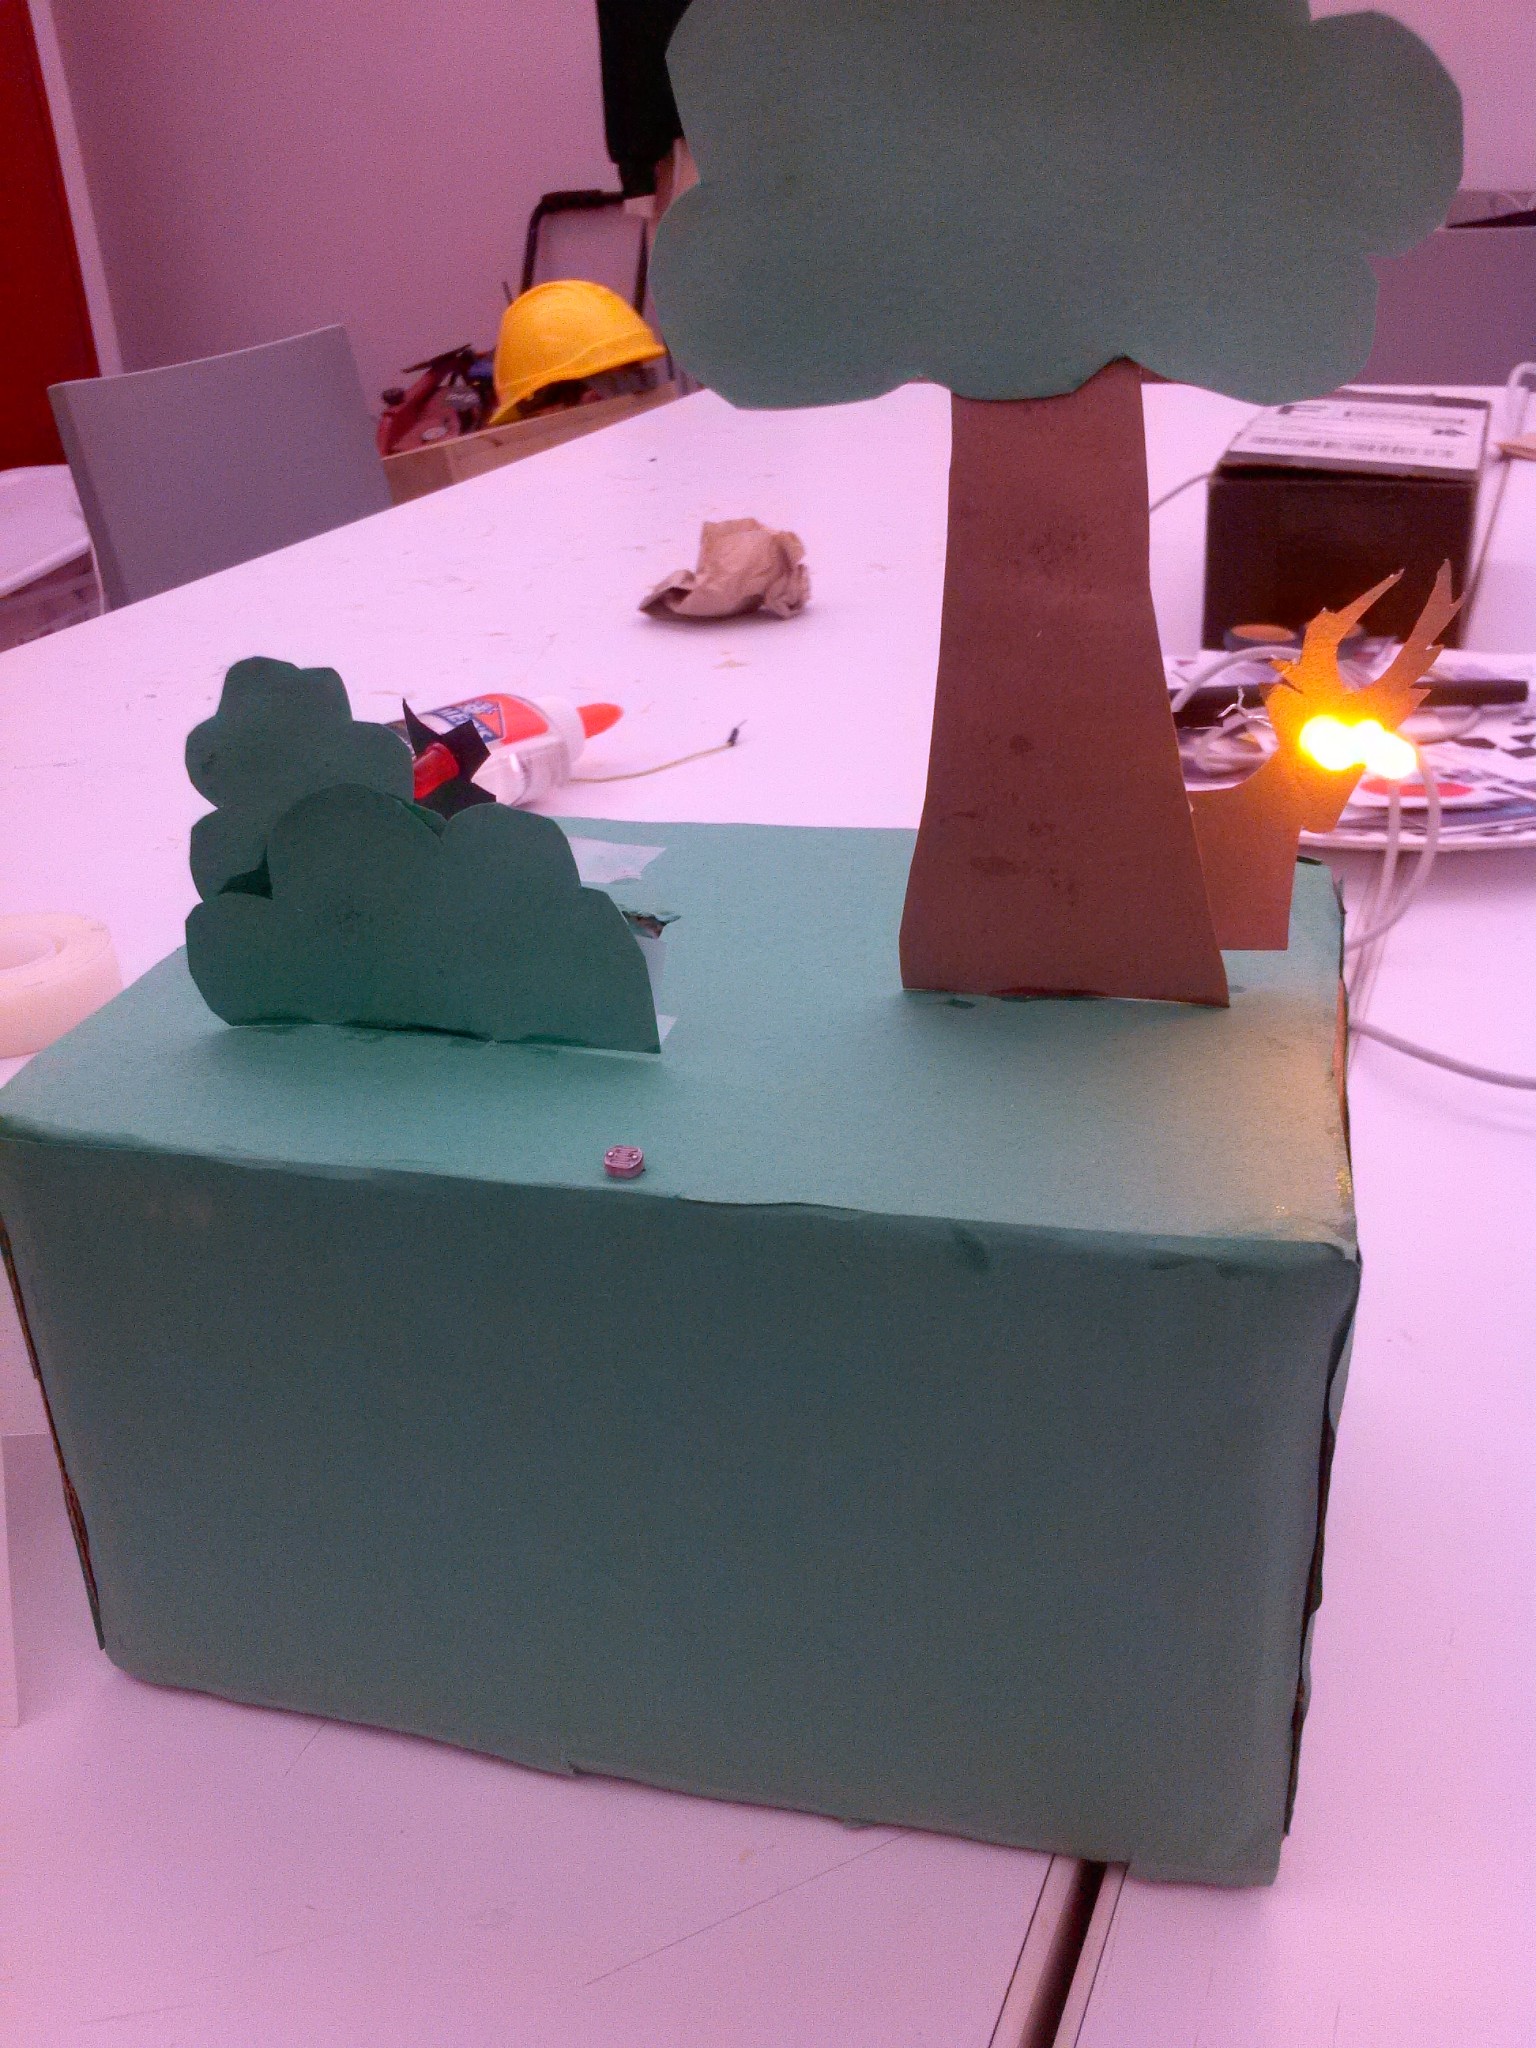
My project is a simple child’s possession that is common at the time.This little box is a small reminder that when there is light, all the evil and troubles recede while the good can flourish.When there is no light, the “evil” wolf is prowling about eyes a glow.However once the sun rises and bathes the box in light, the evil recedes and the peaceful deer can peek his head out without fear.It is important to ingrain the children with this love of light as any idea of returning to dirty sources of power then becomes almost akin to blasphemy.This way as the memory of the tumultuous times of environmental strife fades further and further into distant history, man won’t be tempted to risk the health of the world for a quick an easy profit
Project:
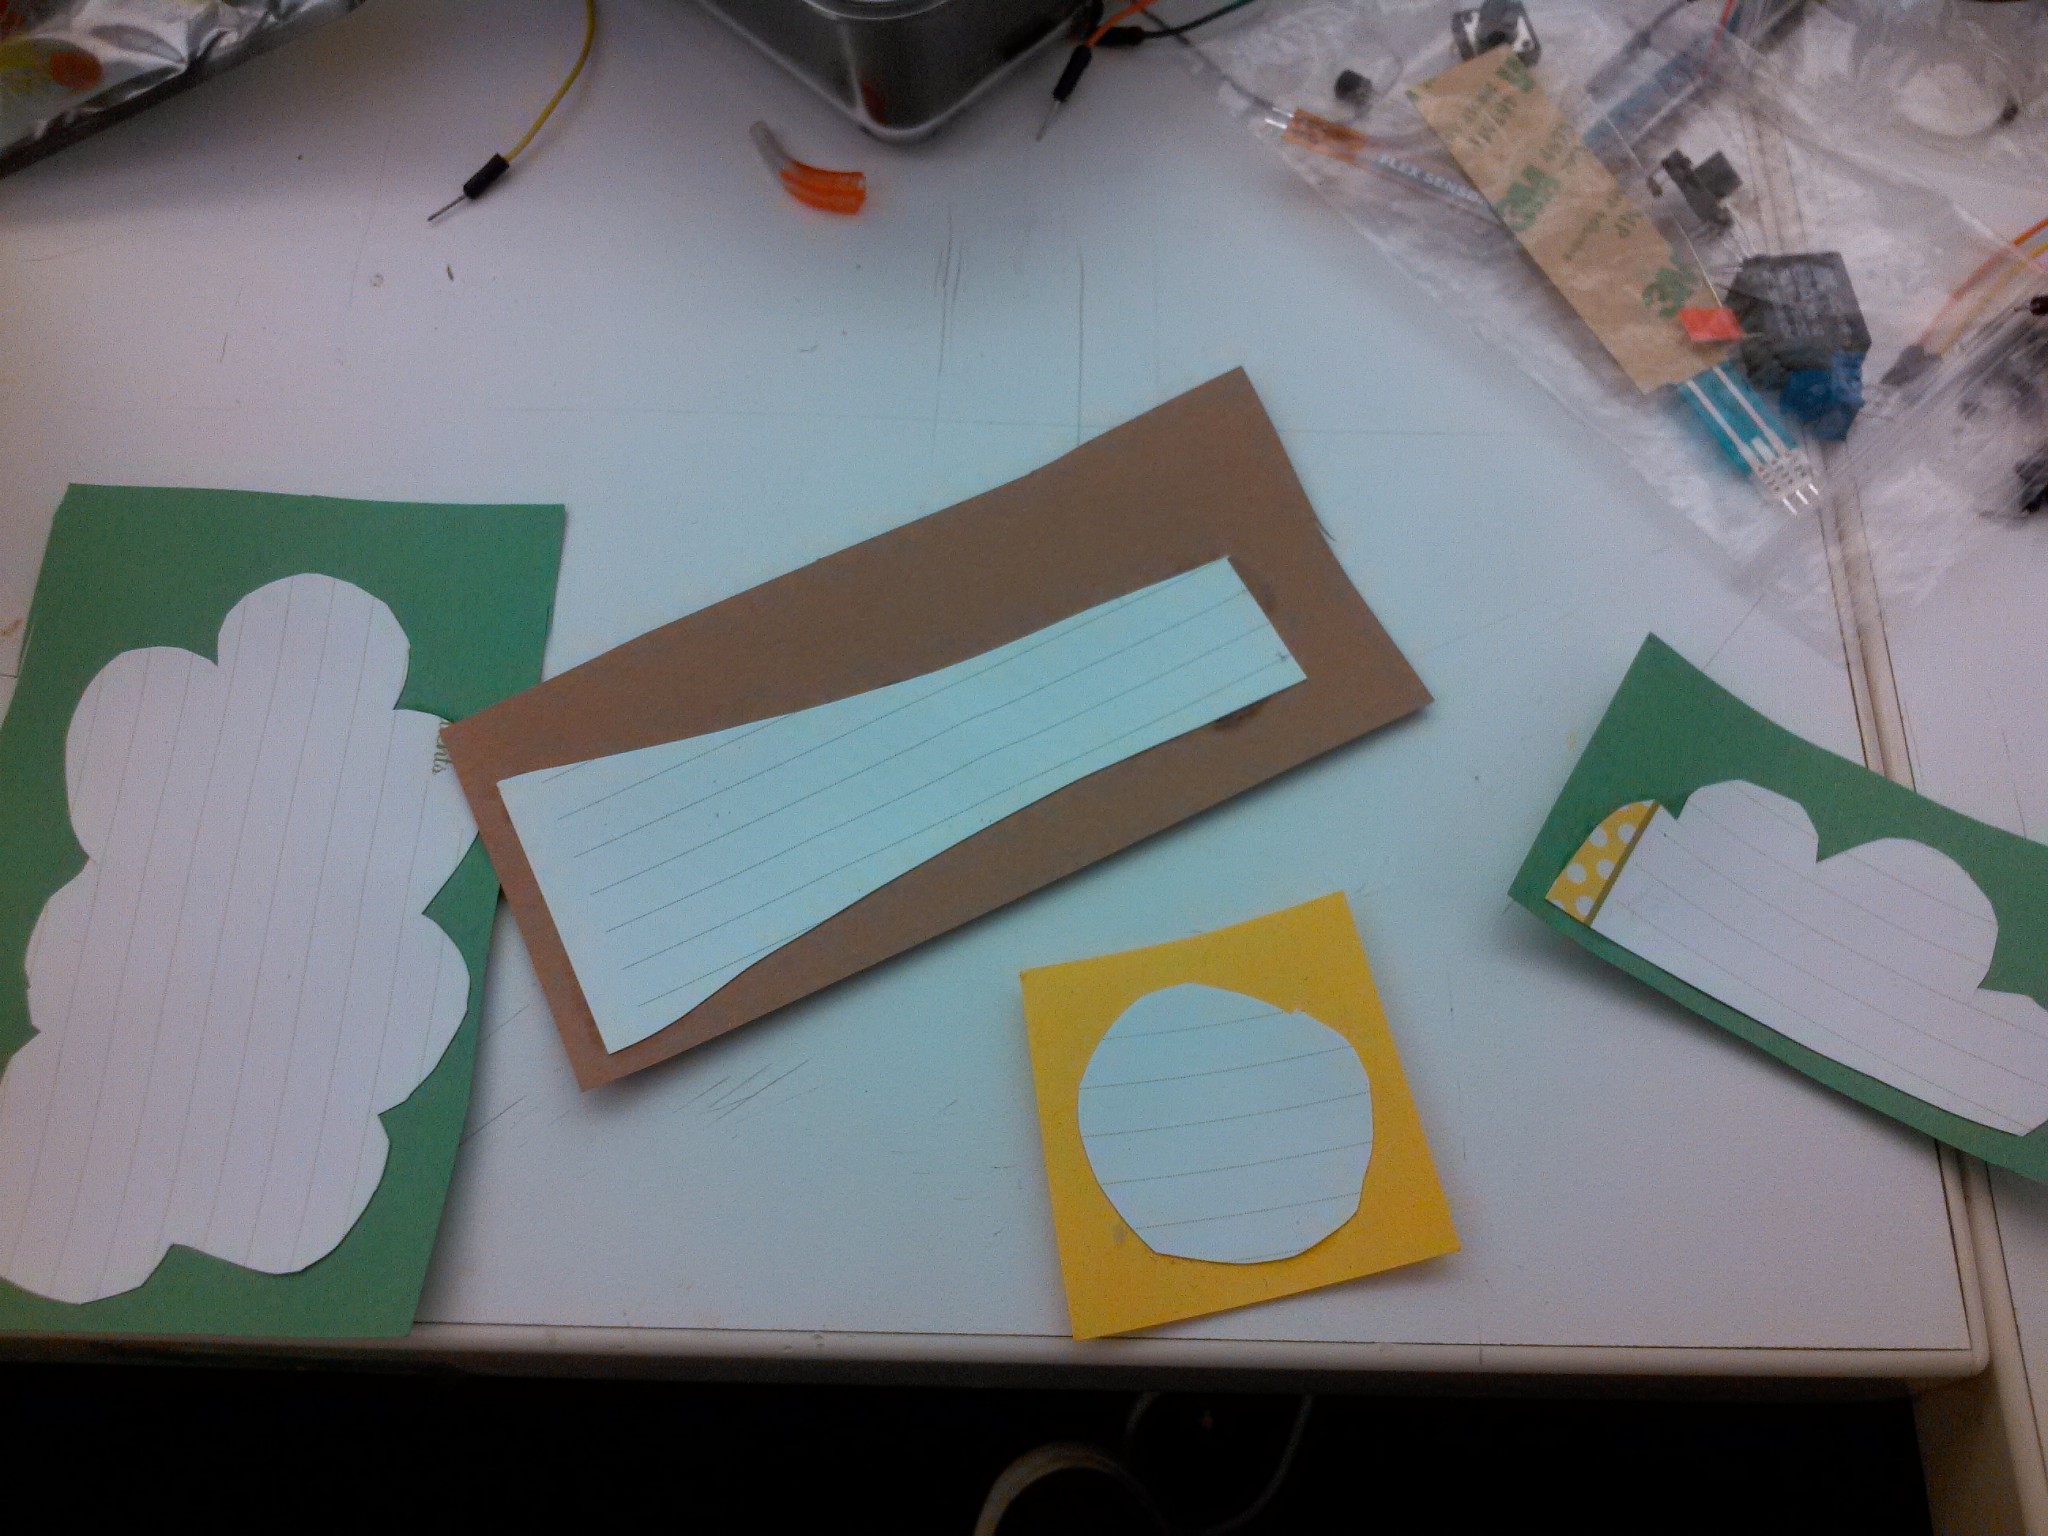
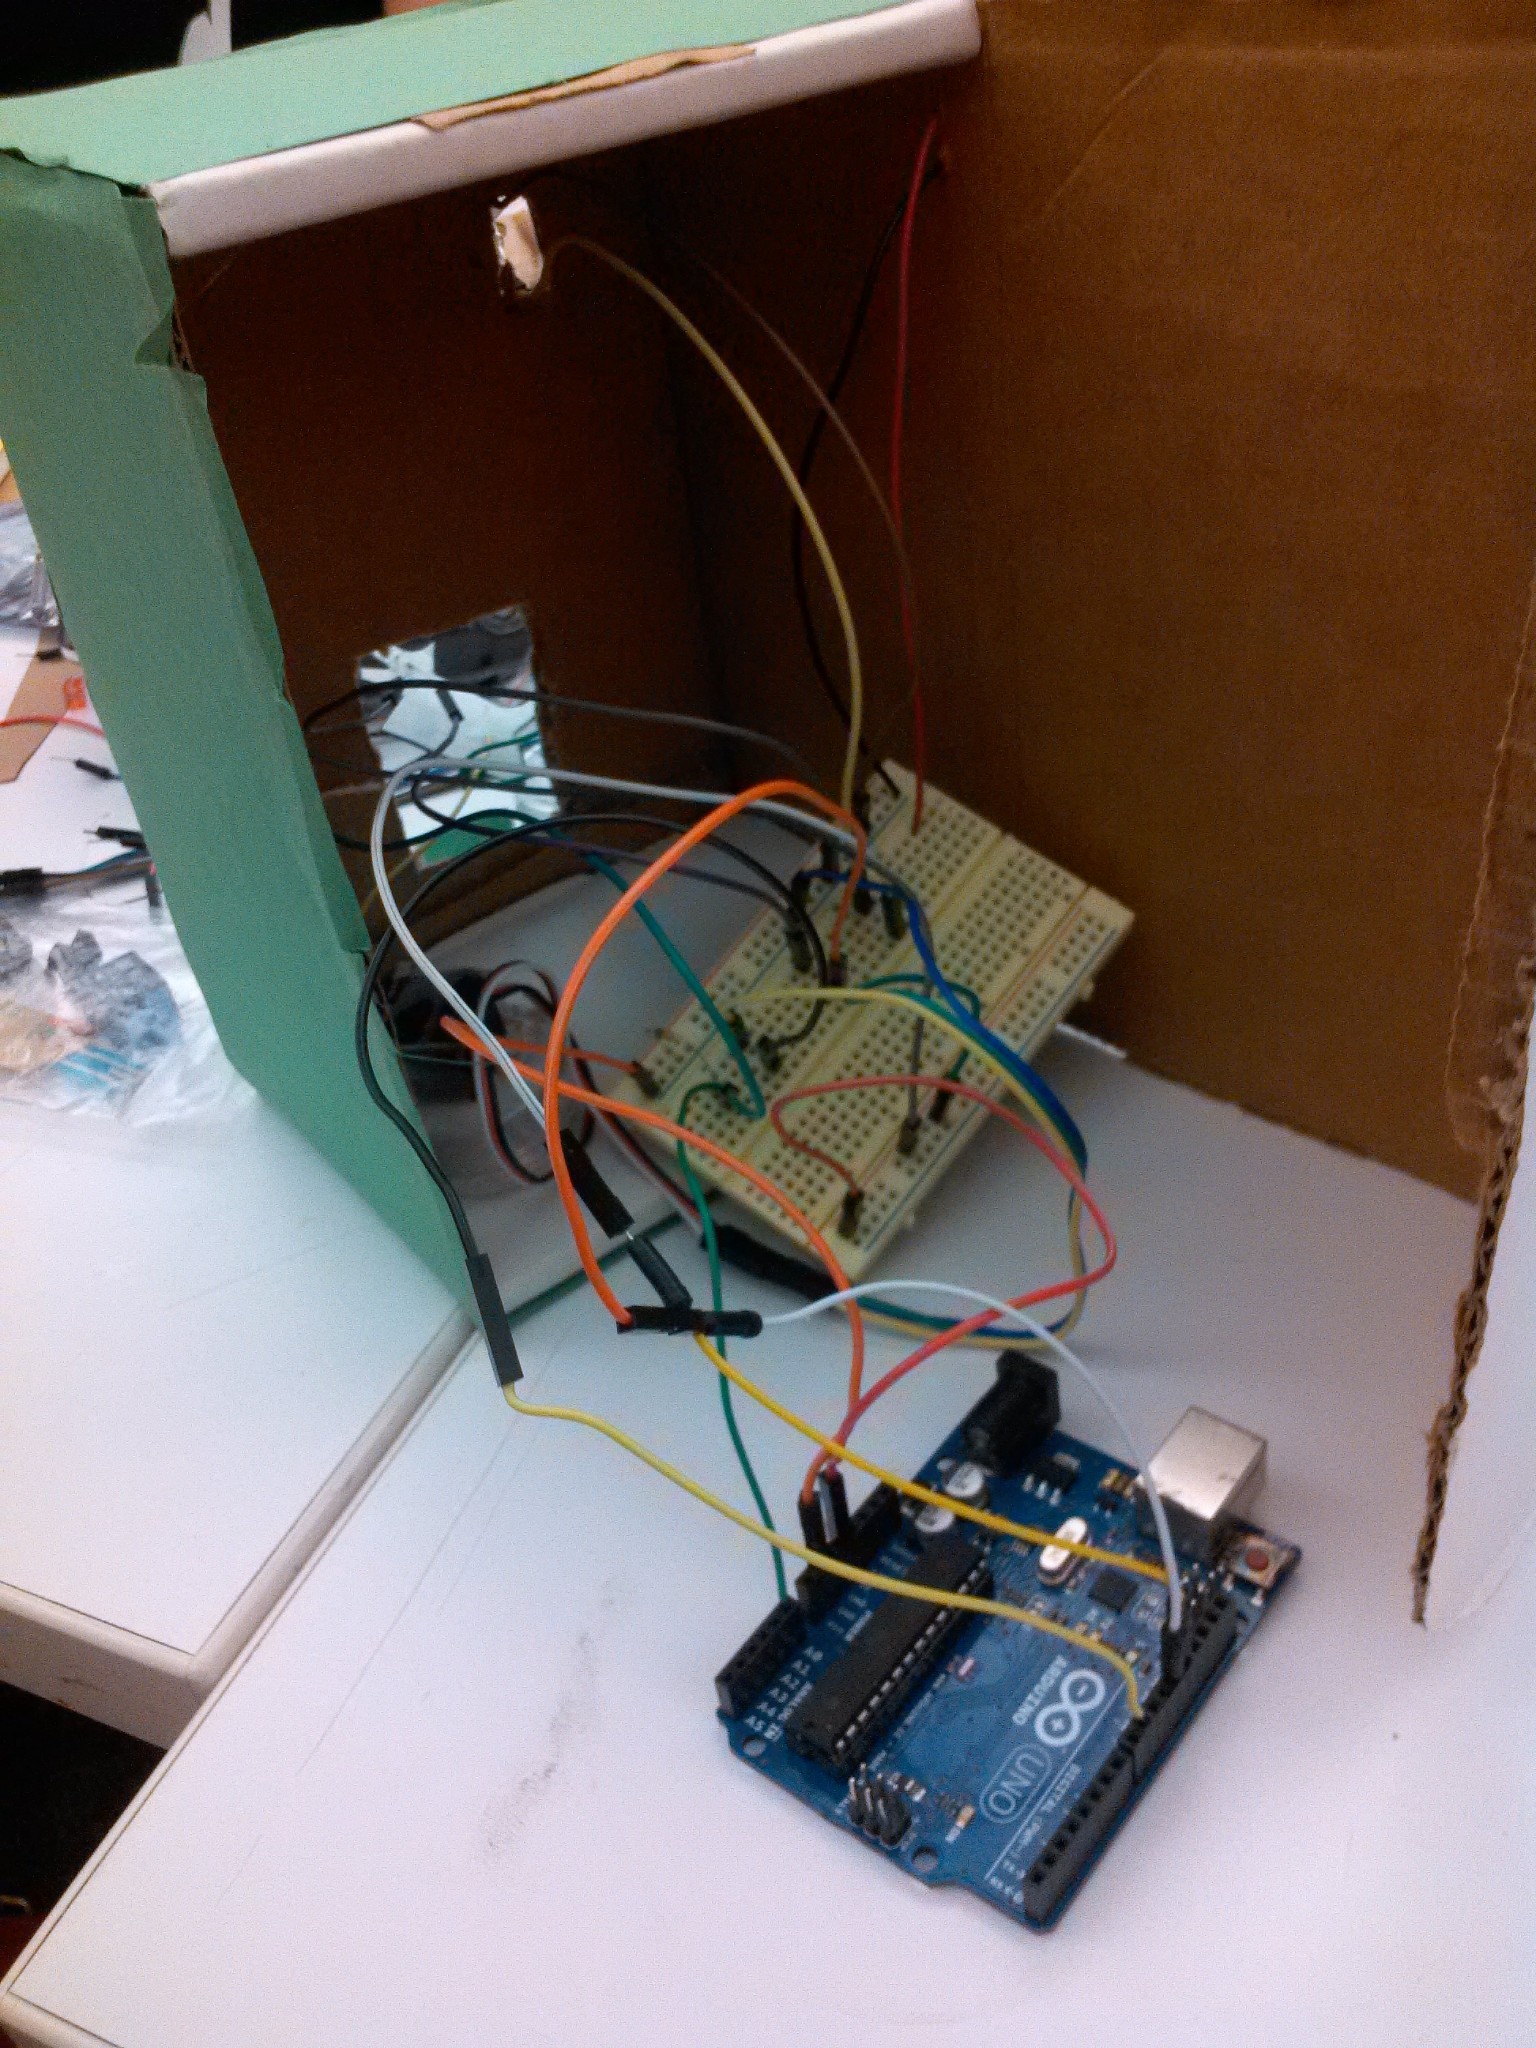
This project was made with construction paper, notecards, servos, led’s, a photocell and arduino!
I started out by designing the shapes I wished to use on notecards to provide some stability for the construction paper. I then glued the notecard shapes to the construction paper and cut away the excess paper
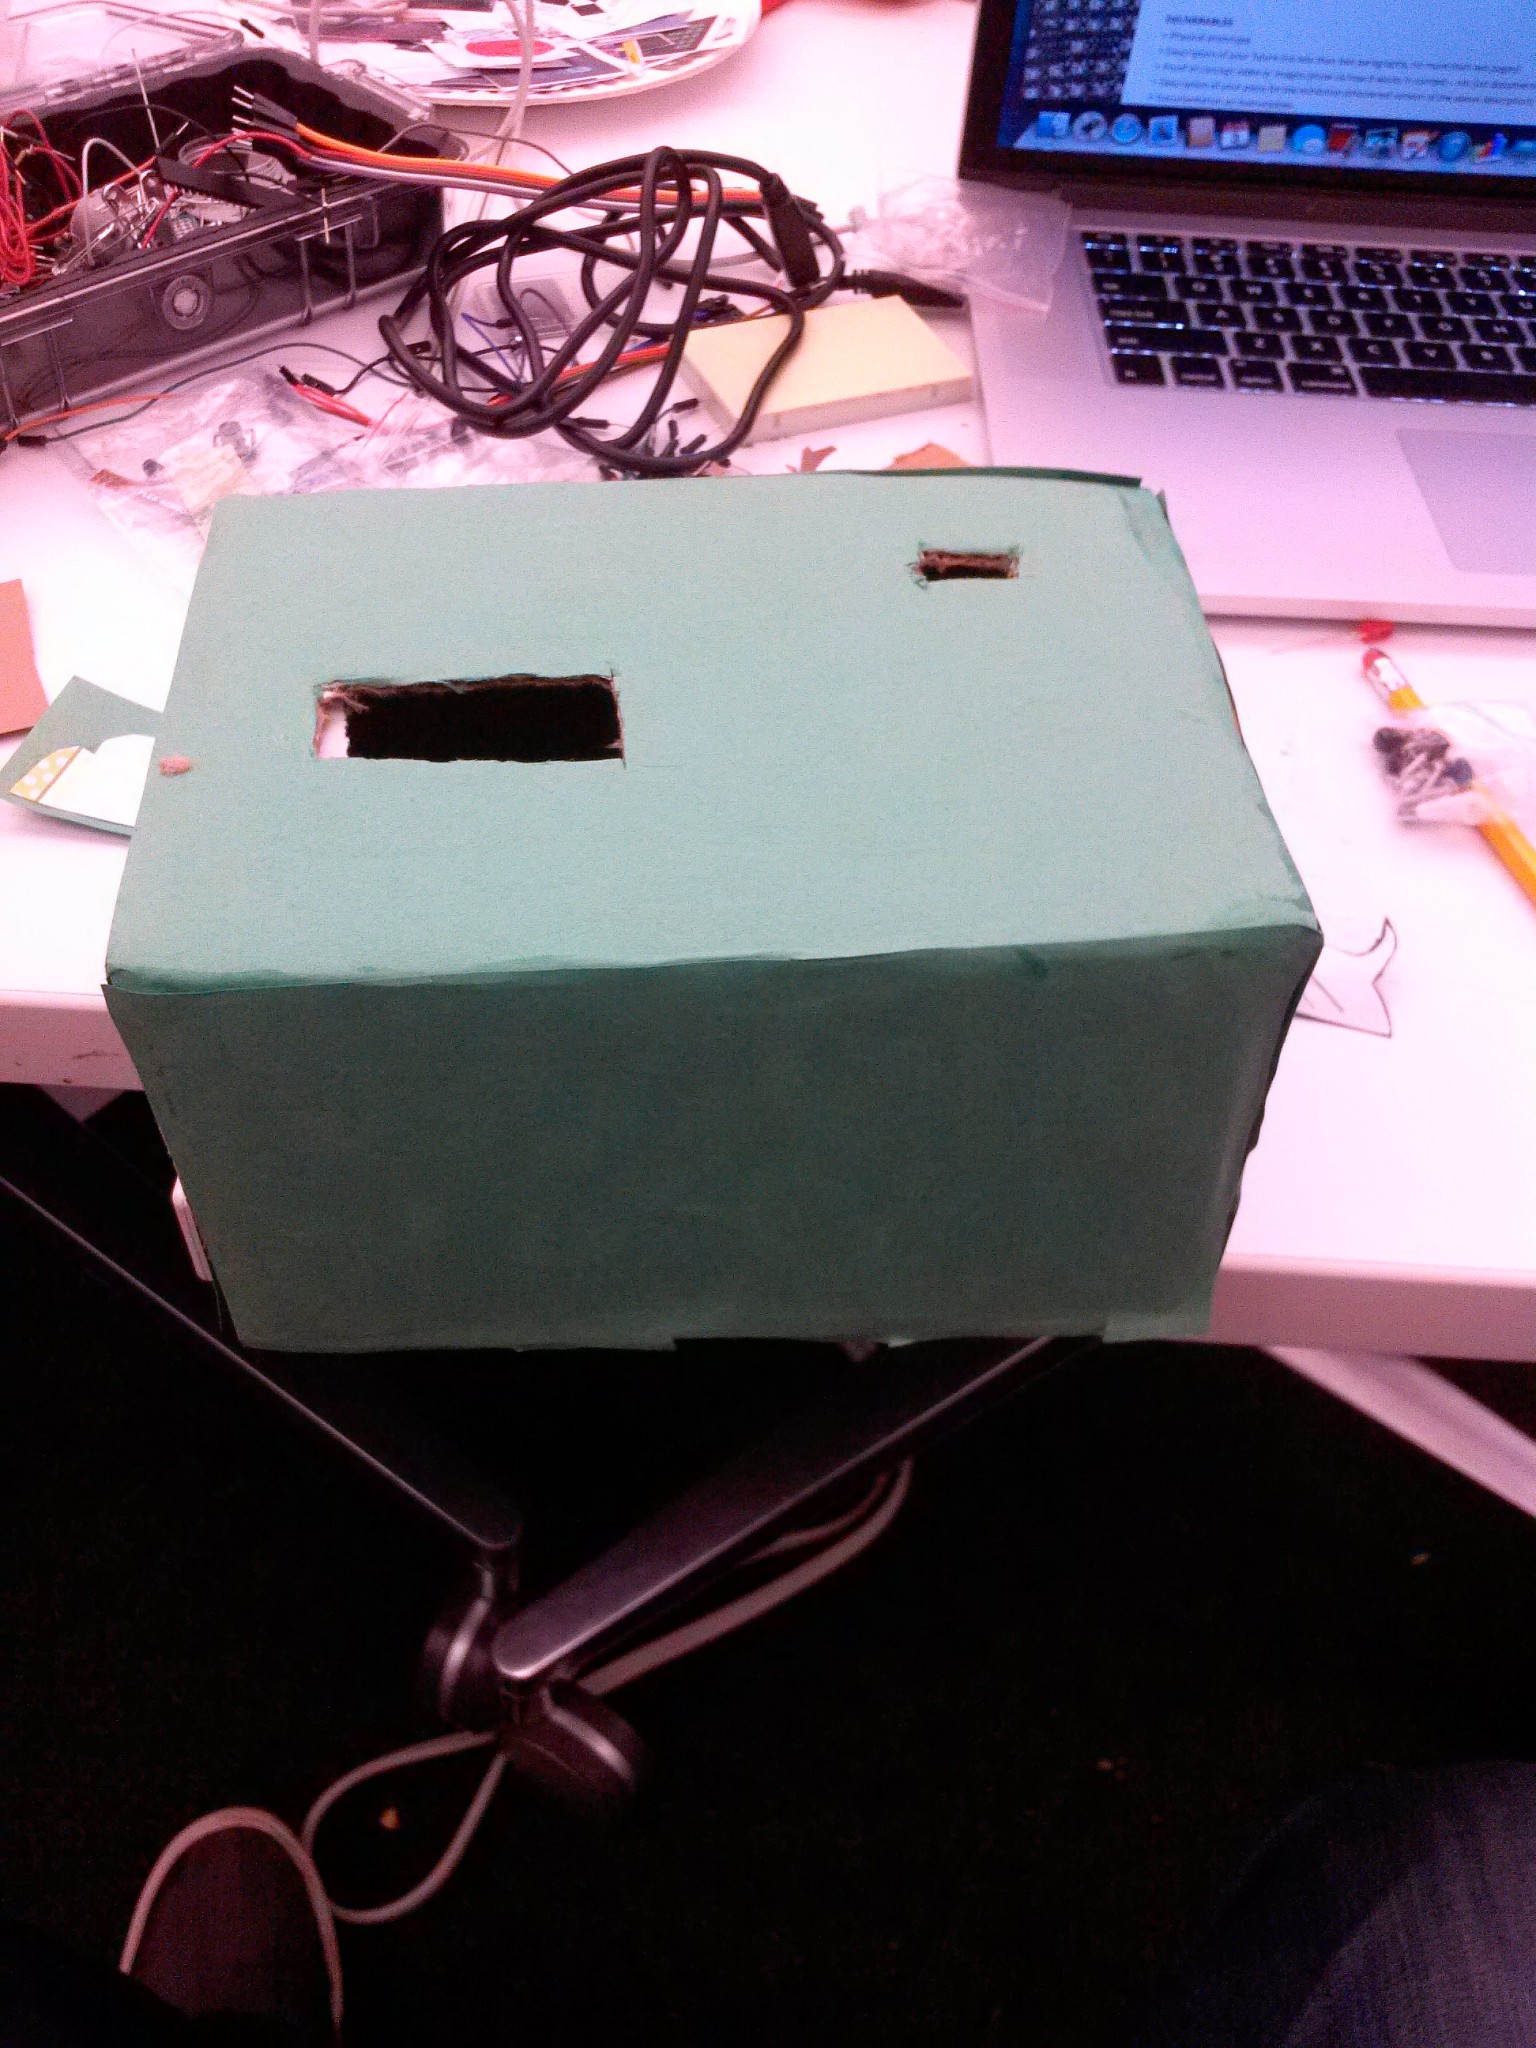
I then wrapped the box I was using to serve as the base with green construction paper and cut out the slots where wires and hardware would poke through.
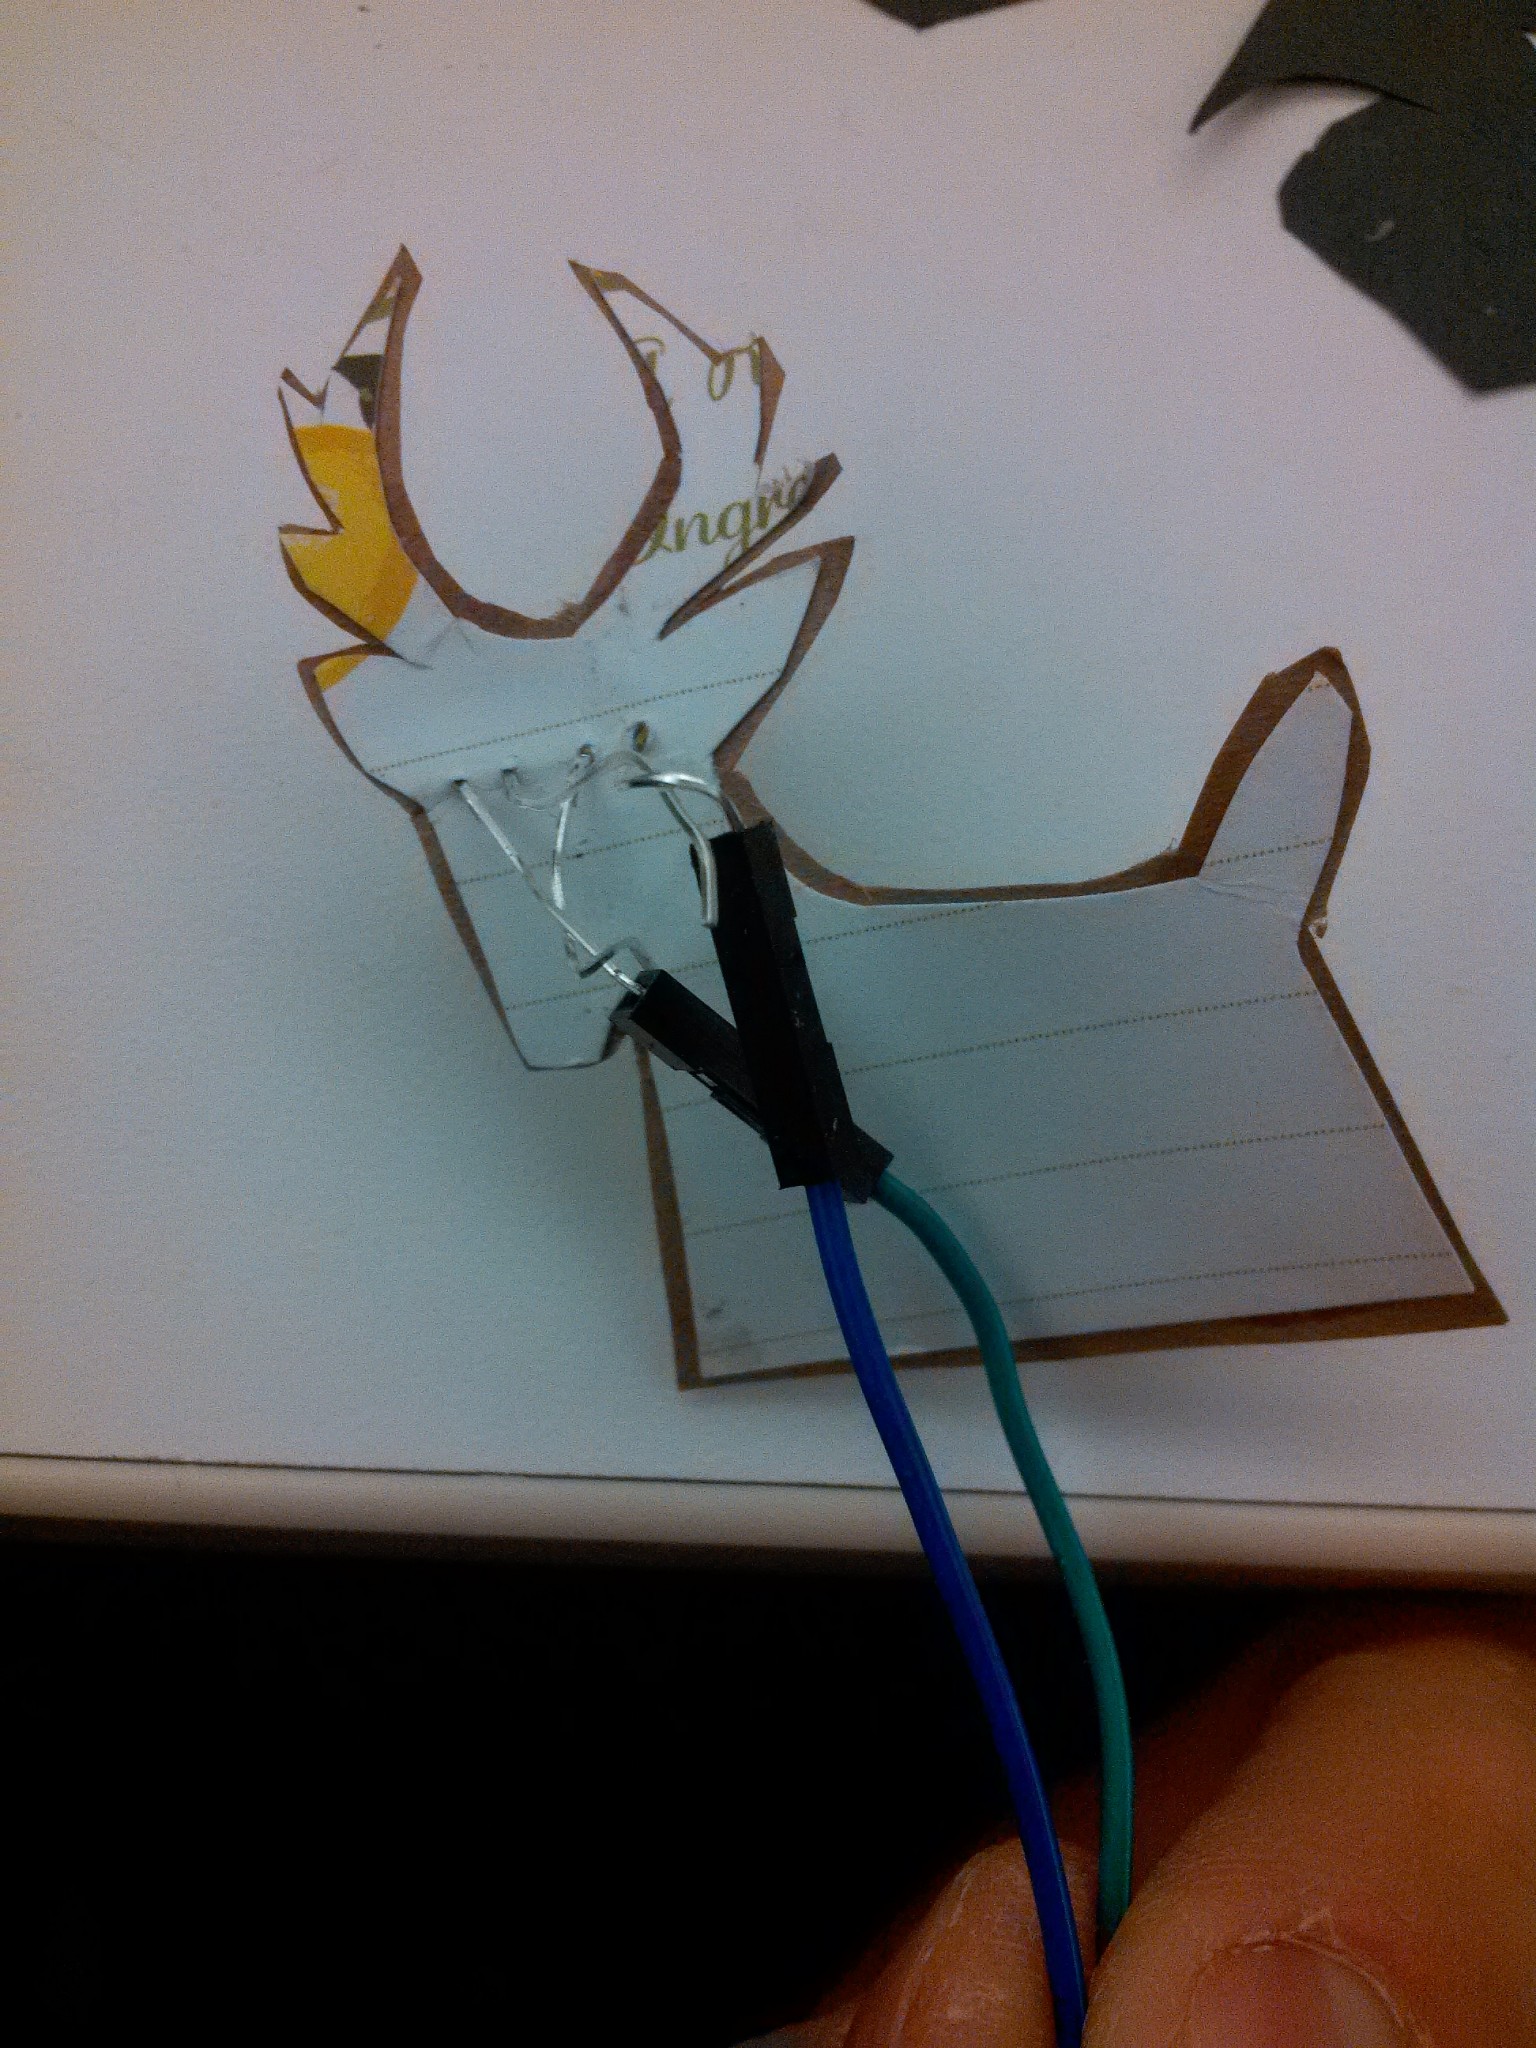
Next I poked holes in my animal shapes to serve as the eyes. I then pushed led’s through these holes and then connected wires to the back of these led’s to run down to my power source.
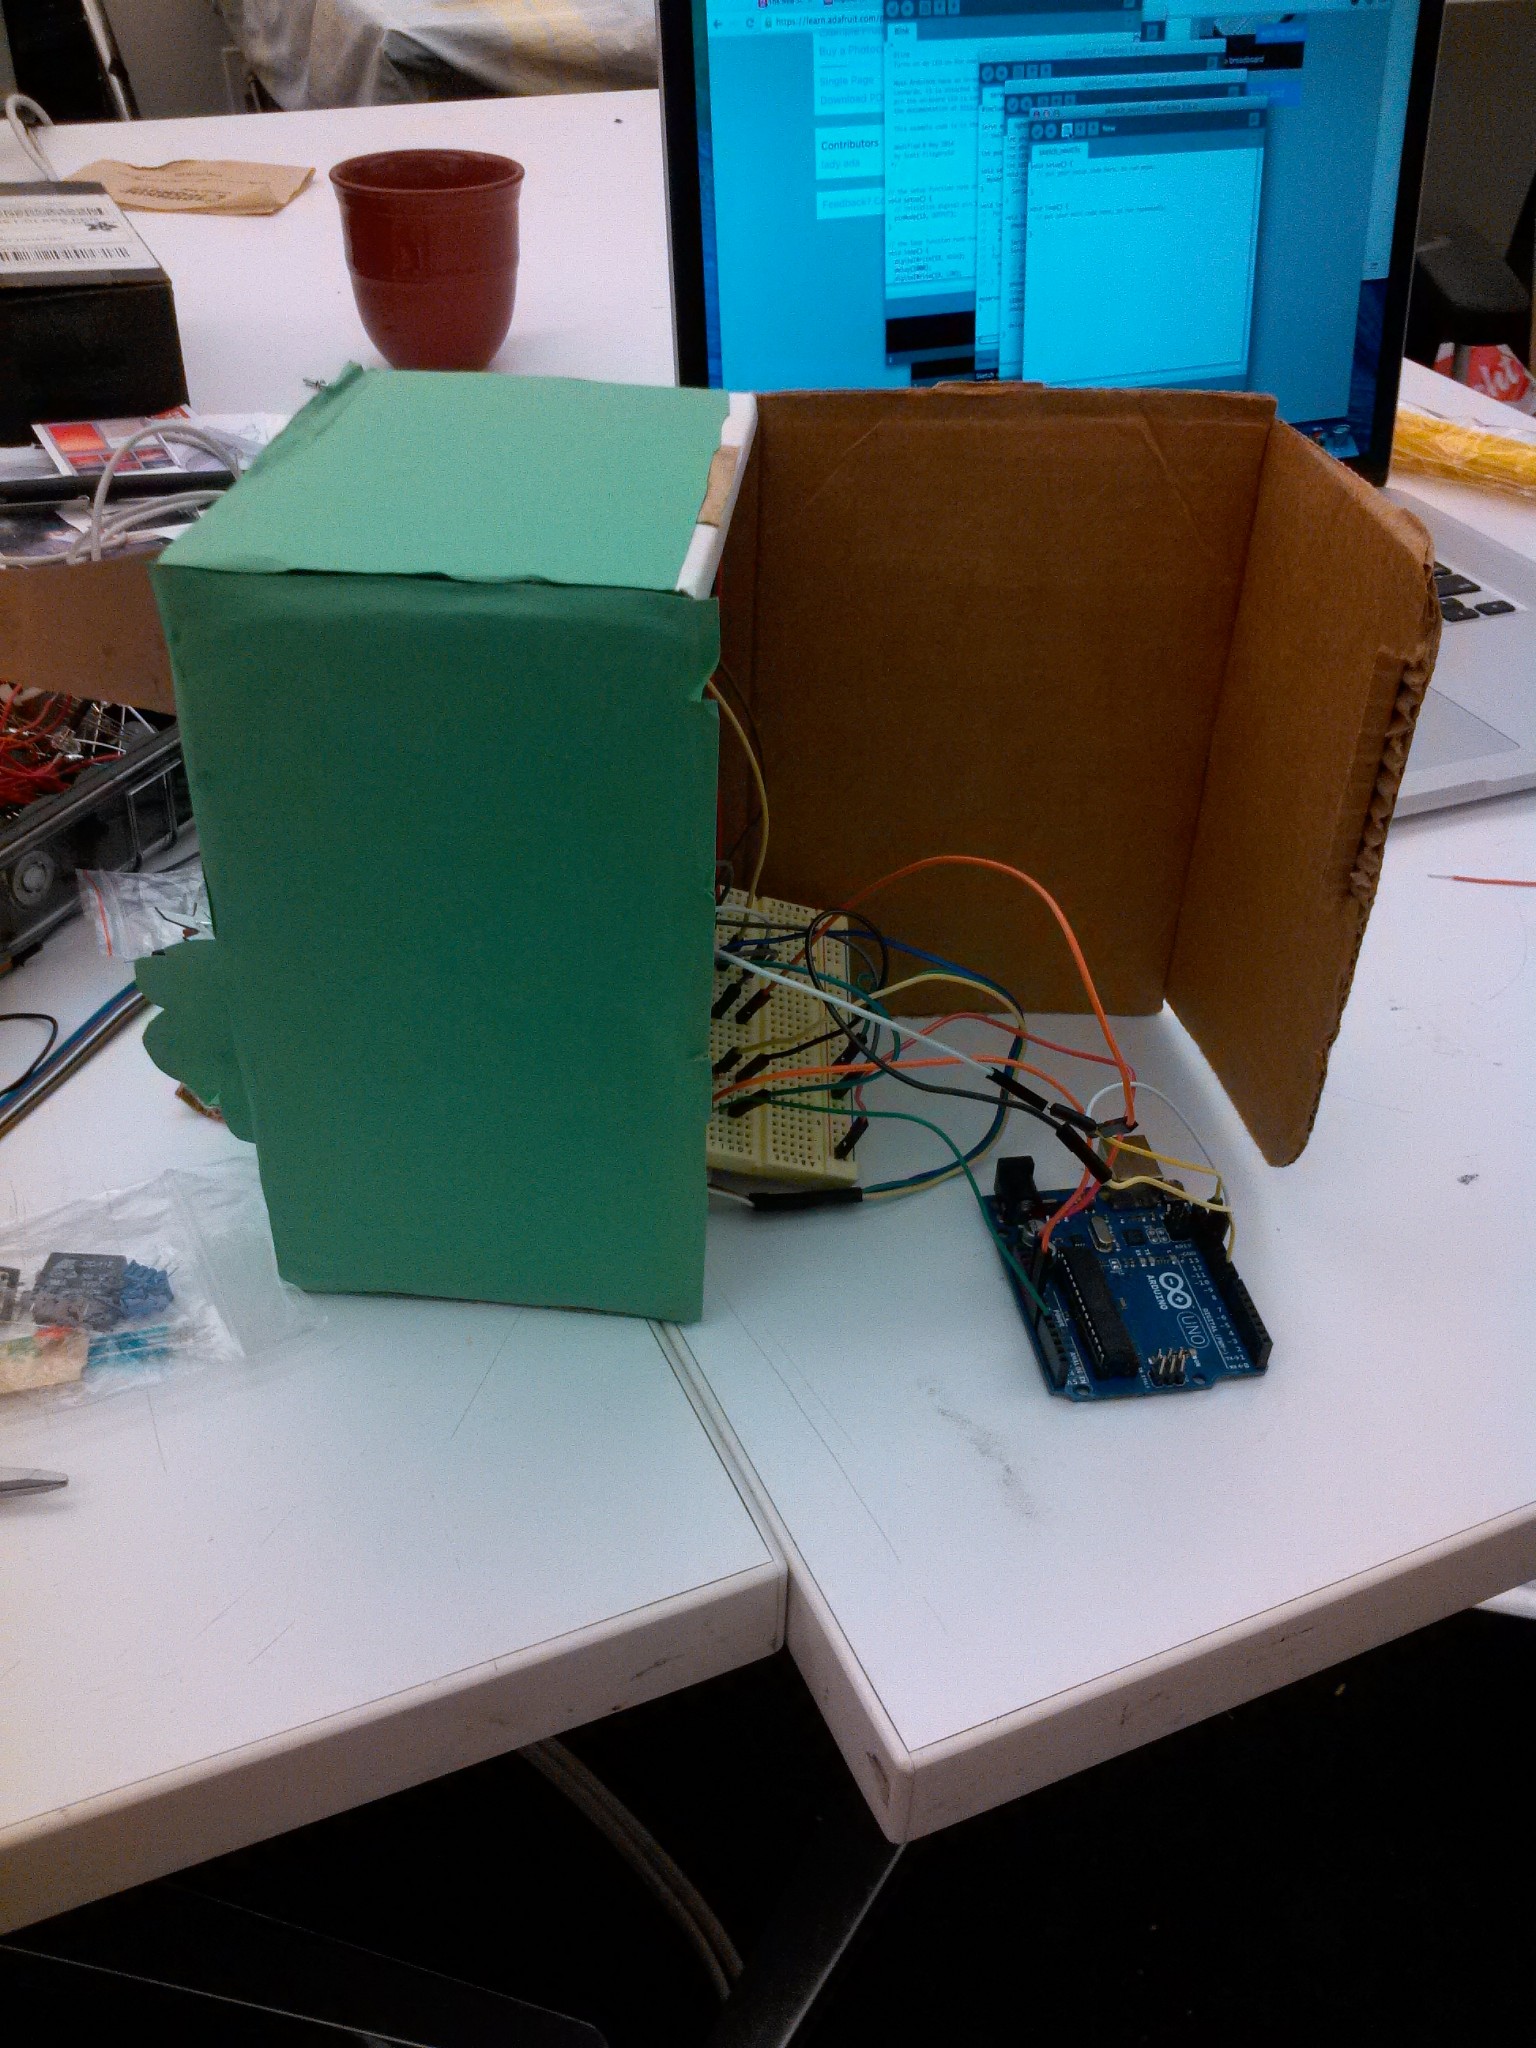
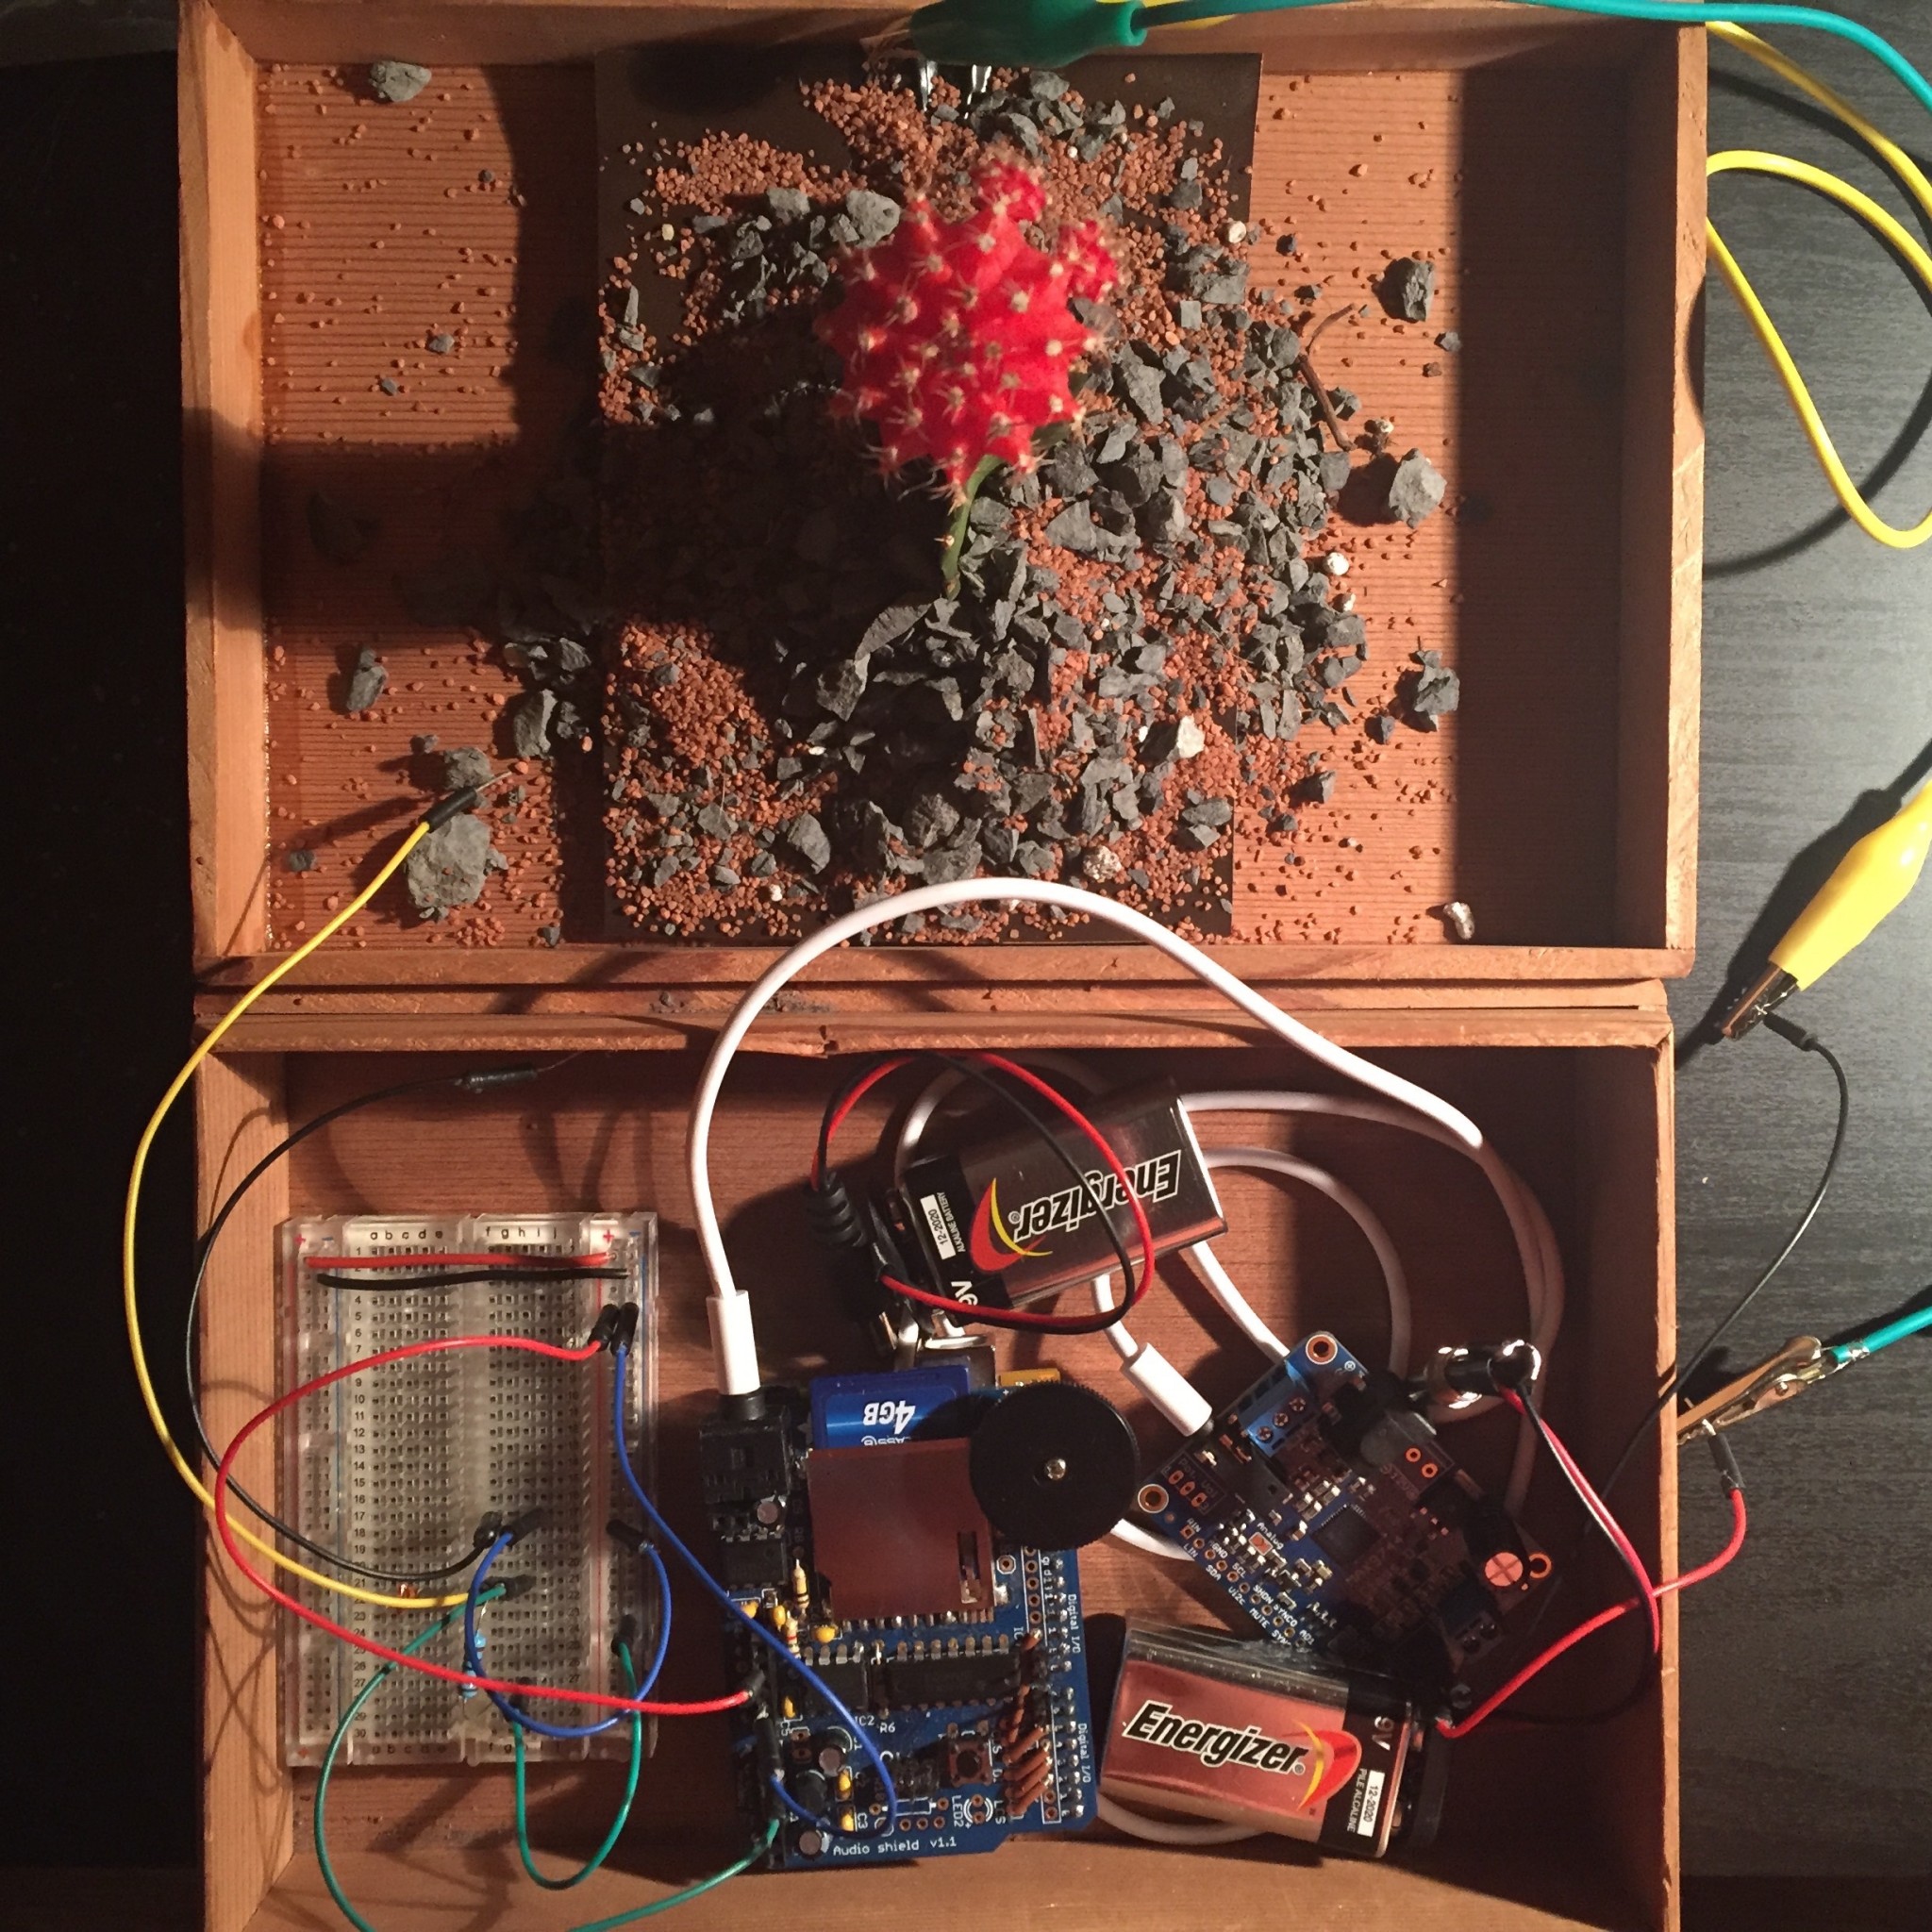
Now it was onto my wiring. I pushed a photocell down in the front of the box to capture the light amount and feed the data to my arduino. I then hooked my wolf character up to a servo using paperclips. Lastly I wired all of this to my arduino and through many annoying attempts, was able to shimmy all of this into the box without any of the connections breaking.
With everything in place I then turned it on! I used a 9 volt batter to power the project that way I was not reliant on an ugly cord sticking out the back (although in the future the people would use a solar powered rechargeable battery!). The box moves the wolf out of his hiding place and turns his eyes on when there is minimal light hitting the photosensor. However when there is ample light hitting the photosensor the wolf retreats down behind the bush and the deer’s eyes begin to light up.
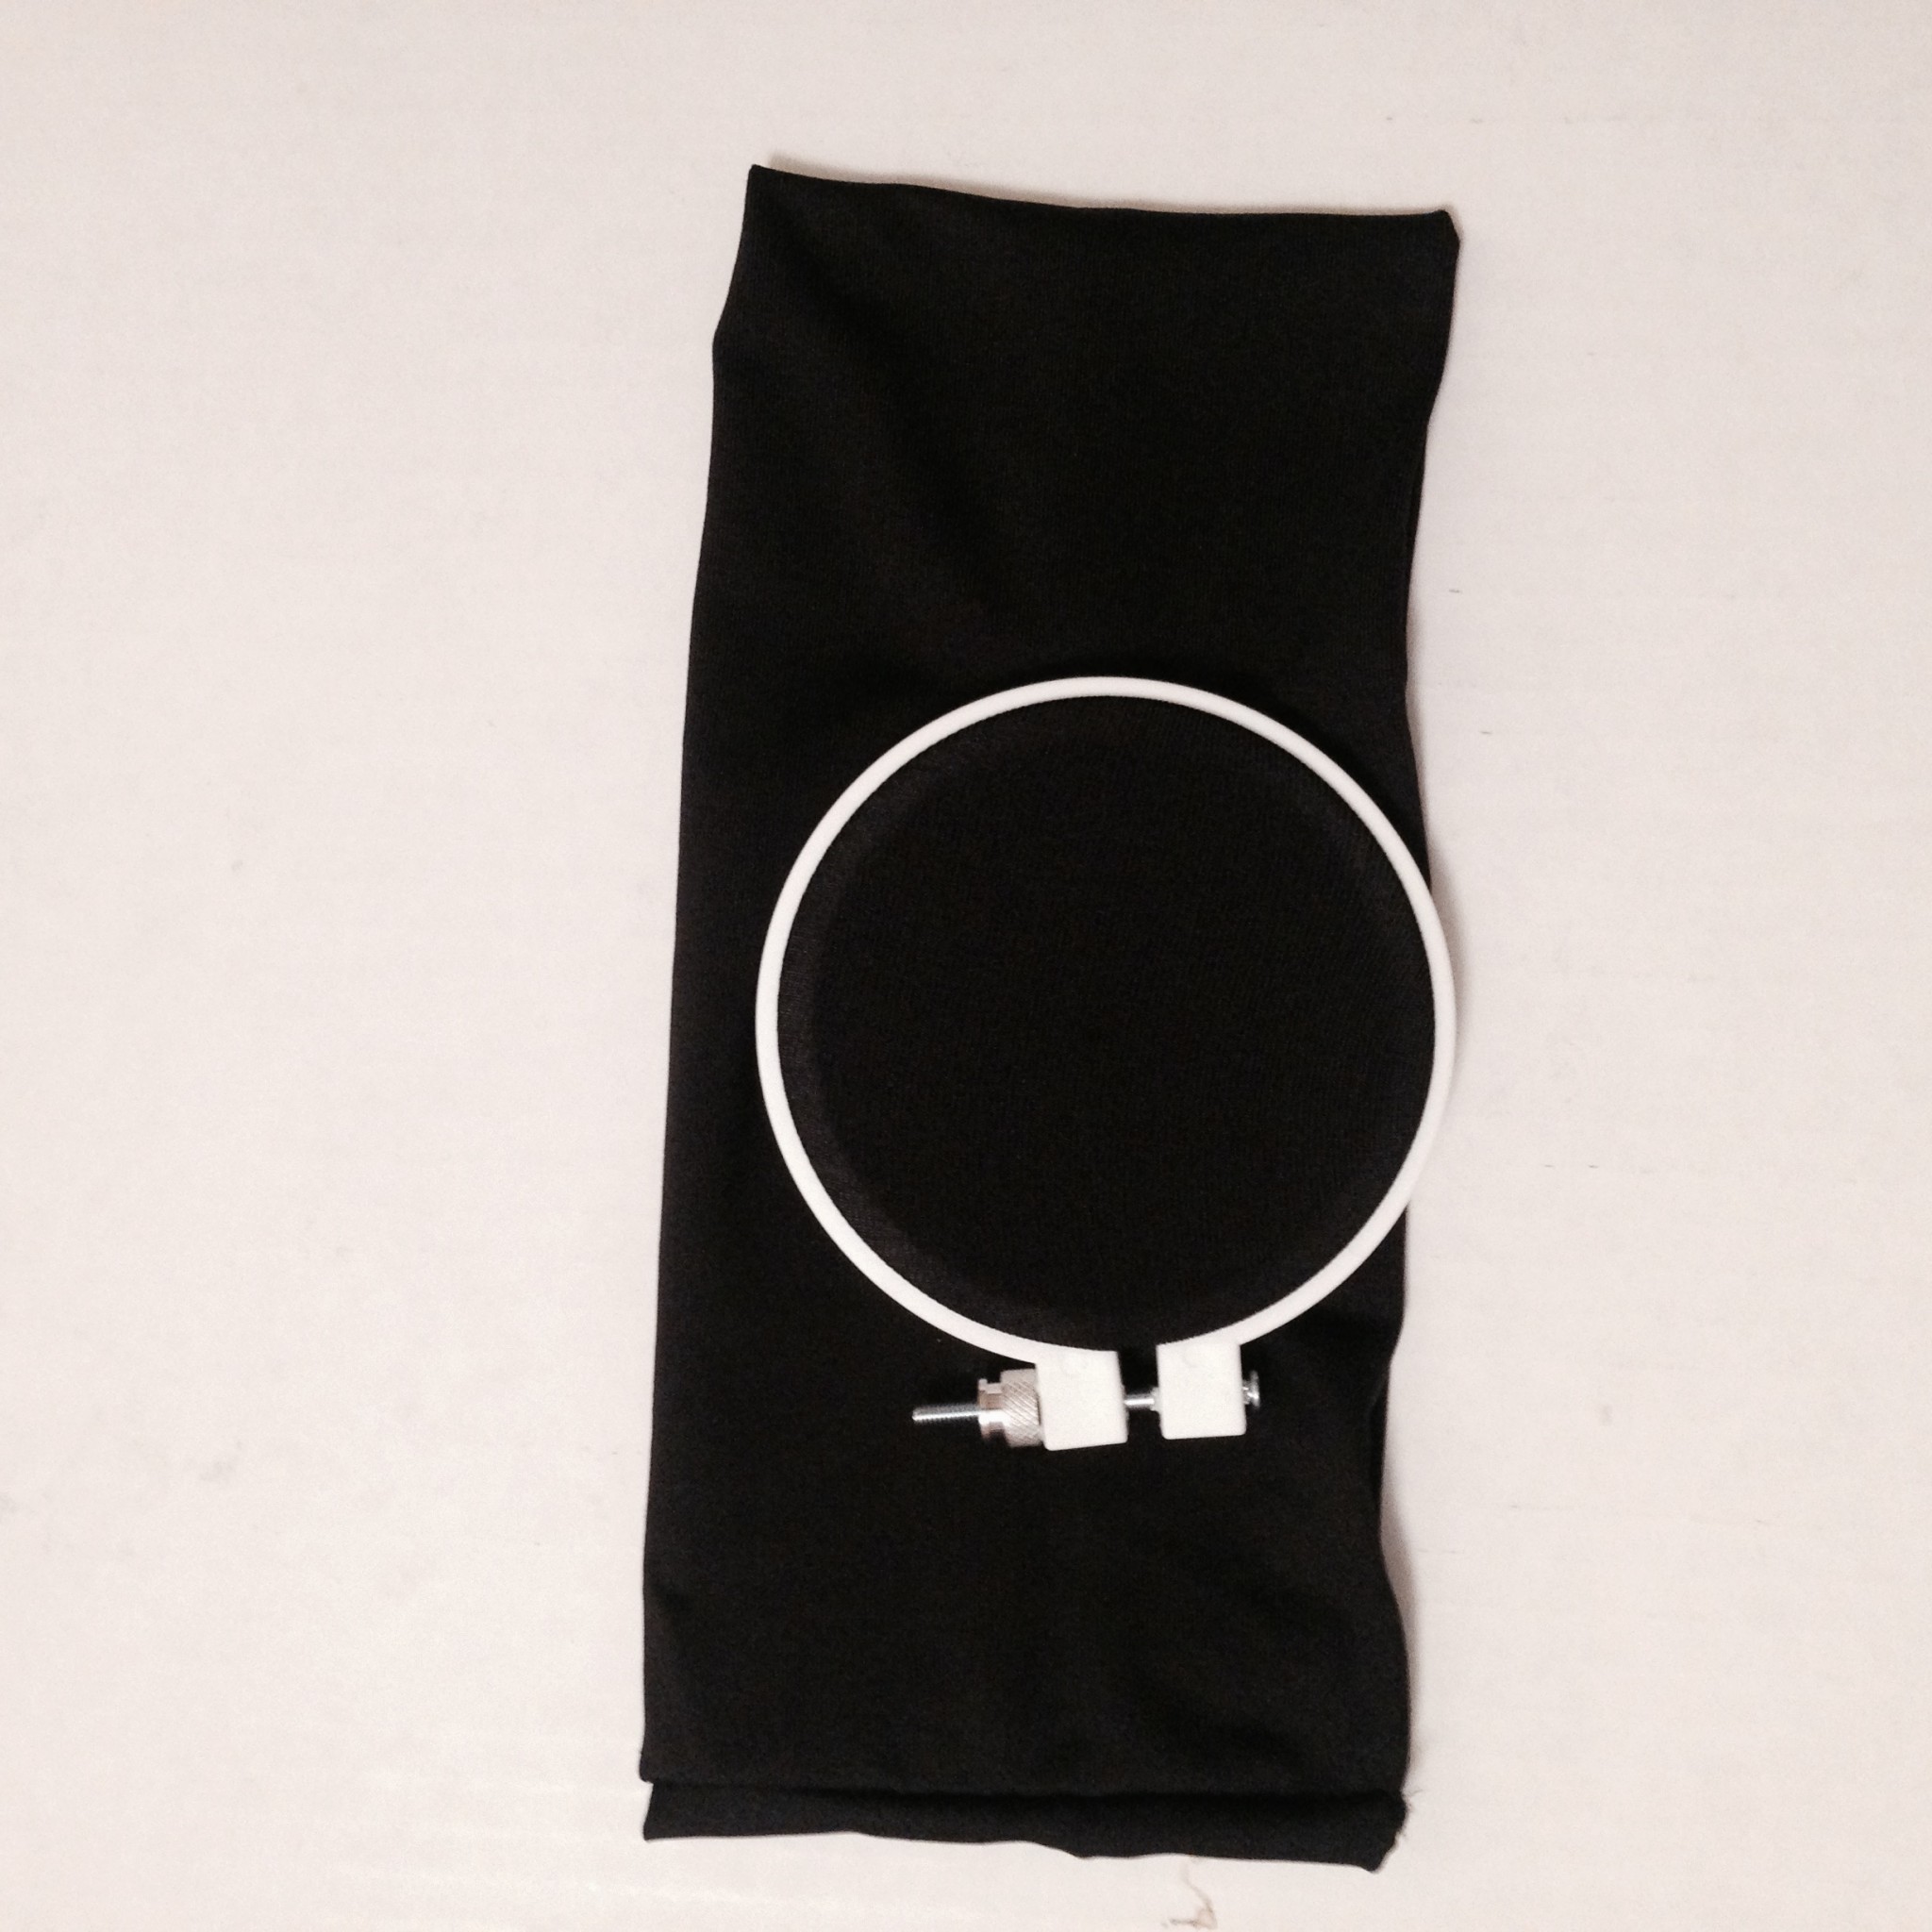
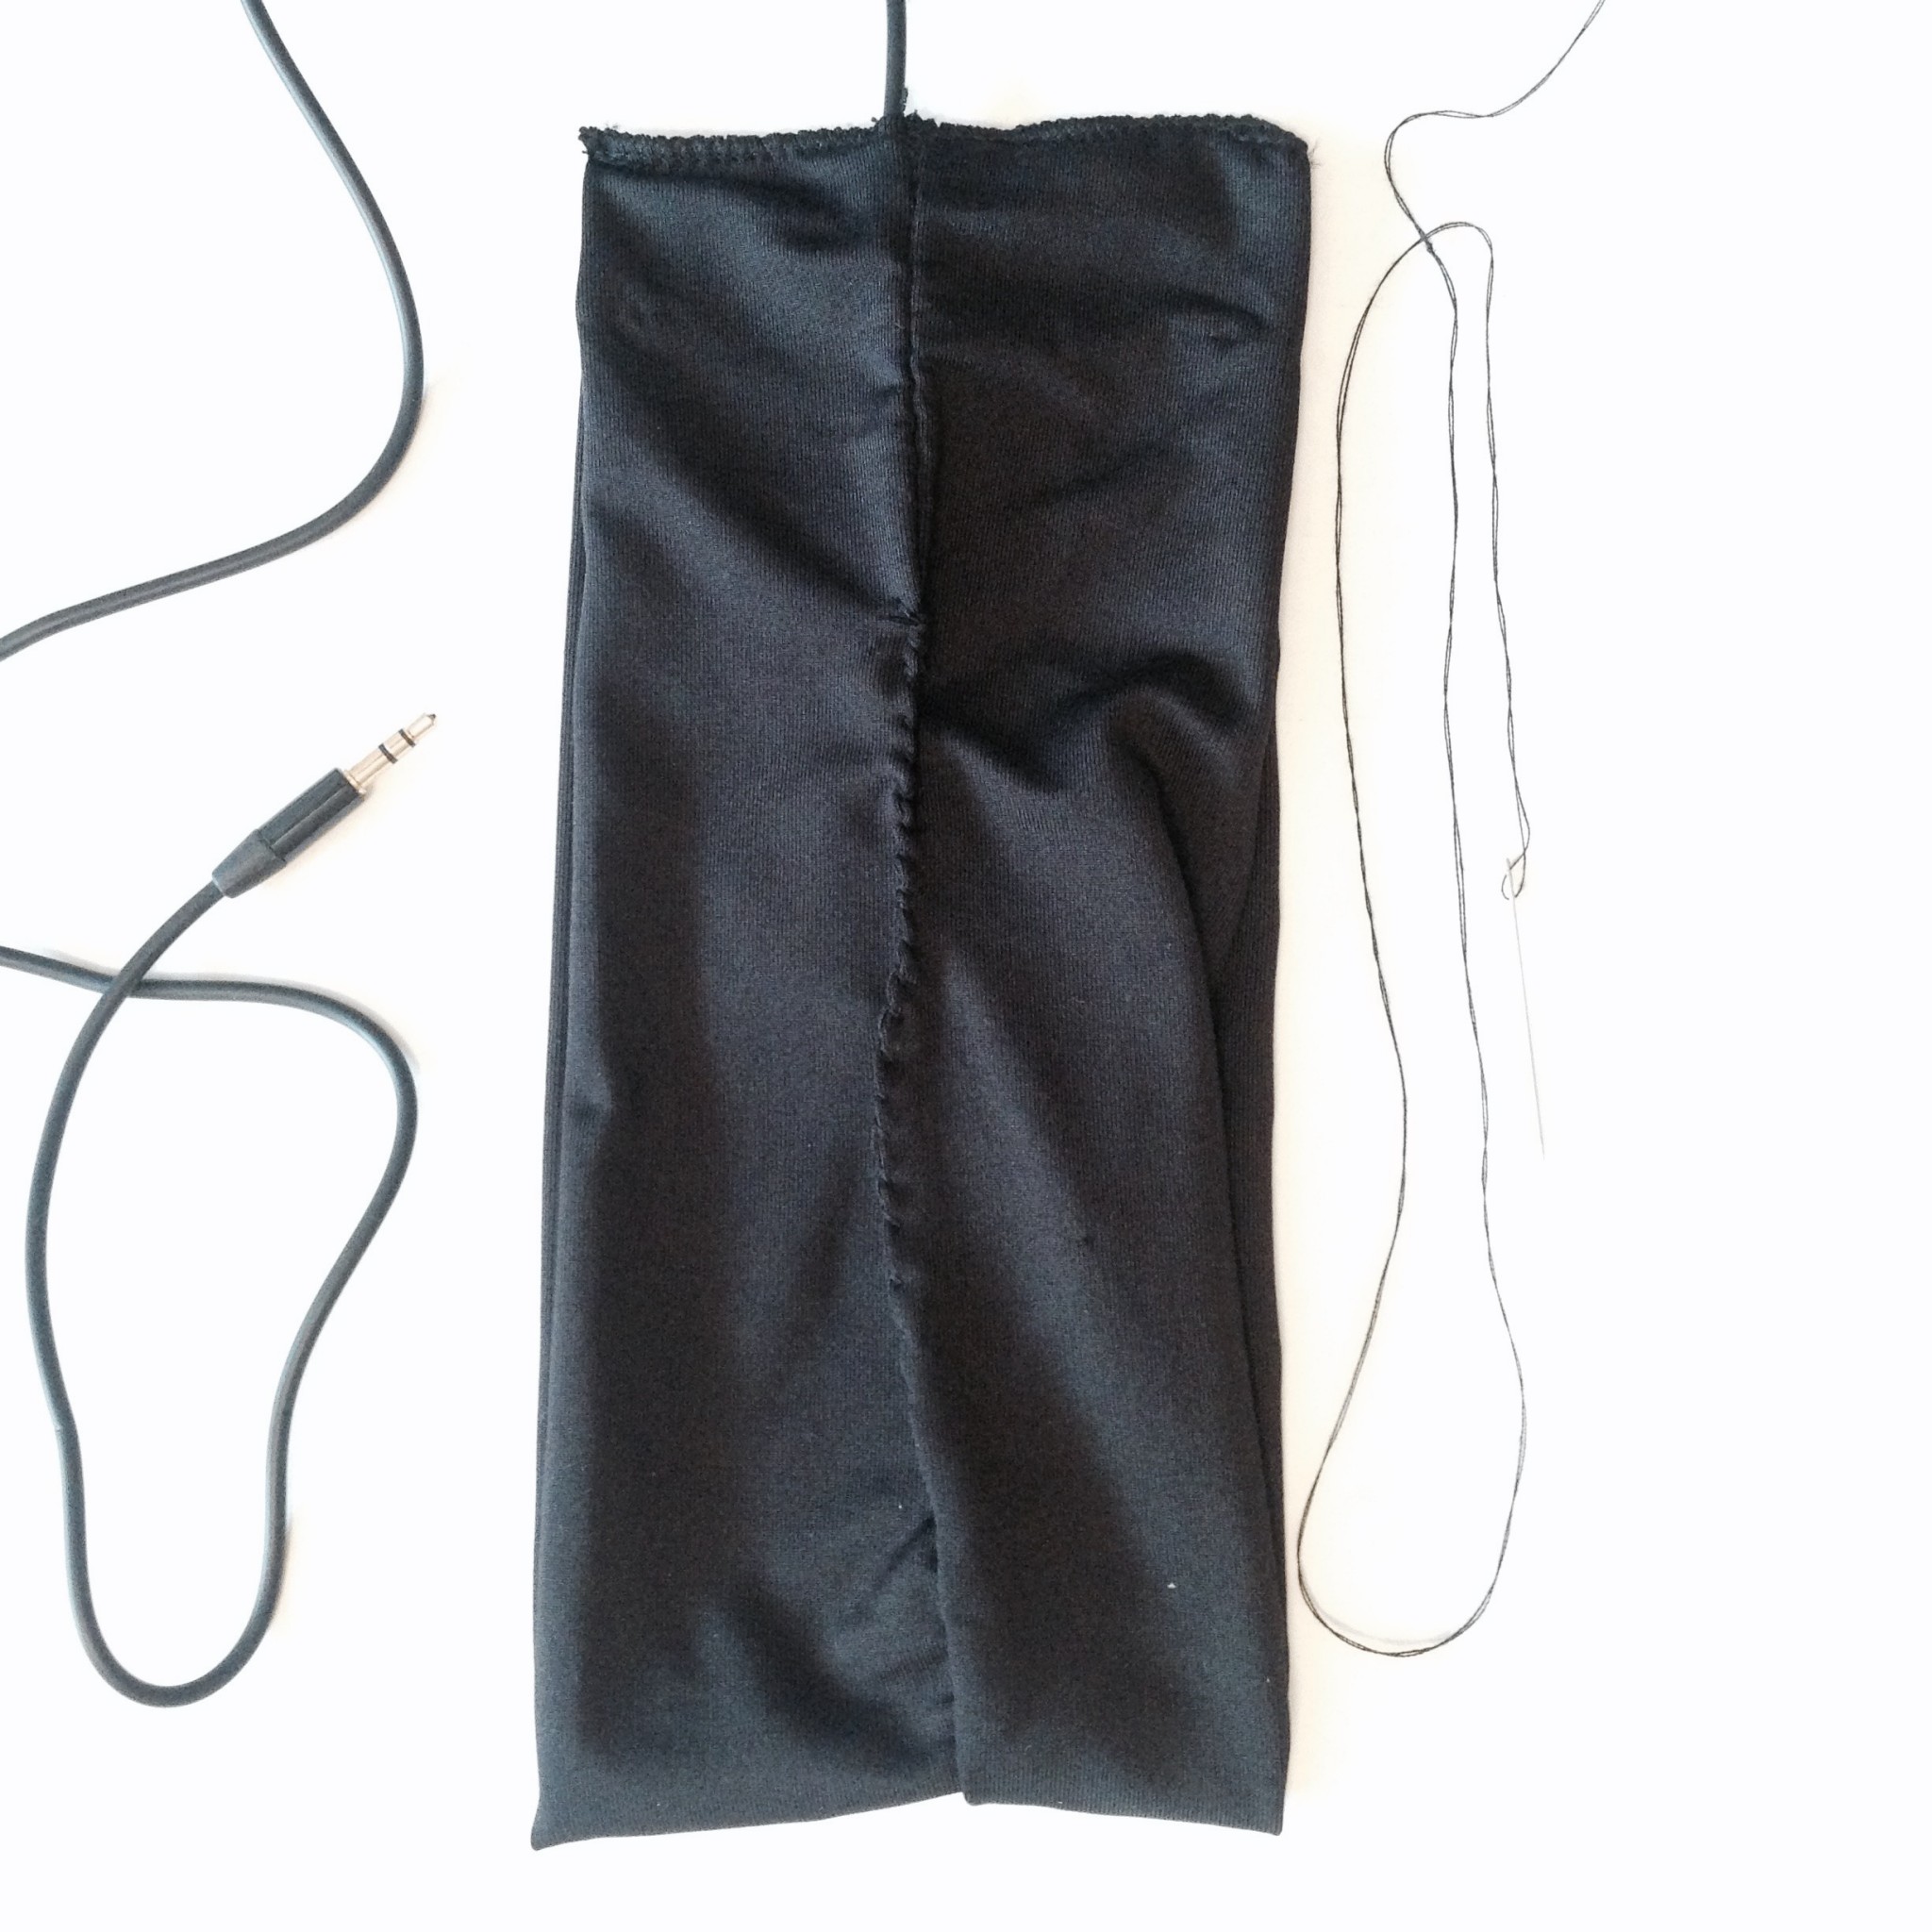
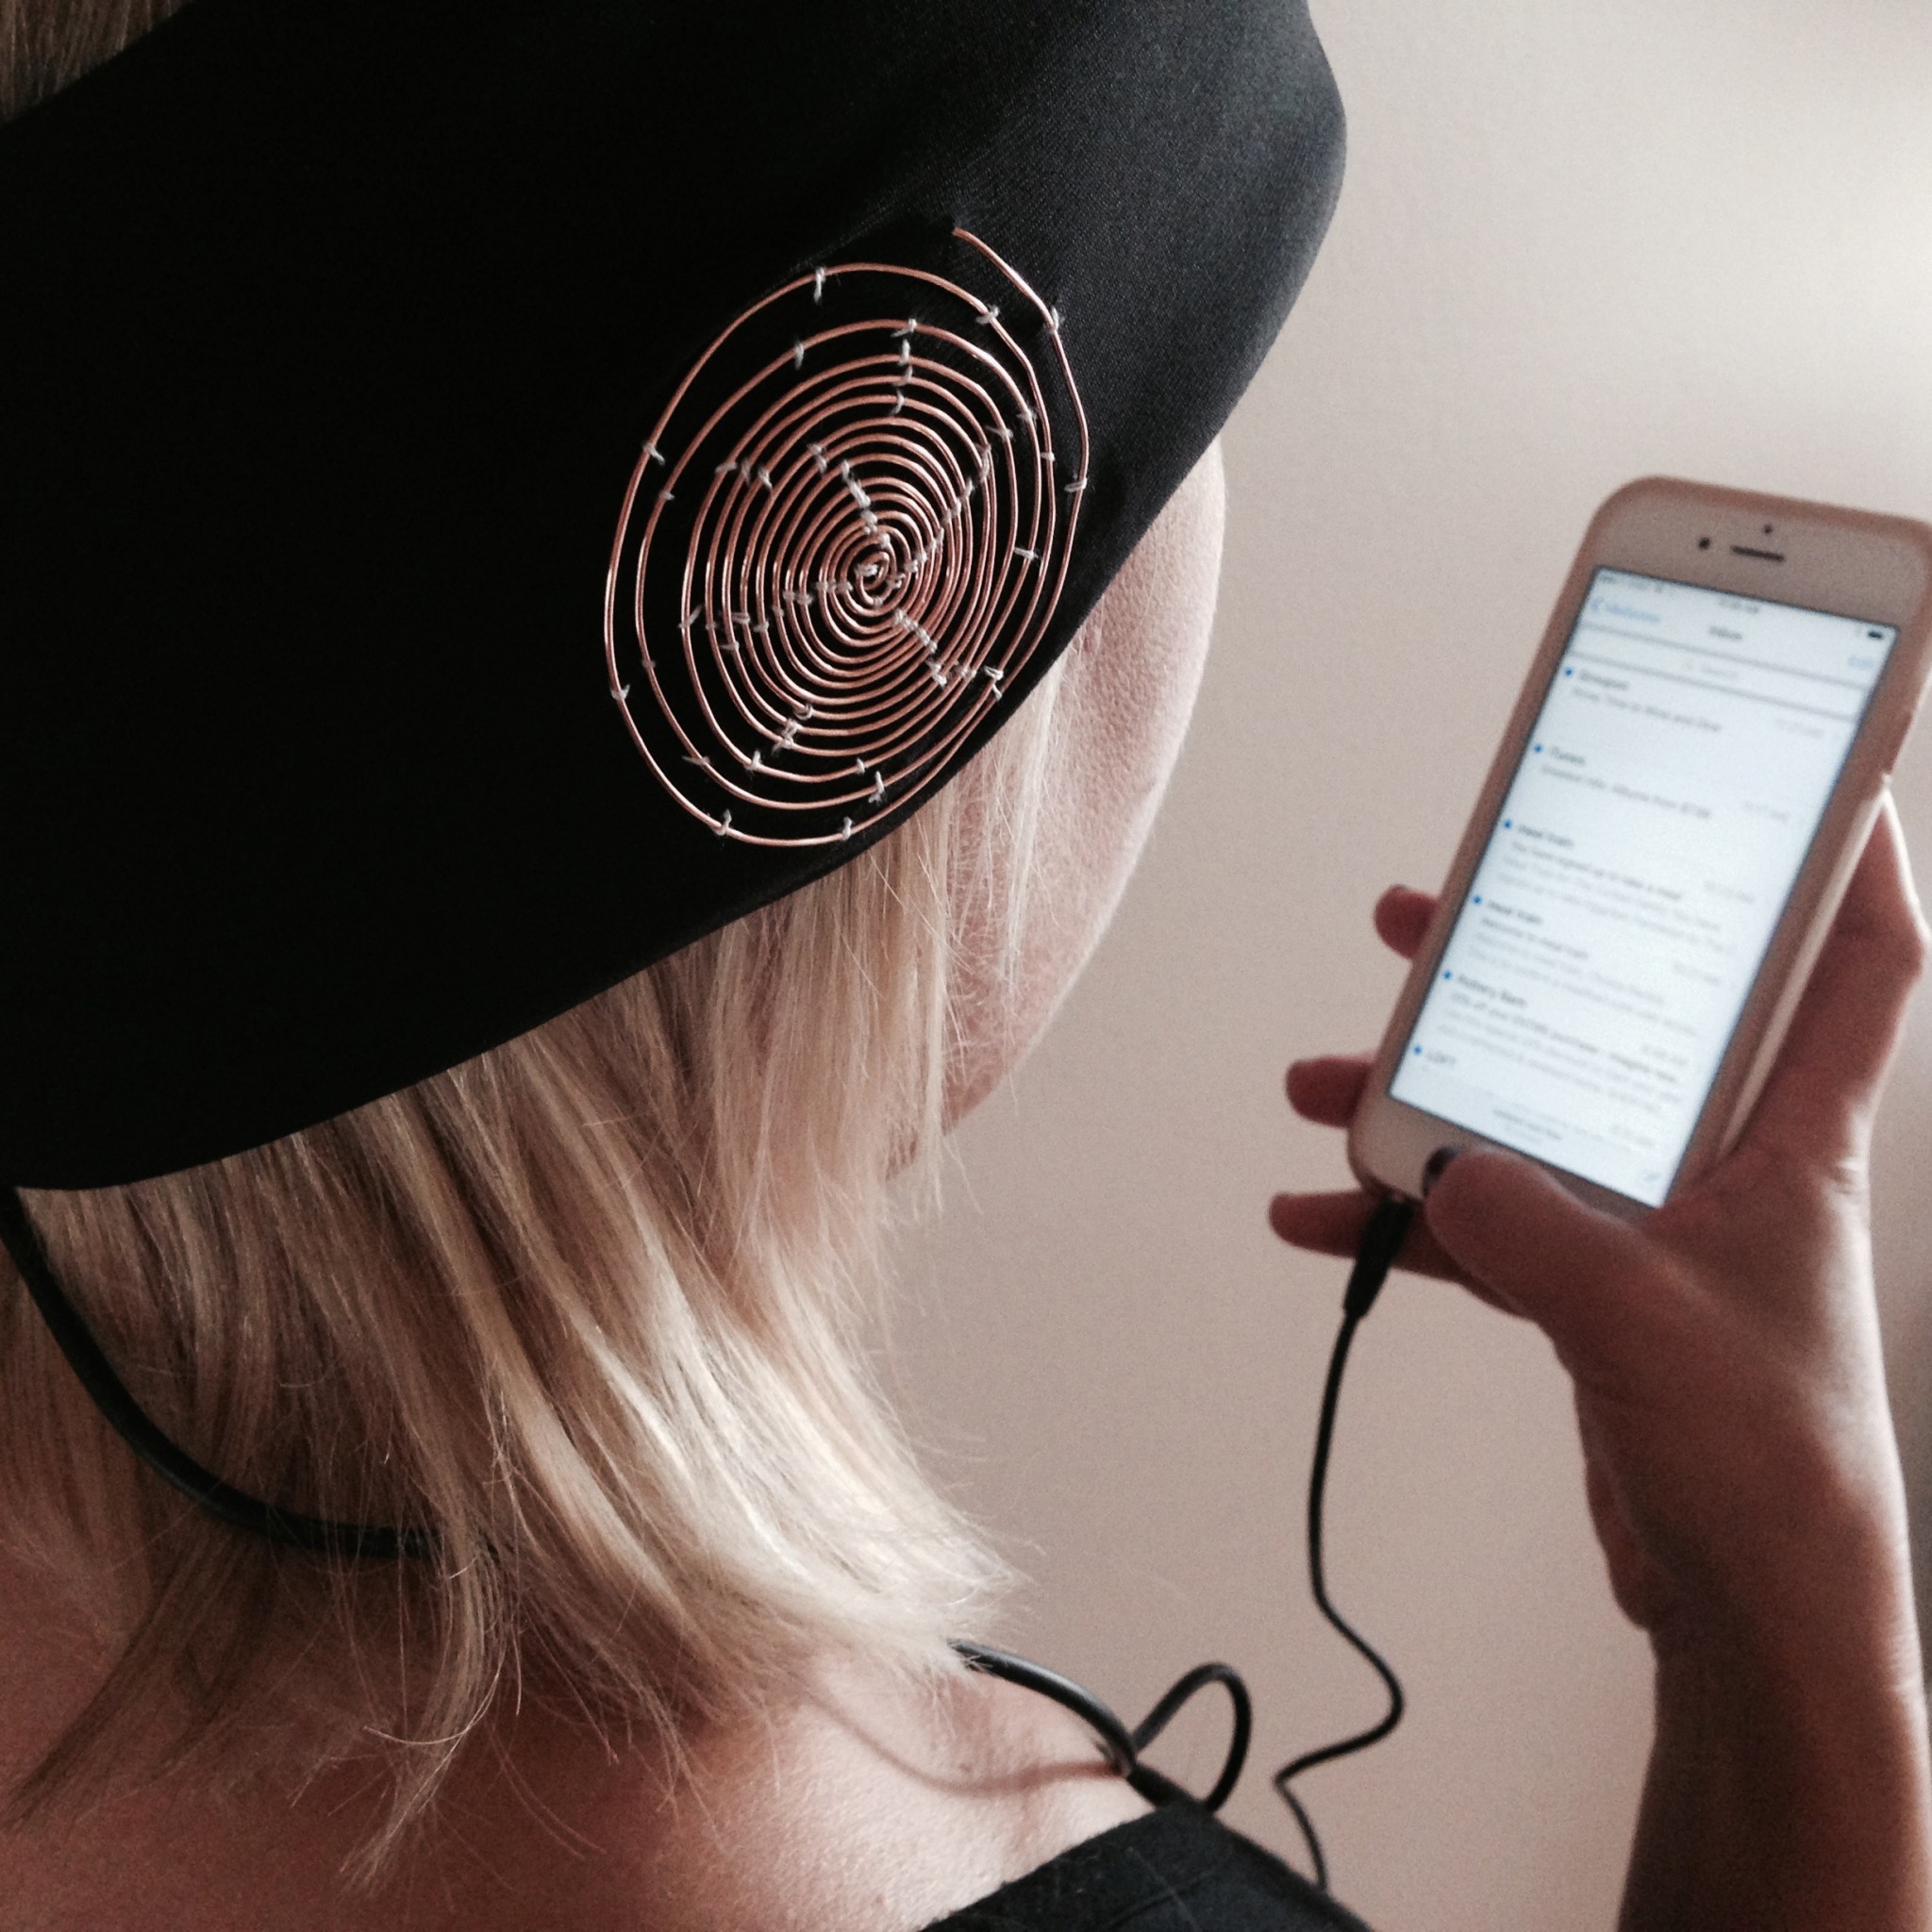
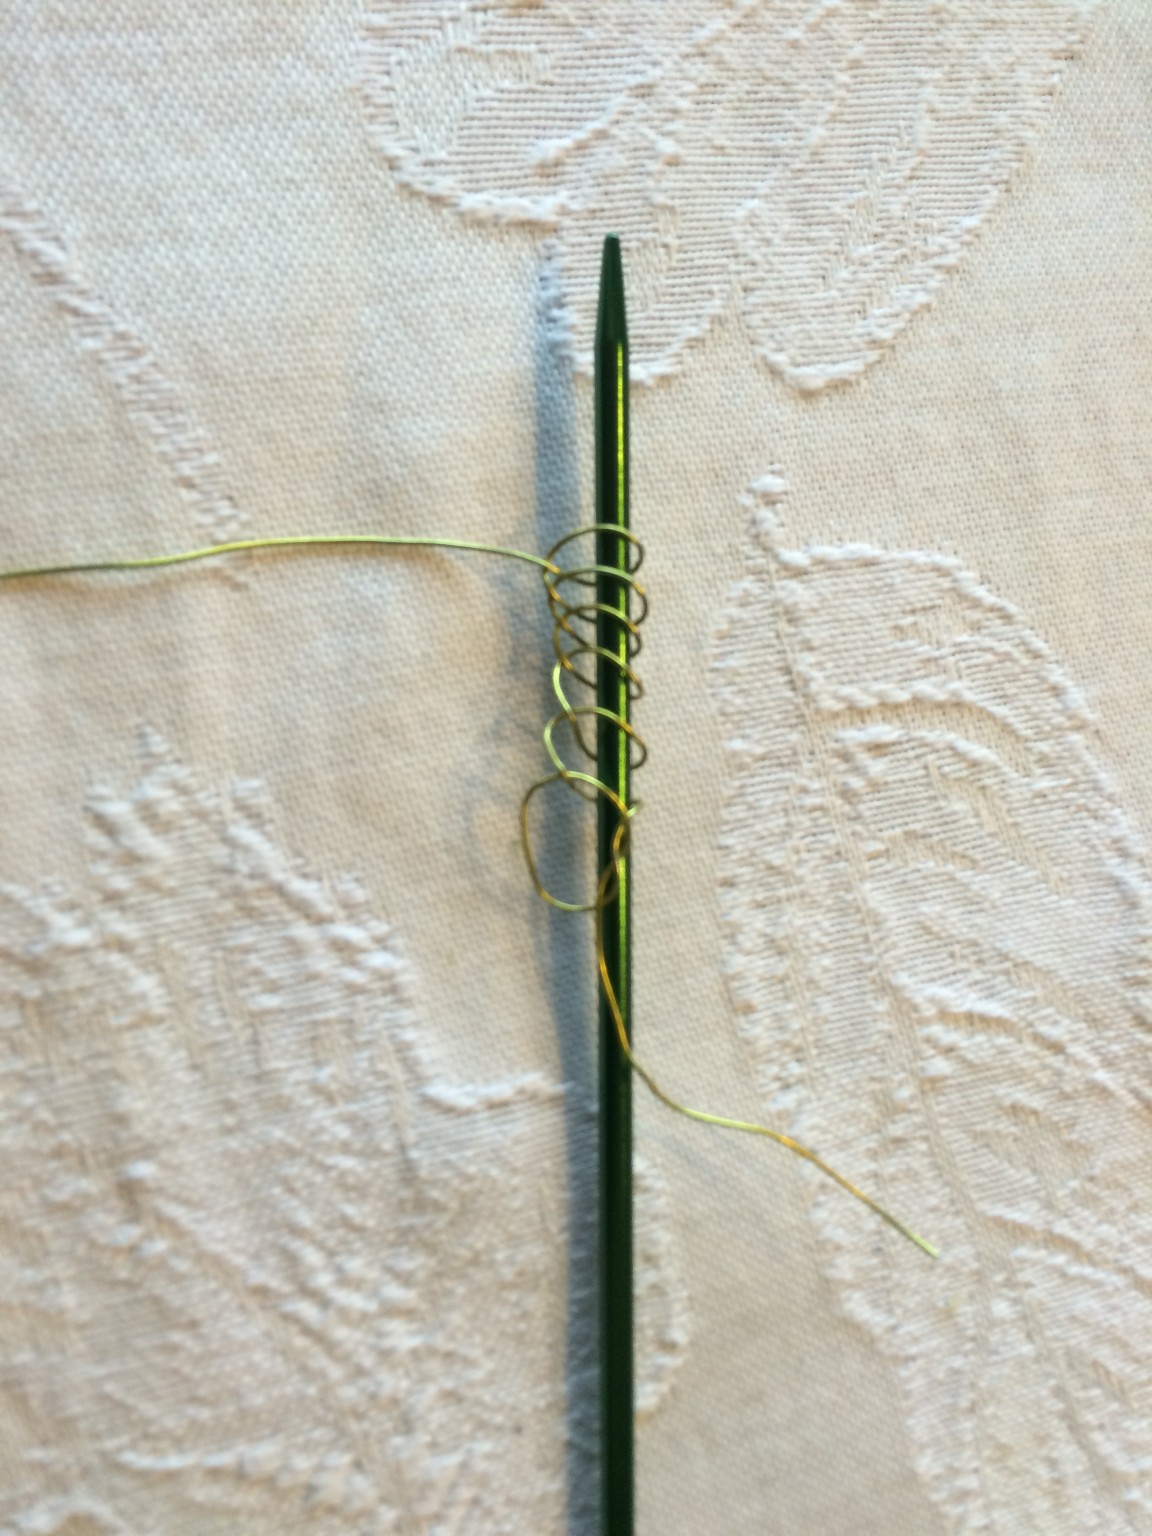
I was very inspired after our final presentation, and decided to re-make my headphones based on the wonderful critique I received. The new design uses the fabric of the headband as the foundation of the speaker to create a more integrated design. I also made the coil a visual focal point by exposing it on the exterior of the headband.
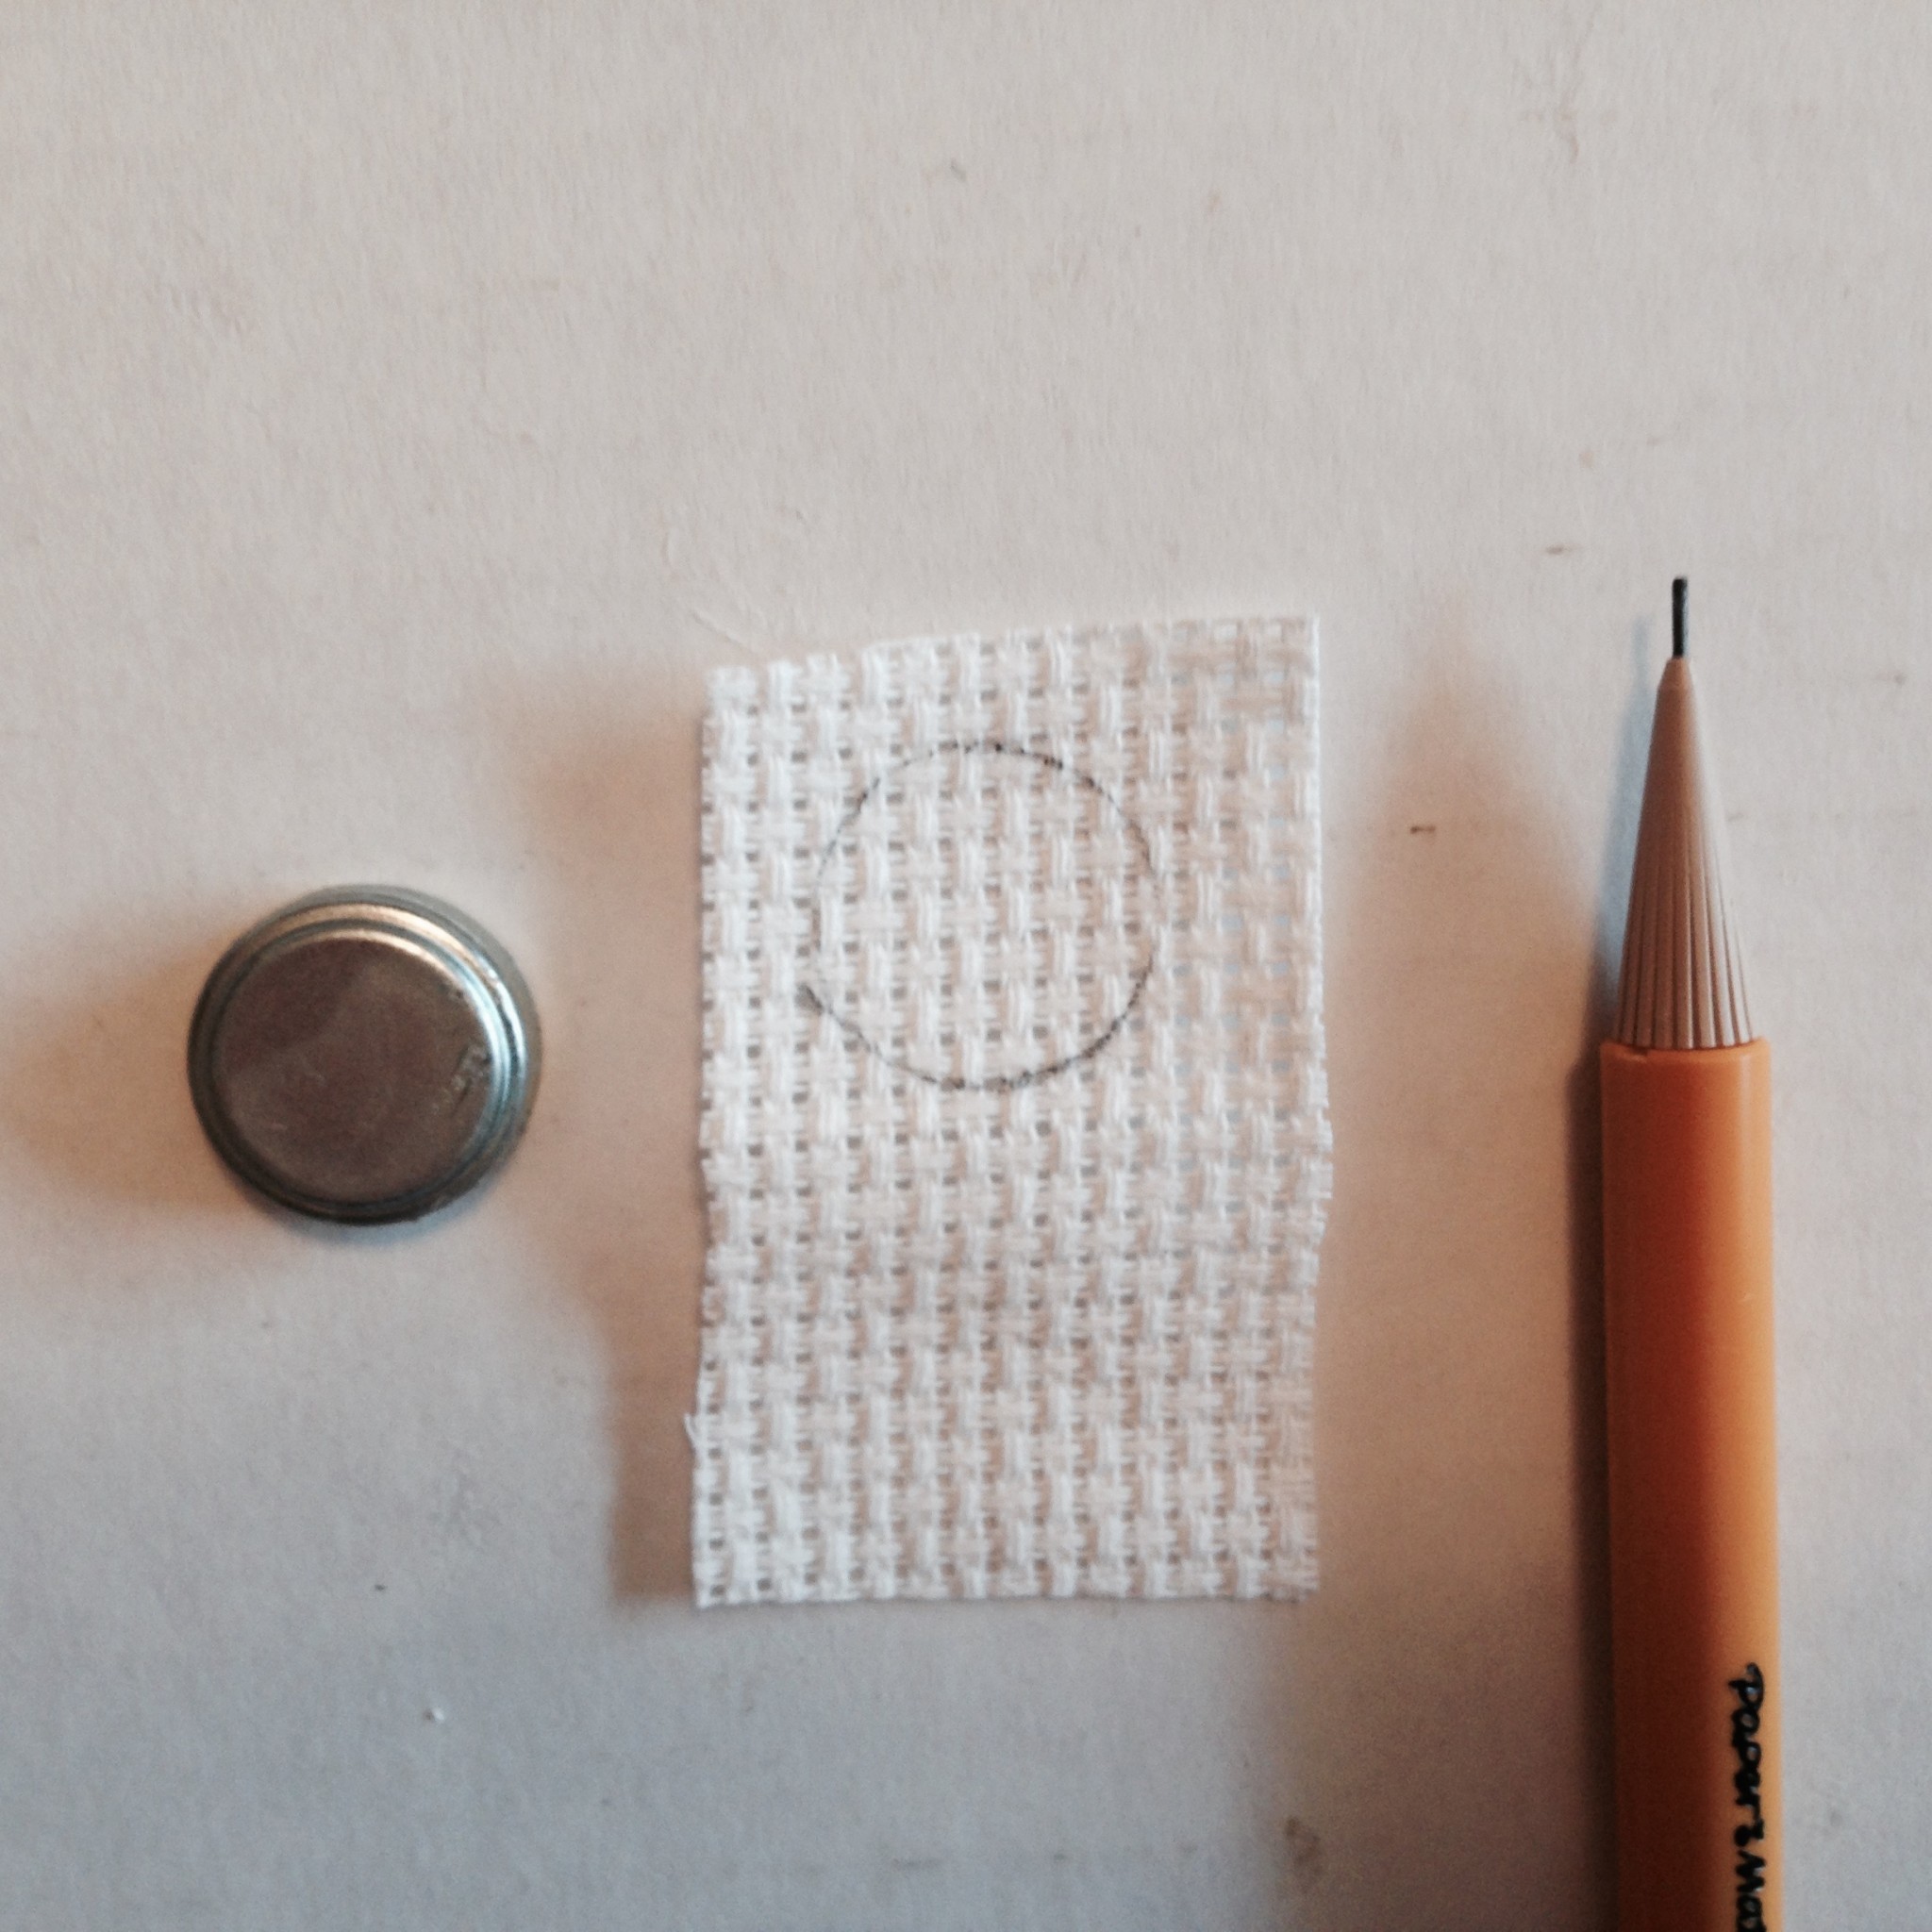
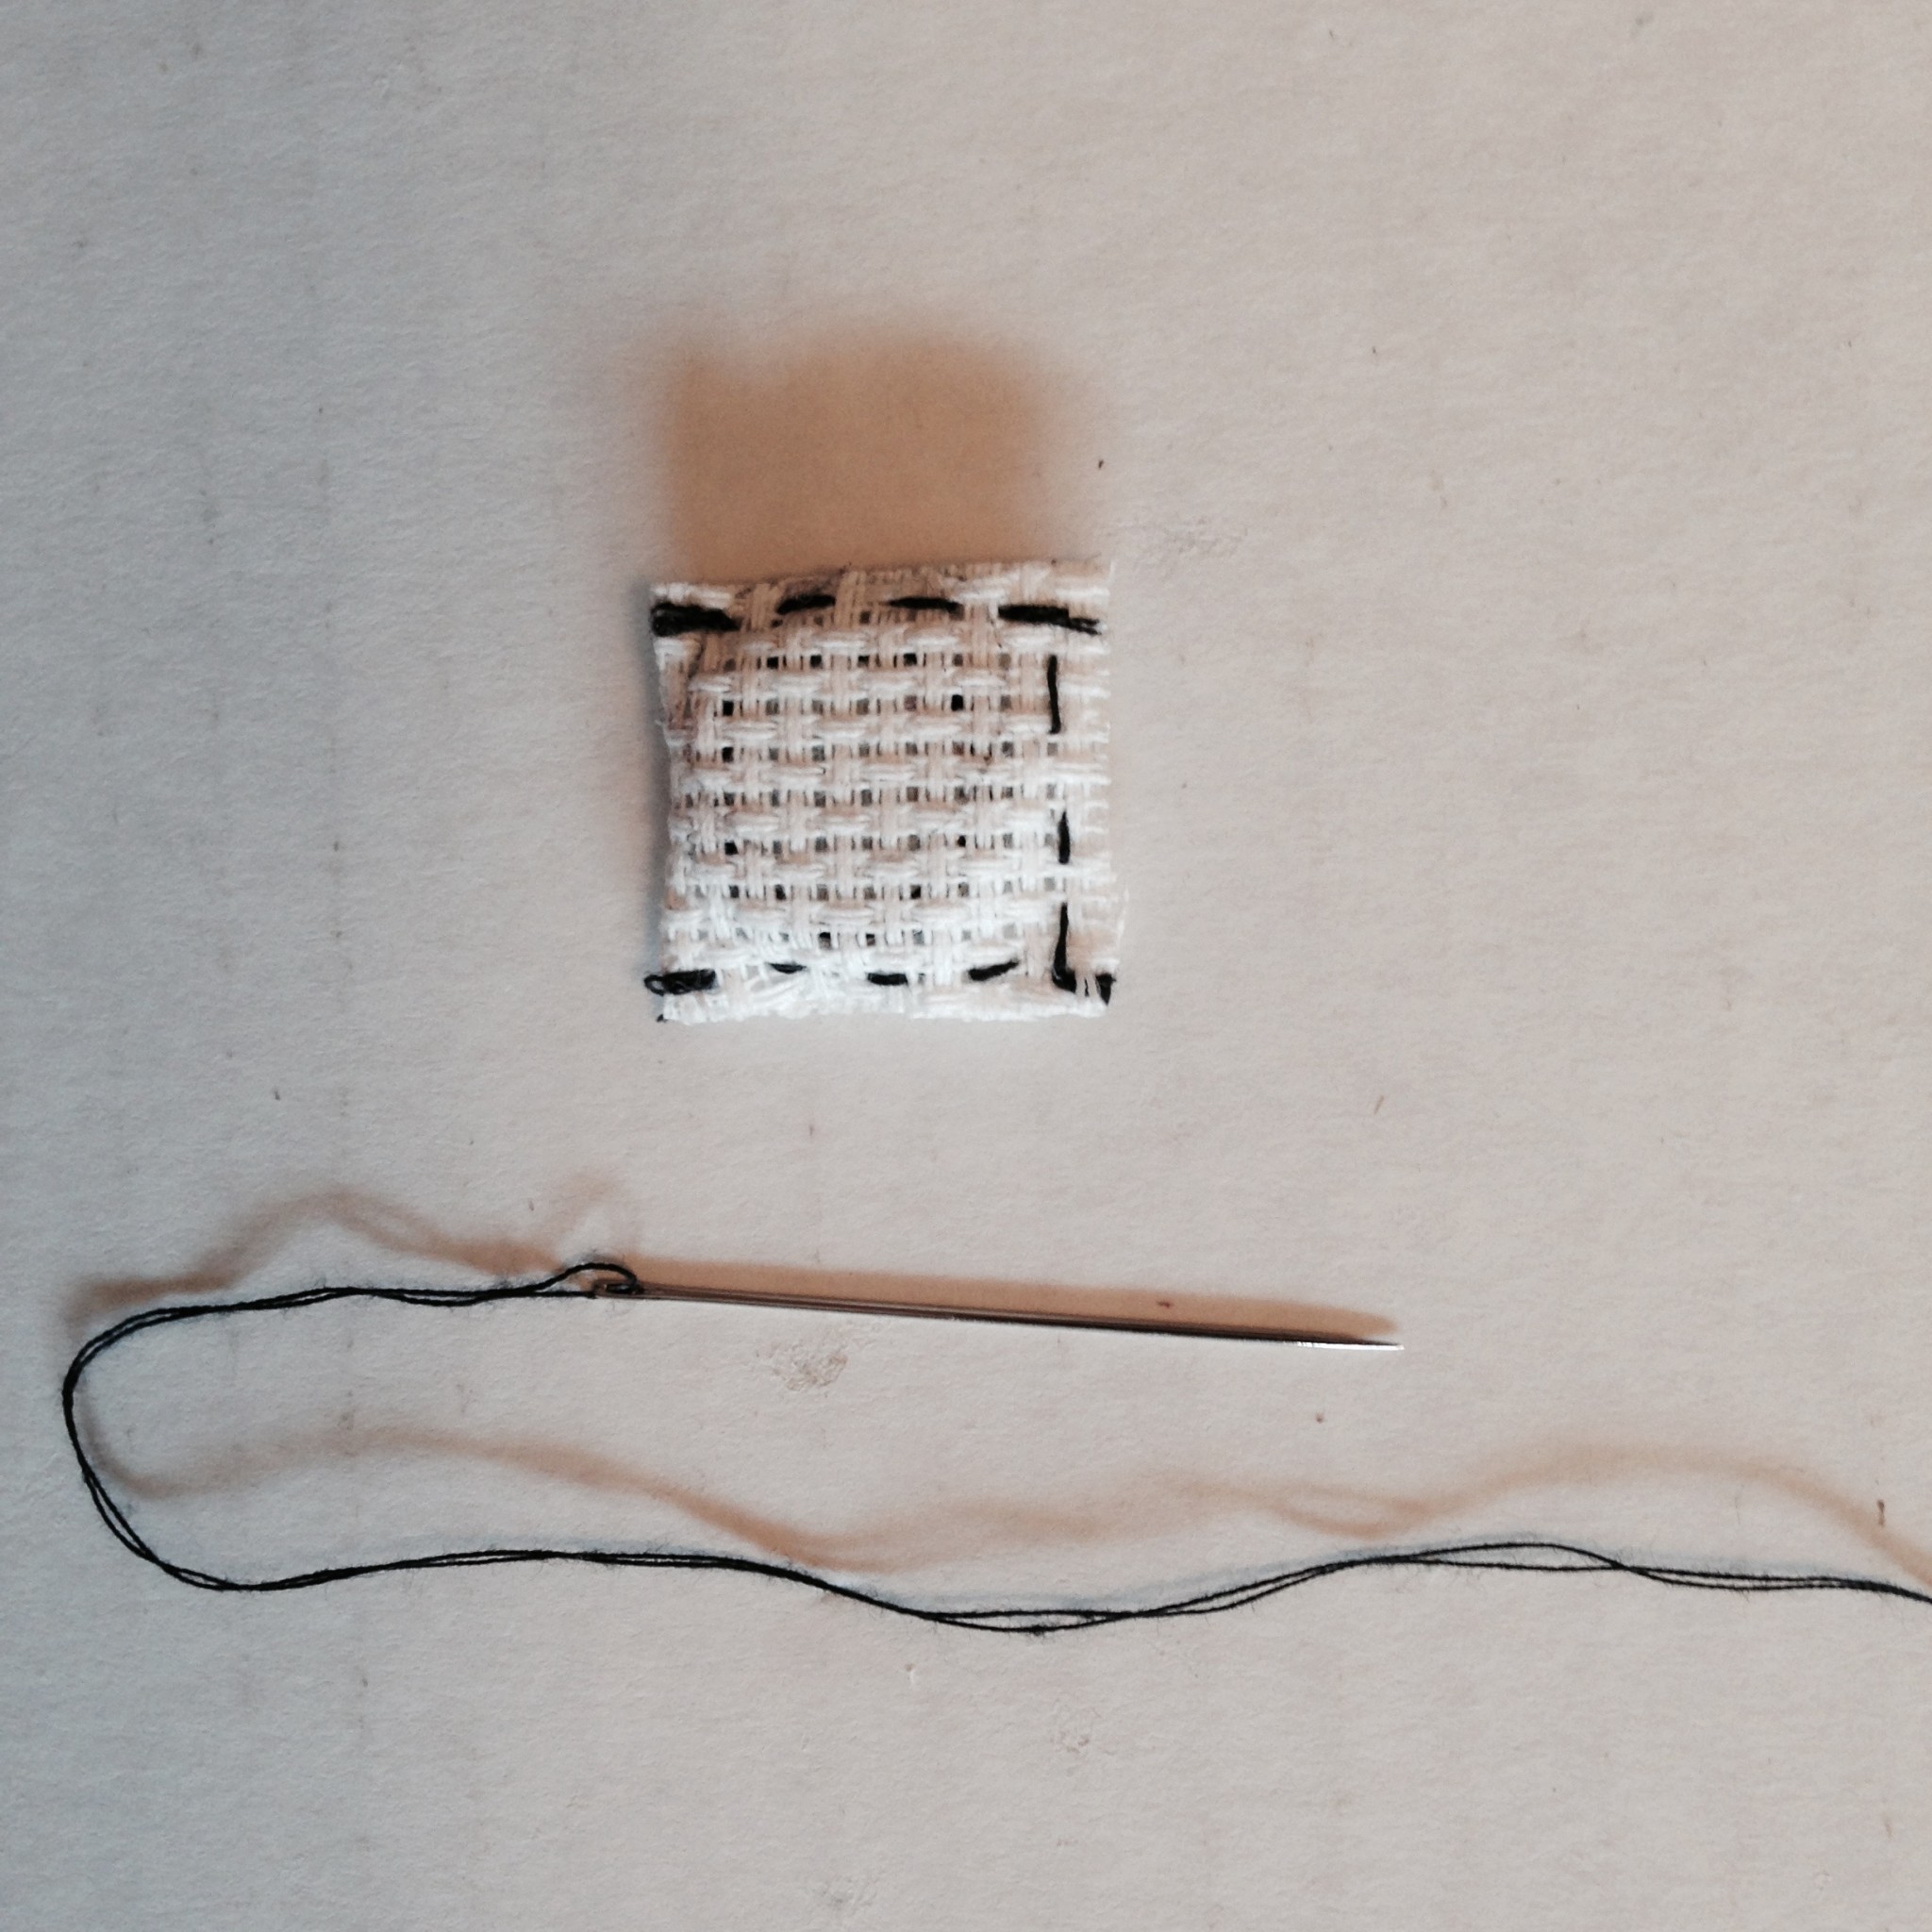
I took a preexisting knit headband and added a capacitive touch sensor to the area that meets the forehead using copper fabric. That way, when someone wears the headband, an LED will turn on, creating a headlamp for running/walking in the park at night during the winter. When the headband is not being worn, a smaller, blue LED will pulse – this is the resting state of my lamp.
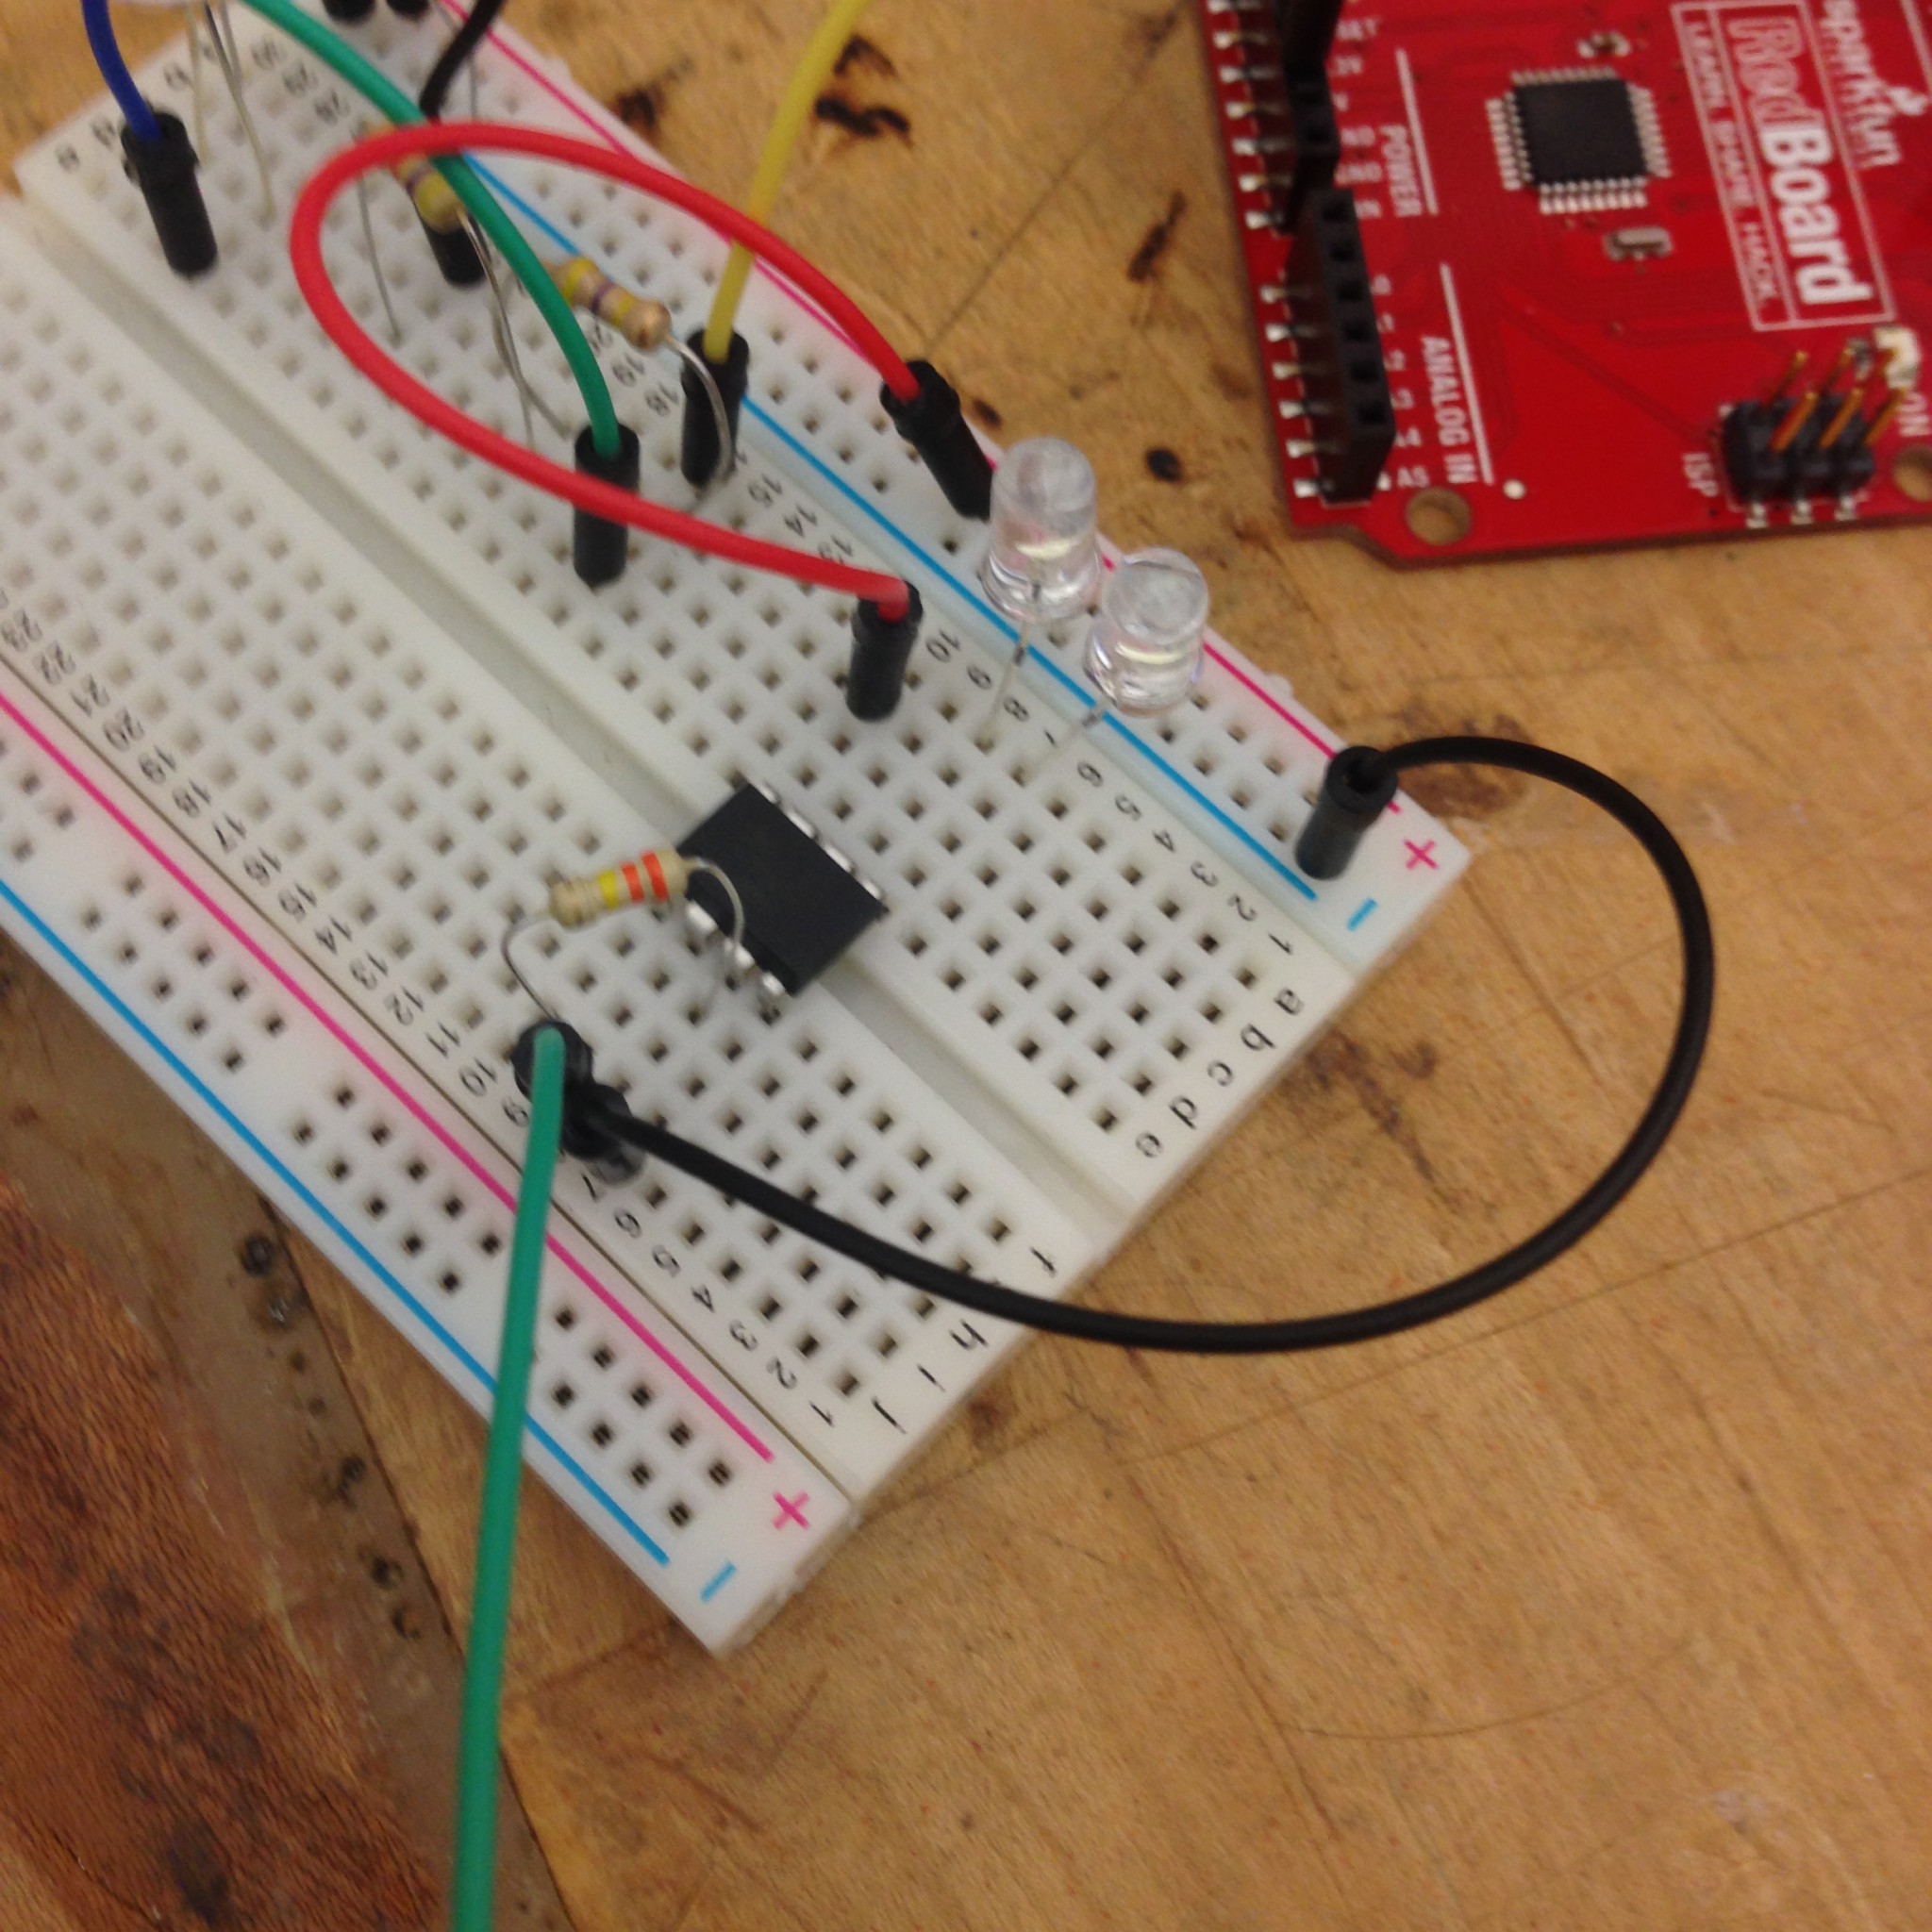
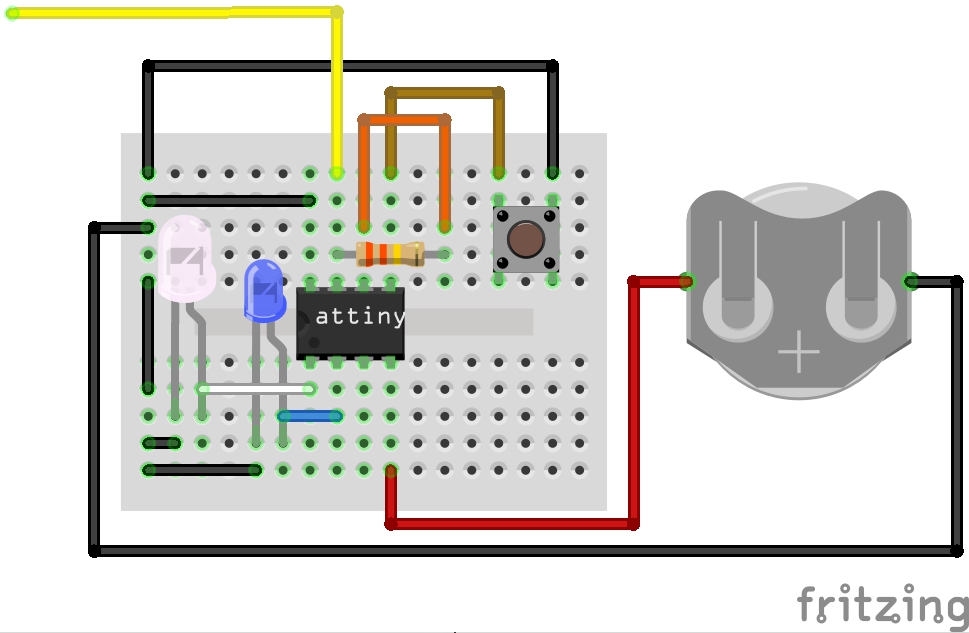
The above video shows the Arduino sketch running on a programmed ATTiny. The ATTiny controls two LEDs using a 3V battery and lights these LEDs based on capacitive touch input (the yellow wire that is touched in the video, which then becomes the copper fabric in the headband below). The “resting state” of the circuit/headband is a small, blue LED that pulses over time. When the input is received via the capacitive touch sensor/when the headband is worn, a second LED (10mm bright white) is lit, lighting the headlamp.
The yellow wire in this diagram connects to a piece of conductive material that – when touched – triggers programmed response (in this case, lights the white LED)
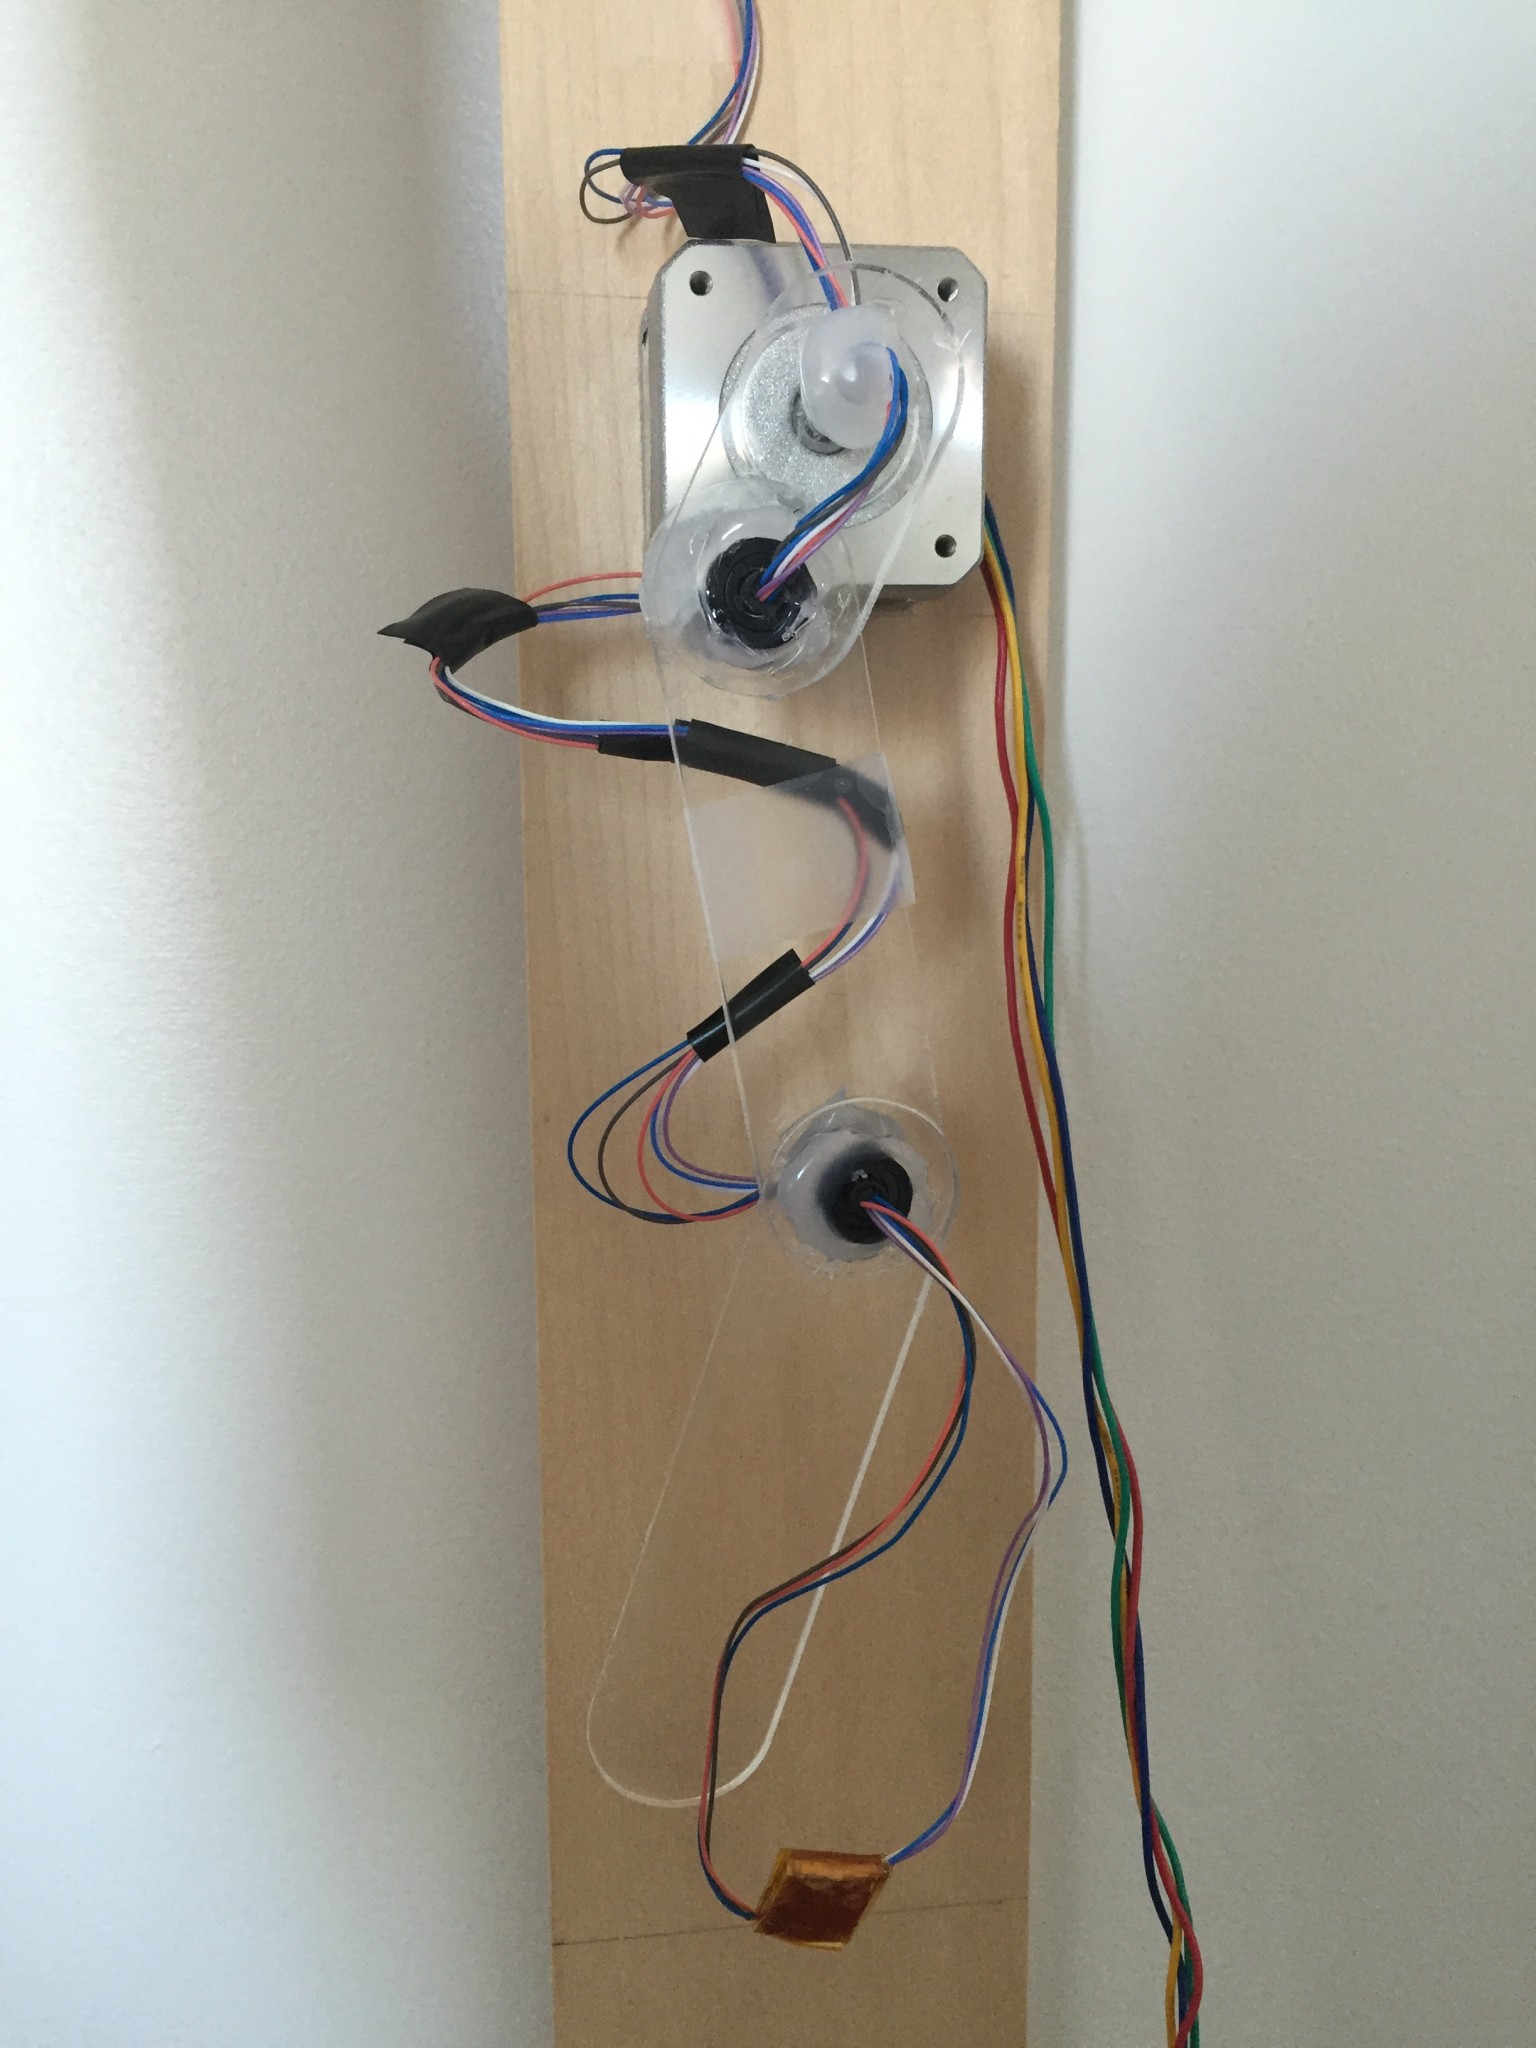
I was inspired by the double pendulum’s random patterns to create something that would capture its patterns randomly for my finals:
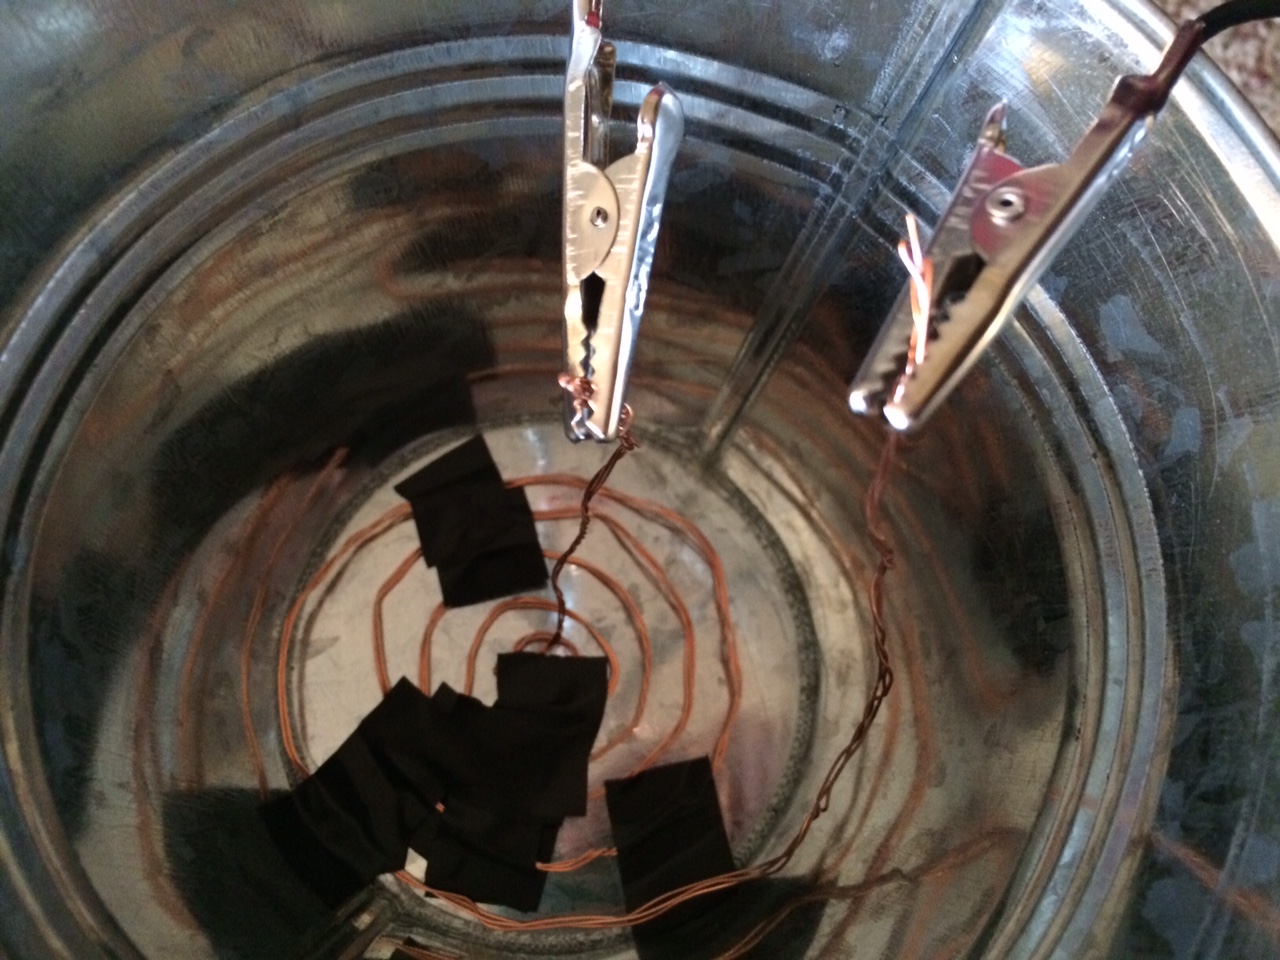
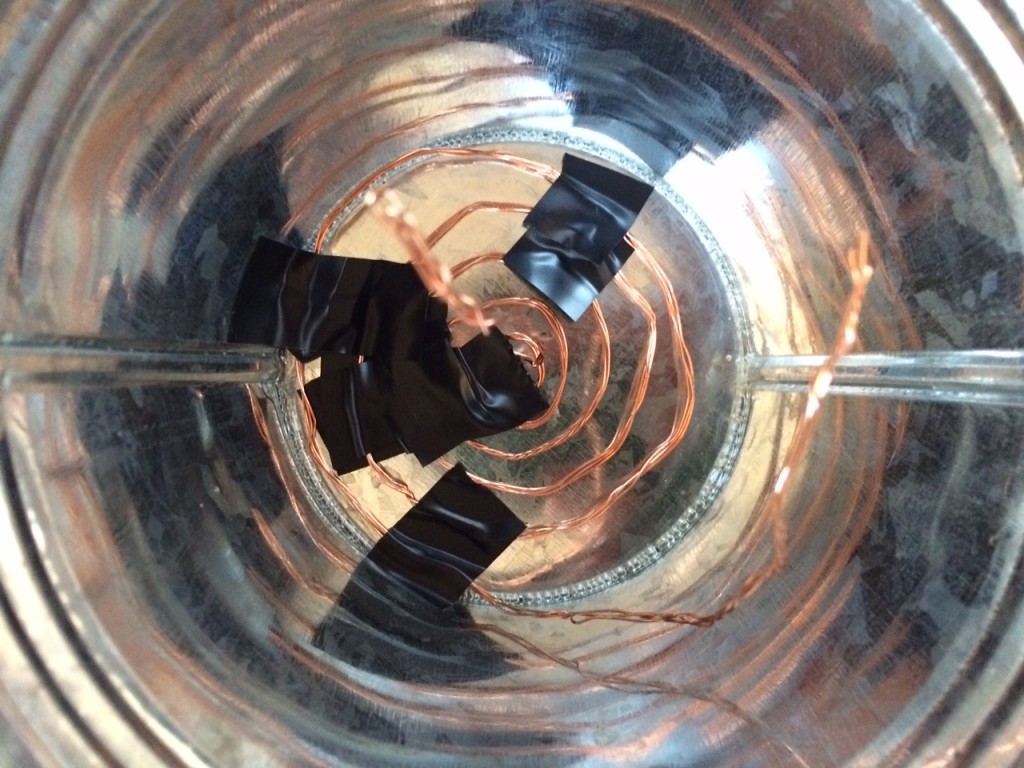
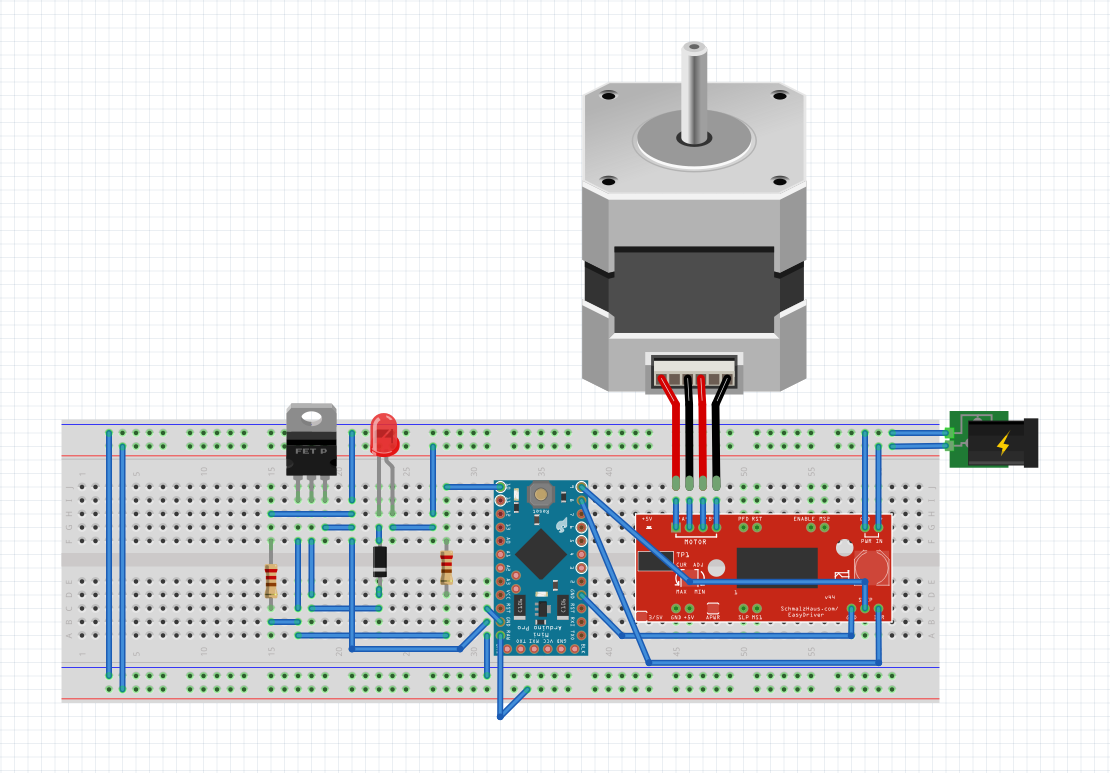
The concept was theoretically simple: I would use a stepper motor and the Easy Stepper Driver from Sparkfun to drive the pendulum, and I would draw the patterns on thermochromic ink with a heating element attached to the pendulum to trace its motion temporarily. All of this would be controlled using a Arduino Pro Mini, though at the beginning, I used an Arduino Uno to prototype.
I powered the motor and driver from Sparkfun using a 12V/1A power source since at first I couldn’t seem to find any concrete information about what kind of power source to use with the driver. I laser cut the pieces for the pendulum from plexiglass and used a slip ring and glue gun to hold them together. The slip ring worked great to wire the heating element at the tip of the pendulum while still allowing for it to swing. I only wished the wires were thicker because the thin ones were flimsy and kept breaking, however, soldering three of them together to create one worked relatively well.
Instead of using the TIP122 transistor though, I used a TIP120 transistor, which according to its spec sheet, can handle up to 60V/5A of power. Throughout working on this project, I used a 9V/1A wall adapter and a 12V/1A wall adapter, and I also briefly tried using a 18V/1.5A battery which I’ll talk more about later. For the heating element, I originally wanted to use flexinol, however it burnt out too easily and its ability to move was a hinder in this case. After some research, I decided to use nichrome wire wrapped between layers of kapton tape for my heating element with much better results.
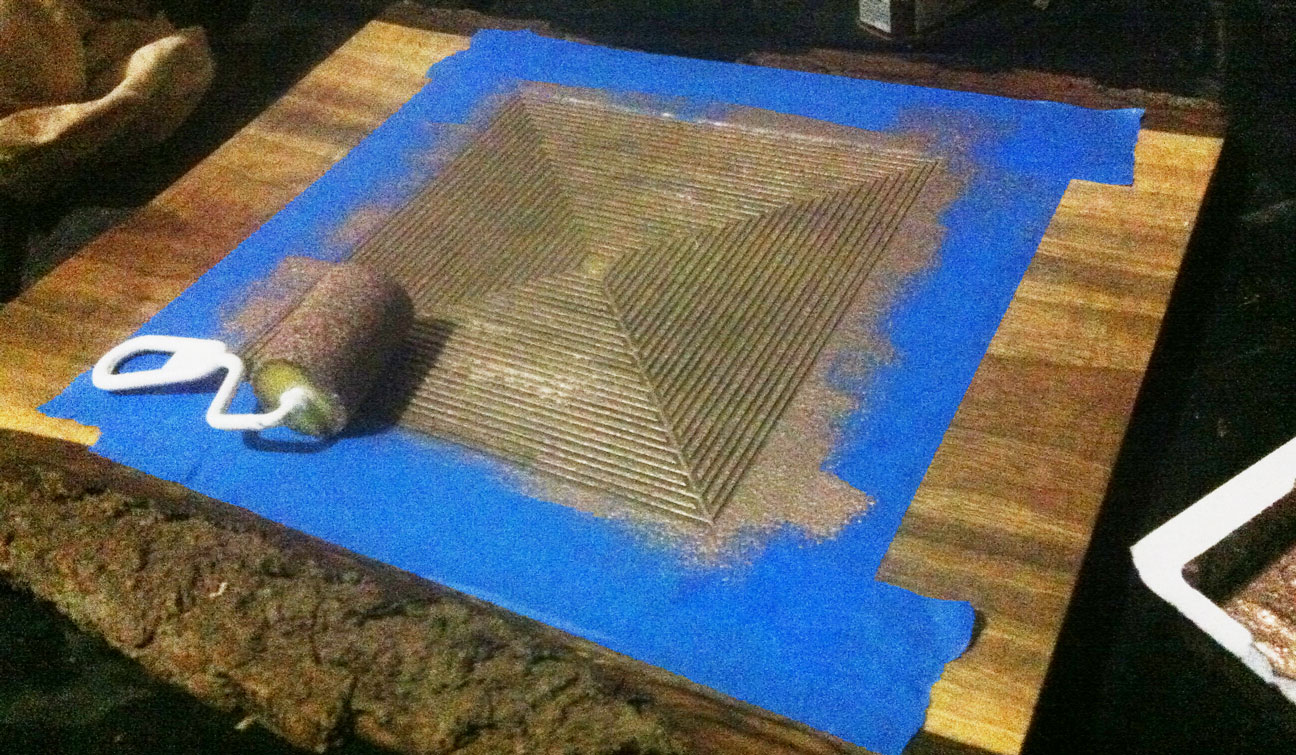
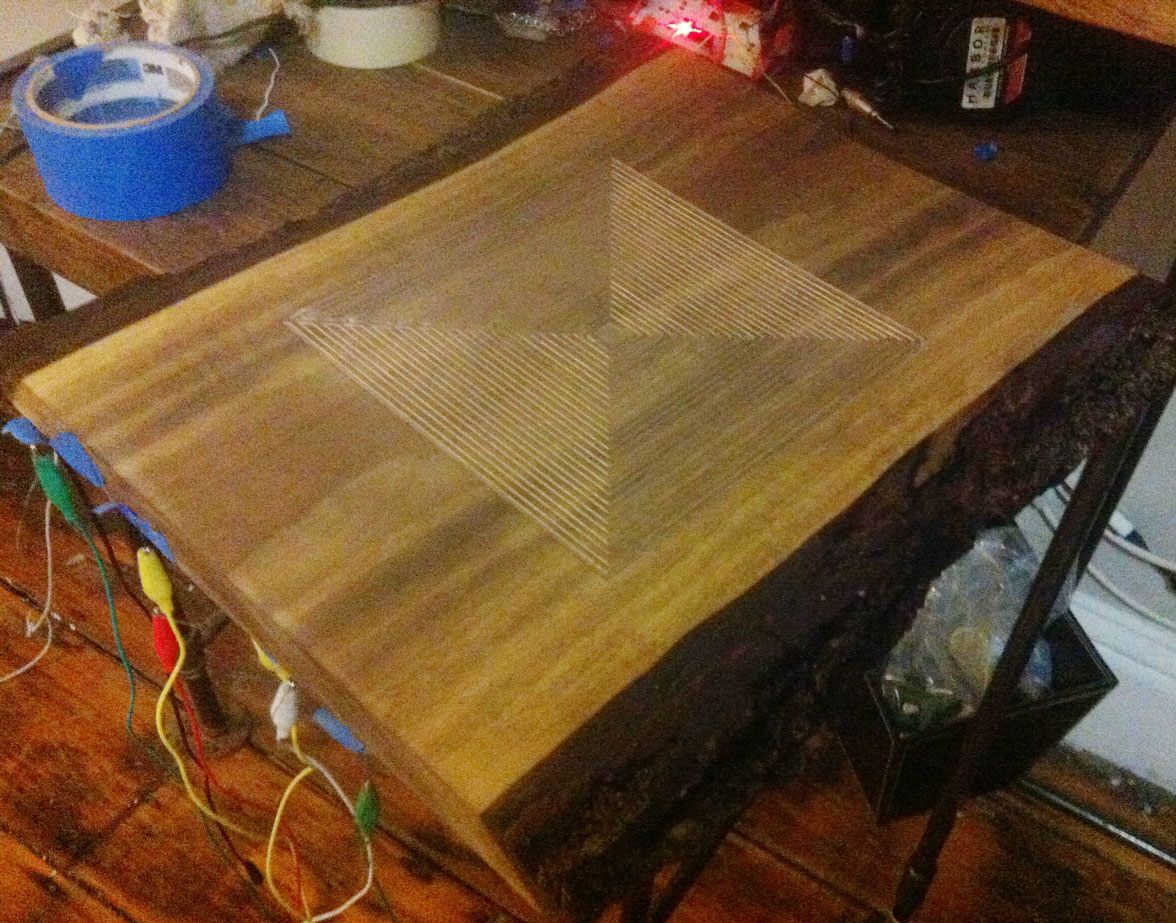
For the “canvas”, I mixed black thermochromic pigment with acrylic fluid matte medium binder, so that when heat was applied to it, the black would fade to an opaque white. Originally, I wanted to spray it onto a large sheet of plexiglass, however, the paint was too thick to go through the spray paint bottle, so I resorted to dabbing paint blobs onto the surface, which resulted in a interesting texture.
I then built a frame around the plexiglass to which I would attach the motor with the heating element attached to it.
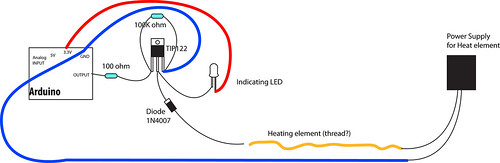
I then soldered the circuits for the motor and heating element together with the Arduino Pro Mini, to run off the same power source (12V/1A). The circuit looked somewhat like this (the heating element is where the red LED is):
The code I was using:
const int DIR = 8; const int STEP = 9; const int HEAT = 10;
int distance = 0; int heatState = LOW; int stepState = LOW;
unsigned long prevMillisHeat = 0; unsigned long prevMillisMotor = 0; unsigned long prevMicrosStep = 0; unsigned long currentMillis; unsigned long currentMicros;
long heatInterval = 5000; long motorInterval = 1; long stepInterval = 100;
As a result, my project worked — for a very brief two minutes or so (which was not enough time to grab a camera to document this), before the power source blew. Wondering if it was just a wonky power adapter, I blew two more before I decided that there was something wrong. Exactly what though, I had no idea. Thinking that the 12V/1A adapter was not giving off enough current, I decided to try a 18V/1.5A rechargeable battery which burnt my nichrome wire into smoke and ash as soon as I plugged in the power source. 1.5A with my current circuit was way too much current, and produced way too much heat for the nichrome to handle.
Doing some more investigation, I found that Brian Schmalz (the designer of the driver) wrote:
M+ : This is the power input to the Easy Driver. Connect this to the positive power supply lead. This should be a 6V to 30V, 2A (or more) power supply that is clean (low ripple).
I have no clue how on earth I missed this! I think because I read the driver can regulate the current to produce 150mA – 700mA, that I thought that 1A would be enough to power the driver. I ended up buying a 12V/2A adapter and prayed it would work.
The problem now, is that 2A would be enough to fry my nichrome, since it’s way more than 1.5A. I had two options: use two power sources, or start thinking a little about physics.
If V = I * R, and E = V * V / R, when I used a 9V/1A power supply, I had roughly 9 watts of power going through the nichrome. For 12V/1A, I had roughly 12W. And 18V/1.5A which caused smoke was roughly 27W. Theoretically if I can keep the W down to ~12W, then I should be able to use 12V/2A. So if I added a 10 ohm resistor to one of the heat lines, that should keep it to roughly 9W of heat going through the nichrome. That’s my theory, but my physics was really, really dusty.
Since I was really short on time, I decided to rewire things to take on two power sources, with this circuit:
So the motor no longer blew out my adapter, and the nichrome played nice when plugged in separately…. However, when I plugged in both of the power sources at once, the motor wouldn’t spin smoothly, if at all.
At this point, I’m at a loss and not quite sure what’s wrong with my project. So I’m going to accept the fact that some things just weren’t meant to work for the time being and leave it be. I’ll come back to it after some time with a fresh mind and hopefully I’ll figure out what’s wrong.
[On Paris]: Honestly, I thought the feedback was alright, but not very useful. It would’ve been great had it come a lot sooner, maybe if we were going back and forth since the beginning of the semester.
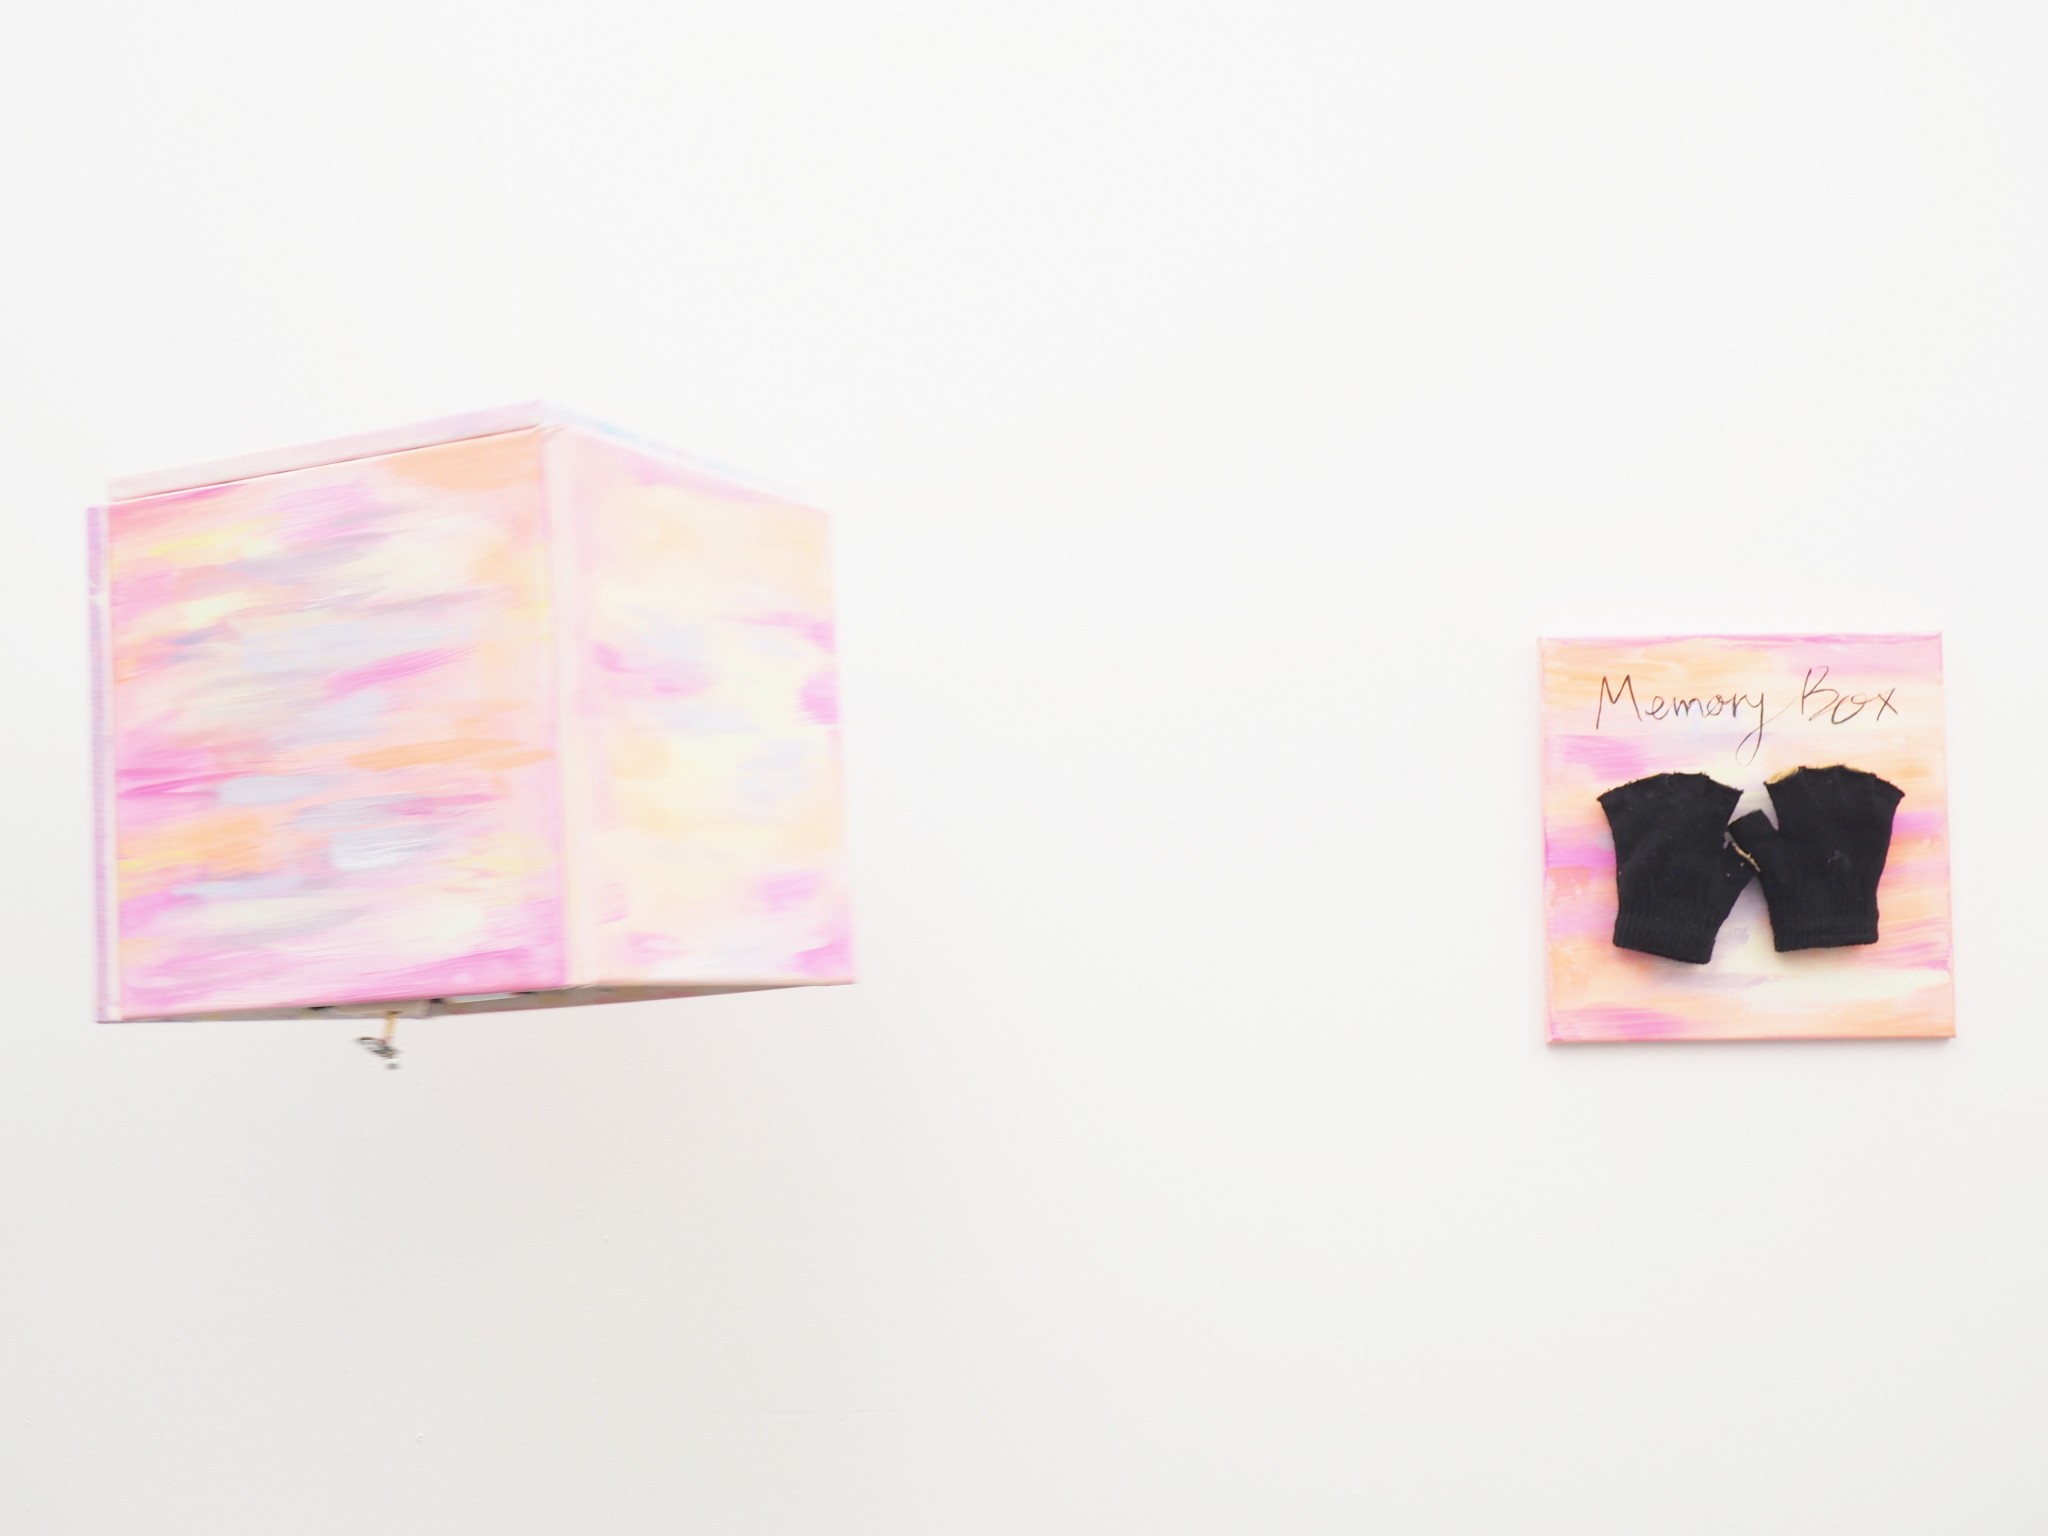
A memory box for people who need to be reminded of their beliefs and identities. When a person touches outside the box, the sound and voice will play by showing the images from their memory on what they want to be reminded of. During a person listens to the sound and voice in the box, the images on the memory box will fade away. That means the images are being absorbed as memories to the person.
We enjoyed working together and were happy with our project in terms of both the technical and aesthetic aspects. In the case of technical aspects, using themocromatic pigments and the sound module worked well.
The one thing we felt not entirely satisfied with was the fact that color changes were insufficient because we might have used too many colors, but this was intended for our concept. Each person has various individual memories to be reminded of, and we tried to represent this visually by using different colors and action paintings to represent passing by many different memories.
Actually, we were thinking about using a distance sensor so that people can hear their memories automatically, not by pressing the button to turn on the sound manually. When someone comes into the space, it would be ready to play, and then it would play when the user touches the dome. However, everything with our project worked well. All the speakers were connected perfectly and the user heard sound when the user played with them.
We got feedback from a student in Paris. We got helpful questions for the future implementation such as how the memory box would recognize a specific person, in terms of the shape of the box, and the way of showing memories. We’ve decided to show the memories with abstract paintings, not specific images using a projector, but if we combine projecting images with paintings, it may be interesting.
I’m very happy with the outcome of my object and excited about moving forward with some of these techniques, having learned what I have from this process.
There was an initial setback after covering the area in copper paint with the foolish idea that I would be able to gouge out channels in the grooves to establish the circuit. After deciding this would be impossible I opted instead to sand off the top using the copper in the grooves as the active component.
From there forward, things seemed to work quite well and I had an interesting time trying to craft a piece of generate code to match the style and type of interaction with the object.
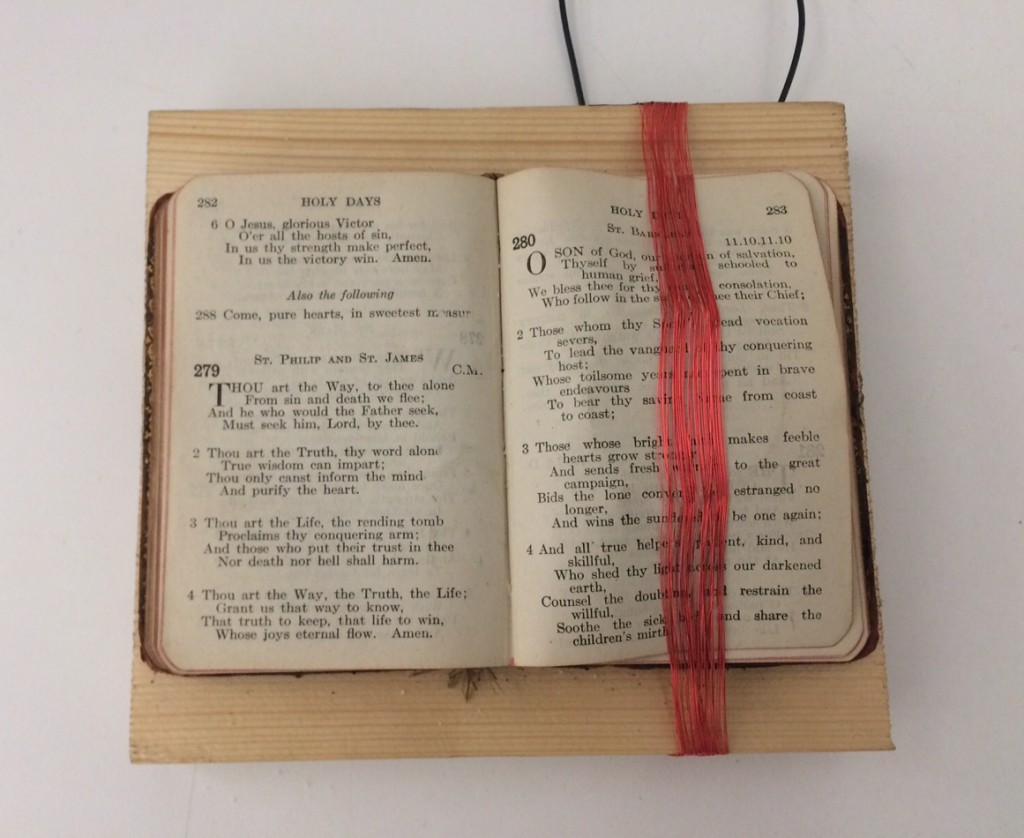
A series of sound sculptures with each having a sound and tactile manifestation of a stanza from a poem called Loteria (referring to the Mexican bingo game).
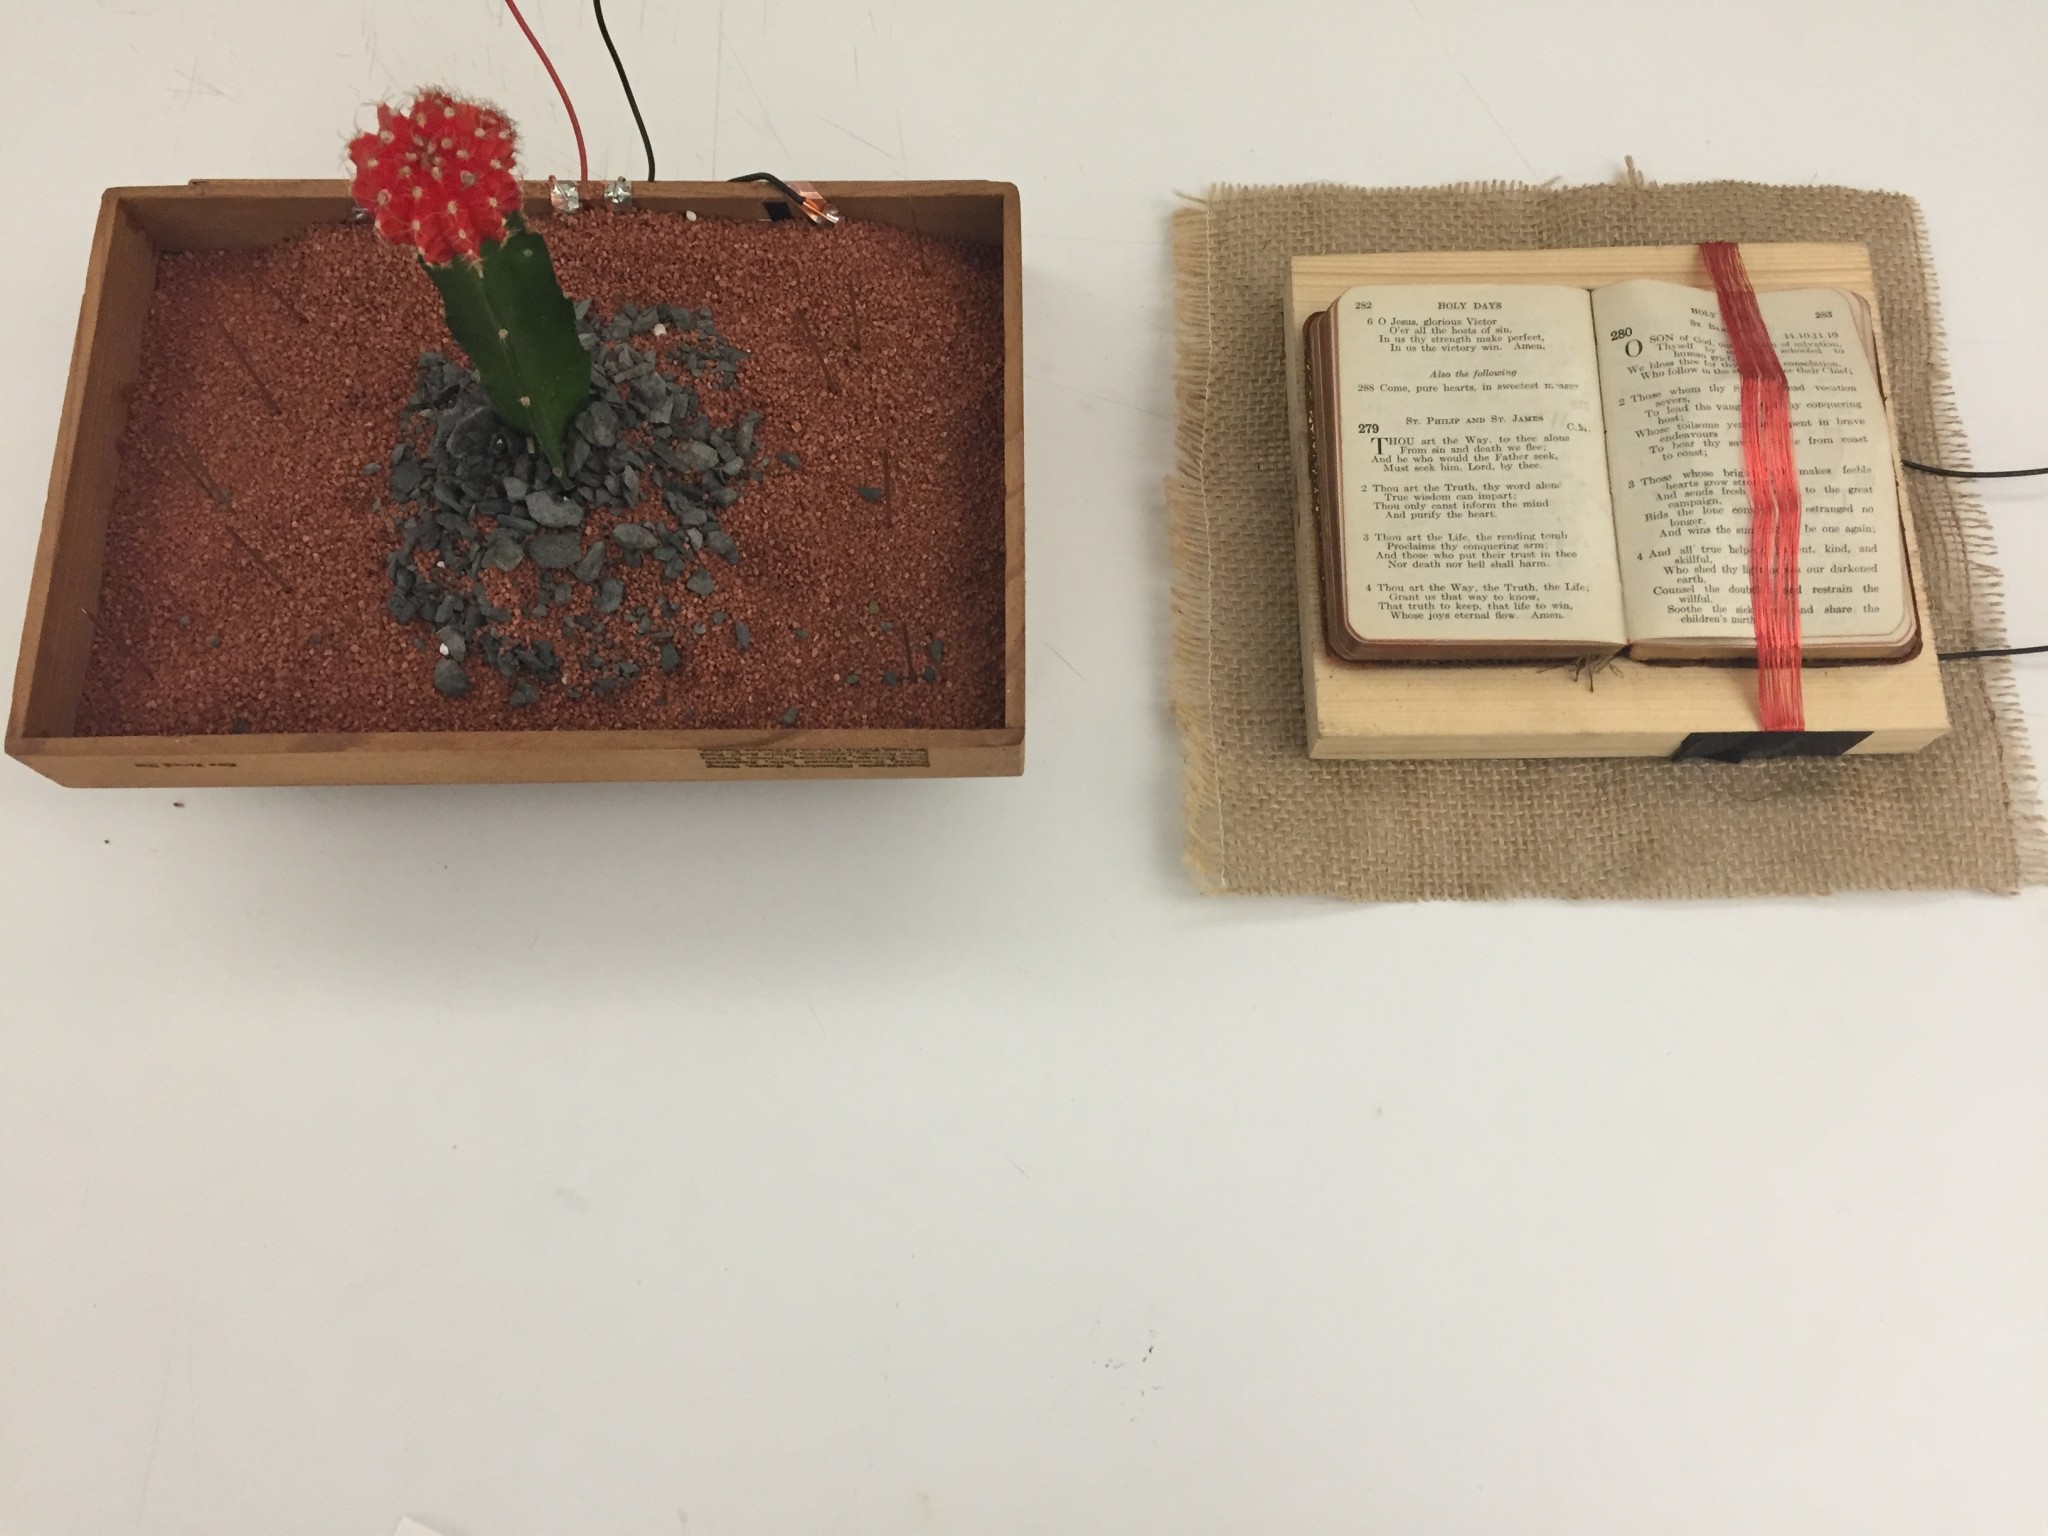
Let whoever reads this understand that when the desert took me, it left me with only a lighter and a friend. Experience: As participant touches the needles around the cactus, the sound plays the stanza
Video:
Sound Sculpture 2: El Musico
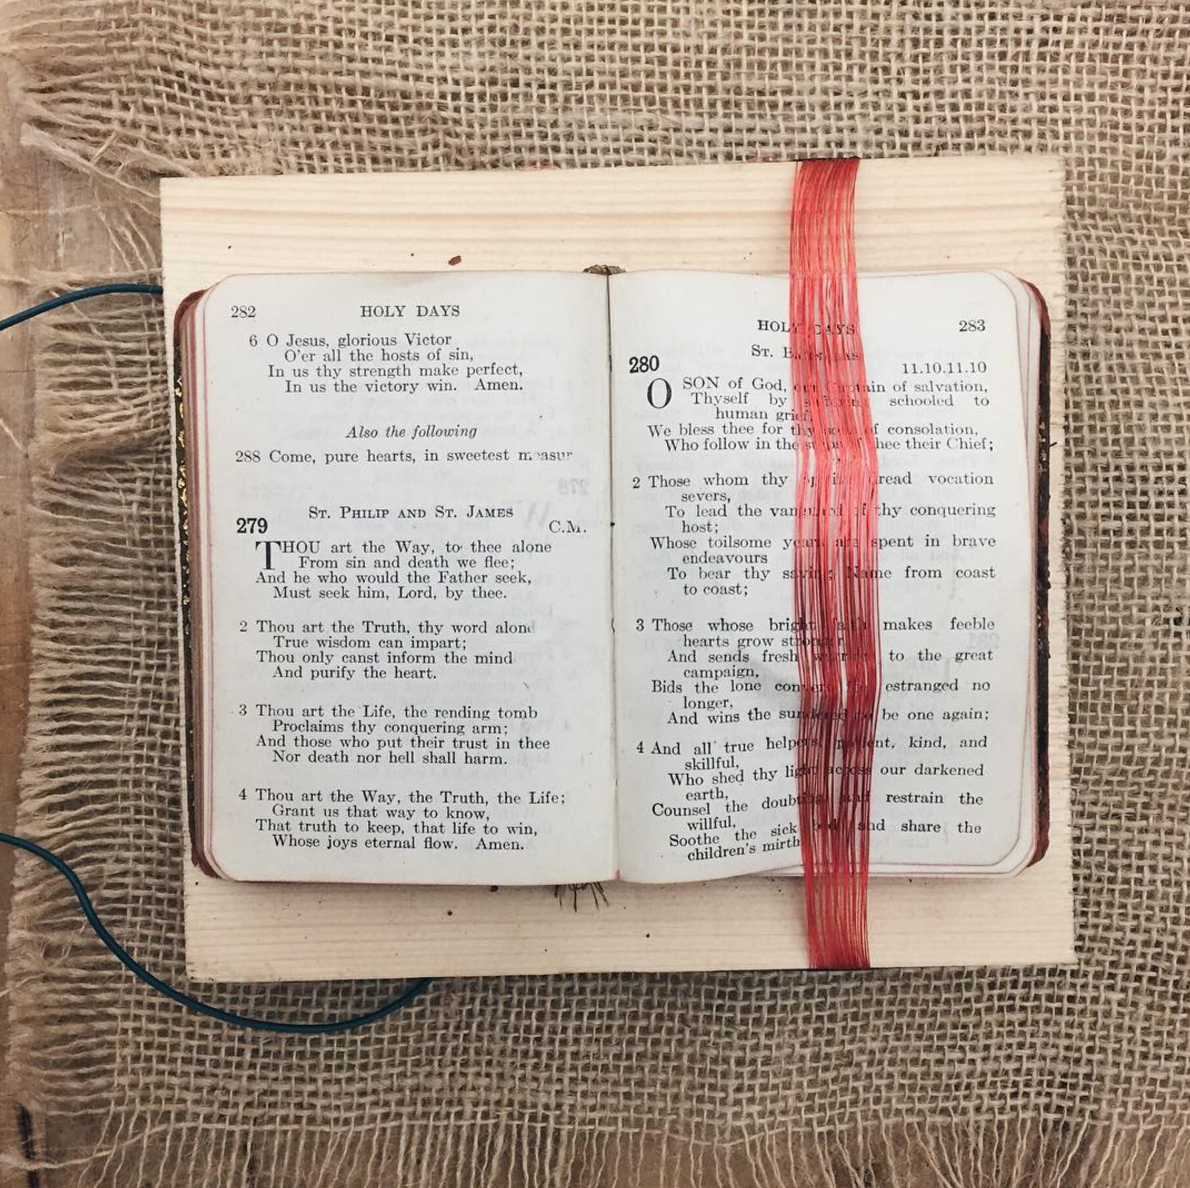
The guitar was called Mojave. It had 10 strings with 4 broken. The perfect sound to reverberate against an audience of sand.
Experience: As the participant gets very close to the book, he or she can listen to the stanza
Sound Sculpture 3: El Alacran
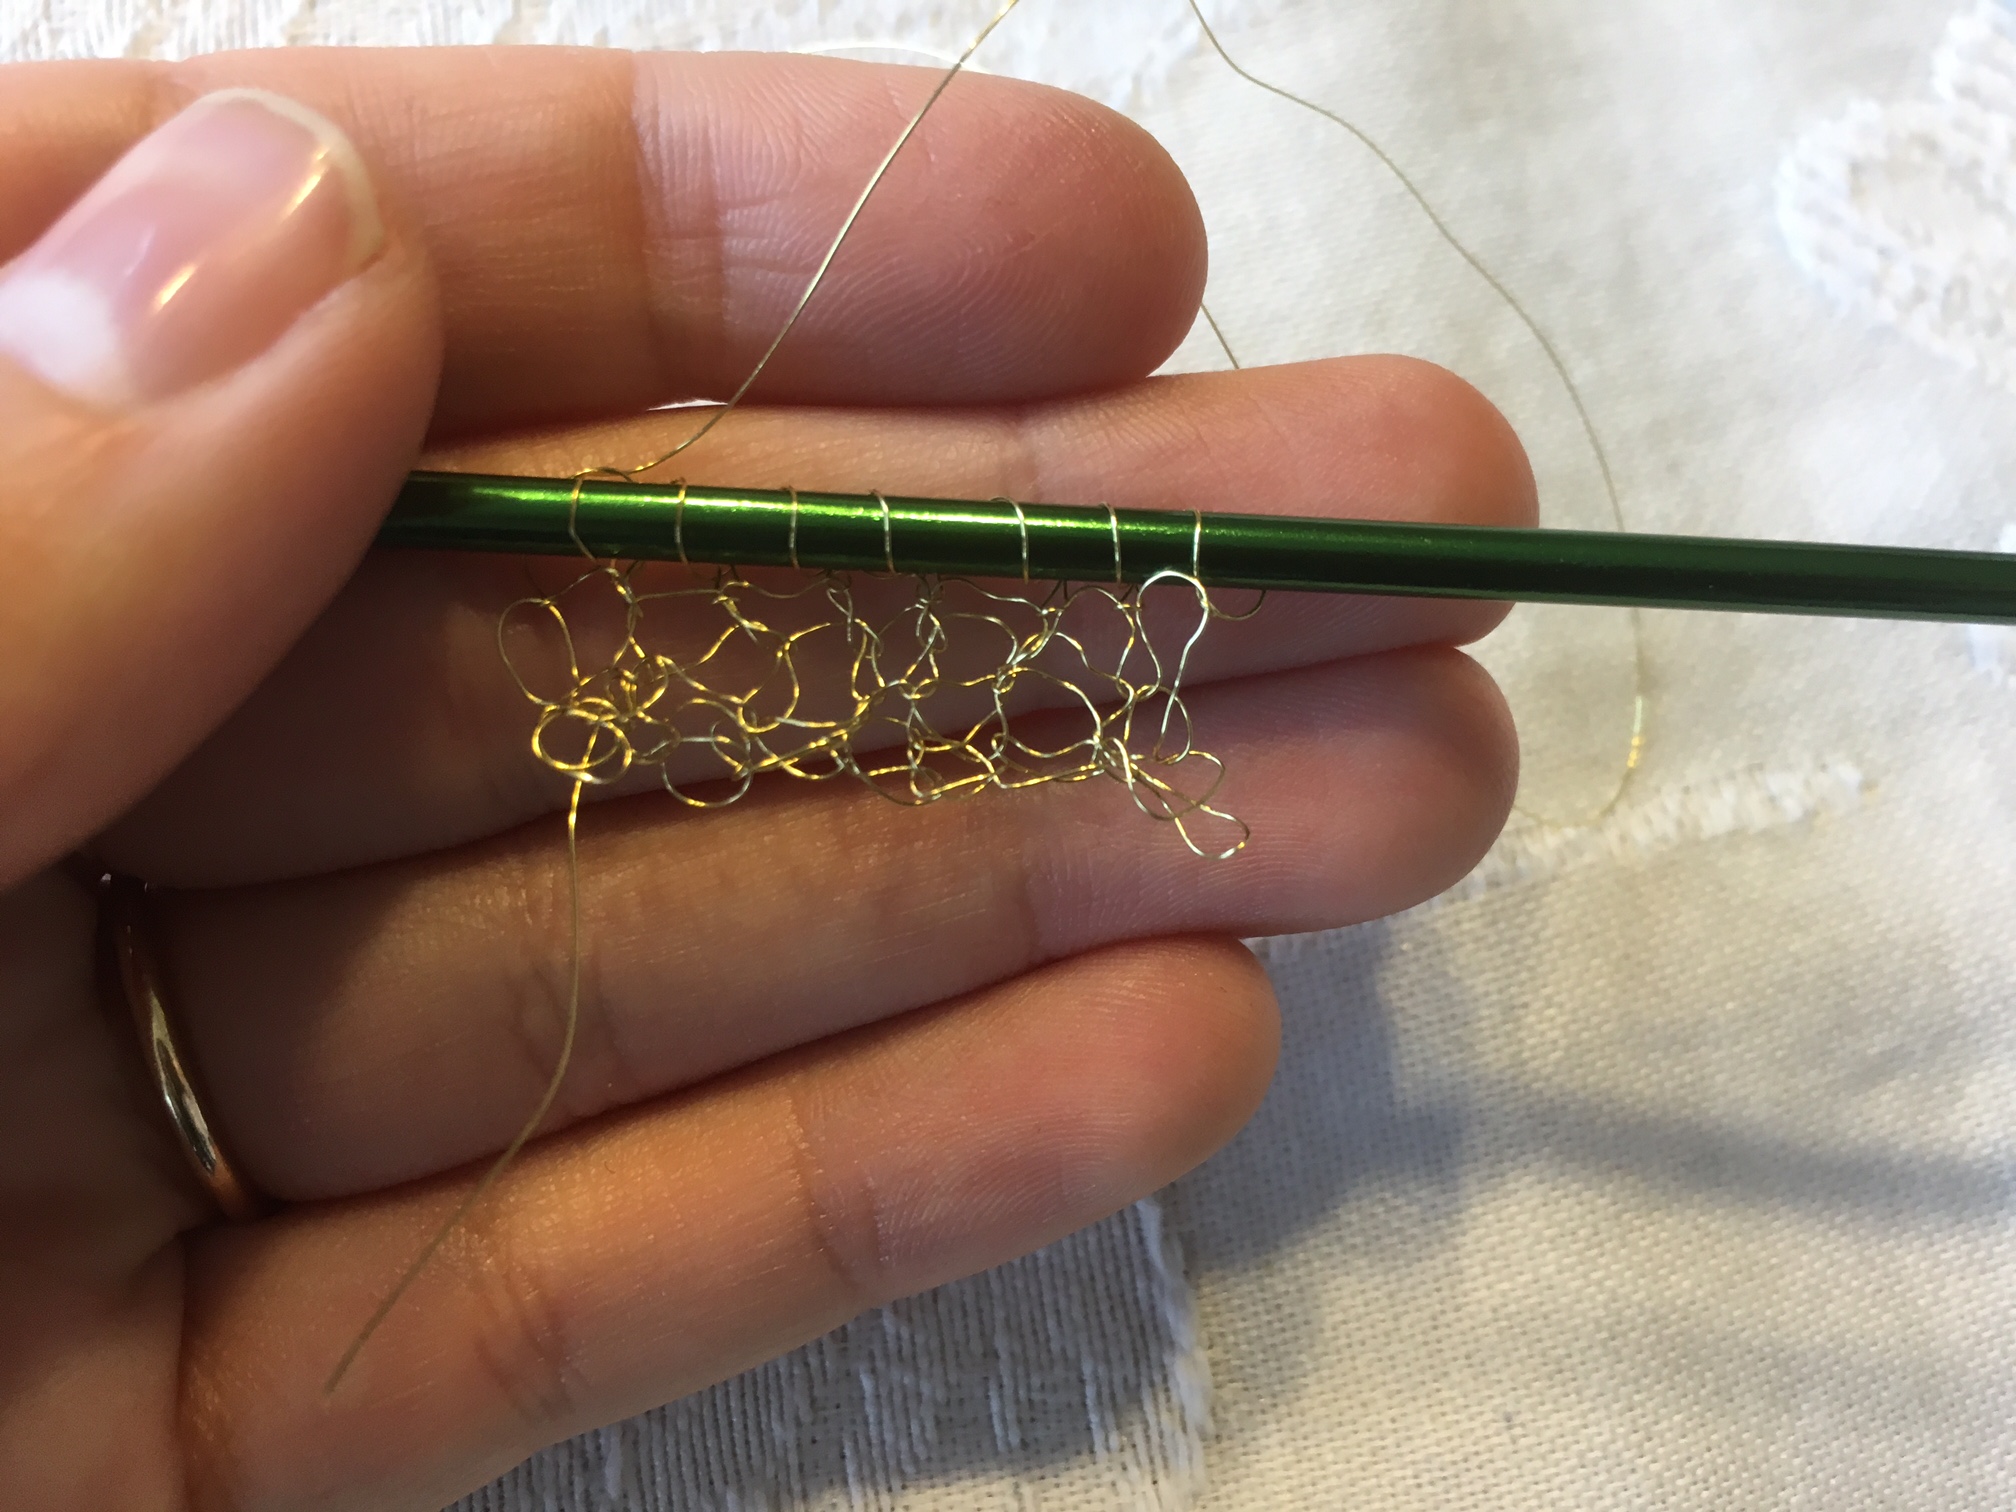
I found one of the Milky Way’s spiral arms embracing a small ranch in Tapalpa. In the darkness I heard two scorpions dancing, singing, We have not been before, and we will not be again.
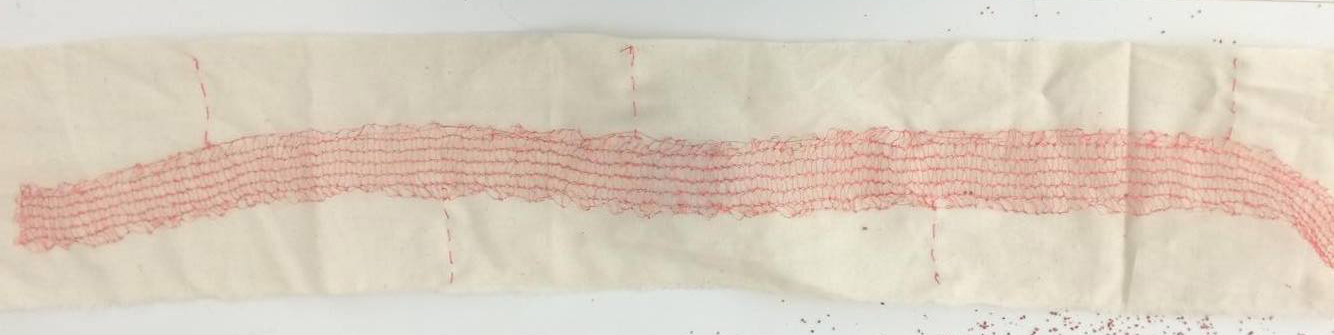
Experience: As two or more people touch the edges of this very long knitted copper wire, the speaker plays the stanza
Sound Sculpture 4: La Pera
I watched a man choke on a pear, and hoped for 6 or 7 minutes that someone else would help him.
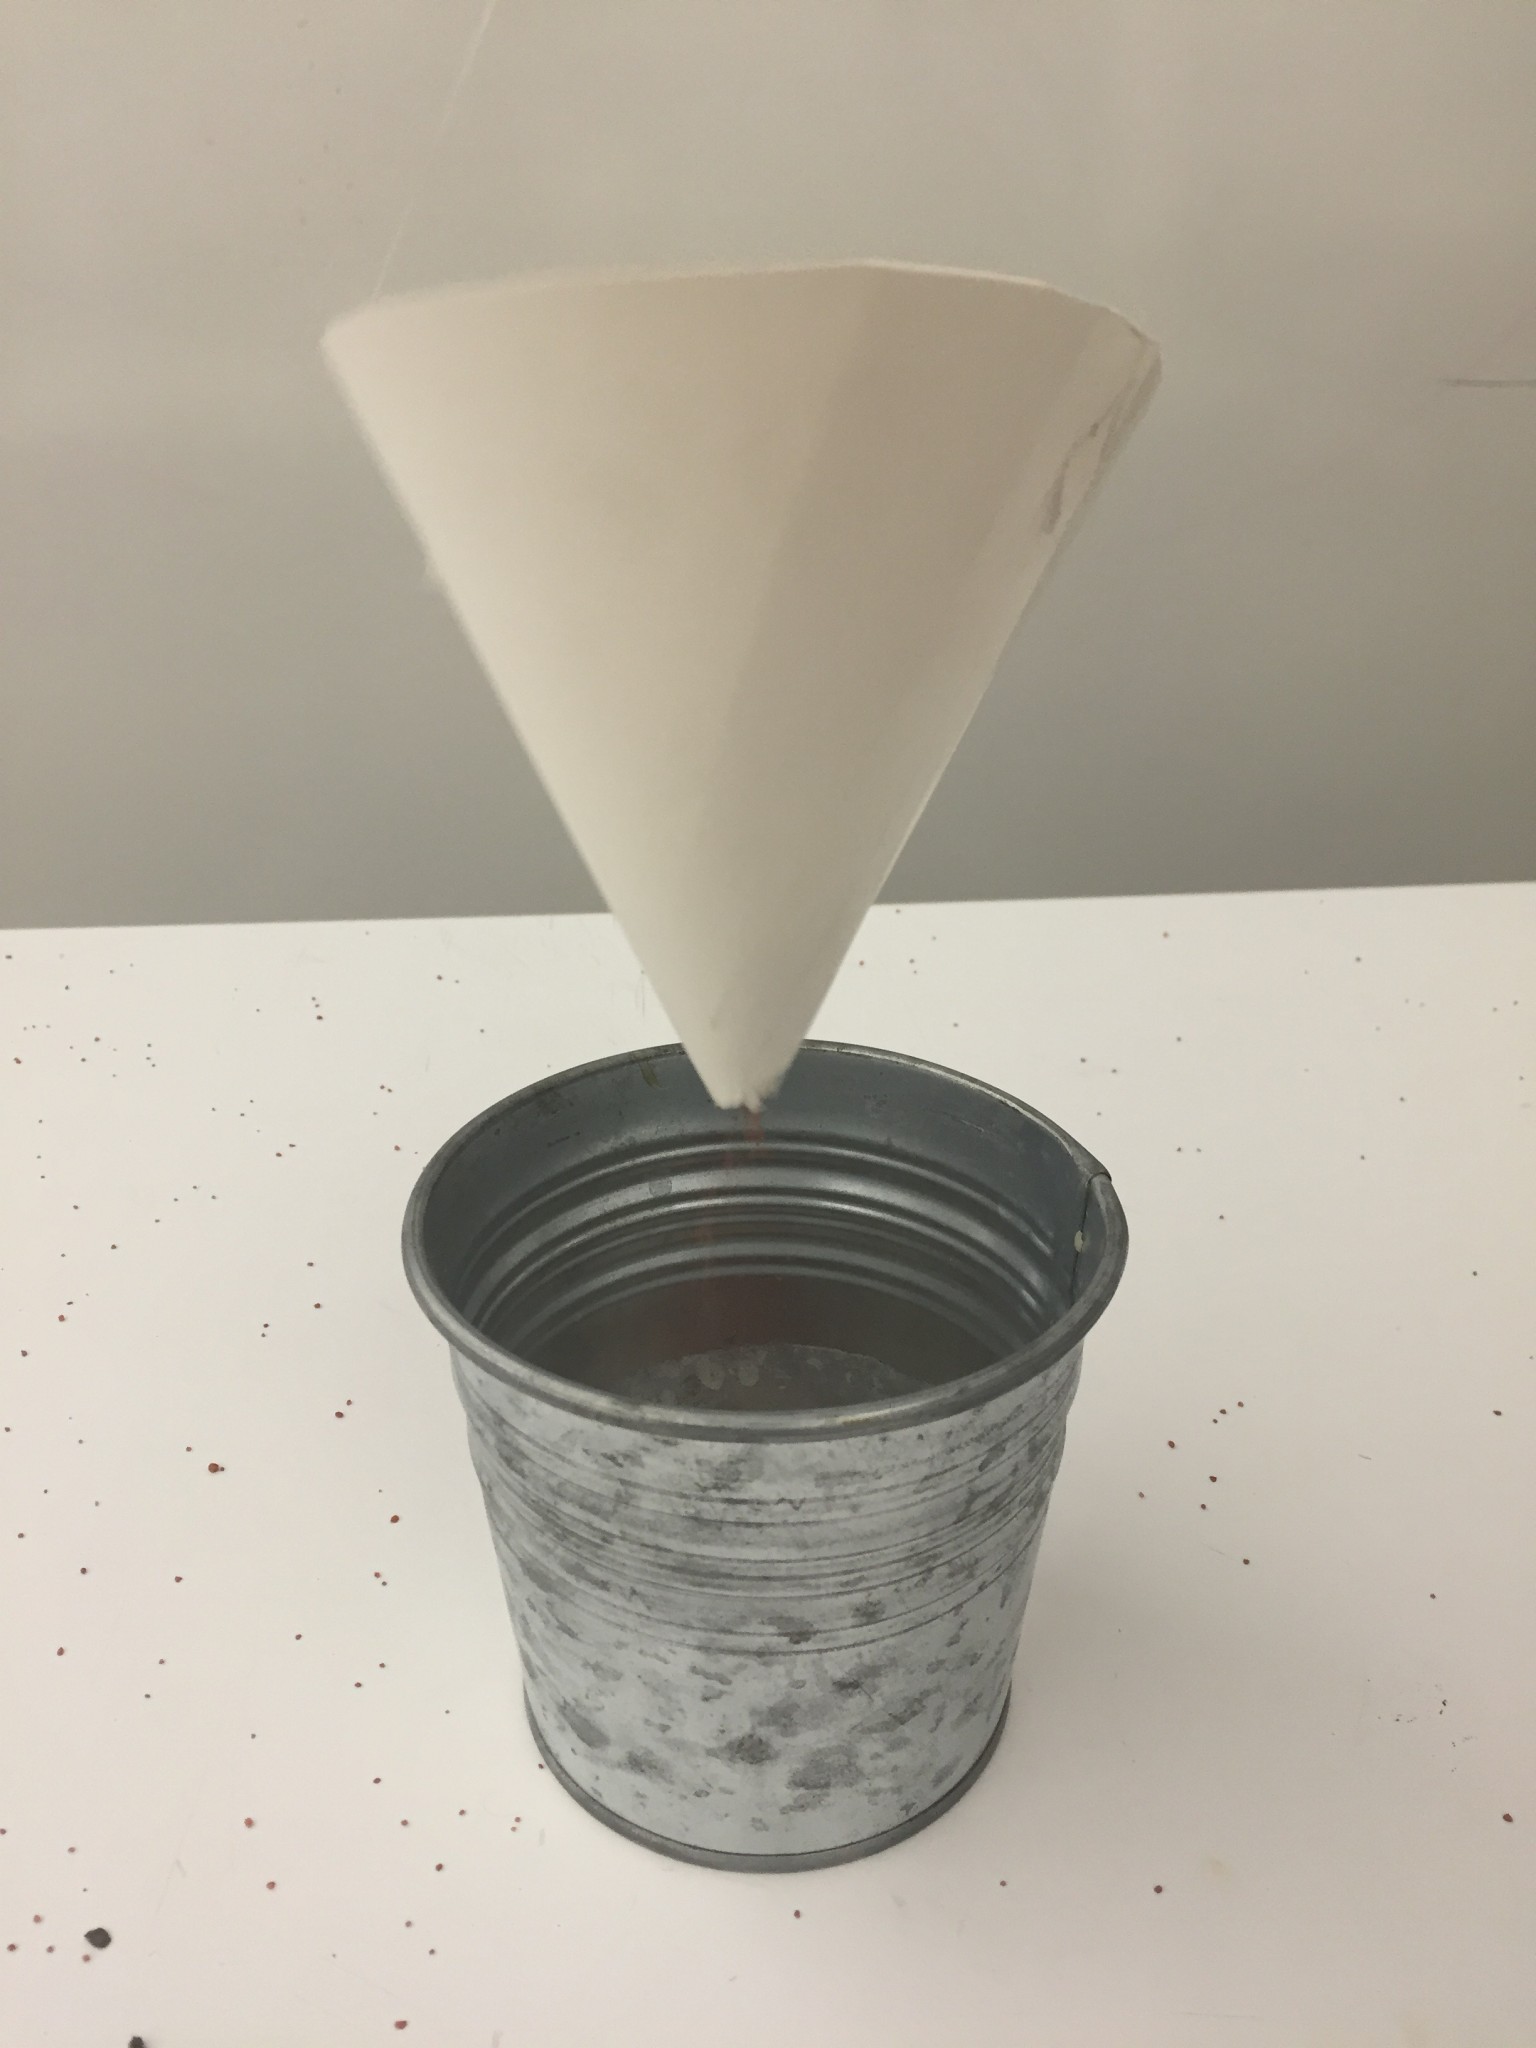
Experience: As sand goes through, the speaker is playing the stanza that is coming from the pot, the more it gets filled the harder it is to hear it