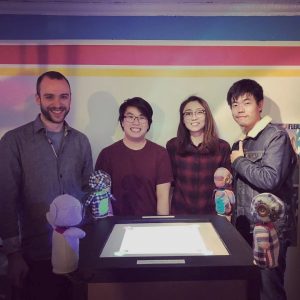
Author Archives: leea666

Final – Owl Prowl

OWL PROWL!

Instructablehttp://www.instructables.com/id/Owl-Prowl-1/
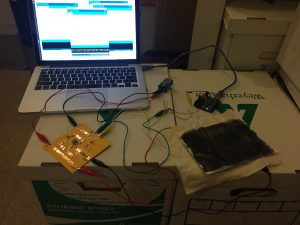
ConceptWe constructed an alternative controller that explores physical gesture and its relationship to playful experiences.

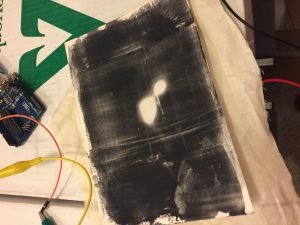
Description: Owl Prowl is a four player competitive game played with alternative controllers. The four players must play as an owl character in the game space. Their goal is to catch the most mice before the time runs out. Each player uses a plushie owl to control their game owl. The game is played in the center of the frame, where the game is reared projected from a projector housed inside the structure. Each player stands on a corner of the structure, which also corresponds to their game space owls’ homes.

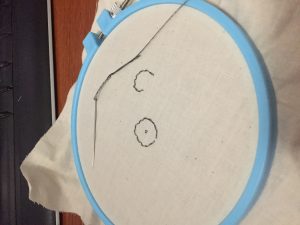
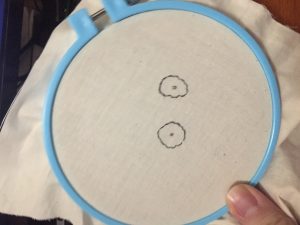
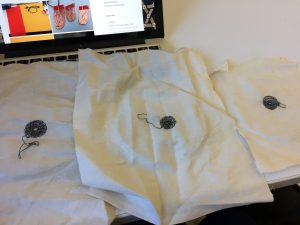
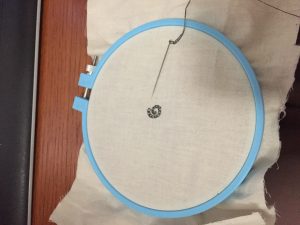
Reflection: Overall I had a lot of fun making Owl Prowl. I learned a lot of new skills such as learning how to use the sewing machine, learning how to make a plushie, and learning that people will be very aggressive even when playing with little owl dolls. It was very sad to see the plushies break after a few hours into the event at Babycastle, but it was an invaluable experience. I learned that people don’t really like to read the rules (or maybe we had to much text and it would be better to have rules in visual form) and that making controllers to appear more intuitive. We noticed players were using the controllers has joysticks rather than spinning their head maybe because the soft owl heads made it more joystick-like.

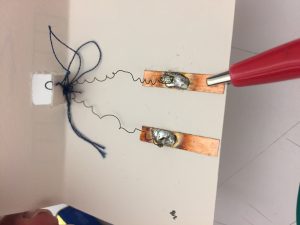
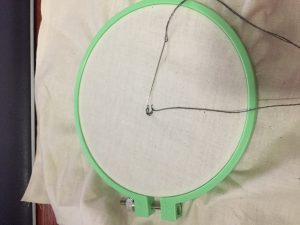
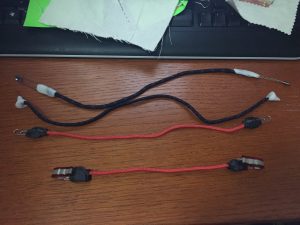
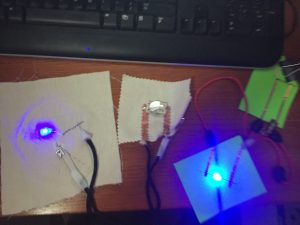
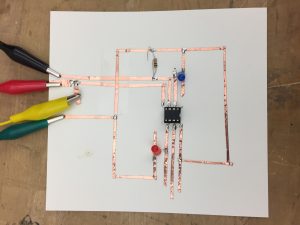
Challenges: Making the plushies as sturdy as possible. Deciding on the game. We spent 13 hours trying to figure out what the game would be (we were trying to make a game with flip dots). In the end, we planned on creating something that would be way too much to do within the allotted time.

Future Iterations: Reiterate on the controllers

I started with building the circuit first to make sure it was worked and then created a story from there. I decided to use paper as the material for the nitinol. It was extremely difficult soldering the crimp bead to the copper tape because the nitinol would contract as it was heated by the solder and didn’t stay in place while I was soldering. Finally I got it to work, I could use a button to make the current go through the wire to open the little gap. I decided to draw a character with one of their teeth being removed (except it gets removed from the bottom, but should be from the top. Also I didn’t have a 12-13 resistor so I ended up trying a 10 resistor and a 47 resistor. The 47 didn’t allow for the nitinol to contract. The 10 resistor allowed the nitinol to contract, but it almost burned.

Week 10 Thermochromic Ink

I decided to make a completely solid color for the thermochromic ink. I thought black was pretty nice when I did the swatch tests during class. I embroidered a pair of eyes that would appear when the circuit was turned on. Unfortunately I think my circuit is broken because nothing appeared. So I put the 9V battery directly to the embroidered pattern and I noticed that the thread quickly heated which caused to make just blotches on the paper. Perhaps I need to make the eyes bigger or maybe it would have worked better with the circuit.


Week 9 Speakers

I made three speakers using conductive thread. I tested the first one I made to make sure it would work, but didn’t test the other two. These speakers ended up being pretty small because the conductive thread kept getting tangled and ripping apart.

Week 8 Assignment

The four connectors I made:

Pin, Paper Clip, Safety Pin, Clip

The hardest one to make was by far the clip because of attaching the adhesive conductive fabric to it. The other connectors were easier to make . Here is a photo of my four connectors attached to my nodes.

Midterm – Color Lamp

Instructable: https://www.instructables.com/id/Coloring-Lamp/

I made a lamp as a tool to help people experiment with additive color theory. Although the lamp is able to display R, G, and B colors at a variance, it could be further improved through tinkering with mapping the colors so that the maximum brightness of all three LEDs could be the same. Currently, the blue LED is the brightest and overpowers the other two while red is the dimmest.

Here is a video of the final lamp:

Week 5 Assignment

Here are some photos of my ATtiny circuit:

1) I would identify myself as an artist, coder, hacker, and gamer in that particular order. I like to make work that responds to my own experiences and seek to see how people respond to my work. Truthfully, I use to hate coding in undergrad because it was super lonely. In my final year in undergrad as well as after coming to DT, I came to appreciate code a lot more and I think coding can create more than just software by creating visuals and installations. I think of myself now as a hacker because over the past year, I have had to figure out things that I wouldn’t necessarily be an expert in and I have always loved playing video games so I would call myself as a casual gamer.

2) I don’t remember what I put down last time for my favorite tool, but right now I think my favorite tool is a pen because I can use it to write words to express myself, but I can also use to to sketch and draw. Whether it is to draw something simplistic or to draw something more formally, it is a very versatile tool to express oneself in a multitude of forms.

3) The new craft I decided to learn was knitting. I used this youtube tutorial and I found it to be really easy to follow. The first attempt was not the easiest, but I was honestly proud that I made it through to the end. I messed up a few times where the yarn fell off the needle and I couldn’t figure out how to get back to that knot, so I just kept going and so there are a couple of holes in it.

The second try as a better and easier as I got into the zone, but I still messed up.

Finally the third try, I did the best. I think it looks good, but the hardest step I think is always the first row of knitting after casting onto the needle. I am not sure why it is the most difficult step. I also had some trouble with casting off, but after the first and second, I got use to doing it and I have to say it is easier now.

Overall I really like knitting. I think once I get into the zone, I can just keep knitting mindlessly and multitask while watching TV or something. My advice would be to definitely use the tutorial I used because I found it super easy to follow.

Week 4 Assignment

We created a circuit using three buttons that each individually lit up different LEDs, which was done by using if/else statements. If button 1 was pressed, then the white LED would turn on. If button 2 was pressed, then the red LED would turn on and finally if button3 was pressed, then the blue LED would turn on. Here is what the circuit looks like:

We created a video explaining what was occurring in the circuit.

The most fun part of doing this video was definitely planning the skit and making it with friends. The most challenge part was also planning the skit. We weren’t sure if we had enough information. We considered getting another person to represent the arduino and have ribbon act as the “wires” connecting from the pins to the arduino, but we decided it would be best to keep it simpler and just show what was happening with the power from the button to the LEDs.

Week 3 Assignment

I made four pressure sensors this week, but I originally planned on making them through sewing conductive thread into cotton cloth, but it didn’t work out well at all. I think maybe I need to find thicker and better quality cloth than the ones I bought from Michaels. Or maybe I just need to practice my sewing because it was painful how awful they turned out.

So I then decided to just go back to paper and cooper tape. I remembered that pressure sensors worked better working with weaving conductive materials together rather than just having two large conductive pieces with a resistive material in between. I ended up making strips of paper and copper tape and weaved them together to forming this:

I glued them together to form a square and then added some velostat in between as the resistive material and created four pressure sensors. It worked really nicely I think, but I noticed when I tested that some electricity would already go through it without adding any pressure. Maybe the velostat layer had to be perfectly cut to the size of the square to cover up all of the cooper tape connections or maybe I needed a higher resistive material. Overall I am really happy with the results and can’t wait to make more sensors! Goodbye buying sensors and hello crafting sensors!

– Aaron Lee

Week 2 Assignment

I chose the children’s book The Very Hungry Caterpillar and the scene I chose to illustrate was when the caterpillar was inside of the cocoon resting. Since we can’t see the caterpillar inside the cocoon, I wanted to illuminate that the caterpillar was indeed inside the cocoon undergoing transformation. So on top of a drawing of a caterpillar I taped a piece of scoby on top to hide the caterpillar and act as a cocoon. When the lights shine, you can vaguely see the caterpillar resting inside of the cocoon.

My first attempt, I used a thicker piece of paper and the light was able to shine through, but it was so thick that the lights weren’t bright enough to illuminate the drawing through the scoby. Here is the circuit that I built:

I ended up redoing the drawing on a regular piece of printing paper and since it was thinner than the other paper I used, the light was able to illuminate the caterpillar.

It is hard to see from the photo, but I think its clearer when you see it physically.