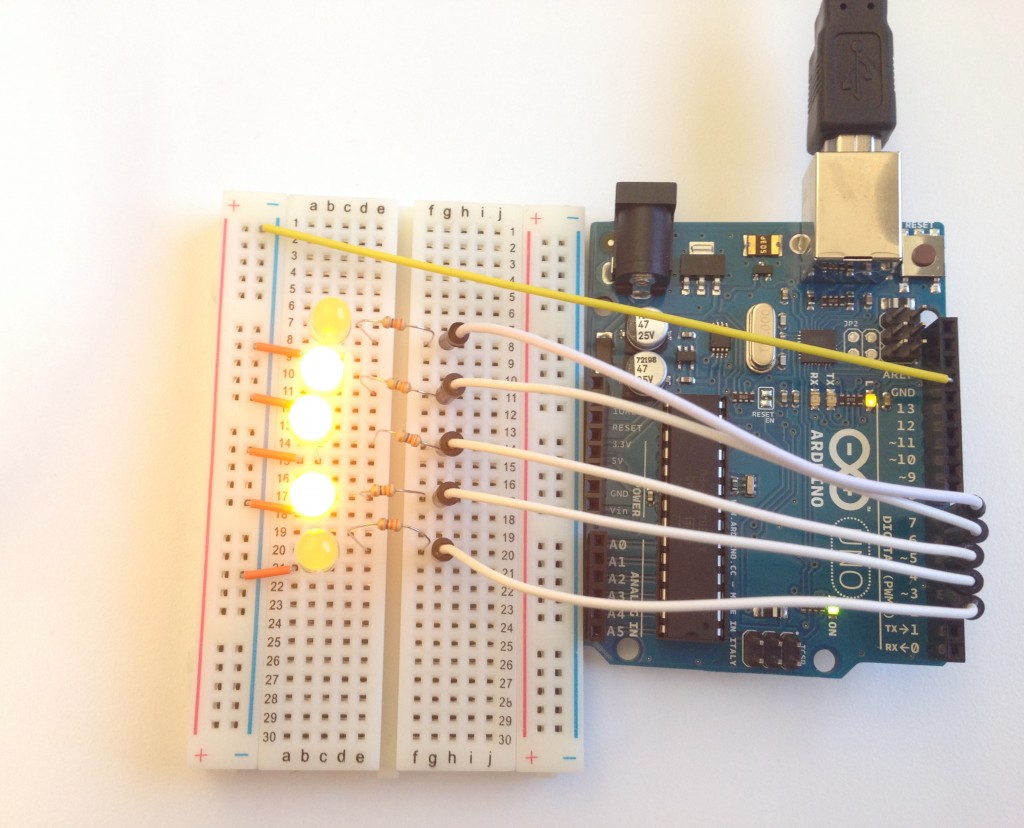
https://www.youtube.com/watch?v=OsP26bBU6zY&feature=youtu.be For the LED emotion homework I decided to manipulate the code of the Arduino in a way to have several LEDs in an automatic on/off manner. I covered it with craft cotton paper that diffused the light and made it look like a jelly fish. As the LEDs alternate between on and off, the Jelly fish appears that it’s breathing. 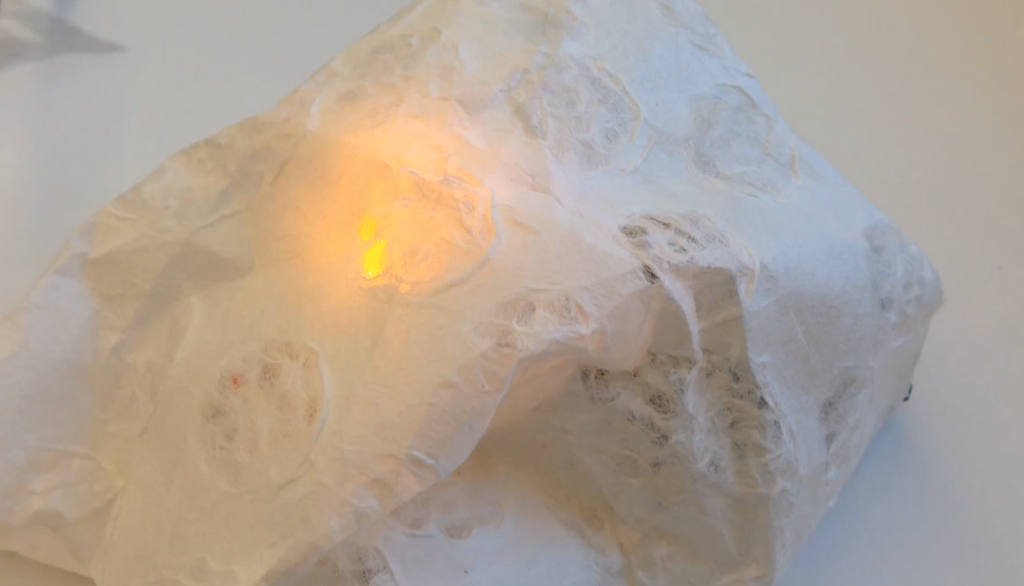
Knit Night Light:Midterm

BEACON Instructables

Midterm – IED Meditation Lamp
Midterm: Light As Paper
DIY Scarf Instructable
Learn how to make your own light up scarf by following my instructables here.
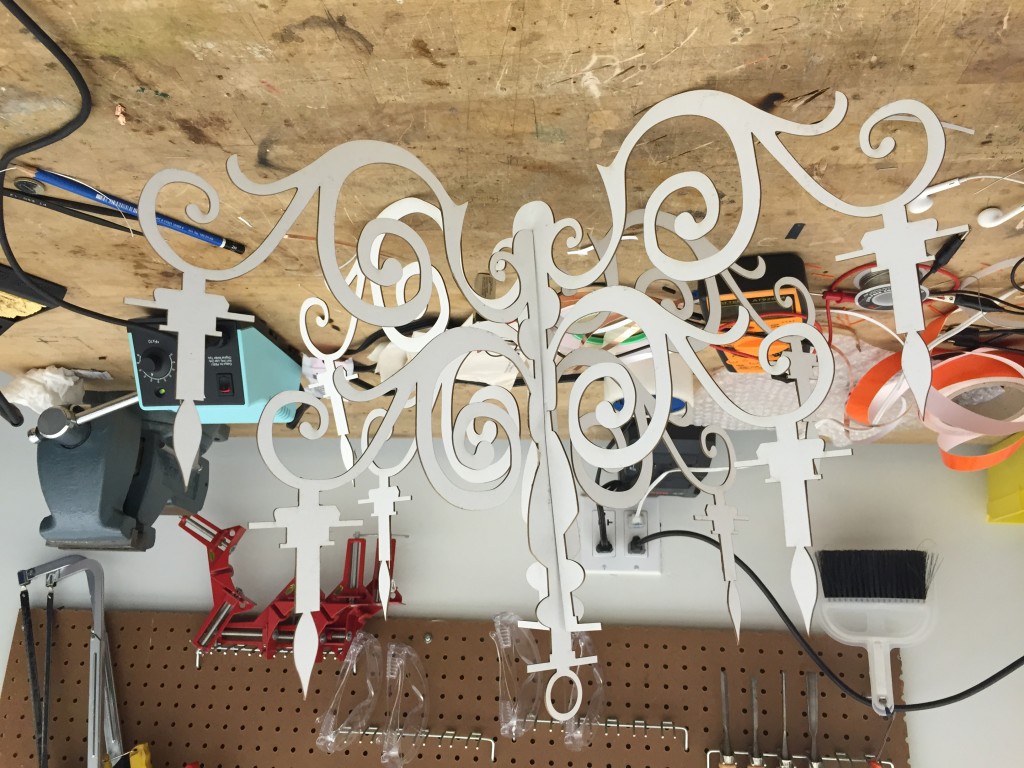
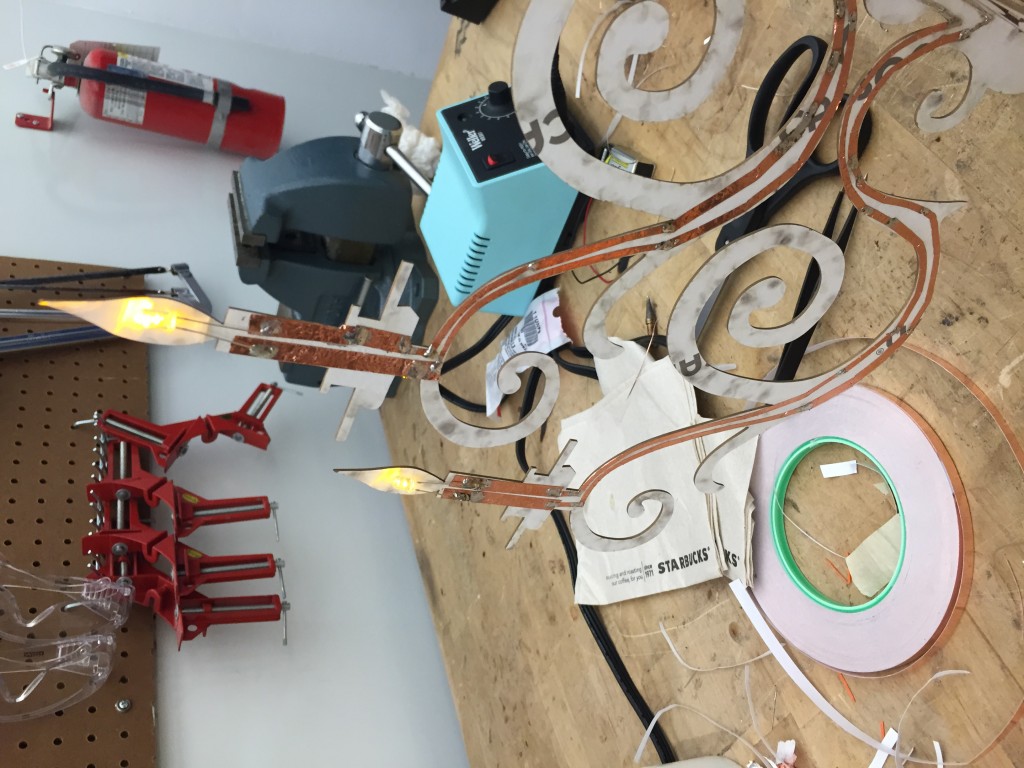
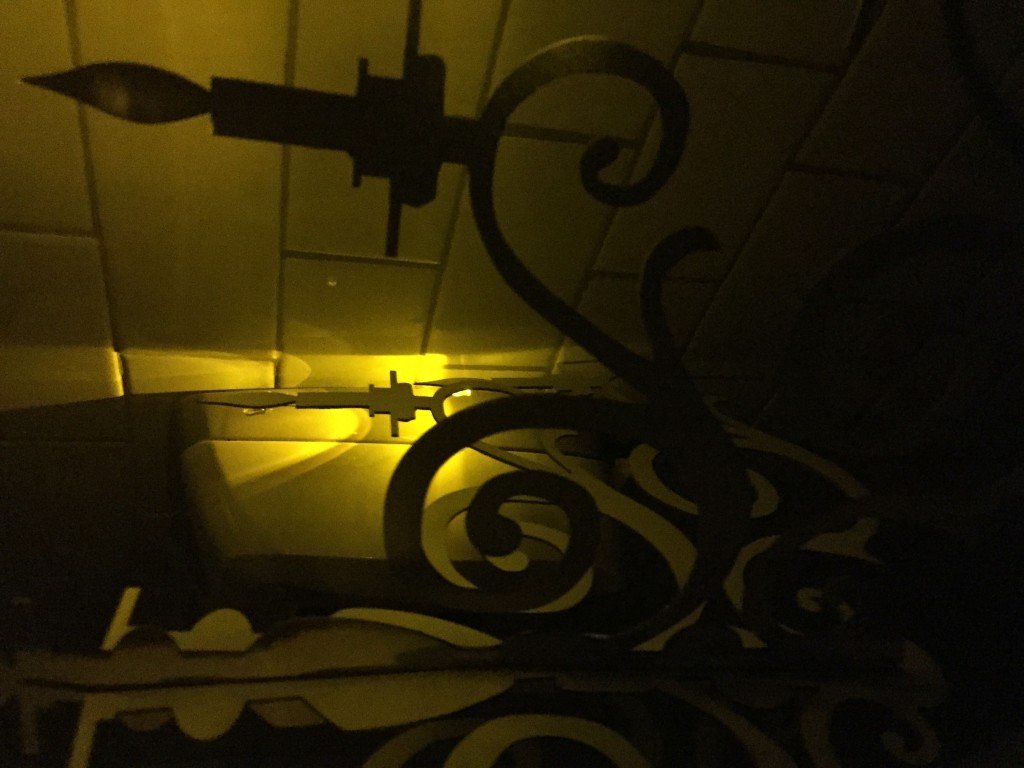
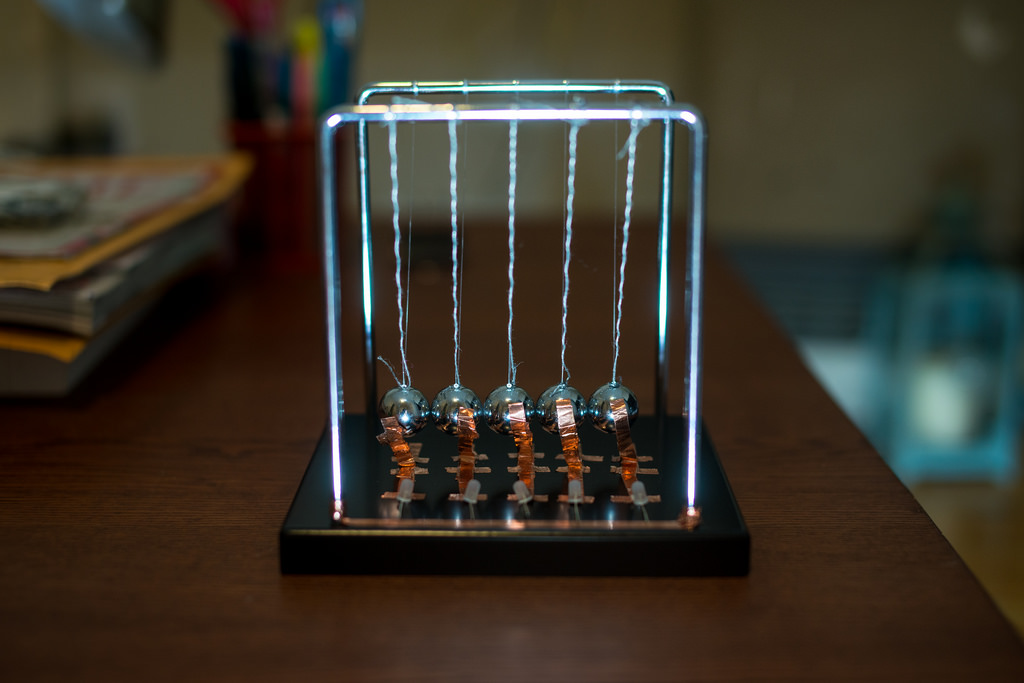
Newton Circuit (Midterm)

Midterm Project – Story Box – Xinhe
For my midterm lamp project, the inspiration came from the traditional Chinese shadow play.
Characters and stage sets are made by leather, and performers control the puppet behind the screen. Lights behind the screen let audience enjoy the play vividly.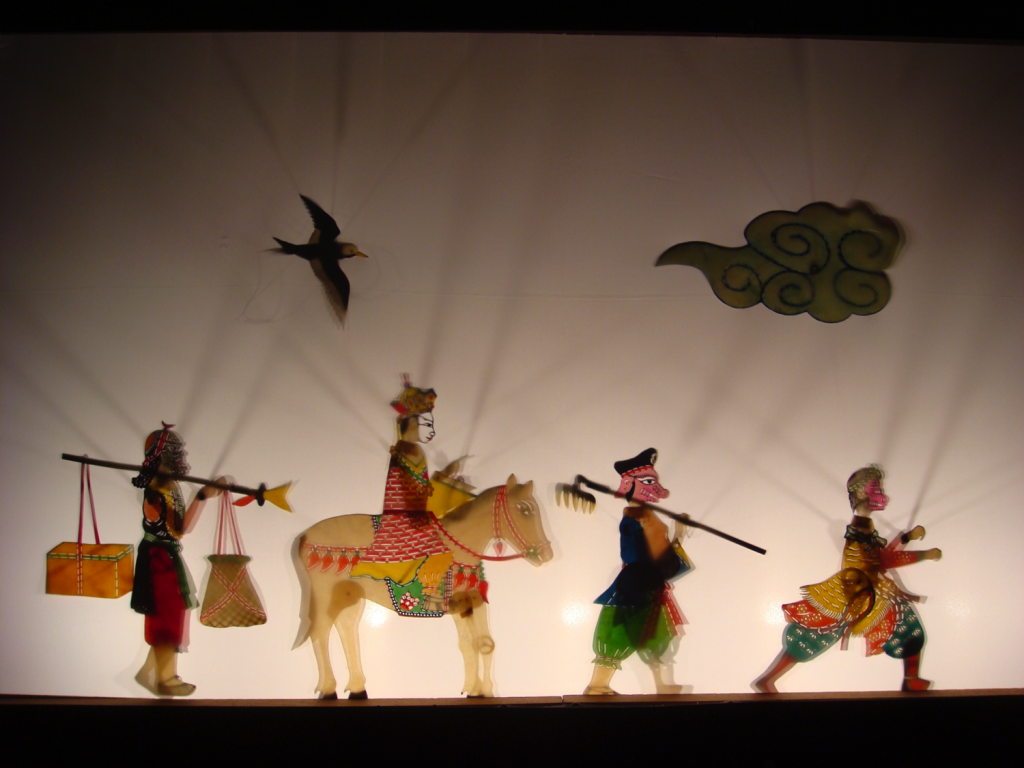

Using shadows or the transparency of materials to design lights is quite popular. There are amazing works playing with similar ideas. However, I feel there is a lack of interaction, and it might be interesting to add some functions along with the light.

The concept of my design is to make a story light box. By changing the color of light and placing different story boards, users can create a small stage and tell a story out of it.
Here is a demo video:
midterm project ; actual piece
So this is an instructable video that I made (my metal ball still didn’t come …)
the name of the project is A mazeing lamp. (I don’t know this makes sense or not, tried to make a word with amazing and a maze)
The piece does not require a lot of coding and it is easy to make. I focused on the interaction between the user and the lamp, so the lamp itself becomes a game.
The laser cutting and connecting the circuit was the most challenging thing for me. Somehow the connection between the “trigger” and the copper tape didn’t work.
My final did not come as I thought but as I was making the project, I learned how to laser cut and the amount of the time that I have to spend to make this. It took a lot longer than I thought.
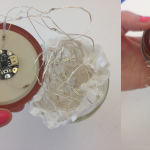
The Firefly Lamp
My project was a second iteration of my firefly lamp. I wanted to make a jar of fireflies that felt more organic than the first one I made. I also wanted to make the switch as simple as a turn of the jar lid. I wanted to create a magical feeling of organic and glowing objects. This object could function as a nightlight or centerpiece for an indoor or outdoor table-setting. It is for anyone who likes mysterious and magical objects. Check out my instructable on how to make it!
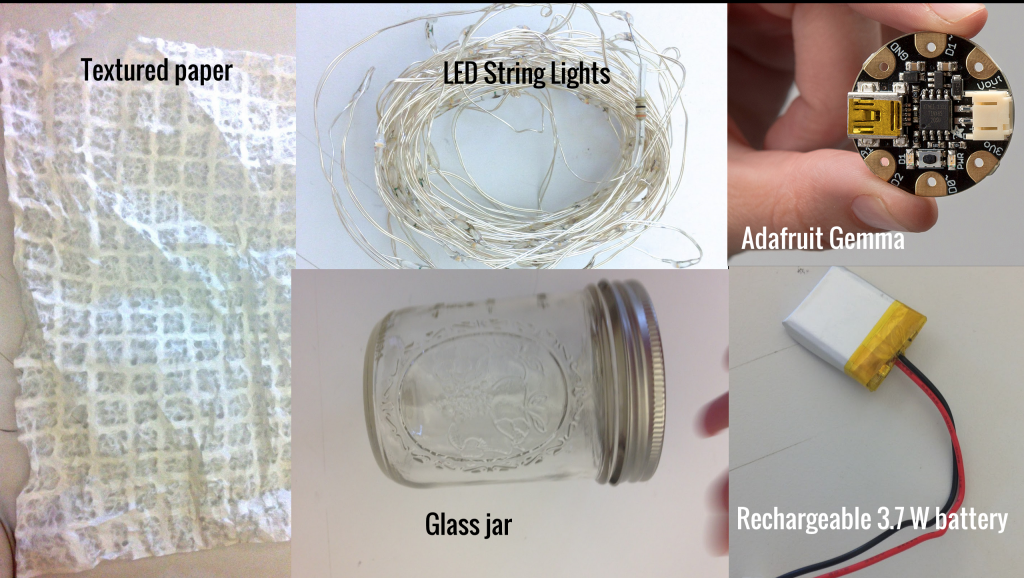
The biggest challenge was finding out what kind of resisters to use with the cut up light strings. I read on some forums and discovered that 47 Ohm resistors were needed. I then soldered them to the positive leads of each light string before connecting that to the Gemma. then I had to attach copper tape to the lid rim on the inside. I also soldered the negative lead from the battery cable to copper tape and placed that in the lip of the jar. So when someone closes the lid the two copper pieces make contact and that completes the circuit to send power to the gemma and start the lights going.
The Firefly Jar is made with Arduino code programmed onto a Gemma. I also used LED string lights from Sparkfun, copper tape, glue, paper, solder, a rechargable 3.7 V battery and a Ball Jar. The light turns on with a twist of the lid. Code on Github.
-
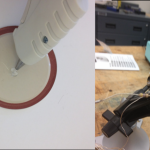
- Gluing the Gemma to the lid
-
- The lid prepped and attached to the lights
-

- Cutting the lights into three segments and wrapping the lights in paper.