Author Archives: K.K.

Final Project: Self-portrait (Video Clips)

instructables: http://www.instructables.com/id/Self-portrait-1/

Finally, my paper garment is connected to a brain wave sensor.

In this semester, I focused on materials and power tests. Originally, I wanted to connect a Pulse sensor. But, I realized that I needed to figure out more specifically emotions and human vital sensors. So, I tried to test out a Neurosky of the meditation Journal that could be concentrated on myself. In this part, Birce and Fito supported me fully. (Thanks a lot, guys! I really appreciate your help! <3 <3 <3 :))

The threshold of Neurosky was 50. If the number goes above 50 with the electric current, the colors show up black to bright ones. If cooling down, they are covered by black colors again.

Final Project: Self-portrait

1. Concept

My thesis project, Self-portrait is an experimental interactive wearable paper garment for performance, which uses thermochromic pigments, soft circuits, and Arduino connected to my vital signs such as heartbeats or brainwaves.

My concept is all about self-esteem, self-portrait, aesthetic emotions, and human connection. I express my internal feelings and emotions in front of audiences through the garment which means to reveal my true self as the second body instead of myself sealing, faking or hiding behind the technology. Ultimately, I aim to find ways to reach healing moments with audiences through empathy.

2. Inspiration

1) Probes; Skin Dresses by Philips Design (2006)

01

2) The Ger Mood Sweater by Sensoree

02

3) Documentation

We might feel LEDs bring out more aesthetic qualities. However, I realized LEDs connected to sensors exist already and are no longer attractive to me. So, I followed another line of inquiry like thermochromic pigment for my thesis prototypes.

I made 10copies of the heating circuits for lower power and longer threads.

05

 Then, I set up chipboard on a dress form. I painted 4 different colors on thin papers.

On the first layer, I painted on normal acrylic colors and on the second layer, I covered thermo ink. When heating up, the bottom layer showed up.

08

4) Final Scene

I will upload a video version soon. Thank you.

thesis_01

Midterm

Title: The Healing Lamp

1) Concept + Design + Goal:

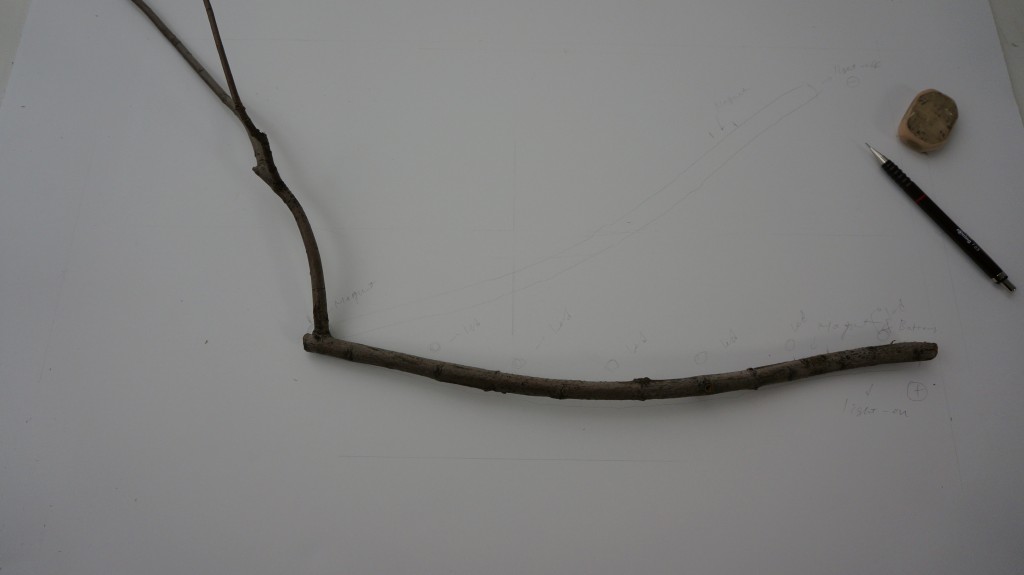
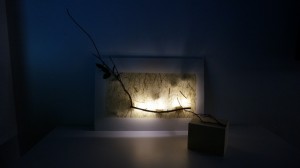
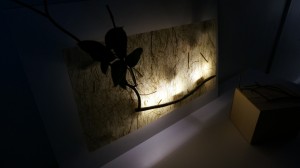
The lamp is designed to be environmentally friendly with visible and touchable functions. The branch is the symbol of nature. The natural shapes give us comfortable feelings and emotions.

It is an aesthetically artistic item even the branch lights off. I design for a person who needs to decorate easily on the wall in any place. This can be so simply easy to set up. Or, anyone can make this product in one’s place looking at the instruction.

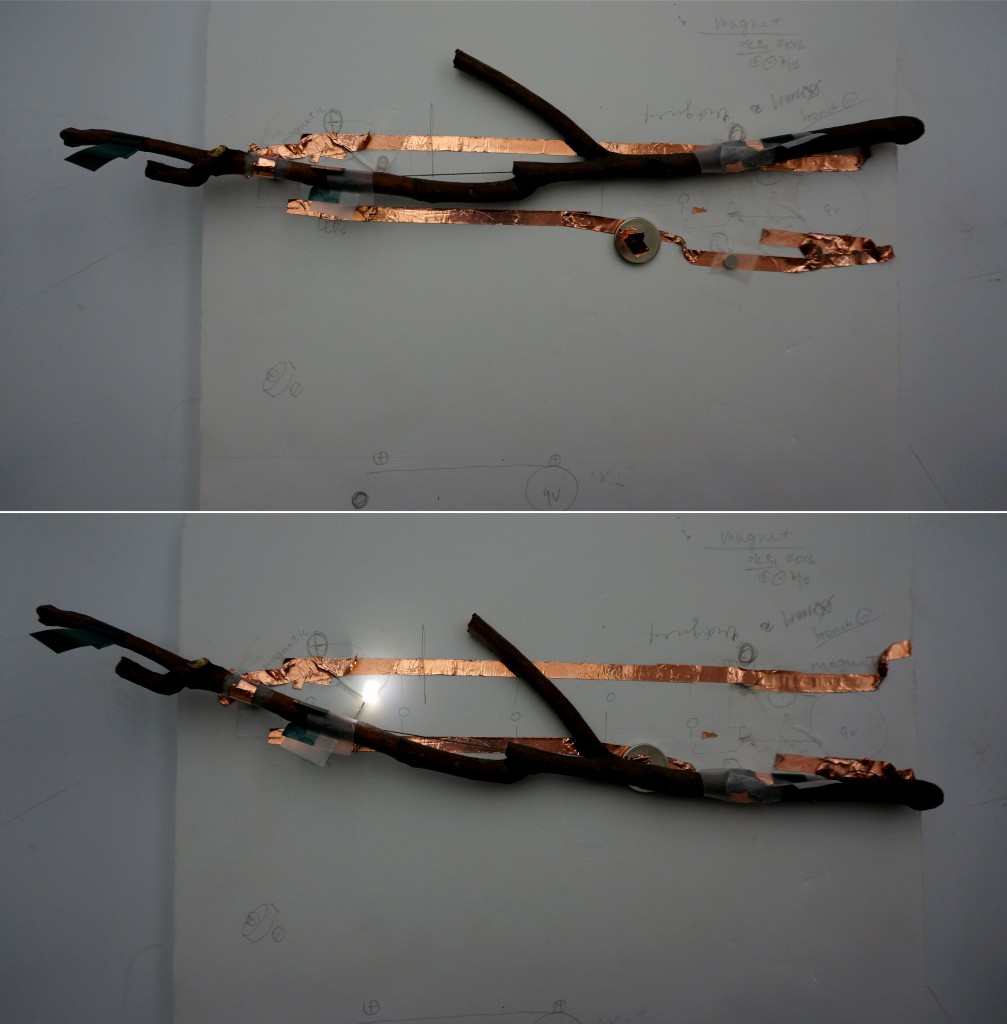
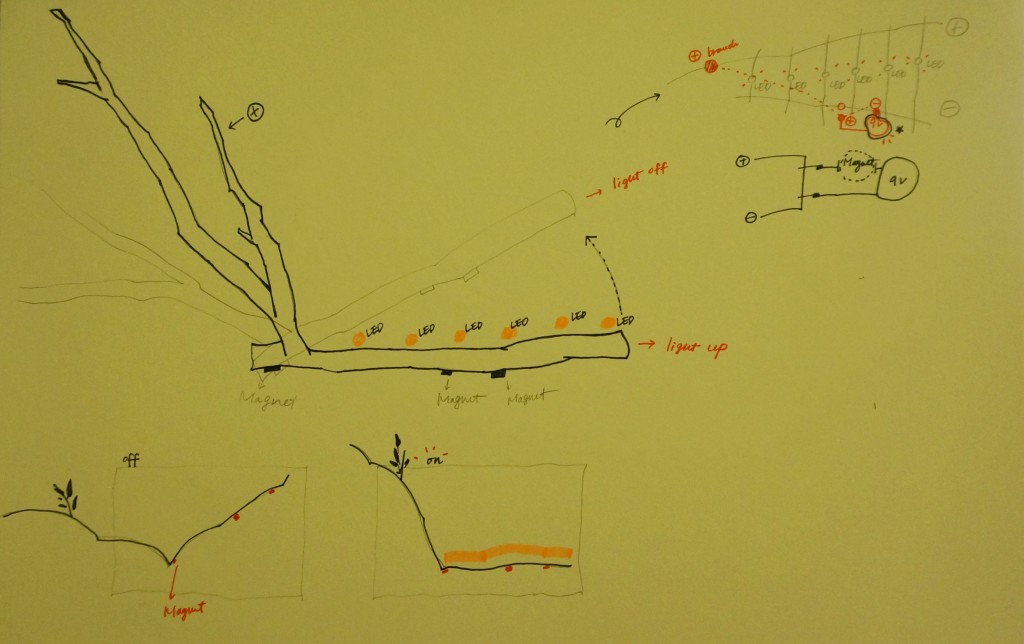
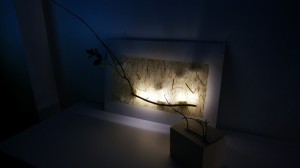
The function is able to do only “on” and “off”. The branch on the left side has one position. If someone switches down the branch on the right side, then the lamp lights up. It moves easily as magnets on the back of the branch stick together connected to “+” or “-” circuits.

The main point what I learn in this project is to drill the tiny holes for electric flows directly with the branch. The magnets only work for adhering to each other on the opposite surfaces and cannot be flowing electrics over the panel without the holes.

2) Documentation

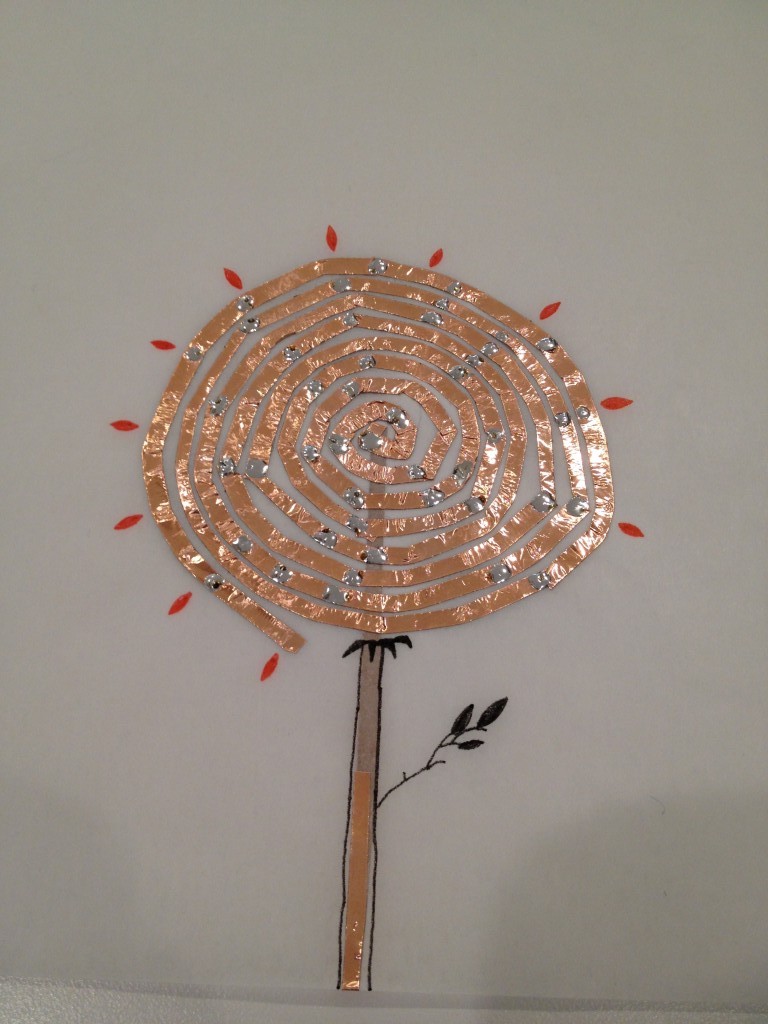
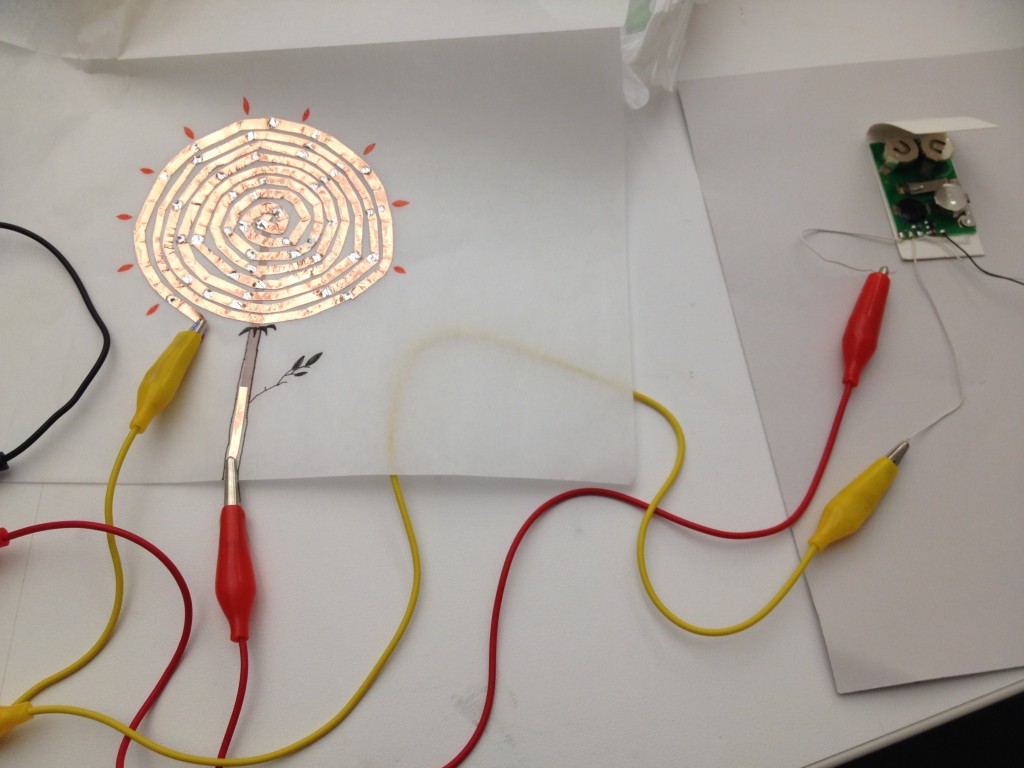
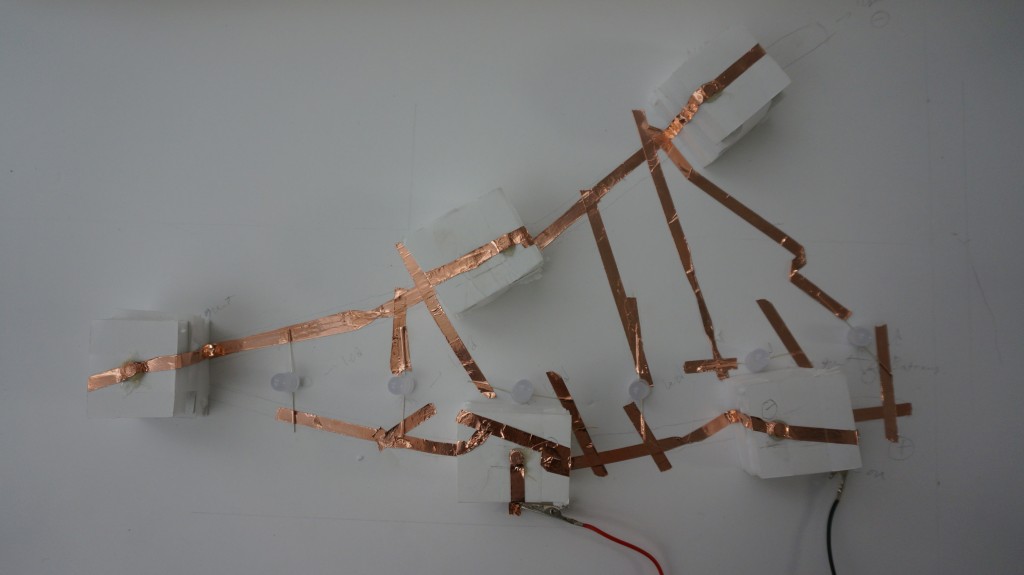
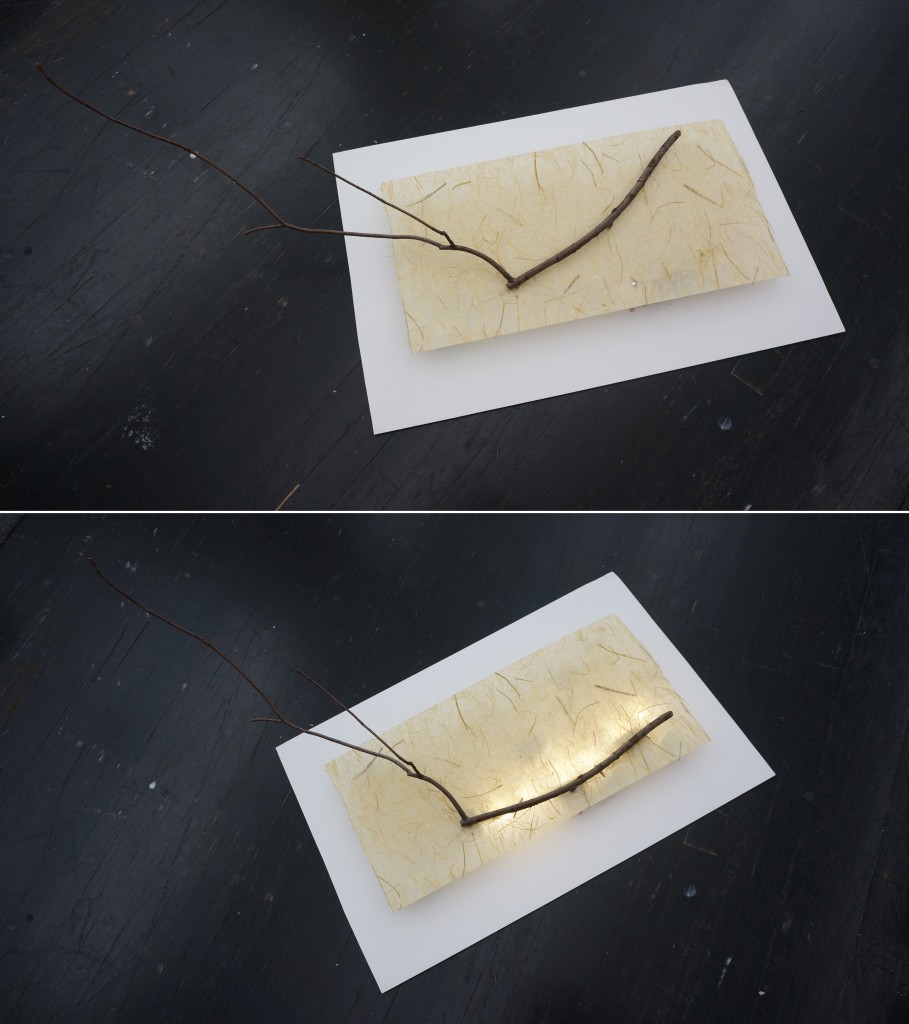
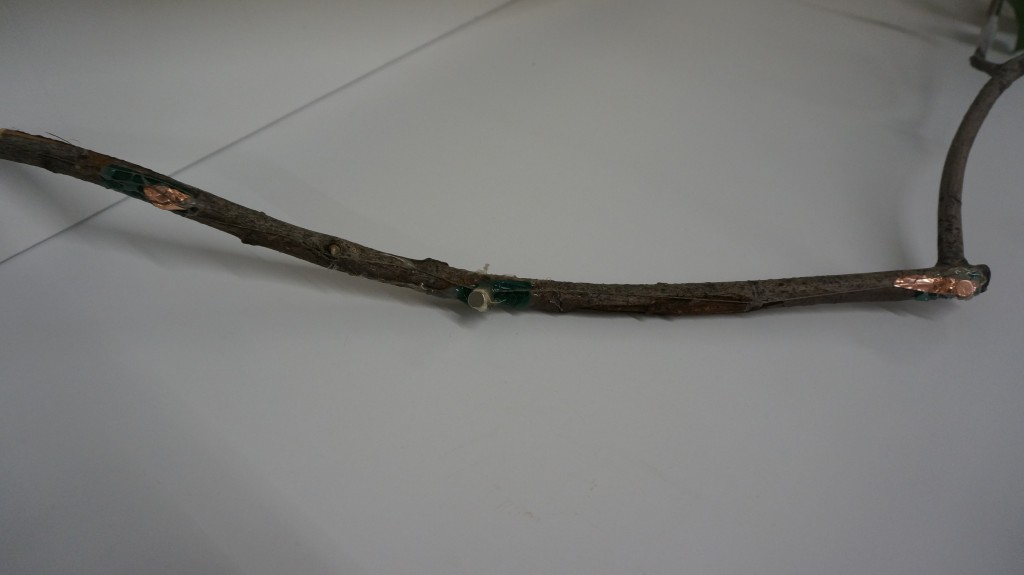
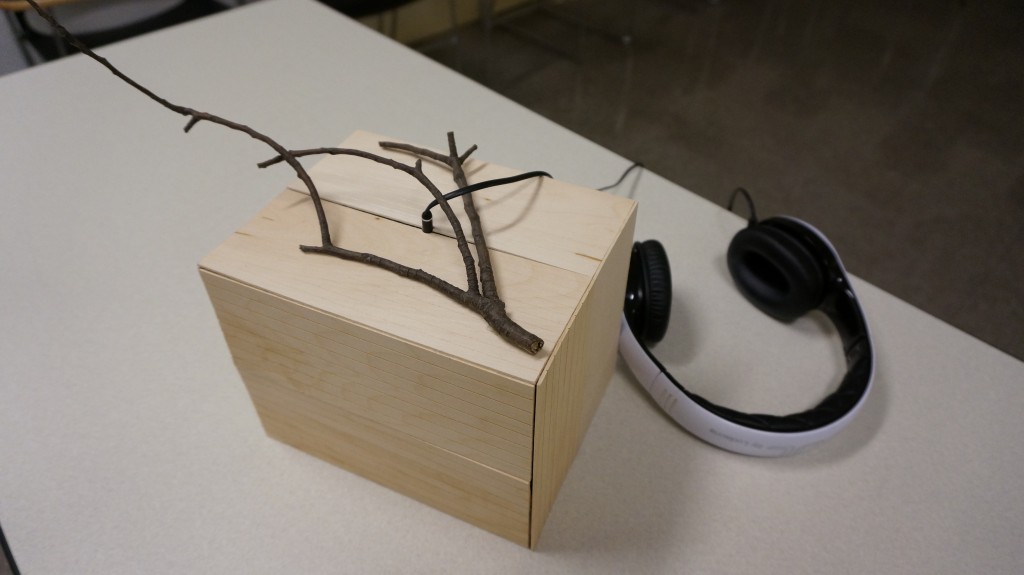
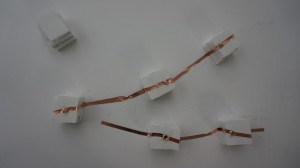
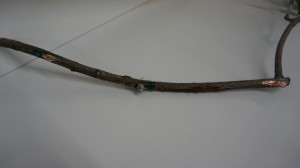
1. Prototype: A small size branch with circuits. The upper line of circuits is off and the bottom line is on.

DSC03401_1

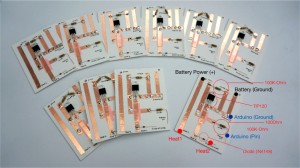
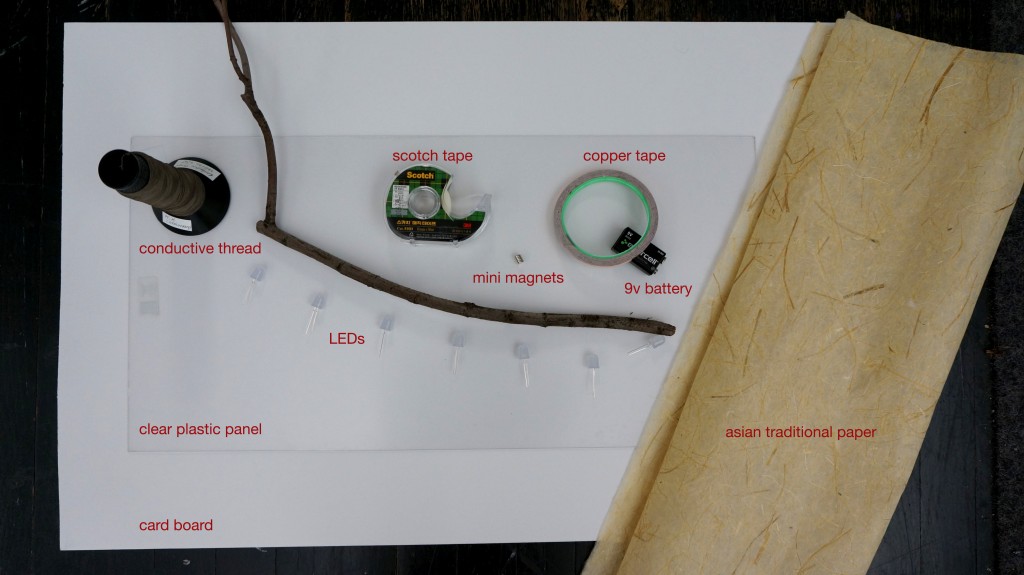
2. Materials: a card board, a clear plastic panel, asian traditional paper, a branch, 6LEDs, copper tape, 9v battery, magnets, scotch tape, conductive thread.

DSC03404_1

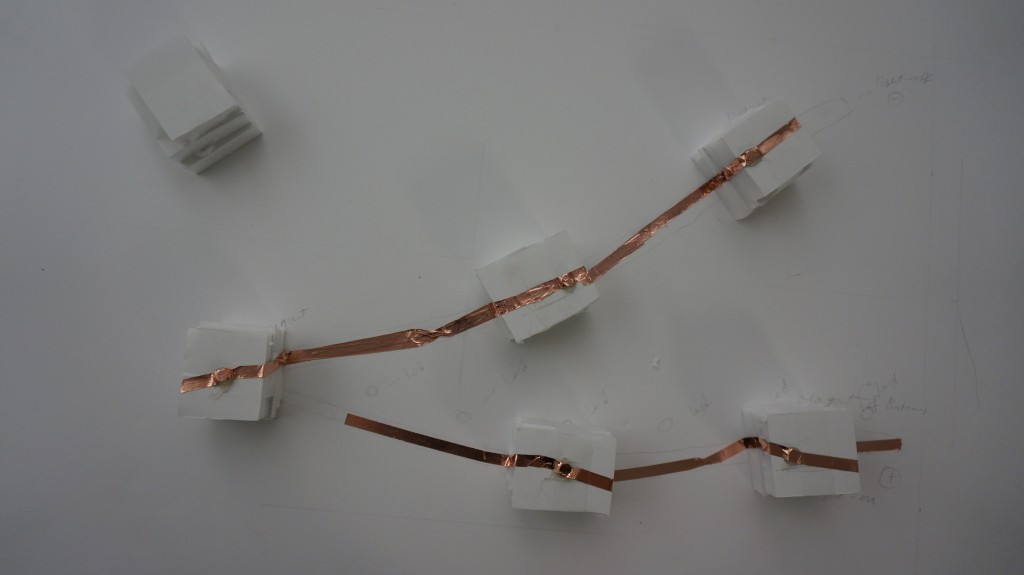
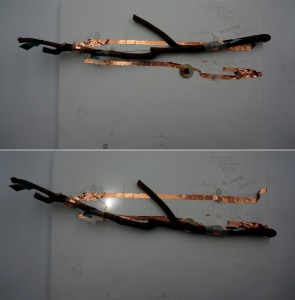
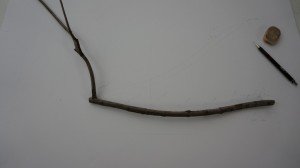
3. Draw circuits on the card board.

DSC03412

4. Make the space around 3~4cm with the pieces of the extra boards and place copper tape with magnets.

DSC03419 DSC03425

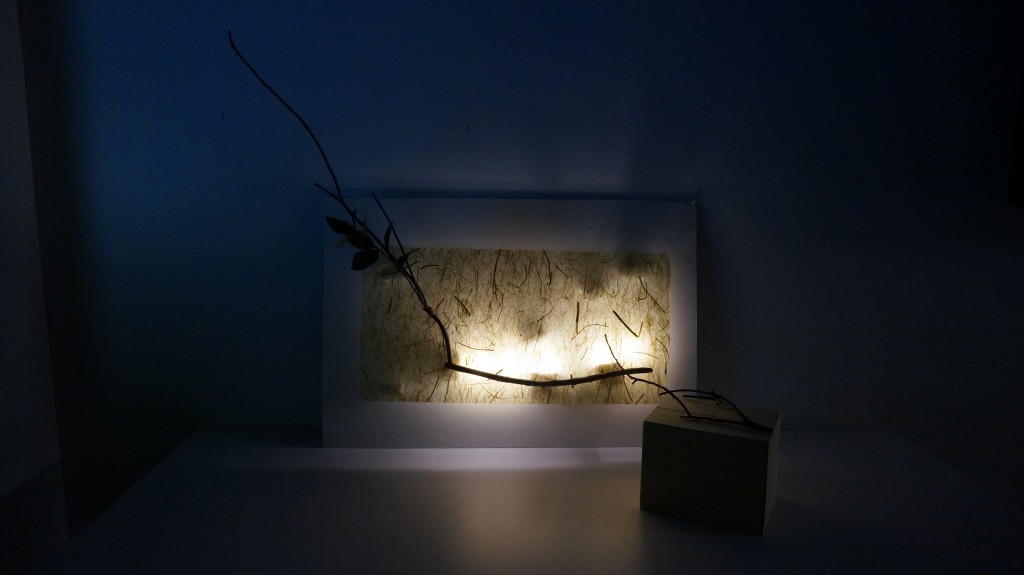
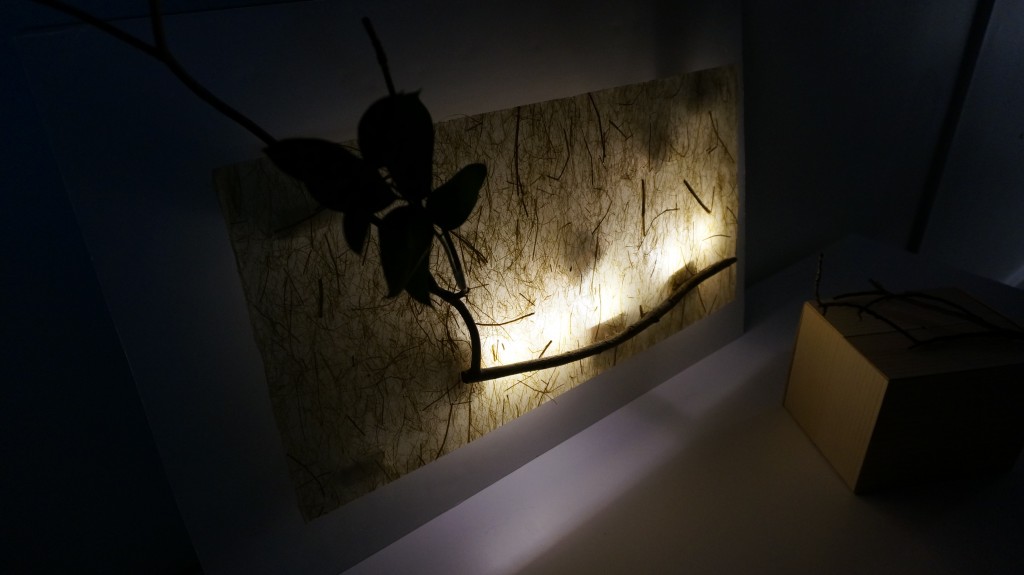
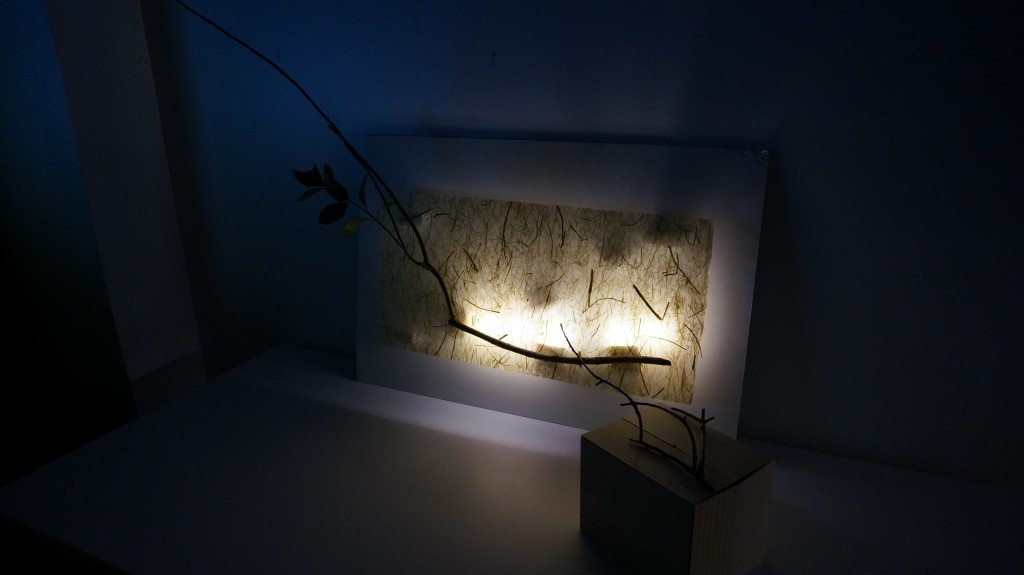
5. Two different shapes according to the angles.

DSC03432_1

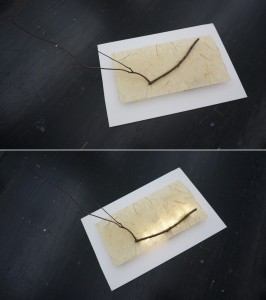
6. Set up on a table or a wall.

DSC03469

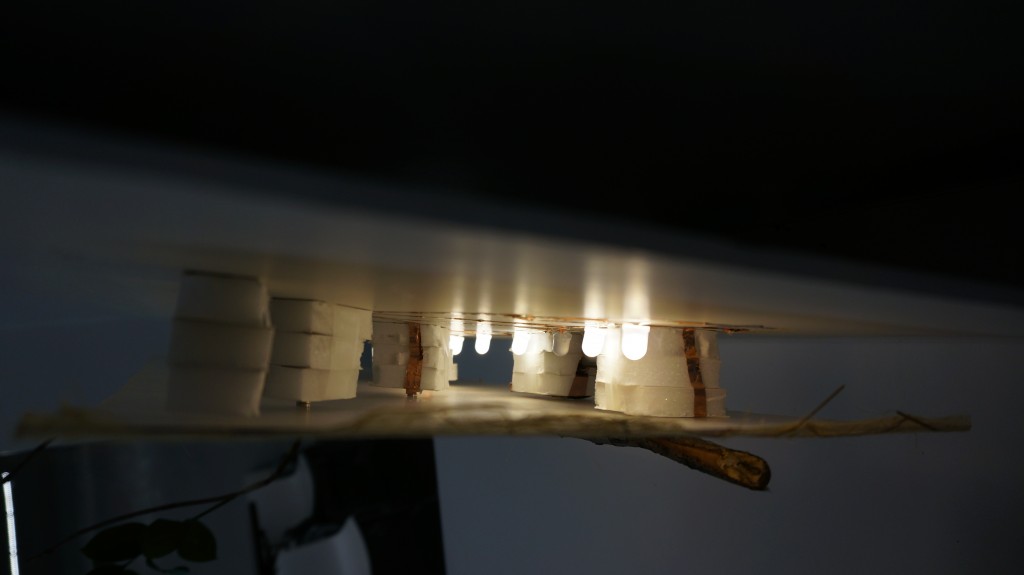
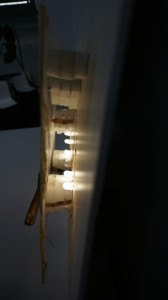
7. Look at the circuits with LEDs and boards from the side.

DSC03464

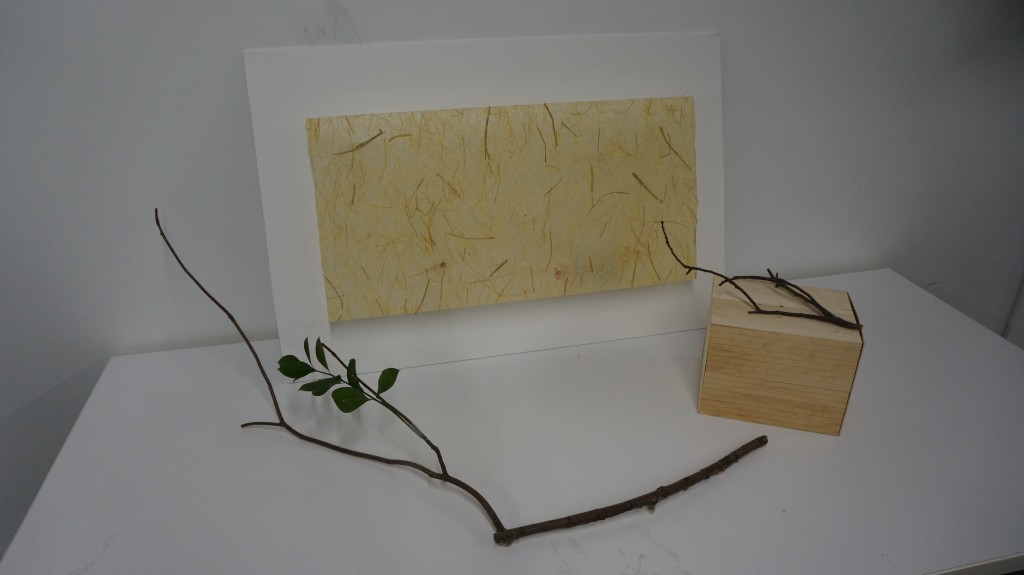
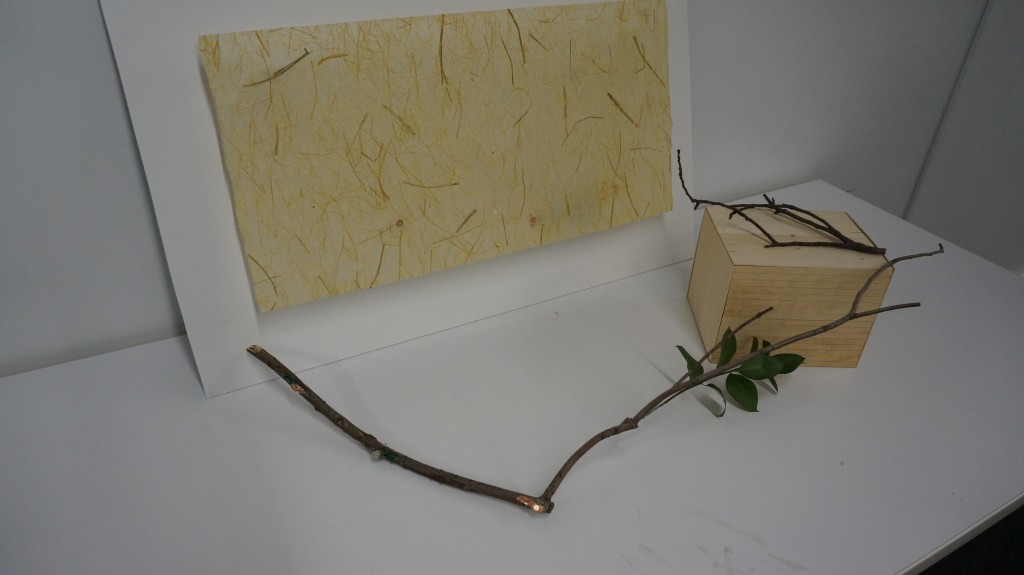
8. The branch can be placed on the table as an ornament item as well.

DSC03494

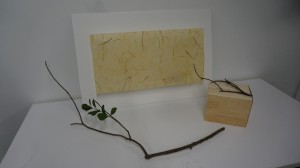
9. The branch has three magnet buttons with conductive thread for connecting. The reason why I use the thread is for concealing and making clear circuits.

DSC03495

10. / – / + / + /

DSC03497

11. Final Scenes.

DSC03486 DSC03481 DSC03473

Thank you. :)

Midterm Proposal

Title: The Healing Lamp

1) Paper prototypes for feedback

This is my first prototype sketch.

DSC03499_1

2) Concept and design goal? Who are you designing for?

The healing lamp is an aesthetically artistic item even the branch lights off. I design for a person who needs to decorate easily on the wall in any place. This can be so easy to set up. Or, anyone can make this product in one’s place looking at the instruction. The owner could feel comfortable when it lights up on the wall.

3) Material lists

a card board, a clear plastic panel, asian traditional paper, a branch, 6LEDs, copper tape, 9v battery, magnets, scotch tape, conductive thread

4) Prior art and precedents that inspired your design and direction. I was inspired by one of my projects named by the healing box. The box is designed to be environmentally friendly with visible, audible, and touchable functions. The branch on top of surface is the symbol of nature. I think the natural shapes give us comfortable feelings and emotions and for the lamp project, I want to create this kind of looking and feeling as well. DSC03210

Week5: Emotional LEDs

Title: Midterm is coming… T—T

Let’s cheer up, all! ^—^ v

Arduino set up (8 x LEDs, 8 x 330ohm, 10 x wires), Embroidery floss for lines, Chenille stems for eyes on two layers, a piece of traditional Korean paper and a piece of blue fabric

Week4: Analog Pressure Sensors

Test 1: Sponge, LED, two pieces of conductive fabric

In this test, the LED just lights on and off according to the palm pressor.

Test 2: Sponge, LED, two pieces of conductive fabric, a piece of velostat

As you can see, in this one, the LED has adjusting brightness by the palm pressor because of a piece of velostat. The velostat should be placed between the two small conductive fabrics.