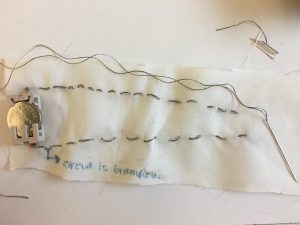
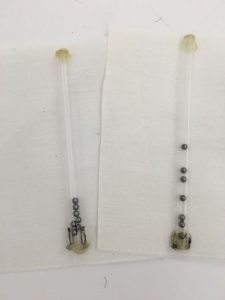
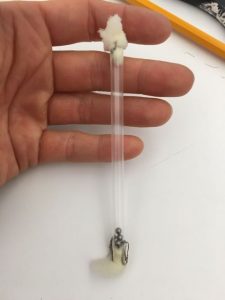
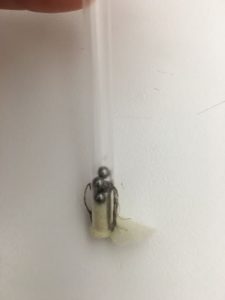
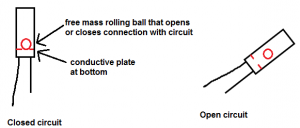
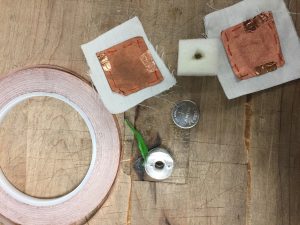
This swatch works as an enlarged version of a typical tilt switch. When tilted up the metal balls inside complete the circuit.
Materials
drinking straw
metal balls
conductive thread
needle
fabric
hotglue
Technique
I sewed two lead legs into opposing sides of the straw leaving a knot inside which the balls would connect. I then capped one end with hot glue, filled with a few balls and closed up the other end with hot glue. I mounted this to a piece of fabric and then sewed leads for the alligator clips to connect to the straw negative and positive leads.
References
I’ve seen this before in my Arduino days. I like the tactile nature of the switch, and that’s why I wanted to try my hand at it, that and a surplus of small metal balls from a previous project.
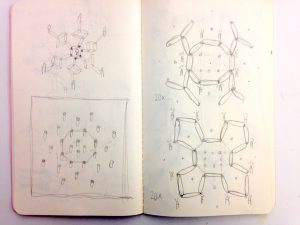
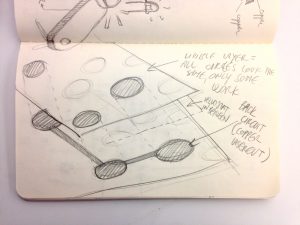
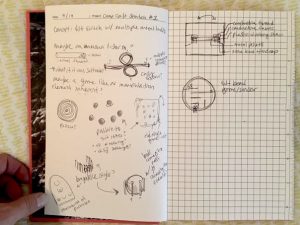
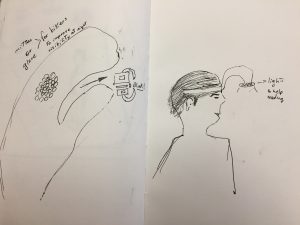
I made a few sketches. Ideas for later too!
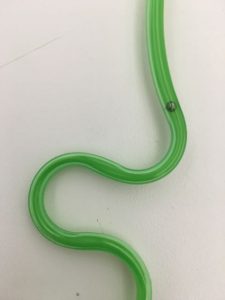
I had hoped to do silly strings in the beginning but my metal balls were too large for the straw and got stuck. Would have been a fun switch though. There’s always next time!
Even if the last leaf falls
I made a tree with a leaf, and attached flower origamis as a metaphor for a hope. Even if the last leaf falls, there are still flowers which never fall even with bright lights on
‘Never give up, I will pray for you, grandma.’
If I can go back to the certain moment, I definitely would like to return to just before my grandmother had conscious when she was alive.
I missed the chance to say goodbye to her, and I couldn’t endure the despair not telling her anything. I should have given hope to her and had a lot of conversations with her.
Whenever I remind the regretful moment, I conjure up the novel ‘The last leaf’.
This story is about giving a hope by drawing a leaf which deceives a person to think it real, on the wall to a person coming down with pneumonia, and being close to death.
Referring to this story, I made a tree with a leaf, and attached flower origamis as a metaphor for a hope. Even if the leaf falls, there are still flowers which never fall even with bright lights on.
To show the respect to my grandma and my sincere pray for her, I displayed the lights fade in and out smoothly.
AUDIENCE
I created the lamp for my lovely grandmother who is not here anymore.
DESIGNED INTERACTION
When the last leaf falls, the lights inside the flowers will turn on, otherwise, they will stay off. I intentionally made flower origamis instead using real flowers to show something immortal, and forever in order to give a hope to my grandma.
I used the arduino to generate natural fade in/out effects right after the leaf fell off the tree in order to not giving her any chance to notice that the leaf’s falling.
Prior art and precedents that inspired your design and direction
I got an inspiration from the novel ‘The last leaf’ by O. Henry published in 1907.
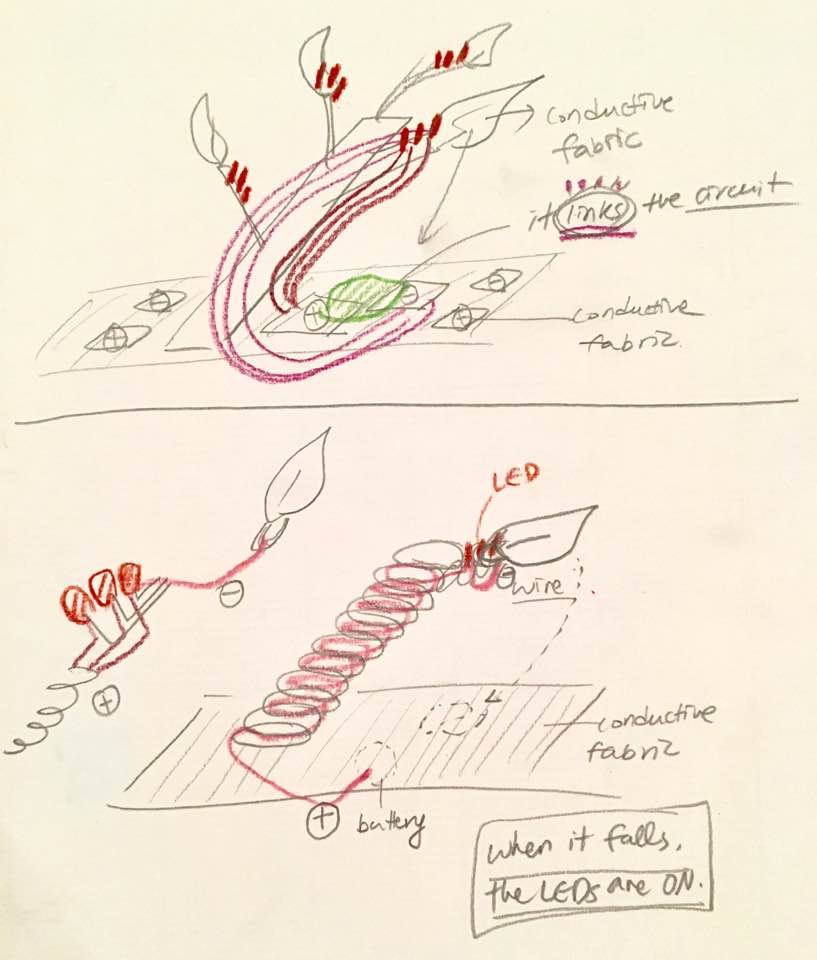
SKETCH 1
My initial design were two directions, but the basic principles are the same. First option was putting the conductive fabric on the floor with a battery beneath it which is linked with (+)side of LED. When the leaf which is connected to the LEDs’ (-), touches(falls) the fabric, the circuit is completed. The other was lying both (+), (—) patches which are linked to the LEDs on the floor, and then when the leaf(switch) falls on both(+,—) surfaces, the circuit is closed, and the lights turn on.
FINAL SKETCH / CIRCUIT
Design Process
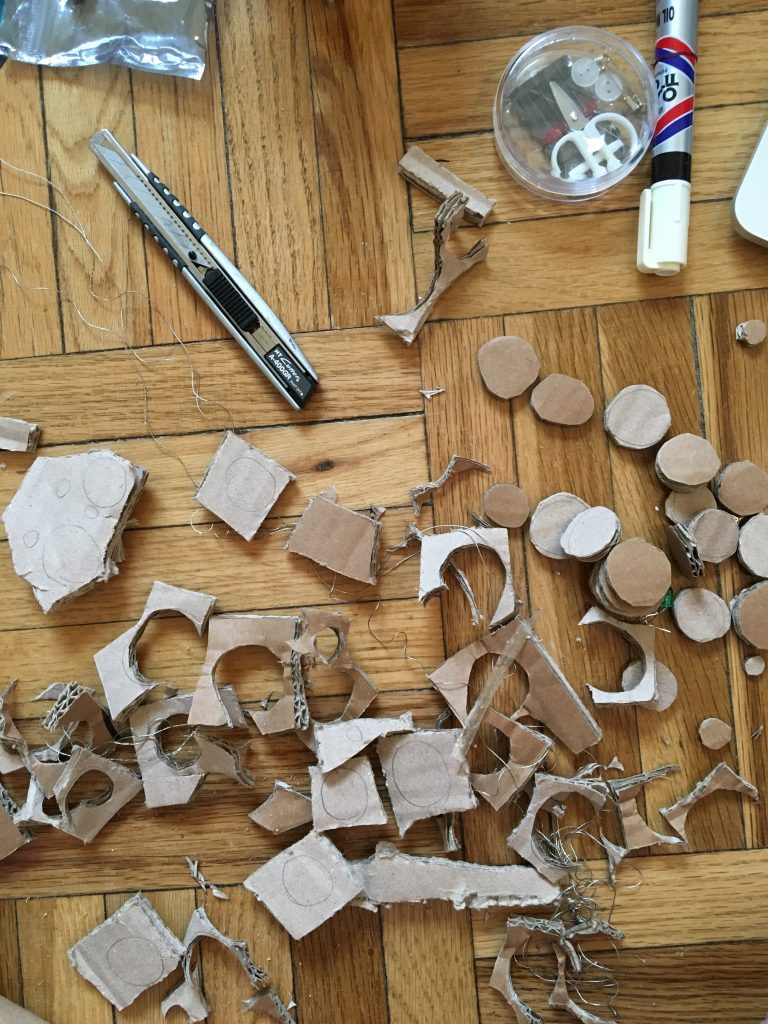
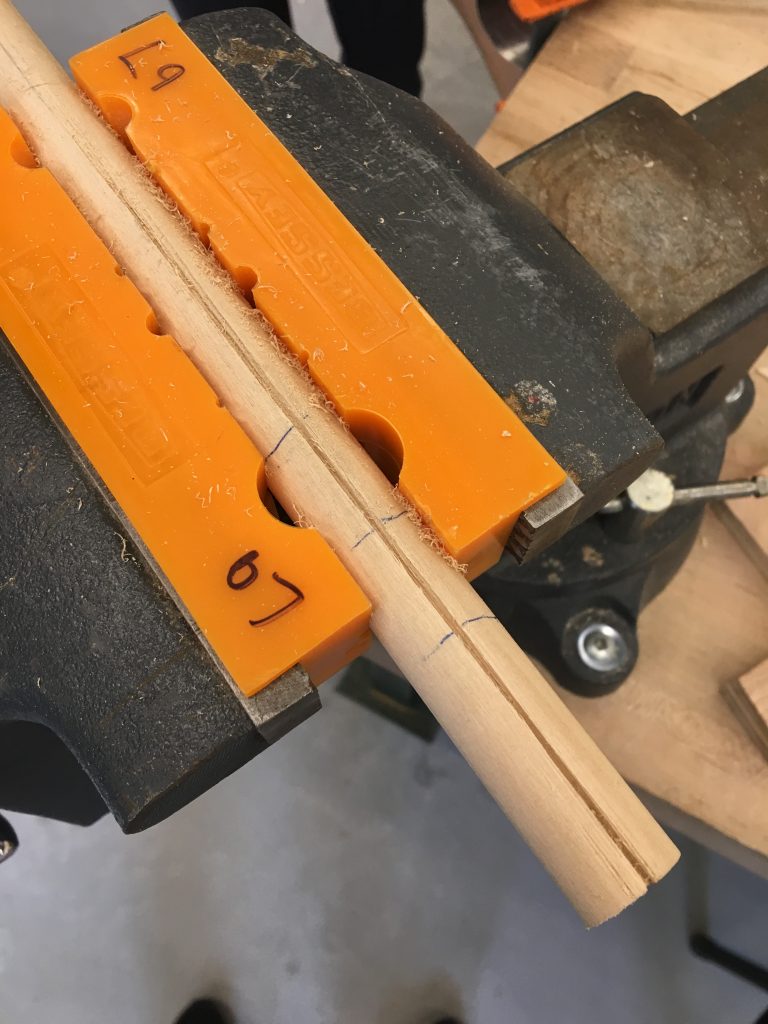
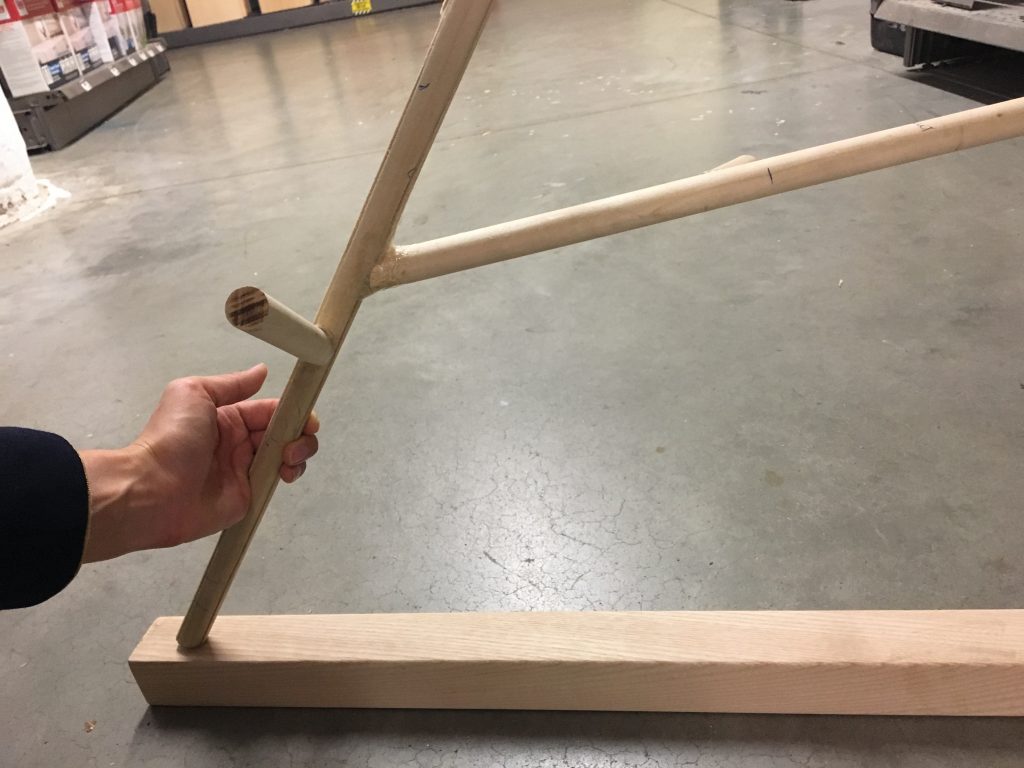
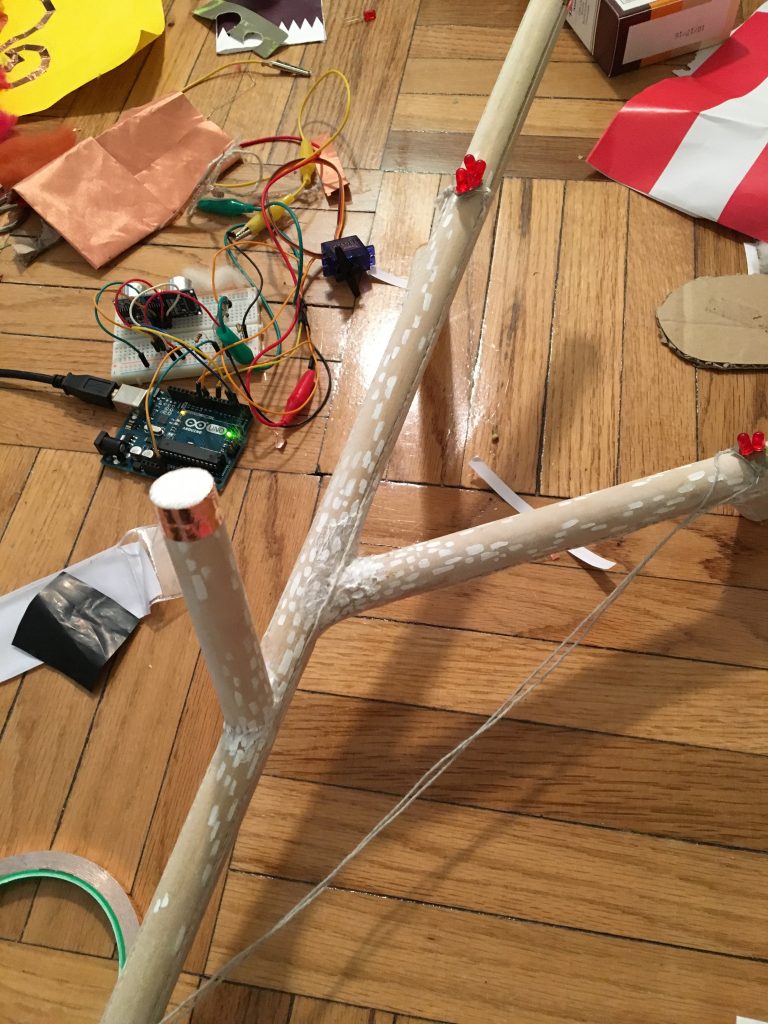
1. Made a structure of the tree by woodcraft
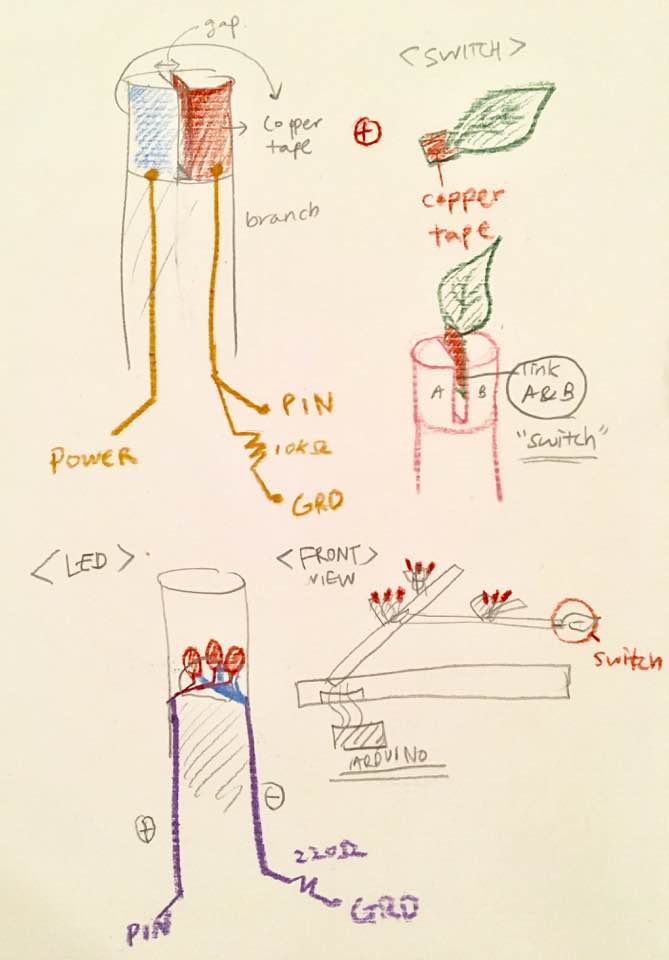
2. Cut the middle of the top of the branch to divide into two in order to construct a part of a ‘switch’.
3. Put a copper tape on the each inside of the separated parts.
4. Made another part of a switch which link the two divided circuits (On/Off)
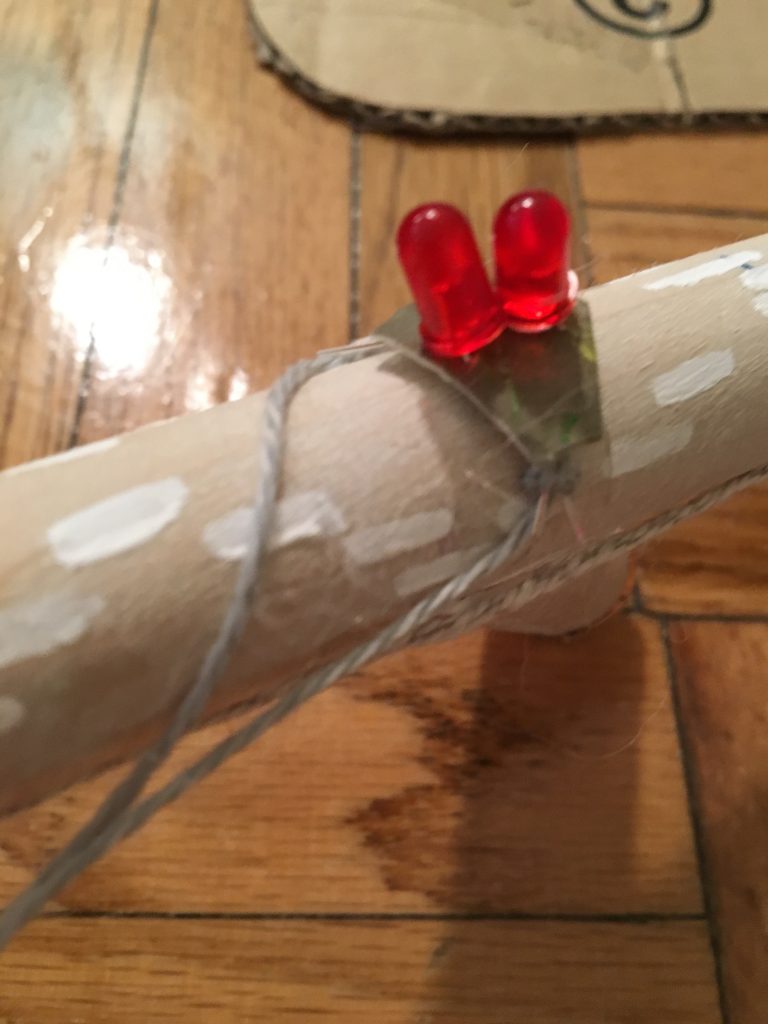
5. Made flower origamis
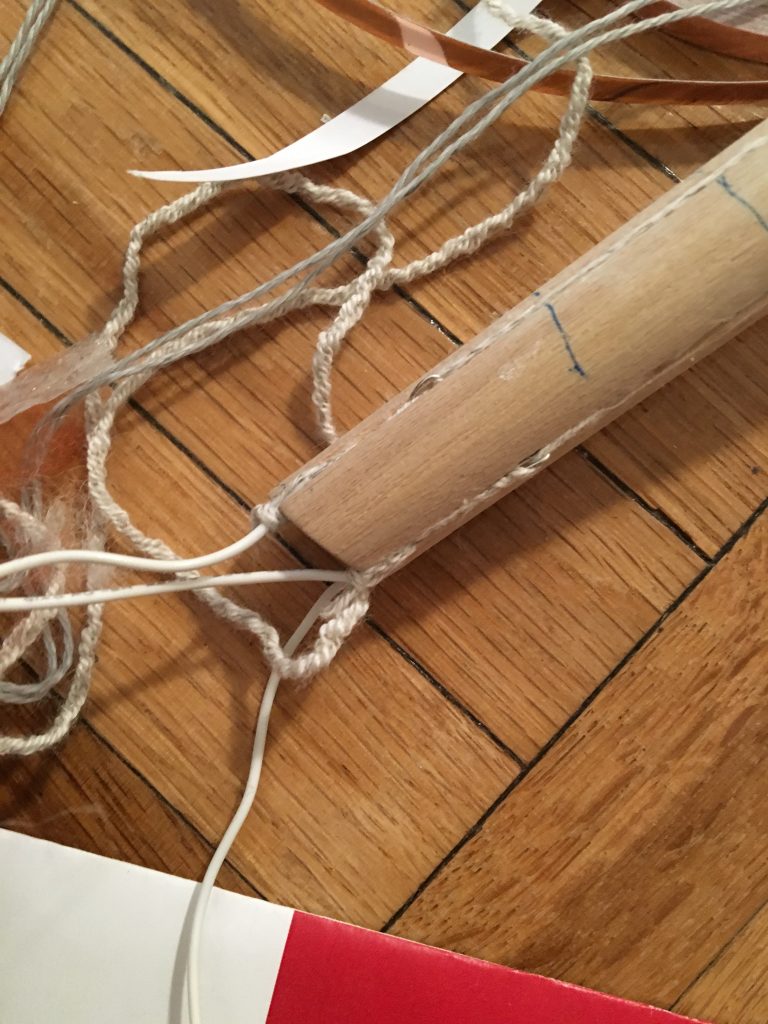
6. Installed the LEDs (Parallel circuit) liked with conductive threads, some resistors.
7. Chiseled the hole to link the wires to the arduino (LED fade in/out)
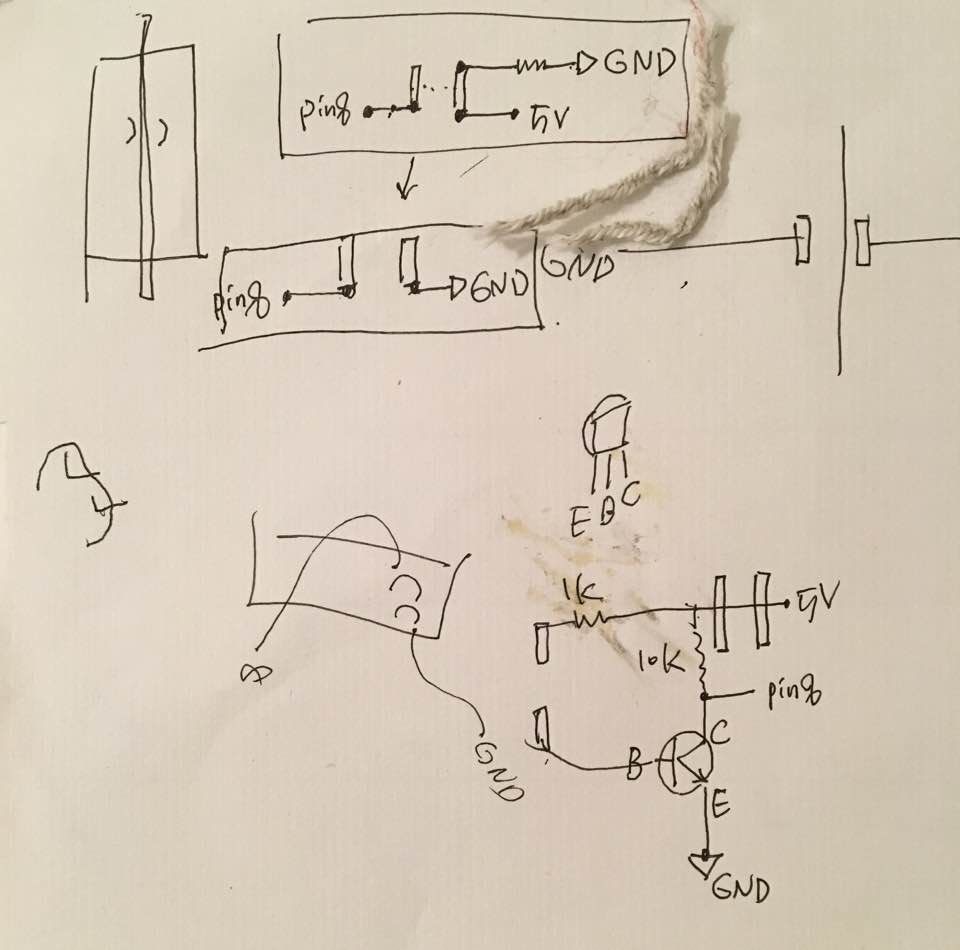
I chiseled to create a gap to disconnect the circuit, and linked each side to power & ground with conductive threads.
Codes
int button = 8;
const int ledOne = 9;
const int ledTwo = 10;
const int ledThree = 11;
int fadeAmount = 2;
int brightness = 0;
LED / Sensor
I made an ‘if/else’ statement with setting different values of the brightness of the LED(green/red/blue) depending on the sensor pressure.
Midterm Plan:
Concept and design goal
Before the last leaf falls
‘Never give up, I will pray for you, grandma.’
Whenever I remind the regretful moment, I conjure up the novel ‘Last leaf’.
This story is about giving a hope by drawing a leaf which deceives a person to think it real, on the wall to a person coming down with pneumonia, and being close to death.
Referring to this story, I will make a tree with a leaf, and attach flower origamis as a metaphor for a hope. Even if the leaf falls, there are still flowers which never fall even with bright lights on.
Design Process
1. Make a structure of the tree by woodcraft
2. Cut the middle of the top of the branch to divide into two in order to construct a part of a ‘switch’.
3. Putting a copper tape on the each inside of the separated parts.
4. Make another part of a switch which link the two divided circuits (On/Off)
5. Make flower origamis
6. Install the LEDs (Parallel circuit) liked with conductive threads
7. Link to the arduino (LED fade in/out)
Materials
Wood
Copper tapes
8 LEDs
paper
Conductive threadsNeedle
Arduino
Prior art and precedents that inspired your design and direction
The novel ‘Last leaf’
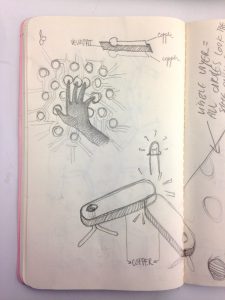
I started this project with two options, one was a pair of mittens with fade in/fade out led lights for bike riders while the other option was to build a hat with a lamp hovering over it to read at night within a personal space.
Then, I decided I could make a better circuit with the hat to make a touch sensitive sensor to turn the lights on and off as well as intensifying or dimming the lights. The parts I planned to use for my circuit were white neo pixel LED’s, 1 3v battery, an ATTiny, conductive thread, copper fabric, conductive tape, cotton fabric, and black cotton thread.
I could not program my ATTiny so had to make some changes to be able to create a touch switch on and off. To build my switch I cut two squares of conductive fabric and sewed to a piece of fabric which I would sew onto the inside of hat. I used conductive fabric to sew my two pieces.
T
Then, I build a little pocket to hold my 3v battery in which I also put two pieces of copper tape on each side. Right after, I knotted two strings of conductive fabric inside on both the power and ground sides to lead my circuit. I sewed in the battery pocket with black thread to blend in with the hat.
I sewed in the positive side of the battery around the hat through the back and the negative side on the front side. Then, placed 4 LED’s instead of the neopixels because I purchased nano neopixels which were too small to solder on the hat. I soldered the conductive thread (which was really difficult to not burn, so kept the heat to the minimum) on each ground and positive ends.
Below is the video showing the functionality of the hat. The next iteration will have an programmed attiny.
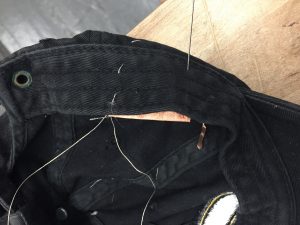
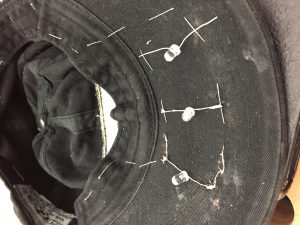
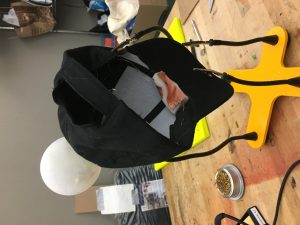
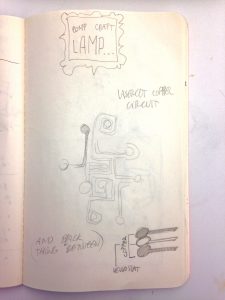
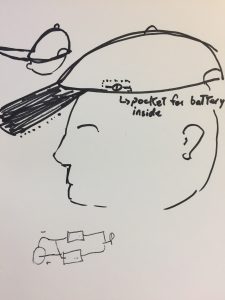
For my midterm project, I wanted to make a cap that would signify when you are deep in thought so that nobody will disturb you. I call it “the thinking cap.”
USER + CONTEXT
The intended user for this is a second year thesis student, but I can see this used in the workplace especially in cases where the workspace is an open floor plan.
DESIGNED INTERACTION
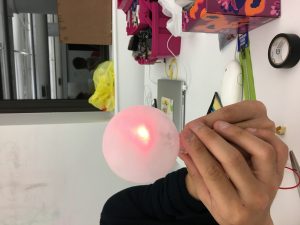
The interaction between the user and my lamp is simple. They just have to put the hat on and the light will turn on. When nobody is wearing the hat, the light will stay off.
INITIAL DESIGN
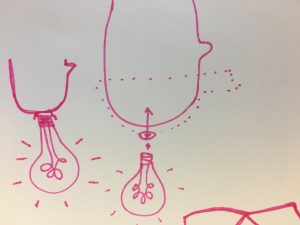
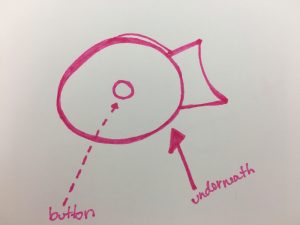
The initial design was to have a button at the top of the hat that would complete or disconnect the circuit, depending on whether it was pressed or not. The lightbulb would turn on or off depending on the presence of a head.
PROCESS
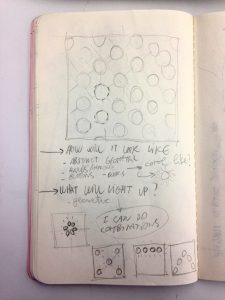
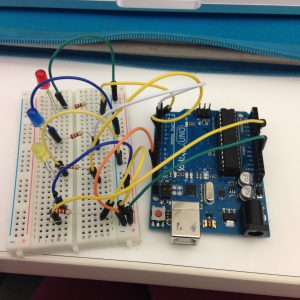
The process of making my cap started with first coming up with a circuit in which multiple LEDs could be powered with a minimal number of batteries.
I created a parallel circuit with 5 LEDs and some resistors, a 3V battery, and conductive thread. The circuit shown below is broken by the bottom line near the battery. That is where the button/sensor connects.
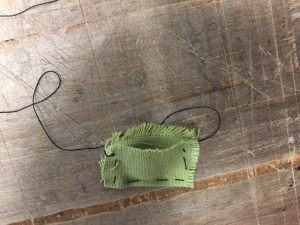
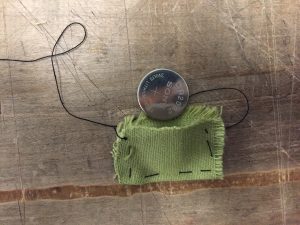
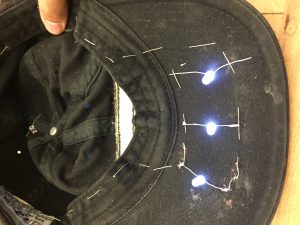
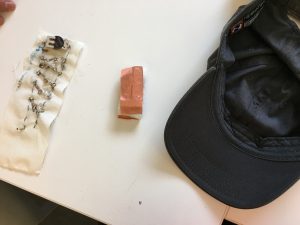
After that, I needed to make a sensor. At first, I was thinking of just using a button on the top of the hat, but I realized I could make a simple pressure sensor with some copper fabric and foam and attach it to the brim of the hat. I chose to do this because that’s a spot in the hat that will always get pressure from the forehead, vs the top where there might not always be contact.
The first thing I learned through testing my pressure sensor was that it wasn’t sensitive enough. So, I made the foam thinner in order to create an easier pathway to connection.
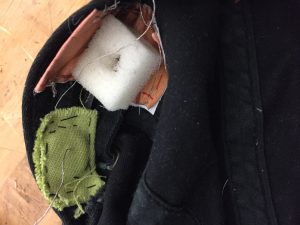
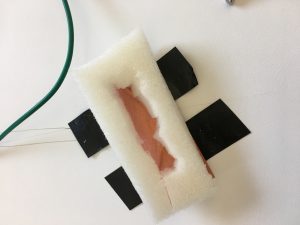
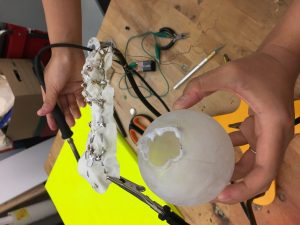
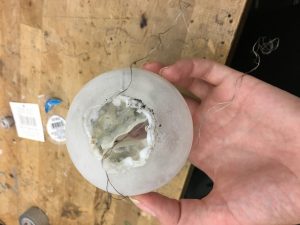
Next came the enclosure for my lightbulb. I needed to make sure the LEDs would shine through but that the circuit would be concealed. I took a clear plastic ornament and sanded it to be frosty.
After placing the circuit in the lightbulb, I sewed conductive thread through the hat to connect the sensor to the circuit.
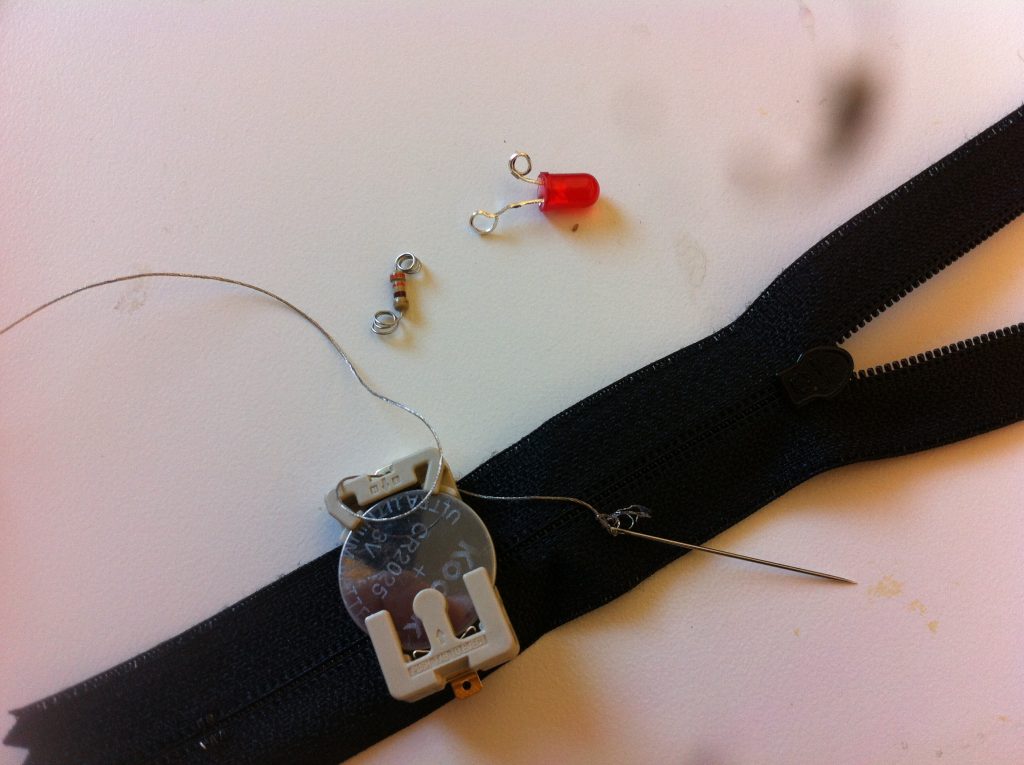
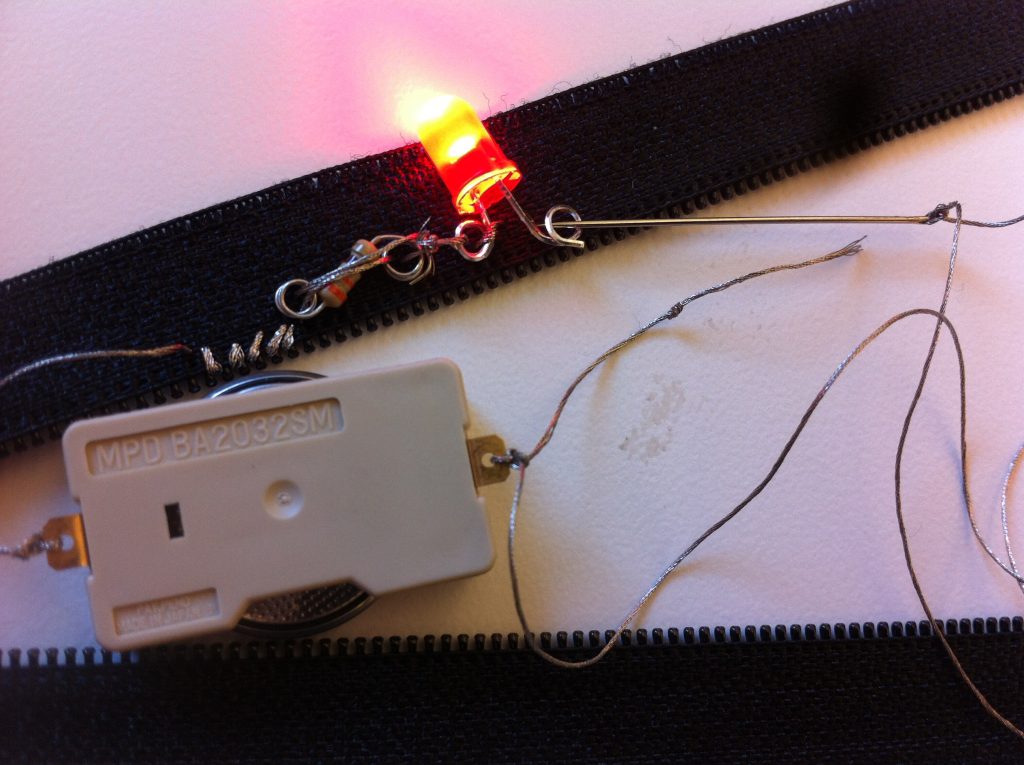
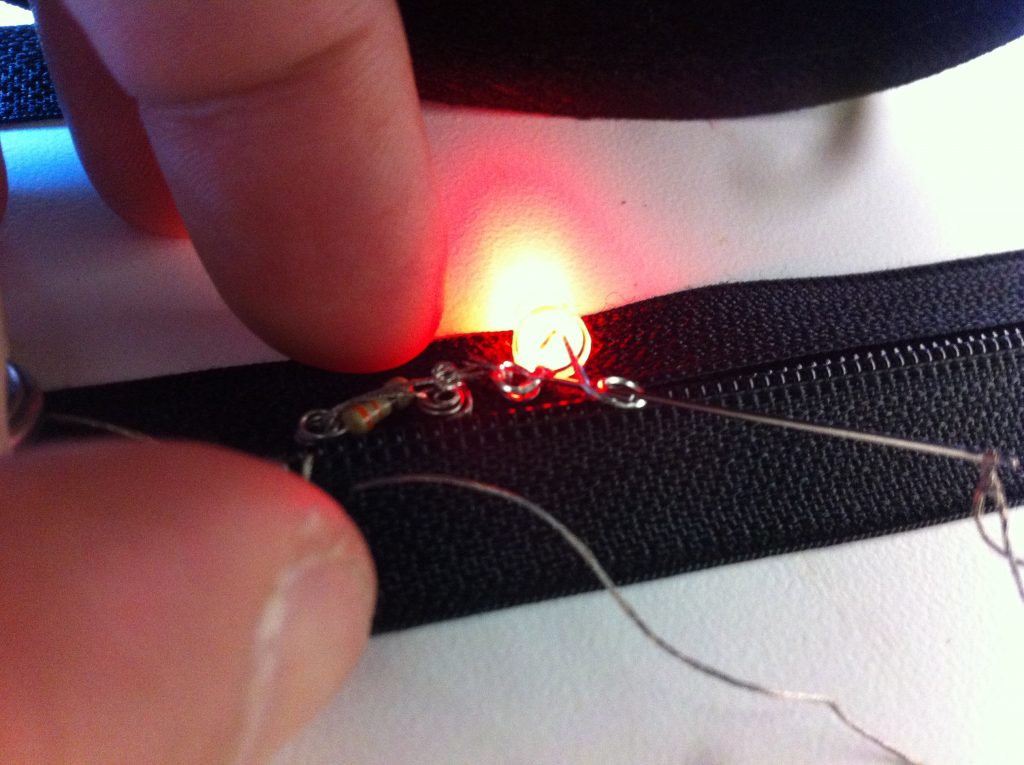
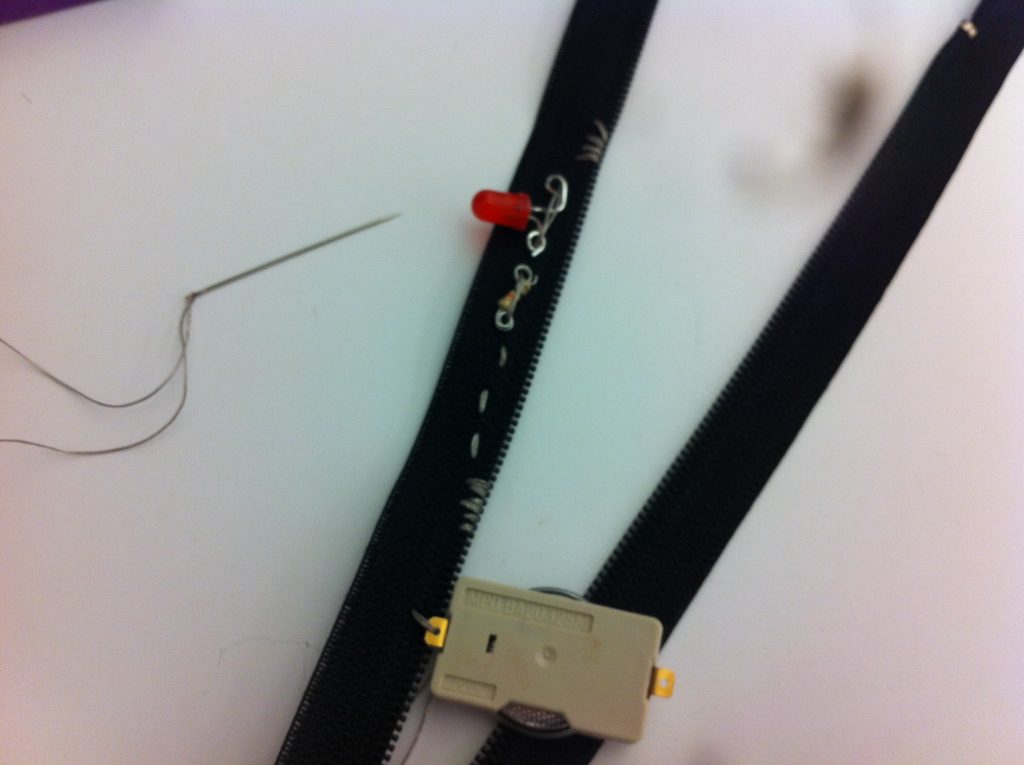
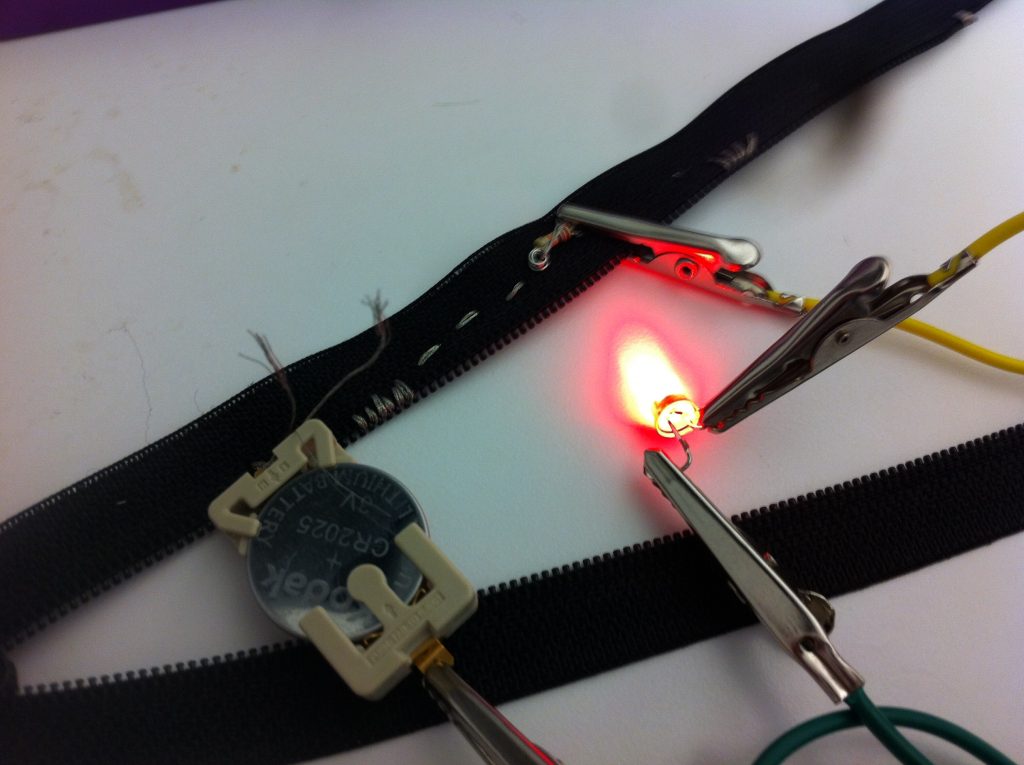
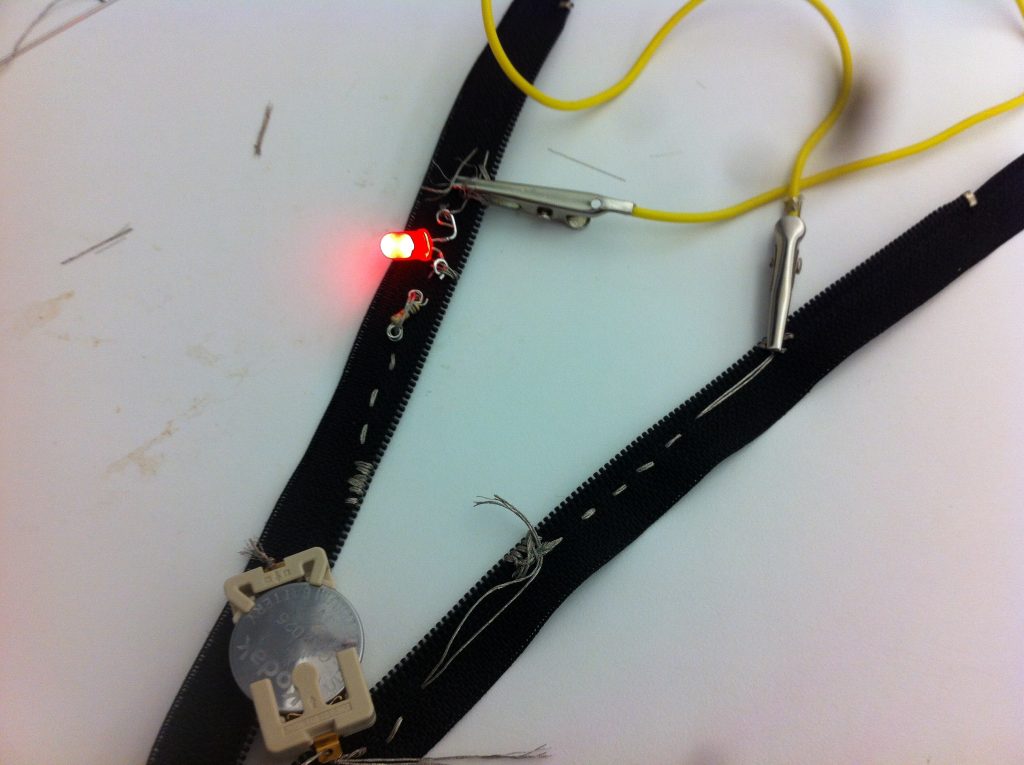
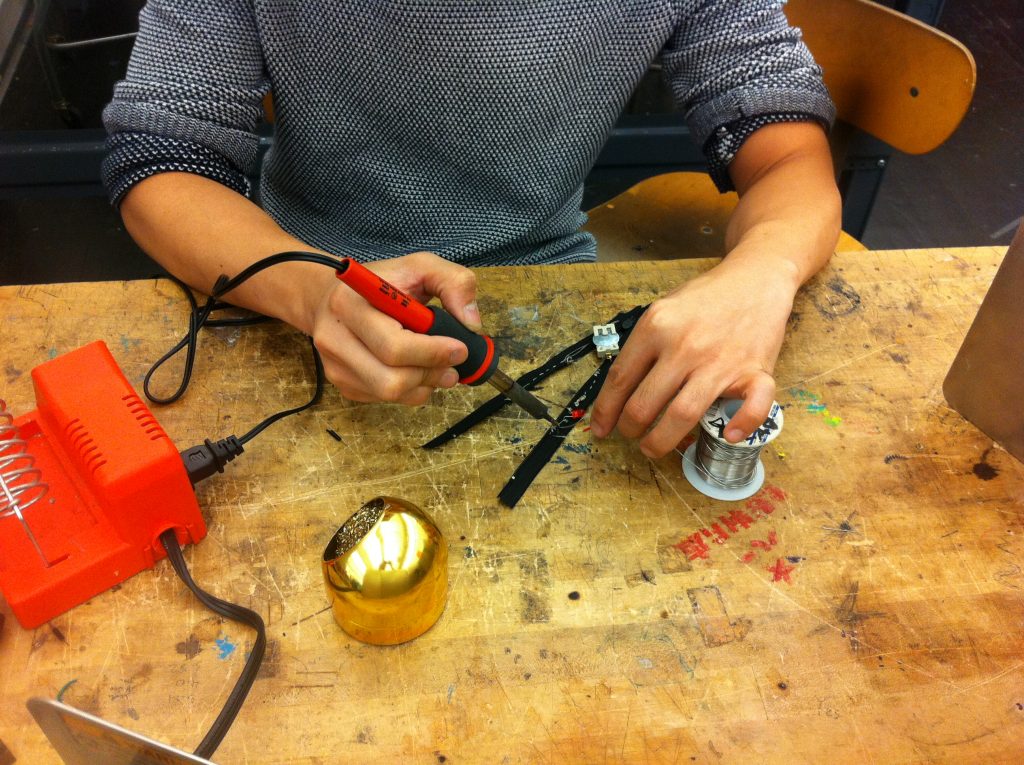
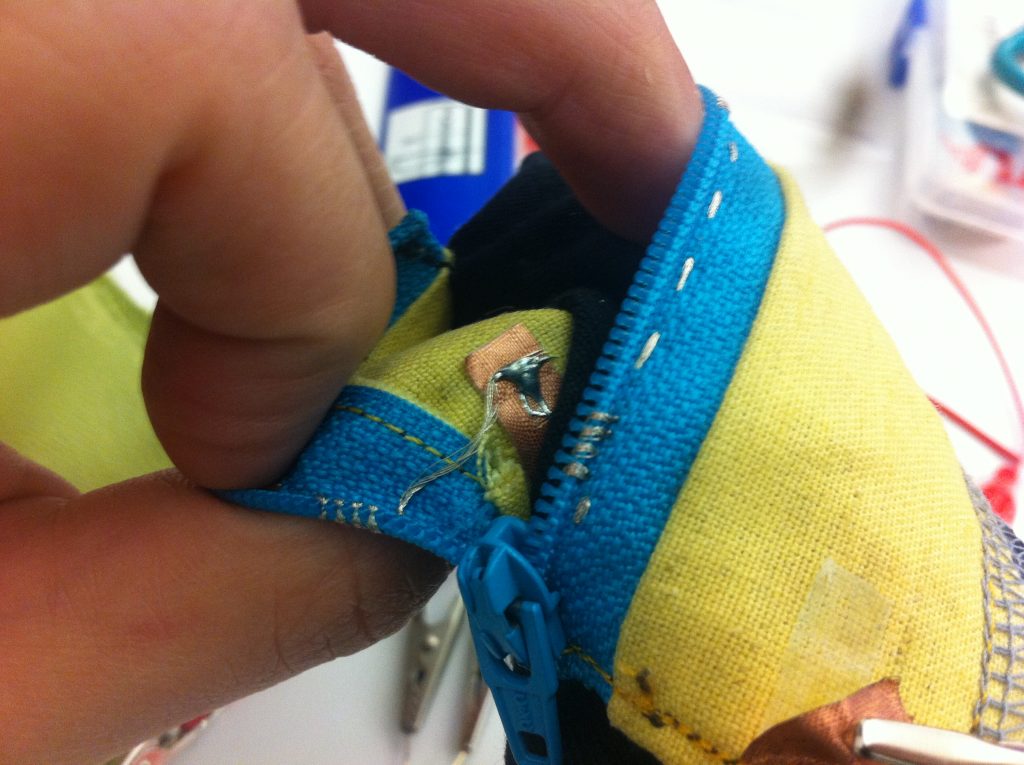
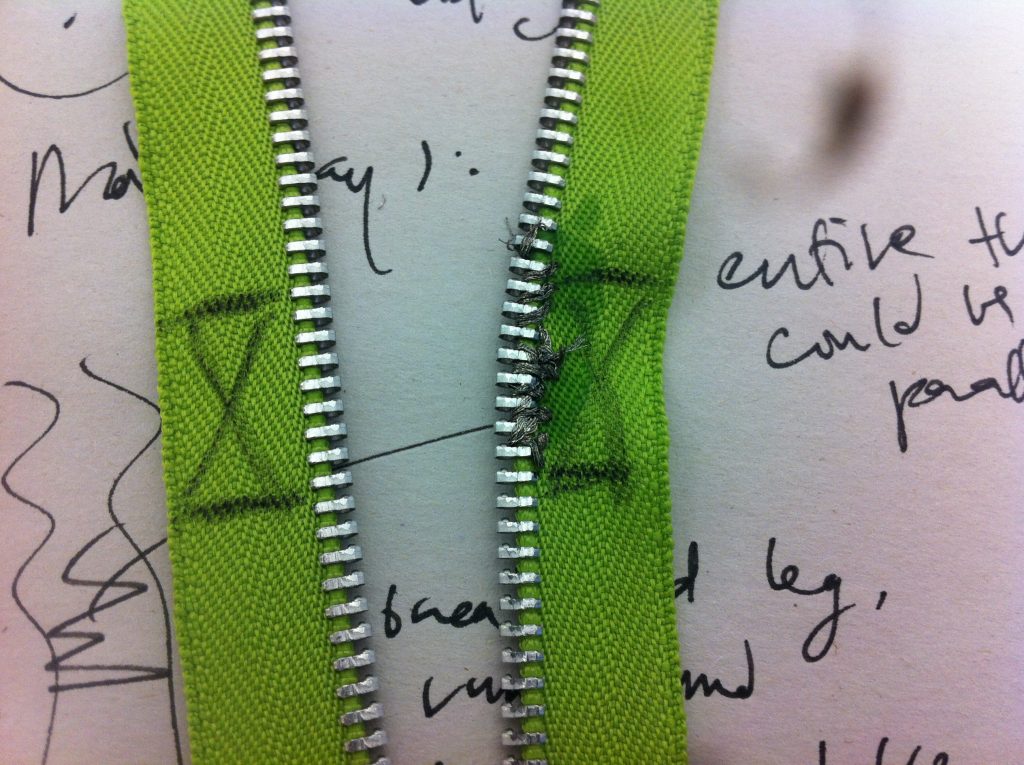
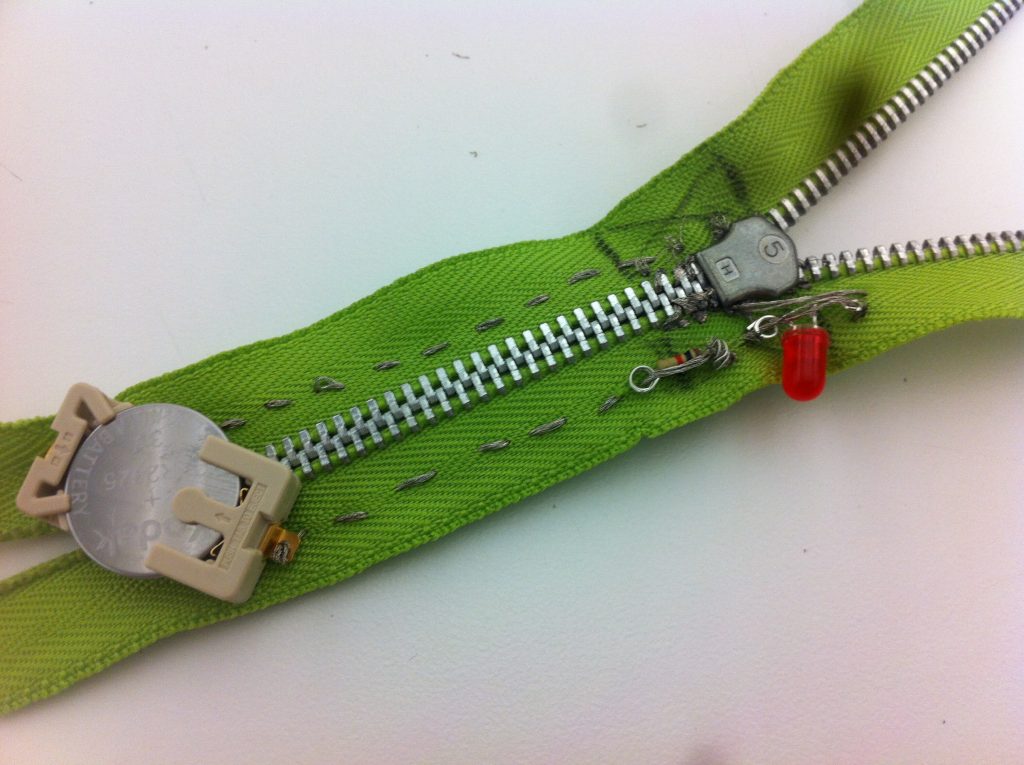
This is my entry documenting my second attempt at making a zipper switch. This time, I used a zipper with plastic teeth. I also brought beeswax (actually hair wax for dreadlocks) so that it can smoothen and tighten finicky conductive thread frayed ends.
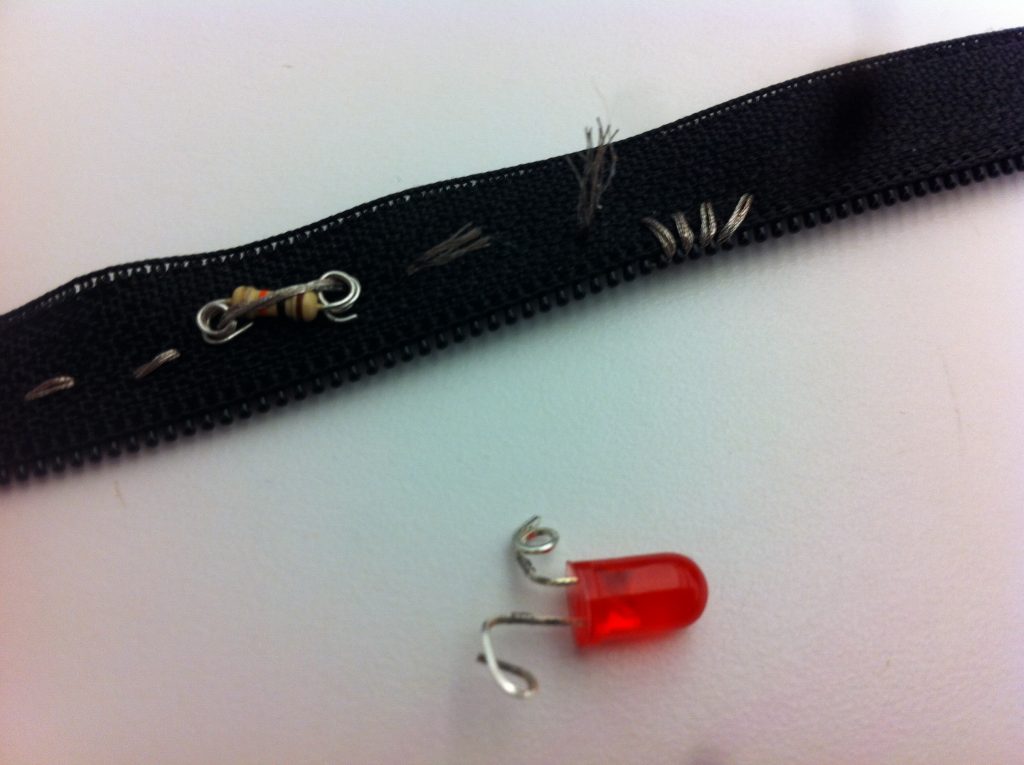
Threading conductive thread was still tricky, but I managed to sew the negative end of the battery through the underside of the zipper. And because it’s negative, I sewed the resistor and LED negative end into it. But if you’ll look closely, you’ll see I made the mistake of sowing through the positive end as well.
It’s tricky. When sowing, I got caught up with the idea of threading through the hole, not realizing that it would ruin the proper path of the circuit.
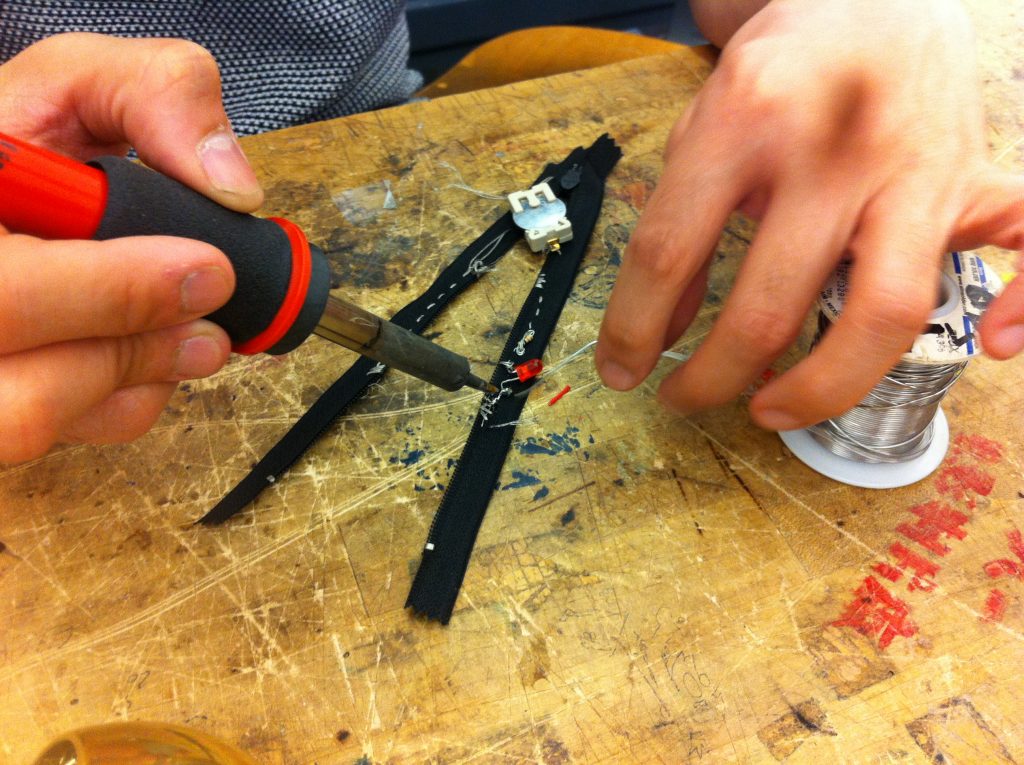
So I snipped the thread connecting the negative and positive ends of the LEDs. I would sow it with thread but not close it.
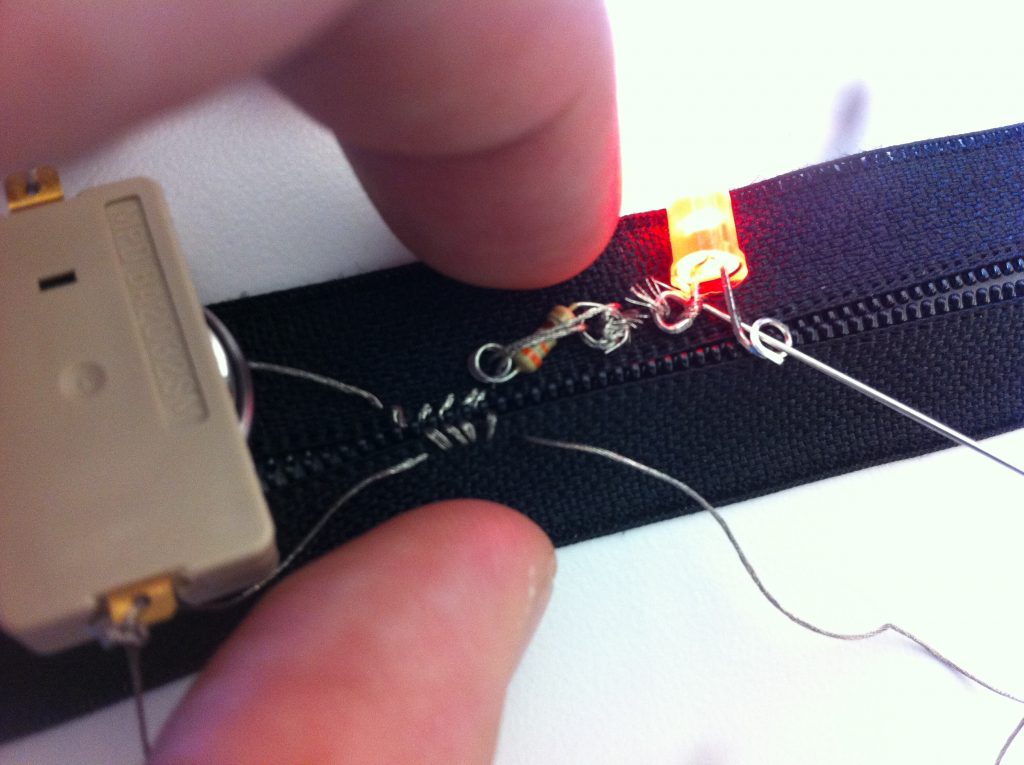
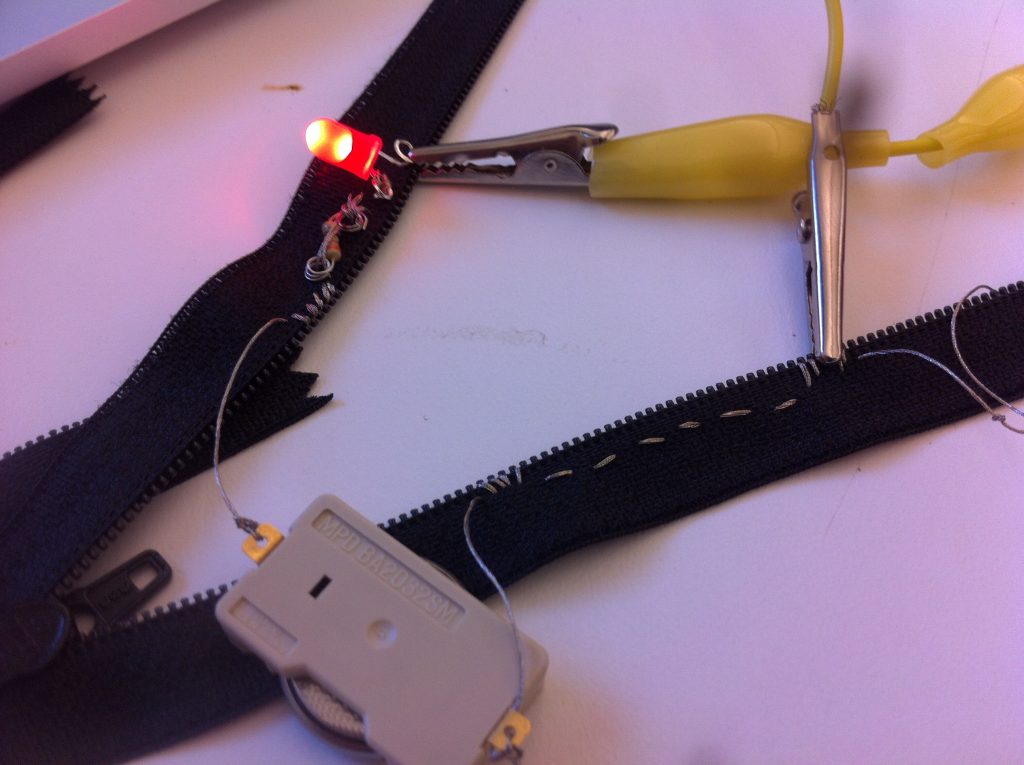
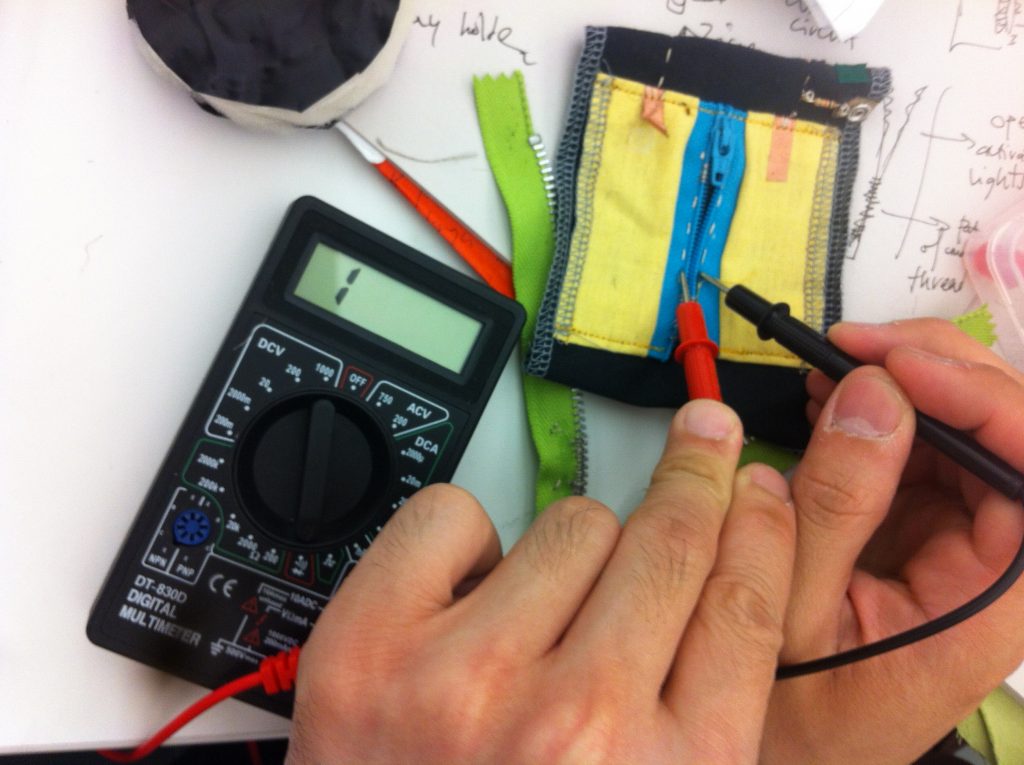
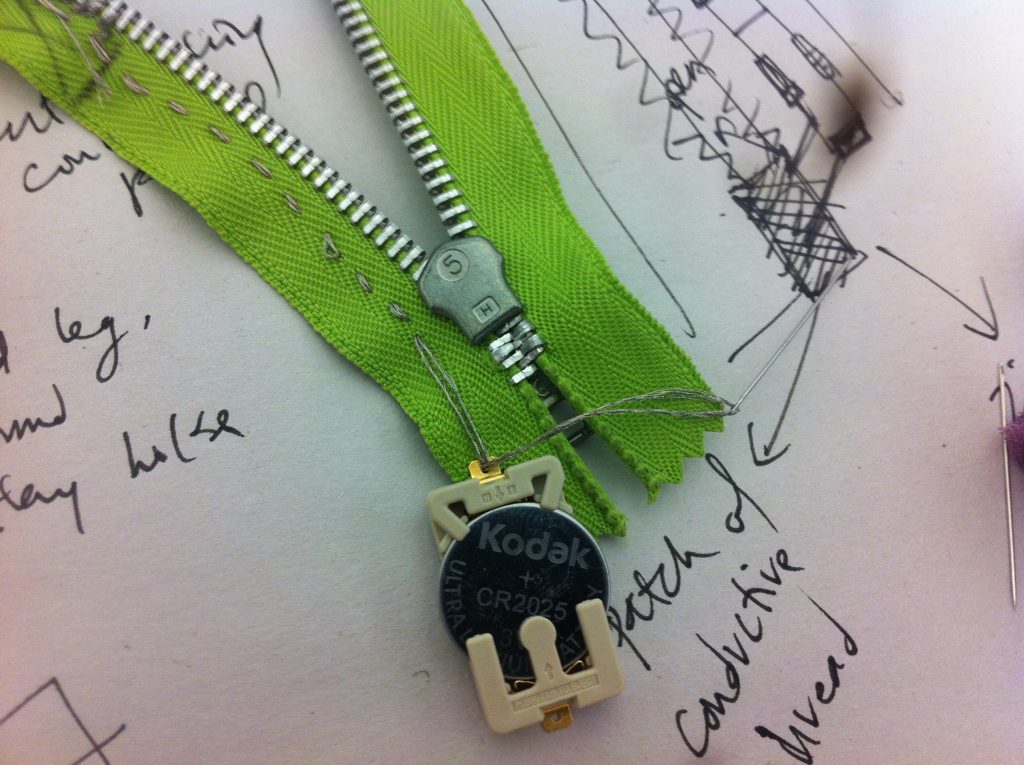
You can see here I tested the connectivity of the battery holder to see if the LED was working.
And here, you can see me testing the connectivity of the conductive thread patch through the negative diode. It works! The conductive thread is holding strong while the positive end of the battery is powering the LED through lobster clips.
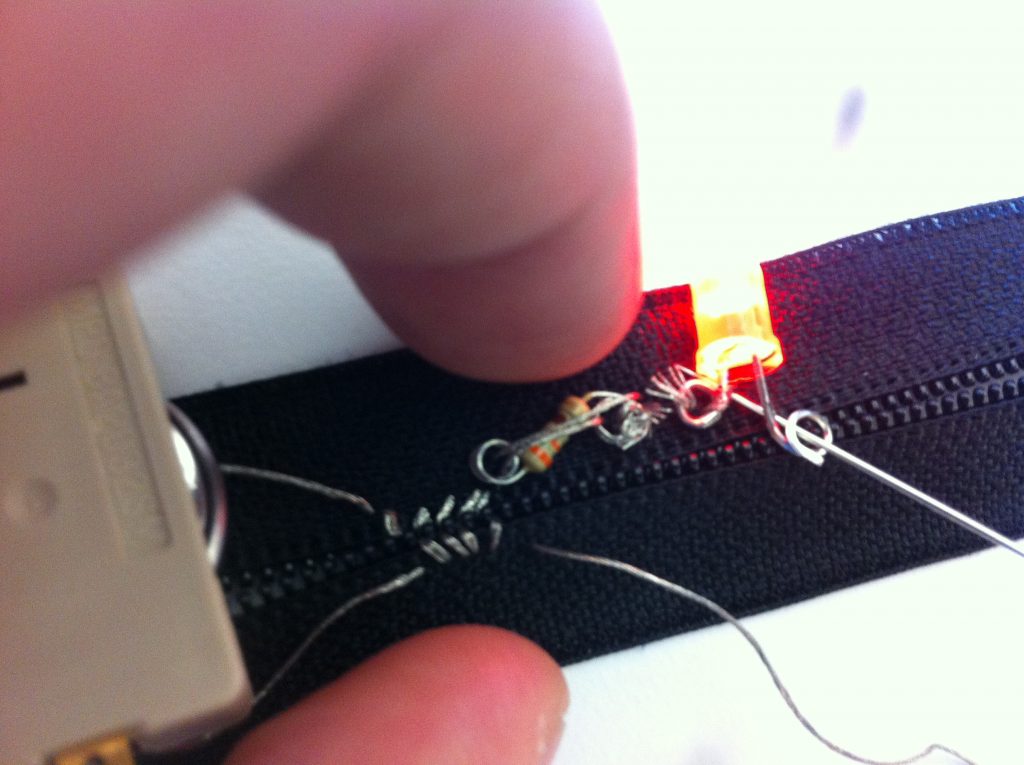
Here in this photo I’ve sown the negative end of the LED into the circuit and left it open. When I attach clips between the positive end of the battery holder into the positive leg of the LED, it lights up. Great!
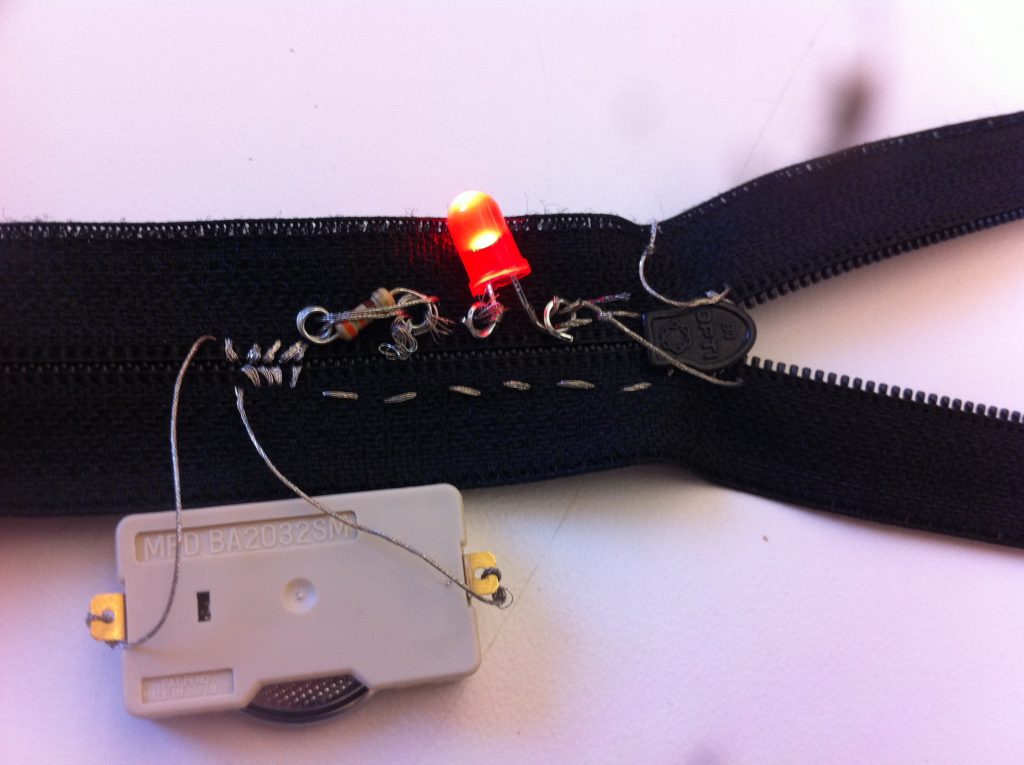
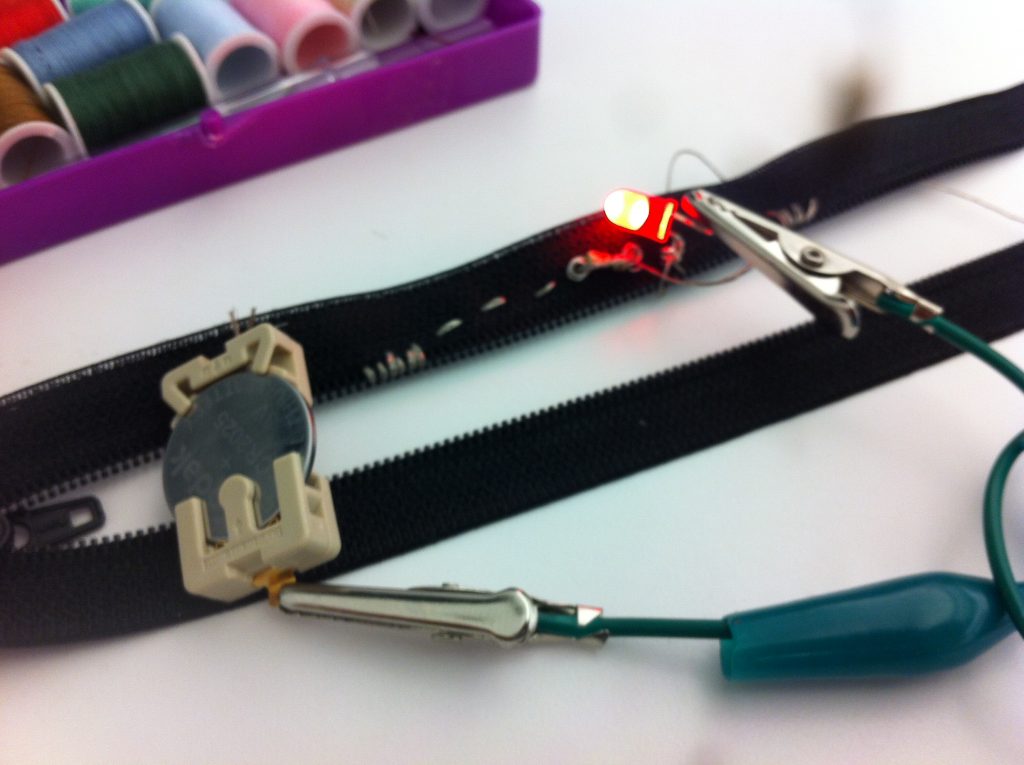
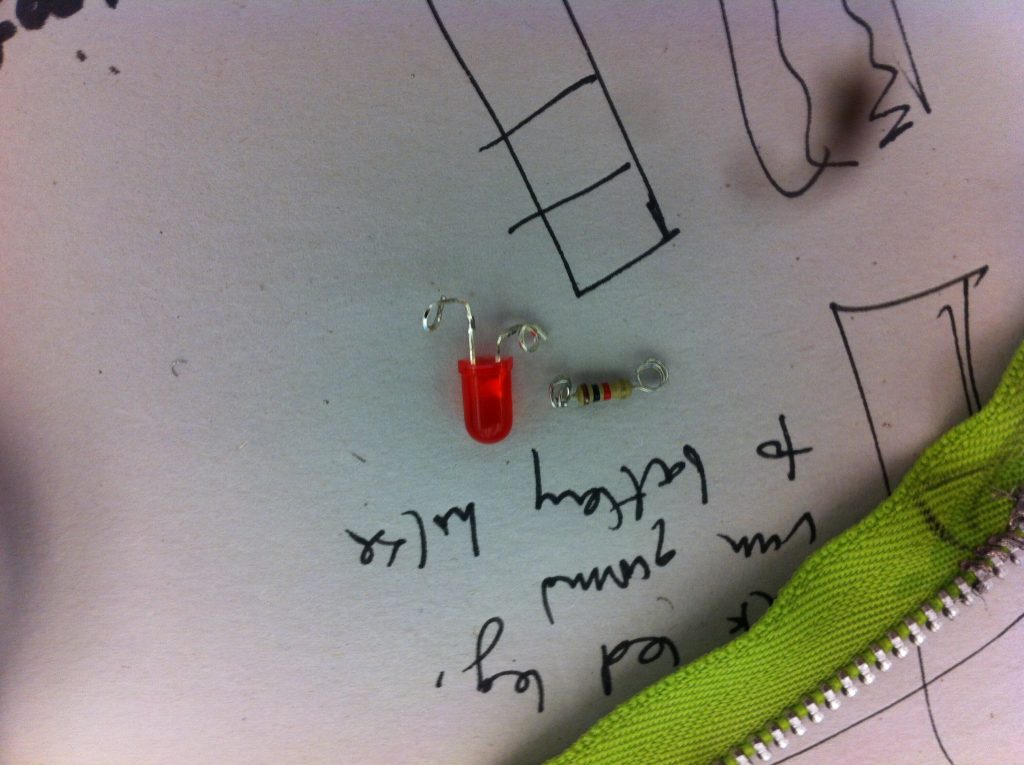
And here you’re seeing me test the connectivity of the positive leg that has been sown into the zipper with conductive thread. This time I left it open. And it works.
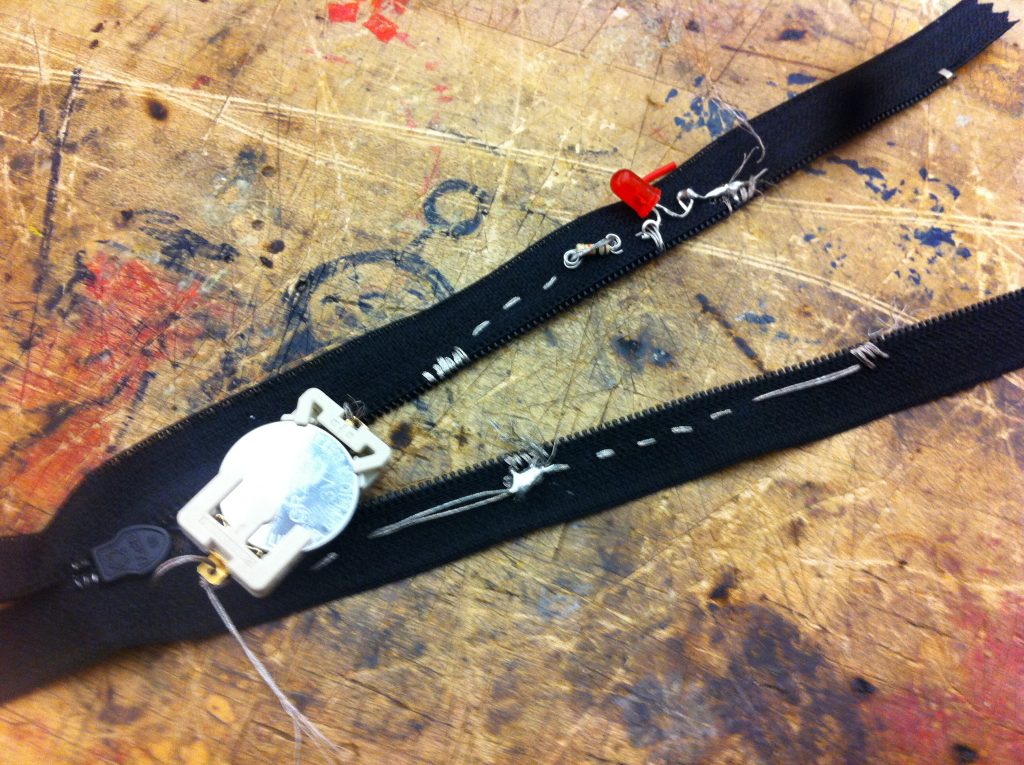
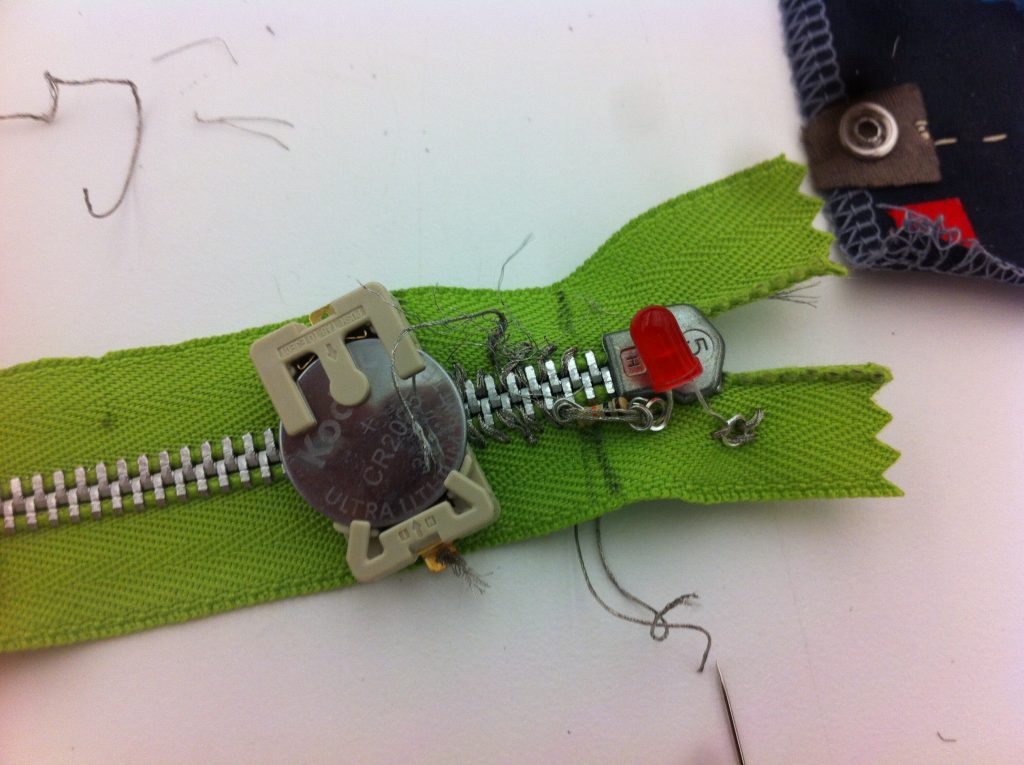
Just one problem…
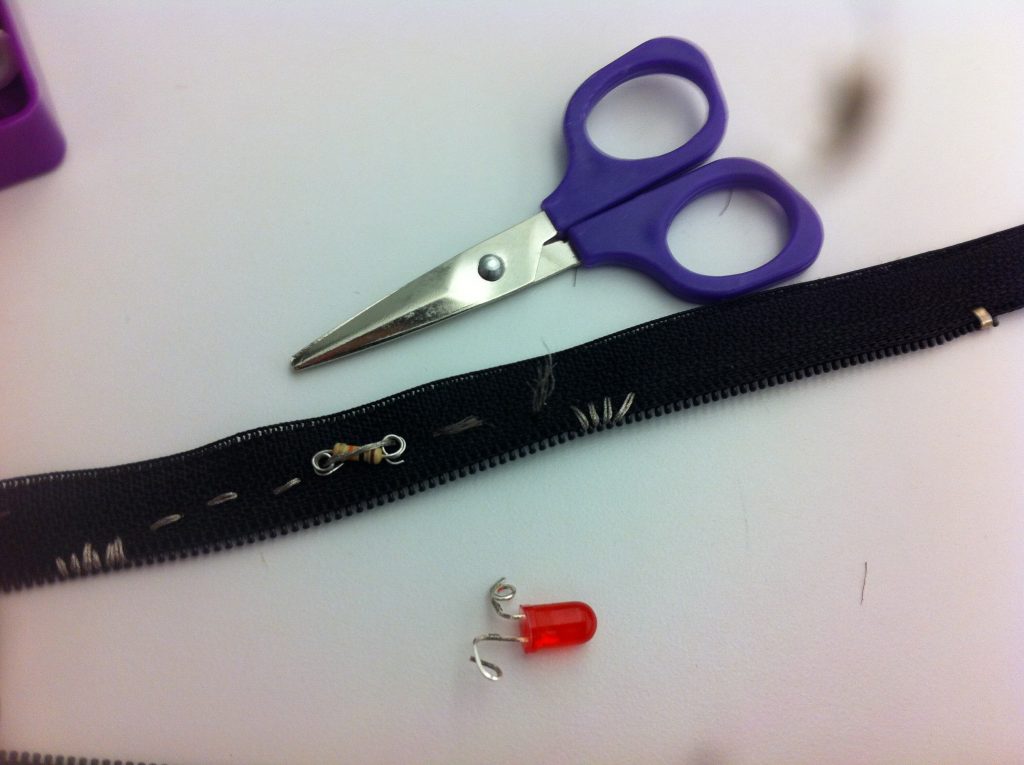
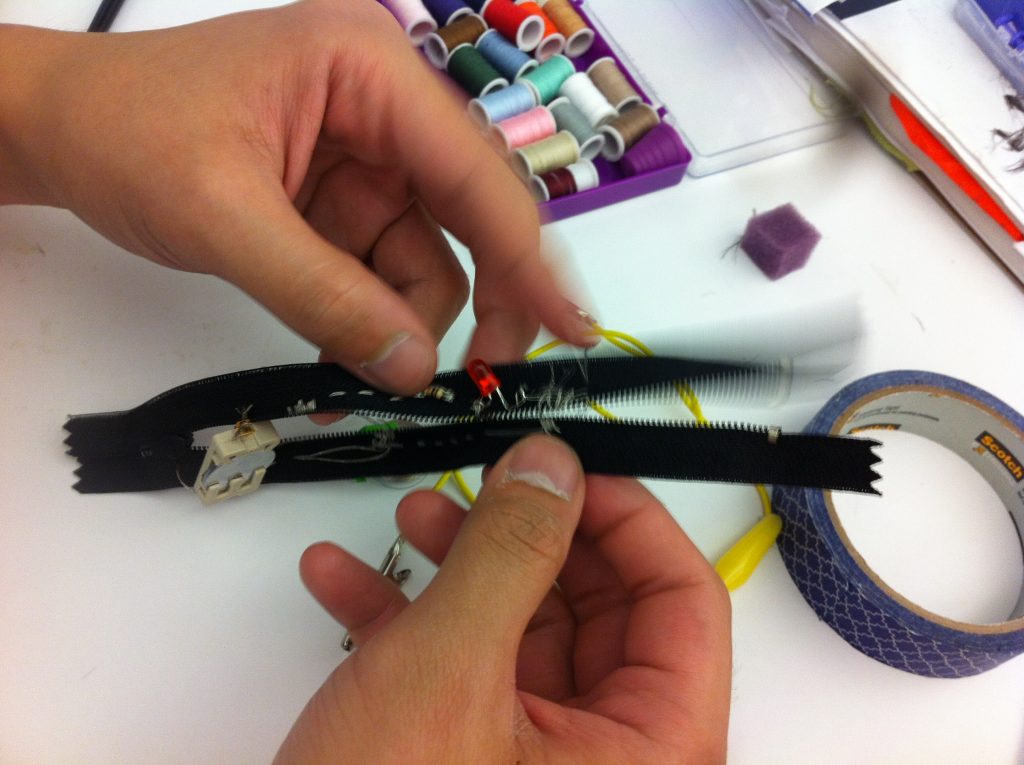
I sowed the thread with such a large gap between the teeth and thread that it doesn’t close up. Unlike Liza’s zipper switch, which is very carefully sowed to be as close to the teeth as possible, bridging it almost.
Zipping teeth this small is excruciatingly hard. Making a zipper switch is harder than it looks. It’s also painful in the fingers because I’m compelled to twist this and the zipper around to get the needle through.
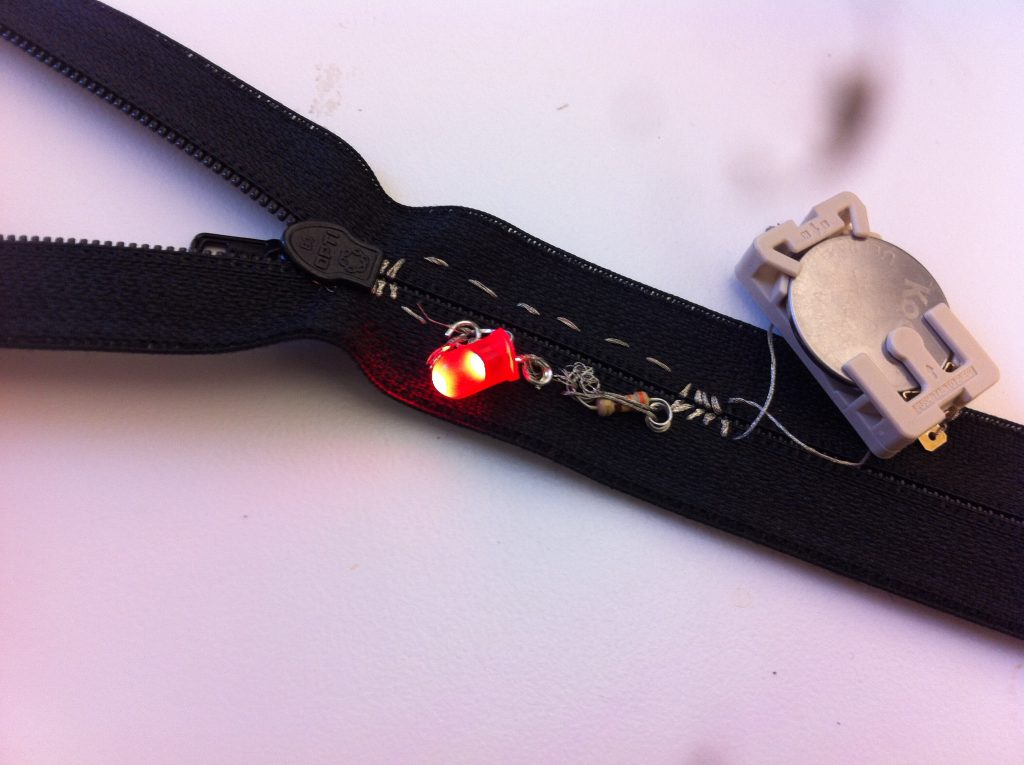
So here, I tried closing the circuit by attaching the positive conductive thread patch to the negative thread patch. The connection on the negative side was too lose. The thread wasn’t wound tight enough. Max, our teaching assistant, recommended I solder the lose end.
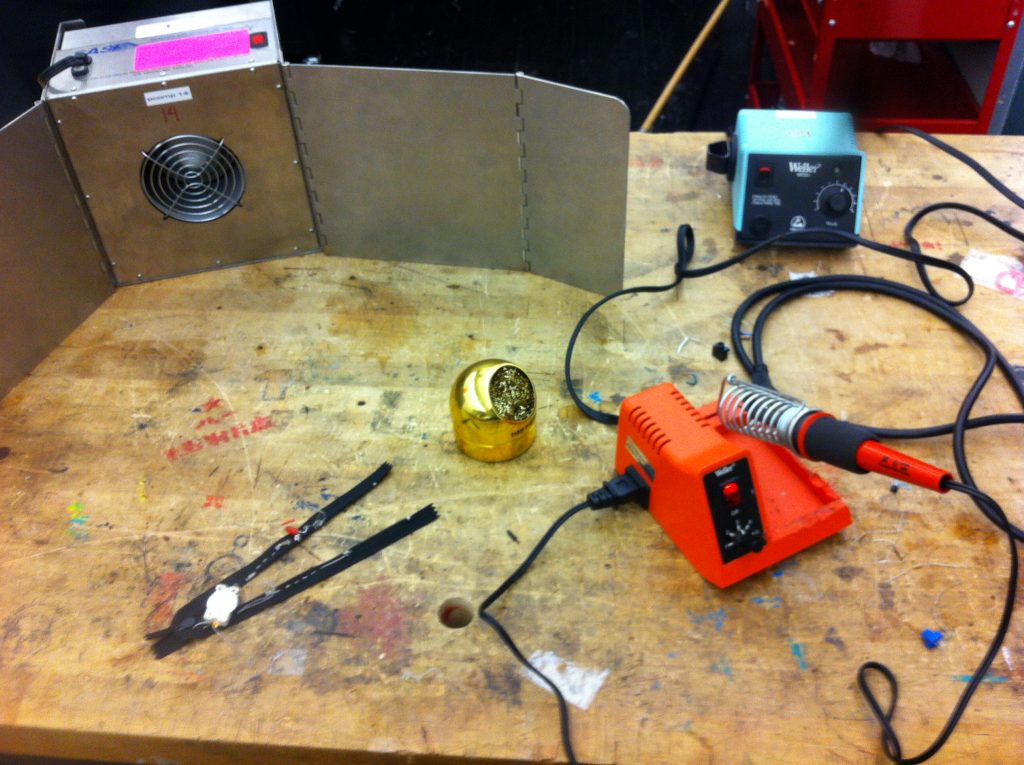
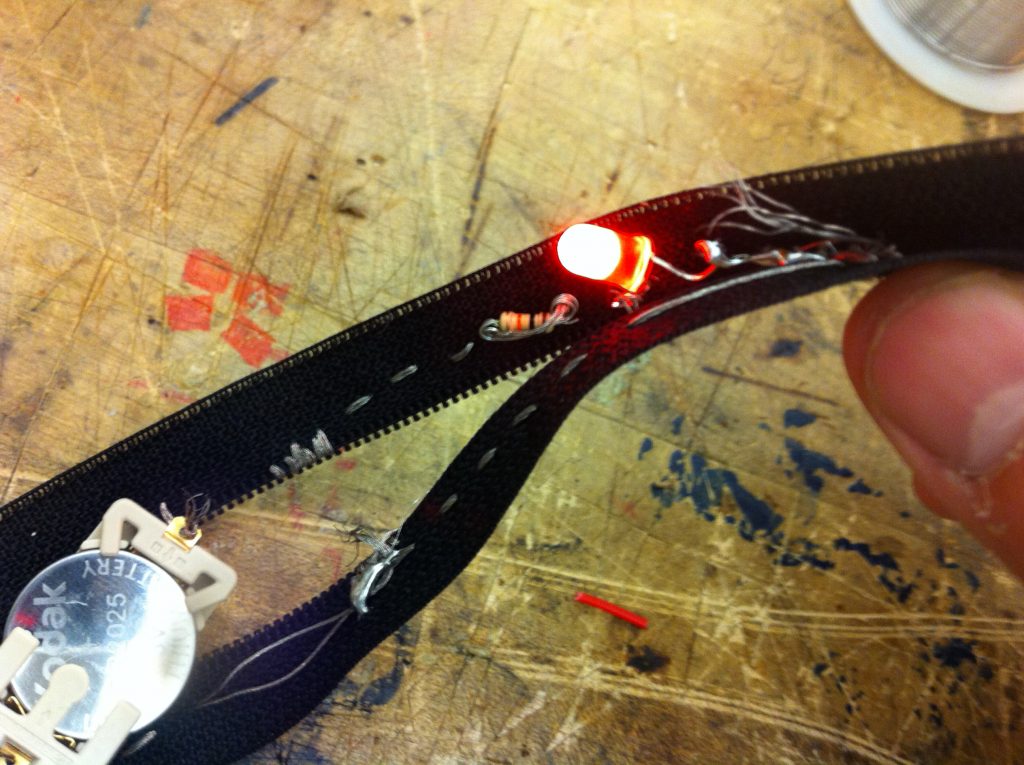
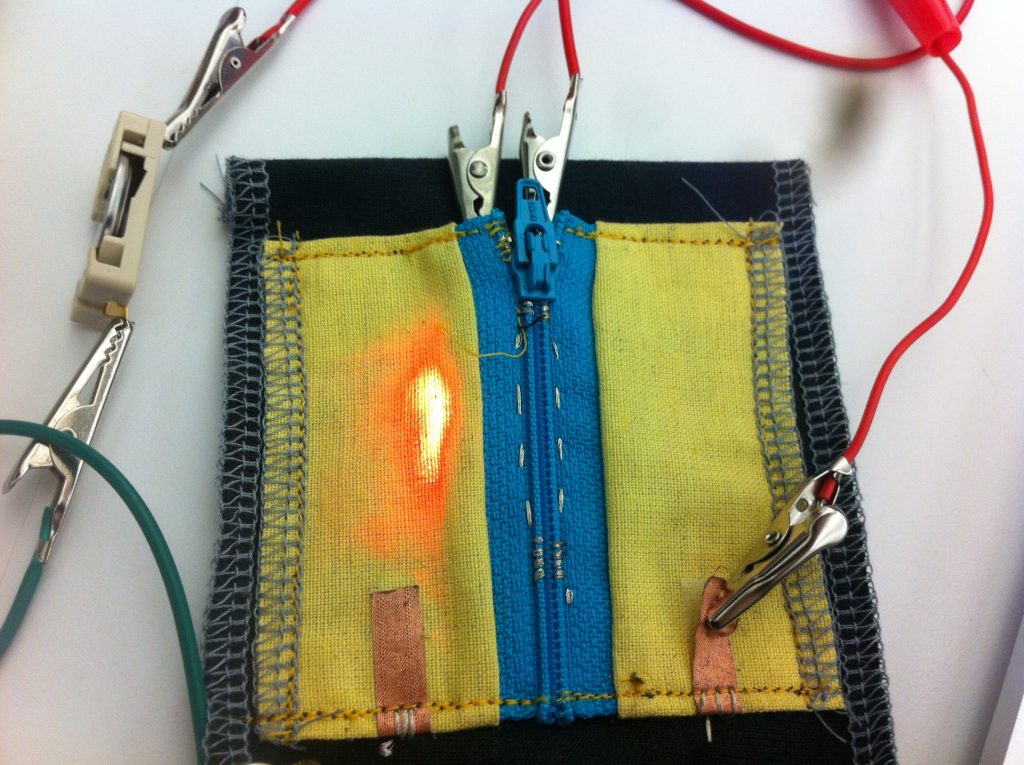
And there. With the loose ends soldered in…
… the LED lights up when the circuit is closed.
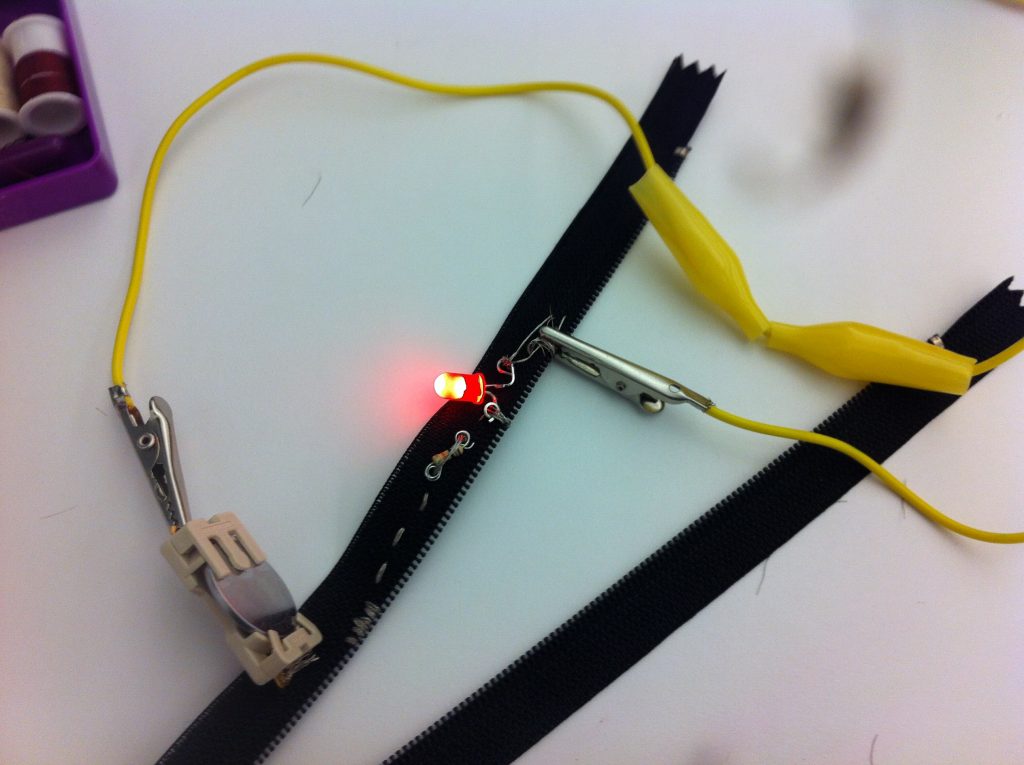
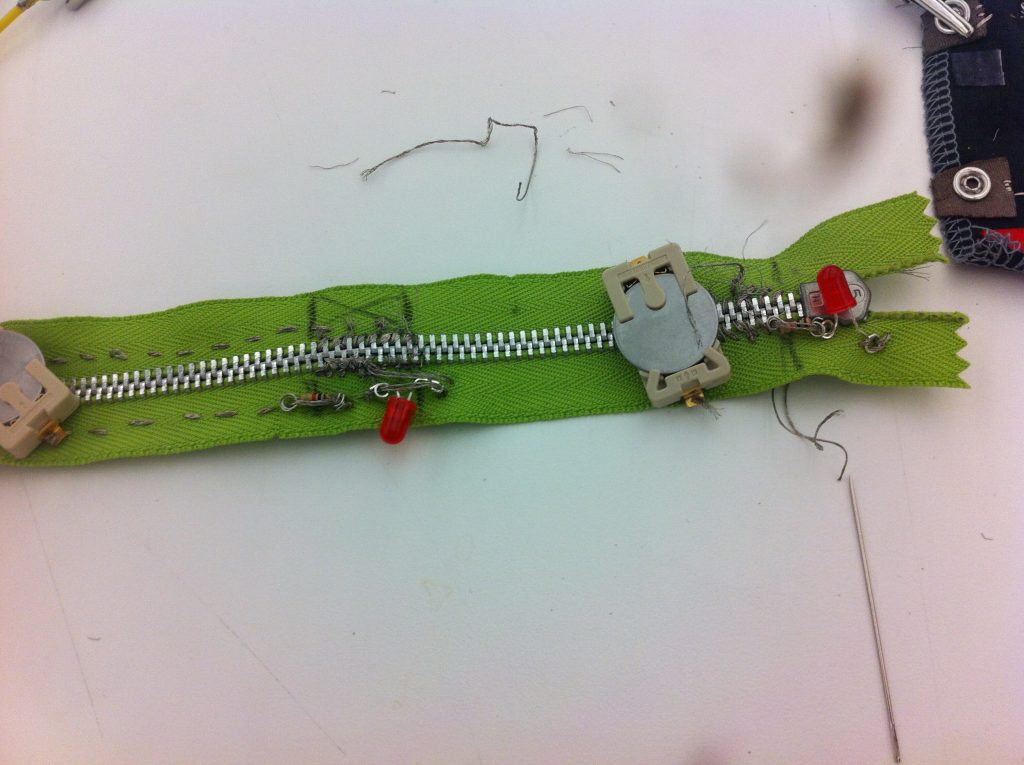
Now that I’ve learned these, it’s off to buy another pair of plastic zippers. Little victories.
What’s going to be inside? I don’t know yet. But our instructor Liza said that whatever should be inside, it has the potential to be powerful.
This is part of my thesis on violence. My original idea was that it would be a button that needs to be pressed to turn on a light. When I told Liza it would have a zipper, she told me to focus on either the zipper or the press.
“People I feel would be more likely to open a body bag zipper than actually touch it,” she said.
So! I decided I would make a zipper switch. This is a post documenting my first unsuccessful attempt to make a zipper switch.
UPDATE: THE TEETH WERE CONDUCTIVE AND THEREFORE DISRUPTING THE CIRCUIT. IT NEVER WOULD HAVE WORKED AS LONG AS THE TEETH WERE METAL AND CONDUCTIVE.
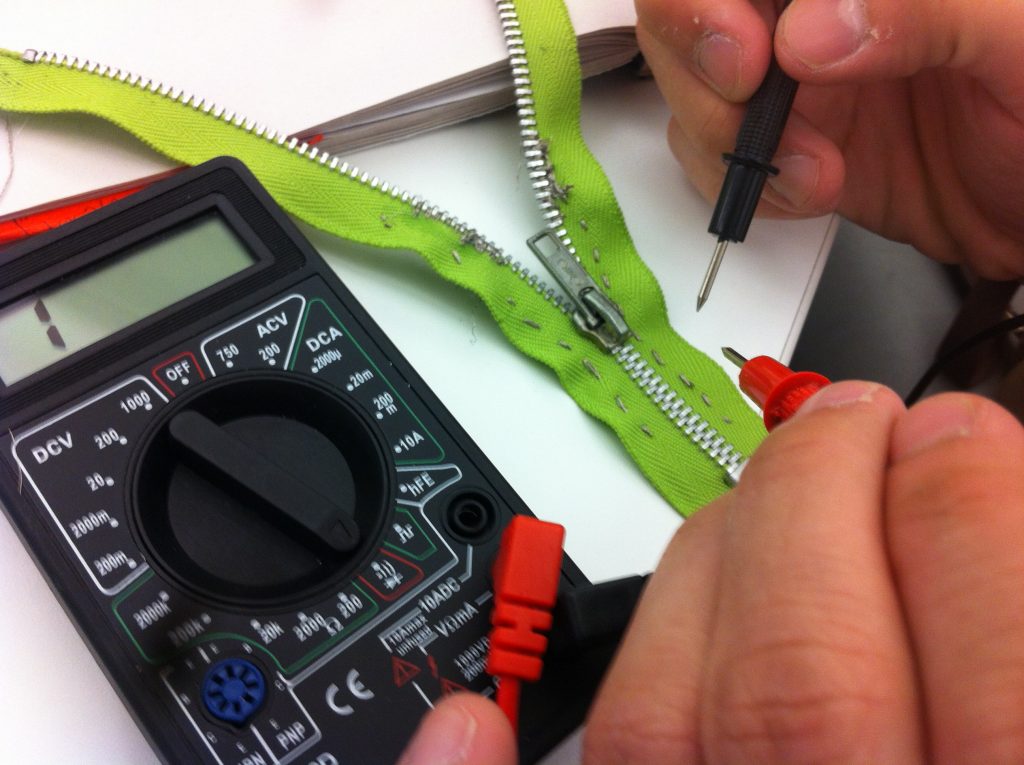
I spoke with classmate Audrey Fox who is a guru. She asked if maybe the teeth were conductive and recommended I take out a multimeter.
Connectivity. The teeth were conductive. Whereas…
The zipper teeth in the swatch are not, because they’re plastic.
Wow. The answer was there in front of me the whole time. The circuit never would have worked. It needed plastic teeth to work.
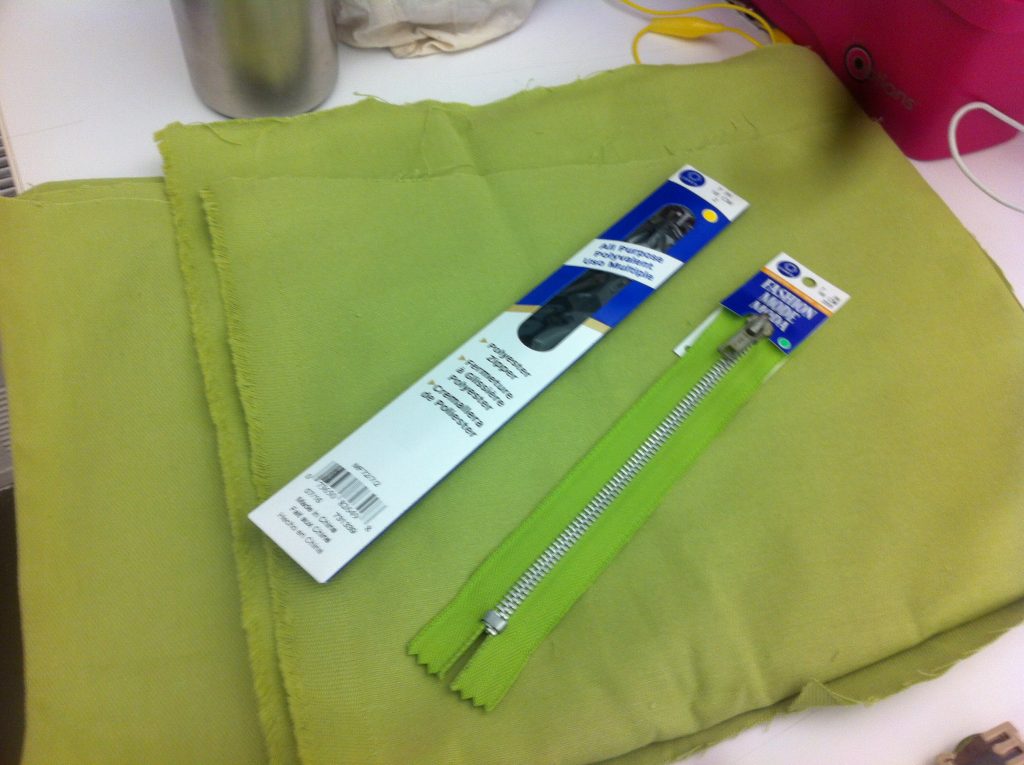
I bought two zippers from Michaels. In a panic I took out the black one, and to my relief, THE TEETH WERE PLASTIC.
I’ll prototype the circuit with the black plastic teeth.
Thank you, Audrey.
Original post below.
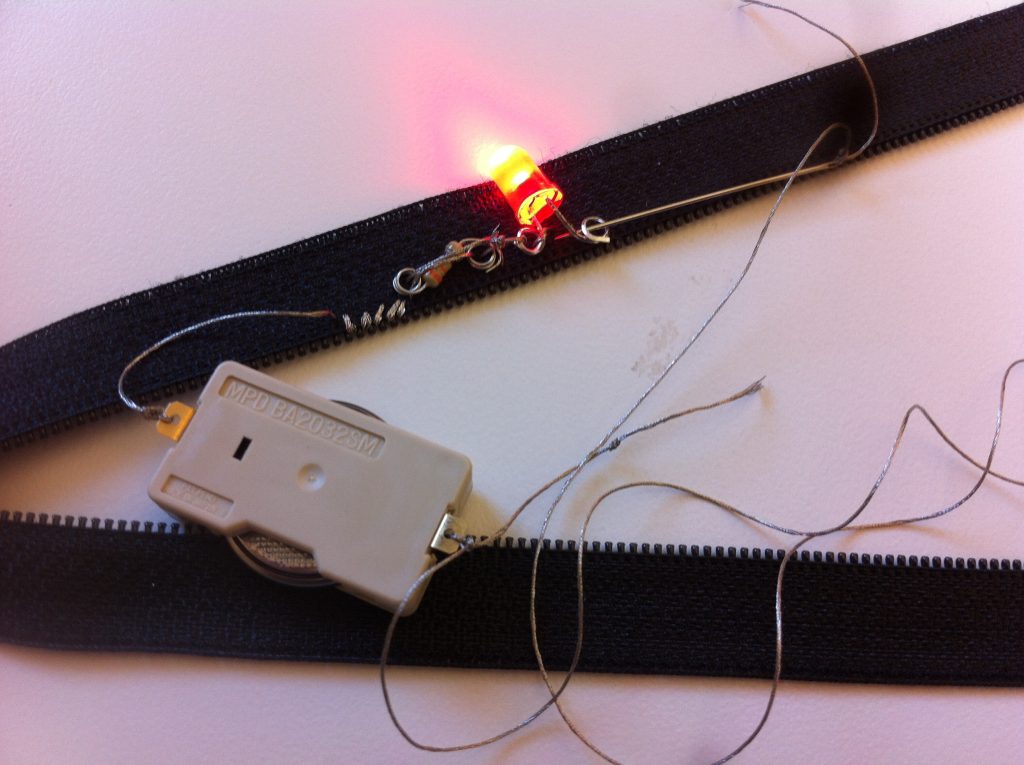
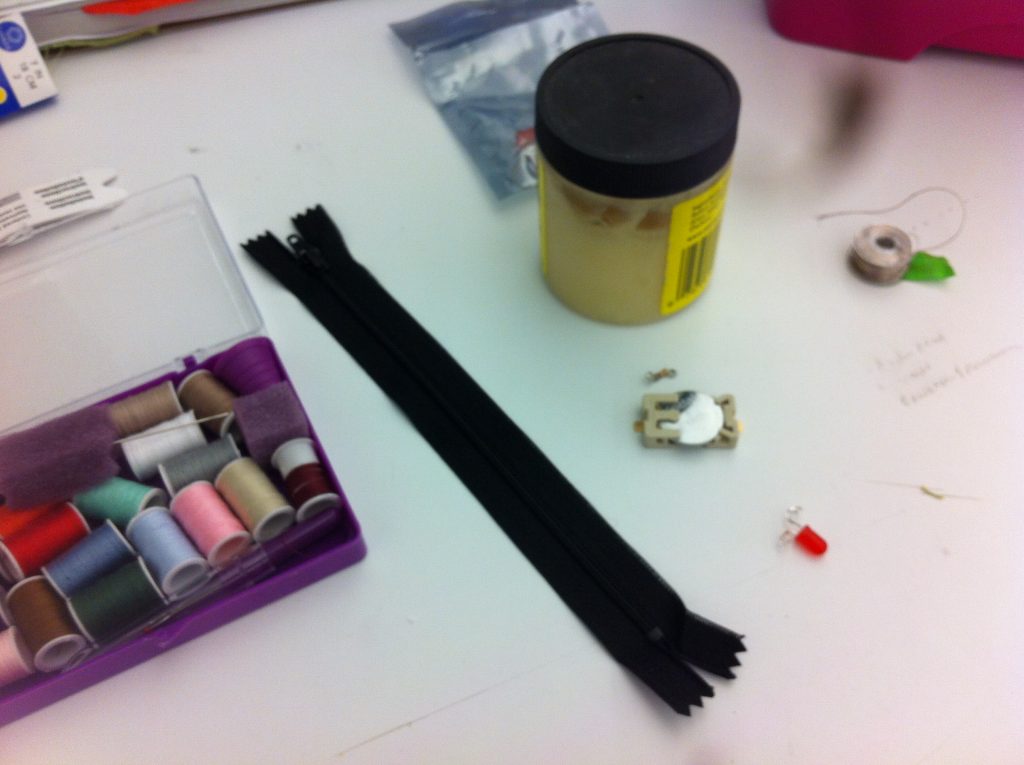
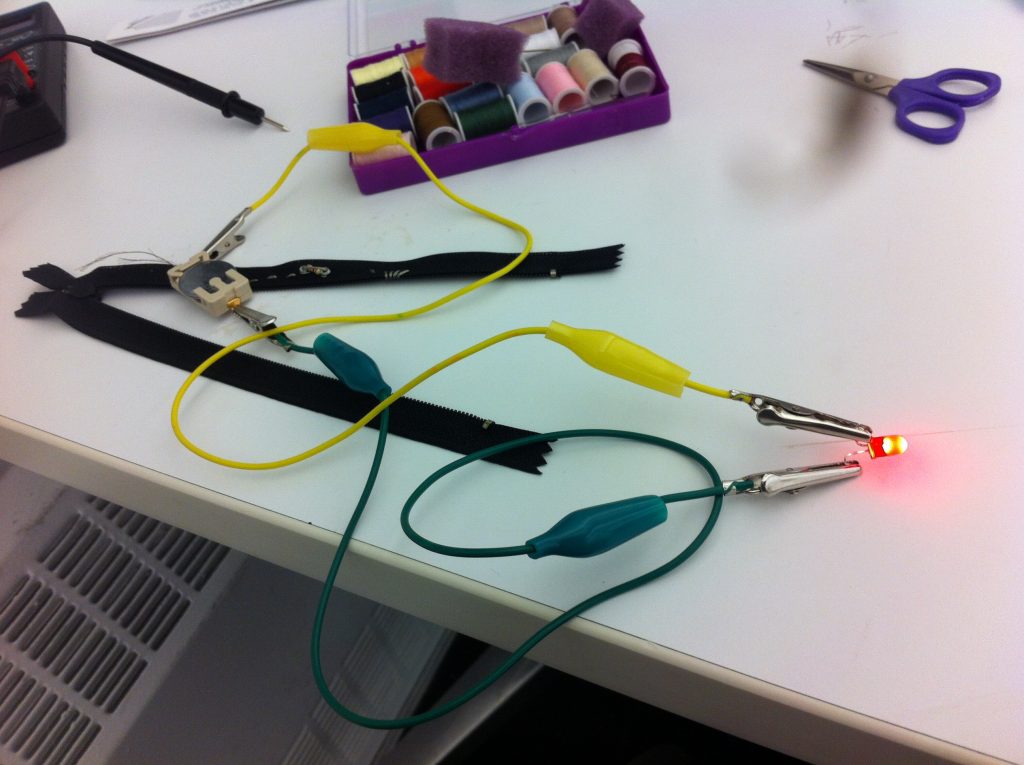
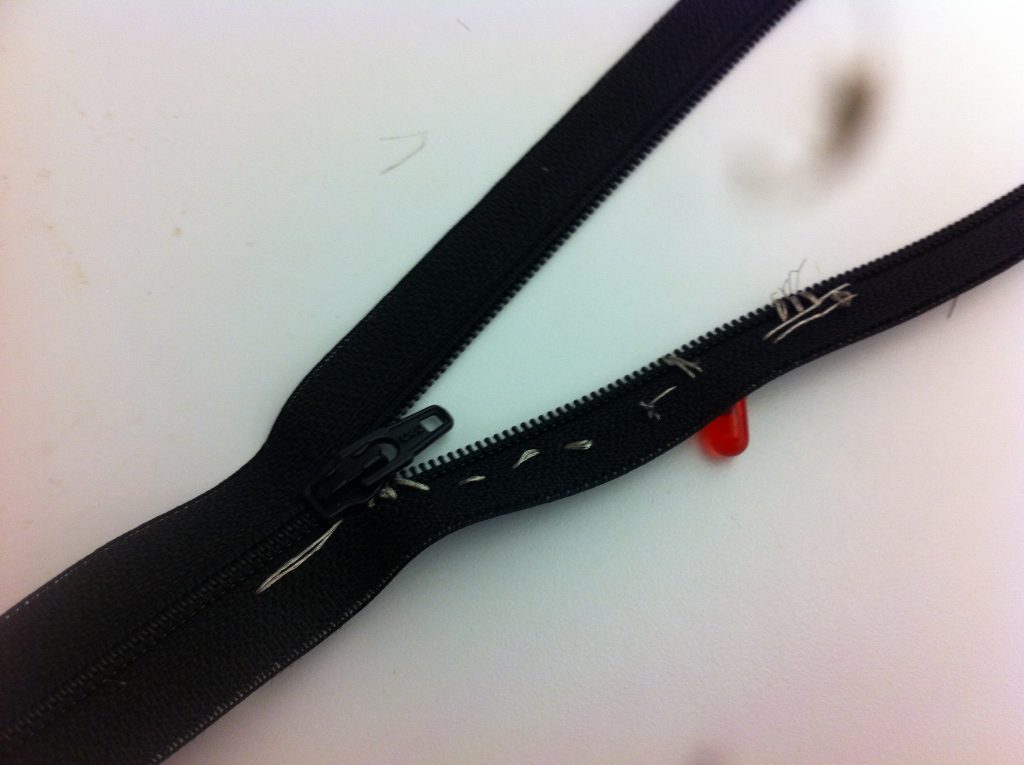
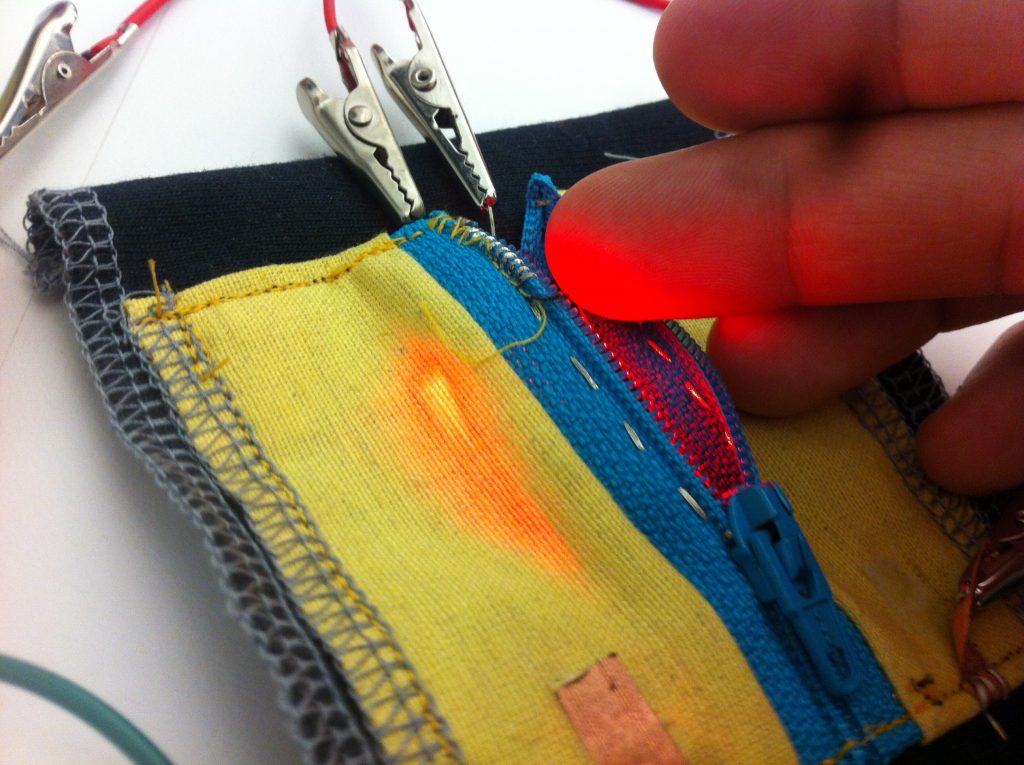
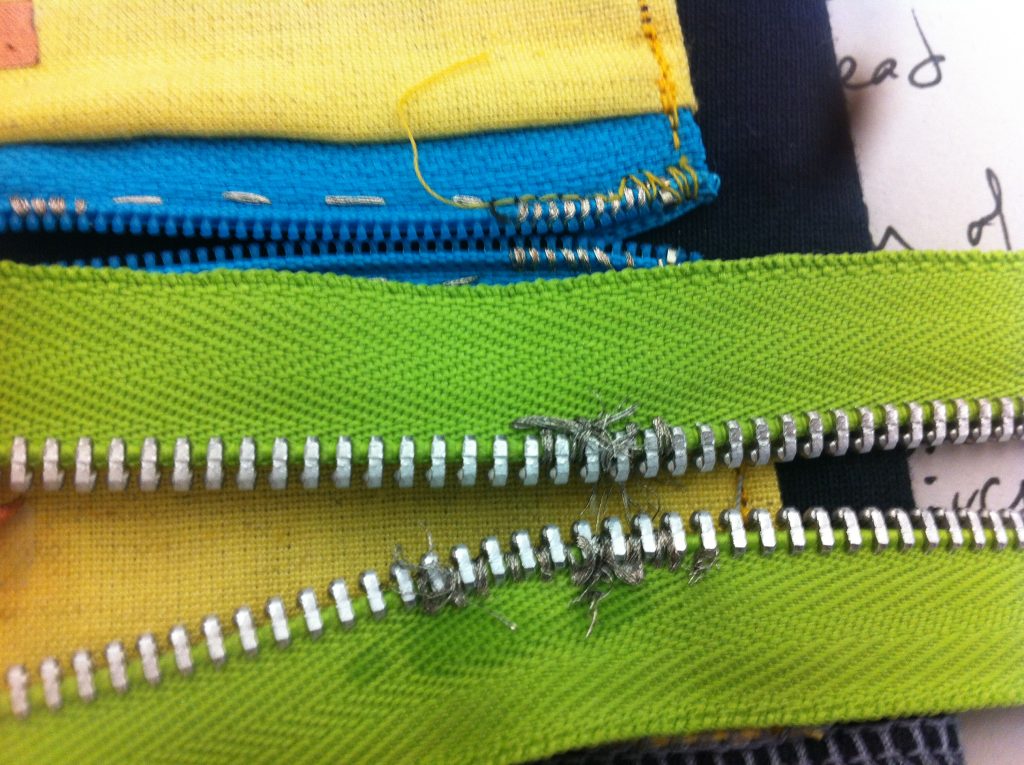
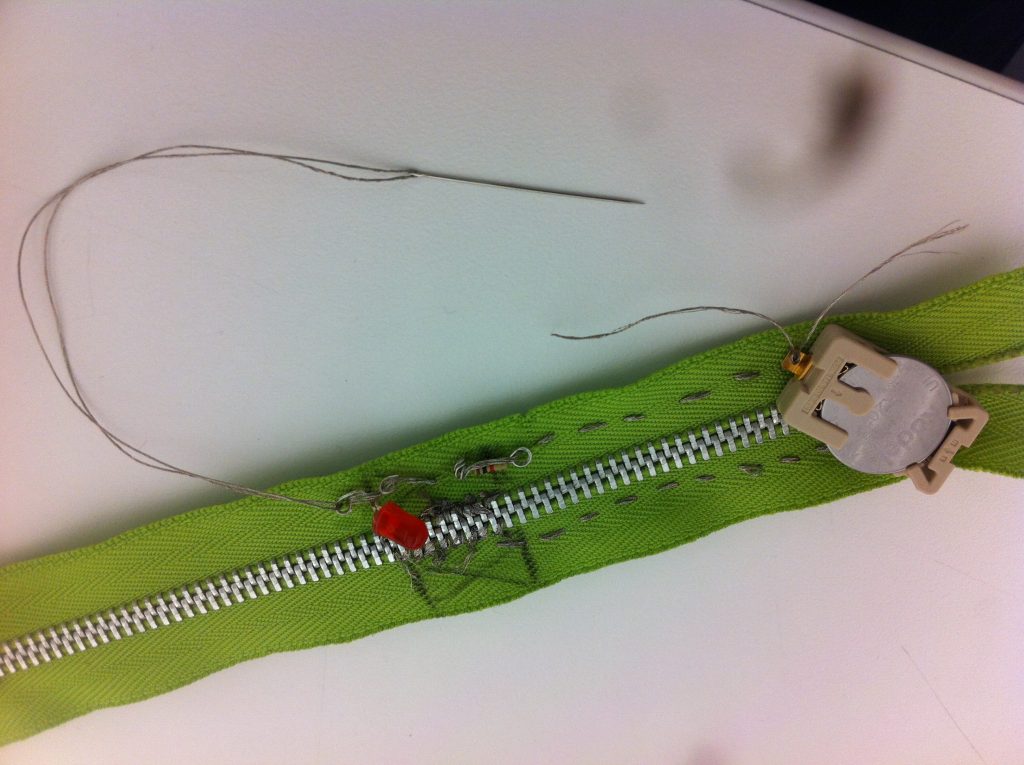
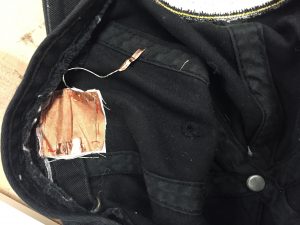
This is Liza’s zipper switch swatch. I borrowed it to study how to construct it. I want a creepy red glow to come out of it when opened.
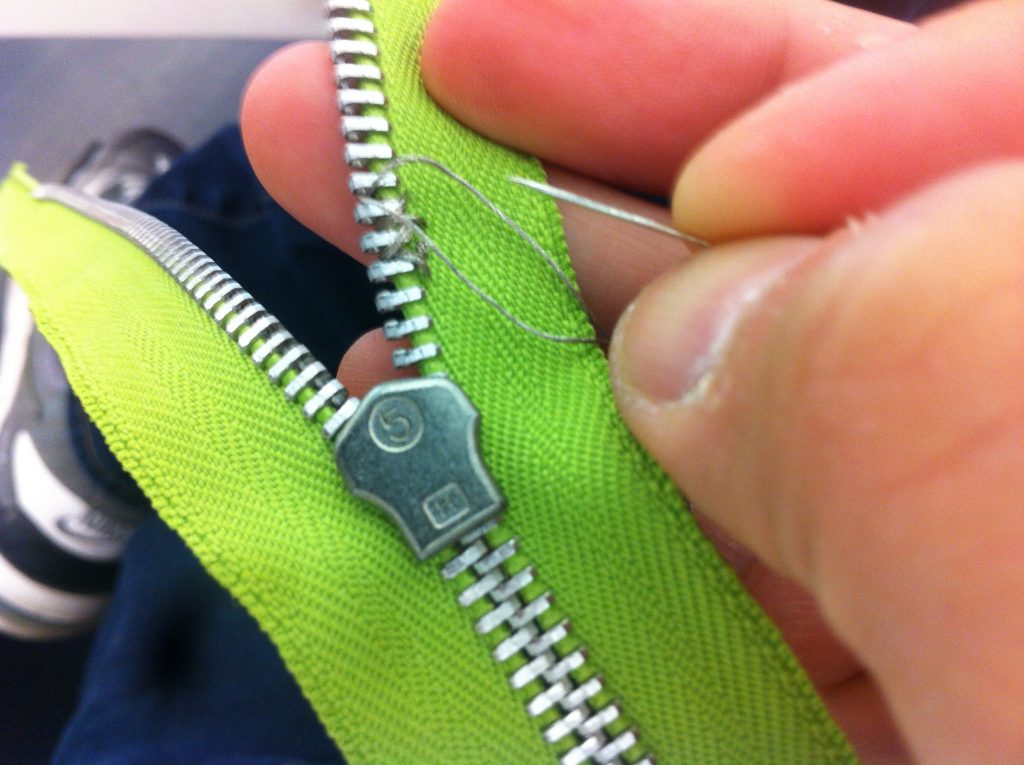
First, I bought a pair of zippers for prototyping. Since I had green fabric, I bought a green zipper. I needed to wind conductive thread between the zipper teeth to create enough conductivity to close a circuit.
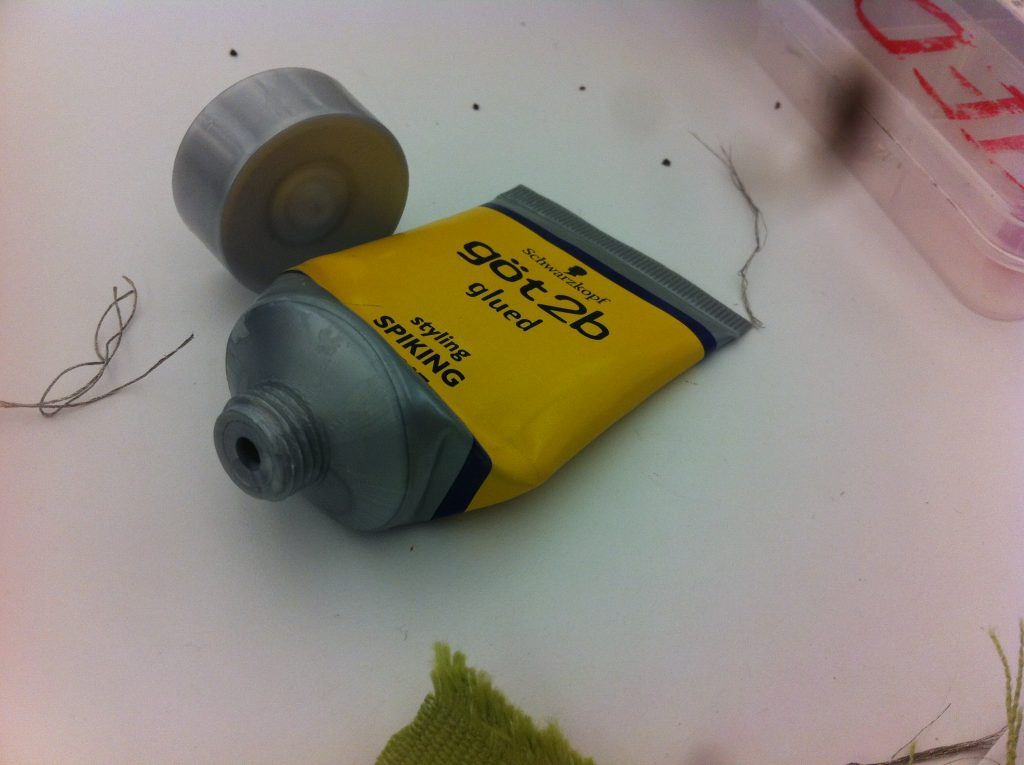
Threading conductive thread through a needle is annoying. The edges fray so easily. I read that I needed beeswax to clump it at the end. I didn’t have beeswax. I had hair glue. Which worked.
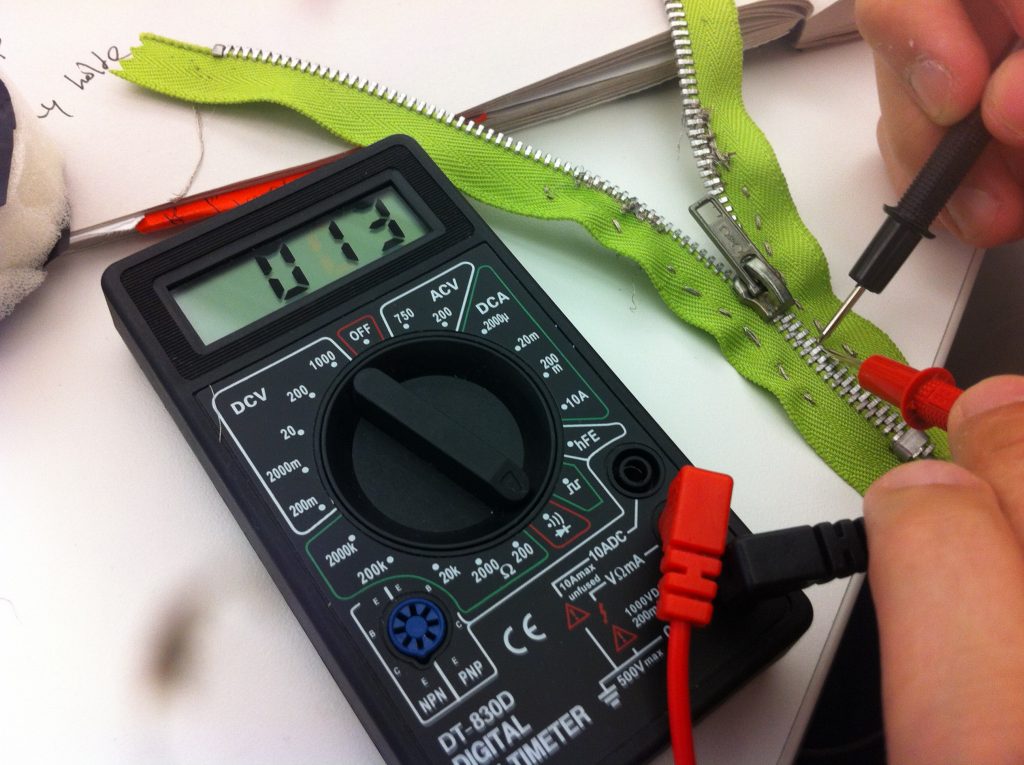
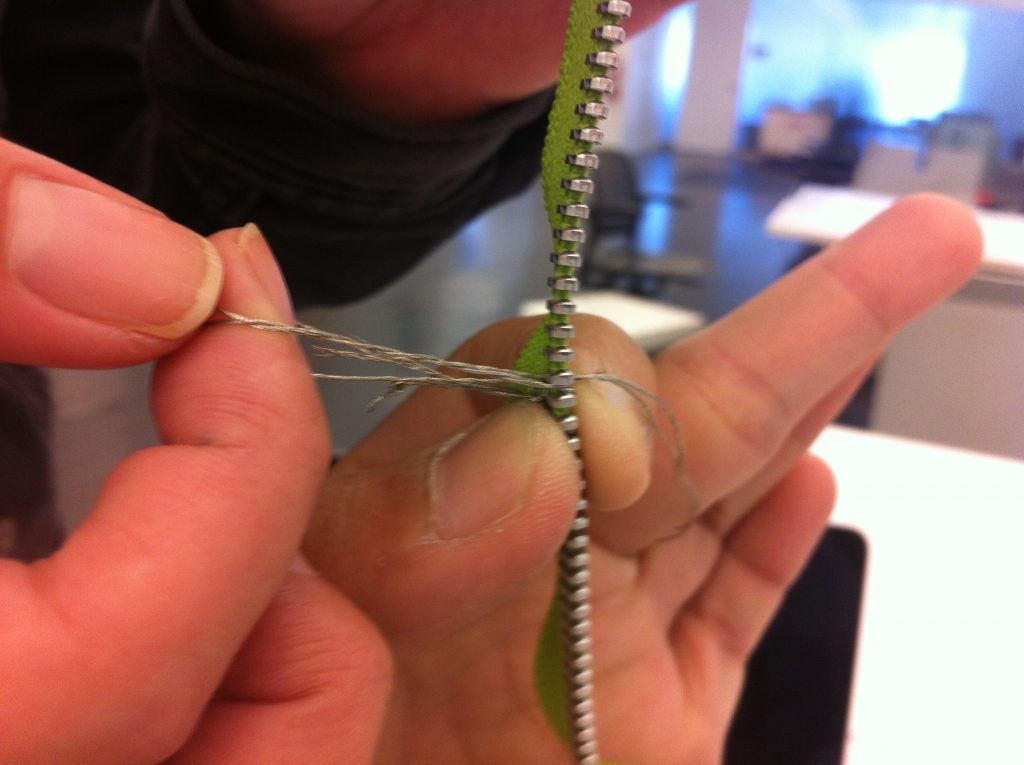
The thread kept getting frayed and stuck between the zipper teeth.
Then comparing the zipper teeth from Liza’s swatch to my zipper, I saw that the teeth in my zipper were larger. Which made it difficult. Look how messy my attempt to sew is.
You can see how clumped it got.
Then I would sew the battery holder in with the LED and resistor.
It didn’t work.
I tried a second attempt and that still didn’t work.


 T
T