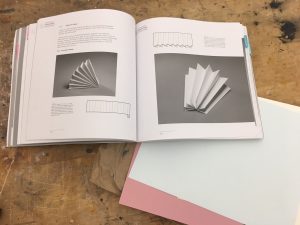
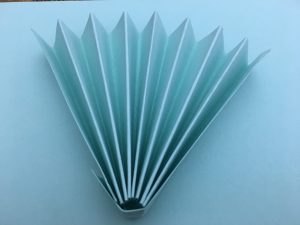
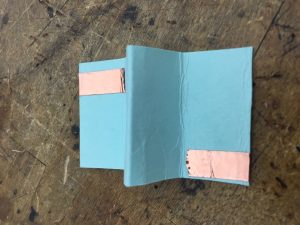
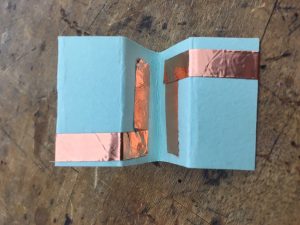
I started off by getting inspiration from the paper craft book in the Comp Craft locker. Man, that book is so cool. In the book, I found some interesting accordion folds. How perfect would that be for muscle wire, I thought, so perfect. So I folded up cardstock, sewed and soldered in my muscle wire and tested it out. When the fan was folded together my muscle wire lost tension and the effect of the 10% shrinkage was invisible.
Undeterred, I tried a flat to folded method. That one worked and I made a button to go with the interaction. You pinch the fold to fold the paper. See the video below!

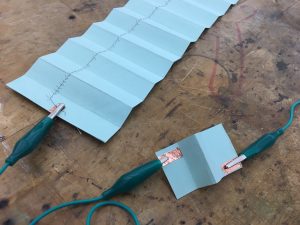
Summary: Liza was right that this stuff is tough to work with. In the future, I’d use a slightly thinner paper and thread the muscle wire through the folds with the metal crimps intermittently in order to hold it in place and provide the shrinking fan effect that I’d originally envisioned.
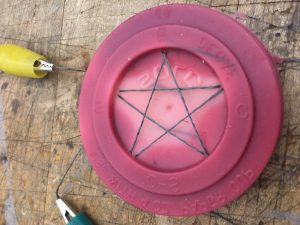
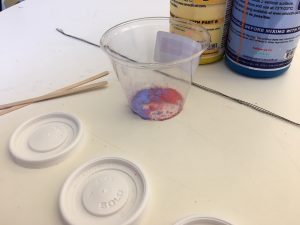
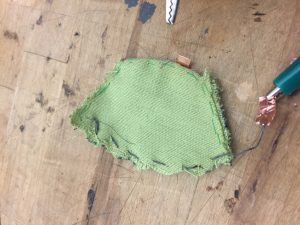
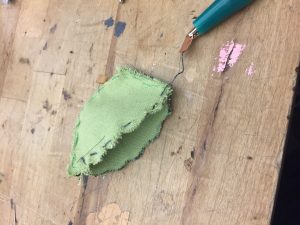
I had some rubber casting supplies left over from a project last spring. What I wondered was if it would respond well to thermochromatic ink. And yes, I discovered, it works very well. The mix I used was about 1/2 tsp red, 1/4 tsp blue and an equal mix of part A and part B of the silicone rubber casting goo- about 4tbsp worth.
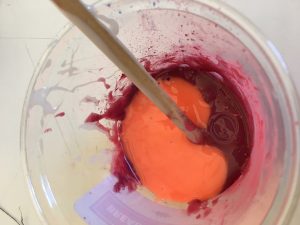
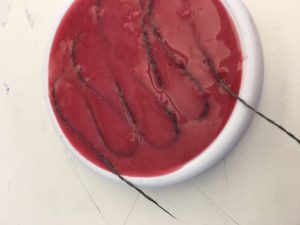
Mix well. Use gloves and be in a well-ventilated area. I poured the mix into the lids of three small cups and laid the stainless steel thread into the goo.
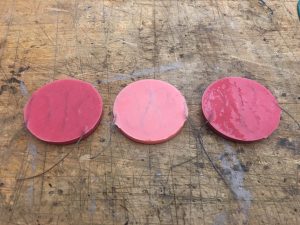
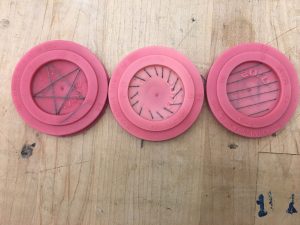
When cured (6hrs), the rubber was nicely reactive to temperature. However the thread I laid into the mix had become too resistive in the rubber and would not conduct enough to heat the matrix. To solve this, I sewed some stainless steel thread into the rubber. This solved the issue and worked quite well.
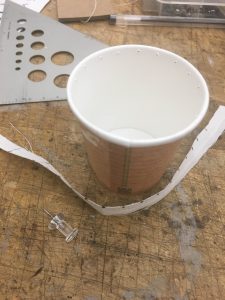
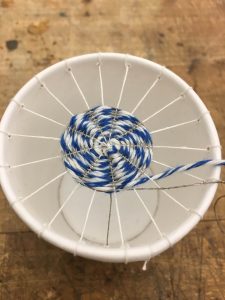
After a series of unsuccessful tests, I chose to follow an Instructables tutorial called “woven paper cup speaker” for my swatch. You can see the full thing here.
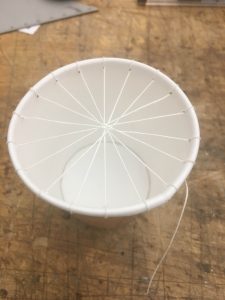
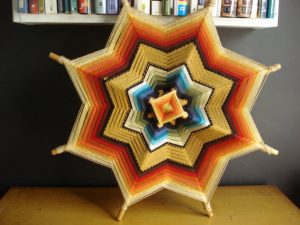
It was a fairly simple process. I changed the build slightly by using espresso cups (cute) instead of full size cups. First you poke 1cm apart homes around the rim then set up the warp (the spoke-like thread matrix) for your weaving. Using conductive and non-conductive thread, work your way around the warp in traditional weaving fashion (under, over, under, over) making sure to alternate rounds with each thread so the conductive thread doesn’t touch itself. Keep this up and in no time you’ll be done! These work pretty well, which leads me to wonder if it’d be possible to change up the structure or the scale (see inspiration below).
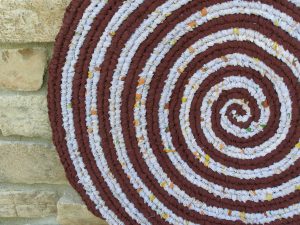
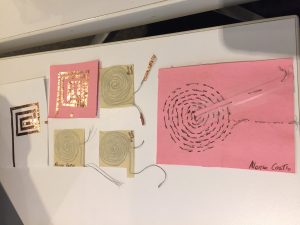
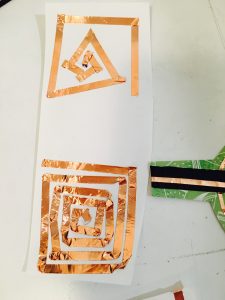
This week, I decided to play with composition, color, and tape thickness for my swatches. I used a tight spiral pattern.

Here are my in-class amp and speaker swatches.
LED Behavior Code
int tempPin = A0;
int led1Pin = 11;
int led2Pin = 9;
int led3Pin = 10;
int currentState = 0;
// LED values:
int ledDim = 50;
int ledMid = 100;
int ledFull = 255;
int tempMin = 100;
int tempMax = 500;
void setup() {
pinMode(led1Pin, OUTPUT);
pinMode(led2Pin, OUTPUT);
pinMode(led3Pin, OUTPUT);
pinMode(tempPin, INPUT);
Serial.begin(9600);
}
void loop() {
int tempReading = analogRead(tempPin);
if (tempReading < tempMin) {
currentState = 0; // dim
} else if ( (tempReading >= tempMin) && (tempReading < tempMax) ) {
currentState = 1; // mid
} else {
currentState = 2; // full on
}
Serial.print(tempReading);
Serial.print(“\t”);
Serial.println(currentState);
switch (currentState) {
case 0: // dim
analogWrite(led1Pin, ledDim);
analogWrite(led2Pin, ledDim);
analogWrite(led3Pin, ledDim);
break;
case 1: // mid
analogWrite(led1Pin, ledMid);
analogWrite(led2Pin, ledMid);
analogWrite(led3Pin, ledMid);
break;
case 2: // full on
analogWrite(led1Pin, ledFull);
analogWrite(led2Pin, ledFull);
analogWrite(led3Pin, ledFull);
break;
}
}
Midterm Prototypes
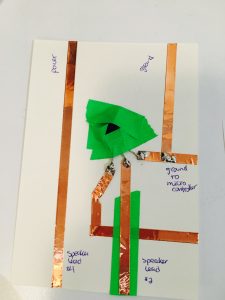
Paper prototypes:

Here I tried to make open close switches with macrame knots and conductive thread. This ties into the idea of pulling the hanging planter down in order to light or turn off the LEDs (think lamp cord).
Concept:
I’m designing a lamp that feels kind of magical. I drew out some sketches and the macrame one stood out for me. That’s what I made my (somewhat unsuccessful) macrame switch prototypes. Mainly this falls into a funny subsection of aesthetics I fondly call witchster, one part witchy one part hipster. It’s huge in Bushwick ;).

Materials list:
Precedents / Style:


I’m a maker, designer, researcher, and a craftsperson.
I choose these words to describe my practice because they reflect how I approach creative expression. My research, daydreaming and desire to get my hands dirty influence my work. As a maker I get curious about how to do anything from make kimchi to knit socks or fix a bike chain. As a designer I like to think about why people choose what they do and how to build affordances into object and experience design. As a researcher I get lost in the pursuit of knowledge. As a crafts person I have a steady hand for structure and tend to obsess over clean lines and materiality.
My favorite tool would be a hot glue gun. I’ve been using them since I was a kid. Pretty sure there is no limit to their usefulness.
I really enjoyed trying out learning to weld in the metal shop. I would recommend it to others and hop I have a chance to use it again soon.