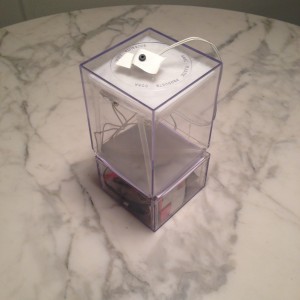
For my memory project, I created a rectangular prism that represents both the act of remembering as well as the subconscious process of forgetting or fading memories.
Background:
Much of our current understanding of memory looks to the chemical or material processes and physical structures that make up what we think of as the abstract concept of a “memory”. Memories are very real, very material things – they are believed to be a series of connections between synapses that are strengthened and weakened over time based on how frequently these memories are accessed, or rather how often chemical neurotransmitters and electrical currents transmit across a unique pattern of synapses.
Synaptic plasticity allows for us to strengthen memories through the use and reuse of synapsis as learning continues, previous thoughts and concepts are associated with new ideas, and the past is remembered. This strengthening has a material basis, with proteins being built or modified to increase connection strength between synapses. In the case of memories, the old idea of “if you don’t use it, you lose it” is believed to be true: If a memory is not frequently attended to, strengthened, or associated with the present, it weakens. The mind has a finite amount of resources, and maintaining an infinite amount of information – treating the most mundane details of our lives as equally important as the moments that we most treasure – would be inefficient and exhausting. Thus, we “delete” old or unnecessary memories from our brain, giving priority to those thoughts and ideas to which we refer to most.
This is a brief overview of the idea behind my project – that there is an ephemeral, material component to memory, and this “memory-matter” degrades over time as we fail to attend to it.
The Prism:
The prism consists of a clear plexiglass container containing a glass jar, woven heating elements, a button, and a thin block of solid coconut oil. The heating elements are constantly being powered by a battery inside the container, warming the solidified coconut oil and causing it to melt and be collected by the funnel into the glass jar below. However, when the button is pressed by the user, the heating elements are turned off, and an LED within the container’s funnel begins to pulse. When the user releases the button, the heating resumes.
This circuit and user interaction is meant to mimic the process of attending to the synaptic connections that form our memories. So long as we continue to remember specific details, those details cannot be forgotten. And so long as we continue to push the button, the oil cannot melt.
Materials:
for the circuit
- LED
- TIP122
- 100k ohm resistor
- 100 ohm resistor
- button
- 9V battery
- Nitinol/high resistance wire (tested multiple materials, and nitinol/muscle wire works best)
- Arduino Uno
- Alligator clips
- wire / conductive thread
- Breadboard
- Thermochromic paint/pigment + paper (for swatch to test heating elements)
for the container
- 4″x4″x6″ clear plexiglass cannister
- 6oz. glass jar
- Perforated plastic / needlepoint plastic sheet (to sew heating elements into)
- Small plastic funnel
- Coconut oil (room temperature or refrigerated to make solid)
- Plastic dowels/straws (to keep things in place)
The Heat Circuit
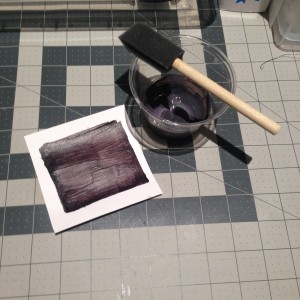
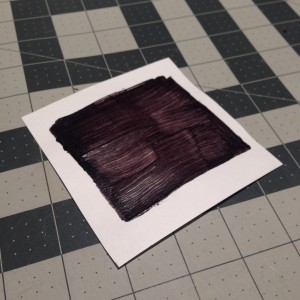
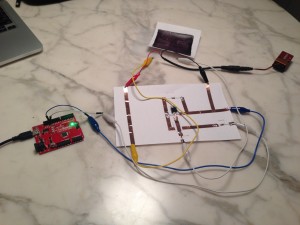
To test the heat circuit that you’ll be making, it’s helpful to prepare a small swatch of thermochromic pigment (material that will change color as it heats up) mixed with a clear medium (I used Modge Podge).
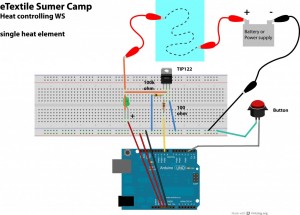
The circuit diagram for the heat controller was found at the eTextile Summer Camp website. They’ve generously provided the following Fritzing diagram:
This was the same circuit used in this project. The following video shows the circuit in action heating up the thermochromic swatch that was previously prepared:
(read more for the code)
The Code:
const int buttonPin = 2; // the number of the pushbutton pin
const int ledPin = 13; // the number of the LED pin
// variables will change:
int buttonState = 0; // variable for reading the pushbutton status
void setup() {
// initialize the LED pin as an output:
pinMode(ledPin, OUTPUT);
// initialize the pushbutton pin as an input:
pinMode(buttonPin, INPUT);
}
void loop() {
// read the state of the pushbutton value:
buttonState = digitalRead(buttonPin);
if (buttonState == HIGH) {
// turn LED on:
digitalWrite(ledPin, HIGH);
}
else {
digitalWrite(ledPin, LOW);
}
}
