Category Archives: Assignments

Week 3: Assignment

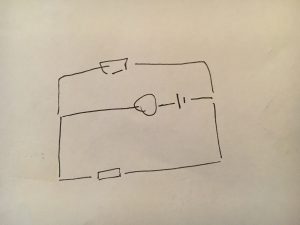
I want to create a tilt switch where I can close a circuit by tilting an object from sides to sides.

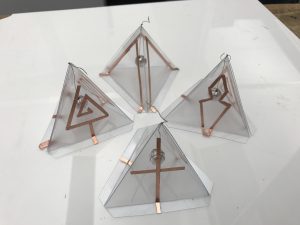
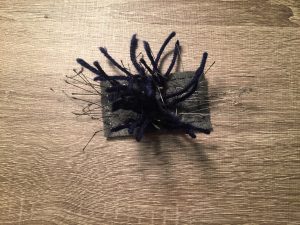
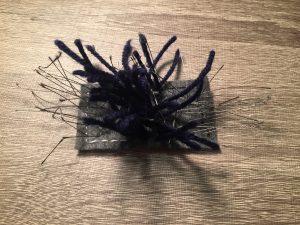
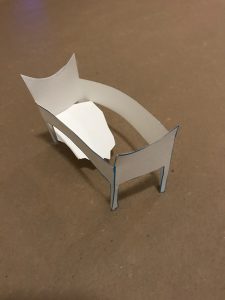
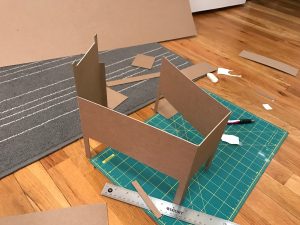
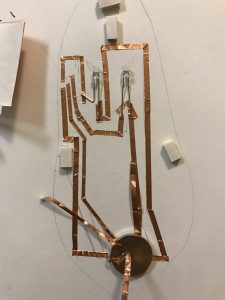
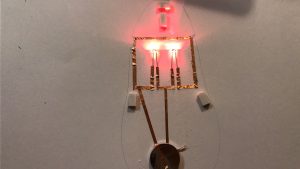
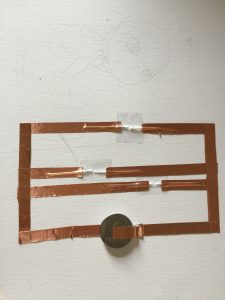
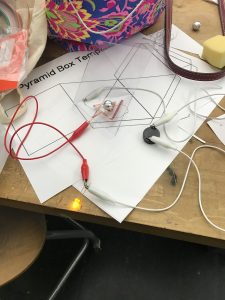
I choose to create a triangular model where I hang a conductive ball (which I made out of a wooden ball covered by foil and sewed around with a conductive thread) in the middle of the pyramid.

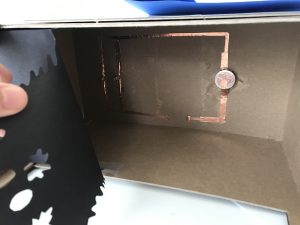
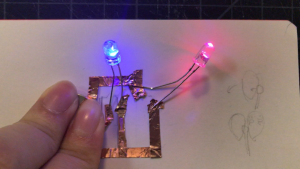
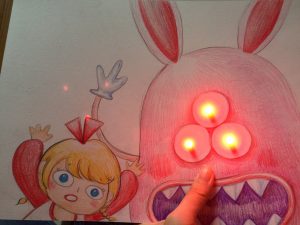
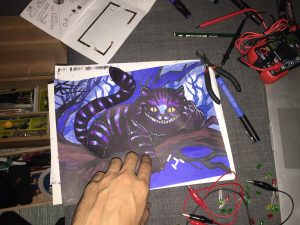
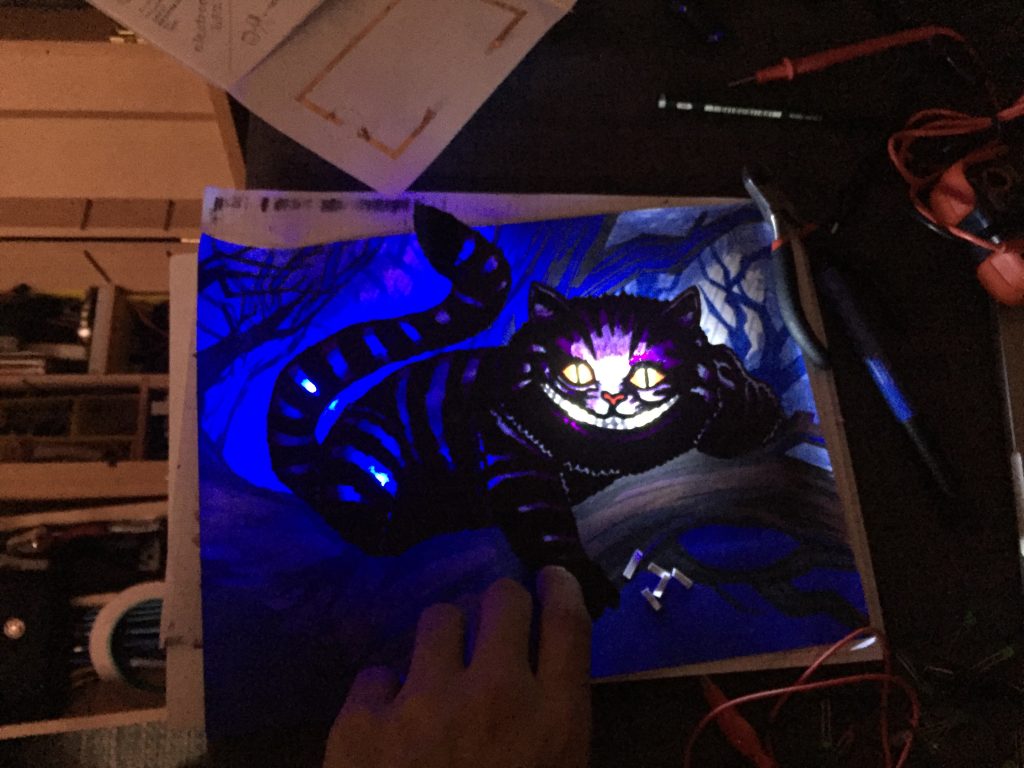
My first test of the conductive ball on a wall of the model.

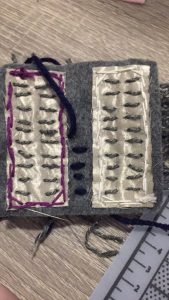
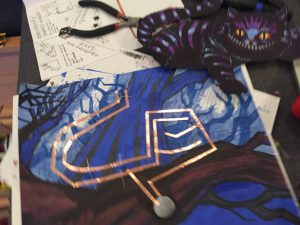
I decided to experiment with different kind of illustrations for each one of the swatches to experiment more ways of tilting the switch.for instance: bringing the ball to the center of the slide to activate a circuit or bringing the ball in between two sides to activate two circuits at the same time.

There are many ways to play with this swatch: bringing the ball to the center of the slide to activate a circuit or bringing the ball in between two sides to activate two circuits at the same time.

From making this I can imagine some games that can use this as a controller to play.

Week 3 Assignment

I made four pressure sensors this week, but I originally planned on making them through sewing conductive thread into cotton cloth, but it didn’t work out well at all. I think maybe I need to find thicker and better quality cloth than the ones I bought from Michaels. Or maybe I just need to practice my sewing because it was painful how awful they turned out.

So I then decided to just go back to paper and cooper tape. I remembered that pressure sensors worked better working with weaving conductive materials together rather than just having two large conductive pieces with a resistive material in between. I ended up making strips of paper and copper tape and weaved them together to forming this:

I glued them together to form a square and then added some velostat in between as the resistive material and created four pressure sensors. It worked really nicely I think, but I noticed when I tested that some electricity would already go through it without adding any pressure. Maybe the velostat layer had to be perfectly cut to the size of the square to cover up all of the cooper tape connections or maybe I needed a higher resistive material. Overall I am really happy with the results and can’t wait to make more sensors! Goodbye buying sensors and hello crafting sensors!

– Aaron Lee

Assignment_03

For this week’s assignment, I’ve decided to create a stroke sensor. Instead of using store bought conductive yarn, I decided to make my own. (I didn’t have any conductive yarn handy, and I had lots of conductive thread available.) I did this by braiding non-conductive yarn and conductive thread together.

This is the first stroke sensor I made. It worked well, but the thread and yarn untangled from each other.

For the second one, I glued the tips together. This worked in keeping the two together. In the first sensor, I glued the conductive fabric to the back of the felt. I wanted to try sewing the two pieces together in the second one and see what kind of results I would get. As it turns out, it worked just as well, and it was much easier to sew all the pieces together. By sewing the pieces together, it also allowed me to customize the sensor a little more.

For the third sensor, I decided to try different methods of using the materials. I left the thread open and I added non-conductive yarn in the middle. This didn’t work as well because the thread is exposed, and it was easy for the two sides to make a connection.

For the last one, I decided to try another type of yarn. This one was hard to use because it the yarn was much thicker. I decided to leave the middle open because the thread was insulated enough as is.

Week 3: Assignment

  1. Create one switch or a sensor. You can use any materials or techniques you like.
  2. Make three more identical ones. You will have 4 total swatches. Bring ALL of them to next class.
  3. Document it on the blog. I will give you a format to follow.
  4. Bring your Arduino and related supplies for next class.

Assignment 2

I chose to create a scene from the book There’s a Monster Under My Bed by James Howe. 

When Simon(The protagonist) said: “I forgot to check under my bed tonight before I got in. Now it’s too late. He’s there. Waiting. Waiting for me”.

It inspired me to create a shadow art, that when Simon is tucked to bed activates the monster under his bed.

My first step was to mocked up a small bed to see if it’ll work or not

Then I constructed the bed

Create the circuit

but I messed it up a bit in the end because it won’t light 2 LEDs so I had to use two battery

and I made the switch on the other side so when the blanket is slid up it will close the circuit

This is my finished product but it seems like the weight of the blanket is not enough to close the circuit so most of the time, I still need to put my hand on the blanket to activate the monster shadow.


Week 1

The most existed thing for the smokedress project for me is the interreact. Anouk Wipprecht which is the designer of the dress give clothing life cause of her your clothes have brain shoes can make decisions and outfits are able can receive the environment around them.

What she made out about the dress makes it became not only just an outfit she make it more functional and she actually does give the dress more meanings people can put the dress into the scenario that they imagine.

Week 2 Assignment _ Chang Liu

INSPIRATION:

I chose a quote from a short story called Painted Skin in Strange Tales from a Chinese Studio (Liaozhai 聊斋) by the Chinese writer Pu Songling(蒲松龄)in 1740. Painted Skin was one of the popular strange tales in this anthologyof supernatural tales.

见一狞鬼,面翠色,齿如锯。铺人皮于榻上,执彩笔而绘之;已而掷笔,举皮,如振衣状,披于身,遂化为女子。

Softly creeping up, he looked through the window and saw a hideous devil, with a green face and jagged teeth like a saw, spreading a human skin upon the bed and painting it with a paint brush. The devil then threw aside the brush, and giving the skin a shake out, just as you would a coat, threw it over its shoulders, when lo! it was the girl.


I got the inspiration from the girl(fox goblin) who was wearing a mask made of human skin, on which her attractive features were painted.

Resource from the film Painted Skin (2008).

https://img1.doubanio.com/view/photo/raw/public/p462059199.jpg

PROCESS:


First, I drew a sketch of my initial idea on the look & feel of this project.

Next, I started to cut out the figure from paper.

Then I started to test how the LEDs would work. There were some obstacles that stopped me in keep working —- I put those two LEDs in the same positive end which could only make one LED light up.

#1 test 

#2 test 

#3 test 

DOCUMENTATION VIDEO:


Week #2 Assignment

Alice in wonderland and characters are always being intriguing and fascinating to illustrate and to bring into a project. For this assignment I took a passage from Lewis Carroll’s book.

“Alice waited a little, half expecting to see it again, but it did not appear, and after a minute or two she walked on in the direction in which the March Hare was said to live. `I’ve seen hatters before,’ she said to herself; `the March Hare will be much the most interesting, and perhaps as this is May it won’t be raving mad–at least not so mad as it was in March.’ As she said this, she looked up, and there was the Cat again, sitting on a branch of a tree.” – Lewis Carroll.

Around this passage i creates both the illustration and the circuit for the assignment.

Crafting A Path (Week 2)

For this project, I decided to make a scene from my favorite book series, Harry Potter. I choose the scene that Harry first produced the patronus, which was in the shape of a stag. So I did this illustration of the scene, and use cotton to create a dreamy effect of the smoke suppose to come out along with his patronus and also as the cover for the LEDs and the copper tape.

After I finished the illustration, I was trying to figure out a way to lay out the circuit underneath the patronus. I decided to go with a parallel connection with the switch and battery in the middle. Here’s the diagram for the circuit I used in the project.

The circuit is completed by moving around the wand and the two LEDs will be lightened up once the wand is in its position. Right now, there’s some connecting issue with the left LED that I need to fix. Although it’s hard to find the right position to lighten up both LEDs, I think this actually make sense since Harry was struggling to produce the entire patronus in its complete form at first.

Here is a demo that shows how this works.