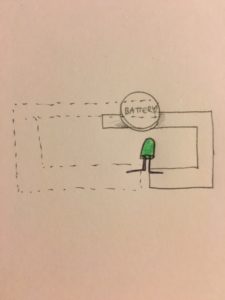
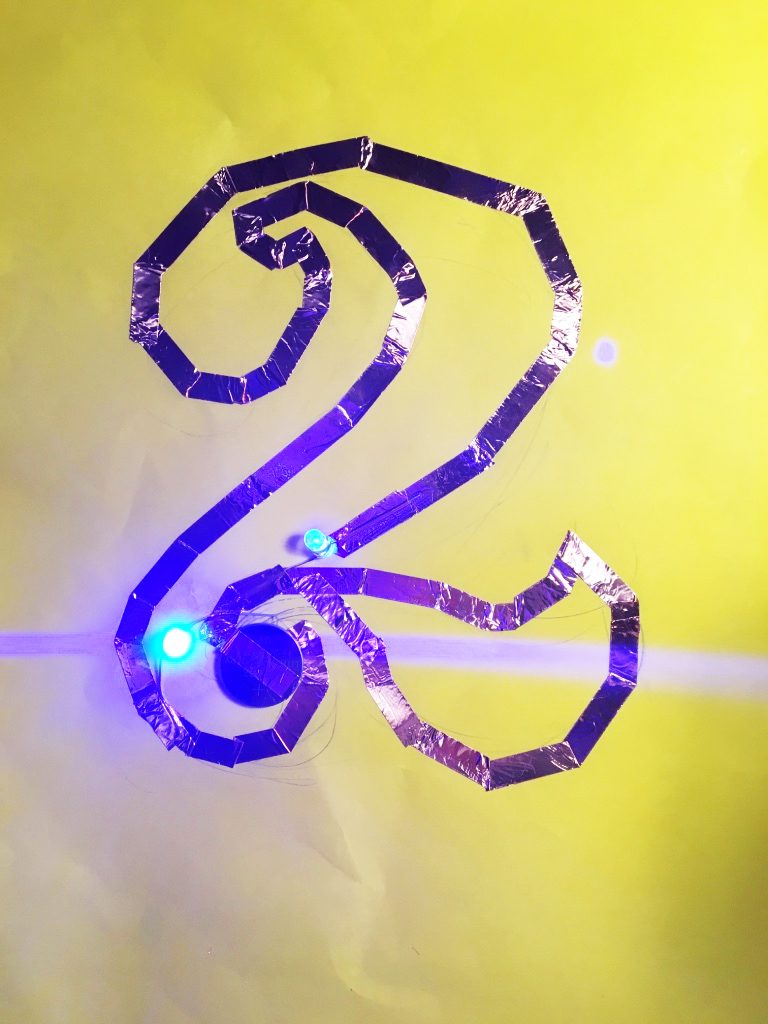
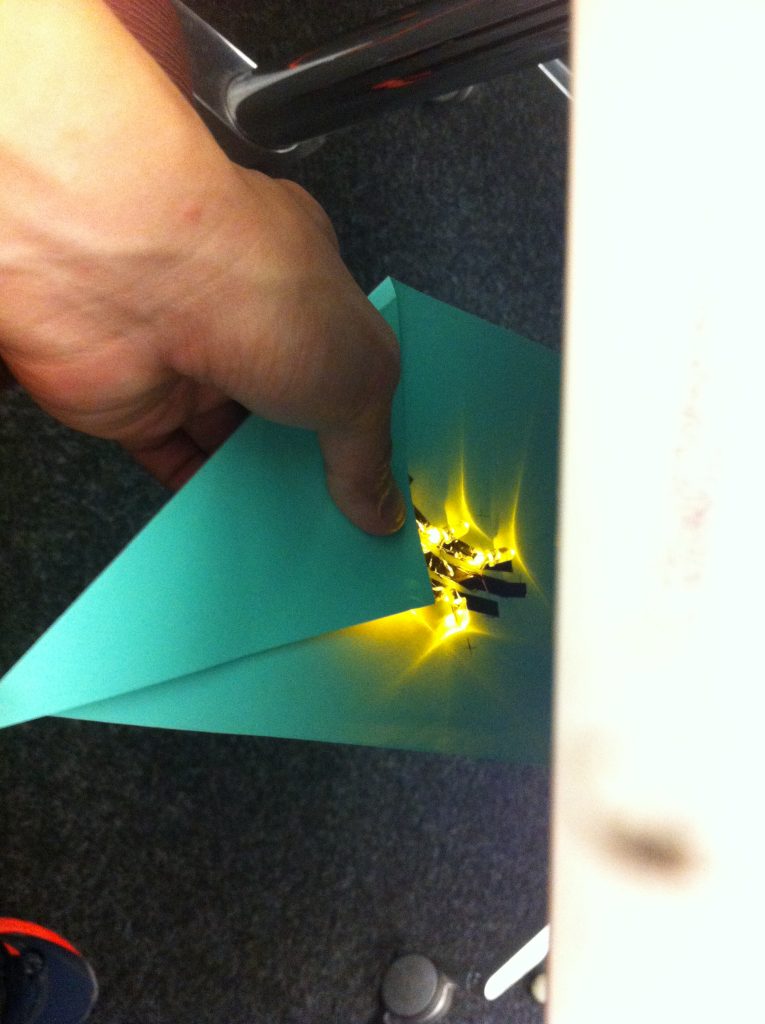
In class, I learned how to make a circuit using 3V battery, two LEDs and a copper tape.
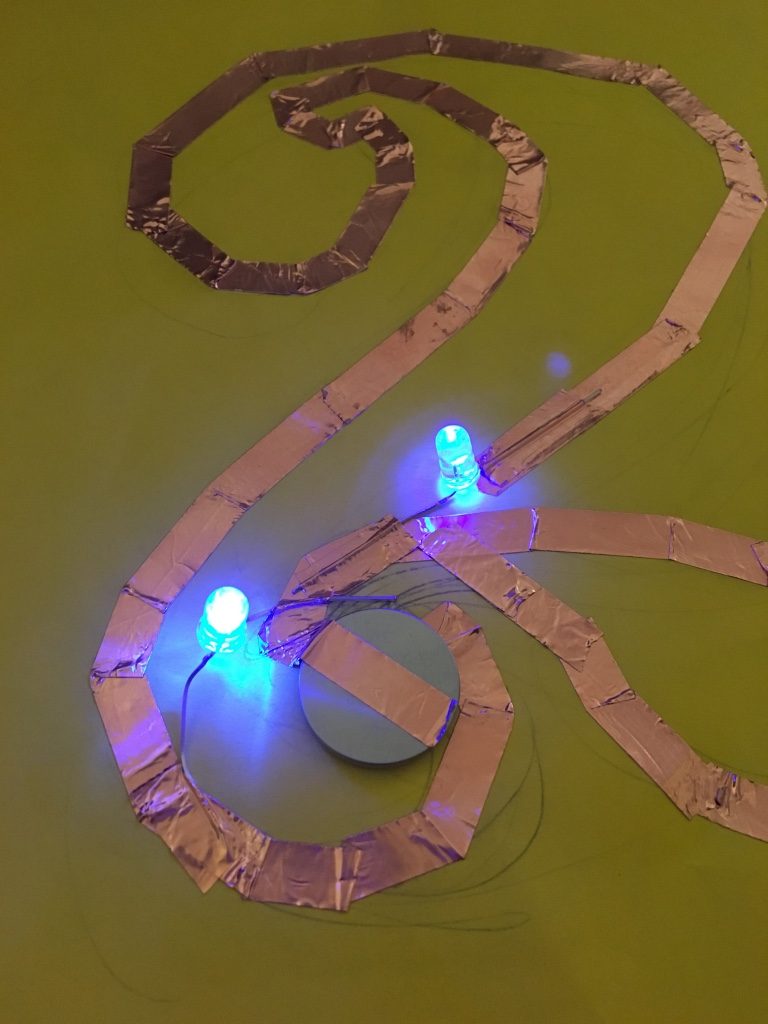
At first I used red LED with other colors, and found out red takes more current than
others, so I tried simple parallel circuit with two blue ones.
In class, I learned how to make a circuit using 3V battery, two LEDs and a copper tape.
At first I used red LED with other colors, and found out red takes more current than
others, so I tried simple parallel circuit with two blue ones.
Tactile Dialogues (Week 1)
Designed by Martijn ten Bhömer, Borre Akkersdijk, Oscar Tomico.
(Here is the link! ( The file is too big to upload.): https://www.youtube.com/watch?v=M8SDxeJkgvw)
‘Tactile Dialogues’ is a smart textile service in the form of a pillow with integrated vibration elements that react to touch. The pillow provides various vibrotactile stimulus patterns that encourage the patient to move and develop conversations in a bodily way. When these elements are touched (by rubbing, stroking, or pushing) a soft vibration can be felt from multiple locations on the object. This stimulates small movements and social connection between the people using the pillow: it allows for a dialogue based on physical interaction to begin.
Examples of interaction behaviors tailored to the person with dementia.
Knitting the double layered 3D fabric with the graphic and tactile pattern.
The 3d printed casings that act as sensor, and transfer the vibration to the fabric.
Materials: Cotton yarn, Elektrisola textile wire, 3D-printed casing, Bekinox conductive fibers, Vibration motors, Custom CRISP motor printed circuit board, Battery
Techniques: Circular knitting, 3D-printing, Programming, Heat pressing, Soldering
I usually care about creating physically or mentally helpful and productive designs in order to improve people’s current status while interacting with them. The aspect that fascinated me the most is how to utilize technical advantages (applied to a familiar object to a user which is a pillow in this case) to people who need help.
At first, I imagined, user(a person with dementia) might be stimulated and use conditioned tactile stimuli by tapping the pillow but found out it’s not simply sending a tactile signals, but communicating with a person in front of the person: The vibrotactile behavior can be adapted to the person by moving their hands to find where the vibration is coming from.
I think it is a simple and effective way of providing accessible entertainment to individuals suffering from dementia, and great to see that it would ultimately improve not only the patient’s quality of life, but the family’s and caregivers’ as well by decreasing rate of mental deterioration. I guess it also has a lot of potentials to be developed in a way of creating tools for babies who start to develop their tactile sense.

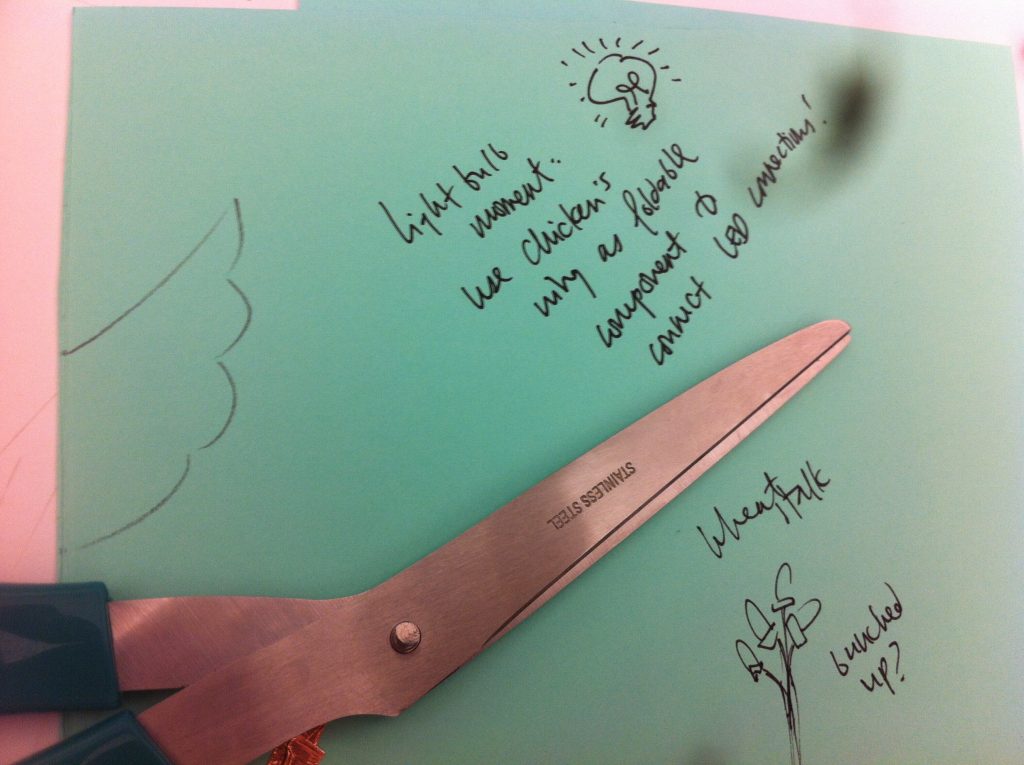
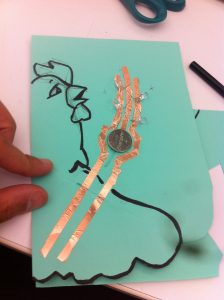
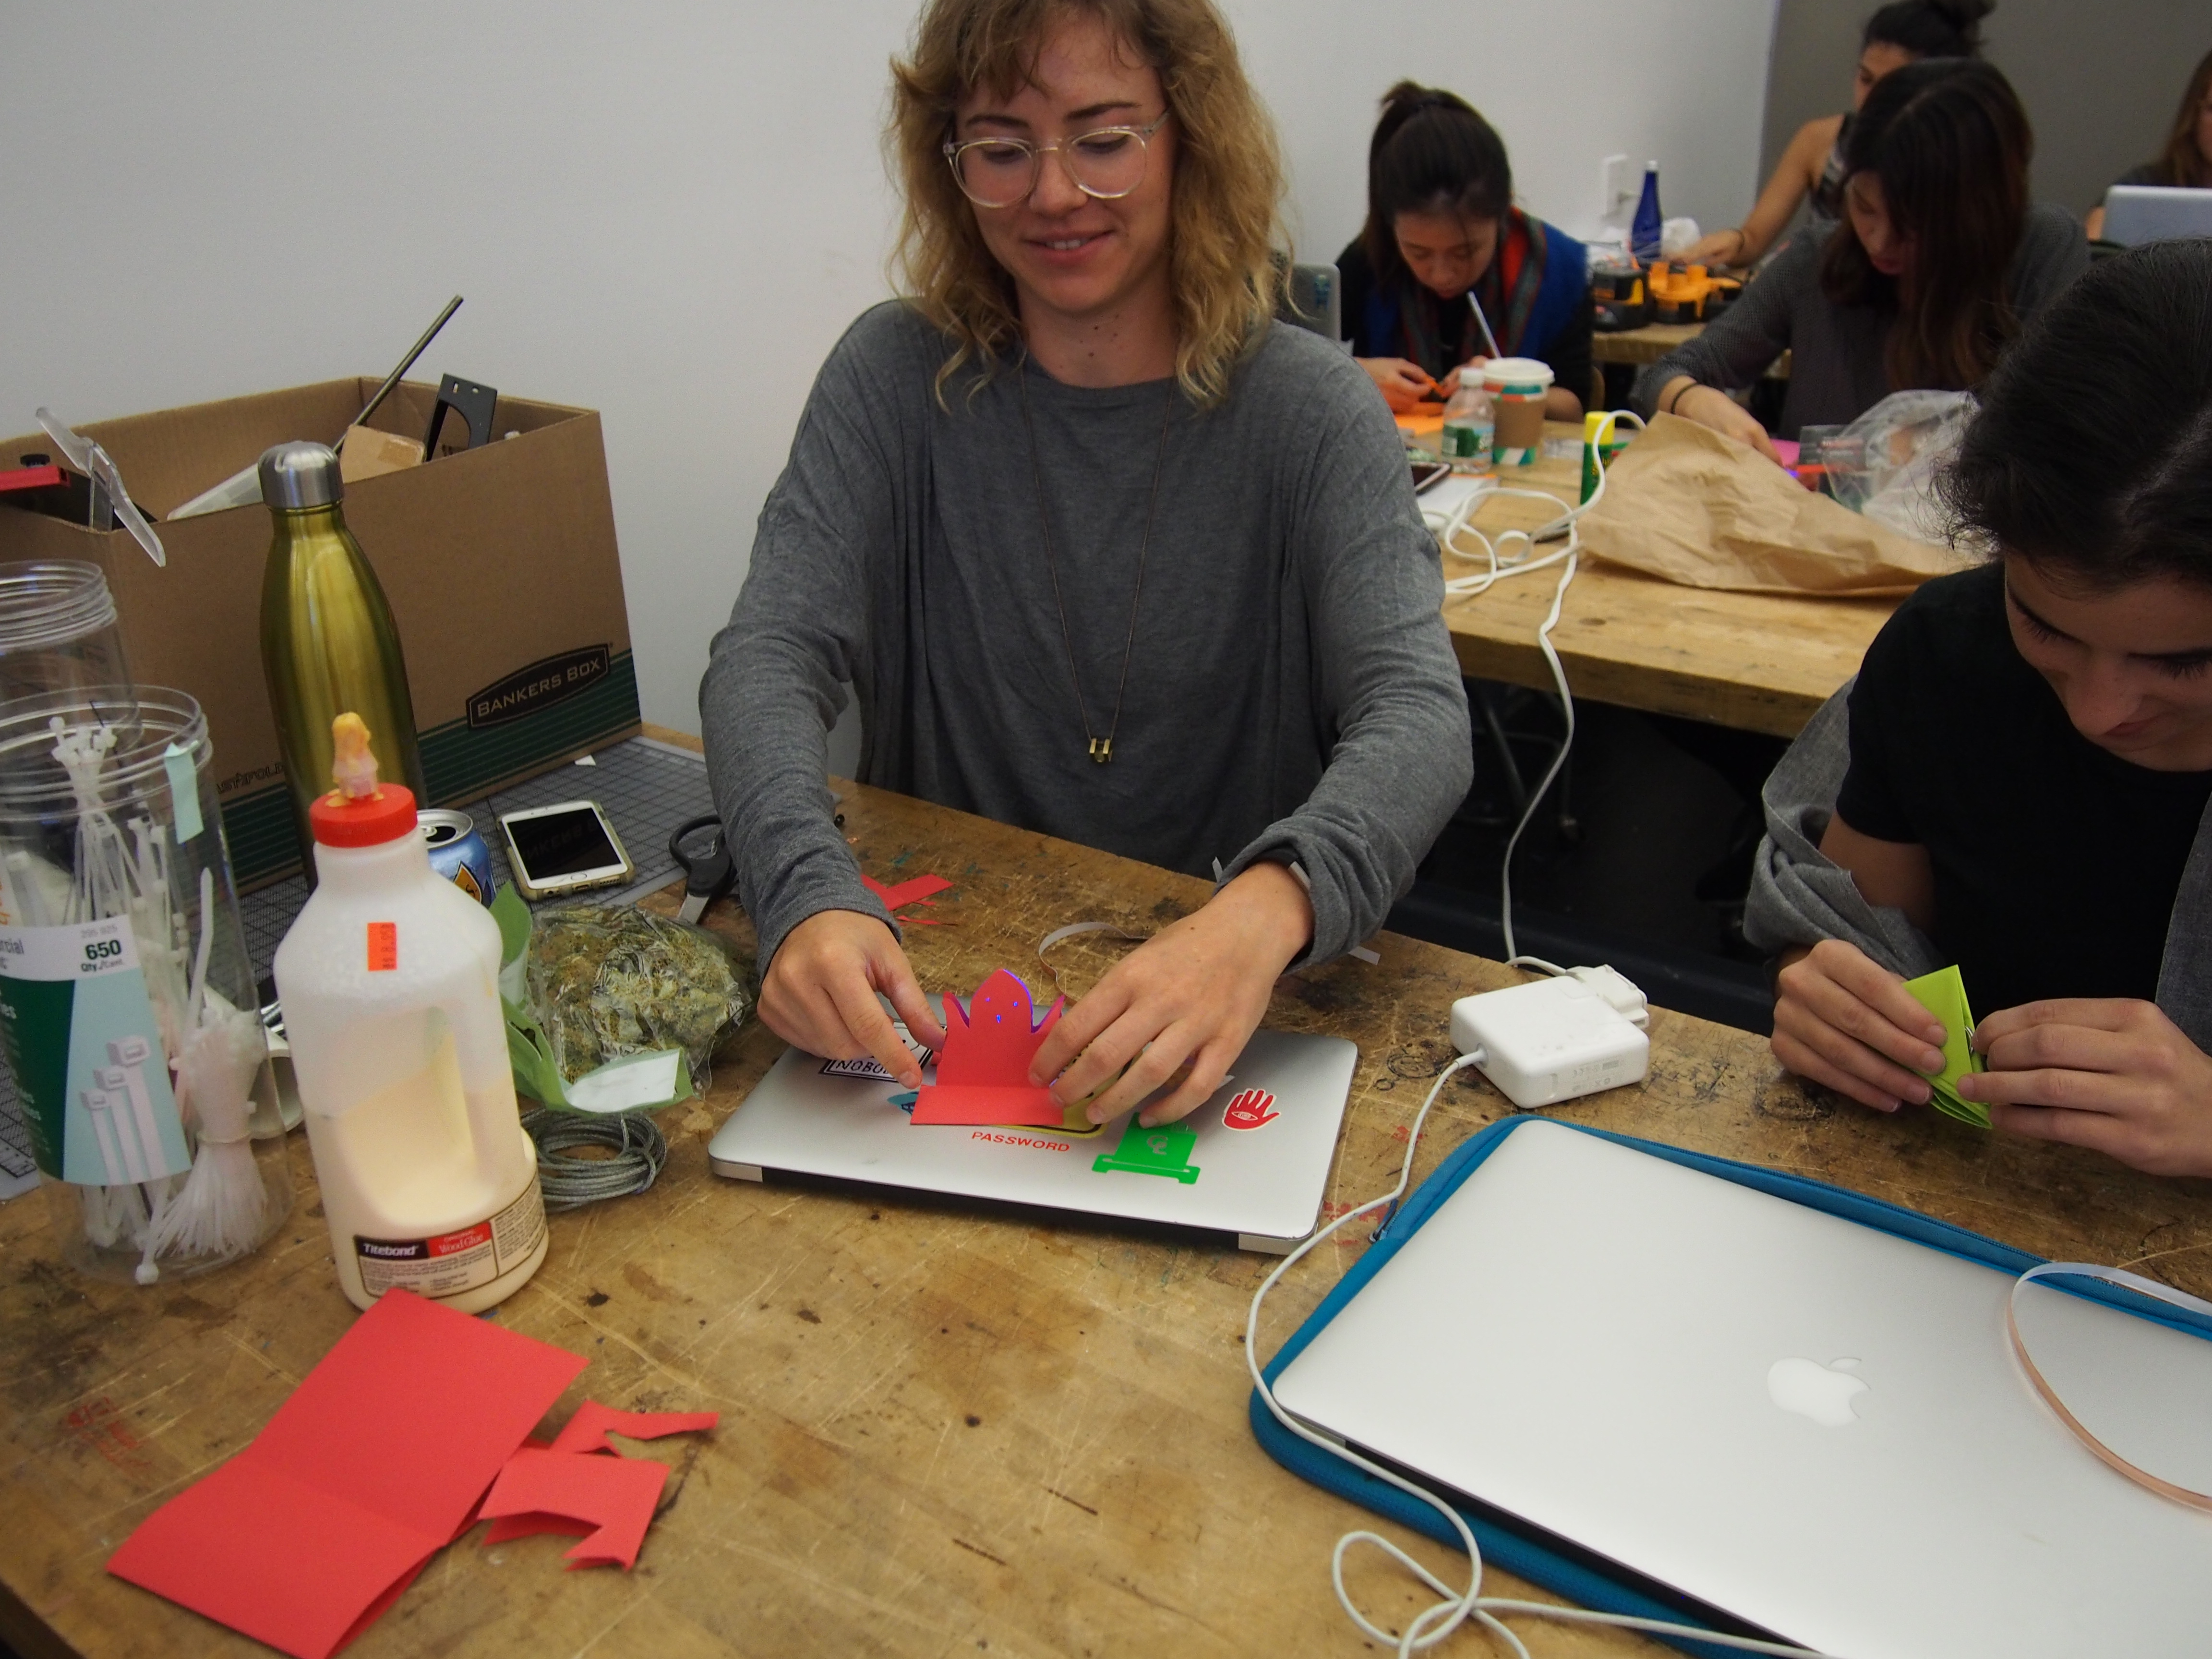
My chosen passage is from The Tale of the Little Red Hen.
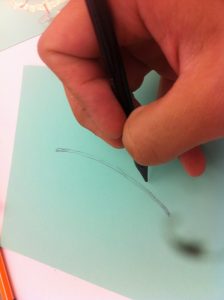
Here is my sketch of how I wanted it to look.
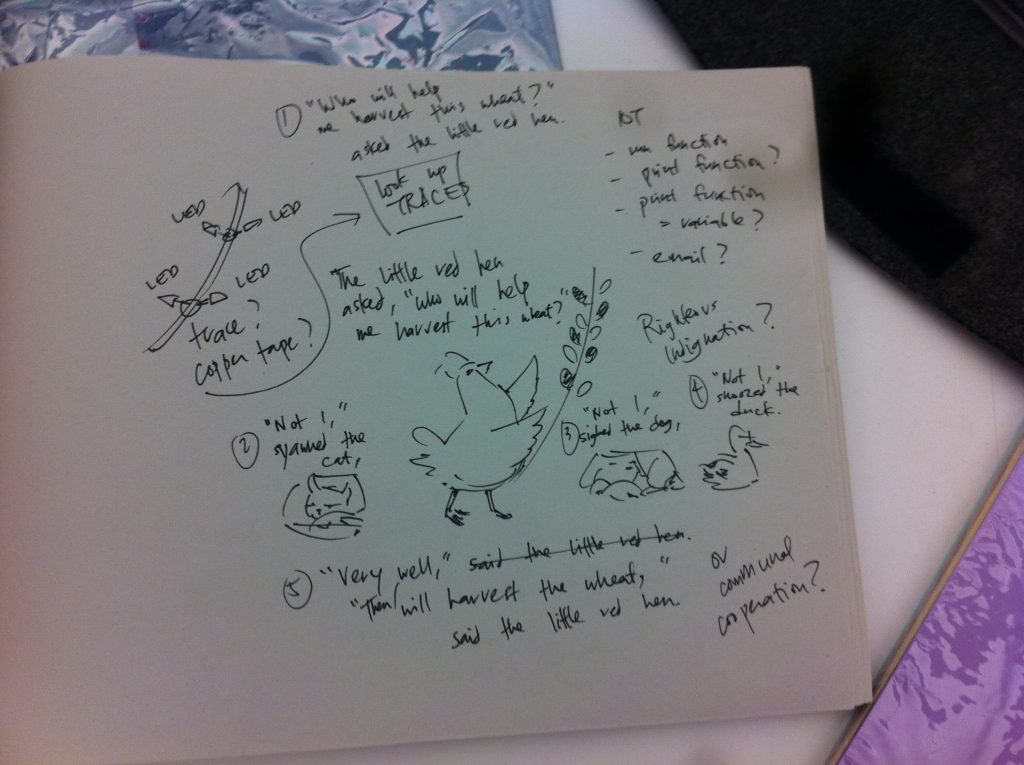
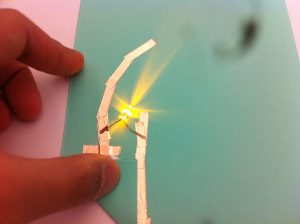
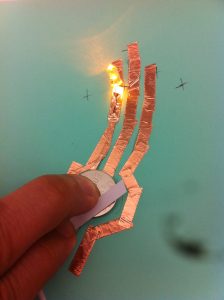
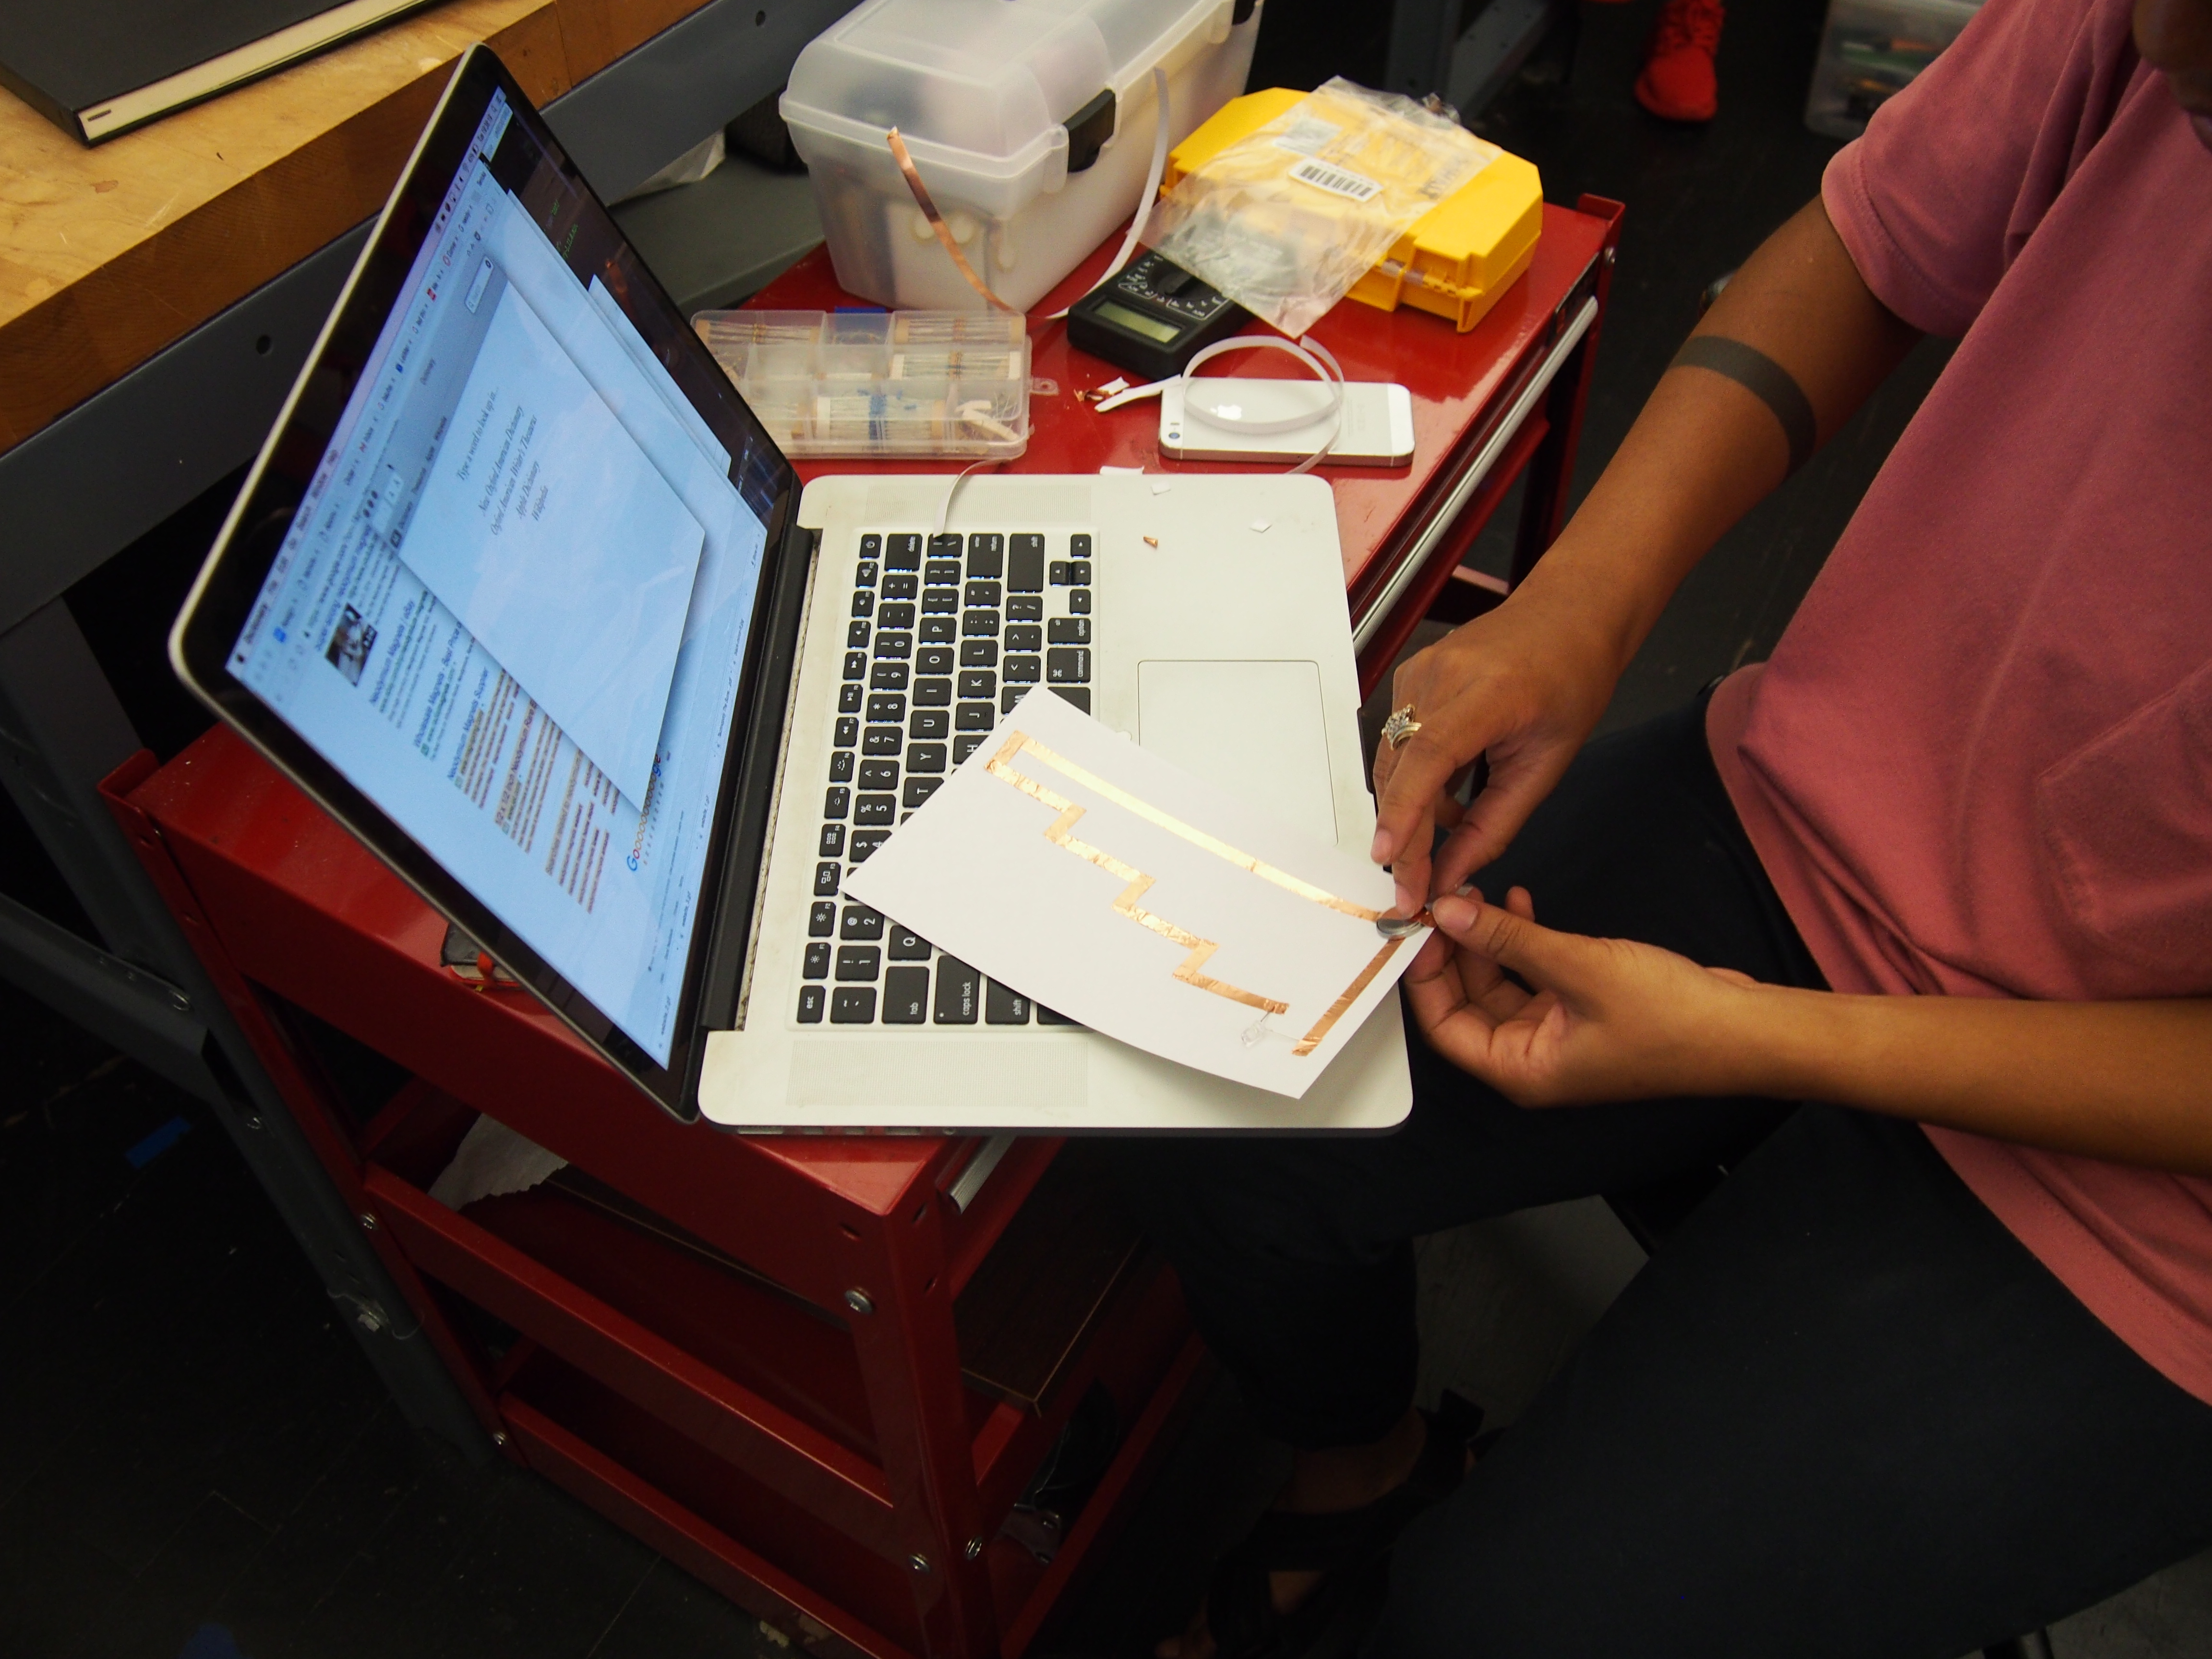
I wanted the wheat to be the central piece of the illustration. I wanted to use yellow LEDs as the wheat buds. So the hard part was crafting traces to give it a smooth, organic look for the wheat stalk. Once I had the circuit done, I would illustrate around it.
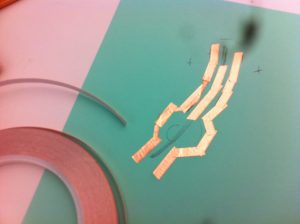
I decided to make a parallel circuit because I learned last class that series circuits don’t work with 3V batteries.
I first did testing of the Simple Circuit Diagram, using High-Low Tech’s tutorial as a reference.
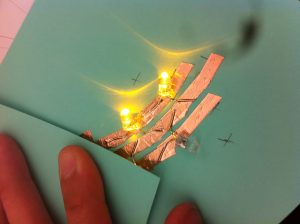
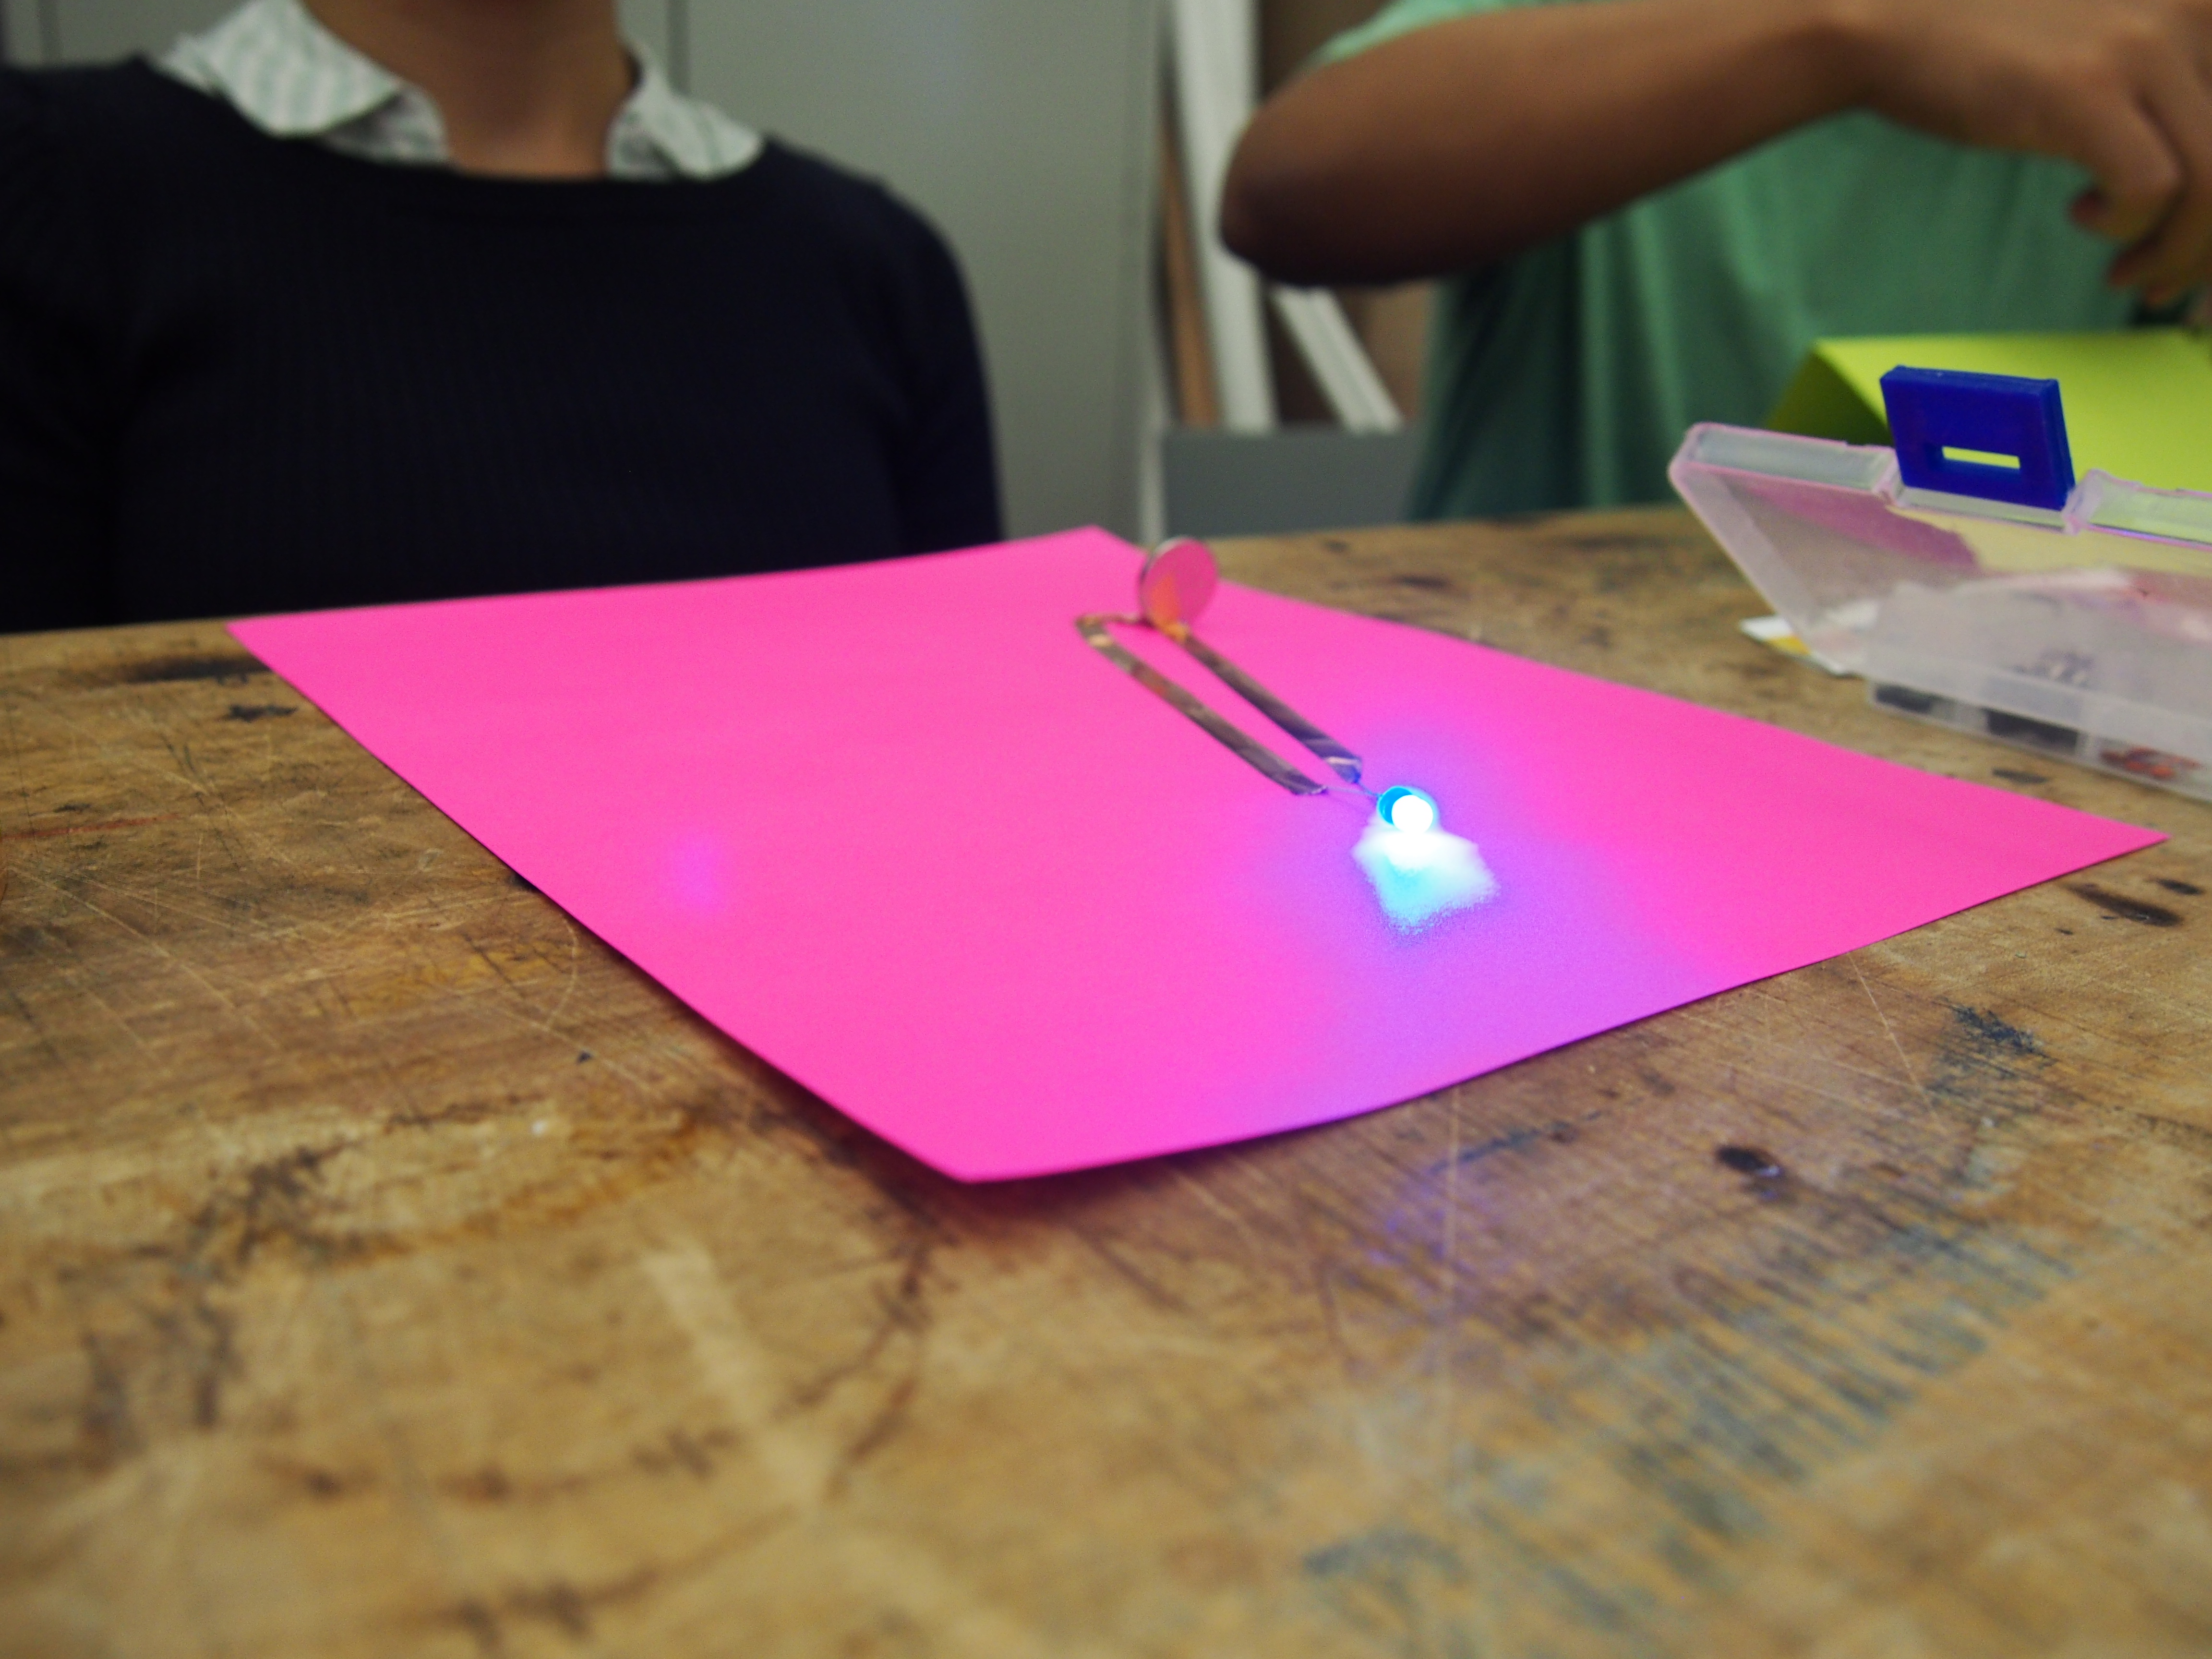
Once I got one LED lit up, I added a second LED. This time, I added a second trace.
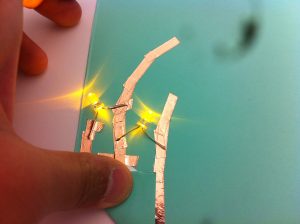
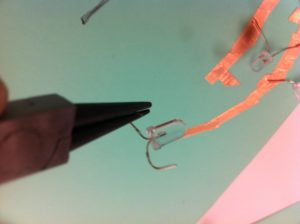
Once I got those in, I felt confident. Now I wanted to add a third LED. This time, I wanted to bend the LED nodes so it wouldn’t be awkwardly sticking out. I took out my long-nose pliers and tested it out, by bending the nodes.

So you can see, I got it curved nicely. And once I got that working…
Three LEDs!
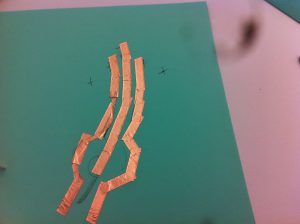
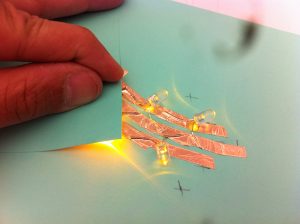
So I sketched out a diagram to refine the next iteration, once I got the principles working.

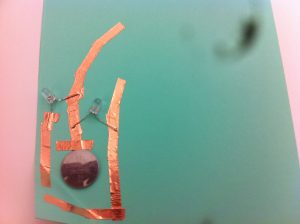
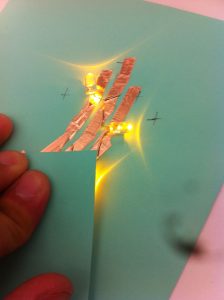
I couldn’t figure out how to hide the battery in the time I had. So I worked a diagram that at least aestheticized the circuit. So I went to sketching the illustration. First, I drew out the wheat stalk, that would serve as the circuit path. This would be the negative path. Then I followed by adding two positive paths. Once those were drawn in, I added copper tape.
Then I hit a problem: how to activate the circuit? I first thought about making a pop-up component: I would put in a folding wing and integrate it into the illustration. The wing would be the chicken’s wing, with copper tape put into it. So I tested that.
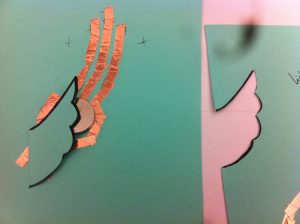
As you can see, I ran into problems right away. I didn’t measure the wing so it wasn’t large enough to cover both the circuit and allow for space to be taped into the paper.
I hit an impasse of forty minutes. Forty minutes of frustration and panic because I couldn’t get the circuit to work. Was it because the copper tape wasn’t connected enough? Were the LEDs loose? I had no idea. I got it to light up but not totally.
Then I kept looking at my first circuit, which was working…
So why not use that, and stylize the folding corner as a wing? That was born out of necessity than anything, but it was a great creative solution to me.
So there!
Now it was a matter of illustrating the scene, and integrating the circuit solution into it.
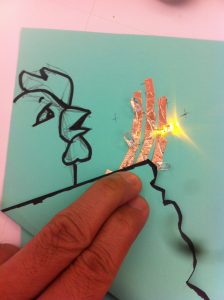

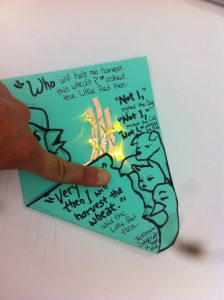
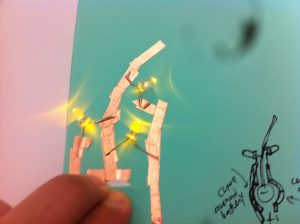
And there we have it! A scene from the Tale of the Little Red Hen, with light-up LED wheat buds. I’m really, really happy it works. It needs a lot of hard pressing to light up, but it lights up, and to me, looks GREAT.
[EDIT: Wait… I reviewed the homework and it said it wasn’t supposed to be “interactive.” Is… this interactive?]
During this short research, I looked up some wearable tech/ fashion pieces that applied electronics to it, and I found many of them is not working or moving as natural as we would love to wear them in our daily life. One of my backgrounds is fashion design, and this research makes me think how these cool technology or electronics solution could be applied on to the real world wearable garments. And then I found this interesting material called “Piezoelectric Fabric” from Kansai University in Japan. The piezoelectric fabric is a fabric consisting of various fibers including PLLA (poly-L-lactic acid) and carbon fibers. PLLA features piezoelectricity; therefore, when it is bent or stretched, it generates an alternating electric potential. From the video in the bottom, that reminds me the piece “Input/ Output paper ” from Jie Qi.
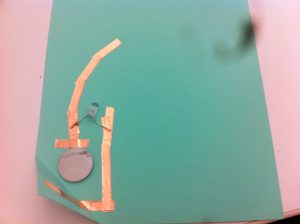
Circuit 1
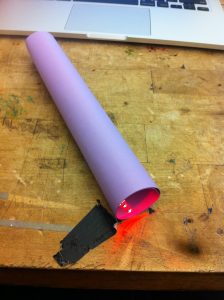
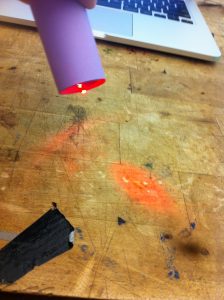
My first in-class circuit was a simple LED-3V battery combination. Using copper tape to fasten the ends of the LED to the negative and positive sides of the battery, I fashioned a rudimentary flashlight. I used a rolled-up tube of art paper, tape to hold the tube together, and the LED-battery combination, taped into the inner lining of the tube.
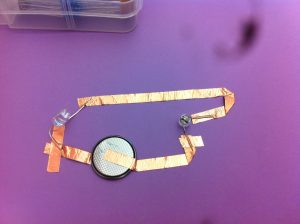
Circuit 2
My second circuit was an attempt to make a series circuit with the 3V, copper tape, and 3 LEDs. I knew that to wire the series together, the positive end of the LED had to be attached to the negative end of another LED, and so on. It didn’t work, and it was only after speaking with the instructor after class that I learned from her that series circuits don’t work if made from 3V batteries. The more you know!
1) Post all circuits you made in class to the blog.
Be sure to include images, materials used, any problems you encountered and a brief description.
2) Illustration project
Pick sentence or passage from a story that you like (children’s storybooks work VERY well). Illustrate one scene from that book and integrate a circuit into it using the materials we discussed in class.
^^ All resource links embedded in.
^^ Paper engineering deck.


I’m really intrigued with the Input/Output self-folding paper. It looks like living origami. In fact, it’s the organic quality that attracts me to it. I’m intrigued by the concept of biomimicry, and this folding paper makes it look like a living flower. This project intrigues me because it makes me think of self-folding origami. I like the idea of folding paper into an origami shape, not by touching it, but by channeling a current into specific parts of the paper.

From http://thenewstack.io/self-folding-mini-origami-robots-are-the-nanosurgeons-of-tomorrow/
I also love the Mi.mu gloves. I looked at the Mi.mu website to see how the gloves were made. It’s a fascinating product of musicality, intuitiveness, technology, and craft. I love that Imogen Heap demonstrated it in the context of a performance/lecture/concert. It was a great demonstration of the technology (if it wasn’t the greatest faked performance ever, because it looks magical).

From https://www.virgin.com/music/all-you-need-is-glove-imogen-heap-and-the-kickstarter-dream
I also discovered the “Cognitive Dress” from an IBM ad I saw online. A collaboration between British design studio Marchesa and IBM Watson, the dress debuted May this year at the “Manus x Machina: Fashion in an Age of Technology” Costume Institute Gala at the Metropolitan Museum of Art in New York City. Worn by model Karolina Kurkov, the dress was designed with LEDs that would change colors based on the reactions of Twitter users following the Gala.

From http://www.cbsnews.com/news/marchesa-ibm-watson-to-debut-cognitive-dress-at-mondays-met-gala/

From http://adage.com/article/digital/ibm-marchesa-debut-cognitive-dress-met-gala/303827
The Knitted Radio (http://www.ireneposch.net/the-knitted-radio/)
Besides liking the way the sweater is portrayed and styled as well as the potential showcase of many cultures through knitting designs merged with digital technology, the Knitted Radio makes me think of a critical tool for us to expand the arts and culture in a whole new way. I can picture sweaters like this one at public parks where poets, musicians and performers could broadcast from. But I also think of what if everyone’s thoughts were broadcasted. Many people including myself think out loud or day dream. This type of project, or another where textile crafting could be used to allow us to communicate with others through live streaming would change our habits of public expression.