Crafting A Path (Week 2)

For this project, I decided to make a scene from my favorite book series, Harry Potter. I choose the scene that Harry first produced the patronus, which was in the shape of a stag. So I did this illustration of the scene, and use cotton to create a dreamy effect of the smoke suppose to come out along with his patronus and also as the cover for the LEDs and the copper tape.

After I finished the illustration, I was trying to figure out a way to lay out the circuit underneath the patronus. I decided to go with a parallel connection with the switch and battery in the middle. Here’s the diagram for the circuit I used in the project.

The circuit is completed by moving around the wand and the two LEDs will be lightened up once the wand is in its position. Right now, there’s some connecting issue with the left LED that I need to fix. Although it’s hard to find the right position to lighten up both LEDs, I think this actually make sense since Harry was struggling to produce the entire patronus in its complete form at first.

Here is a demo that shows how this works.

Week 2 Assignment

“Oh, grandmother, what a horribly big mouth you have!”

“All the better to eat you with”

This is an impressive sentence for me. It is from the story The Little Riding Hood.  So I chose to illustrate this scene in which the wolf and the little riding hood were having a talk about grandmother’s weird appearance and then the wolf threw back the quilt and revealed his real identity with its eyes blazing with greed.

In this project, when the quilt covers the body of the wolf, nothing happens. When players remove the quilt, the eyes of the wolf begin to give out light.

Process


1. Prepared the characters.


2. Designed and made the circuit.


3. Assembled all parts.

Demo:


Project 1 – Circuit – Narrative

For my project, I recalled a memory I have from my childhood. I took a trip with my mother just outside of Canton, Massachusetts and stayed at a bed & breakfast; there was a lovely garden in the backyard with a forest as its backdrop. At night, when we looked outside the window from our bedroom, the garden has be completely draped in darkness. Through the darkness we could hear the sounds of what seemed like hundreds of crickets chirping and frogs croaking. Drawn by the sounds, we looked outside and could see that the entire yard was sparkling with what must have been hundreds of lightning bugs! For me, it was a fantastical experience as a child.

First Step of my process was to create the assets for my scene. I decided to draw my creatures by hand with colored pencil instead of making them on the computer because I wanted them to have more of personal aesthetic.

Next I had to cut out each of my pieces. I wanted to put them on a darker background so that my elements would have a more striking contrast from the background.

Next I needed to plan out my circuitry and the mechanism for the switch that would short circuit the lights, turning them off.

I wanted to somehow incorporate the copper tape because I feel that it is aesthetically beautiful and that it is a shame to hide it completely. So my solution for this was to use it as a kind of branch or bush limb that one of my lightning bugs would be resting on.

Here is a short video of the project:

Assignment 2: Tong Zhang

I chose a quote from one of my favorite comic strips, Mafalda:

I chose my favorite scene from the strip, which was the last scene. I wanted the audience to have an interactive experience with the scene, so that when they pressed onto the comic, it would light up and can be read in the dark as well.

I began the process by tracing the drawing onto rice paper (I wanted a material that was relatively translucent but not enough to see through). Then I cut the foam board into a small box.

Then I made a parallel circuit with copper tape underneath to light up 3 LEDs.

One of the difficulties I encountered was getting the pressure to work as the foam was too hard to press onto. To solve this I had to use a combination of cotton pads and cardboards to fix underneath the pressure point. Once it worked, I sealed the box.

Documentation Video:

Assignment 2

Growing up I loved reading Shel Sliverstein’ s poems.

My favorite poem is “The Poet Tree”.

Underneath the poet tree, Come and rest awhile with me,
And watch the way the word-web weaves Between the shady story leaves.
The branches of the poet tree Reach from the mountains to the sea.
So come and dream, or come and climb – Just don’t get hit by falling rhymes.

I wanted to highlight the leaves in tree and the little boy reading under it.
I used two LED’s in parallel and a 3V battery.


Week 2 Assignment

I chose the children’s book The Very Hungry Caterpillar and the scene I chose to illustrate was when the caterpillar was inside of the cocoon resting. Since we can’t see the caterpillar inside the cocoon, I wanted to illuminate that the caterpillar was indeed inside the cocoon undergoing transformation. So on top of a drawing of a caterpillar I taped a piece of scoby on top to hide the caterpillar and act as a cocoon. When the lights shine, you can vaguely see the caterpillar resting inside of the cocoon.

My first attempt, I used a thicker piece of paper and the light was able to shine through, but it was so thick that the lights weren’t bright enough to illuminate the drawing through the scoby. Here is the circuit that I built:

I ended up redoing the drawing on a regular piece of printing paper and since it was thinner than the other paper I used, the light was able to illuminate the caterpillar.

It is hard to see from the photo, but I think its clearer when you see it physically.

Assignment_02

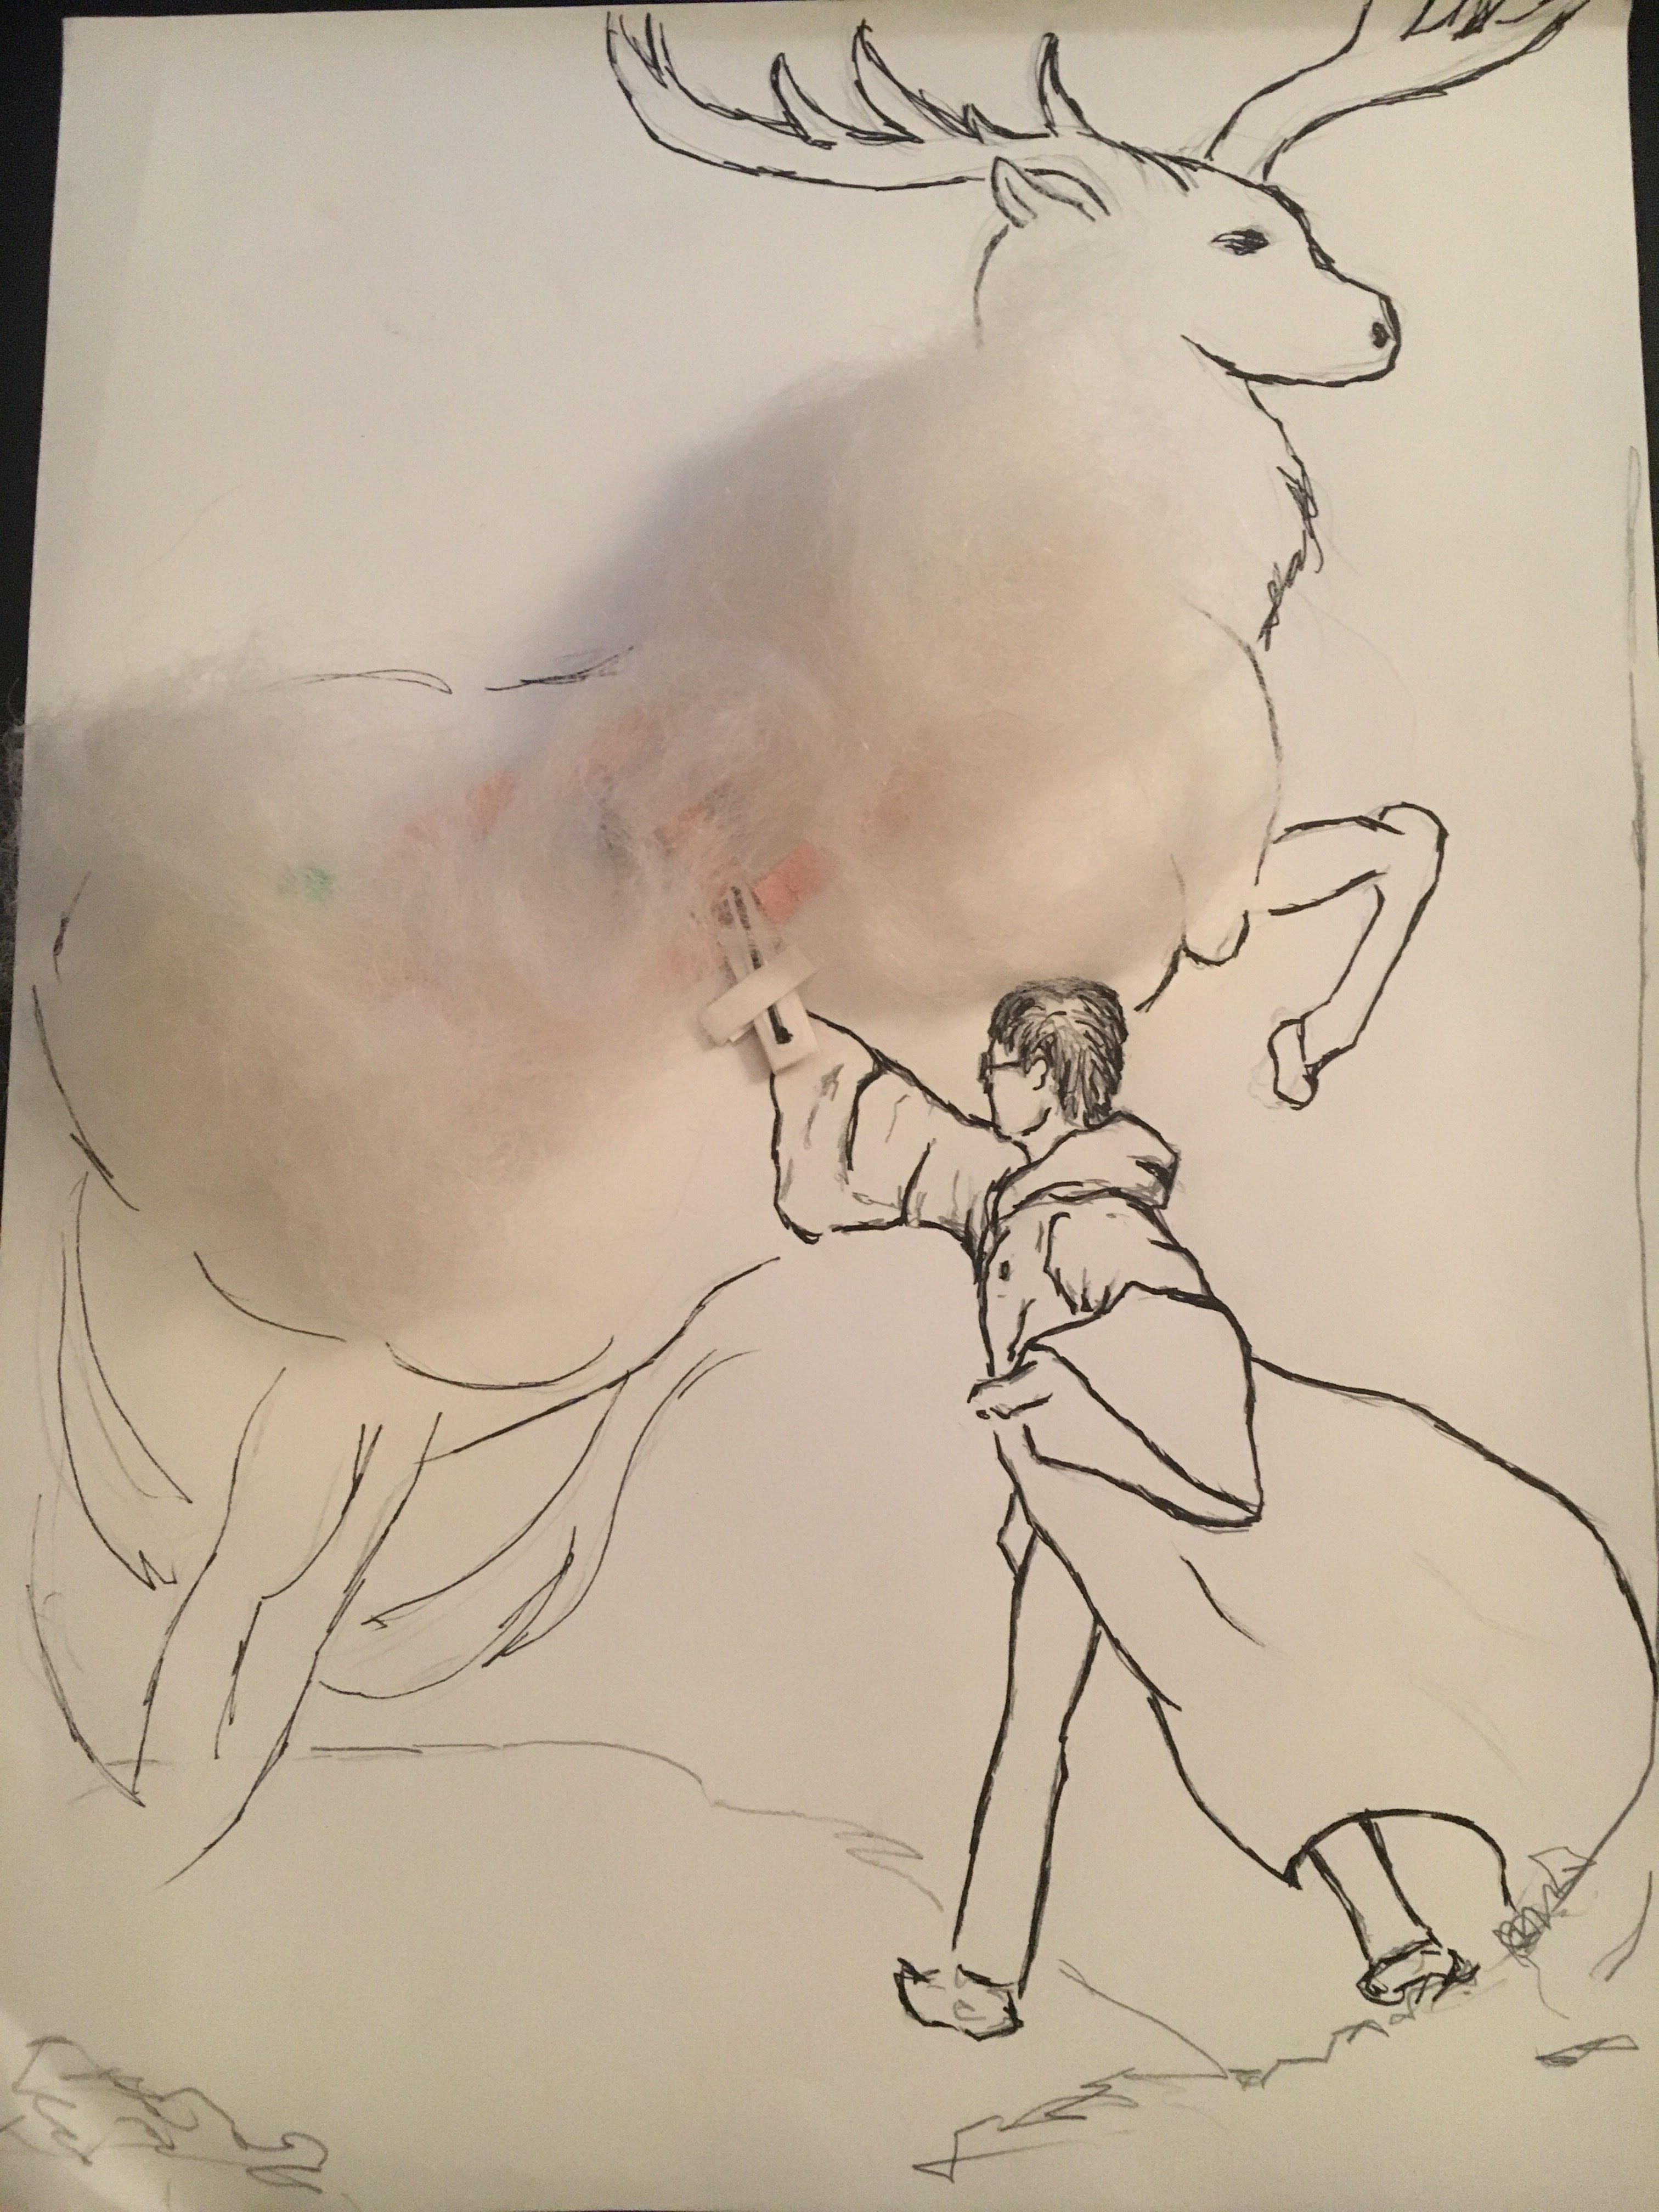
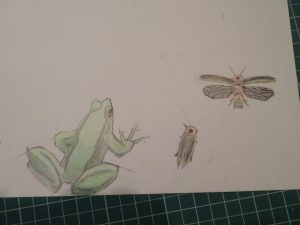
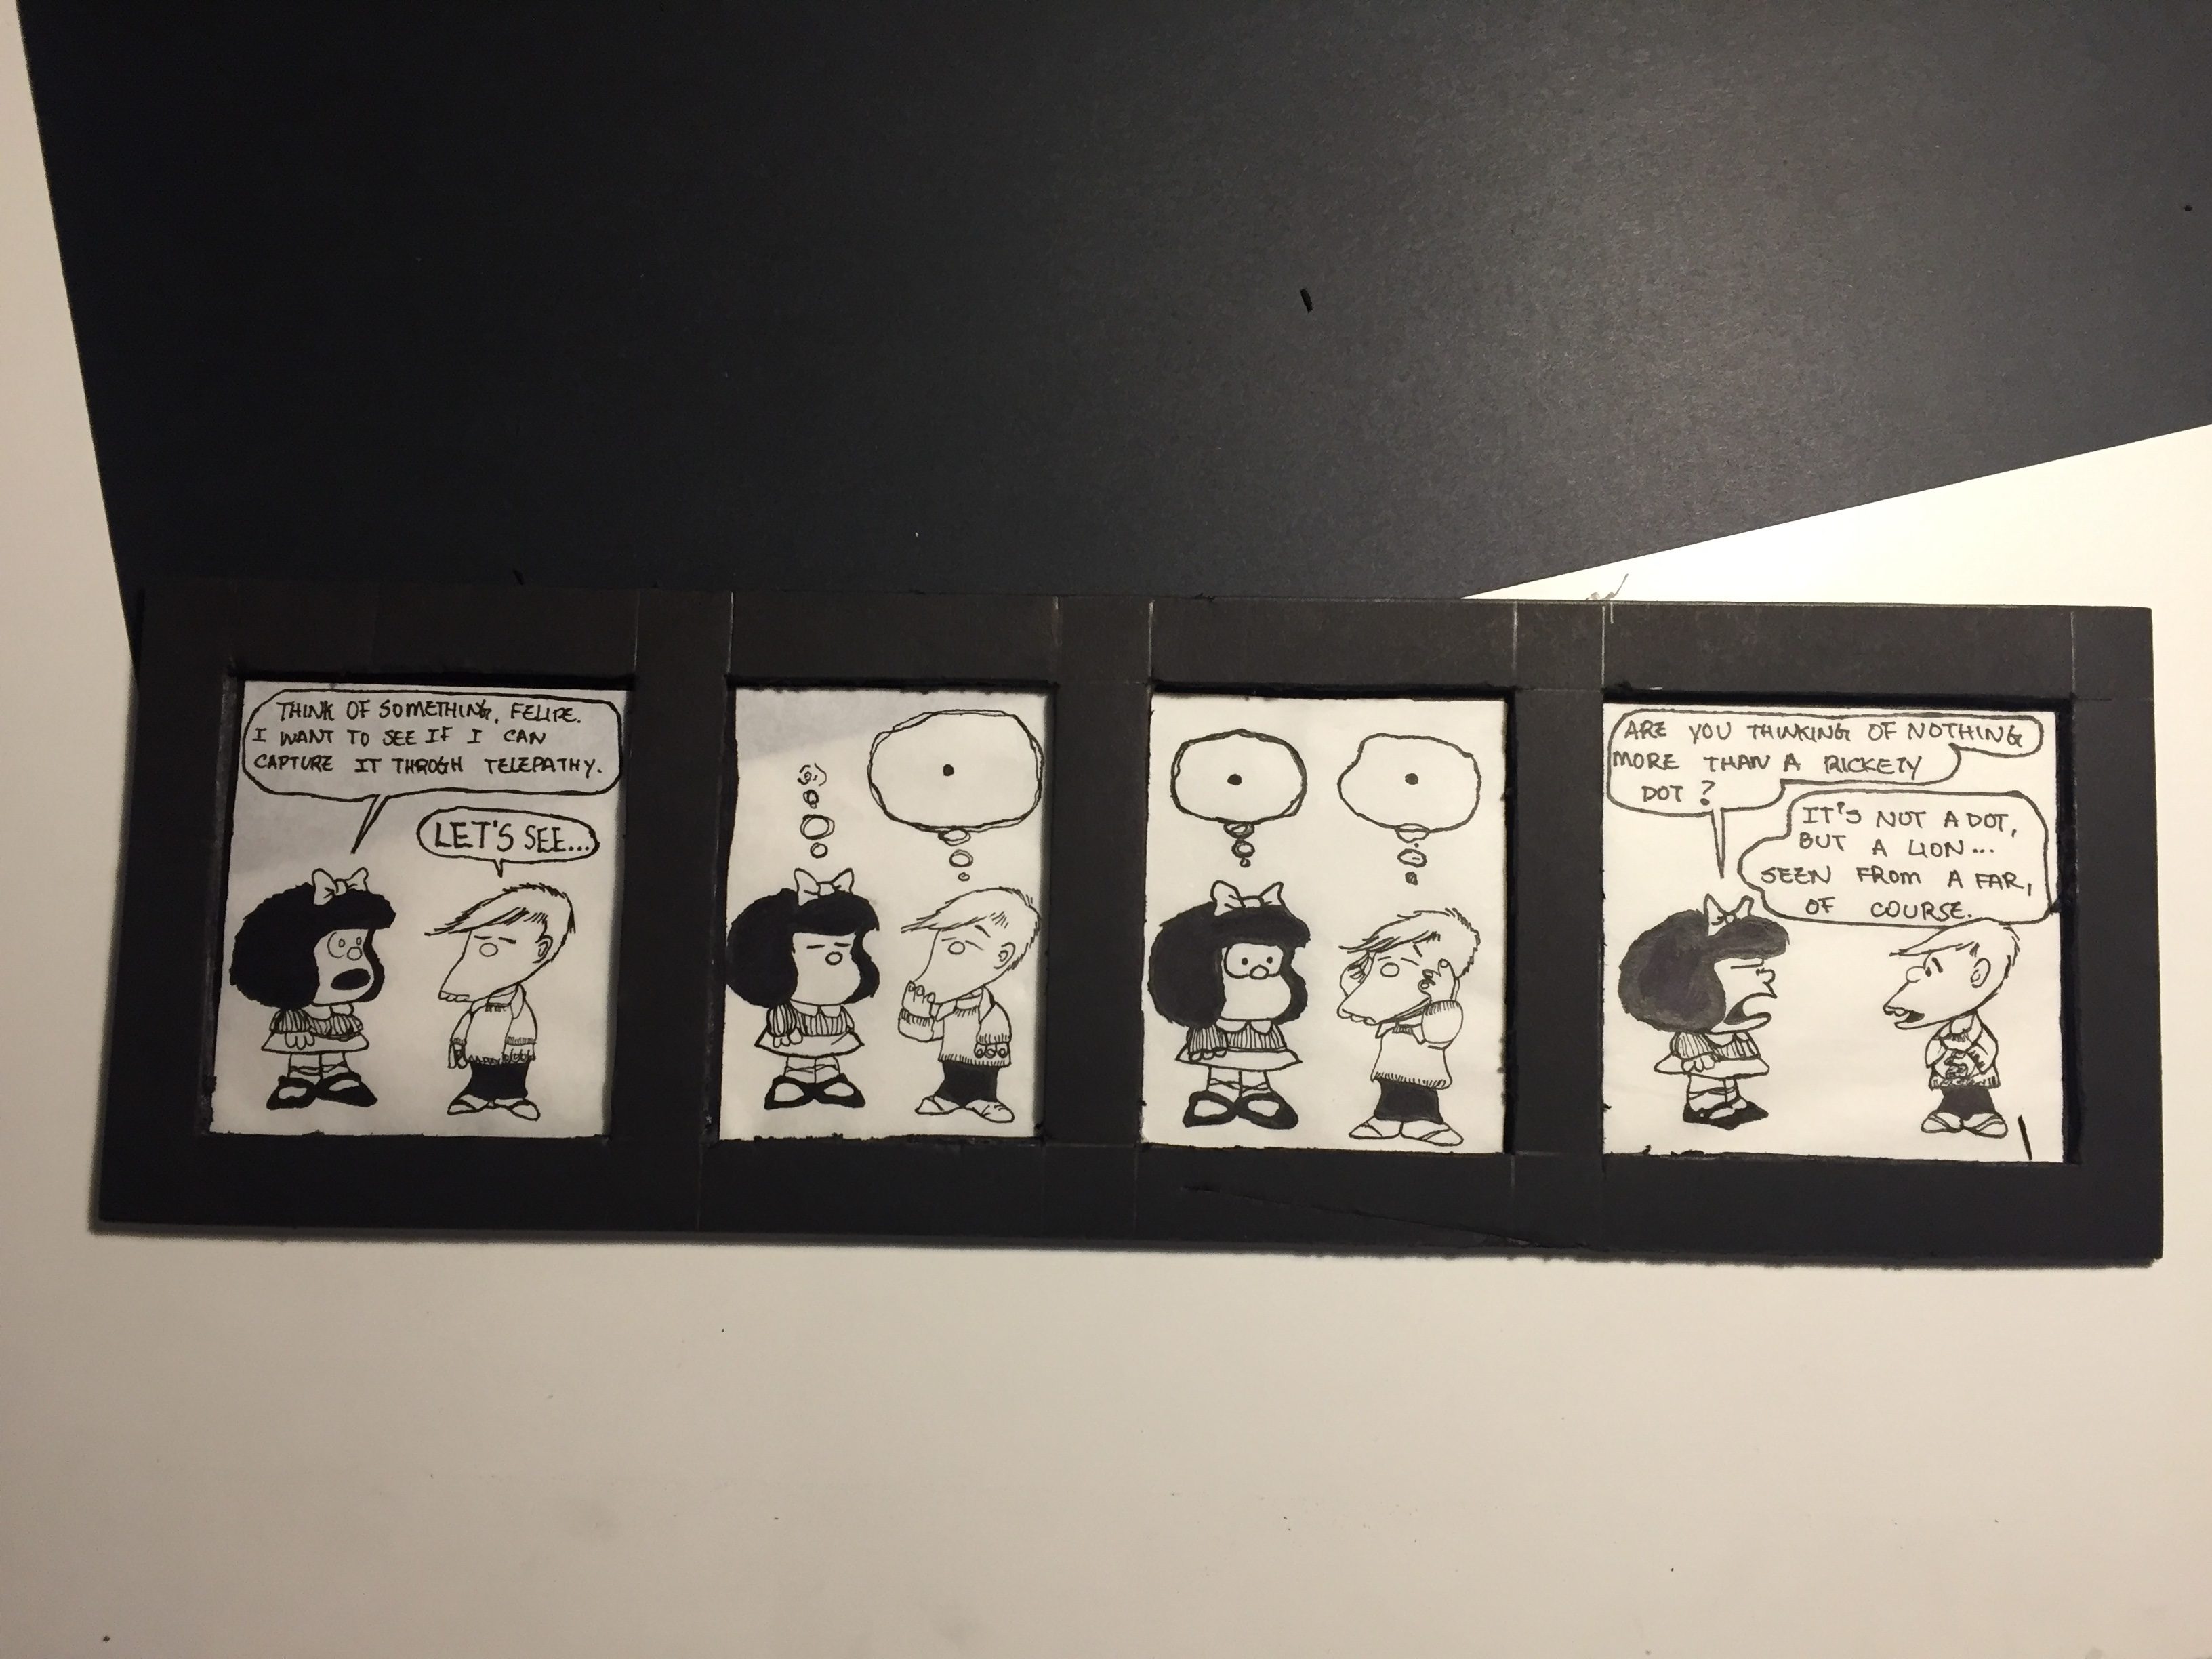
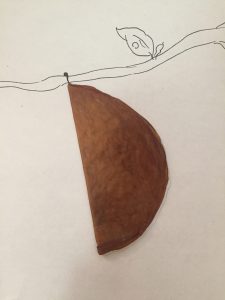
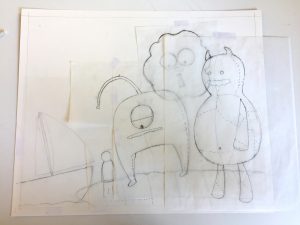
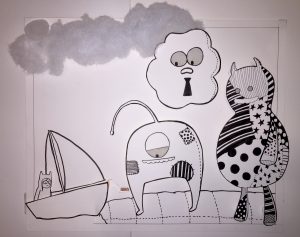
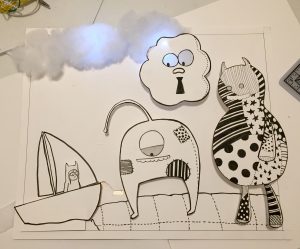
For this assignment, I took a passage from my favorite book Where the Wild Things Are? by Maurice Sendak. Instead of taking imagery straight from the book’s illustrations, I decided to put my own spin on the characters.

In the book, Max, who is the main character, gets sent to his room for misbehaving. While in his room, it turned into a jungle. He gets into a boat and travels for what feels like years to an island where the wild things lived. The passage I chose goes:

“And when he came to the place where the wild things are

they roared their terrible roars and gnashed their terrible teeth

and rolled their terrible eyes and showed their terrible claws

till Max said ‘BE STILL!’ and tamed them with the magic trick

of staring into all their yellow without blinking once

and they were frightened and called him the most wild thing of all”

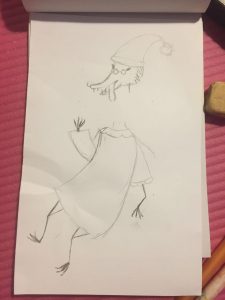
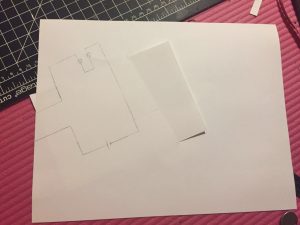
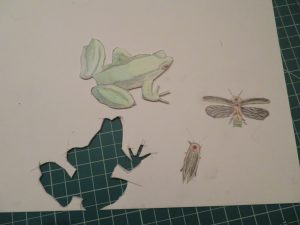
I started my making process with a sketch of the layout of my composition. I like to work with layers of tracing paper, so i can easily move different elements without having to erase or damaging the paper too much.

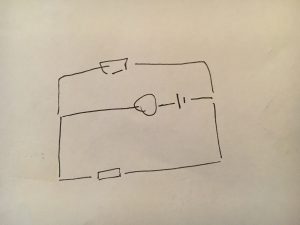
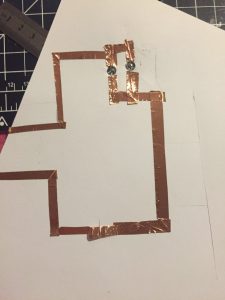
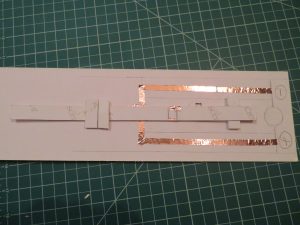
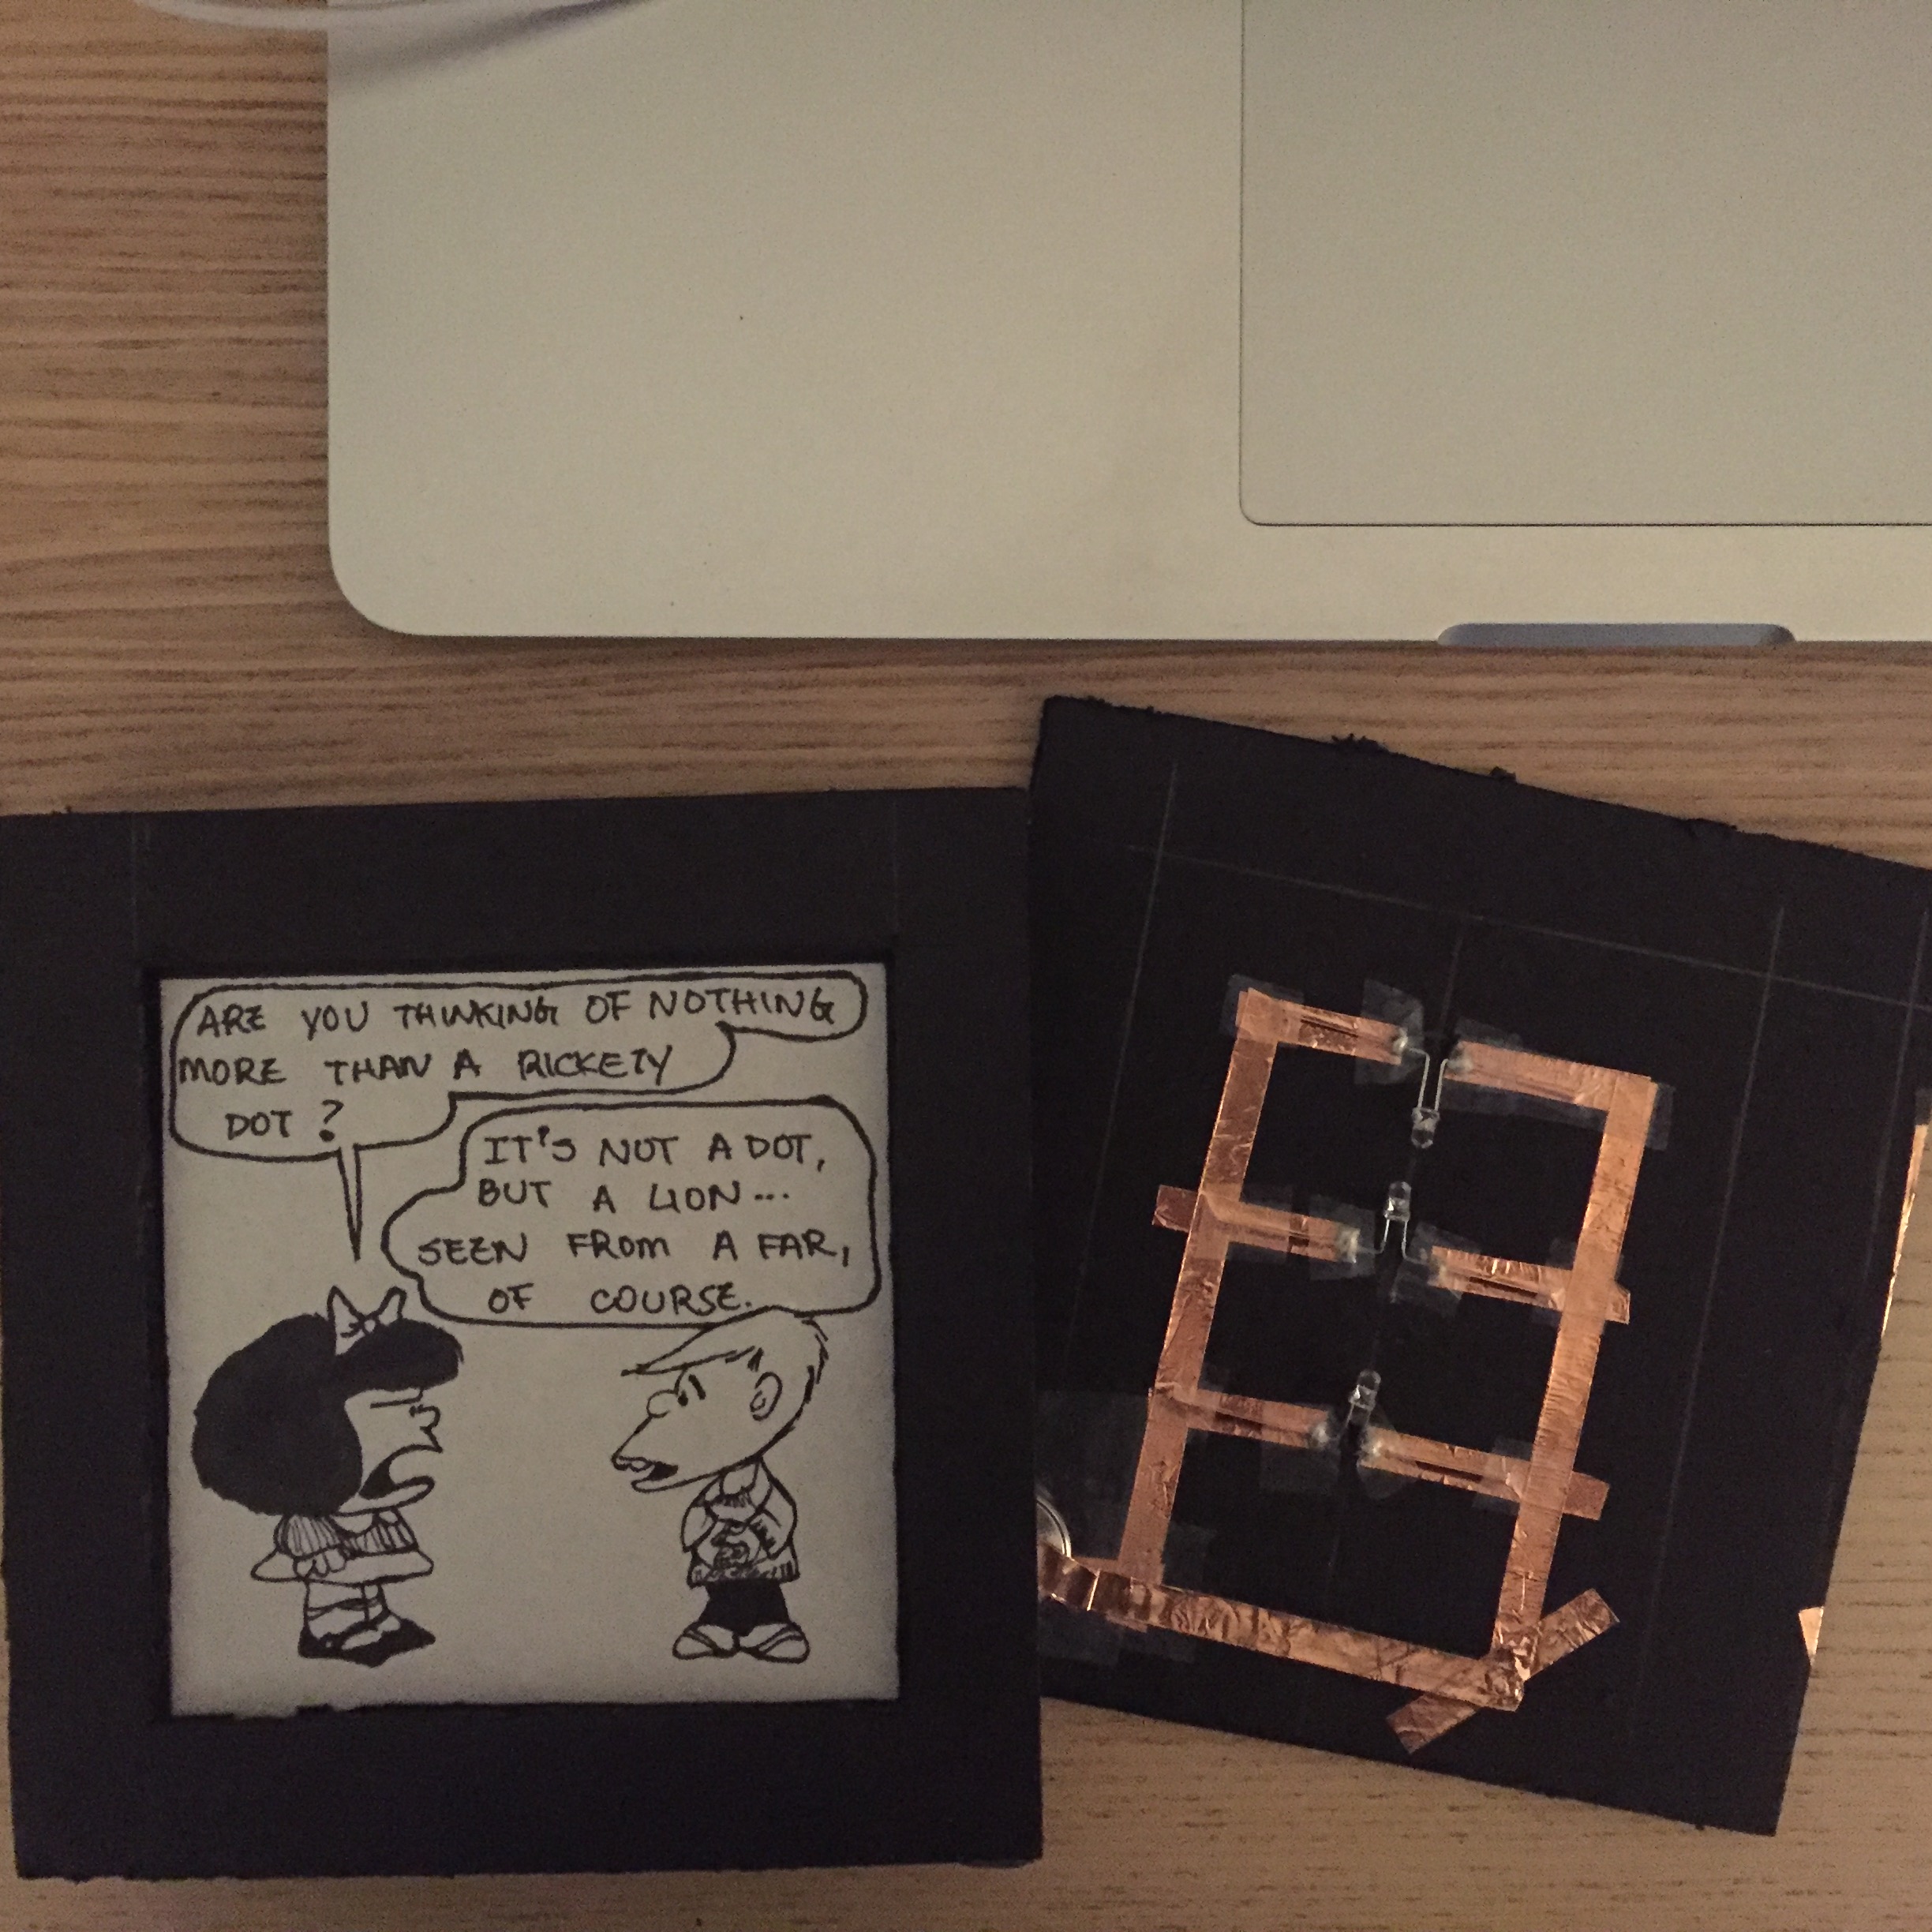
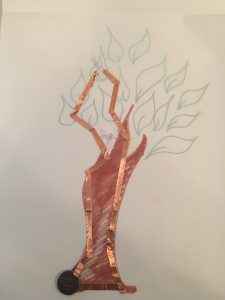
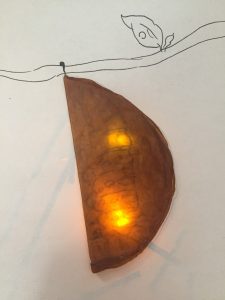
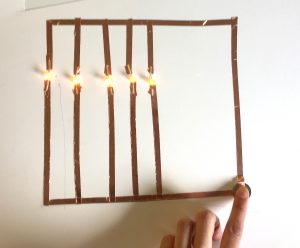
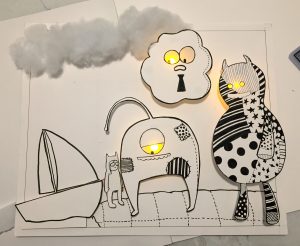
Next, I made a prototype of my circuit. Because the monsters have a total of five yellow eyes combined, I wanted to make sure I can light all five LEDs with one 3v battery. It worked.

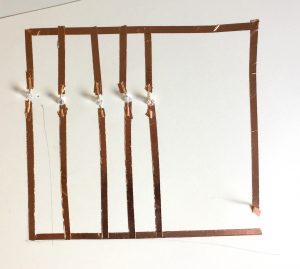
The circuit is split between two sheets of paper, the top being the negative and bottom the positive. I first mapped the circuits on the back of the top sheet of paper, then traced it to the bottom sheet of paper. Once I finished mapping the circuit, I started laying down the copper tape.

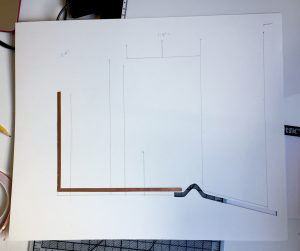
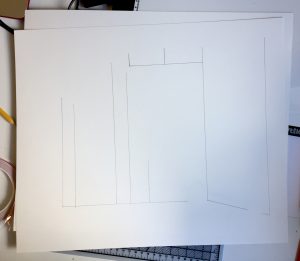
To keep the circuit from crossing with one another, and shorting them, I had to put a “rise” on the sheet.

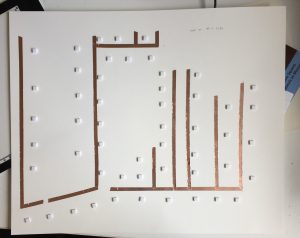
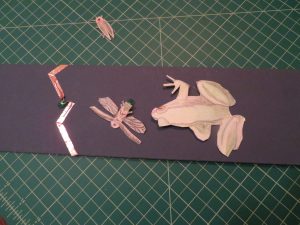
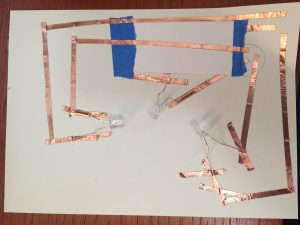
After I finished laying down the circuit, I had to put in the LEDs. This was the most difficult process. (I was so wrapped up in taping the LEDs down, I forgot to document this process.) This was especially difficult because I had to tape one leg of the LED to the top page, then do the same to the bottom page. I broke two LED legs while doing this, and I found that some of the LEDs weren’t getting any power. I also discovered that the connection needed to be soldered, otherwise they weren’t getting enough contact on the circuit to light up.

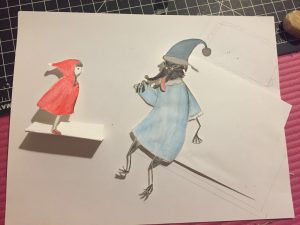
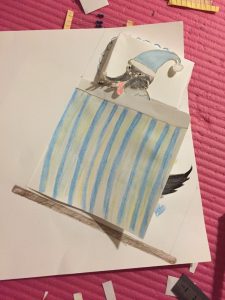
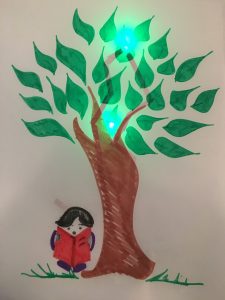
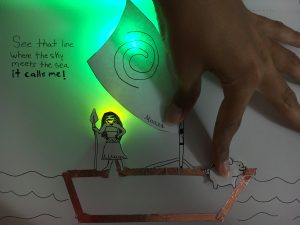
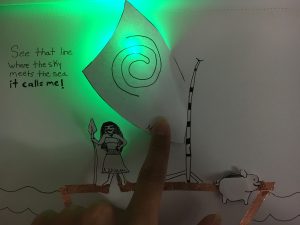
Once the LEDs were in place and working as the should, I placed all the characters in place.


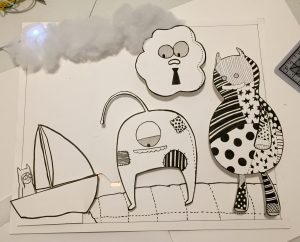
Here is a video of the interaction:


Week 2: Assignment

Illustration Project

Pick sentence or passage from a story that you like (children’s storybooks work VERY well). Illustrate one scene from that book and integrate a circuit into it using the materials we discussed in class.

  1. You must use at least 2 LEDs
  2. Focus on the construction and aesthetics.
  3. Post documentation to the blog and bring your final product into class.