Light+Time Final: PhysComp Room Countdown Clock
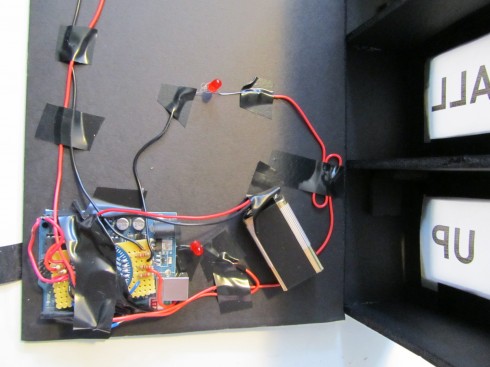
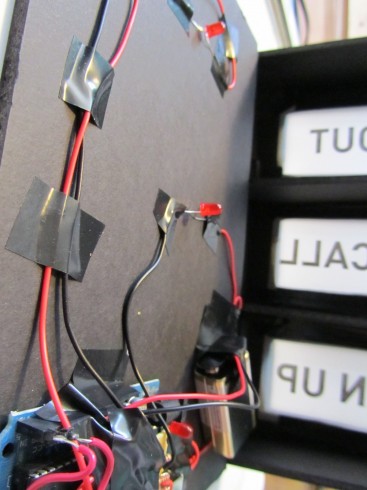
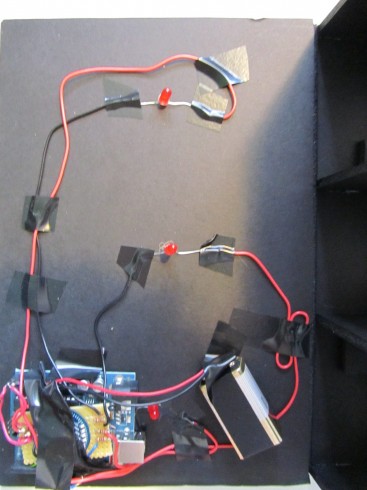
Code:
/*****************************************

 * Liza Stark

 * Physical Computing Final Project: Light+Time

 * May 3, 2011

 *

 * This sketch uses the Macetech Chronodot and I2C protocol

 * to program a cleanup countdown clock for the p comp room.

 *

 * Code for the I2C communication with the Chronodot was

 * adapted from code written by Maurice Ribble. Documentation

 * of it can be found here: http://www.glacialwanderer.com/hobbyrobotics/?p=12

 *

 *

 *

 *

 *

 *****************************************/
#include "Wire.h"
#define DS1307_I2C_ADDRESS 0x68
int cleanUpLED = 8; //Set LED action for first alarm
int lastCallLED = 10; //Set LED action for second alarm
int getOutLED = 11; //Set LED action for third alarm
// Convert normal decimal numbers to binary coded decimal
byte decToBcd(byte val)
{
return ( (val/10*16) + (val%10) );
}
// Convert binary coded decimal to normal decimal numbers
byte bcdToDec(byte val)
{
return ( (val/16*10) + (val%16) );
}
void setDateDs1307(byte second, // 0-59
byte minute, // 0-59
byte hour, // 1-23
byte dayOfWeek, // 1-7
byte dayOfMonth, // 1-28/29/30/31
byte month, // 1-12
byte year) // 0-99
{
Wire.beginTransmission(DS1307_I2C_ADDRESS);
Wire.send(0);
Wire.send(decToBcd(second)); // 0 to bit 7 starts the clock
Wire.send(decToBcd(minute));
Wire.send(decToBcd(hour));
Wire.send(decToBcd(dayOfWeek));
Wire.send(decToBcd(dayOfMonth));
Wire.send(decToBcd(month));
Wire.send(decToBcd(year));
Wire.endTransmission();
}
// Gets the date and time from the ds1307
void getDateDs1307(byte *second,
byte *minute,
byte *hour,
byte *dayOfWeek,
byte *dayOfMonth,
byte *month,
byte *year)
{
// Reset the register pointer
Wire.beginTransmission(DS1307_I2C_ADDRESS);
Wire.send(0);
Wire.endTransmission();
Wire.requestFrom(DS1307_I2C_ADDRESS, 7);
*second = bcdToDec(Wire.receive() & 0x7f);
*minute = bcdToDec(Wire.receive());
*hour = bcdToDec(Wire.receive() & 0x3f);
*dayOfWeek = bcdToDec(Wire.receive());
*dayOfMonth = bcdToDec(Wire.receive());
*month = bcdToDec(Wire.receive());
*year = bcdToDec(Wire.receive());
}
void setup()
{
byte second, minute, hour, dayOfWeek, dayOfMonth, month, year;
Wire.begin();
Serial.begin(9600);
// Change values to set clock
second = 30;
minute = 15;
hour = 2;
dayOfWeek = 1;
dayOfMonth = 25;
month = 4;
year = 11;
setDateDs1307(second, minute, hour, dayOfWeek, dayOfMonth, month, year);
pinMode (cleanUpLED,OUTPUT);
pinMode (lastCallLED,OUTPUT);
pinMode (getOutLED,OUTPUT);
}
void loop()
{
byte second, minute, hour, dayOfWeek, dayOfMonth, month, year;
getDateDs1307(&second, &minute, &hour, &dayOfWeek, &dayOfMonth, &month, &year);
Serial.print(hour, DEC);
Serial.print(":");
Serial.print(minute, DEC);
Serial.print(":");
Serial.print(second, DEC);
Serial.print(" ");
Serial.print(month, DEC);
Serial.print("/");
Serial.print(dayOfMonth, DEC);
Serial.print("/");
Serial.print(year, DEC);
Serial.print(" Day_of_week:");
Serial.println(dayOfWeek, DEC);
delay(1000);
//Set tests for each day of the week
//////////////*********************************Initial Test***********************************//////////////////////
// Starts at 2:15:30 on Day 1
//2:15:40 am = Clean Up!
if((dayOfWeek == 4 ||dayOfWeek == 3 ||dayOfWeek == 2 ||dayOfWeek == 1) && hour == 2 && minute == 15 && second == 40)
{
Serial.println("Clean up!");
digitalWrite(cleanUpLED, HIGH);
digitalWrite(lastCallLED, LOW);
digitalWrite(getOutLED, LOW);
delay(4000);
digitalWrite(cleanUpLED, LOW);
}
//2:15:50 am = Last Call_This is not a pub
if((dayOfWeek == 4 ||dayOfWeek == 3 ||dayOfWeek == 2 ||dayOfWeek == 1) && hour == 2 && minute == 15 && second == 50)
{
Serial.println("Last Call - this is not a pub");
digitalWrite(cleanUpLED, LOW);
digitalWrite(lastCallLED, HIGH);
digitalWrite(getOutLED, LOW);
delay(4000);
digitalWrite(lastCallLED, LOW);
}
//2:16:00 am = Get Out
if((dayOfWeek == 4 ||dayOfWeek == 3 ||dayOfWeek == 2 ||dayOfWeek == 1) && hour == 2 && minute == 16 && second == 00)
{
Serial.println("Get out.");
digitalWrite(cleanUpLED, LOW);
digitalWrite(lastCallLED, LOW);
digitalWrite(getOutLED, HIGH);
delay(4000);
digitalWrite(getOutLED, LOW);
}
//////////////*********************************Test Monday - Thursday***********************************//////////////////////
//12:50 am = Clean Up!
if((dayOfWeek == 4 ||dayOfWeek == 3 ||dayOfWeek == 2 ||dayOfWeek == 1) && hour == 0 && minute == 50 && second == 0)
{
Serial.println("Clean up!");
digitalWrite(cleanUpLED, HIGH);
digitalWrite(lastCallLED, LOW);
digitalWrite(getOutLED, LOW);
delay(4000);
digitalWrite(cleanUpLED, LOW);
}
//1:15 am = Last Call_This is not a pub
if((dayOfWeek == 4 ||dayOfWeek == 3 ||dayOfWeek == 2 ||dayOfWeek == 1) && hour == 1 && minute == 15 && second == 0)
{
Serial.println("Last Call - this is not a pub");
digitalWrite(cleanUpLED, LOW);
digitalWrite(lastCallLED, HIGH);
digitalWrite(getOutLED, LOW);
delay(4000);
digitalWrite(lastCallLED, LOW);
}
//1:30 am = Get Out
if((dayOfWeek == 4 ||dayOfWeek == 3 ||dayOfWeek == 2 ||dayOfWeek == 1) && hour == 1 && minute == 30 && second == 0)
{
Serial.println("Get out.");
digitalWrite(cleanUpLED, LOW);
digitalWrite(lastCallLED, LOW);
digitalWrite(getOutLED, HIGH);
delay(4000);
digitalWrite(getOutLED, LOW);
}
//////////////*********************************Test Friday and Sunday***********************************//////////////////////
//10:50 pm = Clean Up!
if((dayOfWeek == 5 || dayOfWeek == 7) && hour == 23 && minute == 50 && second == 0)
{
Serial.println("Clean up!");
digitalWrite(cleanUpLED, HIGH);
digitalWrite(lastCallLED, LOW);
digitalWrite(getOutLED, LOW);
delay(4000);
digitalWrite(cleanUpLED, LOW);
}
//11:15 pm = Last Call_This is not a pub
if((dayOfWeek == 5 || dayOfWeek == 7) && hour == 24 && minute == 15 && second == 0)
{
Serial.println("Last Call - this is not a pub");
digitalWrite(cleanUpLED, LOW);
digitalWrite(lastCallLED, HIGH);
digitalWrite(getOutLED, LOW);
delay(4000);
digitalWrite(lastCallLED, LOW);
}
//11:30 pm = Get Out
if((dayOfWeek == 5 || dayOfWeek == 7) && hour == 24 && minute == 30 && second == 0)
{
Serial.println("Get out.");
digitalWrite(cleanUpLED, LOW);
digitalWrite(lastCallLED, LOW);
digitalWrite(getOutLED, HIGH);
delay(4000);
digitalWrite(getOutLED, LOW);
}
//////////////*********************************Test Saturday***********************************//////////////////////
//6:50 pm = Clean Up!
if(dayOfWeek == 6 && hour == 18 && minute == 50 && second == 0)
{
Serial.println("Clean up!");
digitalWrite(cleanUpLED, HIGH);
digitalWrite(lastCallLED, LOW);
digitalWrite(getOutLED, LOW);
delay(4000);
digitalWrite(cleanUpLED, LOW);
}
//7:15 pm = Last Call_This is not a pub
if(dayOfWeek == 6 && hour == 19 && minute == 15 && second == 0)
{
Serial.println("Last Call - this is not a pub");
digitalWrite(cleanUpLED, LOW);
digitalWrite(lastCallLED, HIGH);
digitalWrite(getOutLED, LOW);
delay(4000);
digitalWrite(lastCallLED, LOW);
}
//7:30 pm = Get Out
if(dayOfWeek == 6 && hour == 19 && minute == 30 && second == 0)
{
Serial.println("Get out.");
digitalWrite(cleanUpLED, LOW);
digitalWrite(lastCallLED, LOW);
digitalWrite(getOutLED, HIGH);
delay(4000);
digitalWrite(getOutLED, LOW);
}
}
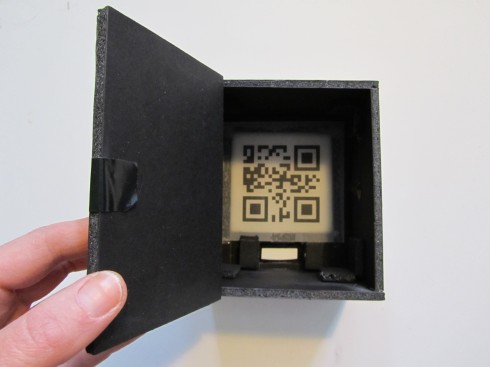
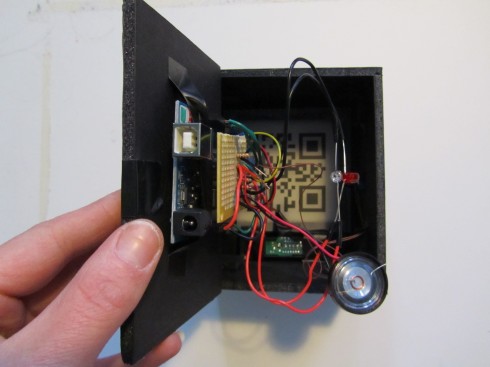
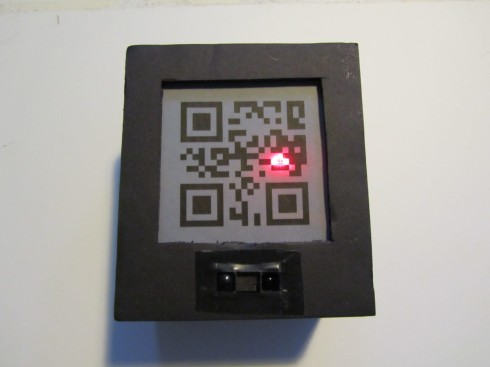
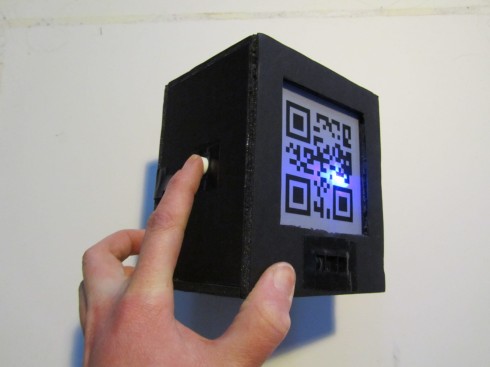
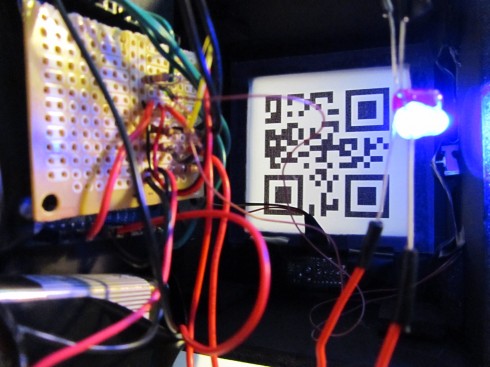
Calm Computing+IR Sensor Final = SleepWalker Alarm
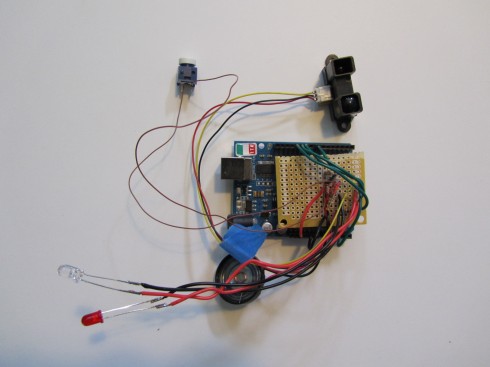
Code:
/*****************************************

 * Liza Stark

 * Physical Computing Final Project: Calm Computing

 * May 3, 2011

 *

 * SleepWalker Alarm Clock

 *

 * This sketch uses a sharp IR sensor to detect motion

 * when a person sits up in bed. The feedback comes in

 * two stages: light and sound. When turned on, the dimLED

 * acts as a nightlight to let the user know it is on. When the user sits up or moves within

 * a range that is less than 60 cm, the dimLED goes off and the alarmLED turns on.

 * If the user does not push the button within 15 seconds, the sound alarm goes off.

 *

 *

 *

 *

 *

 *****************************************/
int IRpin = 3; // analog pin for reading the IR sensor
int dimLED = 9; // Feedback LED to tell user it is on
int alarmLED = 10 ; // LED for first alarm
int speakerAlarm = 11; // Speaker alarm
int buttonPin = 7;
int buttonVal = 0;
int lastButtonVal = LOW;
int timer=0;
int lapse=15000;
int counter=0;
float volts;
float distance;
boolean alarm=false;
boolean restState = false;
boolean alarmOne = false; // This will test to see if
boolean alarmTwo = false;
boolean stayOff = false;
void setup() {
pinMode(dimLED, OUTPUT);
pinMode(alarmLED, OUTPUT);
pinMode(speakerAlarm, OUTPUT);
pinMode(buttonPin, INPUT);
Serial.begin(9600); // start the serial port
}
/**********************TIMER EXAMPLE************************/
//int timer=0;
//
//int lapse=2000;
//
//int counter=0;
//
//void setup(){
// Serial.begin(9600);
//}
//
//
//void loop(){
//
// if (millis()-timer>=lapse){
// counter++;
// timer=millis();
//
//
// }
//
// Serial.println(counter);
//}
/******************************************************************/
void loop() {
// Check IR and button values
volts = analogRead(IRpin)*0.0048828125; // value from sensor * (5/1024) - if running 3.3.volts then change 5 to 3.3
distance = 60*pow(volts, -1.0); // worked out from graph 65 = theretical distance / (1/Volts)S - luckylarry.co.uk
Serial.println(distance); // print the distance
delay(100);
buttonVal = digitalRead(buttonPin);
if(buttonVal){
Serial.println("pressed");
digitalWrite(dimLED,HIGH);
digitalWrite(alarmLED,LOW);
noTone(speakerAlarm);
digitalWrite(speakerAlarm,LOW);
alarm=false;
}
else{
if(distance < 60){
digitalWrite(alarmLED,HIGH);
digitalWrite(speakerAlarm,LOW);
digitalWrite(dimLED,LOW);
digitalWrite(speakerAlarm,LOW);
noTone(speakerAlarm);
alarm=true;
}
}
if(alarm){
if (millis()-timer>=lapse){
counter++;
timer=millis();
//Serial.println(counter);
Serial.println("speaker on");
digitalWrite(speakerAlarm,HIGH);
tone(speakerAlarm,10000);
}
}
}
PhysComp Final Project Concept 2
Calm Computing+IR Sensor
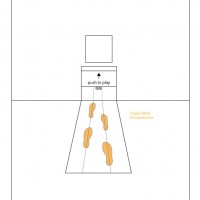
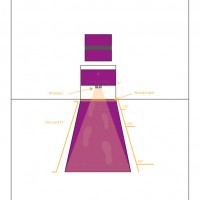
This final project assignment has three parameters: it must be calm computing; it must solve a problem; and it must use a IR sensor. Brainstorming this and avoiding a completely kitsch or overdone concept is much harder than you would think; so, I propose a project that would alleviate the omnipresent ordeal of erasing the spatial divide between user and interactive object. That is, constructing an object that facilitates interaction between the user/audience and an installation piece. Installations are often the preferred method of execution for many projects, yet we all fall into the trap of assuming our project will call people to interact with it. In reality, we have been conditioned with a museum mentality not to touch and we must break this behavior through the affordances of our design.
By combining the IR sensor to gauge the distance of a potential user, thermochromic ink and fabric traces (copper, specifically), I will construct a “red carpet” of sorts to invite the user to interact with a piece when they pass. As the user gets closer, Arduino triggers voltage from a certain pin to a footprint that leads up to the piece. Once the user is 6″ away, a sign is revealed to them that says “push me”. Not only will this aid in encouraging interaction with the specific piece, but is a form of interaction itself that can be used in a variety of situations.
Below are the paper prototypes and distance logistics (based on the ideal range of the sensor (4cm – 150cm):
Proof of Concept:
PhysComp Final Project Concept 1
Light+Time
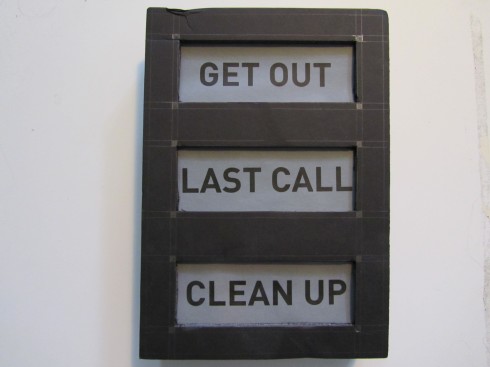
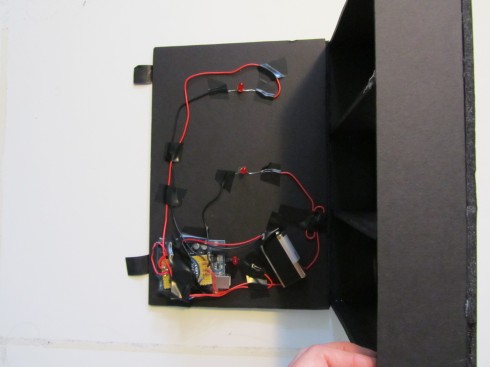
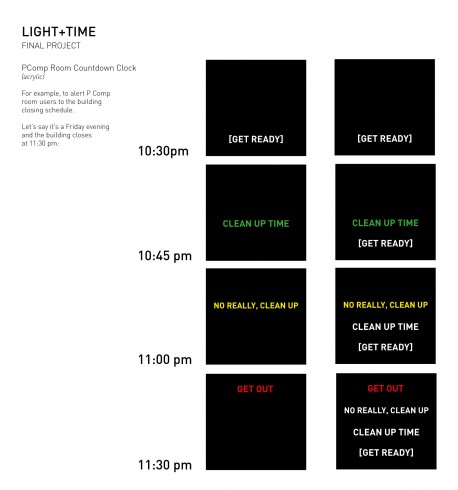
For my light and time final project, I am stepping away from the modules for a more topical subject more in the line of calm computing: a countdown clock for the p comp room. After a program-wide email stressing our timeliness in cleaning up (I withhold judgment on the validity of sending an email in this particular situation) AND the general state of the p comp room during finals/thesis, I propose a countdown clock that will be programmed in accordance with building closing hours. There are four stages (names are subject to change): get ready, clean up, no really, clean up, and get out.


“Serial Alien Attacks LCD!”
This was a MONSTER of an assignment:
Upload eight custom characters to a Newhaven LCD display (3 wire config) via RS232 protocol using the Arduino Software Serial library.
Yea. I know. Please use the code below as a reference, because there ain’t much out there:
SoftwareSerial serial=SoftwareSerial(7, 8);
byte topL = 0x01;
byte topR = 0x02;
byte bottomL=0x03;
byte bottomR = 0x04;
byte leftFoot=0x05;
byte rightFoot=0x06;
byte handUp=0x07;
byte handDown=0x08;
void setup() {
pinMode(7, INPUT);
pinMode(8, OUTPUT);
// set serial rate
serial.begin(9600);
// turn lcd on
lcdOn();
// set lcd contrast to default 40
defltContrast();
// clear lcd
clearLCD();
// top left of alien
customChar(topL);
serial.print(0x00, BYTE);
serial.print(0x00, BYTE);
serial.print(0x0F, BYTE);
serial.print(0x1F, BYTE);
serial.print(0x19, BYTE);
serial.print(0x19, BYTE);
serial.print(0x1F, BYTE);
serial.print(0x1F, BYTE);
// top right of alien
customChar(topR);
serial.print(0x00, BYTE);
serial.print(0x00, BYTE);
serial.print(0xFE, BYTE);
serial.print(0xFF, BYTE);
serial.print(0xF3, BYTE);
serial.print(0xF3, BYTE);
serial.print(0xFF, BYTE);
serial.print(0xFF, BYTE);
// bottom left of alien
customChar(bottomL);
serial.print(0x1F, BYTE);
serial.print(0x1F, BYTE);
serial.print(0x1F, BYTE);
serial.print(0x1C, BYTE);
serial.print(0x1C, BYTE);
serial.print(0x1C, BYTE);
serial.print(0x0, BYTE);
serial.print(0x0, BYTE);
// bottom right of alien
customChar(bottomR);
serial.print(0xFF, BYTE);
serial.print(0xFF, BYTE);
serial.print(0xFF, BYTE);
serial.print(0xE7, BYTE);
serial.print(0xE7, BYTE);
serial.print(0xE7, BYTE);
serial.print(0x0, BYTE);
serial.print(0x0, BYTE);
customChar(leftFoot);
serial.print(0x1F, BYTE);
serial.print(0x1F, BYTE);
serial.print(0x1F, BYTE);
serial.print(0x0, BYTE);
serial.print(0x0, BYTE);
serial.print(0x0, BYTE);
serial.print(0x0, BYTE);
serial.print(0x0, BYTE);
customChar(rightFoot);
serial.print(0xFF, BYTE);
serial.print(0xFF, BYTE);
serial.print(0xFF, BYTE);
serial.print(0x0, BYTE);
serial.print(0x0, BYTE);
serial.print(0x0, BYTE);
serial.print(0x0, BYTE);
serial.print(0x0, BYTE);
customChar(handUp);
serial.print(0x0, BYTE);
serial.print(0x0, BYTE);
serial.print(0x0, BYTE);
serial.print(0xE4, BYTE);
serial.print(0xEC, BYTE);
serial.print(0xF8, BYTE);
serial.print(0xF0, BYTE);
serial.print(0xF0, BYTE);
customChar(handDown);
serial.print(0x0, BYTE);
serial.print(0x0, BYTE);
serial.print(0x0, BYTE);
serial.print(0x0, BYTE);
serial.print(0x0, BYTE);
serial.print(0x0, BYTE);
serial.print(0x0, BYTE);
serial.print(0xFF, BYTE);
}
void loop(){
serial.print(topL, BYTE);
serial.print(topR, BYTE);
serial.print(handUp, BYTE);
// move cursor to second line
serial.print(0xFE, BYTE); // command flag
serial.print(69, BYTE); // cursor position command
serial.print(0x40, BYTE); // cursor position
serial.print(bottomL, BYTE);
serial.print(bottomR, BYTE);
// admire the little guy for a sec
delay(1000);
// make way for the next step
clearLCD();
serial.print(topL, BYTE);
serial.print(topR, BYTE);
serial.print(handDown, BYTE);
// move cursor to second line
serial.print(0xFE, BYTE); // command flag
serial.print(69, BYTE); // cursor position command
serial.print(0x40, BYTE); // cursor position
serial.print(leftFoot, BYTE);
serial.print(bottomR, BYTE);
delay(1000);
// clear lcd
clearLCD();
serial.print(topL, BYTE);
serial.print(topR, BYTE);
serial.print(handUp, BYTE);
// move cursor to second line
serial.print(0xFE, BYTE); // command flag
serial.print(69, BYTE); // cursor position command
serial.print(0x40, BYTE); // cursor position
serial.print(bottomL, BYTE);
serial.print(rightFoot, BYTE);
delay(1000);
// clear lcd
clearLCD();
serial.print(topL, BYTE);
serial.print(topR, BYTE);
serial.print(handDown, BYTE);
// move cursor to second line
serial.print(0xFE, BYTE); // command flag
serial.print(69, BYTE); // cursor position command
serial.print(0x40, BYTE); // cursor position
serial.print(leftFoot, BYTE);
serial.print(bottomR, BYTE);
delay(1000);
// clear lcd
clearLCD();
serial.print(topL, BYTE);
serial.print(topR, BYTE);
serial.print(handUp, BYTE);
// move cursor to second line
serial.print(0xFE, BYTE); // command flag
serial.print(69, BYTE); // cursor position command
serial.print(0x40, BYTE); // cursor position
serial.print(bottomL, BYTE);
serial.print(rightFoot, BYTE);
delay(1000);
// clear lcd
clearLCD();
delay(2000);
serial.print("Hello");
delay(2000);
// move cursor to second line
serial.print(0xFE, BYTE); // command flag
serial.print(69, BYTE); // cursor position command
serial.print(0x40, BYTE); // cursor position
serial.print("serial.");
delay(2000);
clearLCD();
}
void customChar(byte address) {
serial.print(0xFE, BYTE);
serial.print(0x54, BYTE);
serial.print(address, BYTE);
}
void clearLCD(){
// clear lcd function
serial.print(0xFE, BYTE);
serial.print(0x51, BYTE);
}
void backSpace(){
// go back one space
Serial.print(0xFE, BYTE);
Serial.print(0x4E, BYTE);
}
void serCmd(){
// command flag
serial.print(0xFE, BYTE);
}
void defltContrast(){
// set default contrast
serial.print(0xFE, BYTE);
serial.print(0x82, BYTE);
serial.print(0x51, BYTE);
}
void lcdOn(){
// turn lcd on
serial.print(0xFE, BYTE); // command flag
serial.print(0x41, BYTE); // on command
}
void shiftRight(){
serial.print(0xFE, BYTE);
serial.print(0x56, BYTE);
}
void cHome(){
// ser cursor to home position
serial.print(0xFE, BYTE); // command flag
serial.print(0x46, BYTE); // cursor home command
}
void bcOn(){
// set box cursor on
serial.print(0xFE, BYTE); // command flag
serial.print(0x4B, BYTE); // cursor on command
}
/*
void dftBaudRate(){
serial.print(0xFE, BYTE);
}
*/
LIGHTandTIME
Prototype 1
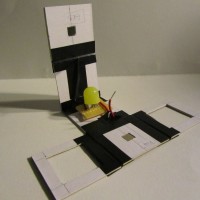
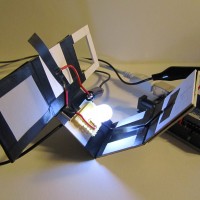
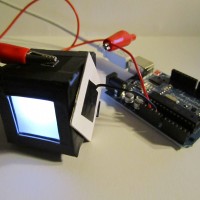
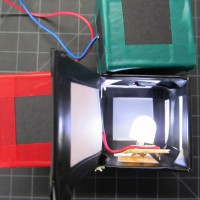
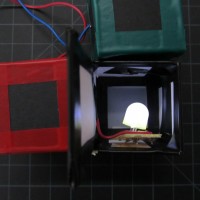
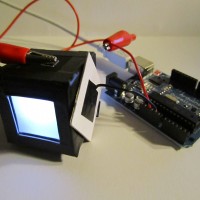
This is documentation for the first prototype of the light and time in Physical Computing 1. For assignment, we were charged to construct a prototype using only LEDs and one push button (if any), with a focus on calm computing.
My object is a look and feel prototype that conveys the idea of having a modular clock made of cubes that you can rearrange to keep time of a certain task. The light fades at a higher rate for those that need more immediate attention, and more slowly for those that do not.
Critique & Feedback
The class liked the look and feel of the cubes, and they were responsive to the modular concept. There was concern, however, that as a set of objects acting as an ambient task manager would strain rather than relieve mental stress since s/he would have to remember what each cube was and also be tasked with programming the cube when the task changed. While this issue could be negotiated in numerous ways, I think I am going to drop the concept of task manager in favor of exploring how objects relate and react to each other over time. Another suggestion aside from modes of interaction was the idea to manipulate the shape and size of the objects.
Further Iterations
For the next series of prototypes, I want to play with ideas of interactions among multiples and the resulting emergent behavior. I will test size, shape, hierarchy, and color interaction. Mission One: triangles are fun.
Process
Fading LEDs and Tones
/*
Liza Stark
March 1, 2011
PWM Siren and Fading LEDs
*/
//Set and initialize variables for LED pins
int green = 10;
int red = 5;
int white = 6;
// Set and initialize variable for speaker
int speaker = 9;
//Set variable for fadeValue
int fadeValue;
void setup() {
// nothing happens in setup
}
void loop() {
// fade green up
for(fadeValue = 0 ; fadeValue <= 255; fadeValue +=1) {
// sets the value (range from 0 to 255):
analogWrite(green, fadeValue);
tone(speaker, 300 + fadeValue);
delay(30);
}
// fade green down
for(fadeValue = 255 ; fadeValue >= 0; fadeValue -=1) {
analogWrite(green, fadeValue);
Serial.println(fadeValue);
tone(speaker, fadeValue – 300);
delay(30); // delay to see fade
}
// fade red up
for(fadeValue = 0 ; fadeValue <= 255; fadeValue +=3) {
// sets the value (range from 0 to 255):
analogWrite(red, fadeValue);
Serial.println(fadeValue);
tone(speaker, 200 + fadeValue);
delay(30);
}
// fade red down
for(fadeValue = 255 ; fadeValue >= 0; fadeValue -=3) {
// sets the value (range from 0 to 255):
analogWrite(red, fadeValue);
Serial.println(fadeValue);
tone(speaker, fadeValue – 200);
// wait for 30 milliseconds to see the dimming effect
delay(30);
}
//fade white up
for(fadeValue = 0 ; fadeValue <= 255; fadeValue +=5) {
// sets the value (range from 0 to 255):
analogWrite(white, fadeValue);
Serial.println(fadeValue);
tone(speaker, 100 + fadeValue);
delay(30);
}
// fade white down
for(fadeValue = 255 ; fadeValue >= 0; fadeValue -=5) {
// sets the value (range from 0 to 255):
analogWrite(white, fadeValue);
Serial.println(fadeValue);
tone(speaker, fadeValue – 100);
// wait for 30 milliseconds to see the dimming effect
delay(30);
}
}
Simple Code Lock
Enter the correct code to set the green LED, type the wrong code and find yourself in the red. Uses an counter and if statement to determine the correct order of the lock code.
P Comp Organ
br/>
For week 3 of physical computing, we were charged with making an “organ” using a variety of capacitors to determine the frequency of sound outputted to the speaker.


