
Push Me Pull Me :: Construction + Code = User Testing
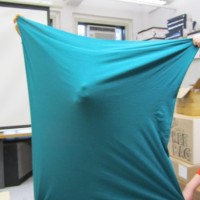
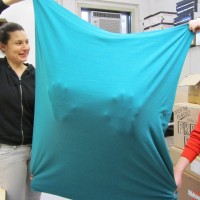
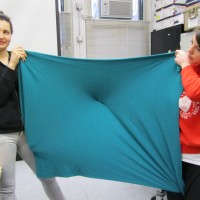
After a few snags in materials and construction, Paola offered us a fantastic solution. She suggested placing fabric around the boxed structure and focus on using the materials that we know work (i.e. the elastic), instead of forcing the materials we considered more aesthetically in line with our concept. As mentioned in a previous post, the elastic works much better in getting a dynamic range from the painted on liquid graphite; the other materials, such as spandex and jersey, ended up breaking the connection too much after a few uses.
Below are the videos documenting our first working prototype for the final piece and a bit of user testing:
Push Me, Pull Me: Soft Circuits Final Project Concept
Concept
For our final project in Soft Circuits, Kate Watkins and I will create a large scale interactive, fabric-based soft circuit. One of the key motivations for us in deciding on this project was challenging pre- and mis-conceptions of soft circuits, especially in terms of their possible functioning and durability.
Feedback and New Questions
We got some fantastic feedback and new focus after our first class presentation. The main questions and themes that arose were:
-
What are the assumptions we are dealing with? What does it mean to be durable? What are the terms and concepts we need to examine and define for ourselves? Moving forward, one idea mentioned is to associate each panel with a different assumption, which will allow users to push and pull it, discovering all the potential in between.
-
How can you exploit the cracks, literally and metaphorically – i.e. how can we use what we know doesn’t work to stretch the boundaries of possible interaction. For example, silk screened paint on fabric is not the most durable way to create a circuit because it will crack when overused, but this could be used as a switch: when the cracks come back together, they will still complete the circuit.
-
What types of materials will we use? And more importantly, how will they be executed within the structure? Will the materials be integrated or attached; i.e. will there be a panel of velostat that acts as the main material or will there piece pieces of it sewn onto a larger piece of spandex (or any other material). I think the former could be much more interesting for experimentation, but also much more expensive. TBD.
-
How will we get people to interact with our project? What are the interactions we want to see happen? Or at least how will we constrain the type of interaction to create a meaningful interaction for our audience? Cecilia rightly reminded us of how easy it is to assume people will telepathically connect with the concept and engage in the associated action (which is never the case). In doing so, she also insinuated the trap of a one off interaction, which is so easy to fall into and a terrible mire, or for loop better yet, to climb out of.
Next Steps
Moving forward, here are the requirements for our second round of prototypes next week:
-
Define interactions and interaction with materials
-
List of materials
-
Articulate how materials will integrated or attached
Documentation
Our presentation is living here at the moment.
Soft Switch Documentation
Materials:
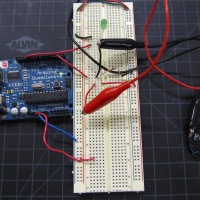
Fabric pushbutton
Fabric pressure sensor
Code:
The code for the pushbutton is located in “File” –> “Examples” –> “Digital” –> “Button” in Arduino.
The code for the pressure sensor is a very simple variation of the AnalogInput example code:
/*
Liza Stark
Fabric Pressure Sensor
March 7, 2011
This is a variation of the AnalogInput code that can be found on the Arduino website.
http://arduino.cc/en/Tutorial/AnalogInput
*/
int sensorPin = A0; // select the input pin for the potentiometer
int ledPin = 11; // select the pin for the LED
int sensorValue = 0; // variable to store the value coming from the sensor
void setup() {
// declare the ledPin as an OUTPUT:
pinMode(ledPin, OUTPUT);
//pinMode(sensorPin, OUTPUT);
}
void loop() {
// read the value from the sensor:
sensorValue = analogRead(sensorPin);
// turn the ledPin on
analogWrite(ledPin,sensorValue);
// write the value of the sensor to the ledPin using PWM
}
Stroke Sensor
-
- Materials
-
- Circuit diagram
-
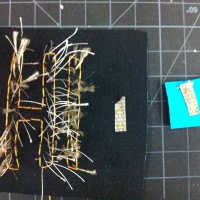
- Battery Pack
-
- Back of the circuit
-
- Stroke off
-
- Stroke on!
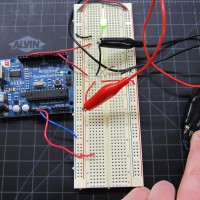
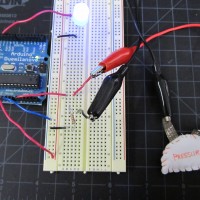
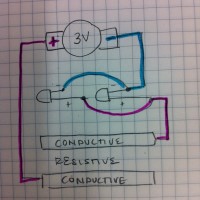
How it works:
This stroke sensor uses conductive and resistive thread to complete the circuit and light up the LEDs (“threaded” in parallel).
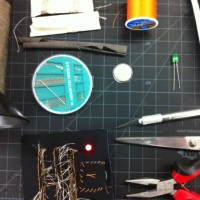
Materials:
Conductive thread
Resistive thread
Conductive fabric
Fabric
Thread
Needle
Scissors
Pliers
Exacto knife
3V battery
LEDs
[vimeo http://www.vimeo.com/20455091 w=398&h=294]
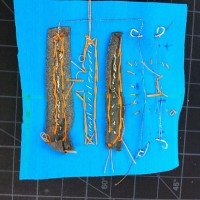
Paper Circuit
-
- Materials
-
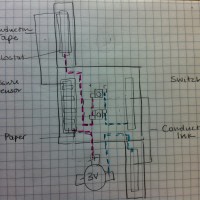
- Circuit diagram
-
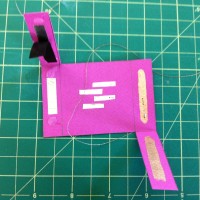
- Conductive skeleton
-
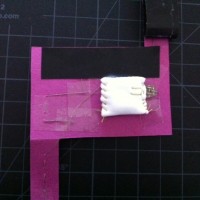
- Back of the circuit
-

- It’s alive!
How it works:
Close one side to turn on the switch and depress the other side to activate the pressure sensor.
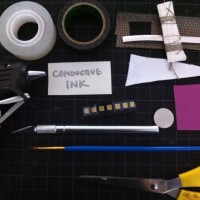
Materials:
Conductive thread
Conductive fabric
Conductive tape
Conductive ink
Fabric (battery pack)
Paper
Electrical tape
Tape
LEDs (5050)
Exacto knife
Scissors
Glue gun
Paint brush
3V Battery
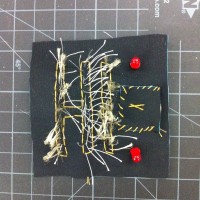
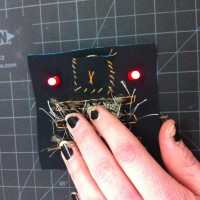
Valentine’s Pressure
This circuit has one pressure sensor to activate the right and middle heart and a “switch” to complete the circuit and turn on the last heart.


Materials:
felt
bristol paper
conductive thread
regular thread
conductive fabric
Velostat (resistive fabric)
5050 LED
tape
glue (Sobo Premium Craft and Fabric Glue)
scissors
needle
exacto


hello_world switch

Materials:
- Cardstock (green and white)
- 5050 LED (yellow)
- Conductive Thread
- Conductive Fabric
- 3V CR2032 Battery
- Clear tape
- Double-sided tape
- vellum
hello world from Liza Stark on Vimeo.
Description:
For this flap switch, pull the tab out to open the flap and turn on the LED. The LED is attached to conductive fabric on the front, and fed to the back through the hole for the popup flap. It is then connected to conductive thread on both the positive and negative sides. One thread runs directly to the positive side of the battery and the other (negative) runs to the opening for the pull tab. The tab has a small, strategically place piece of conductive fabric sewn to it; the thread coming out from the back of the tab is attached to the negative side of the battery. When you pull it to a certain point, the conductive fabric and thread touch and complete the circuit.


The Vellum Pirate

Materials
- Cardstock (green and white)
- 5050 LED (cool white)
- Conductive Thread
- Conductive Fabric
- 3V CR2032 Battery
- Clear tape
- Double-sided tape
- vellum
the vellum pirate from Liza Stark on Vimeo.
Press both the pirates hands to the paper to make his eyepatch light up. This circuit uses conductive thread to connect the elements and conductive fabric for large points of contact.


Umbrella bumpers beware!
An umbrella is an object that shield us from the elements, predominantly rain and sometimes sun, and certainly from each other. The structure and design that are so effective for keeping us dry make it difficult to maneuver around other umbrella users, especially on crowded urban sidewalks.
We have all been in this situation, either as perpetrators or victims: it starts to rain and umbrella-users come out in full force, colliding into other users and nonusers. By combining an umbrella with another technology that can help us determine proximity of other people, this remixed object will allow users to know when another person or stationary object is too close for comfort.


ROLE
This umbrella would detect when other people and their umbrellas are approaching to alert the user to move aside. This object is intended for an urban setting.
LOOK & FEEL
The materials would consist of an umbrella and embedded LEDs. The user activates the power by simply opening the umbrella. The LEDs for both prototypes 1 and 2 would be visible to the user and the approaching people, but its primary purpose is to alert the user. The proximity sensor is placed at five equidistant points on the outer rim of the umbrella. The battery would be place in the handle to avoid any problematic mechanics with the closing and opening of the umbrella.
IMPLEMENTATION
It starts to rain;
user opens her/his umbrella;
rods extend and are no longer in contact with the base rod;
power is turned on;
LEDs emit green light;
user walks down the sidewalk;
person approaches;
proximity sensor detects the person at 6 feet away;
LEDs turn from green to yellow;
person comes closer;
proximity sensor detects the person at 3 feet away;
LEDs turn from yellow to red;
user steps to the side;
user avoids collision.